Advertising
{Partner: Staedtler // Information about advertising at my fairy dust}
We are getting closer and closer to Advent in the DIY Night Advent countdown – three more days until the first Advent! Every day in November, a creative door opens on our countdown calendar DIY nights with a great prize.
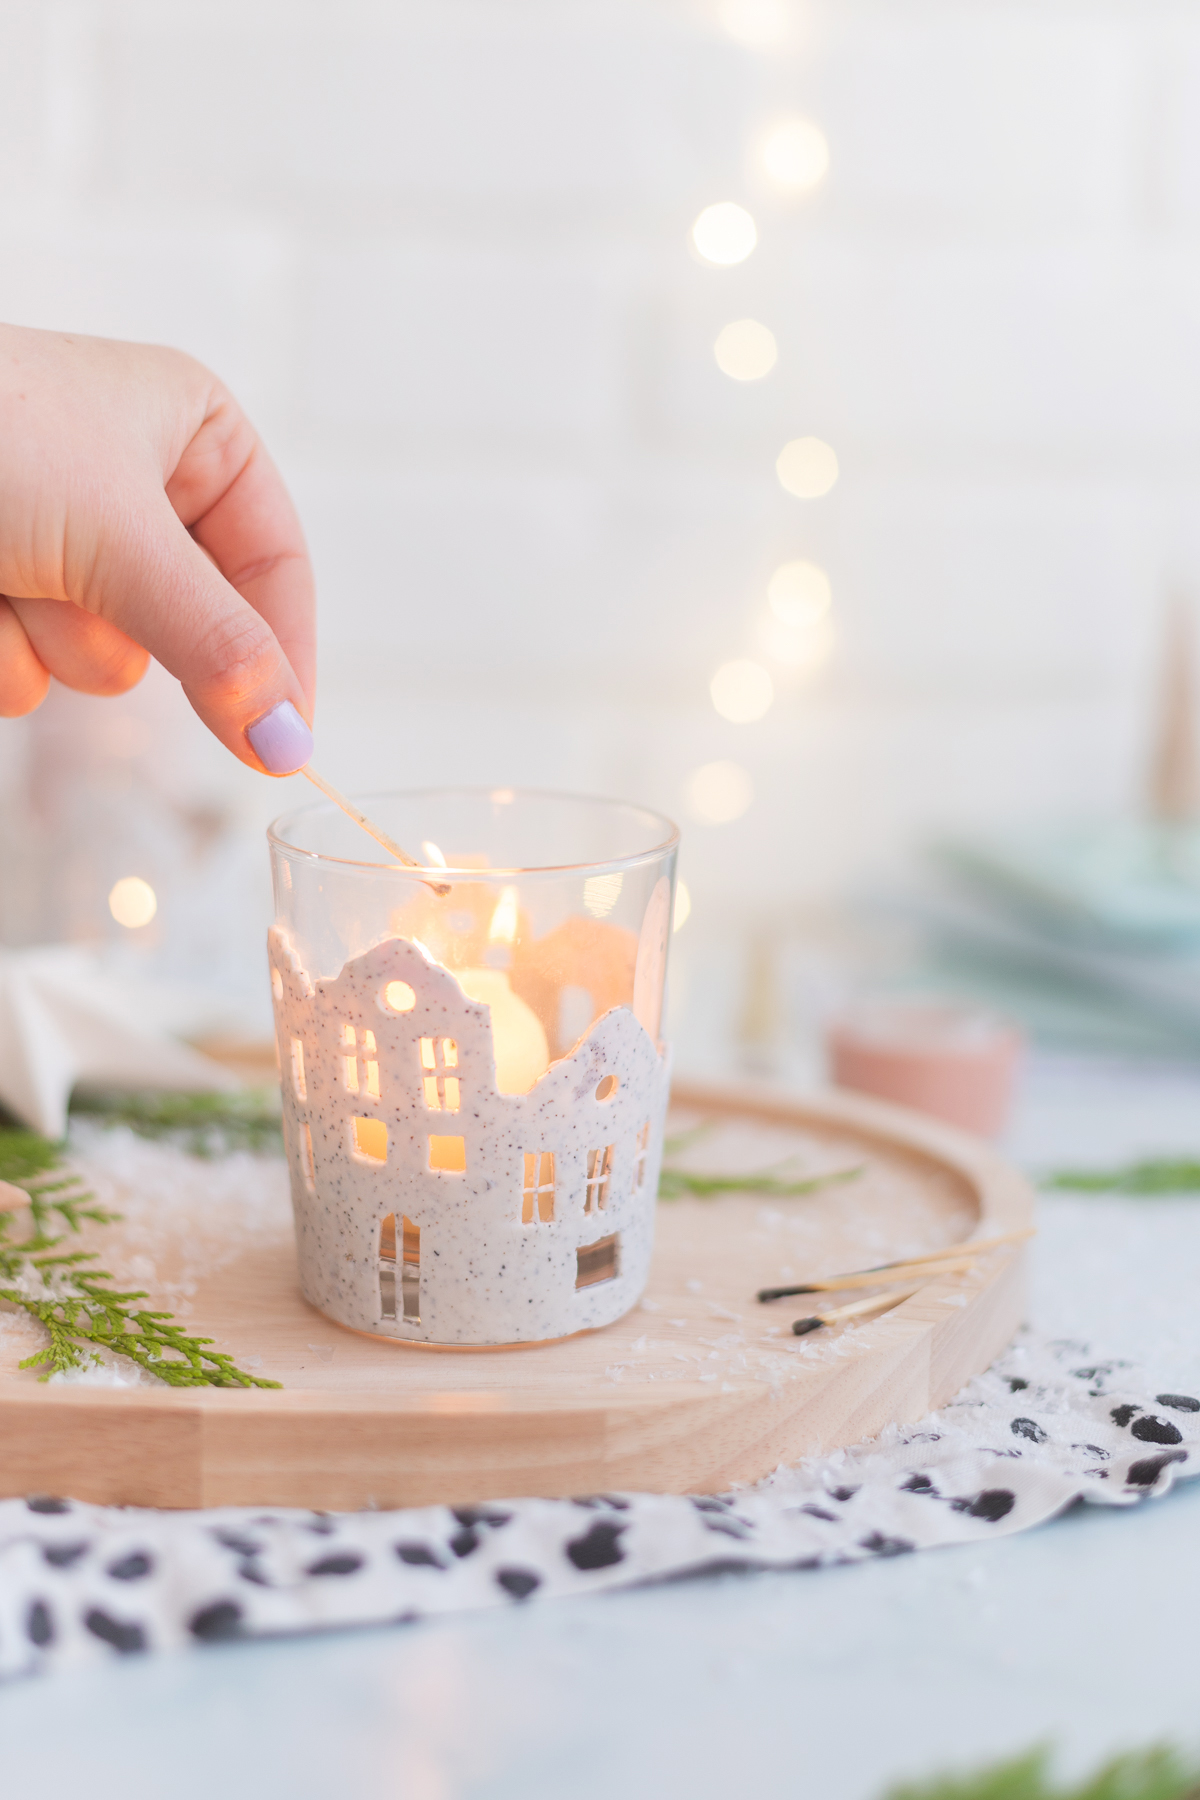
I’m opening my door today with my partner Staedtler. I have a creative idea with the new ones FIMO effect Botanical Farben implemented. As you know, I am a big FIMO fan. I made a winter lantern with houses using the FIMO Botanicals. You will also receive a free template for the houses from me.
As always, you can win something great at the end of the post – today, of course FIMO Botanicals to win.
But first I will introduce you to the beautiful new FIMO colors and also explain the creative project step by step.

THIS IS THE DIY NIGHT ADVENT COUNTDOWN:
DIYnachten is the creative Advent countdown by Gingered Things, Mrs. Greenhouse, Dekotopia and me. Behind the individual doors you will not only find a DIY idea for crafting, but also super cool prizes that will make the hobbyist’s heart beat faster.
Together with you in November we will count the days until Advent and open a new countdown door every day on one of our blogs. Behind every countdown door there is one DIY idea and a brilliant win for you! You can easily click on the door of the day via the website.

About FIMO Botanicals:
Manure is an oven-hardening modeling clay that is available in many great colors. “Oven-hardening” means: You can model and shape FIMO according to your wishes – you then let your work harden in the oven so that it becomes solid. This makes FIMO wonderful for jewelry, accessories and of course home decoration.
Die FIMO Botanicals are six new FIMO effect colors. The special thing about the colors: they contain plant particles and are also named like this: sunflower, mallow, spinach, rose, seaweed and rose hip.
Thanks to the plant particles, the FIMO Botanical colors have a speckled effect and a great, natural look.
You can find all information and further DIY ideas about the FIMO effect botanicals here: FIMO® effect 8010 Botanical – oven-hardening modeling clay
And to shop click here FIMO® Effect modeling clay, individually | Buy online – artist shop gerstaecker.de
or here STAEDTLER FIMO effect 8010 Botanical Oven-hardening modeling clay, single product botanical sunflower, 8010-170: Amazon.de: Toys

Since the colors of the FIMO Botanicals Because they are so beautifully delicate, they can be combined wonderfully and look great together.
For my creative project I combined two colors from FIMO Botanicals: mallow and seaweed. I have the two shades for this DIY house lantern used. You can easily do this with my template. I’ll show you how it’s done.
This is how it works: Make a FIMO lantern with houses
The links are partner links. This means that if you purchase the product via this link, I will receive a tiny commission. Nothing changes in price for you!
You can download the template for the houses here for free:
To download, click on the image and save it. Then you can print it in the size of your choice.
(As always, the template is intended exclusively for private use.)
Step 1: Roll out FIMO thinly
In the first step, the FIMO (here: seaweed) is rolled out very thinly. Be sure to use a smooth surface. A glass plate or tile is very suitable for working with FIMO. An acrylic roller will help you roll it out.

To determine the required length and width of the rolled out FIMO: Place the house template once around the glass and mark on the template how many houses you need to get around the glass. Optionally, you can of course also make houses on it if your glass is a little larger.

Step 2: Roll out second color and layer colors
Now the second color (here: mallow) is also rolled out very thinly. Then layer the two rolled out FIMO sheets and roll over them again with the acrylic roller until the length and width are suitable for the house template.

Step 3: Cut out houses
Now it’s time to cut out the houses. In this step, I like to place a piece of baking paper under the FIMO – this way, when doing delicate work, I avoid the FIMO sticking to the base when it is removed.
Use a knife to cut out the houses and windows. Of course, you can also add more windows and doors.

Step 4: Detail work
As the icing on the cake for the winter houses, I rolled very thin strands out of the remaining FIMO, which I made into rungs on the windows using a FIMO tool. But this is optional – you can also leave the windows “blank”.

Step 5: Attach Houses
When you’re happy with your houses, you can place them around the glass. Simply cut off the excess houses with the knife and smooth the cut edge with a FIMO tool.

Now your work can be placed in the oven at 110 degrees for 30 minutes to harden. Make sure the oven is preheated and use an oven thermometer to make sure the temperature is right.
Then let your lantern cool down – all you need is a candle and your beautiful homemade decoration is ready.
Thanks to the many small windows and doors, the house lantern conjures up a really beautiful play of light.
Do you want to do it the same way? Today we are giving away a set with all FIMO botanicals to five of you.
DIYNIGHTS COMPETITION
Can today five of you a set of all 6 FIMO botanicals win!
You take part by writing a comment under this post.
You don’t have to have a blog to participate, but you must be at least 18 years old. You can take part until tomorrow morning, 5:59 am German time. 🙂
The winner will be determined at random. Be sure to leave your email address when commenting, otherwise I will not be able to contact you. (If you simply enter your email address in “Email” when commenting, it will not be available publicly.)
As soon as the giveaway has been drawn and the winner has been chosen, I will send you an email asking you to provide your postal address. If you don’t get back to me within a week, the prize will be redrawn.
Who won will be announced in this post. I’ll edit it here.
Do you like the DIY idea? Then mark it on one of your Pinterest boards so you can find it again later:

Many thanks to our DIYnachten main sponsors!
I’m Lisa – and I can never sit still. I’ve been blogging about my passions on my fairy dust since 2013: These are great DIY ideas, chic design and very special illustrations. The main thing is homemade! More about me.
Source: meinfeenstaub.com


