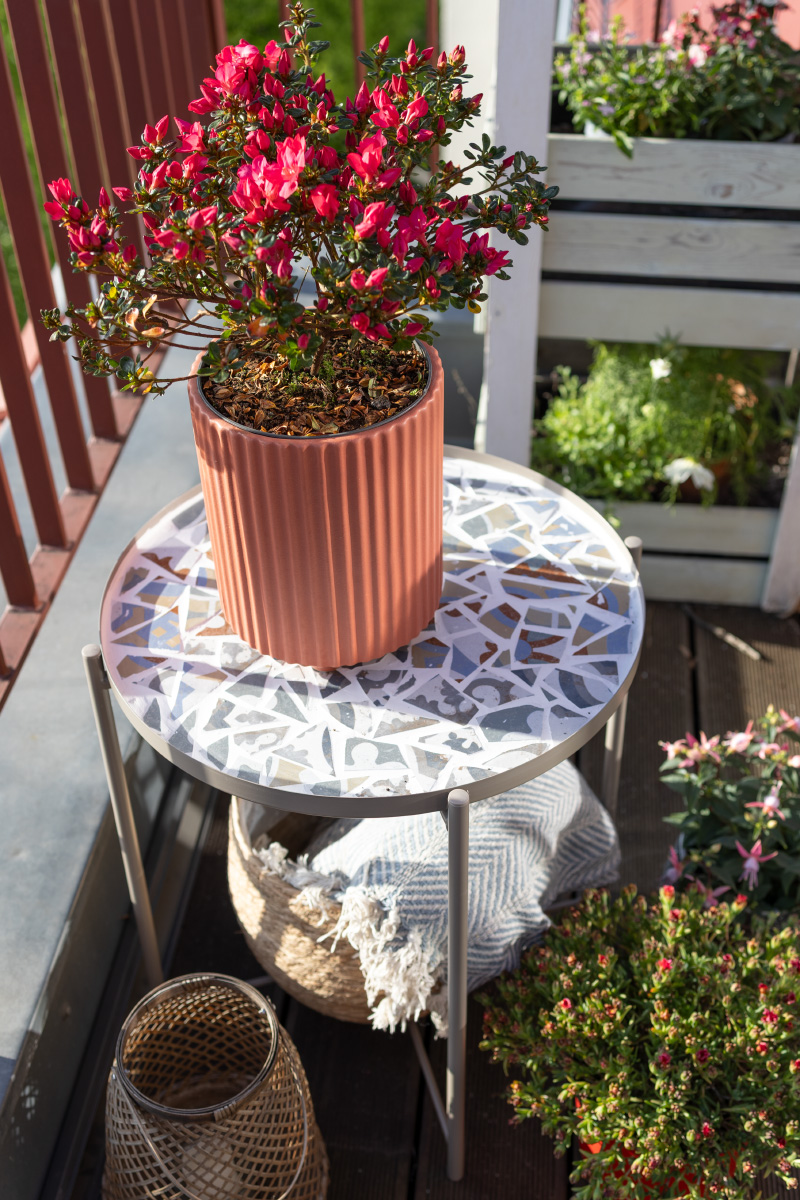
Advertising, unaffected A simple Ikea Gladom table becomes a real eye -catcher! With a few simple steps, turn the simple side table into a beautiful mosaic work of art for your balcony. This DIY project is not only a great eye-catcher, but also super easy to imitate-perfect for everyone who wants to have creative upcycling. In this step-by-step instructions, I will show you how you can design your own mosaic table and give you helpful tips so that the result becomes perfect.
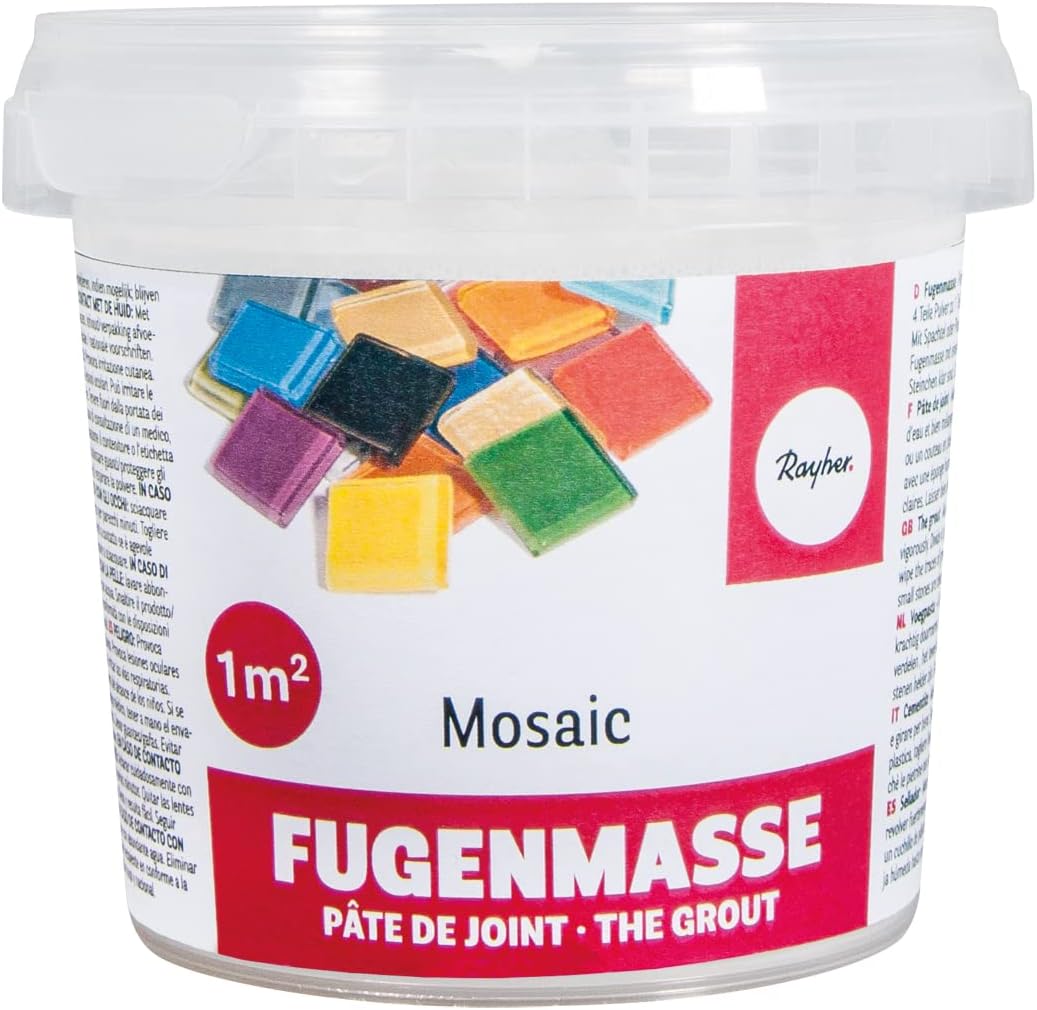
Rayher joint mass for mosaic work, pure white, 1a quality, cup 500 g, powder for mixing, for the use of mosaic stones, for indoor and outdoor area, mosaic joint filler, 1460100*
Preis: € 6,29
Buy now*
Price incl. VAT, plus shipping costs
Last updated on. We would like to point out that prices displayed here may have changed. All statements without guarantee.
Instructions
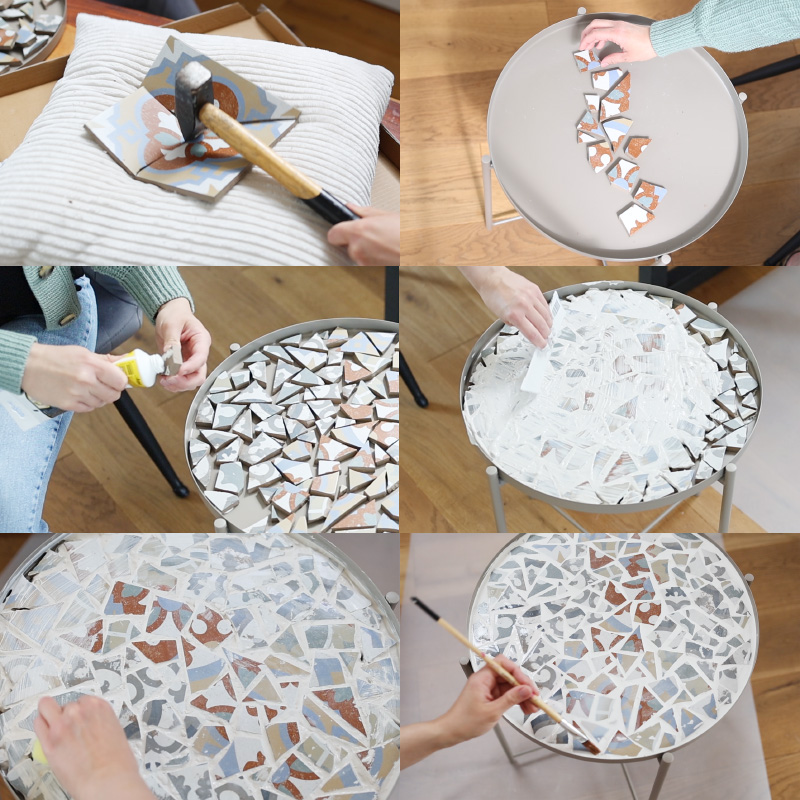
Place the tiles on a pillow or a soft pad to protect them when smashed. Put on safety glasses and carefully smash the tiles with a hammer until you have many small pieces of mosaic.
Roughly put the mosaic pieces on the Gladom table and arrange them so that a beautiful pattern is created.
Now apply the assembly adhesive to the underside of the individual tiles and stick the mosaic pieces according to your desired pattern. Let the glue dry well.
When the glue has dried, you apply the grout with a spatula. Make sure that all gaps are well filled.
Let the grout dry a little (depending on the package instructions) and then remove the remains from the mosaic surface with a damp sponge. Make sure not to wipe too much so as not to clear the joints again.
Let everything dry well. Then you can also spread the table with a mosaic joint fine. So it forms a dirt and water-repellent protective film.
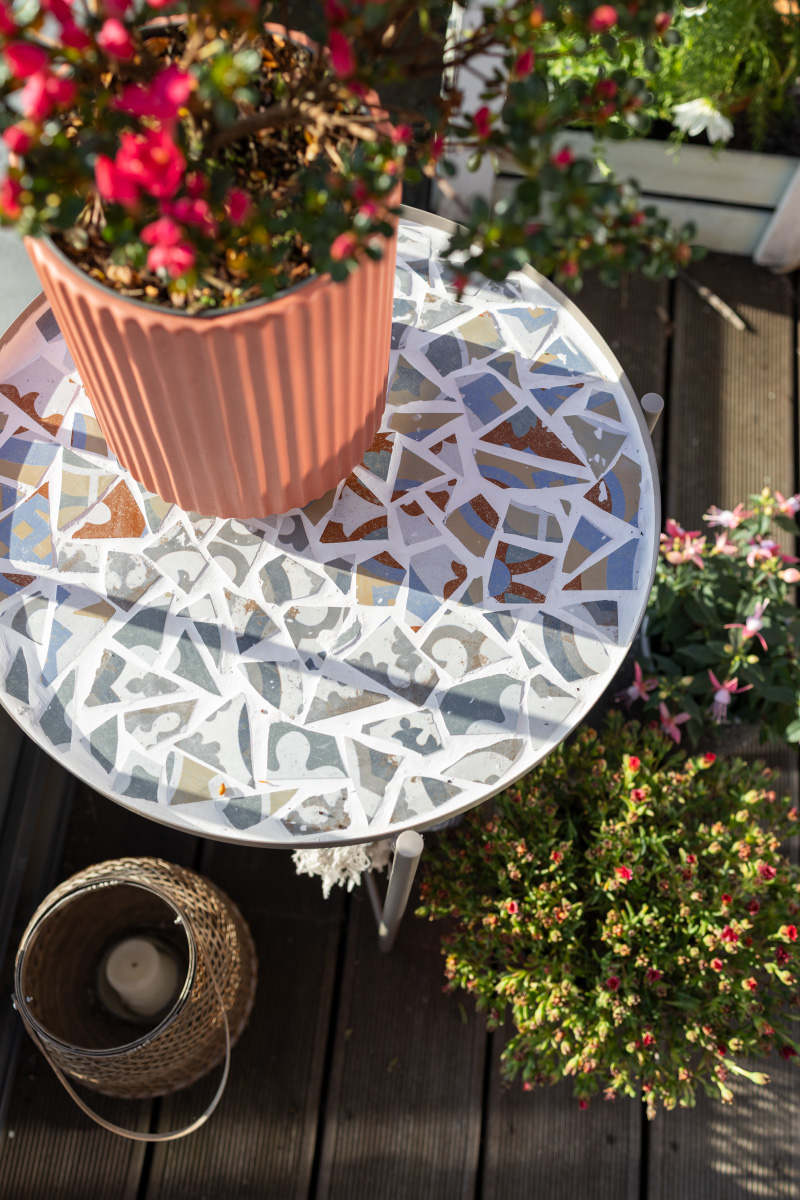
And your mosaic table is ready for the balcony with the Ikea Gladom!
Tips for a perfect result of the Gladom Mosaic table:
– Use different tile colors for a particularly lively look.
– If you want to put a specific pattern, it has been slightly on the table beforehand.
– The grout can be selected in different colors to achieve different effects.
– It is best to use weatherproof joint mass if the table is to be outside.
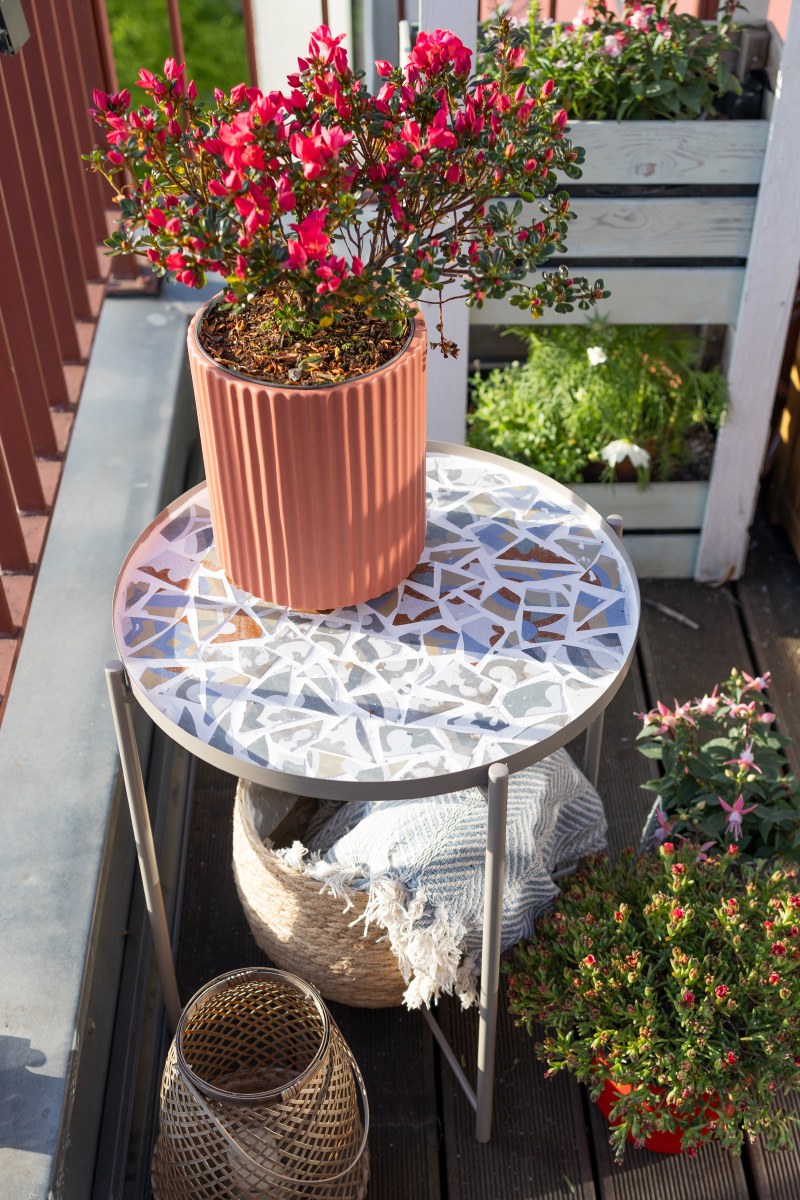
An Ikea Gladom table can be transformed into a real design highlight with a few means. This DIY mosaic project is not only super easy, but also sustainable-perfect for your balcony or terrace. Have fun copying!
Frequent questions:
How weatherproof is the mosaic table? With the correct grout and a good seal, the table can withstand rain and sun without any problems.
Which tiles are best suited for a DIY mosaic table project? Ceramic or mosaic tiles are ideal. Remains of old tile projects can also be used great.
Can I also do the project with children? Yes, however, the steps with the hammer and the adhesive should only be carried out under supervision.
How do I properly maintain the mosaic table? Simply wipe them off with a damp cloth – with heavy pollution, you can also use mild cleaning agents.
More Ikea Hacks for your home
Would you like to see more IKEA hacks? Then have a look here: Ikea Hack: Remodel IVAR cabinet, redesign Ikea Lack shelf or make IKEA Bestå wardrobe yourself.
See you then. Your Laura
Source: trytrytry.de