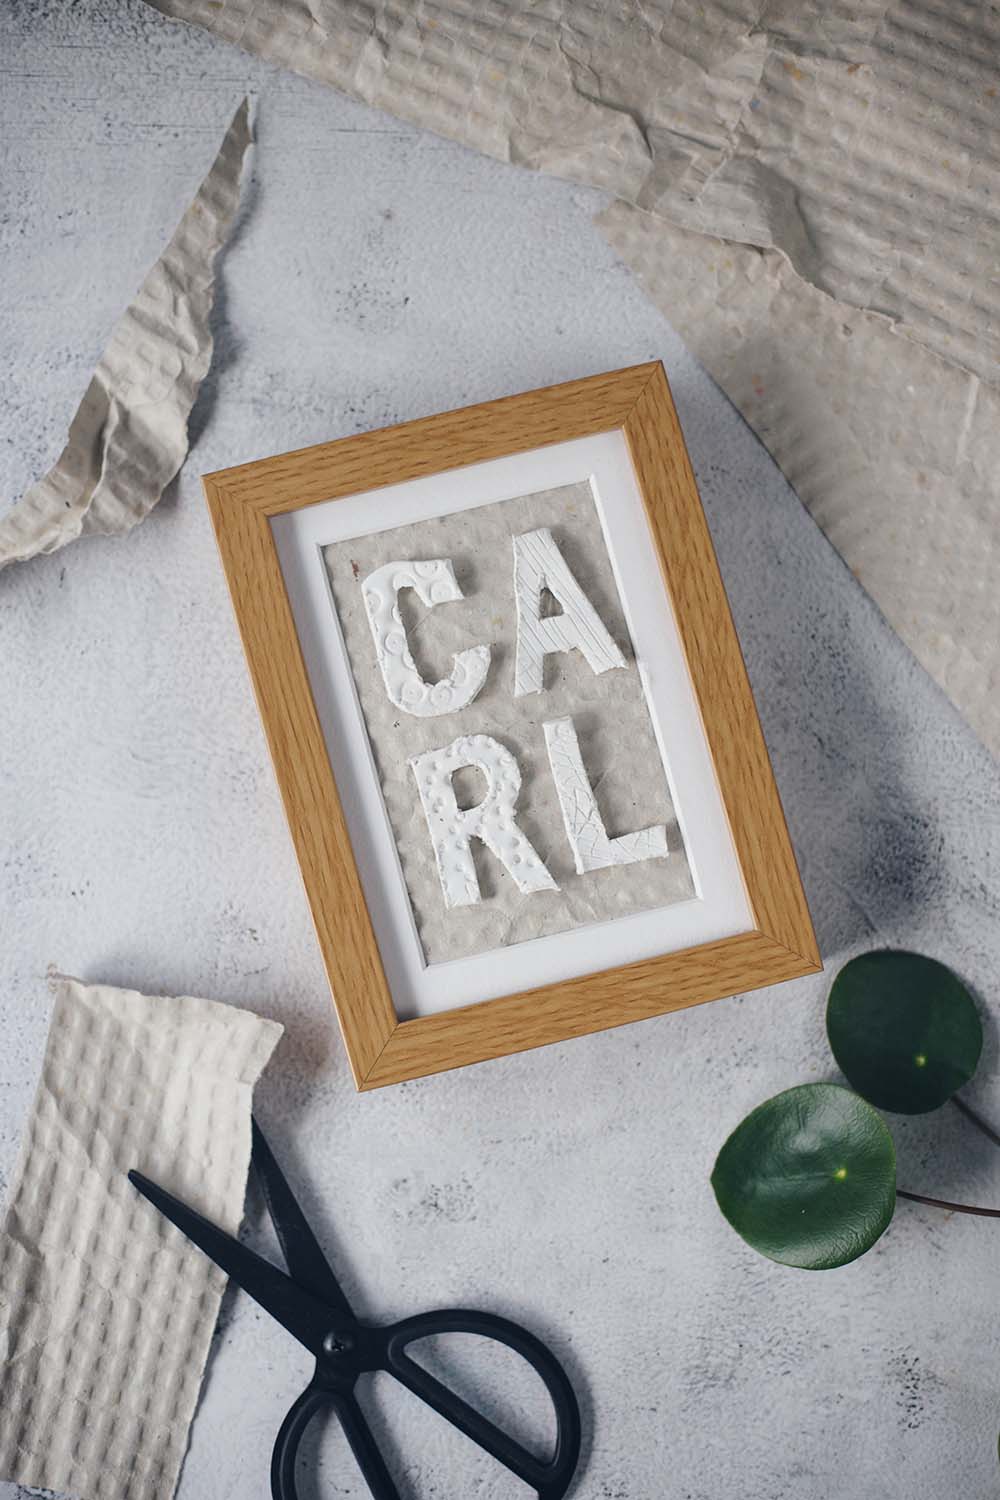
Today I have another nice gift idea for you: I’ll show you how you can easily make a picture with a name yourself! With modeling clay and packaging cardboard, the picture gets a beautiful 3D structure.
Gift idea for birth – make a simple 3D picture with names from modeling clay yourself
The packaging material inspired me to create the beautiful 3D picture with names – I found the plain paper with the beautiful structure much too beautiful to throw away. I still had modeling clay and a simple picture frame – and boom – the beautifully structured name picture was ready! Today I will show you step by step how to do it.
Incidentally, an older DIY of ours inspired me to create the structures on the surface of the modeling clay – these small pots for succulents or small offshoots of plants.
Material and tools – make your own 3D name picture – that’s what you need
Advertising note: The links are affiliate links – the article is not sponsored
- Picture Frame – I used Ribba in oak look. You can also order the frame online, for example here via Amazon: Ribba 13×18 or Ribba square Or cheaper directly from Ikea. Here you can find the Ribba overview page
- textured cardboard – Here I used shipping material with structure. But you can also simply crumple up craft cardboard in gray or beige
- Modeling clay for air drying (Caution, the modeling clay must be suitable for painting so that it does not soften again with the glue. Alternatively, you can also use an oven-hardening product.
- rolling pin or smooth round object to roll out – I use this roller for modeling clay
- Messer and other tools to create structure (pen, wooden stick)
- All Purpose Adhesive or hot glue
That’s how it’s done – make your own 3D picture with a name

I have also created an Idea Pin with video for Pinterest for this guide. We would be very happy if you follow us there and continue to pin our ideas. Feel free to pin this collage as well so that you can find the idea again and again.
Design and cut out the modeling clay
First roll out the modeling clay thinly and then use the different tools to attach a structure. I simply made imprints with pencils and wooden sticks, drew lines in the mass and the like.
Then print out the name you want. I first measured the picture frame within the passe-partout and then adjusted the writing accordingly. Tip: Simply display the ruler in Word under View – Ruler. Alternatively, you can also draw the desired letters by hand.
I then used the templates to cut out the letters. You can then carefully smooth the edges. The modeling clay must then dry for 24 hours. You could also smooth them out with some sandpaper afterwards. However, I consciously opted for a rougher look.
Compose 3D picture with name
After I finished the letters, I took the back side out of the picture frame and glued the wrapping paper around it. Then I put the passe-partout and the back back in place, but left out the pane. Now just stick on the letters and you’re done!
More birth gift ideas
If you are looking for more birth gift ideas, you will definitely find them in our gift finder. You can then simply select the topic and all suitable ideas will then be displayed. You will also find a small selection here
Happy gift giving
Jutta
Maybe interesting too. . .:
Source: kreativfieber.de


