Do you love to transform your balcony into a little oasis of wellbeing – with a lot of heart, love love and small highlights that make everyday life more beautiful? Then you will love this DIY idea: a self-made one Solar fountain for the balconywho not only looks pretty, but also as a Beebounds works and brings the calming rippling of a mini pond.
Without any power connection, super easy to implement and perfect to make your outdoor area sustainable.
I show you two variants that I have built myself-one of them discreet and bee-friendly, the other with more spraying for everyone who is looking for a small water highlight. You can find the instructions below in the post – including material tips and tricks, how your solar fountain stays beautiful for a long time.
Why a solar fountain on the balcony?
-
✔ No socket necessary – runs with solar energy
-
✔ ideal as a natural Beebounds
-
✔ cools through evaporation on hot days
-
✔ Creates a relaxing atmosphere
-
✔ DIY-friendly & inexpensive
Materials – you need that:
For both variants you only need a few things that you get online or in the hardware store:
Variant 1 – The bee drinks edition
- A slightly smaller pot
-
1 flat bowl (e.g. ceramics, sound, zinc)
-
1 small Solar pump fountain
-
Kiesel stones or cork slices for landing
- Plant earth
-
Flowering plants
Variant 2 – The mini pond with fountain
Build the solar fountain step-by-step
Step 1: Find the right location
Select a sunny place on your balcony – 4–6 hours of direct sun are ideal per day. The solar cell works best without shadow.
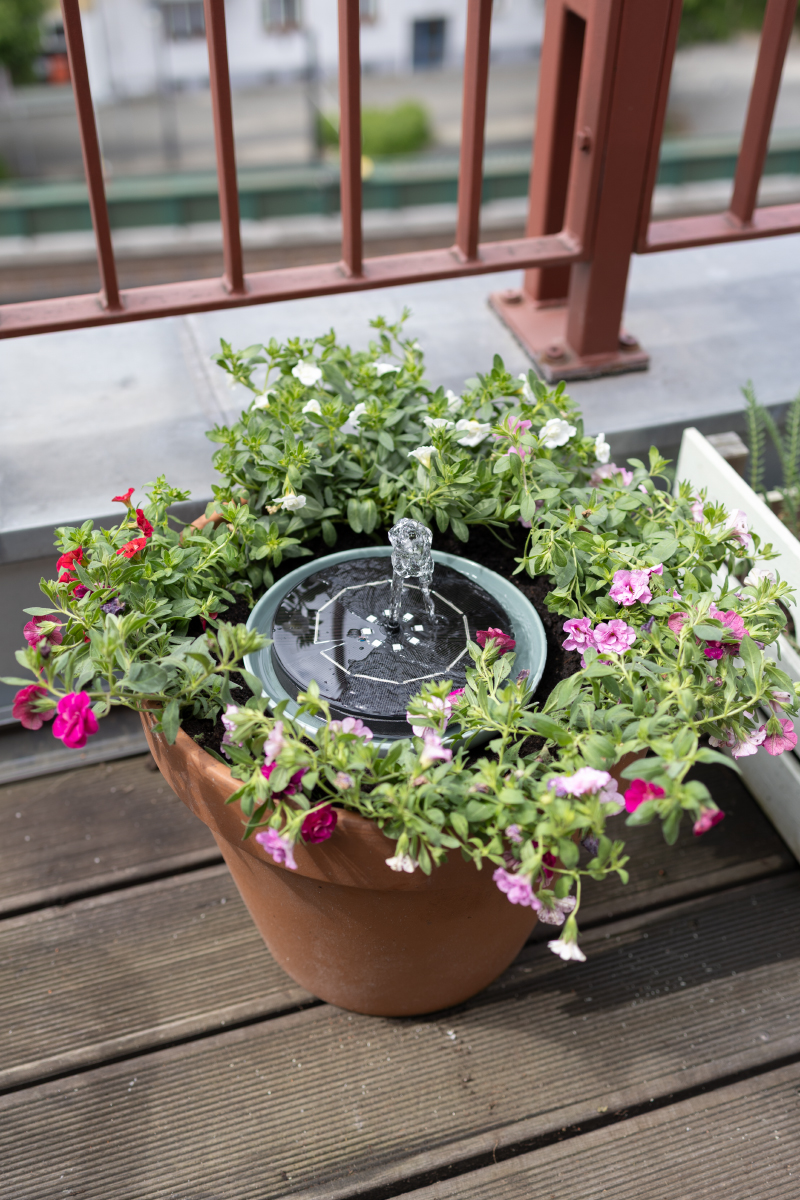
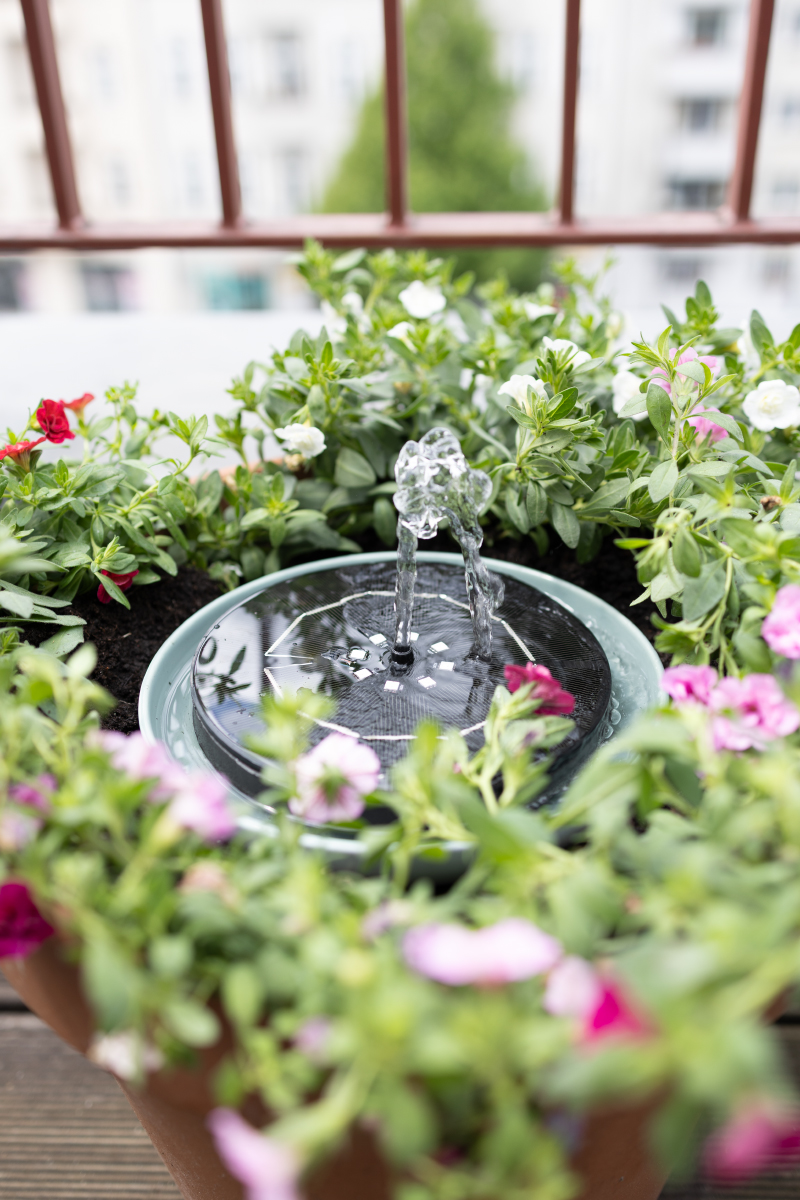
Step 2: The flat variant – build bee drinks
- Place a smaller pot with the opening down into the larger pot as a podium for the potions.
- Fill the pot with potting soil and plant as a wreath on the edge the flowers.
- Place a bowl in the middle.
- Put water in the flat bowl so that the floor is well covered.
- Position the solar pump in the middle. Make sure that it is completely under water.
- So that bees can land, some stones or floating cork pieces in the water.
- Outside the bowl with flower pots, e.g. B. lavender, thyme or nasturtium. That attracts bees and looks great.
- As soon as the sun shines, your mini solar fountain ripples off-without any electricity.
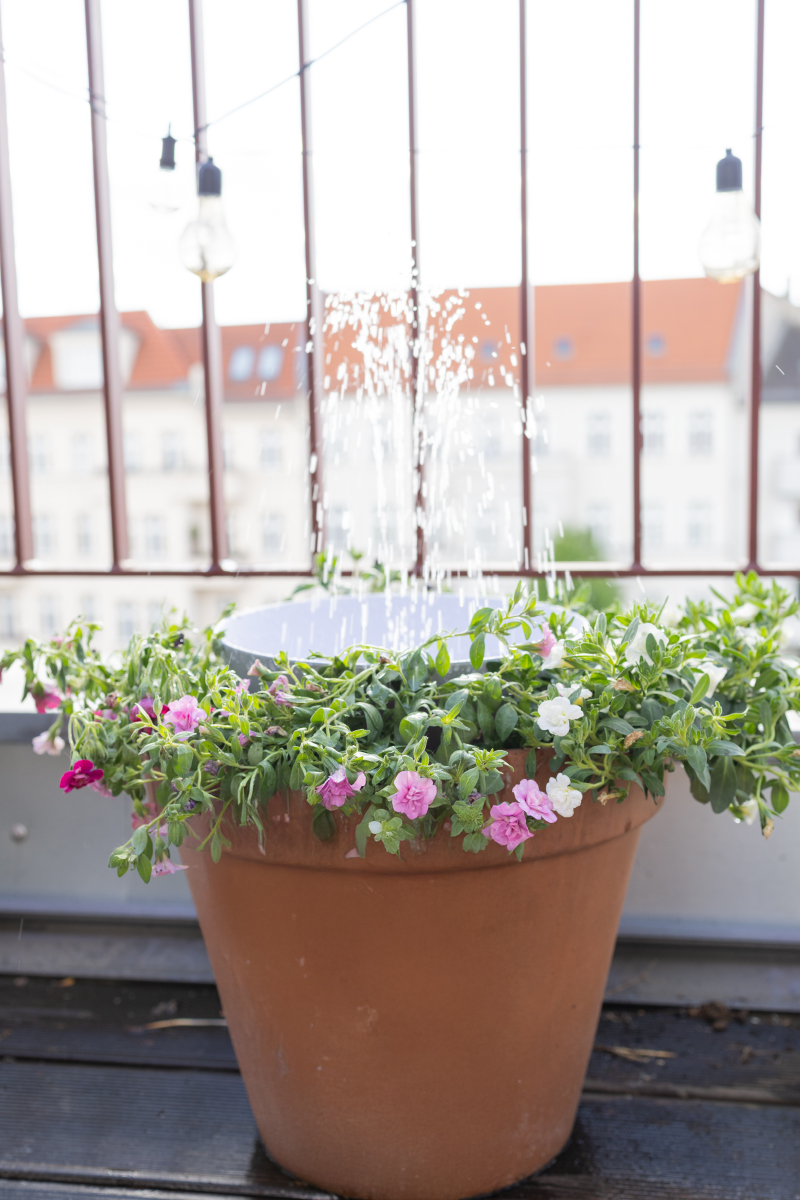
Step 3: The fountain variant-lively mini pond
- Place a smaller pot with the opening down into the larger pot as a podium for the potions.
- Fill the pot with potting soil and plant as a wreath on the edge the flowers.
- Fill the deeper bowl with water and place it in the middle.
- Choose an attachment with a slightly higher spray picture (usually included in the set).
- Make sure that the water jet is not too high – otherwise too much water evaporates.
Care tips for permanently beautiful solar fountain
-
Change the water every 3–5 days
-
Clean the pump regularly from algae and dirt
-
Add a few copper coins – this has a slightly algae -resistant effect
-
Store the fountain frost -free in winter
Why your solar fountain is more than just decoration
The flat water point of your solar fountain fulfills two functions:
Especially in cities there is often a lack of safe water sources for bees. With a few stones or a rough surface you help them enormously.
Whether as a relaxing ripple on the balcony or as a bee -friendly eye -catcher – a self -made solar fountain is a wonderful DIY project that combines nature, sustainability and creativity. I have used both variants for weeks – and cannot decide which I love more.
See you then. Your Laura
Source: trytrytry.de