It’s been over 1 year since I gave my bedroom a major makeover and there are still a few things on the list to be done. But I can still show you a great before and after today.
The article contains affiliate links (info)
Bedroom makeover – intermediate status
Bedroom furniture – an ongoing project.
The reason I haven’t finished the makeover yet is because a little girl has nested herself here on an extra bed. At some point, my own sleep became more important to me than the principle that small children should sleep in their own room. In the meantime, however, I am hopeful that we are on the verge of a change and that the mouse will soon really be spending the nights with her sister in the children’s room. And then I can finally look further for a new second bedside table and two beautiful bedside lamps next to the bed. The wall lamp option can only be implemented when our bed can be aligned a little more centrally on the wall.

New Plans – Walk-in closet in bedroom
And since the 4 of us live in a small house of about 110 square meters, I already have another plan in mind how we can create more space in the children’s room. Since our bedroom is large by Dutch standards, I thought about setting up a kind of family walk-in closet. This means that the children’s clothes can also come into the bedroom and the girls have more space to play. The new chests of drawers or wardrobes for the children are then placed at the foot of the bed. There could also be a half-height partition between the chest of drawers and the bed to provide privacy. This makes the sleeping corner extra cozy.

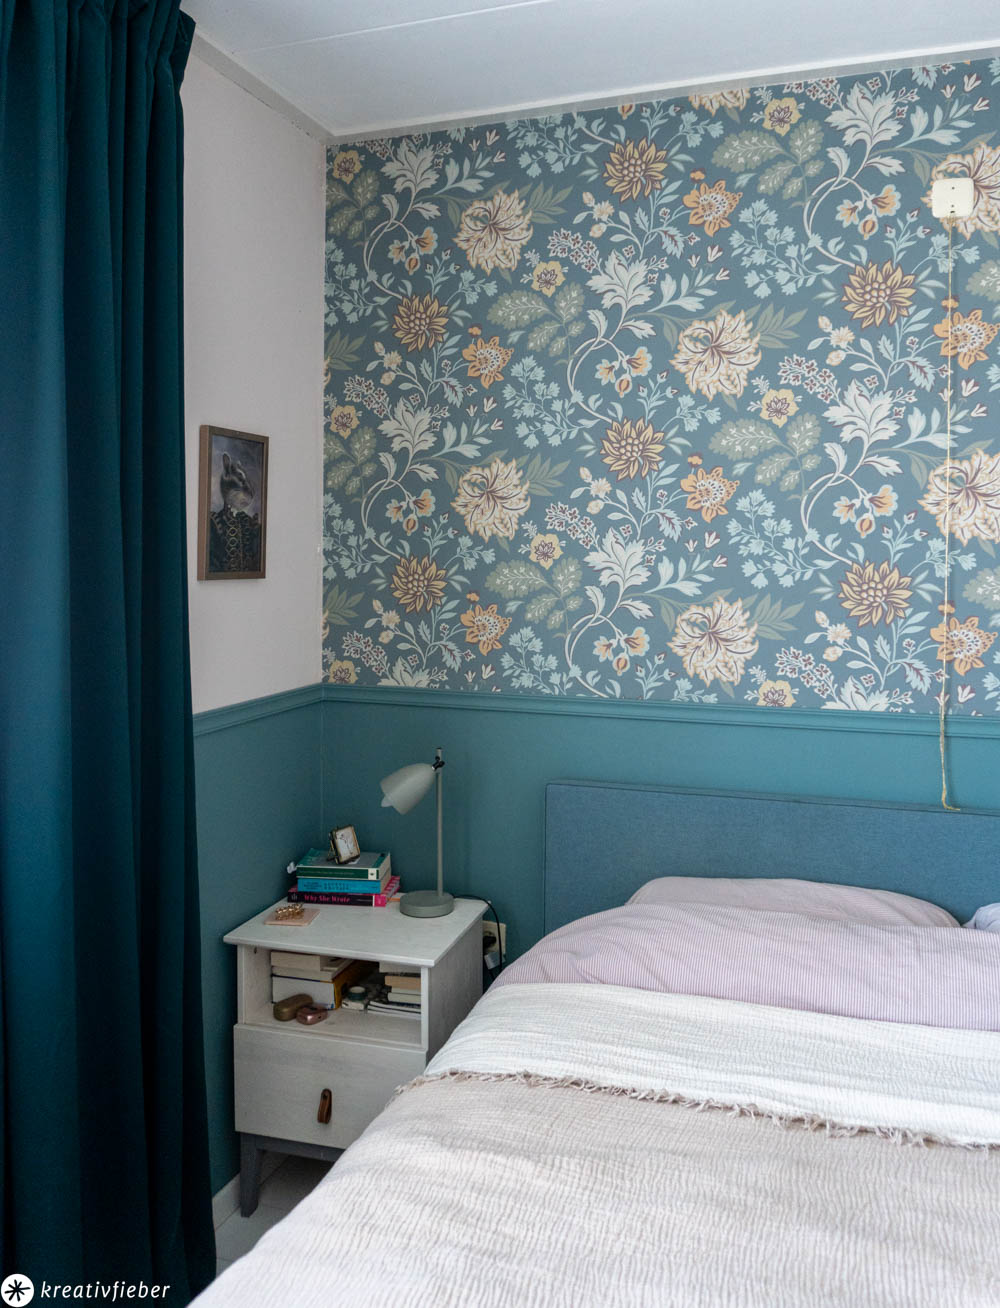
Bedroom makeover with wallpaper, wall paint and decorative moldings
Back to the first step of my bedroom makeover.

Wall color combination green blue and neutral pink
First I painted the walls in two colors. A teal on the bottom and a light, neutral shade of pink on top. So the contrast to the green doesn’t look quite as harsh and it gives the room a slightly warmer balance.
Attach motif wallpaper

Then came the exciting project of motif wallpaper as an accent wall above the bed. I had fallen in love with this Swedish wallpaper brand for a long time and ordered two rolls. Luckily there were two, because I made a really stupid mistake when cutting them. How not to do that and which tips I have collected for this project, you can soon read here in the article wallpapering motif wallpaper.
decorleiste

Finally, I painted a wooden decorative strip in the same shade of petrol and attached it all around to the wall. I glued the strip with construction glue and fixed it with small nails. Since the walls in a 1930s house are anything but straight, this was definitely a good solution for better support. I then painted over the nails with no heads so that they can no longer be seen.
Decorate
The large flower collage, which is one of my favorite DIYs from our early blog days, had to go because the color didn’t match anymore. So far I’ve only found a small substitute that the Dutchman painted, but I’ll look again for more paintings or to commission something from him.

On the side of the bed I have what I think is a very humorous piece of art made by my late chipmunk, Knoppers, through the Lavistique shop. Here you can have historical portraits designed using the photos of your pets.
The dark green curtains are also relatively new and now go perfectly with the new wall. The curtains are from IKEA, in dark green and available online and they do a really good job of darkening the room.
I also have a new, super soft and beautiful bedspread from Etsy shop Budapestemal.

The new lamp can also be found on Amazon.

All in all, I love my new bedroom and I’m excited to see how the plans continue.
All the best,
Maike
Maybe interesting too. . .:
Source: kreativfieber.de