Christmas collection and DIY Advent calendar with IKEA Sindelfingen and Ludwigsburg *Advertising
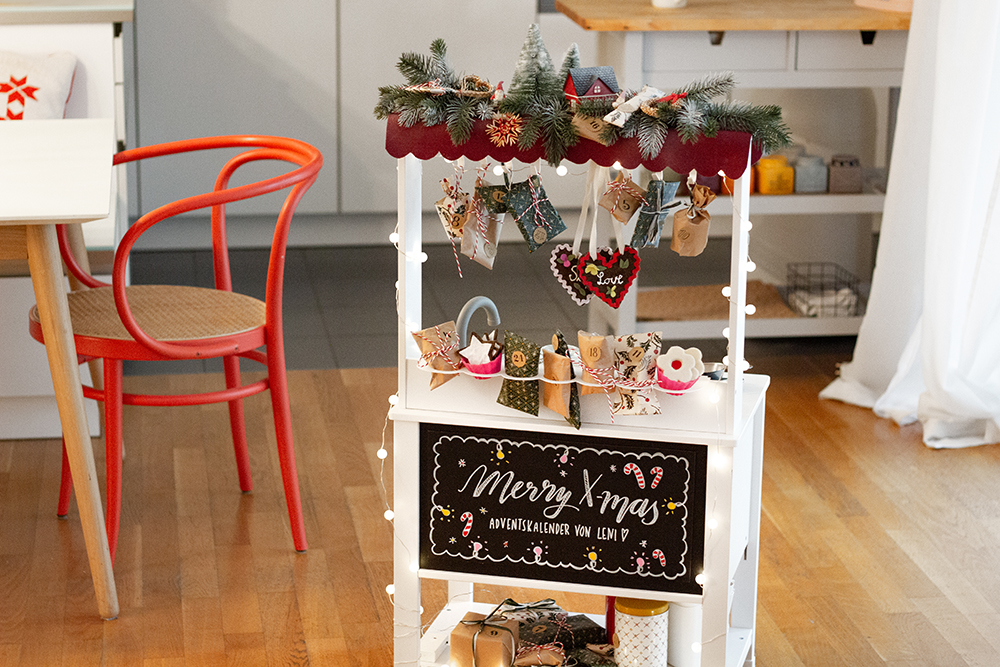
Yay, it’s almost Advent time again! After this long summer, my anticipation is even greater and it’s almost traditional for me to show you the new Christmas collection from IKEA again this year. Together with IKEA Sindelfingen and IKEA Ludwigsburg, here in the blog post there is again a short tour of the IKEA Christmas market – and so that your children get something out of it, I will then show you a very special DIY Advent calendar, which is also a mini Christmas market with lots of homemade ones Treats are. Not only is it fully covered with all the little gift packages, but it will also provide your children with lovely hours of play throughout Advent.
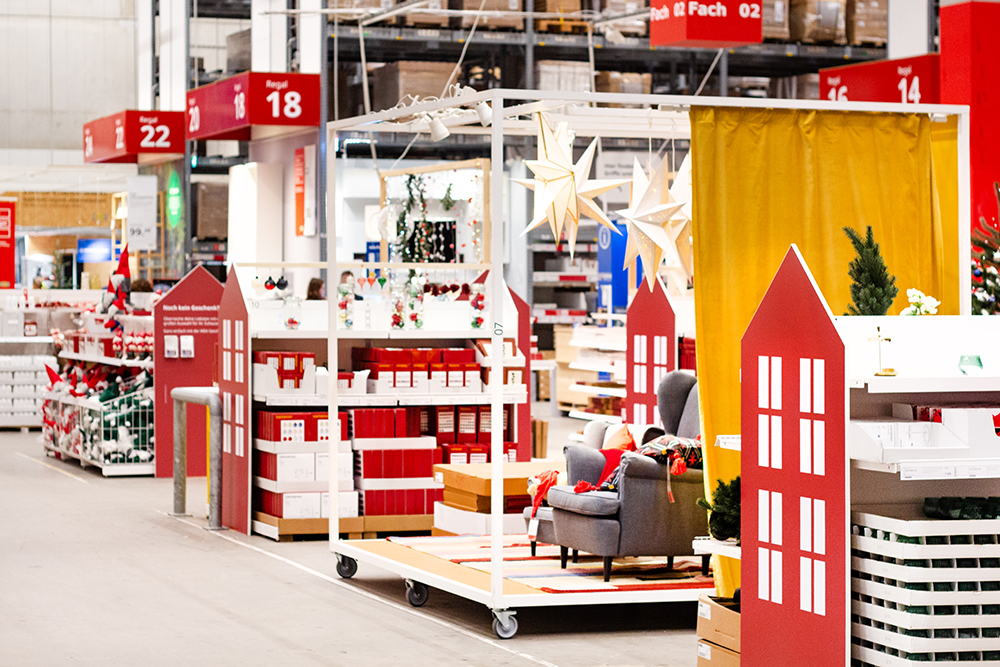
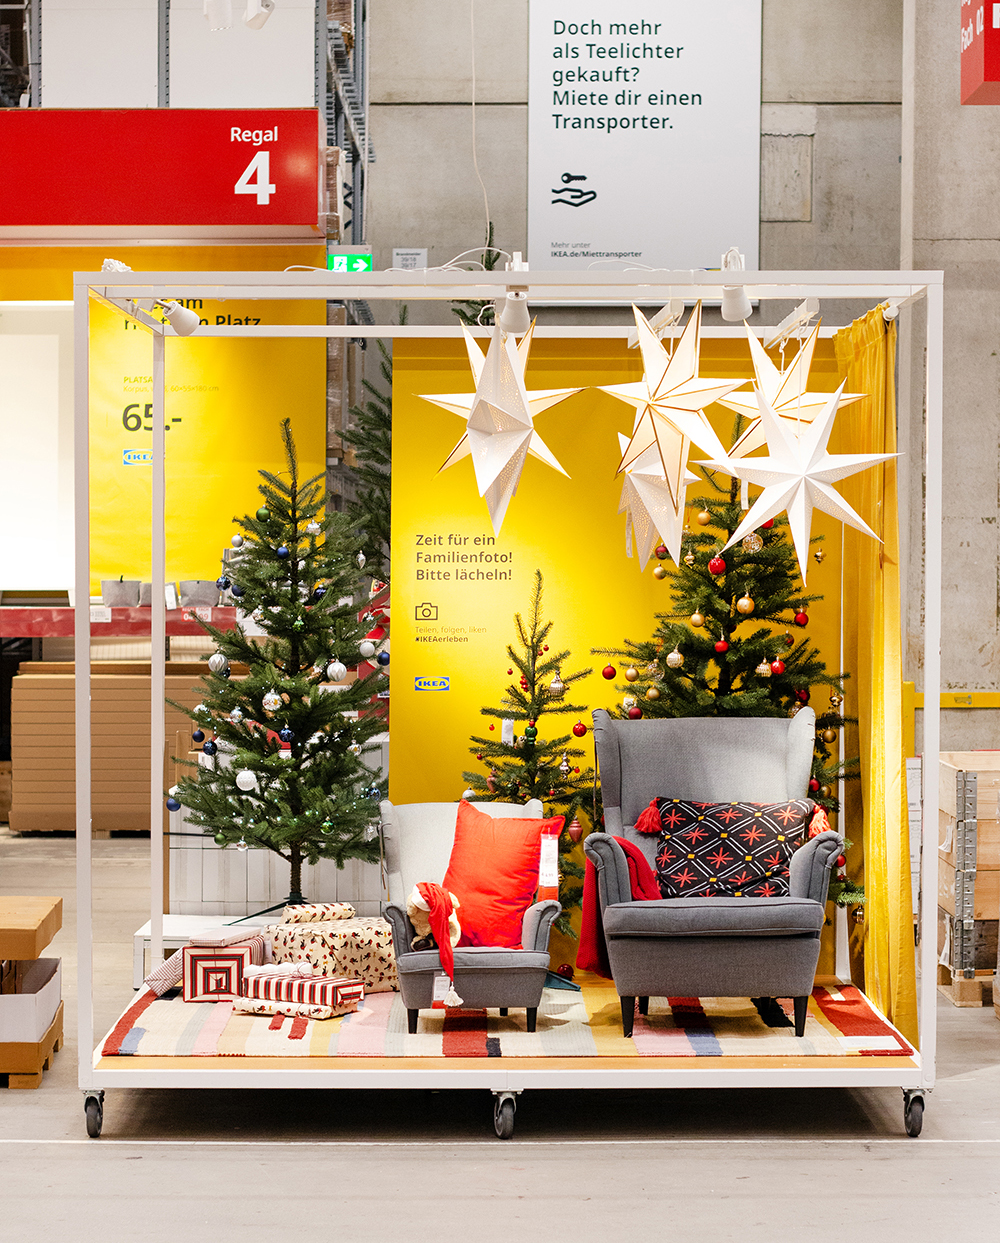
1.) This year’s Christmas market at IKEA Sindelfingen
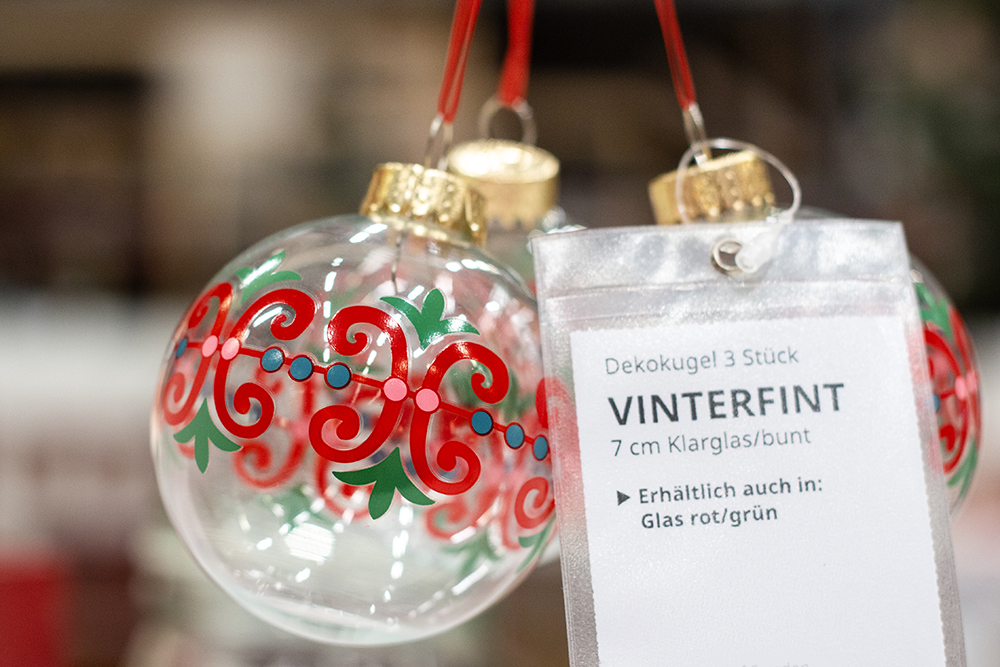
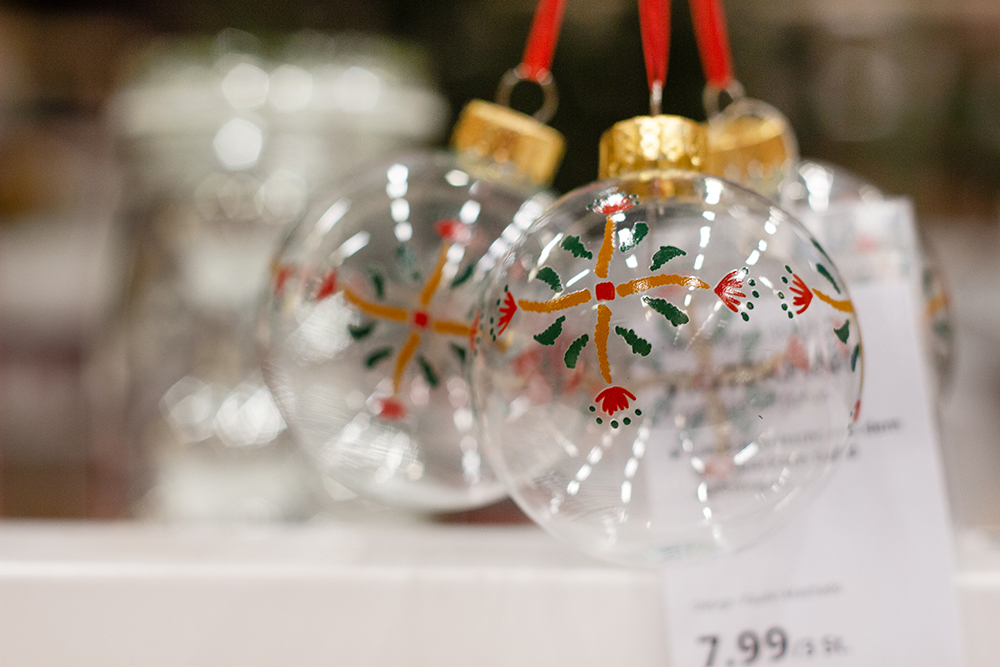
Small, but once again nice! The Christmas market at IKEA Sindelfingen is manageable and still has all the important new items WINTERFINT Collection on offer. This year’s collection is a small homage to IKEA’s Swedish roots and draws on the figures, colors and patterns of traditional Swedish folk art. VINTERFINT gives classic winter motifs, graphic patterns and playful figures a new, modern life.


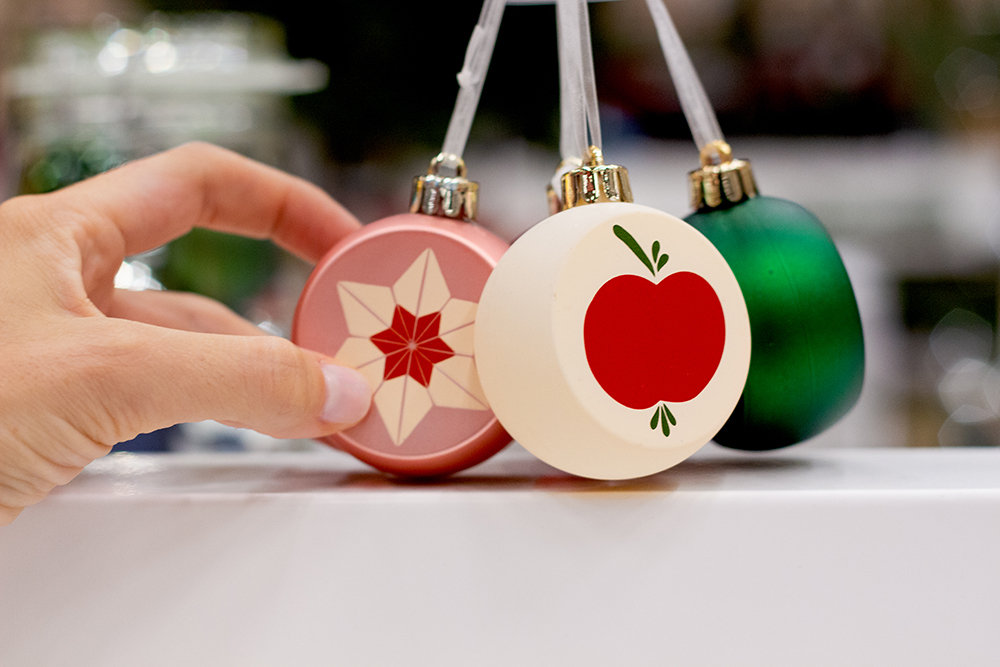
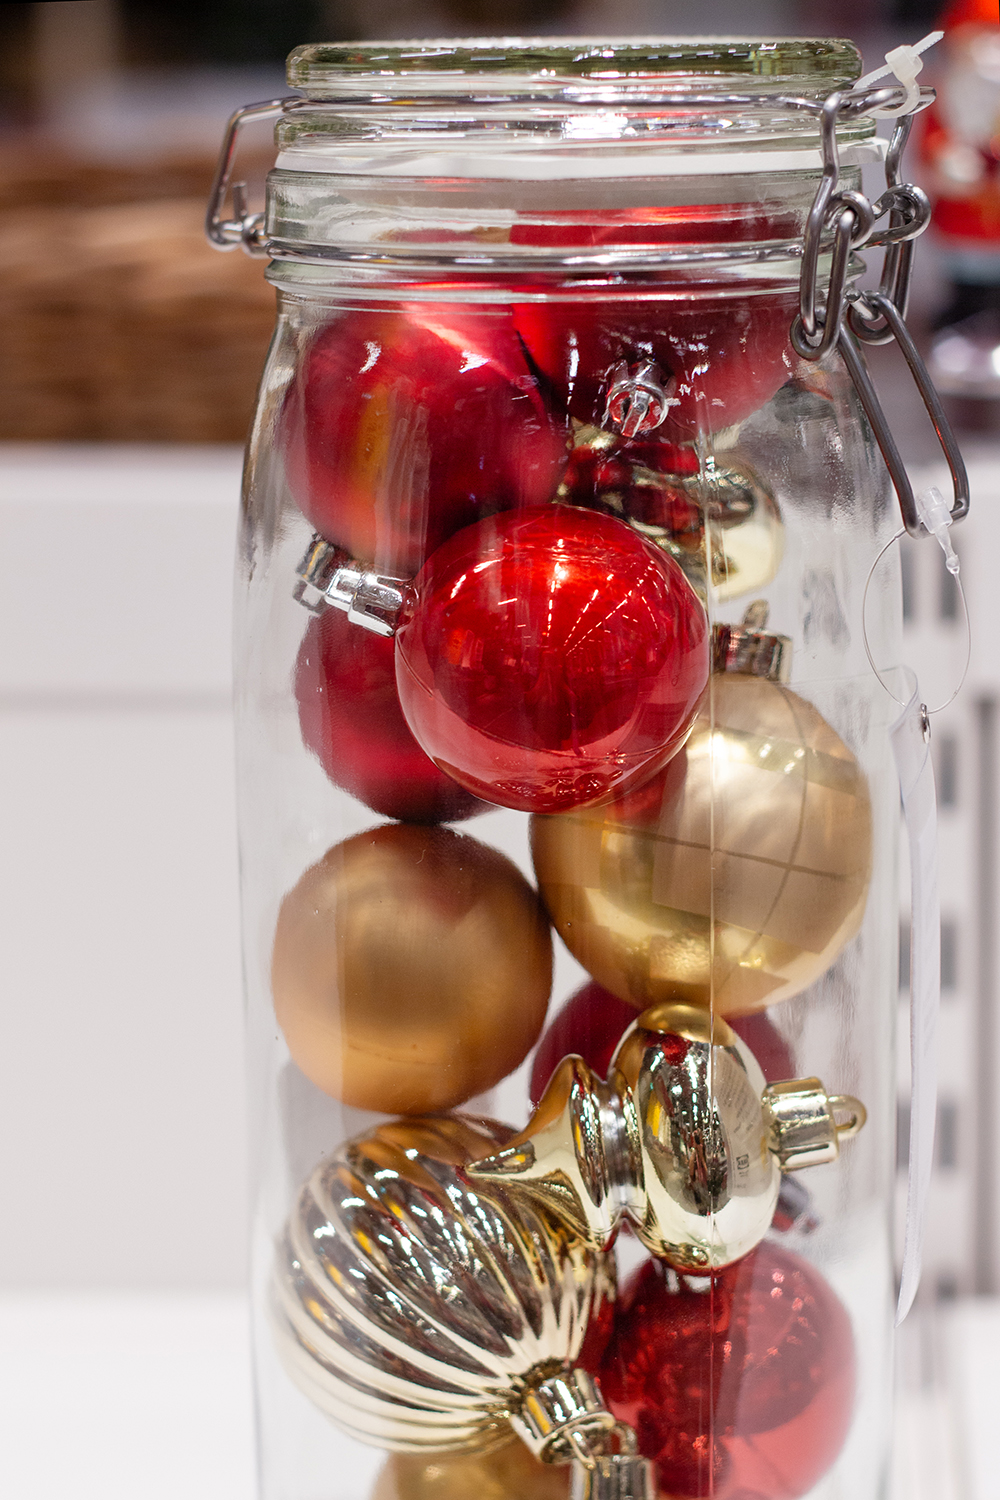
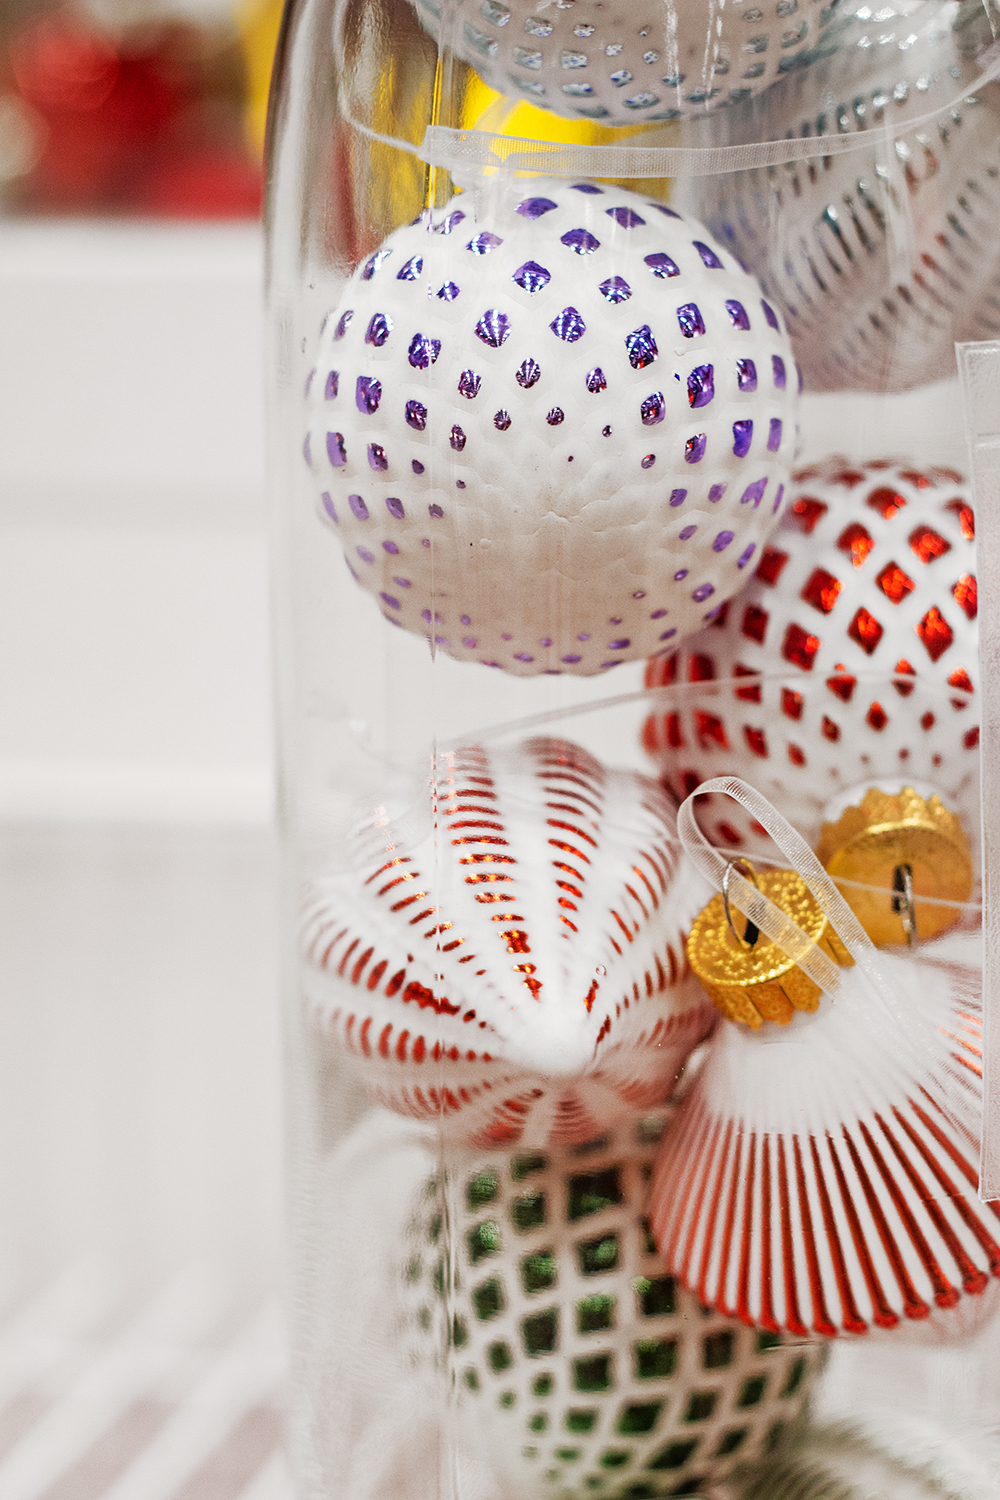
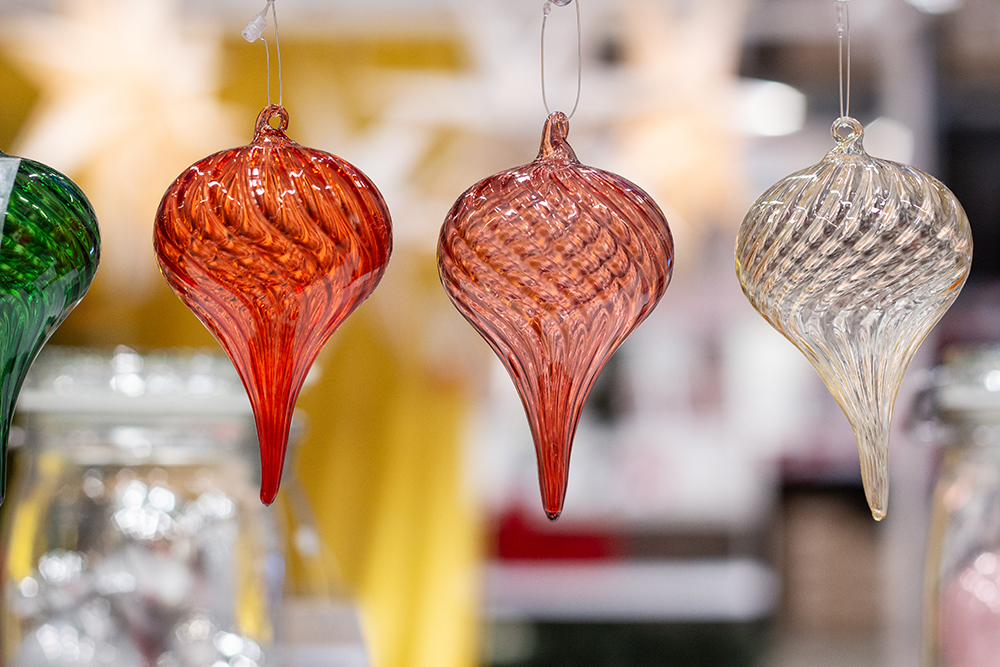
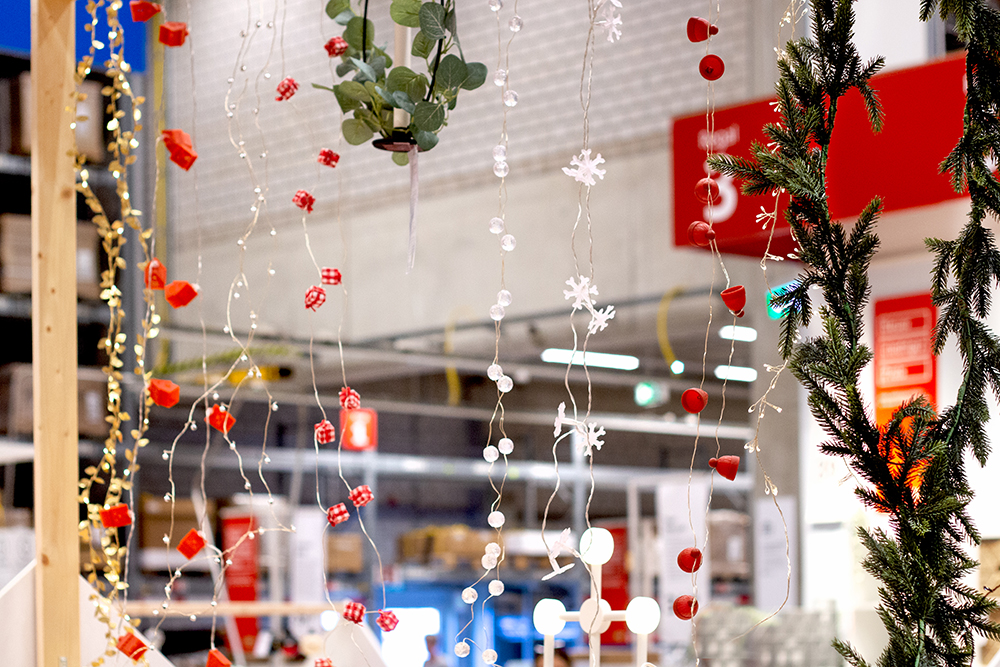
The tree decorations are in traditional Christmas colors. Whether simply elegant, a little kitschy or something in between – there is something for everyone here. I find these particularly beautiful glass balls with the Christmas patterns and the flattened balls with flower and apple motifs:
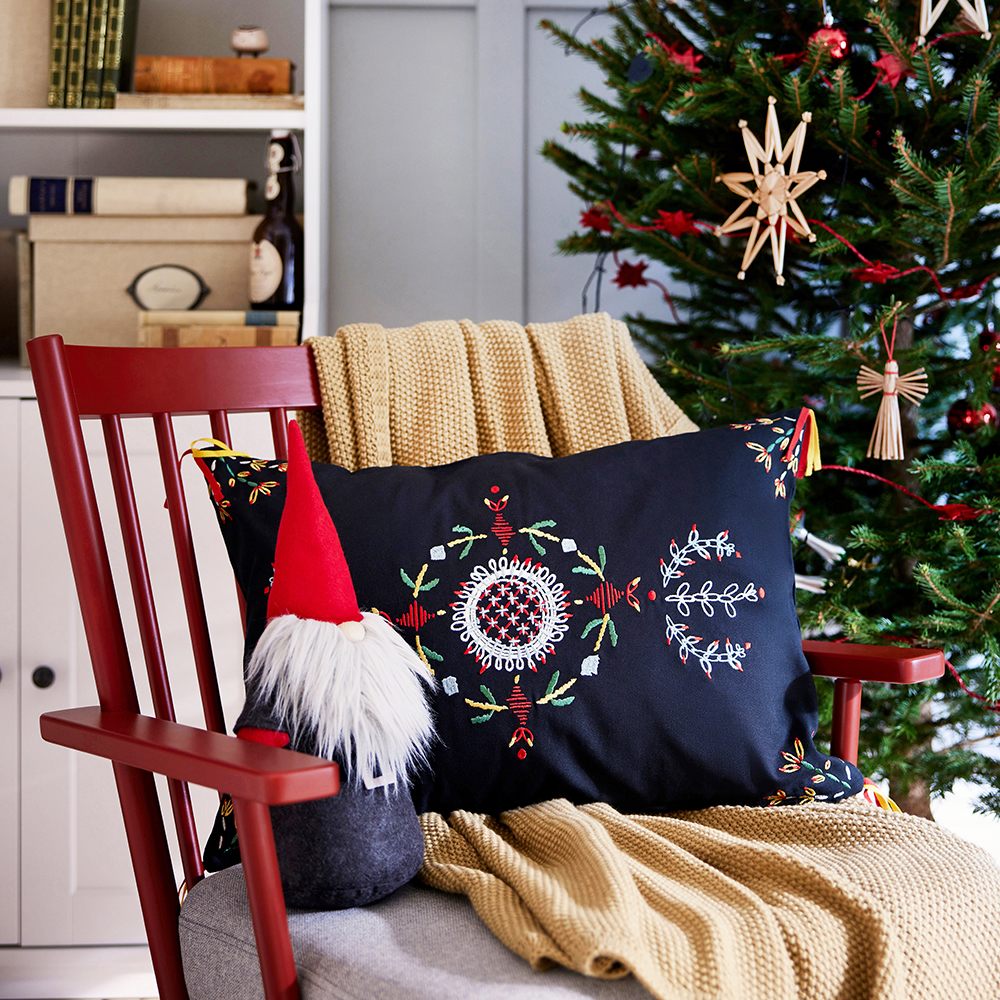
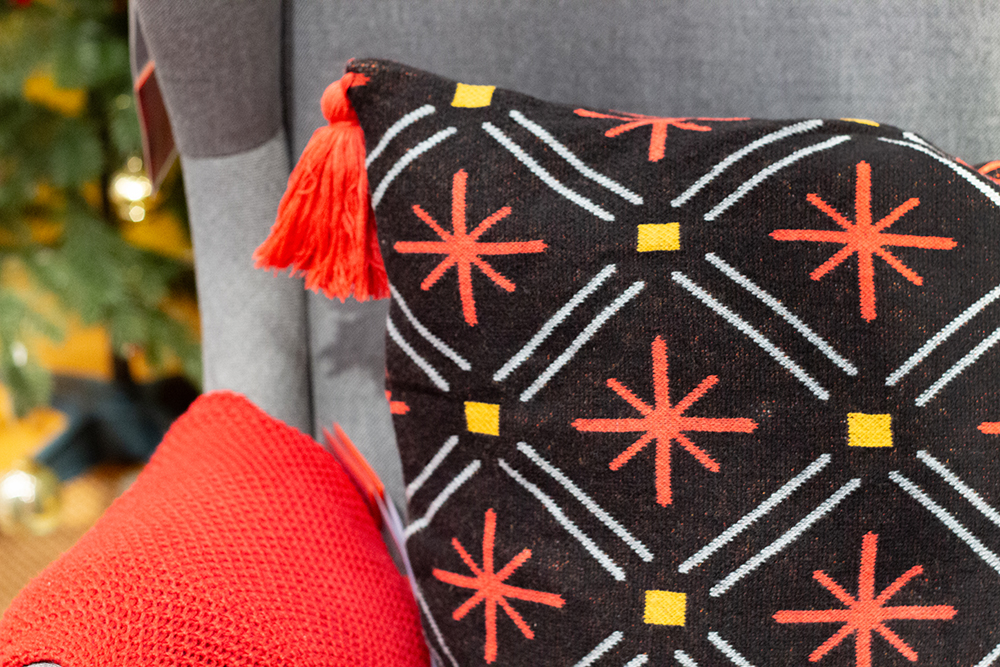
The cuddly ones WINTERFINT The textile come in a mix of a wintery traditional and playful look and could decorate the row of seats in a cozy winter carriage. In fact, IKEA designer Paulin Machado was inspired by the design of riding cushions that were previously used to make traveling in horse-drawn carriages more comfortable. Totally beautiful, right?
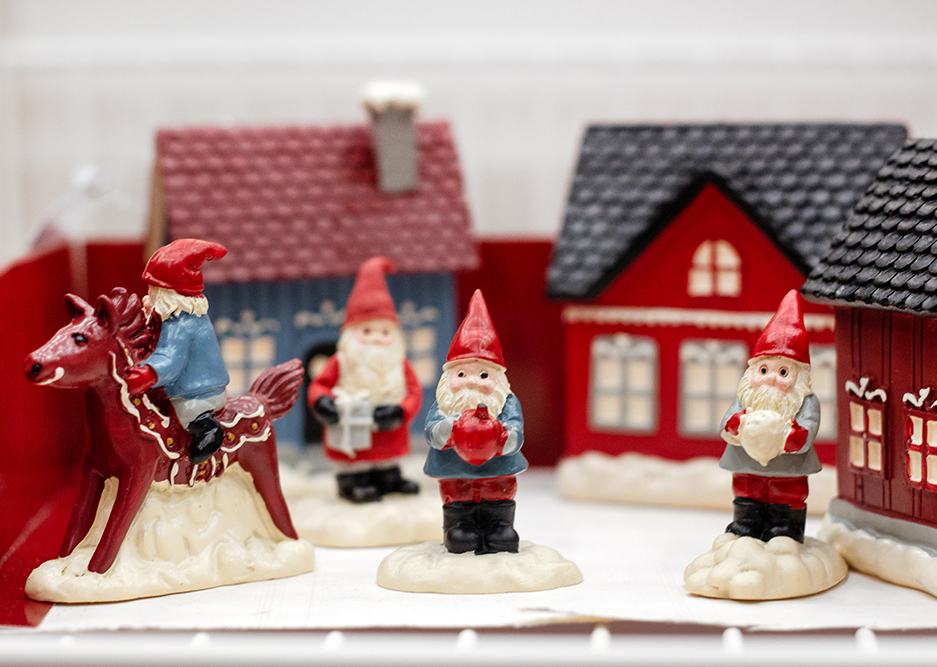
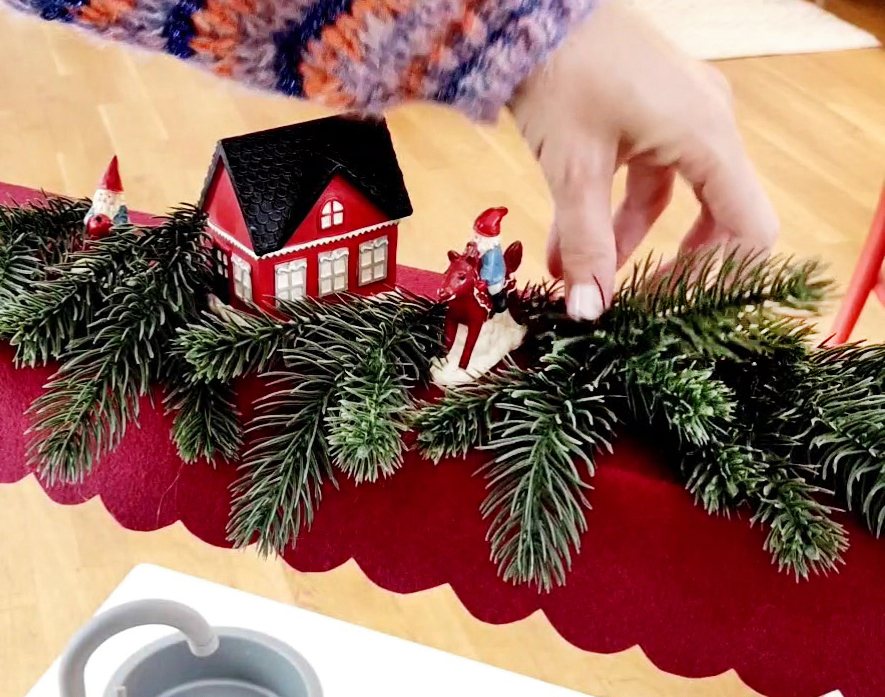
I find that very cute small winter village with Christmas elves and traditional Swedish houses – I also used these to decorate my DIY Christmas market 😉
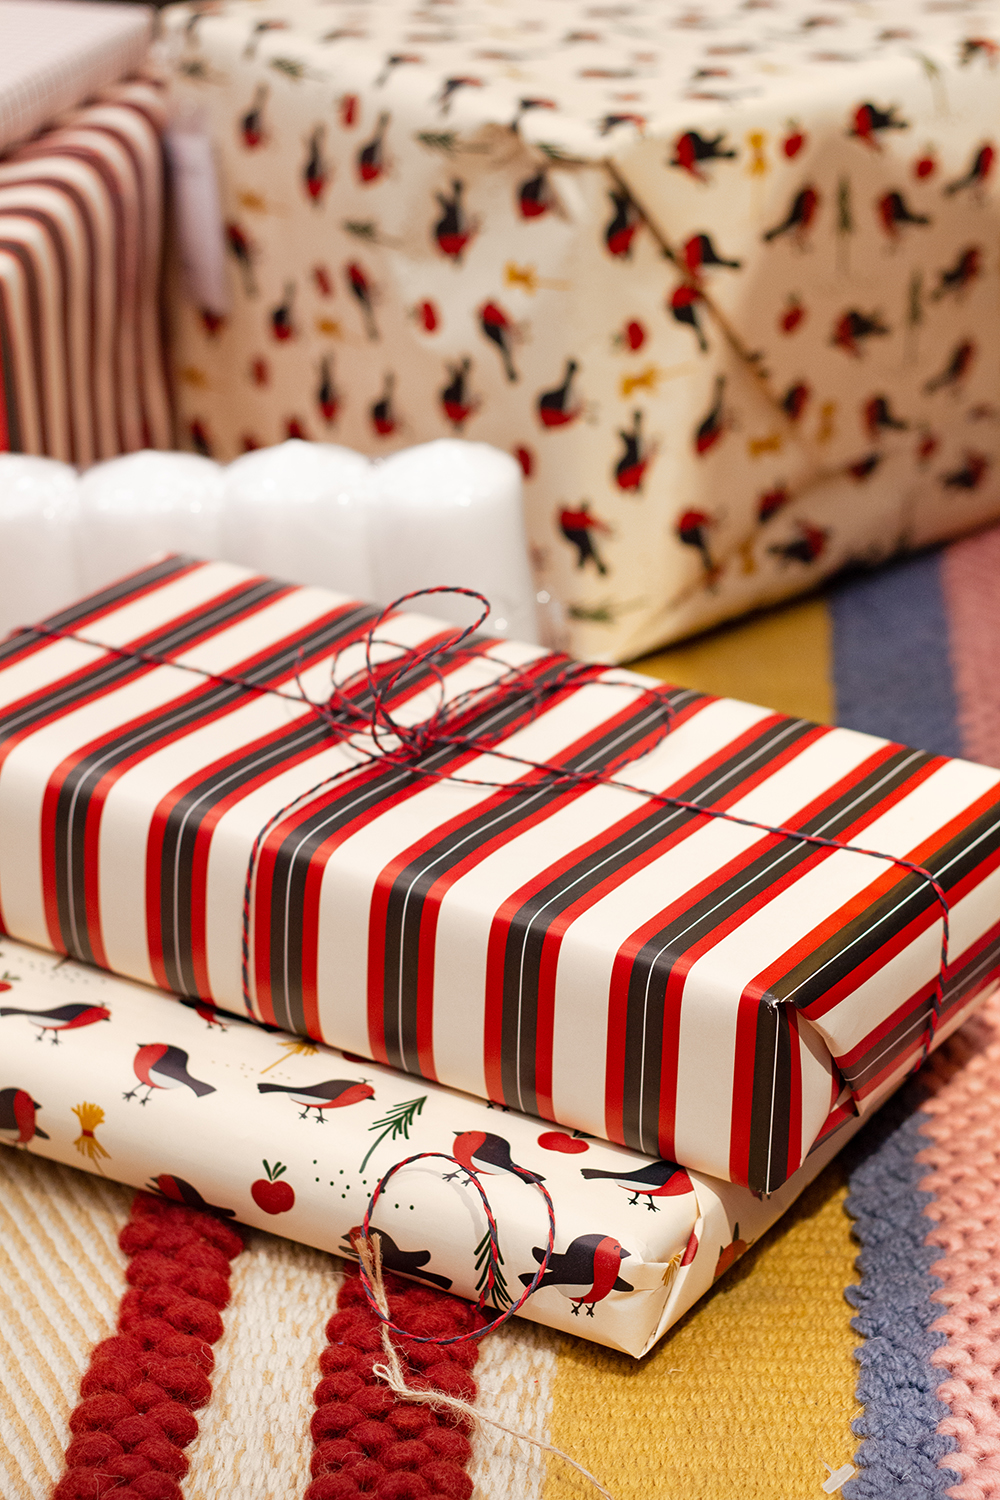
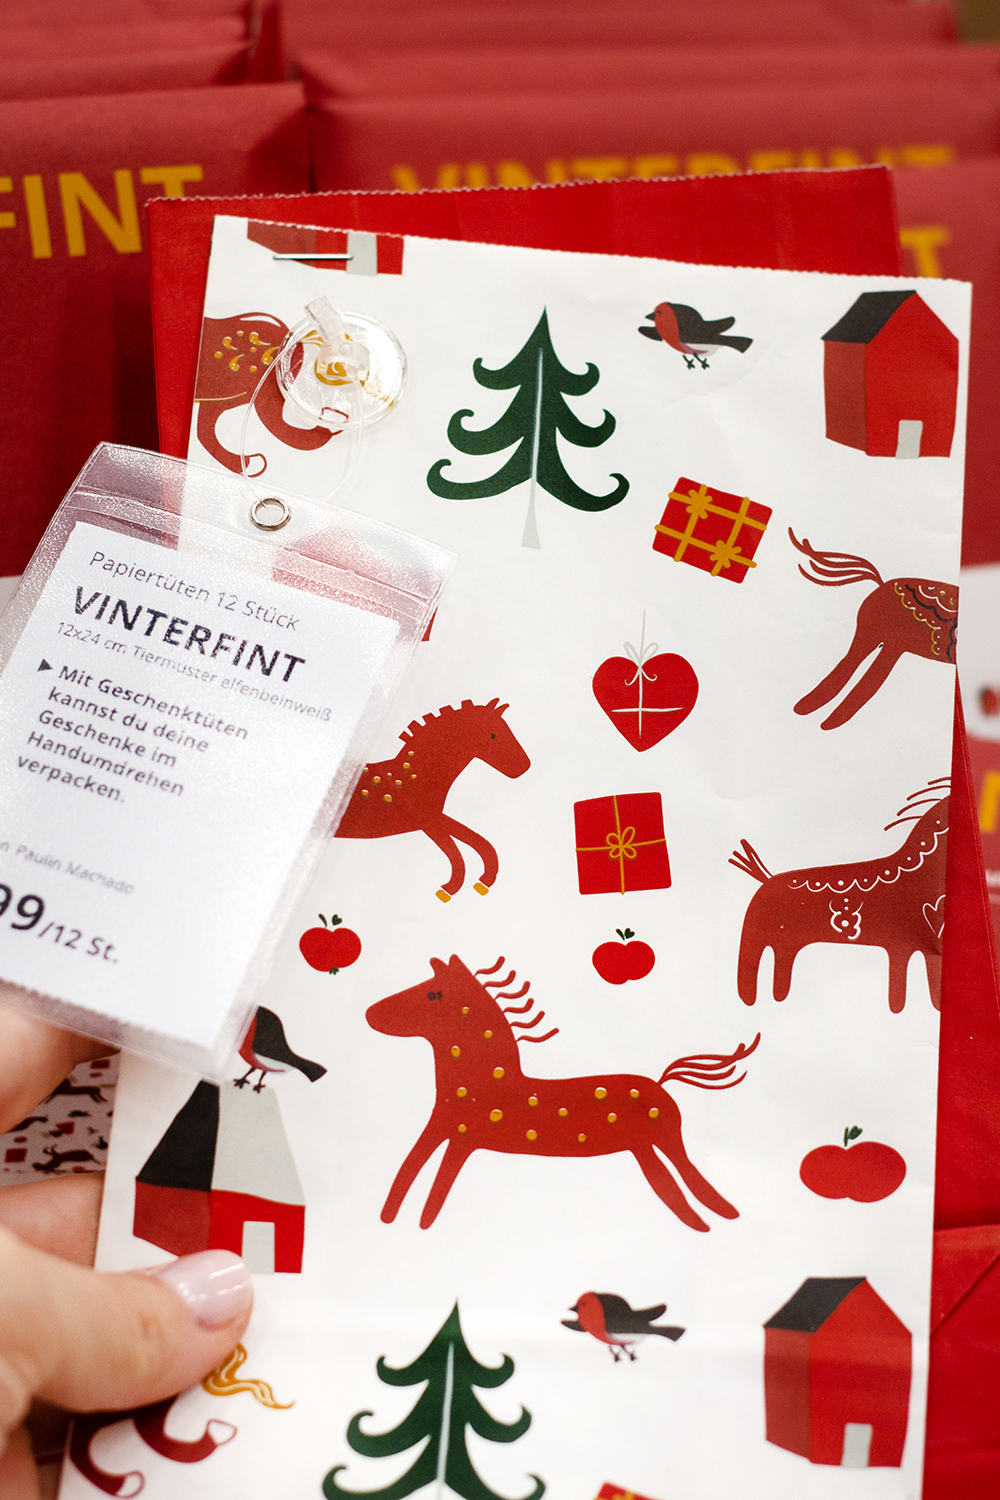
Here are a few more stationery inspirations: also on this VINTERFINT wrapping paper and the gift bags feature playful Swedish traditional figures and graphic motifs.
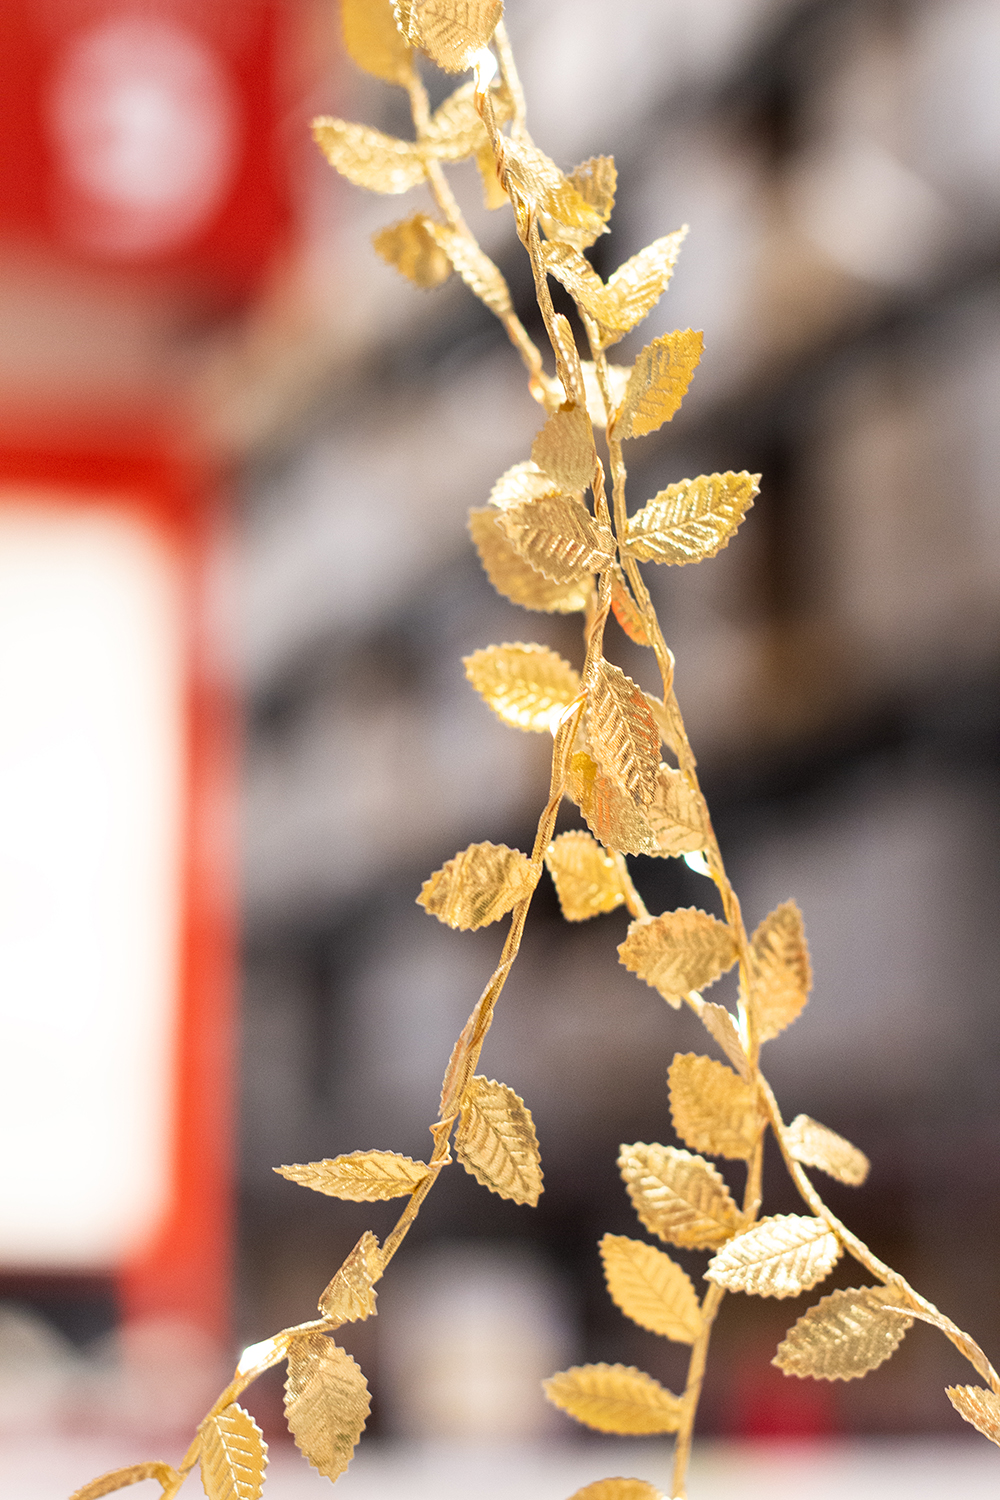
IKEA also has something to offer when it comes to lighting STRÅLA Collection again a nice selection. The LED fairy lights are battery-operated, so they can be used very flexibly anywhere in the home. I find these particularly sweet fairy lights with the delicate golden leaves that I can imagine looking beautiful on a Christmas table.
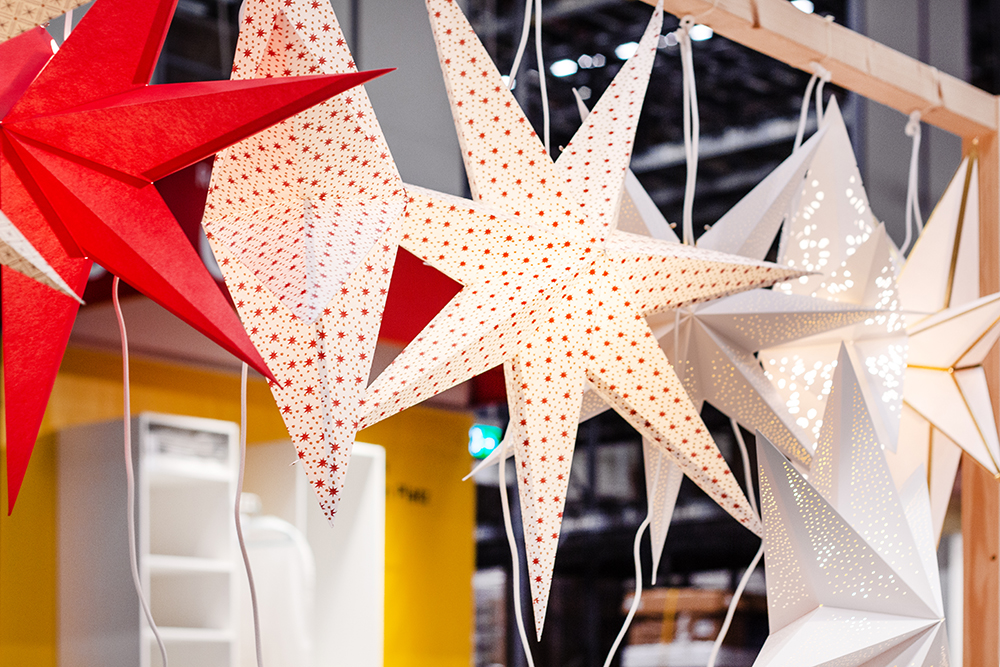
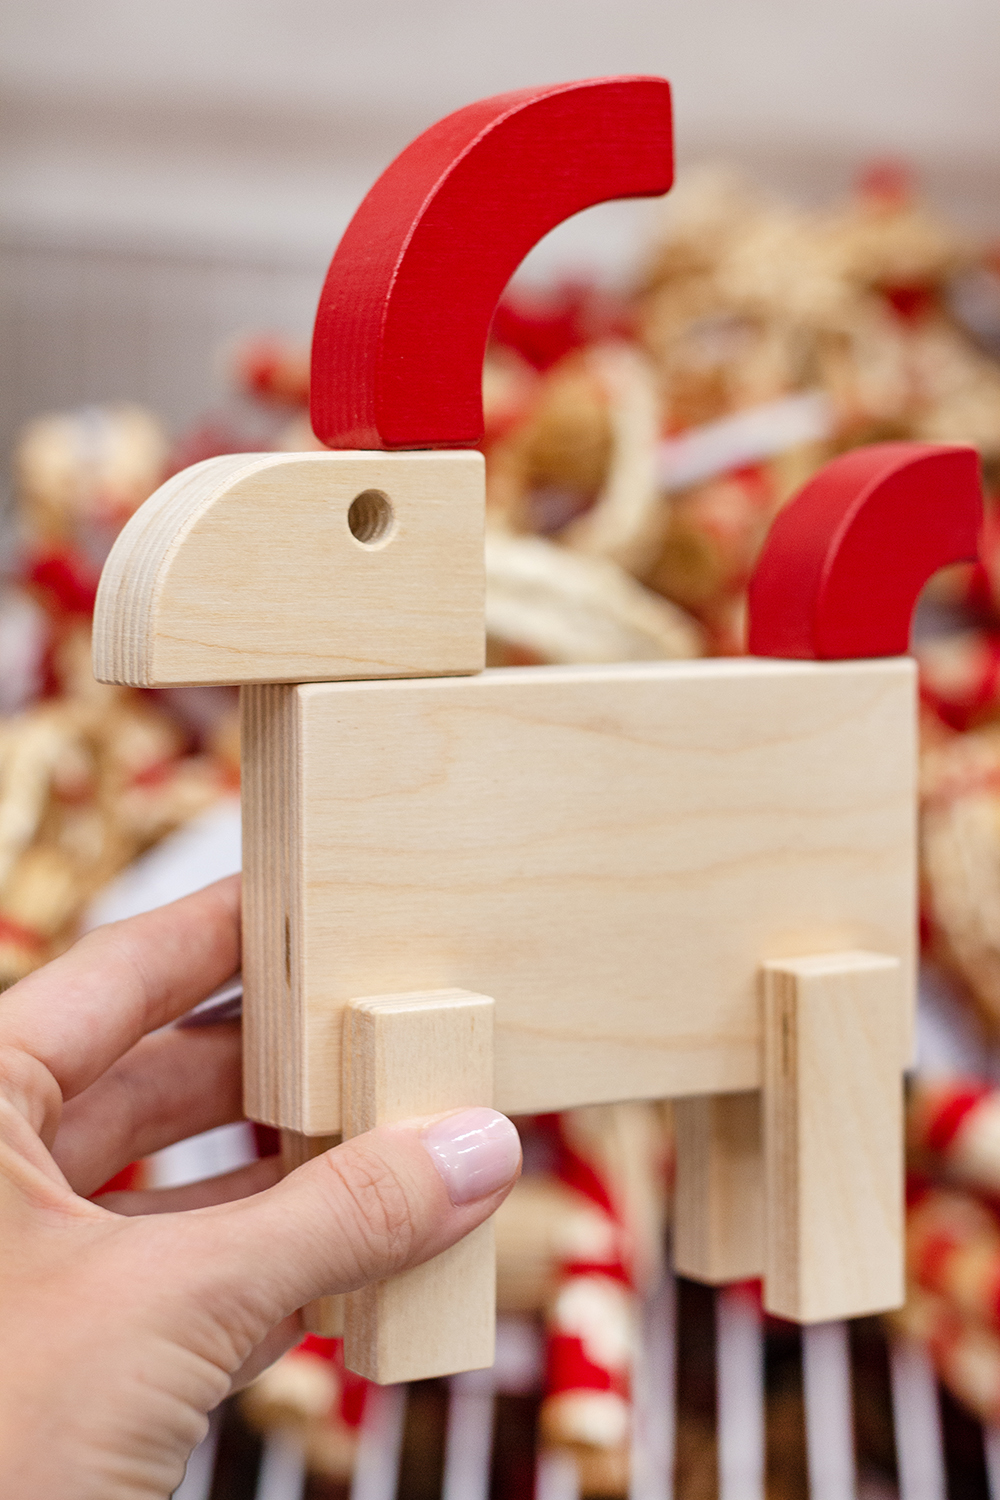
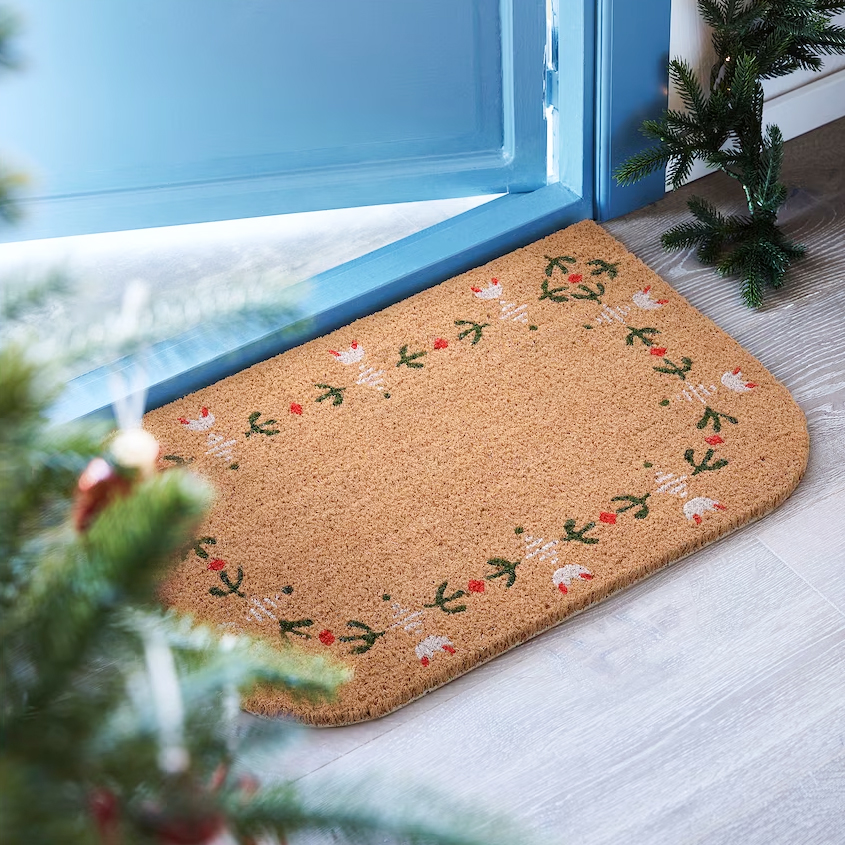
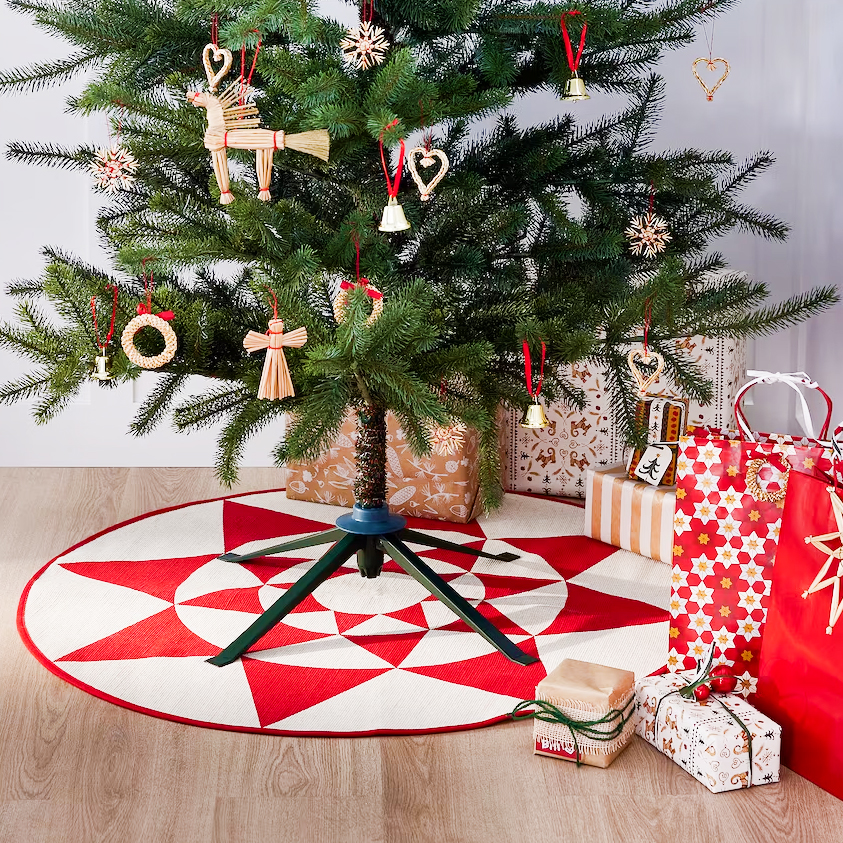
Last but not least, I’ll show you three of my favorite products here: The Wood moose with its minimalist shapes, the Christmassy Doormat and the beautiful one Star pattern Christmas tree matwhich I will definitely get for our tree this year.
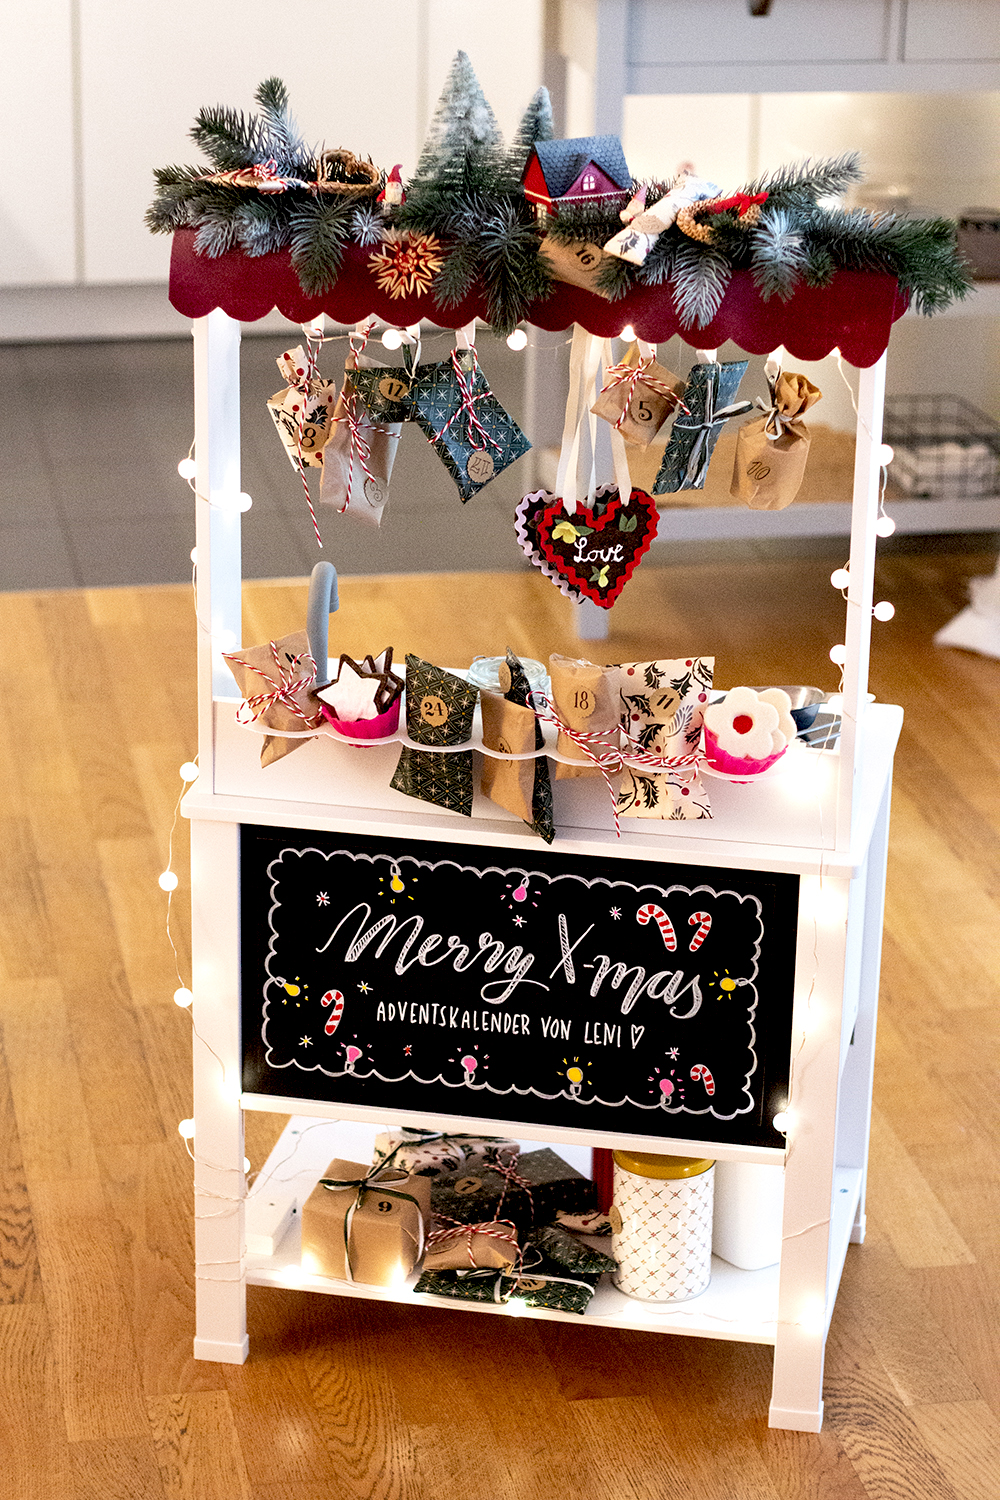
2.) DIY Advent calendar Christmas market
As promised, I will now show you how you can recreate the DIY Advent calendar with all the cute accessories so that your children can also use it as a mini Christmas market stall and play a few rounds of selling with you or your relatives and friends. To make it really easy to recreate, I have prepared a multi-page freebie for the labeled board, the number labels and the candy shapes, which you can find in the material list below. And let’s get started with the instructions. You can read the classic instructions with pictures here or watch this video here:
Material list:
- My Freebie: CLICK
- Children’s kitchen SPISIG: CLICK
- BEST Notiztafel: CLICK
- Wrapping paper VINTERFINT: CLICK
- Punch for the number labels: CLICK
- SUNNSERTA Chin Set: CLICK
- Mini fir trees for the roof: CLICK
- Houses and figures: CLICK
- Straw tree hanger: CLICK
- Artificial fir for the branches: CLICK
- Never
- Fairy lights: CLICK
- 28 x 55 cm piece of felt (sold by the meter from the fabric store)
- brown & cream felt thick (3-4mm): CLICK
- red, green felt and other colored felt: CLICK
- Rick-rack (wavy decorative ribbon) in desired colors: CLICK
- Any decorative ribbon for the heart chains
- 3D pearl marker white: CLICK
- Cork coaster for the waffles: CLICK
- WINTER FINT The dose: CLICK
- white, light brown and dark brown permanent markers (mine are from Bine Brändle)
- white acrylic paint and bristle brush
- good scissors
- Scissors small and pointed
- double-sided tape
- hot glue
Affiliate Links
That’s how it works:
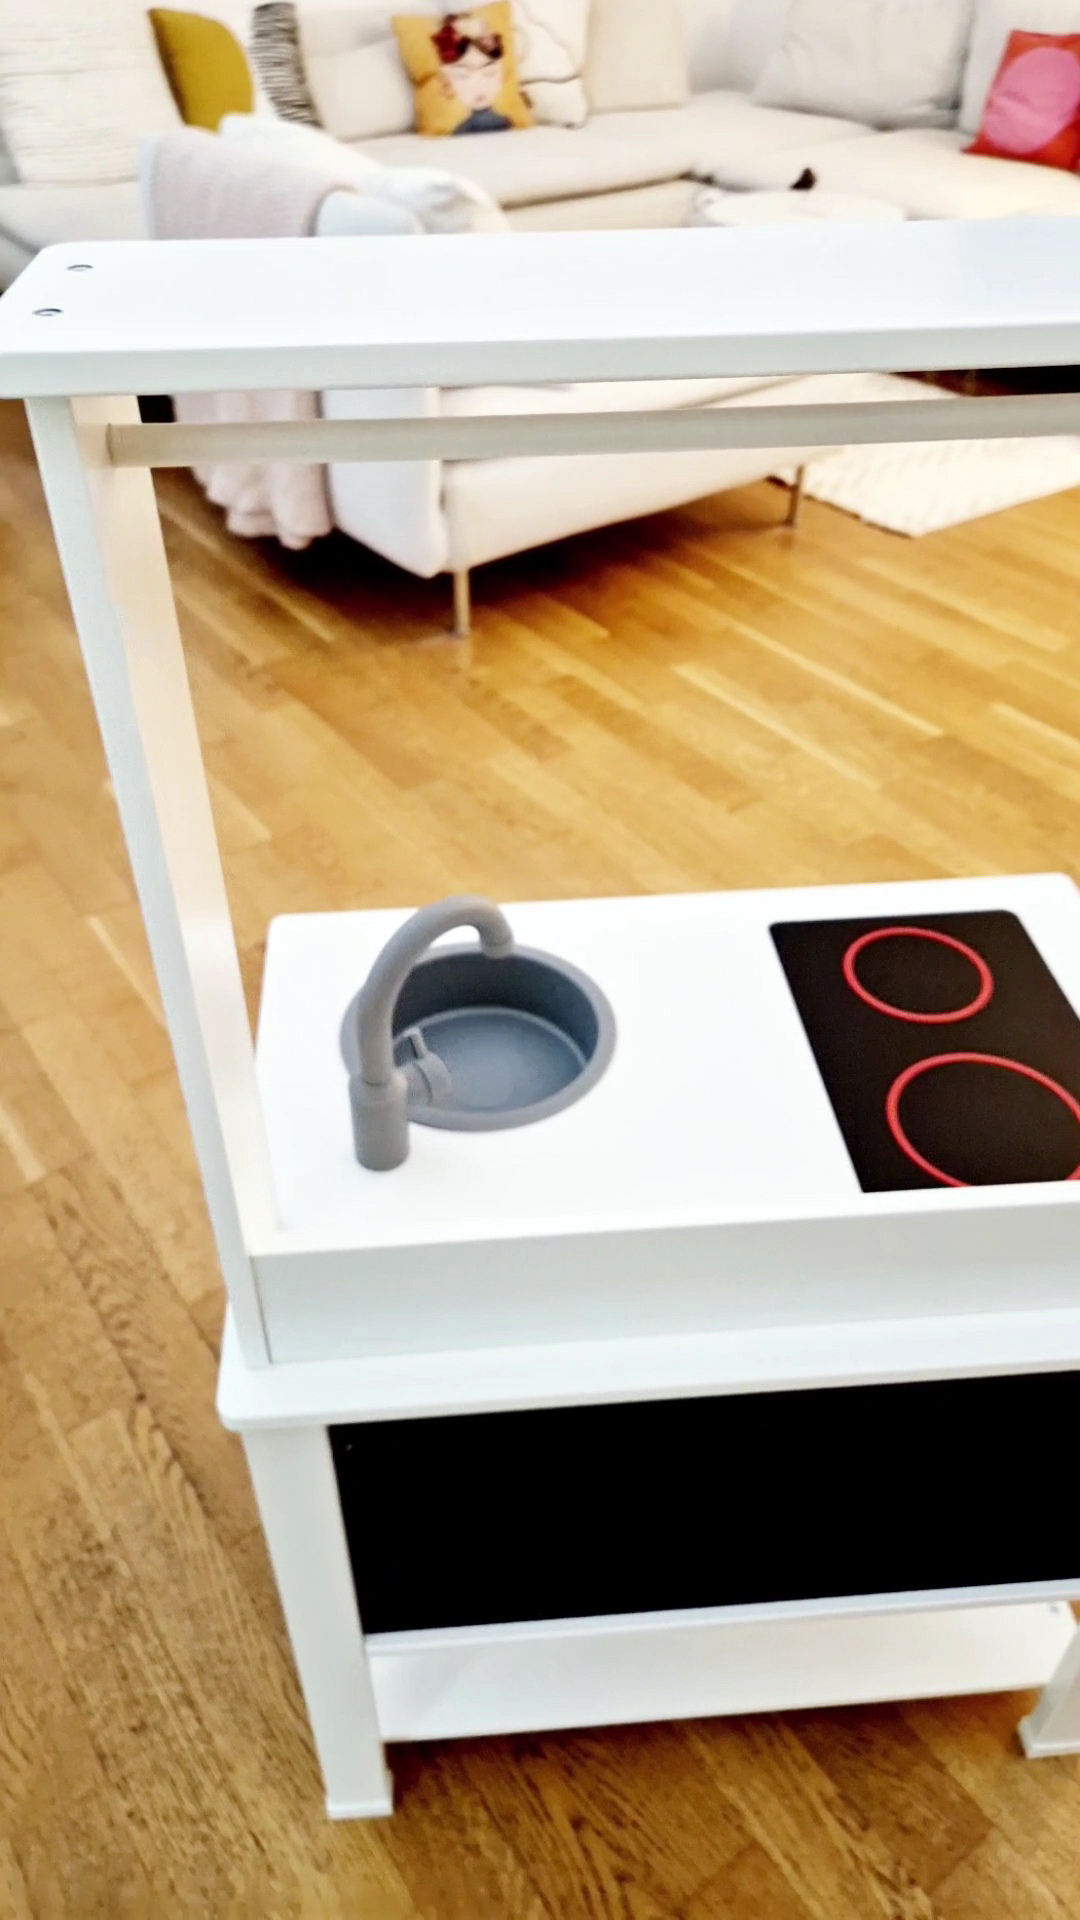
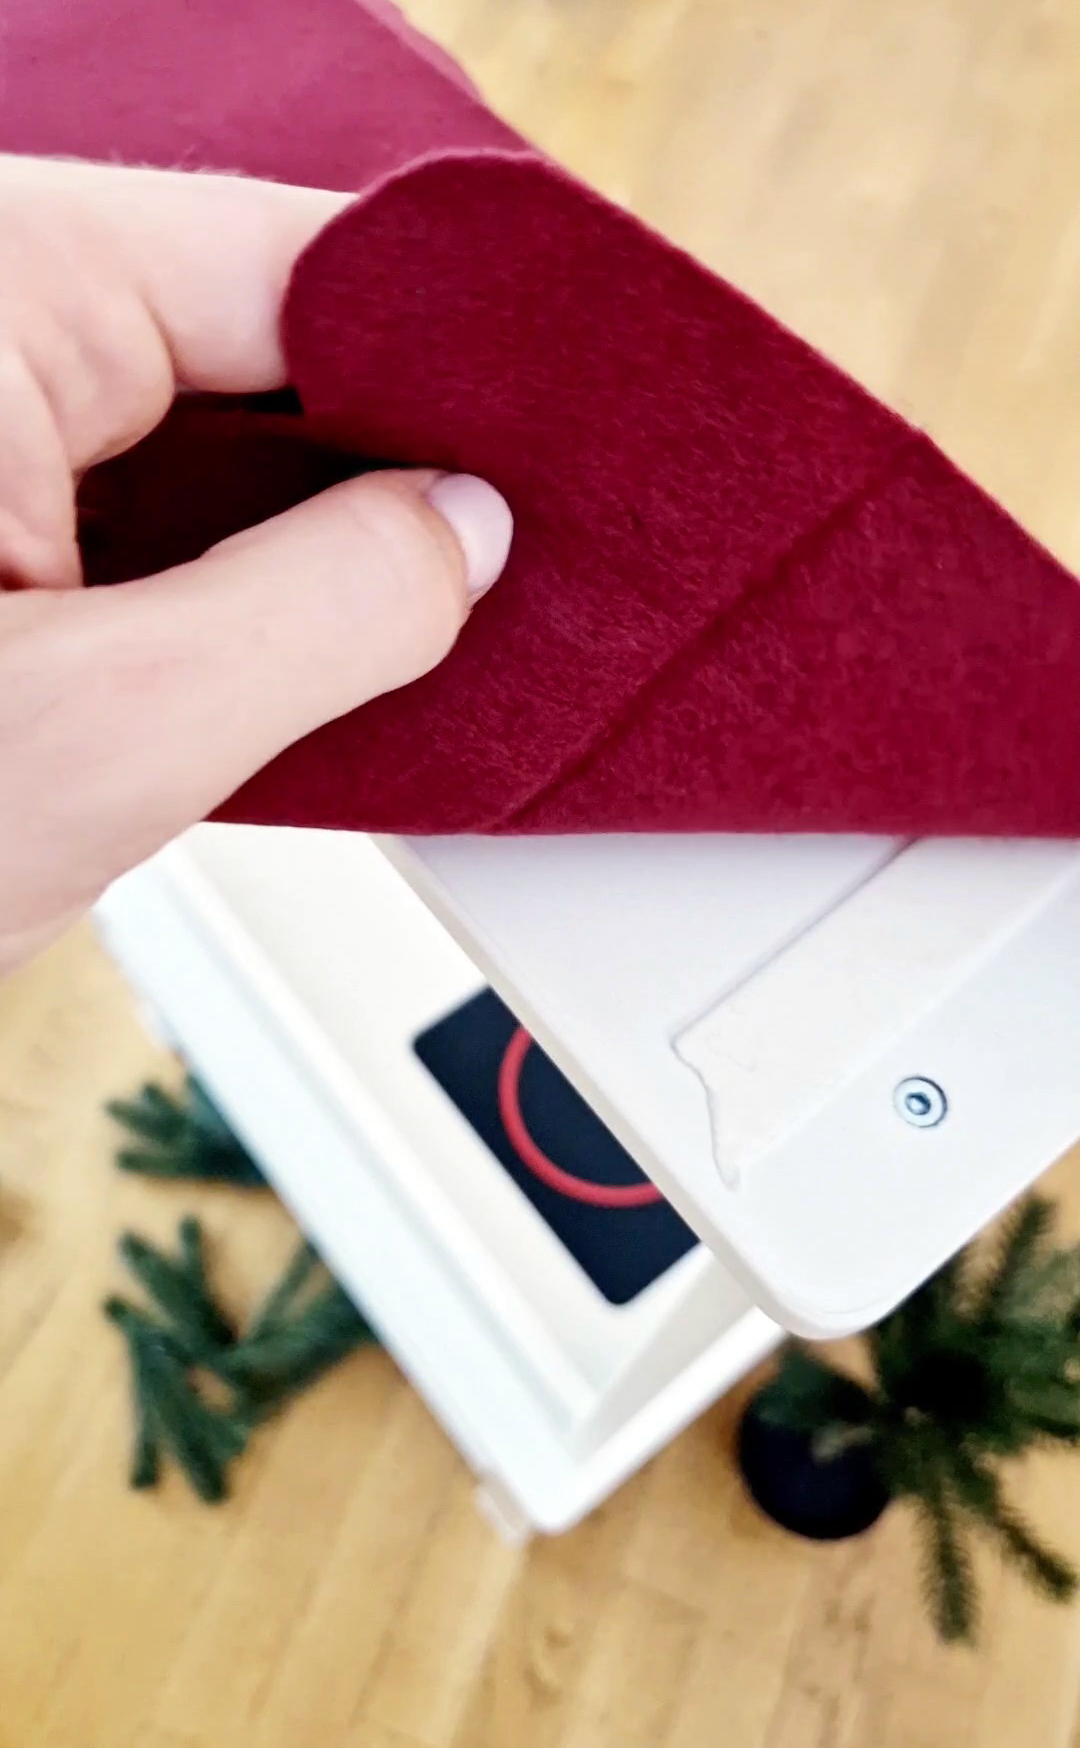
1.) Rack & Filzdach First, assemble the SPISIG children’s kitchen according to the instructions. Just leave the curtain aside, it’s not needed. Cut out a piece of felt measuring 28 x 55 cm and trim the long edges rounded as shown. Then hold the fabric on the roof and bend the edges. Then pre-iron these accordingly. Then attach the felt roof to the frame with double-sided adhesive tape.
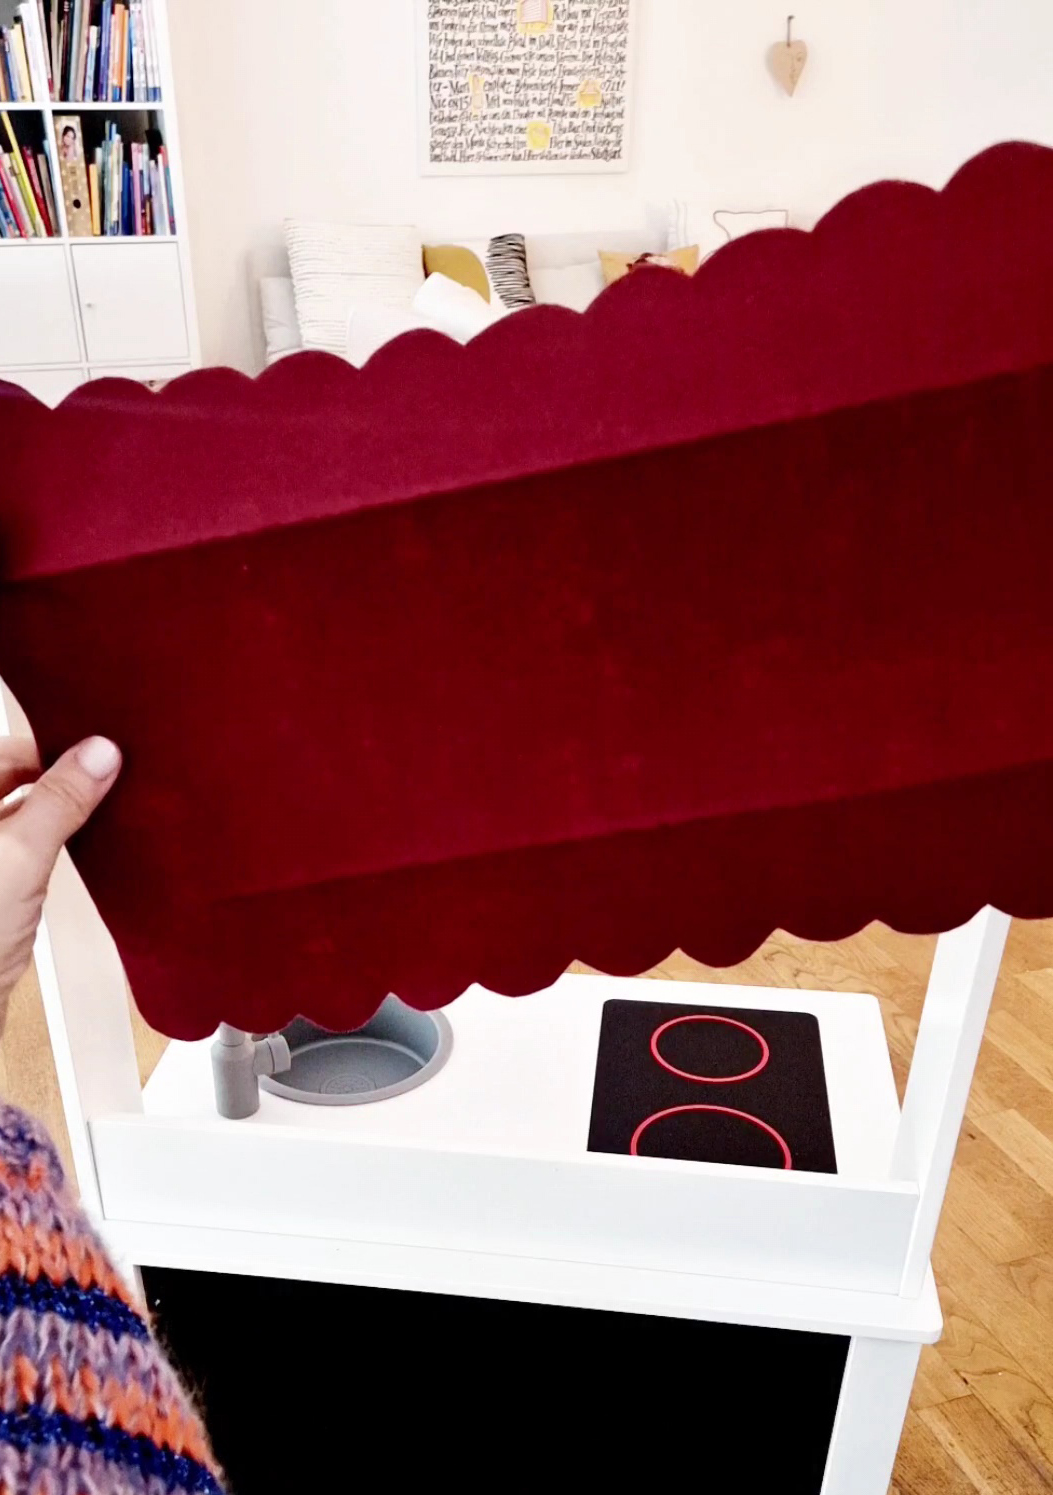
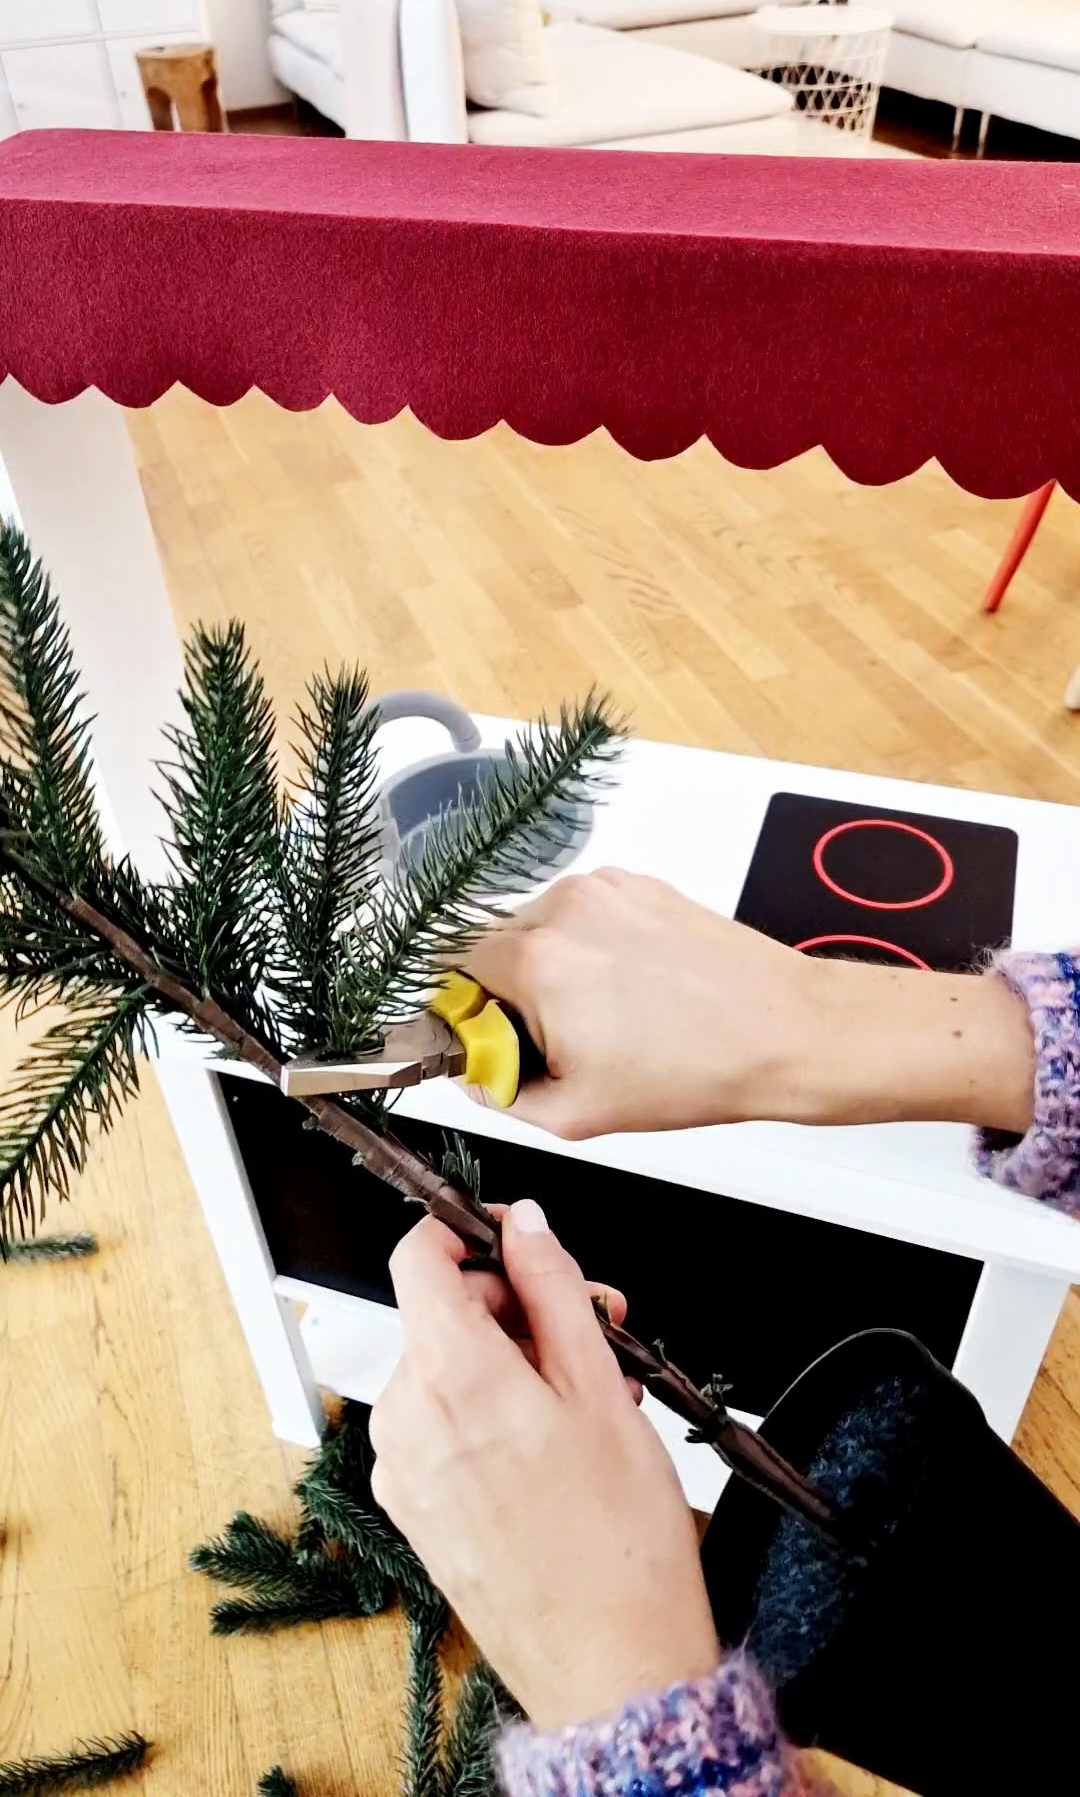
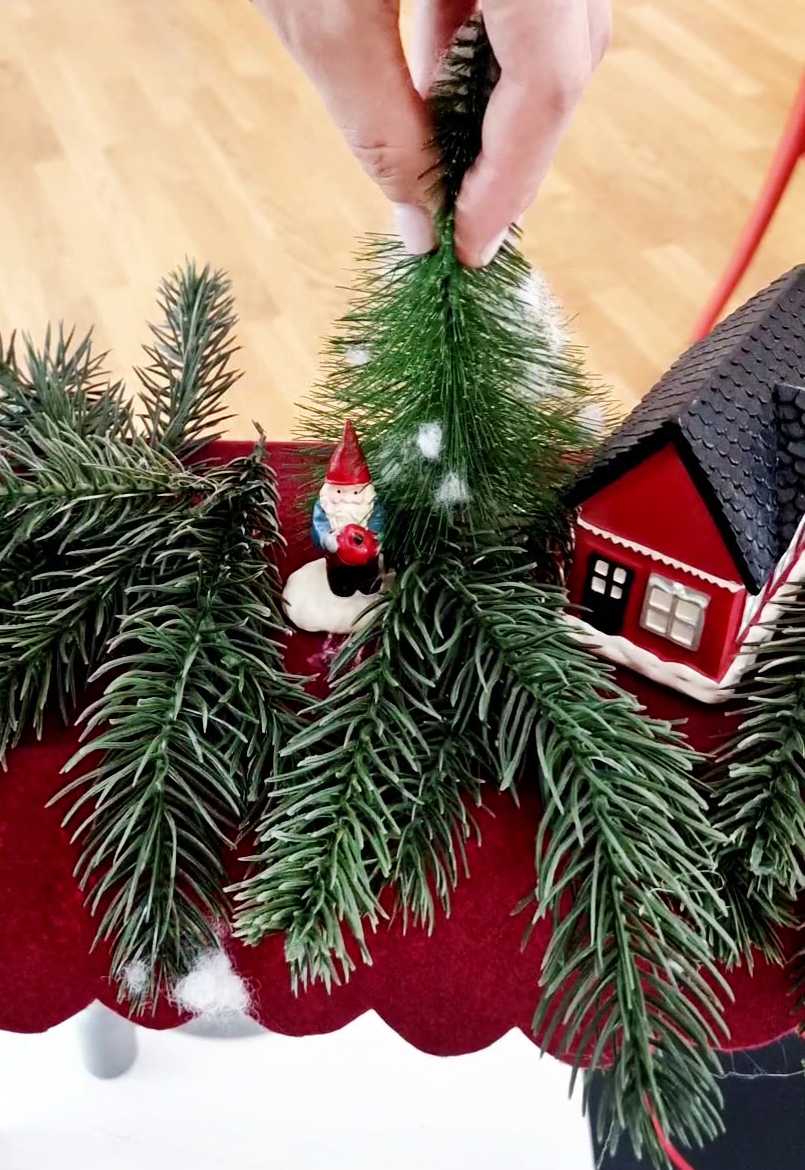
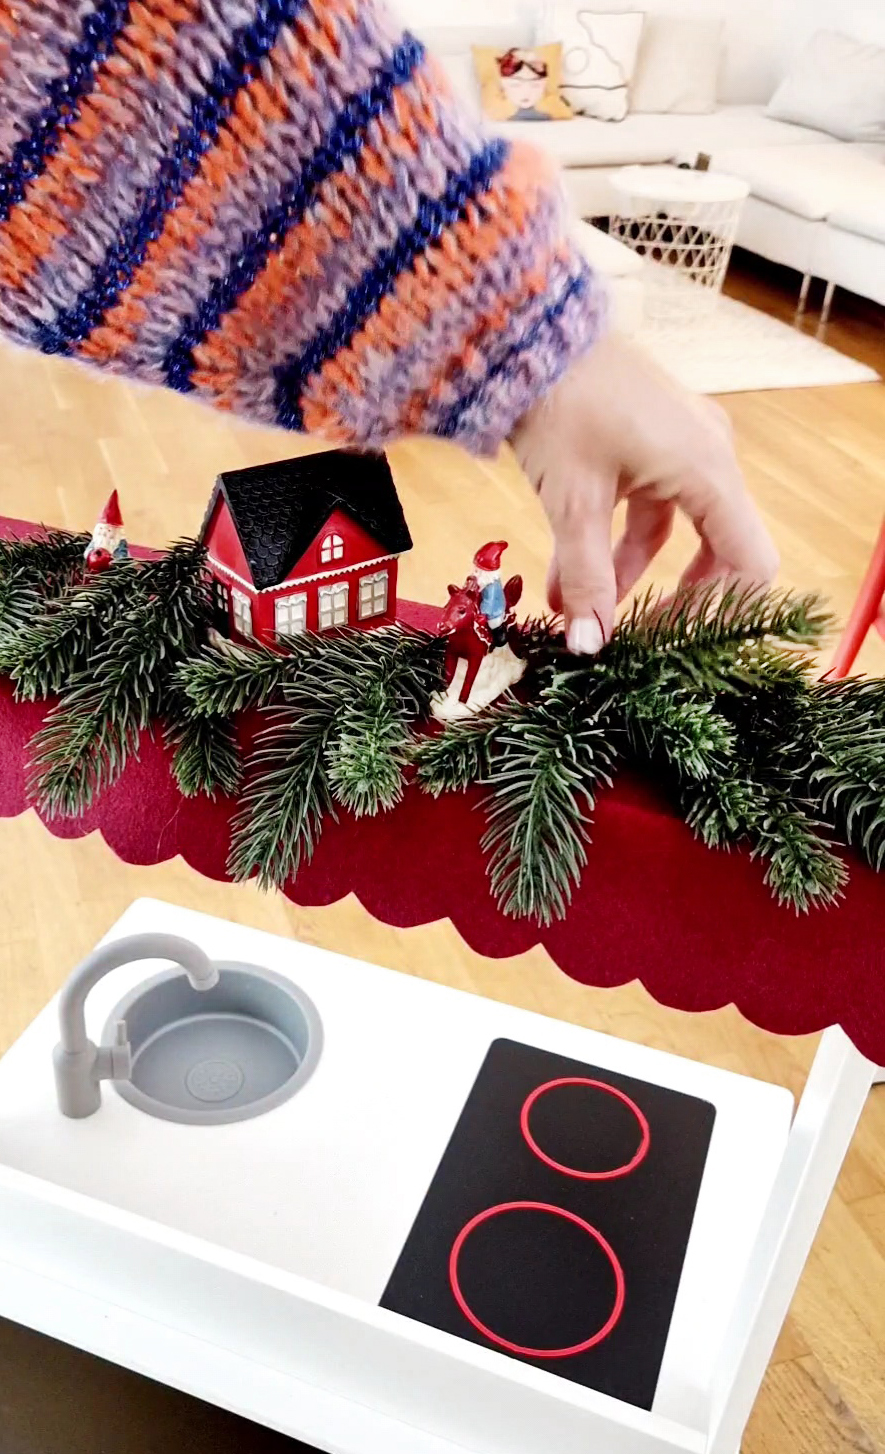
2.) Decorate felt roof Take the VINTERFINT decorative tree and use the pliers to pinch off the individual branches. Now use hot glue to first attach the decorative houses, the small fir trees and figures and then the individual fir branches around them. Finally, I used white spray to give it a bit of a snowy look.
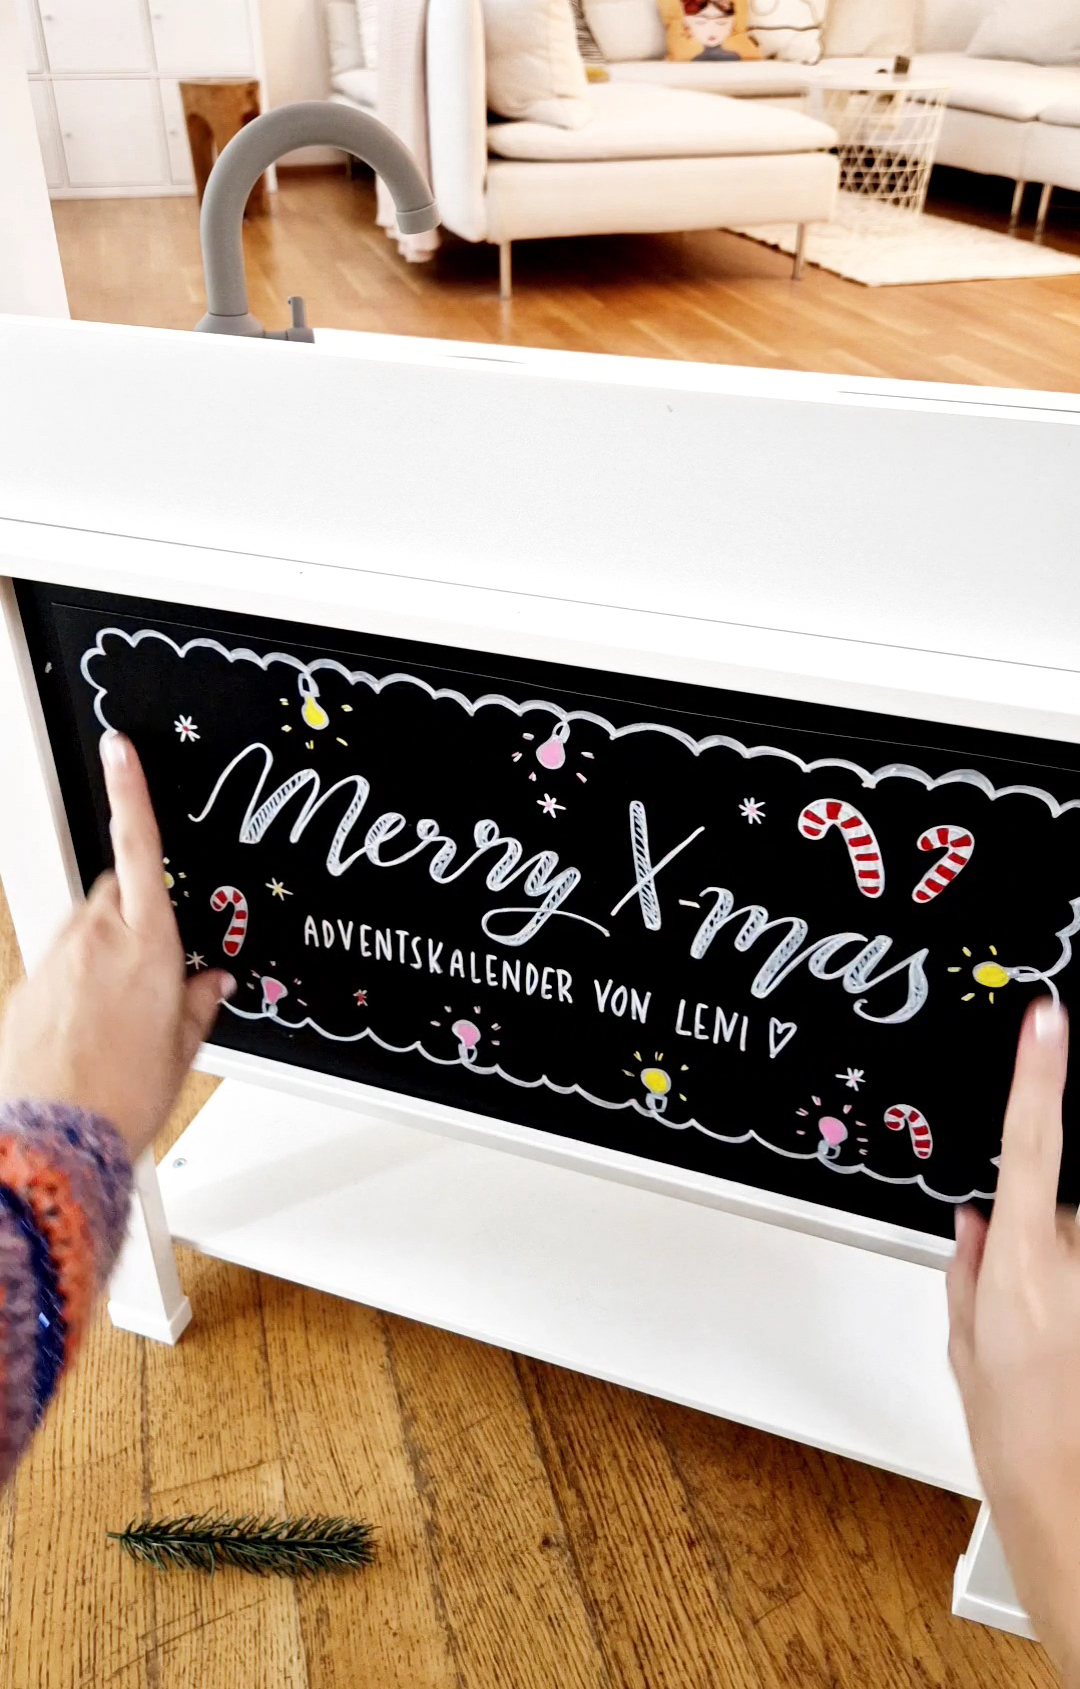
3.) Make a shield Now print out my freebie sign on two A4 sheets of paper and stick them together. Then cut out a rectangle measuring 21 x 42cm from the SÄVSTA note board. Now you can trace the sign. The easiest way to do this is to cross-hatch the back of the template along the contours with a pencil, then place it the right way round on the note board and then trace the contours with a sharp pencil. This is how the pencil on the back is transferred to the board. Then trace the shapes with marker pens. When you’re done, stick the sign to the children’s kitchen with double-sided adhesive tape.

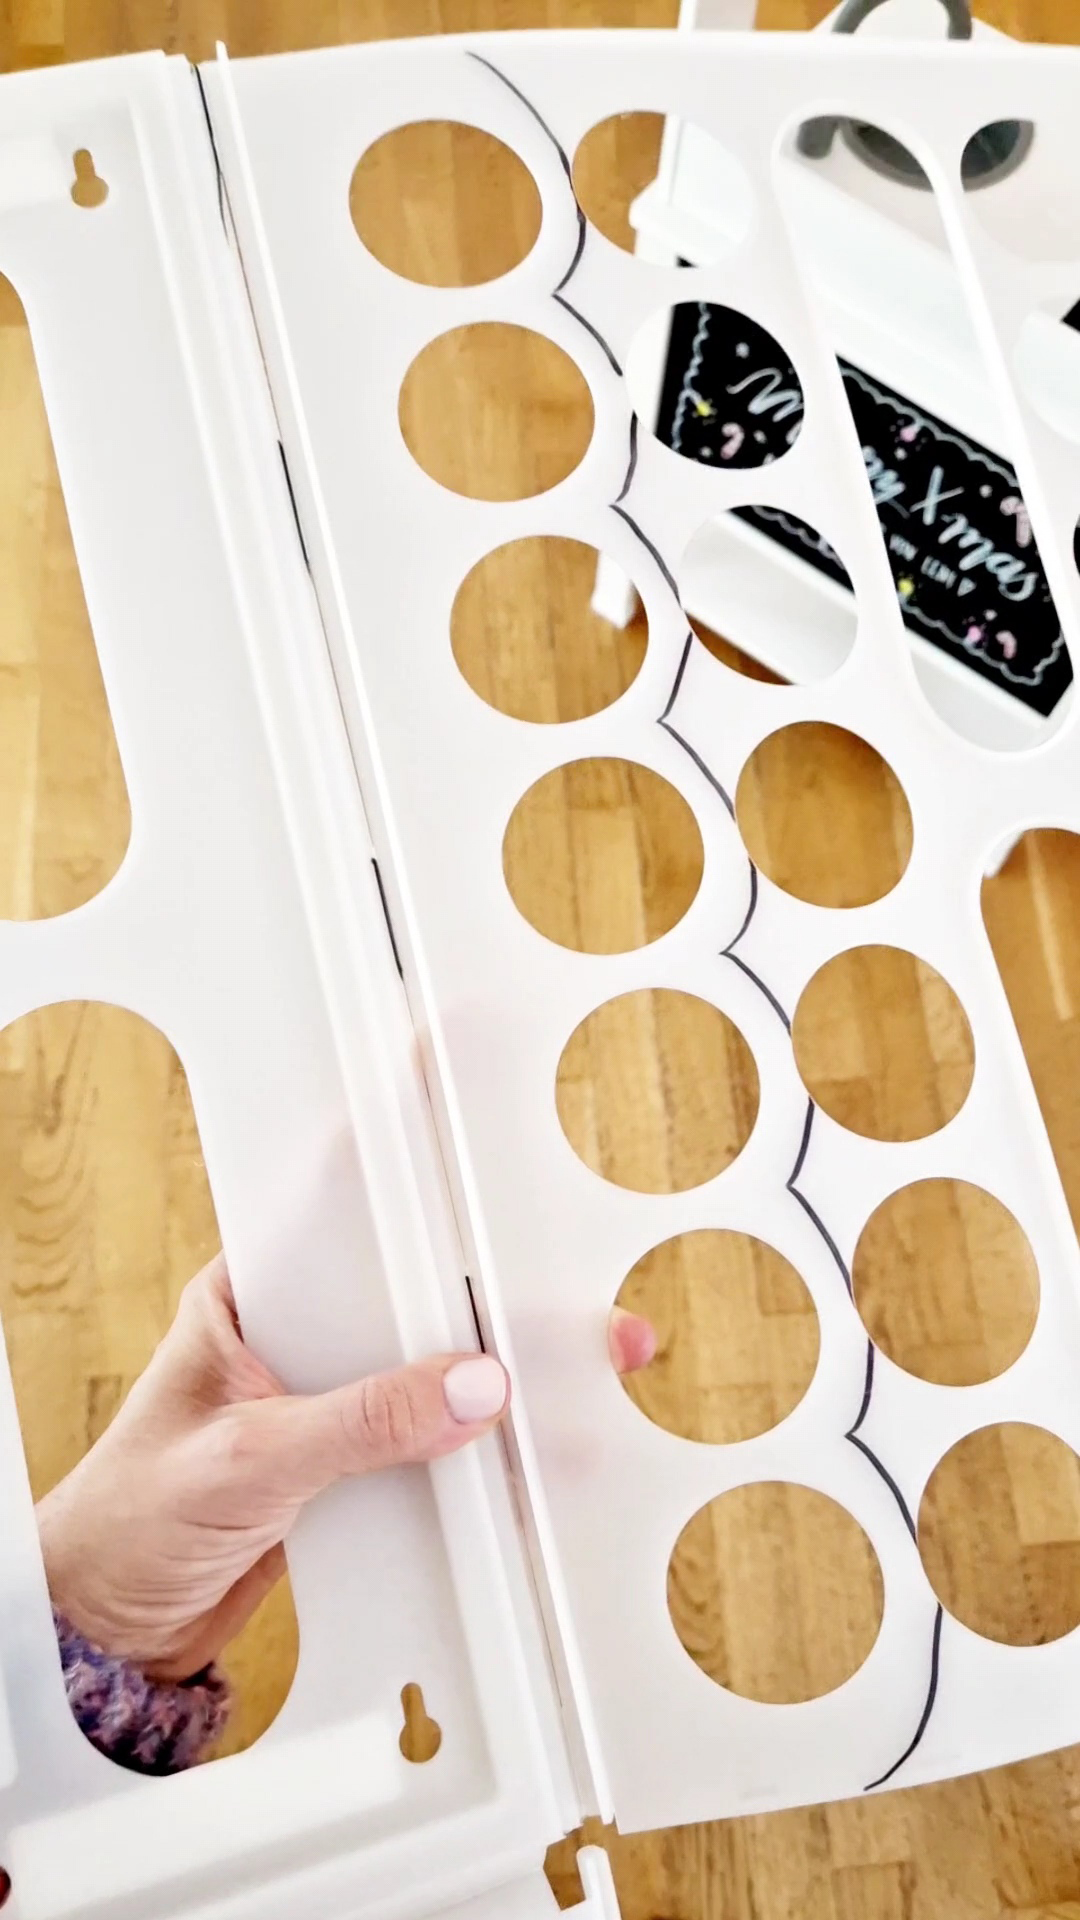
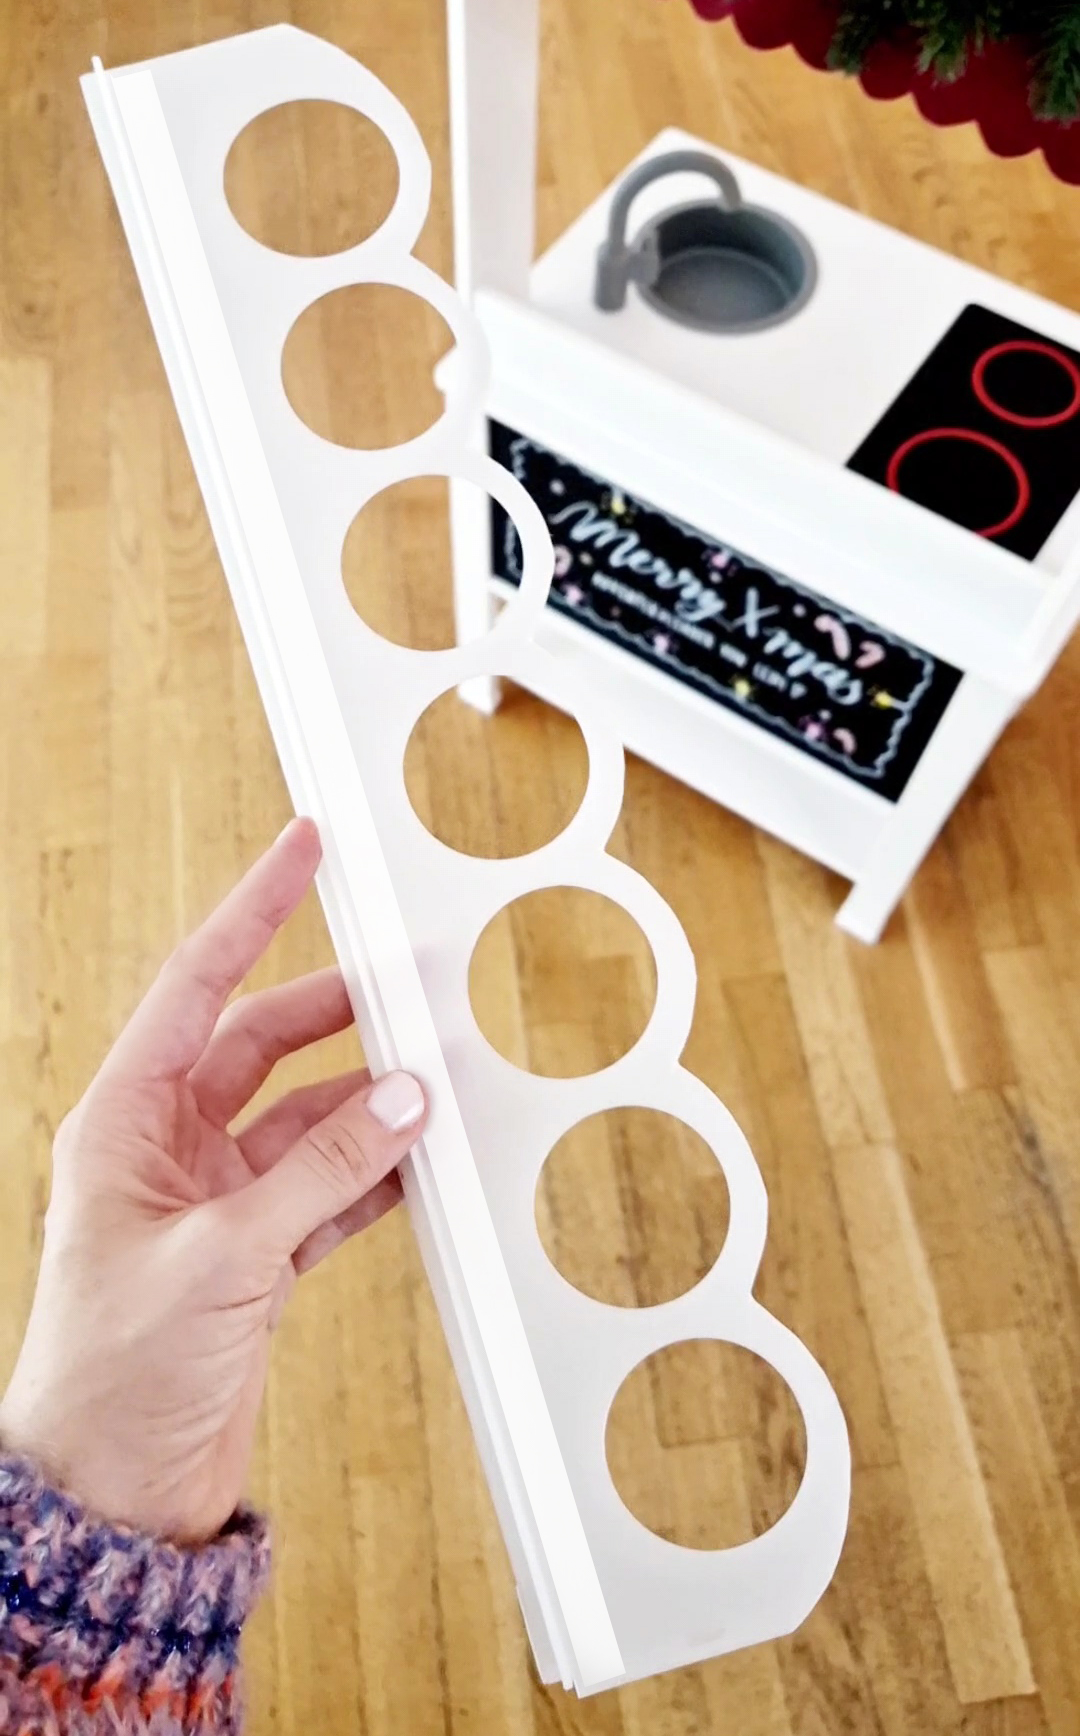
4.) Make a holder Take the VARIERA bag dispenser and cut out the part shown. Attach this to the children’s kitchen with double-sided adhesive tape.
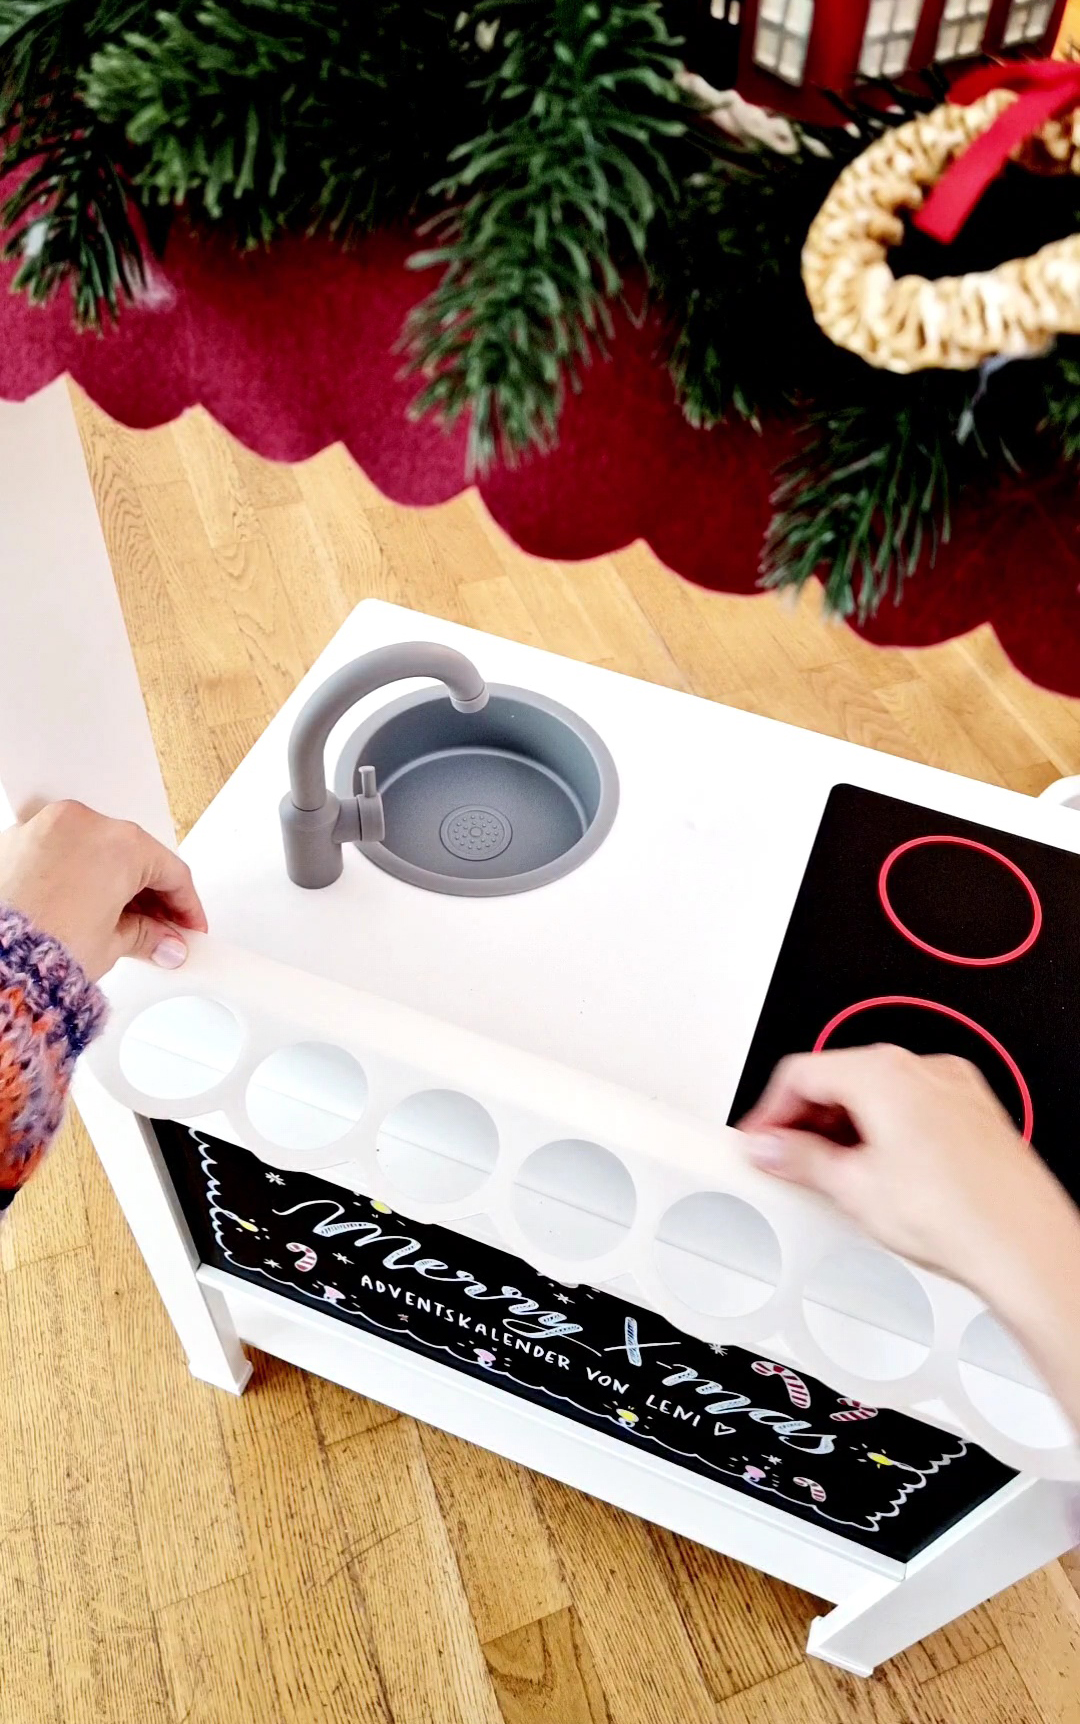
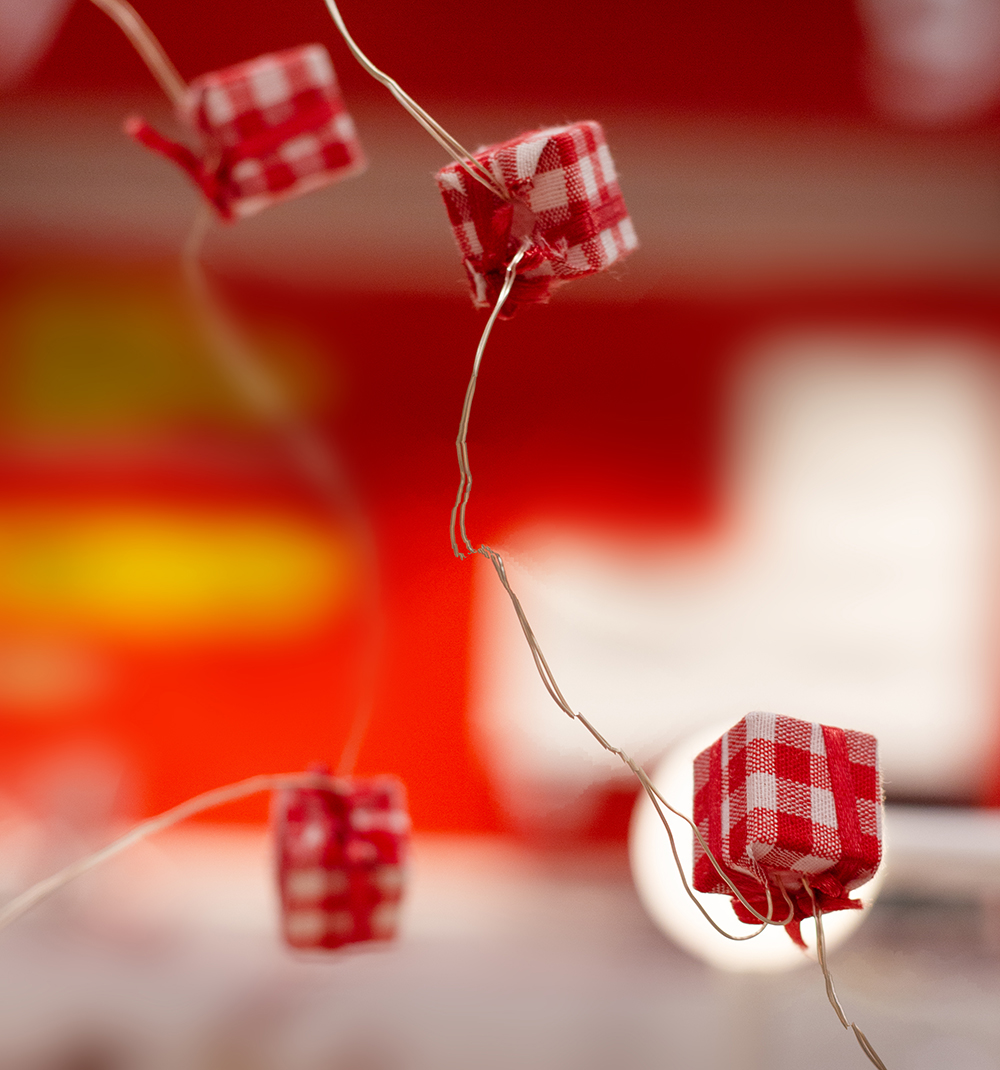
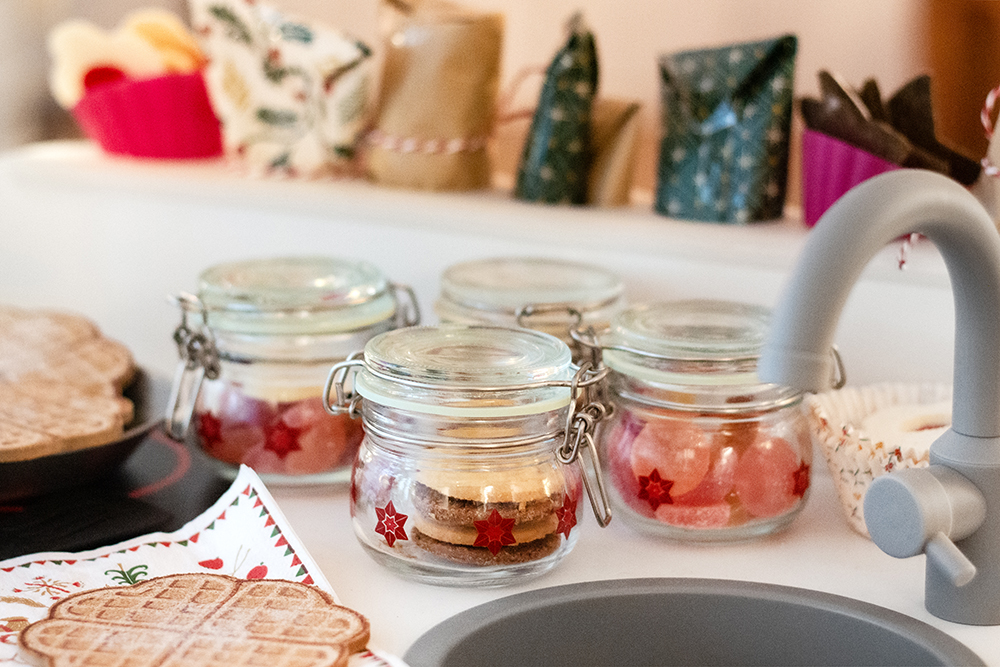
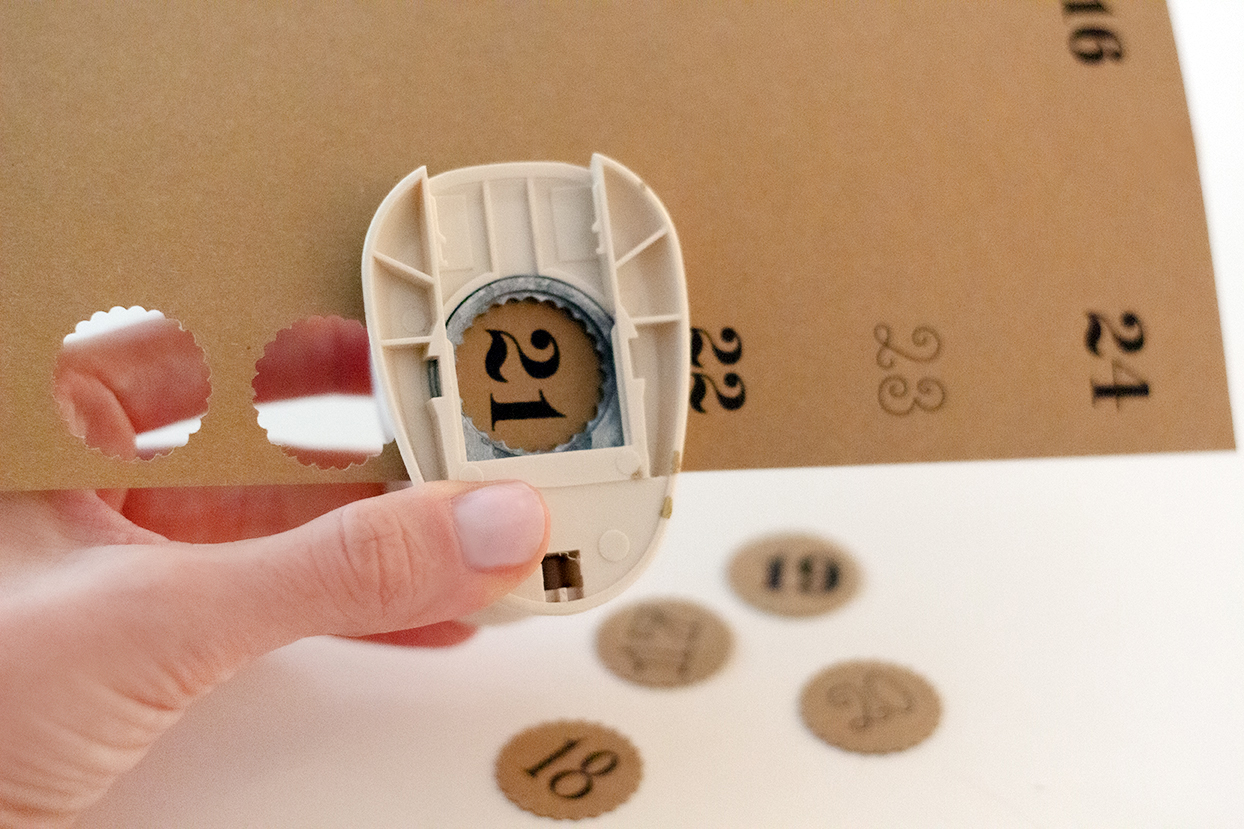
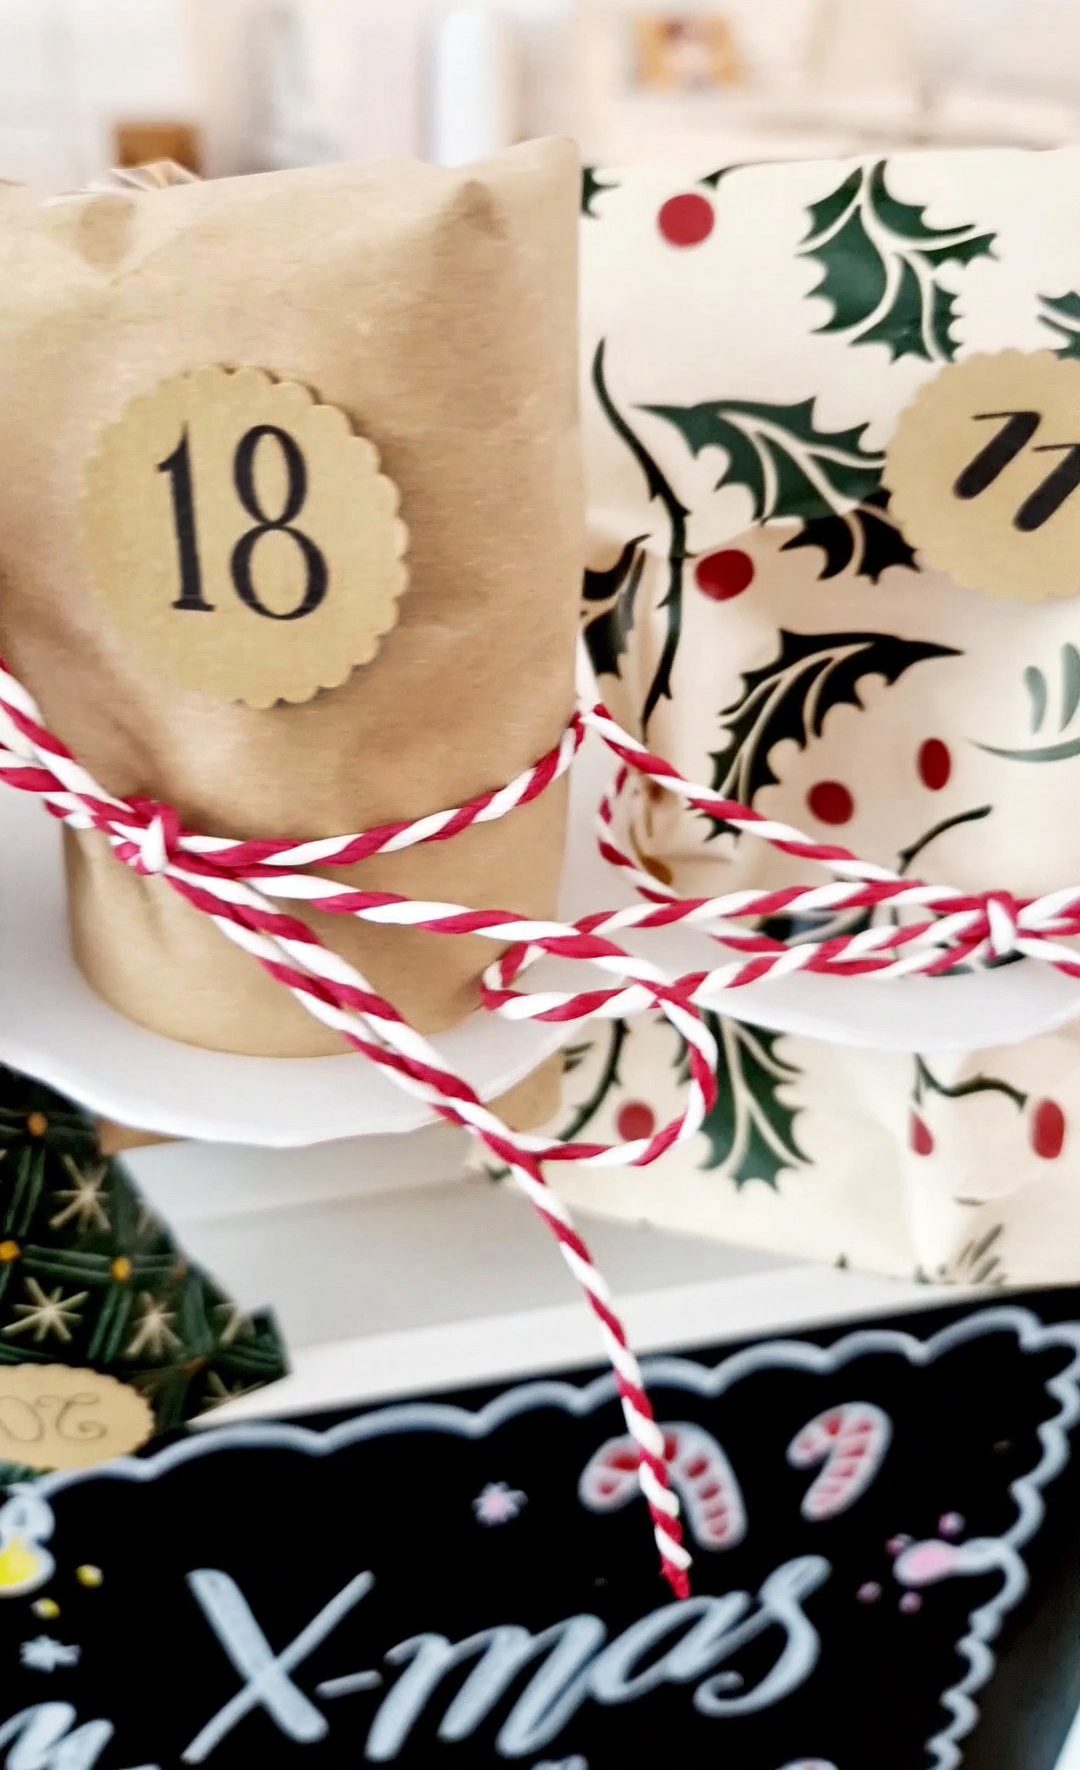
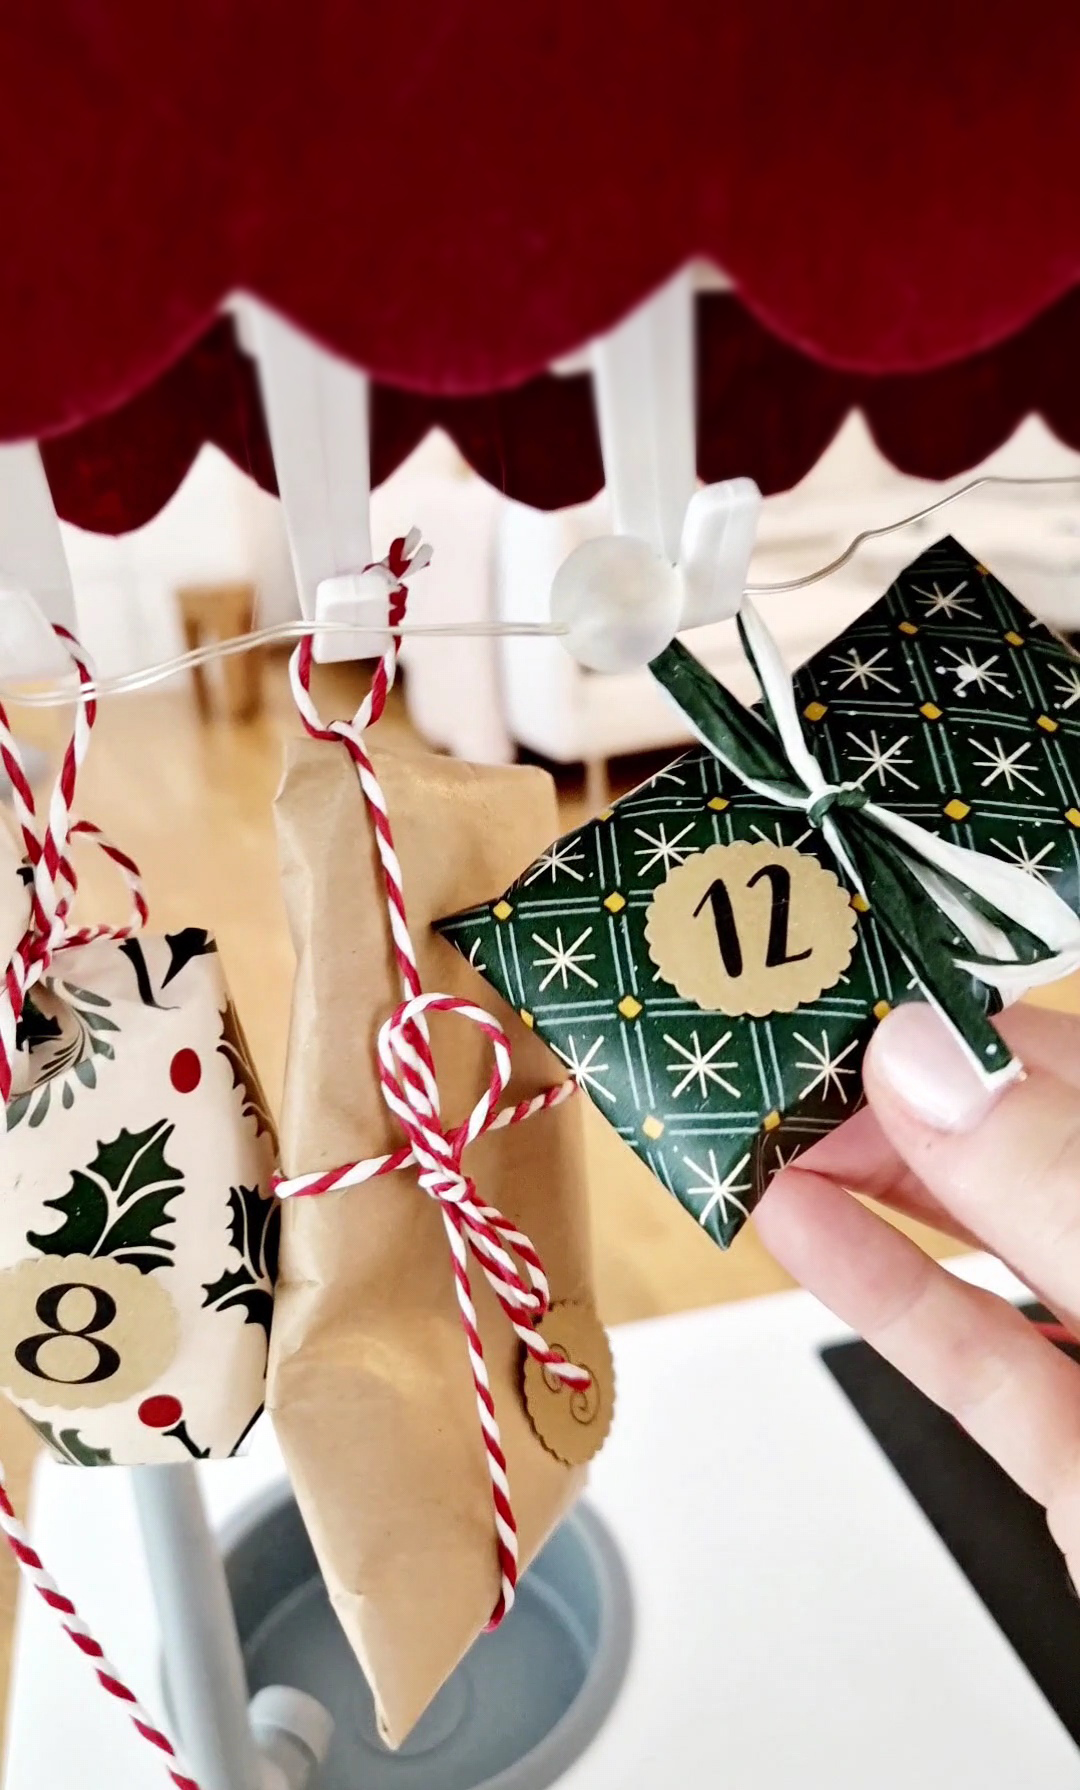
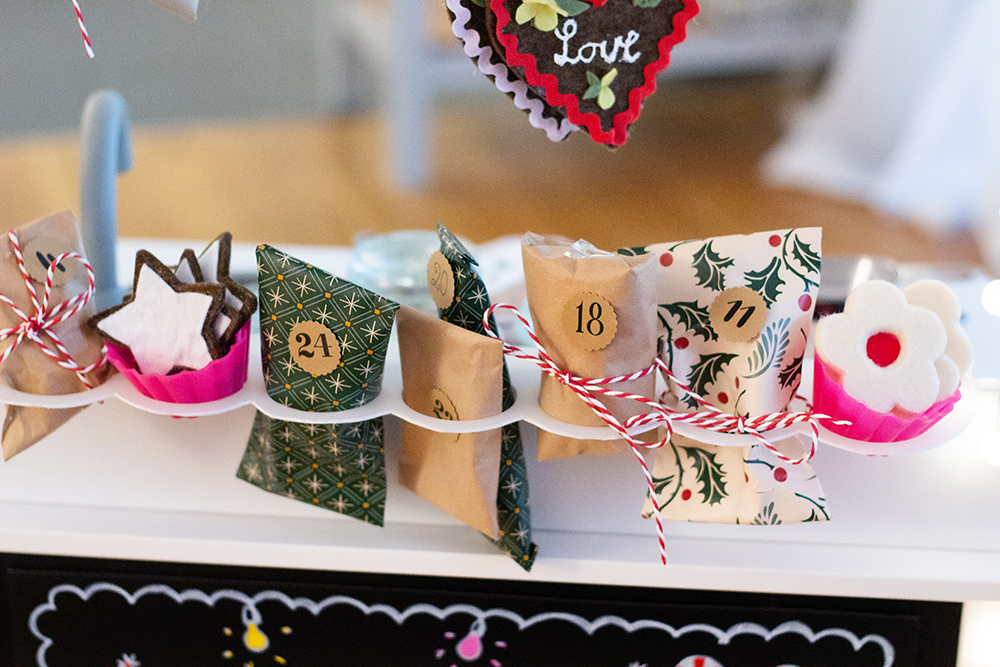
5.) Gift packages Wrap your gifts and feel free to use my number labels, which you can find on page 5 of the freebie in the material list above. You can easily punch out all the numbers with a 2.5 large punch by simply holding it upside down – this way you can see whether the numbers are in the middle. Then put some finished gifts into the holes in the holders or hang them on the SUNNERSTA hooks, which you can easily attach to the curtain rod.
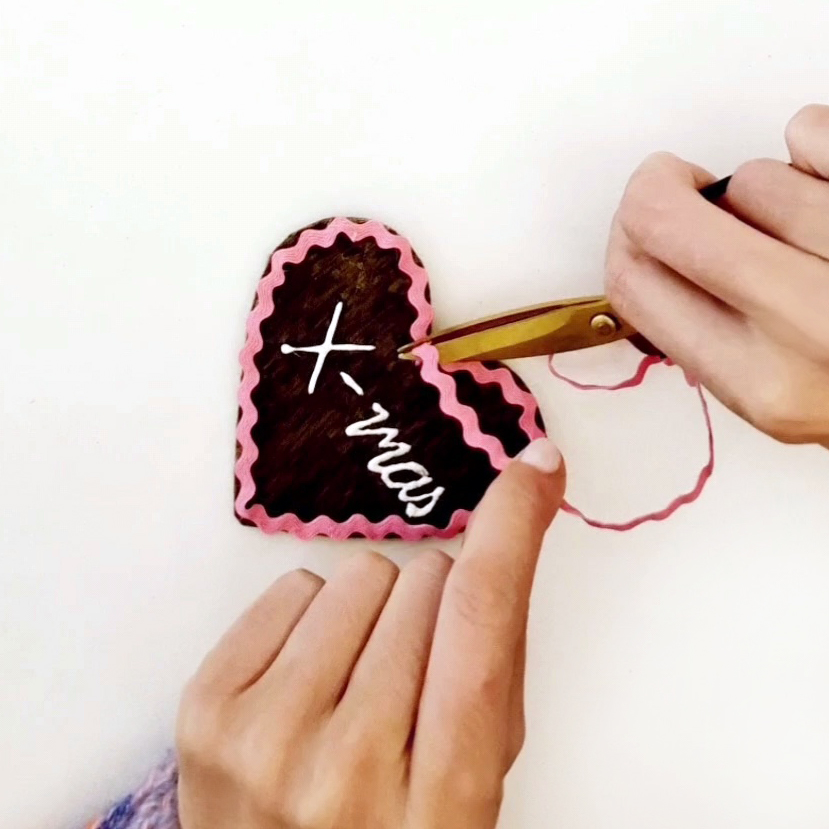
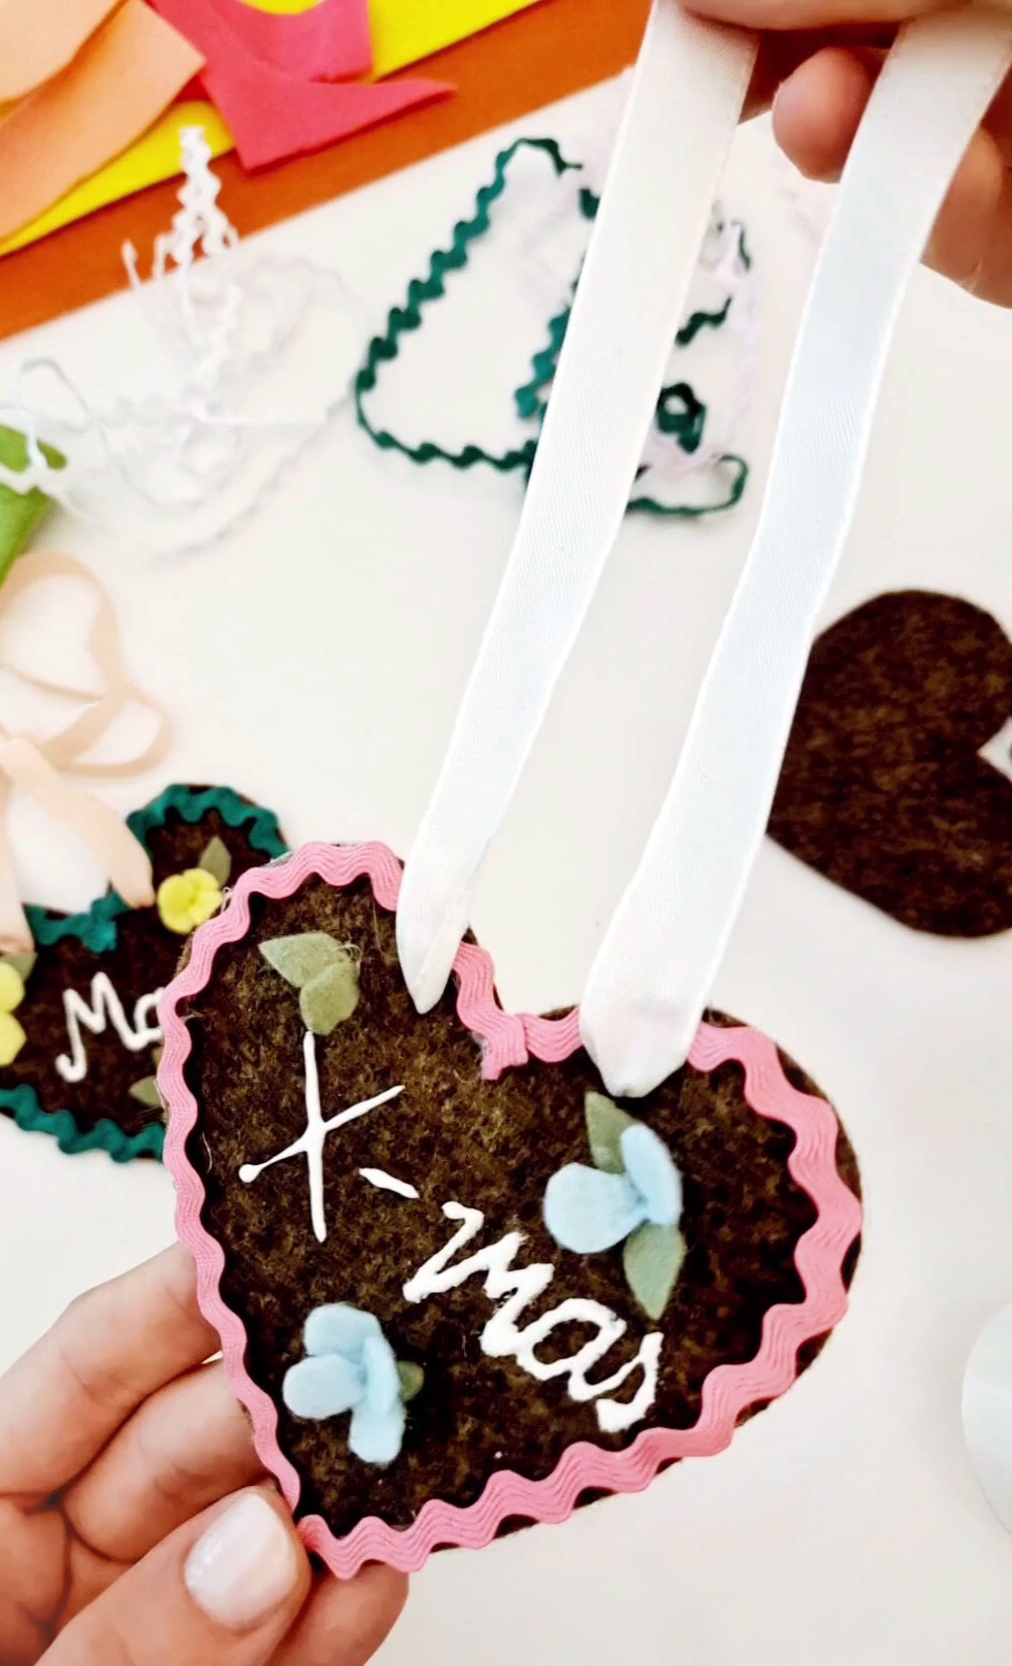
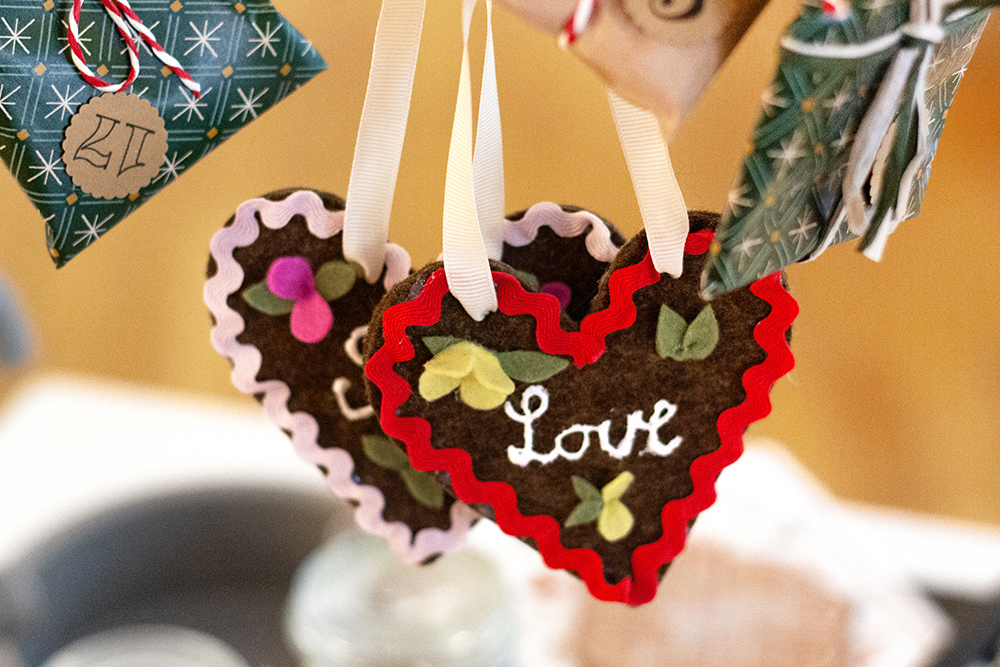
6.) Make gingerbread hearts Cut out hearts from the thick brown felt and label them with the 3D pen. Then glue a wavy decorative ribbon around it with hot glue. Add small flowers and leaves made of thin felt and finally thread a ribbon through it for hanging.

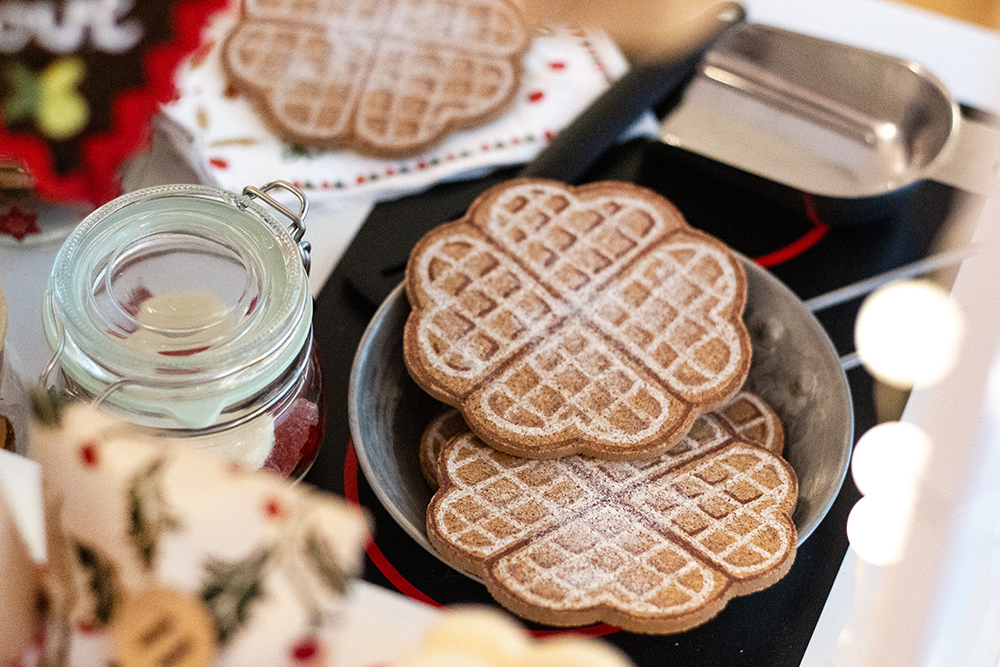
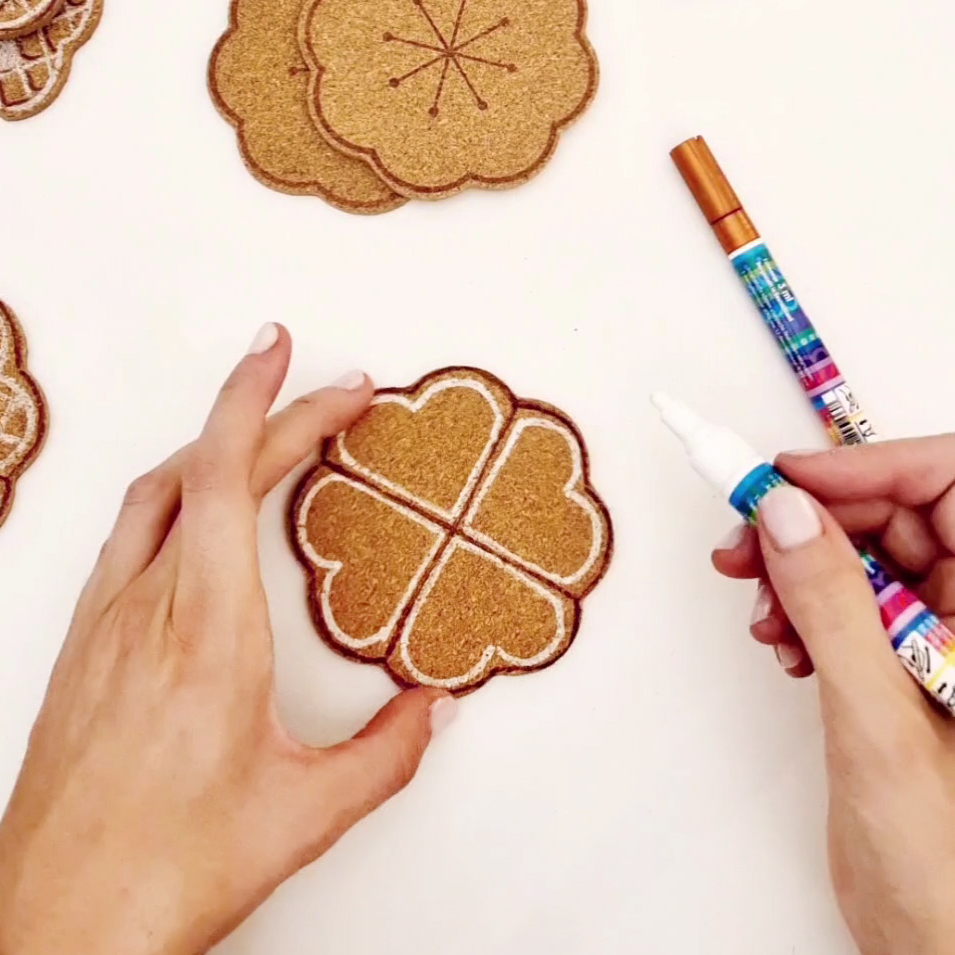
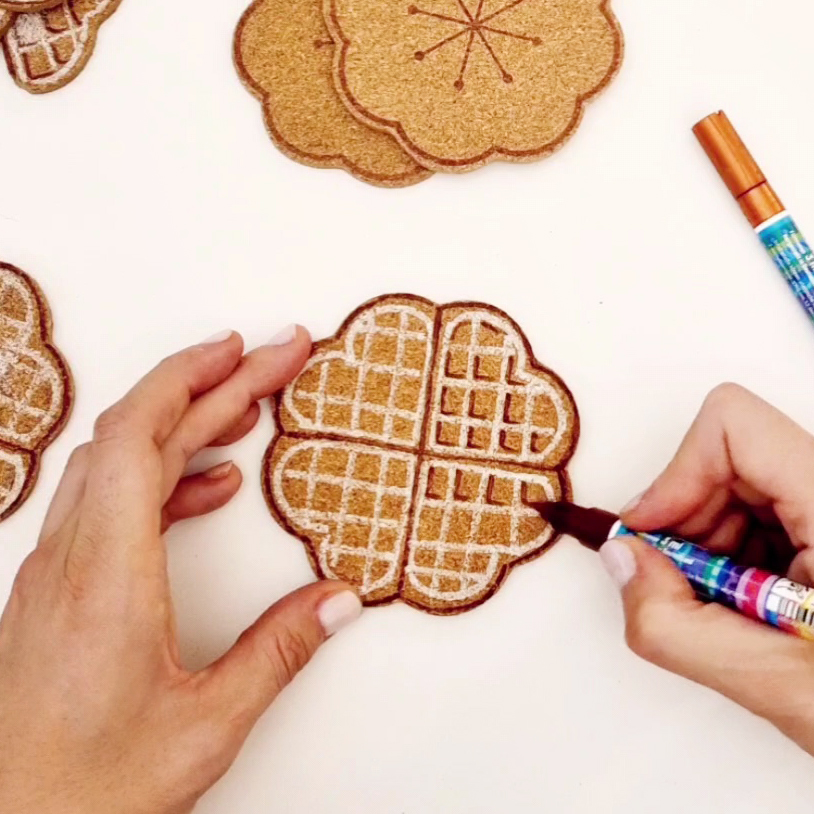
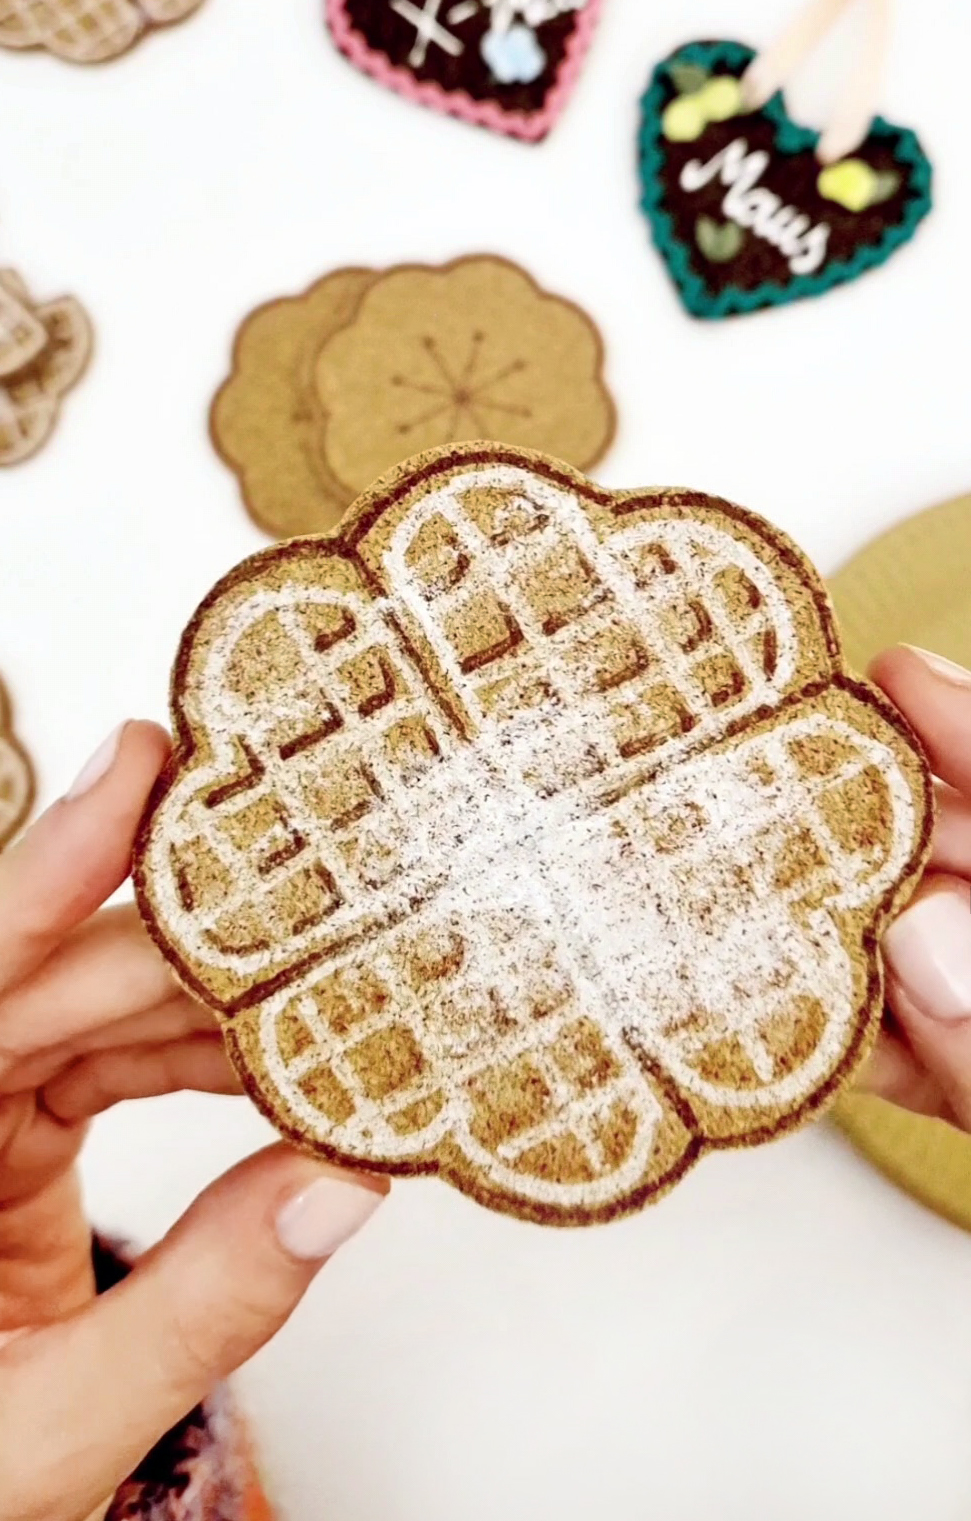
7.) Make waffles The SVARTVIDE cork coasters can now be turned into deceptively real waffles by painting them with brown and white marker pens as shown here. Finally, use a bristle brush to dab on a little white acrylic paint as powdered sugar.


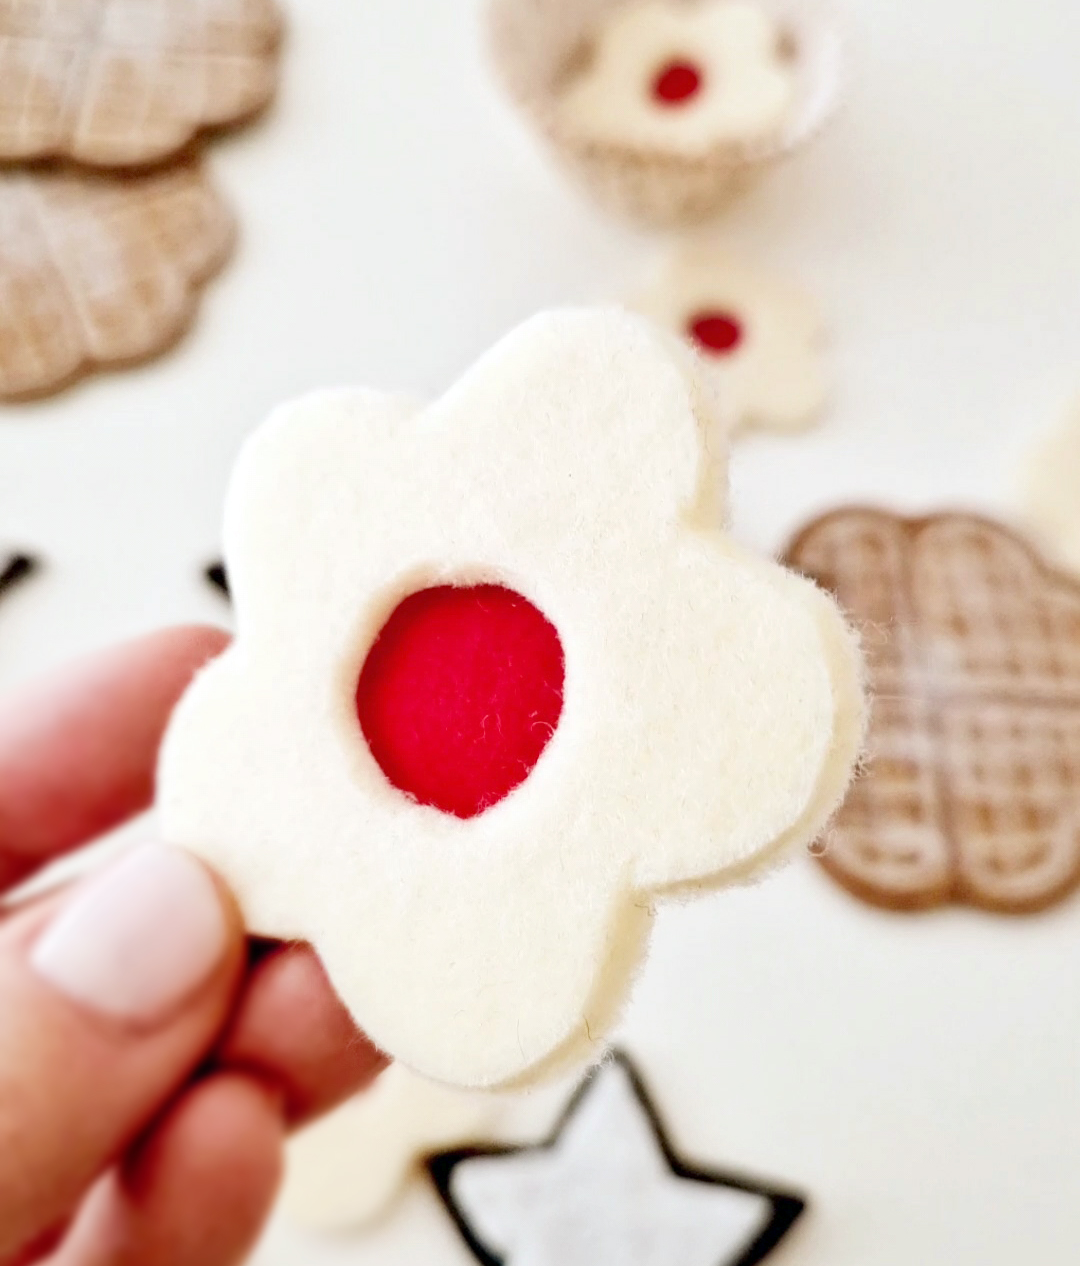
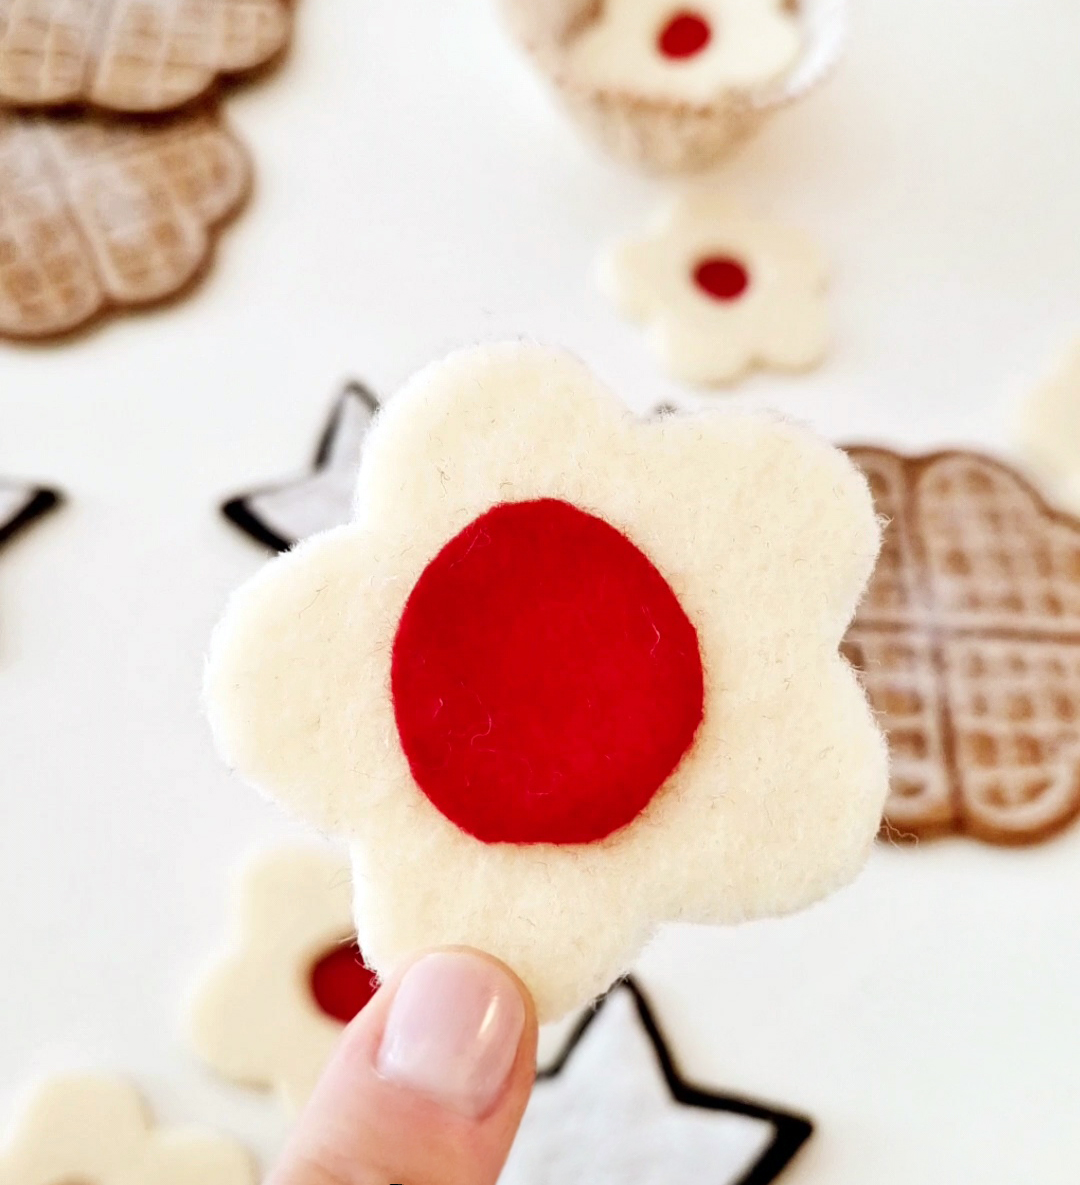
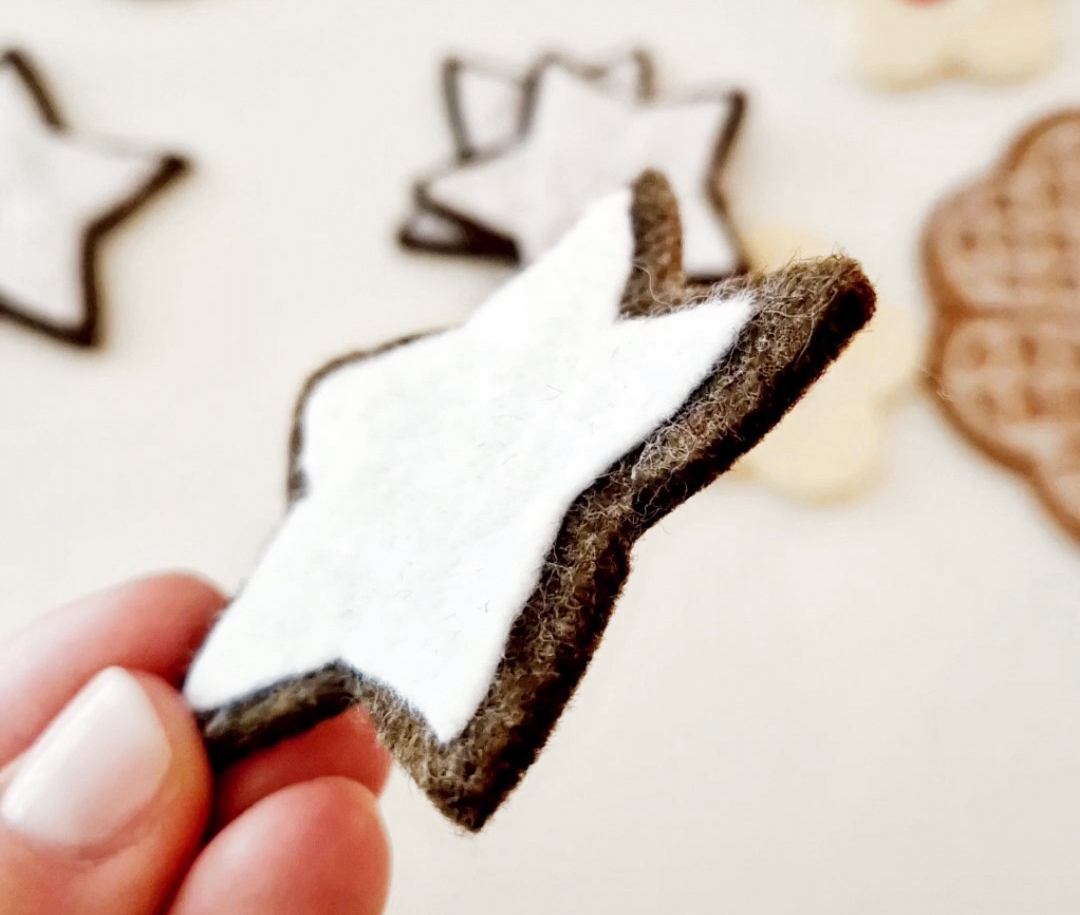
8.) Make cookies You can now easily make jam cookies and cinnamon stars from thick and thin felt. On page 6 of the freebie in the materials list you will find the templates for the shapes.
9.) Finish decorating the stand Now sort the sweets and, if you want, add a few VINTERFINT glasses with real treats 😉 Finally, wrap the STRALA fairy lights around the frame and the sweet Advent calendar is ready, which is also a great market stall for the Christmas season!


Did you like my little tour of the IKEA Christmas market and my DIY Advent calendar this year? Then you are welcome to stop by IKEA Sindelfingen or Ludwigsburg yourself – there you can see my little stand live and in color and you can buy your materials directly to make it yourself 😉
I wish you a wonderful Advent season!
Your Sammy
Source: www.sammydemmy.de