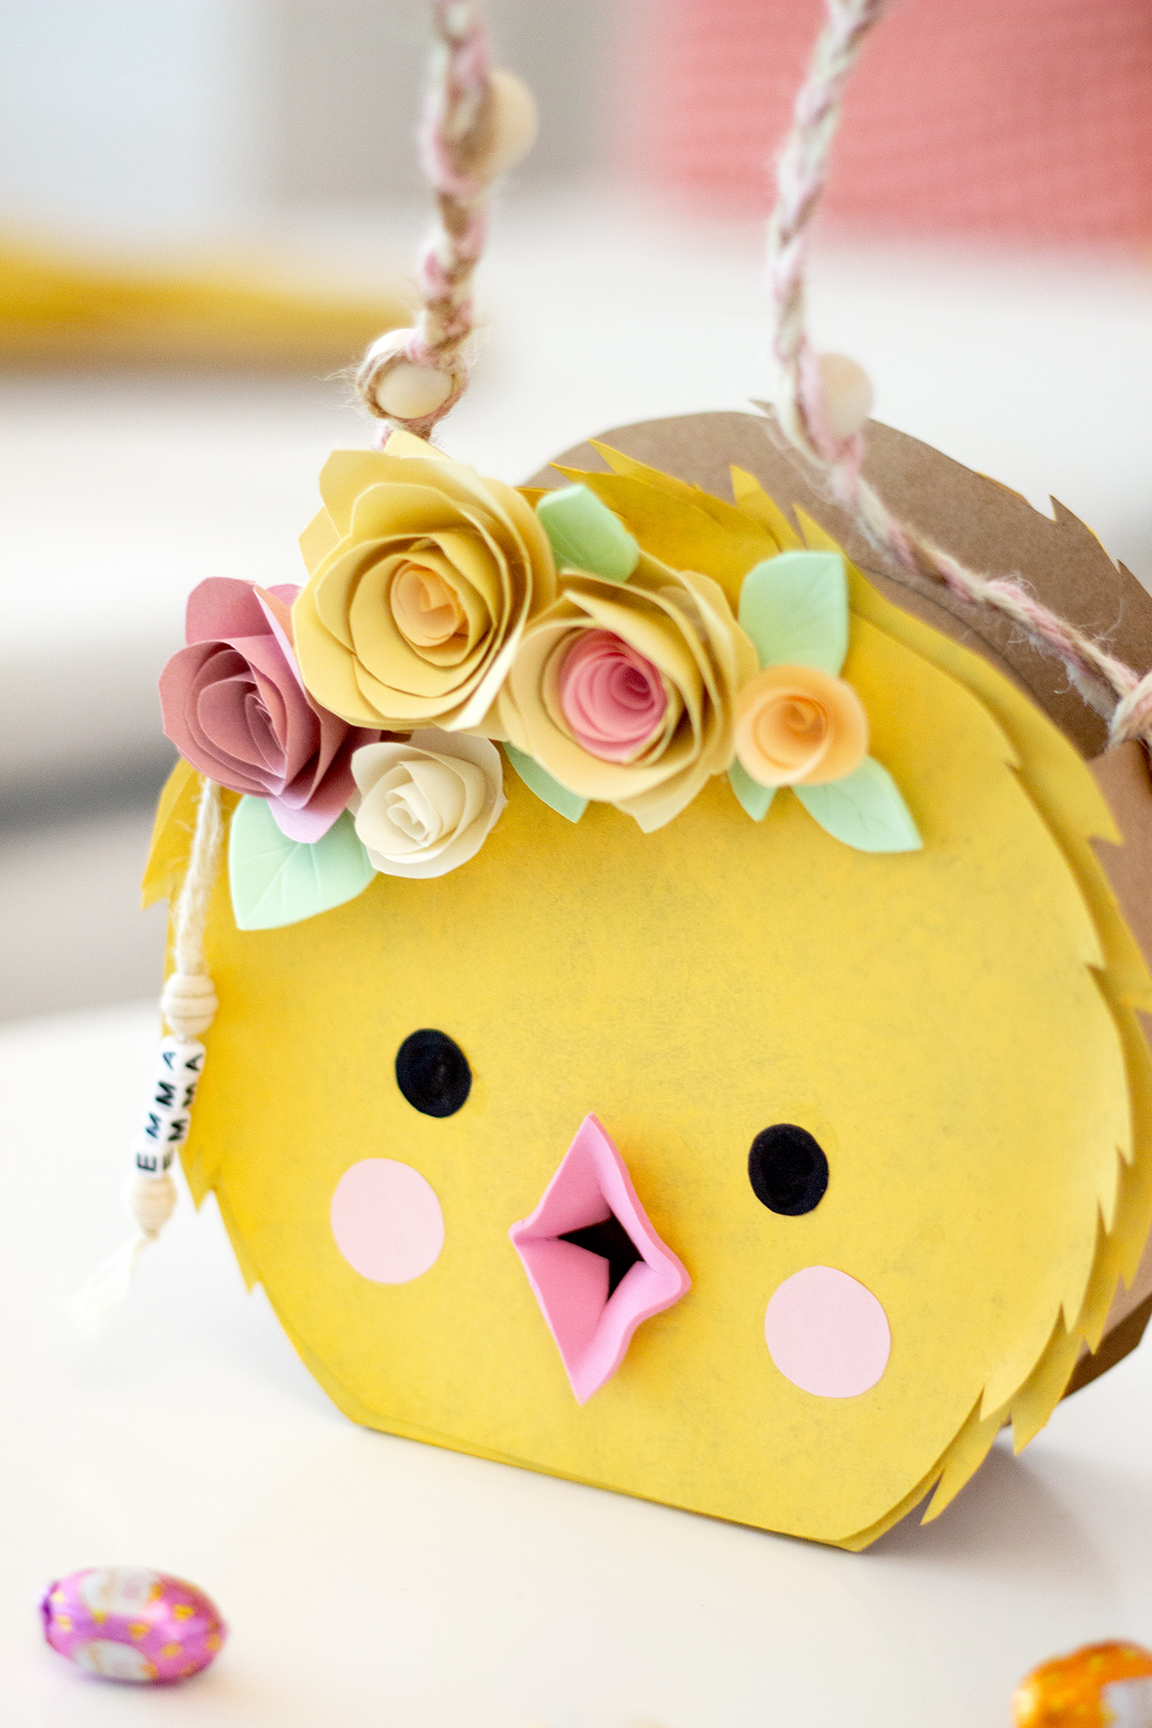
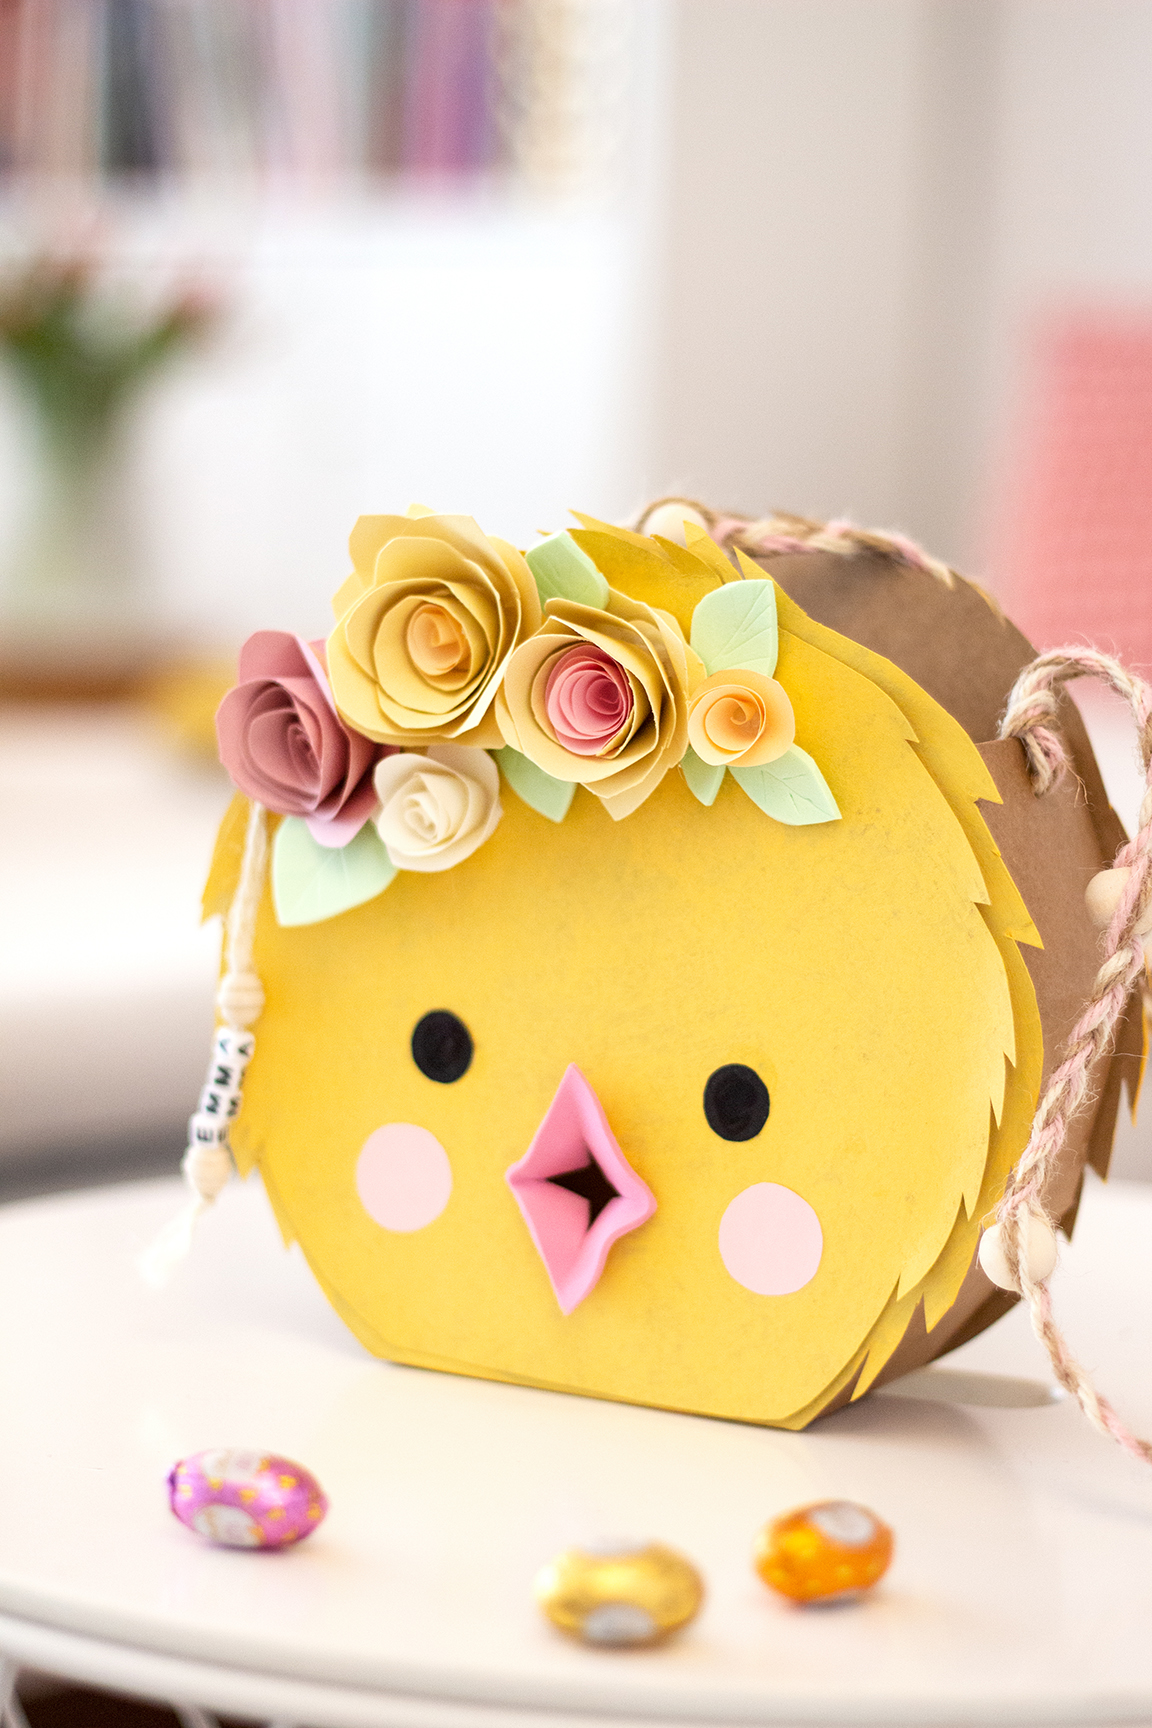
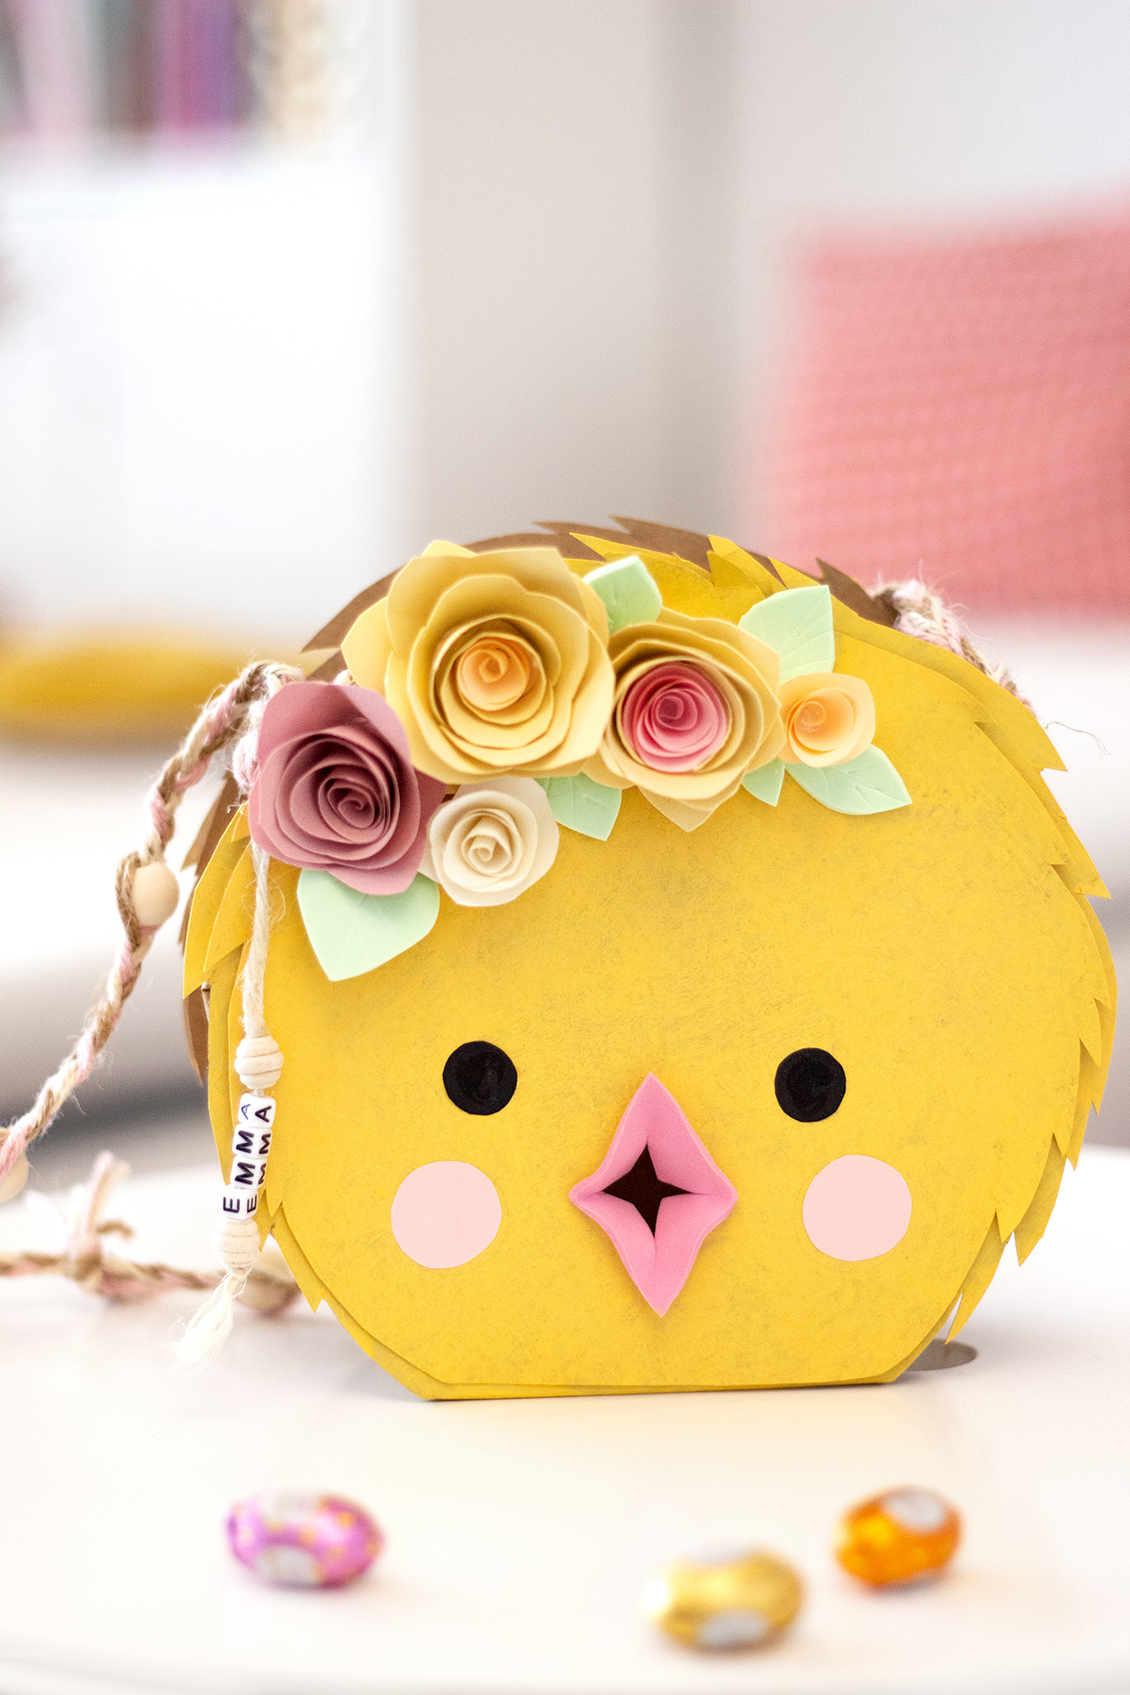
This is how you make this cute chick as an Easter basket *contains advertising
Easter is just around the corner and that means it’s crafting time again! Today I show you together with Folia a sweet DIY Easter basket for your children: namely a little chick with flower decorations, which can even be fed with mini Easter eggs through its small beak 😉 This cute basket will certainly make your children’s eyes shine a little more when looking for Easter eggs.
Win three awesome Folia craft kits!
https://www.instagram.com/reel/Cp77E1tMGps/?utm_source=ig_web_copy_linkOn Instagram there is right now 3x great craft kits from Folia with all the materials used here and a few more extras to win! Join us until April 01, 2023, 11:59 p.m.: CLICK
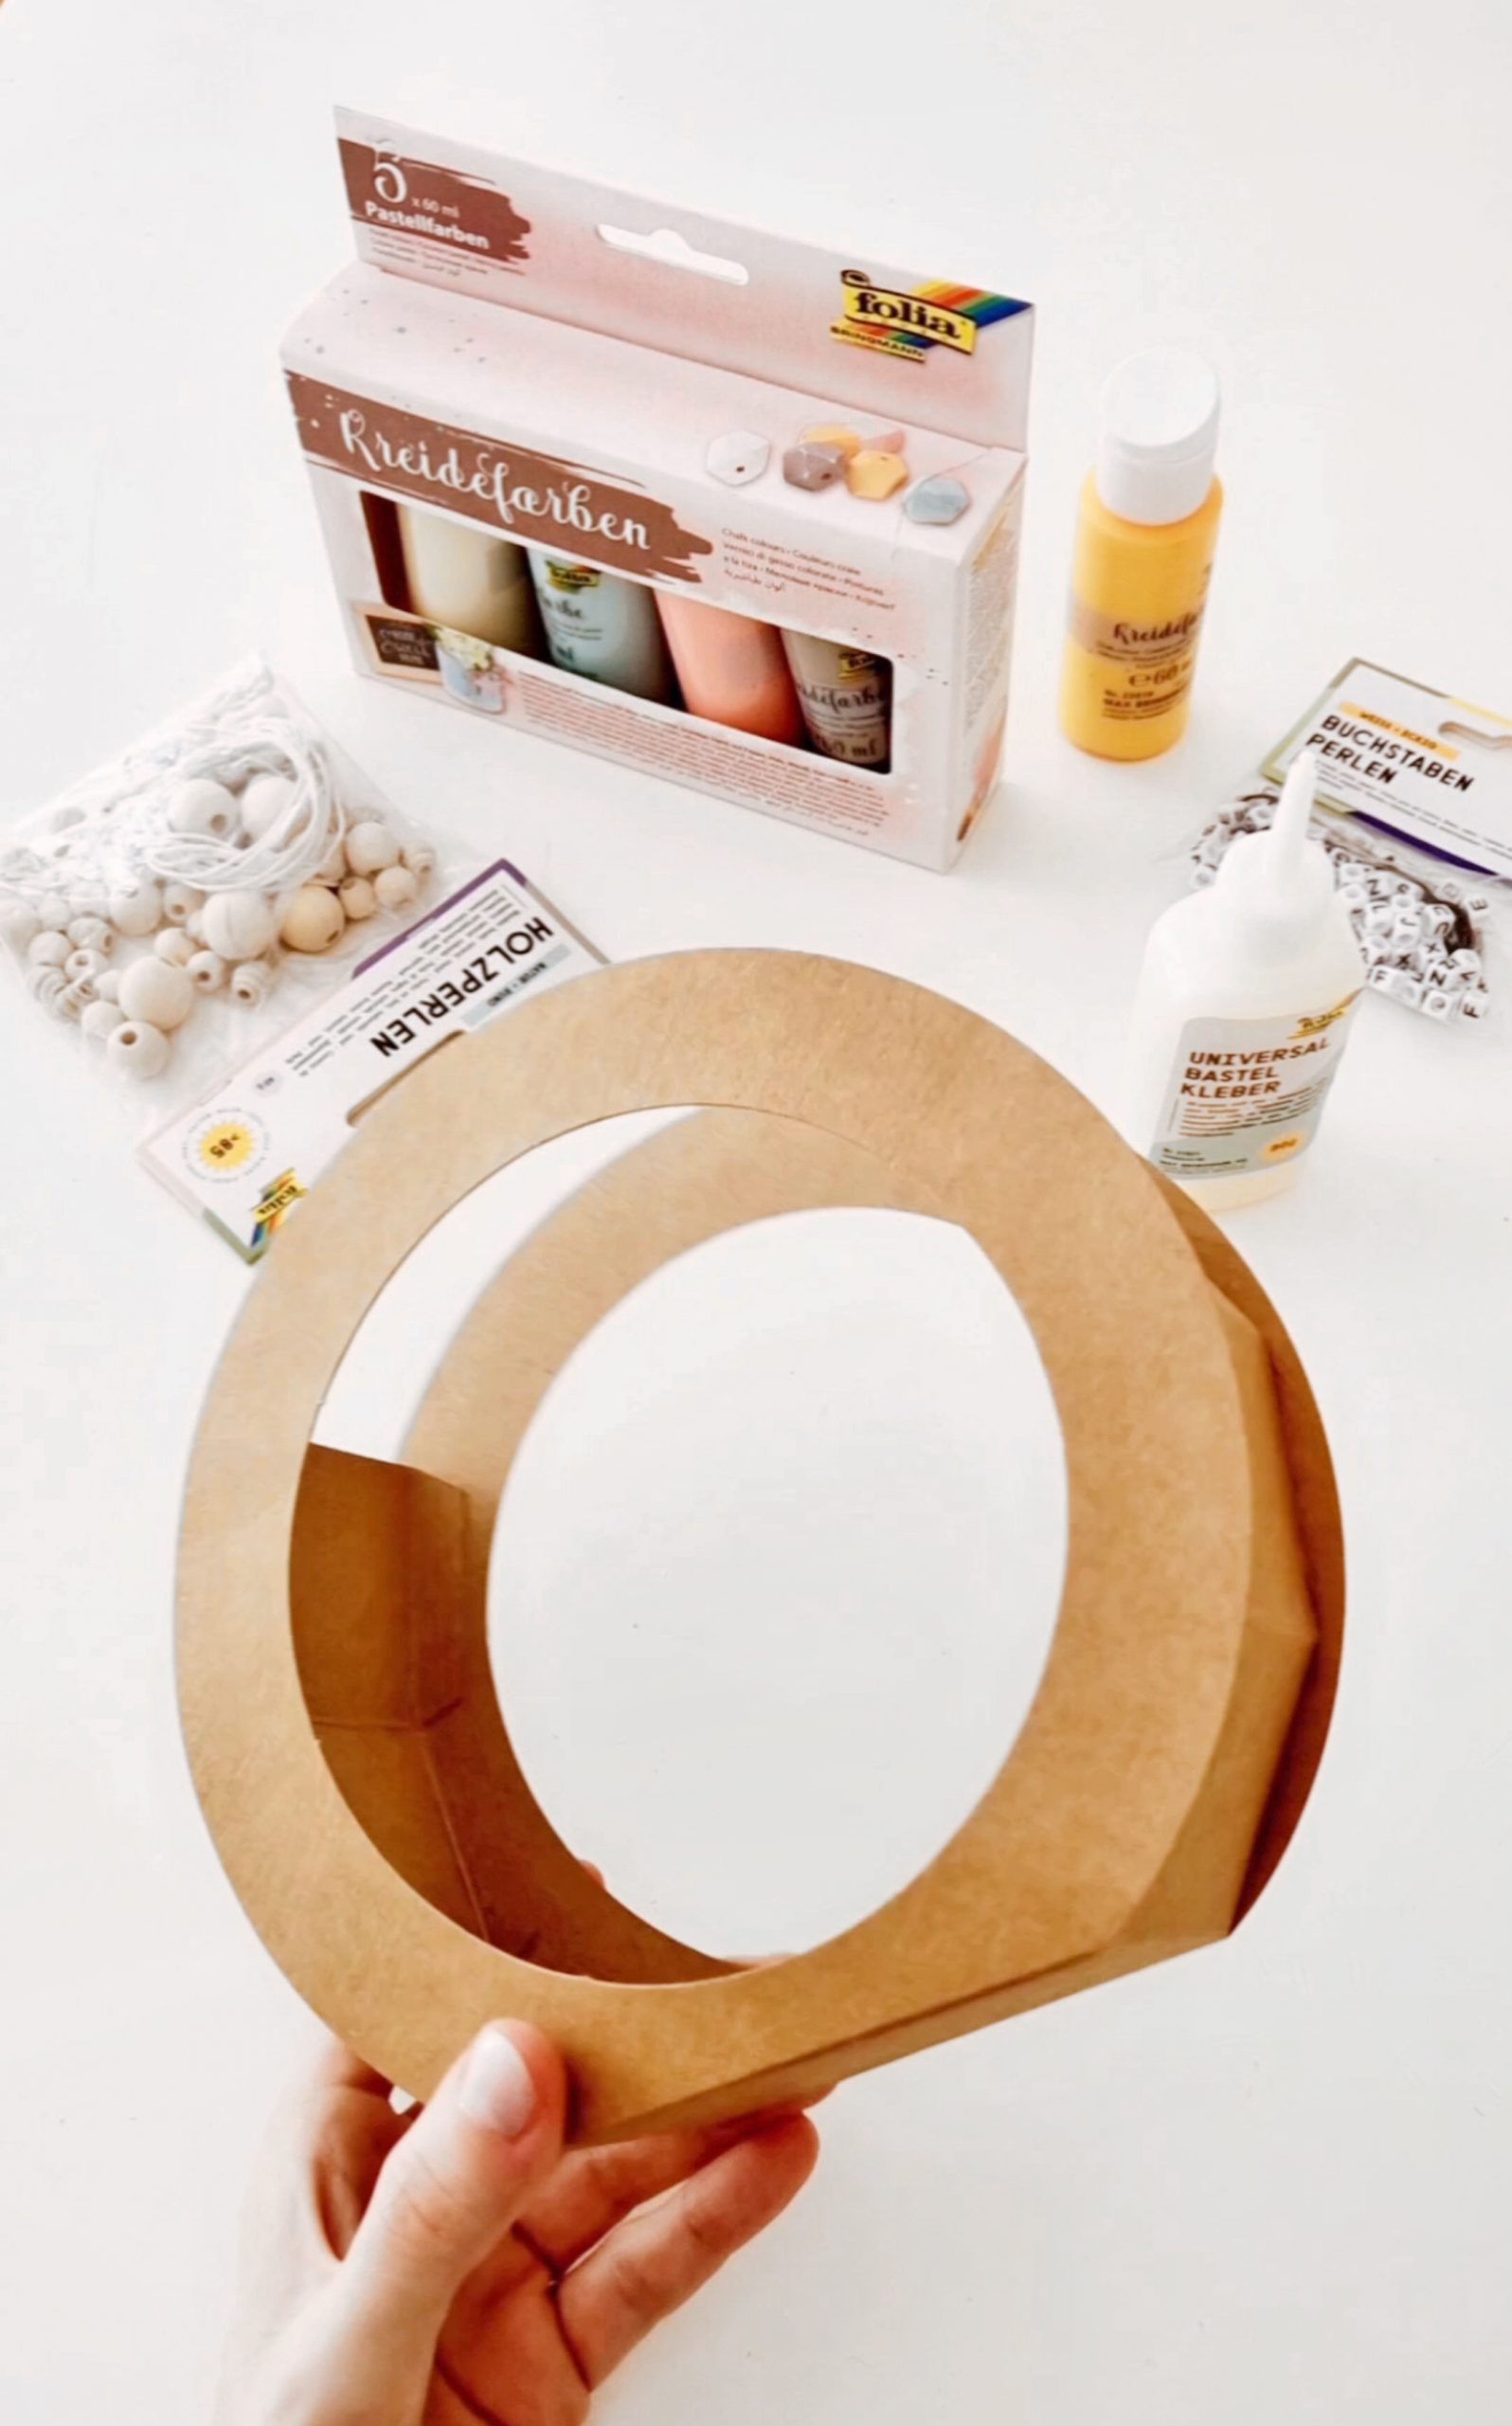
Material list:
That’s how it works:
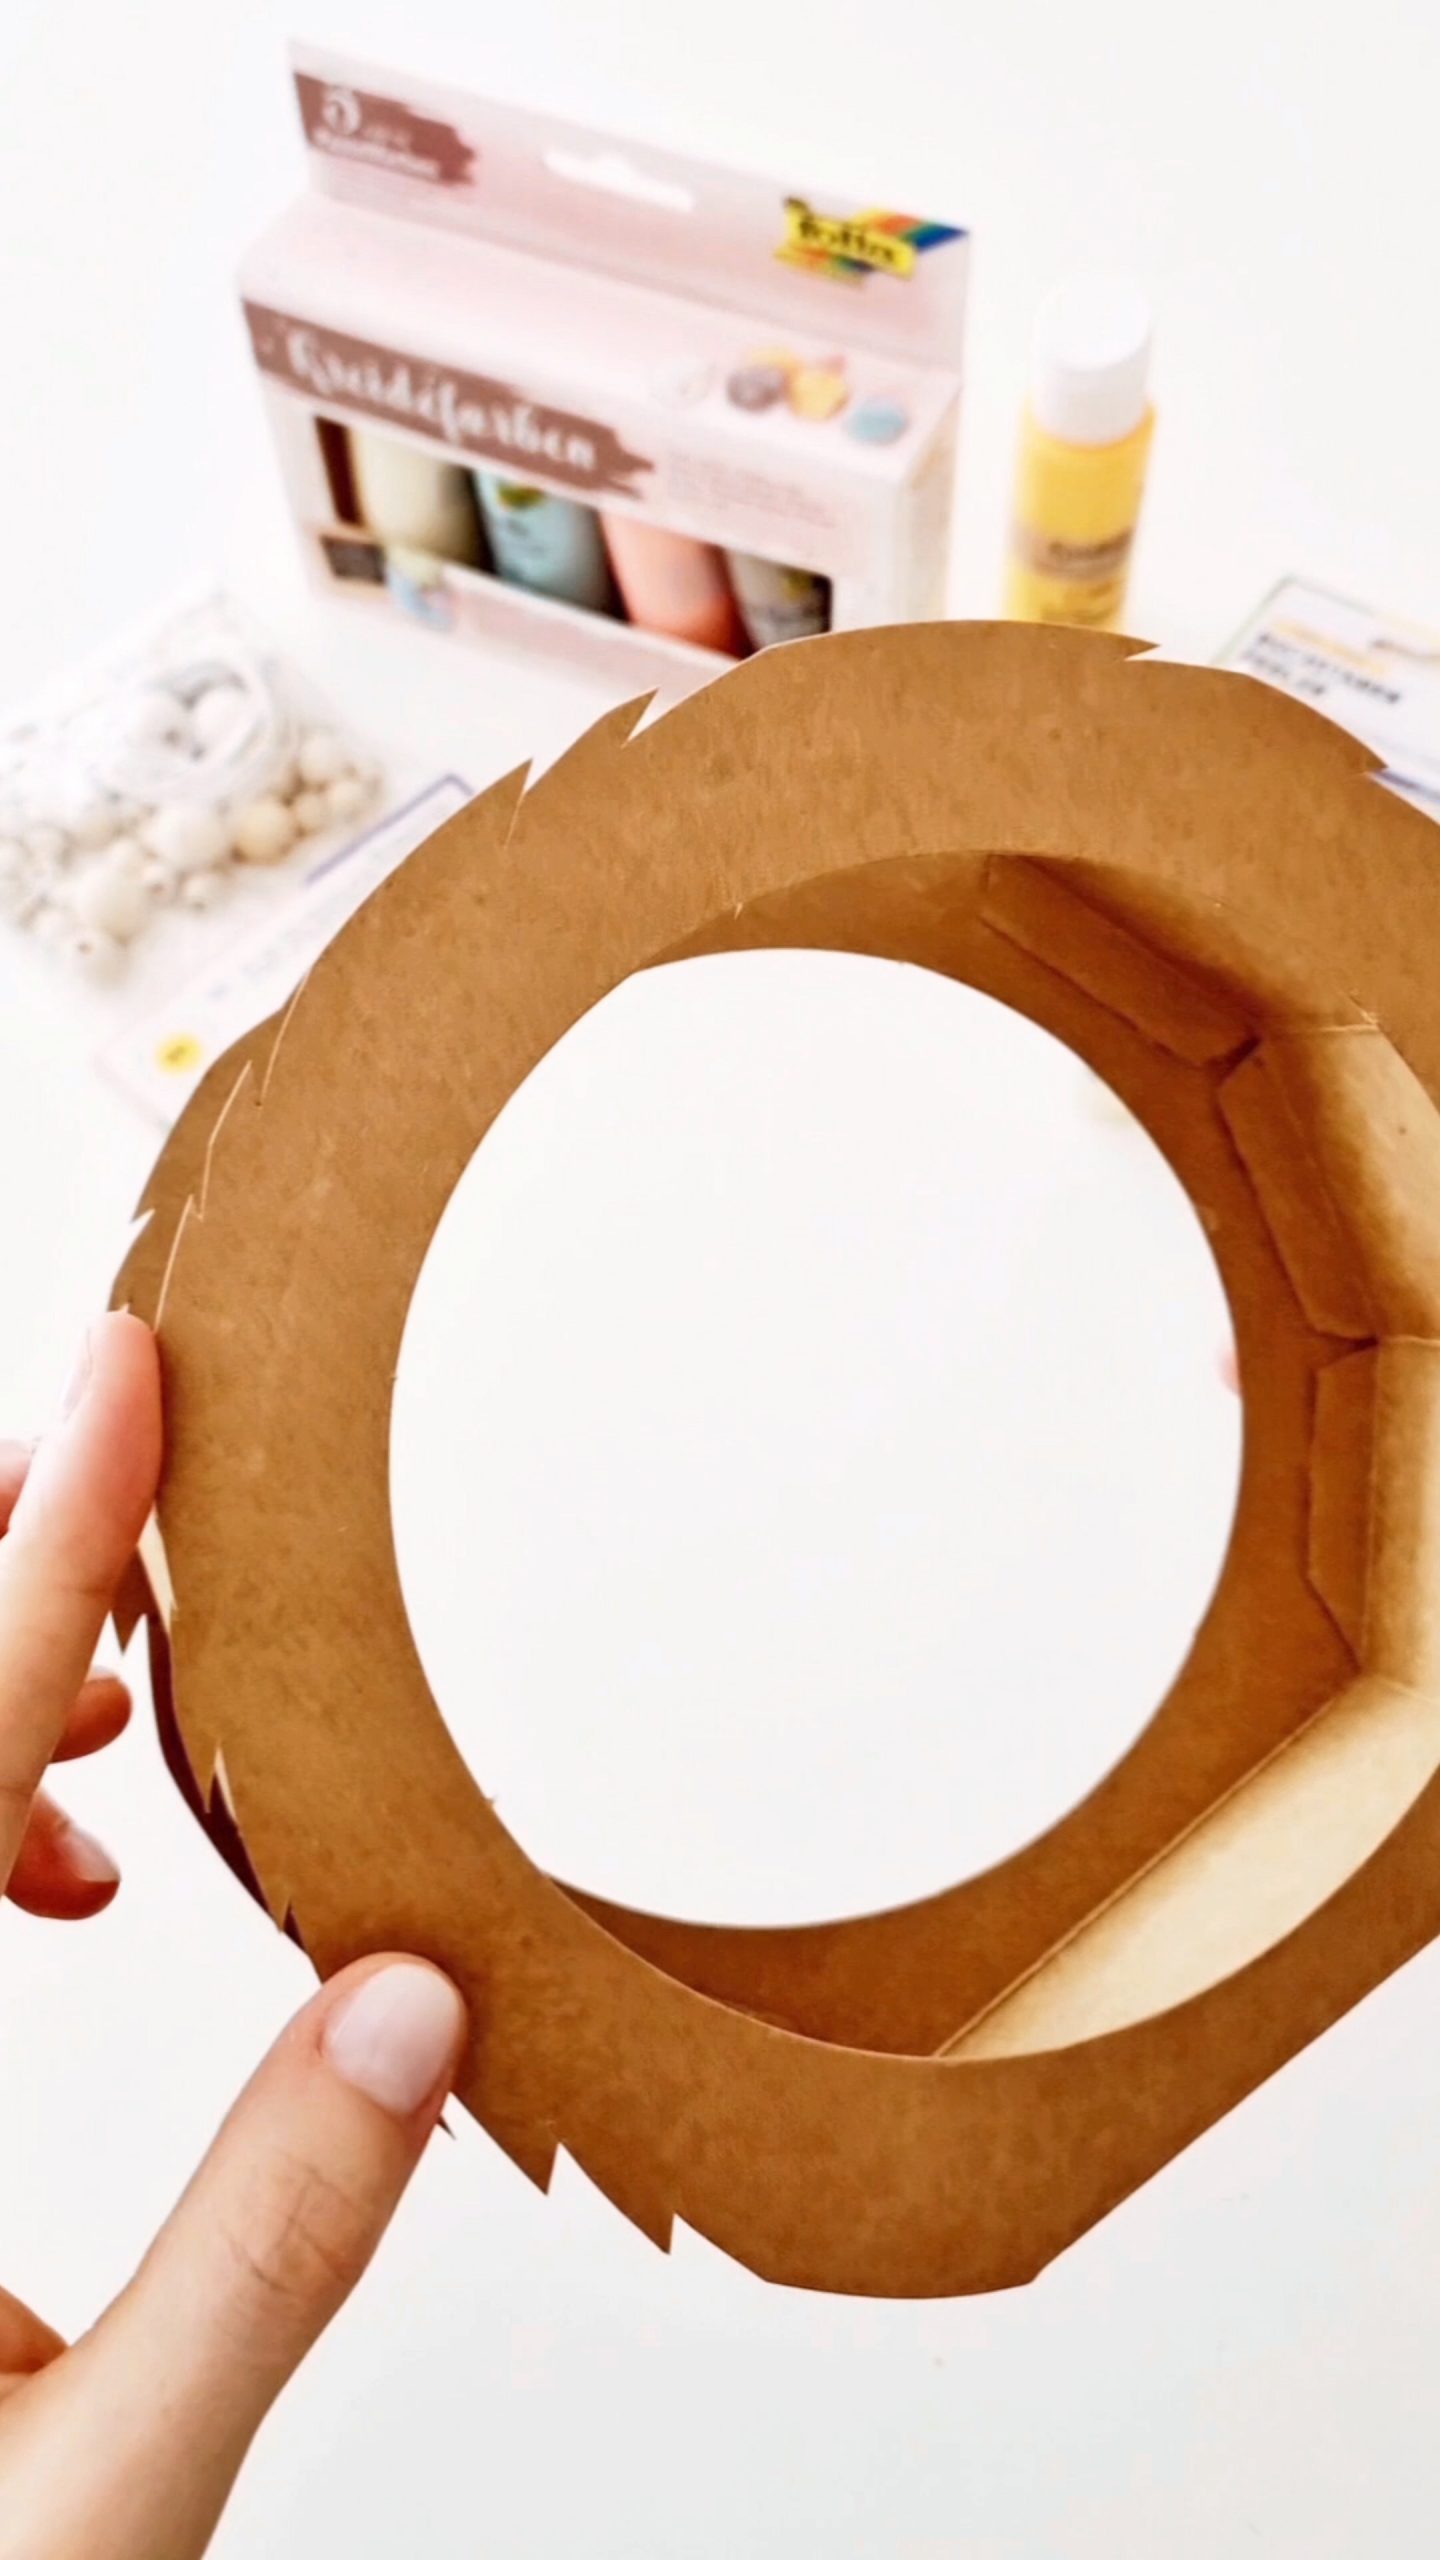
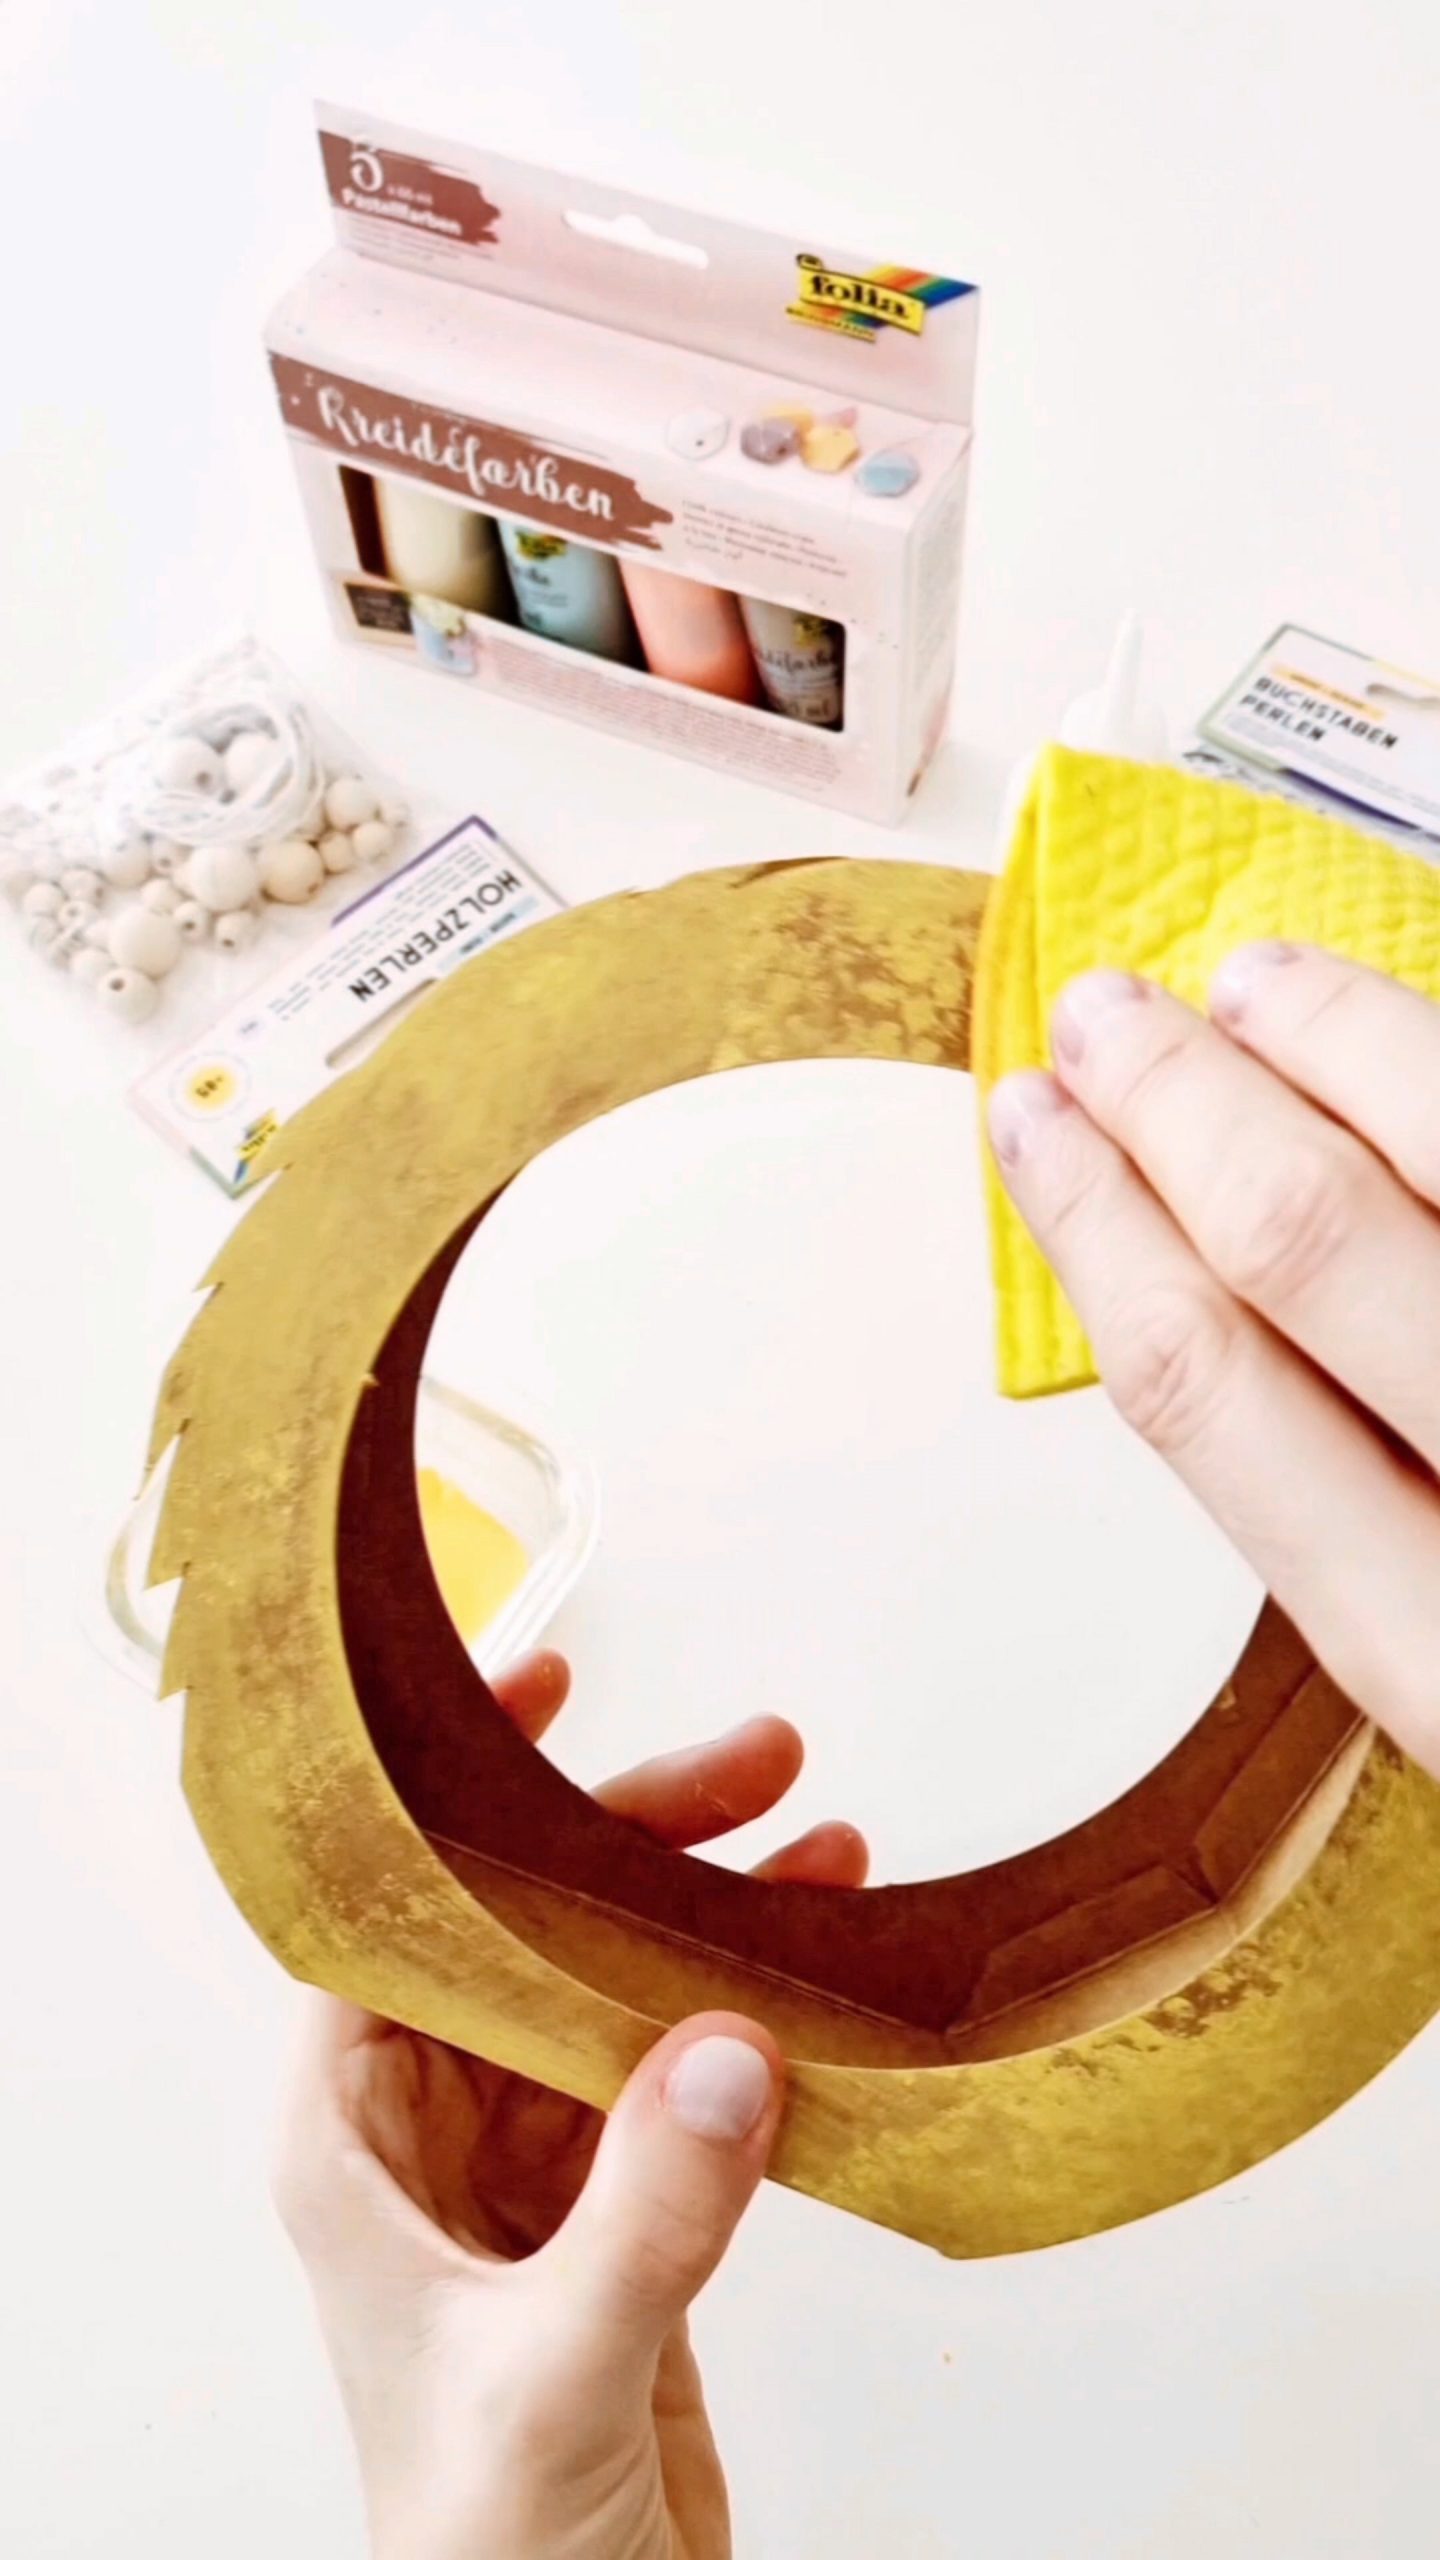
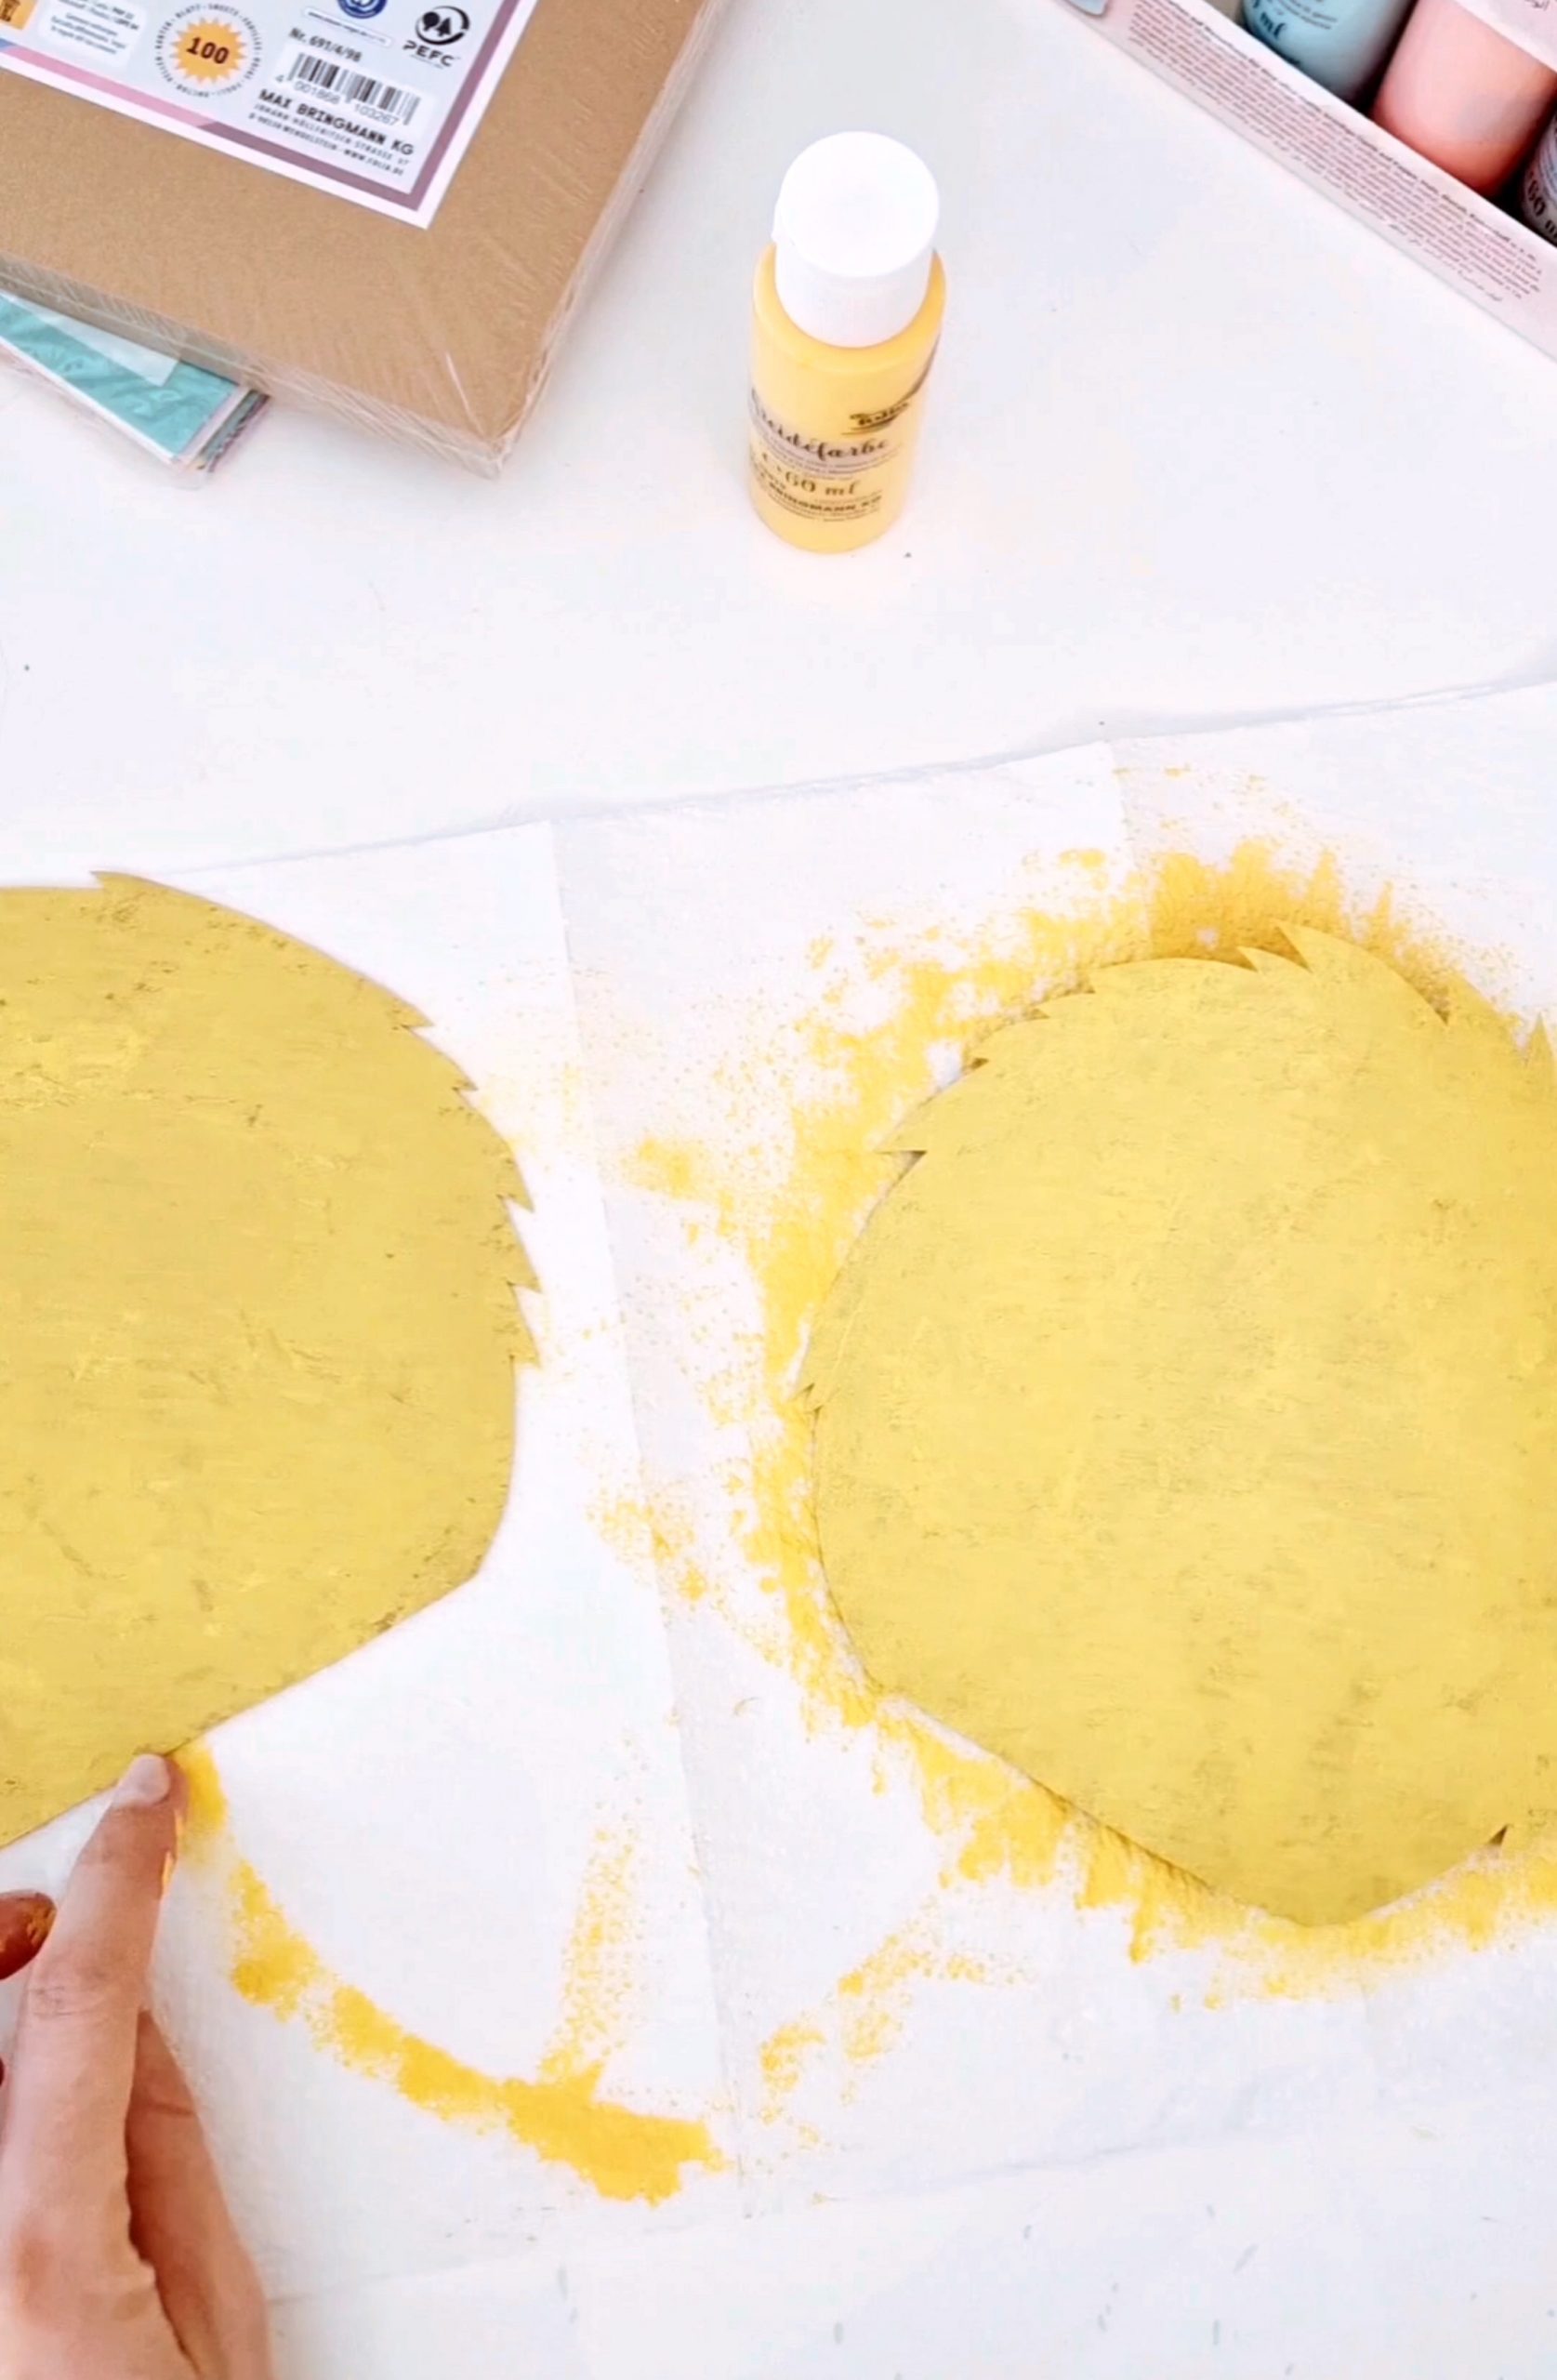
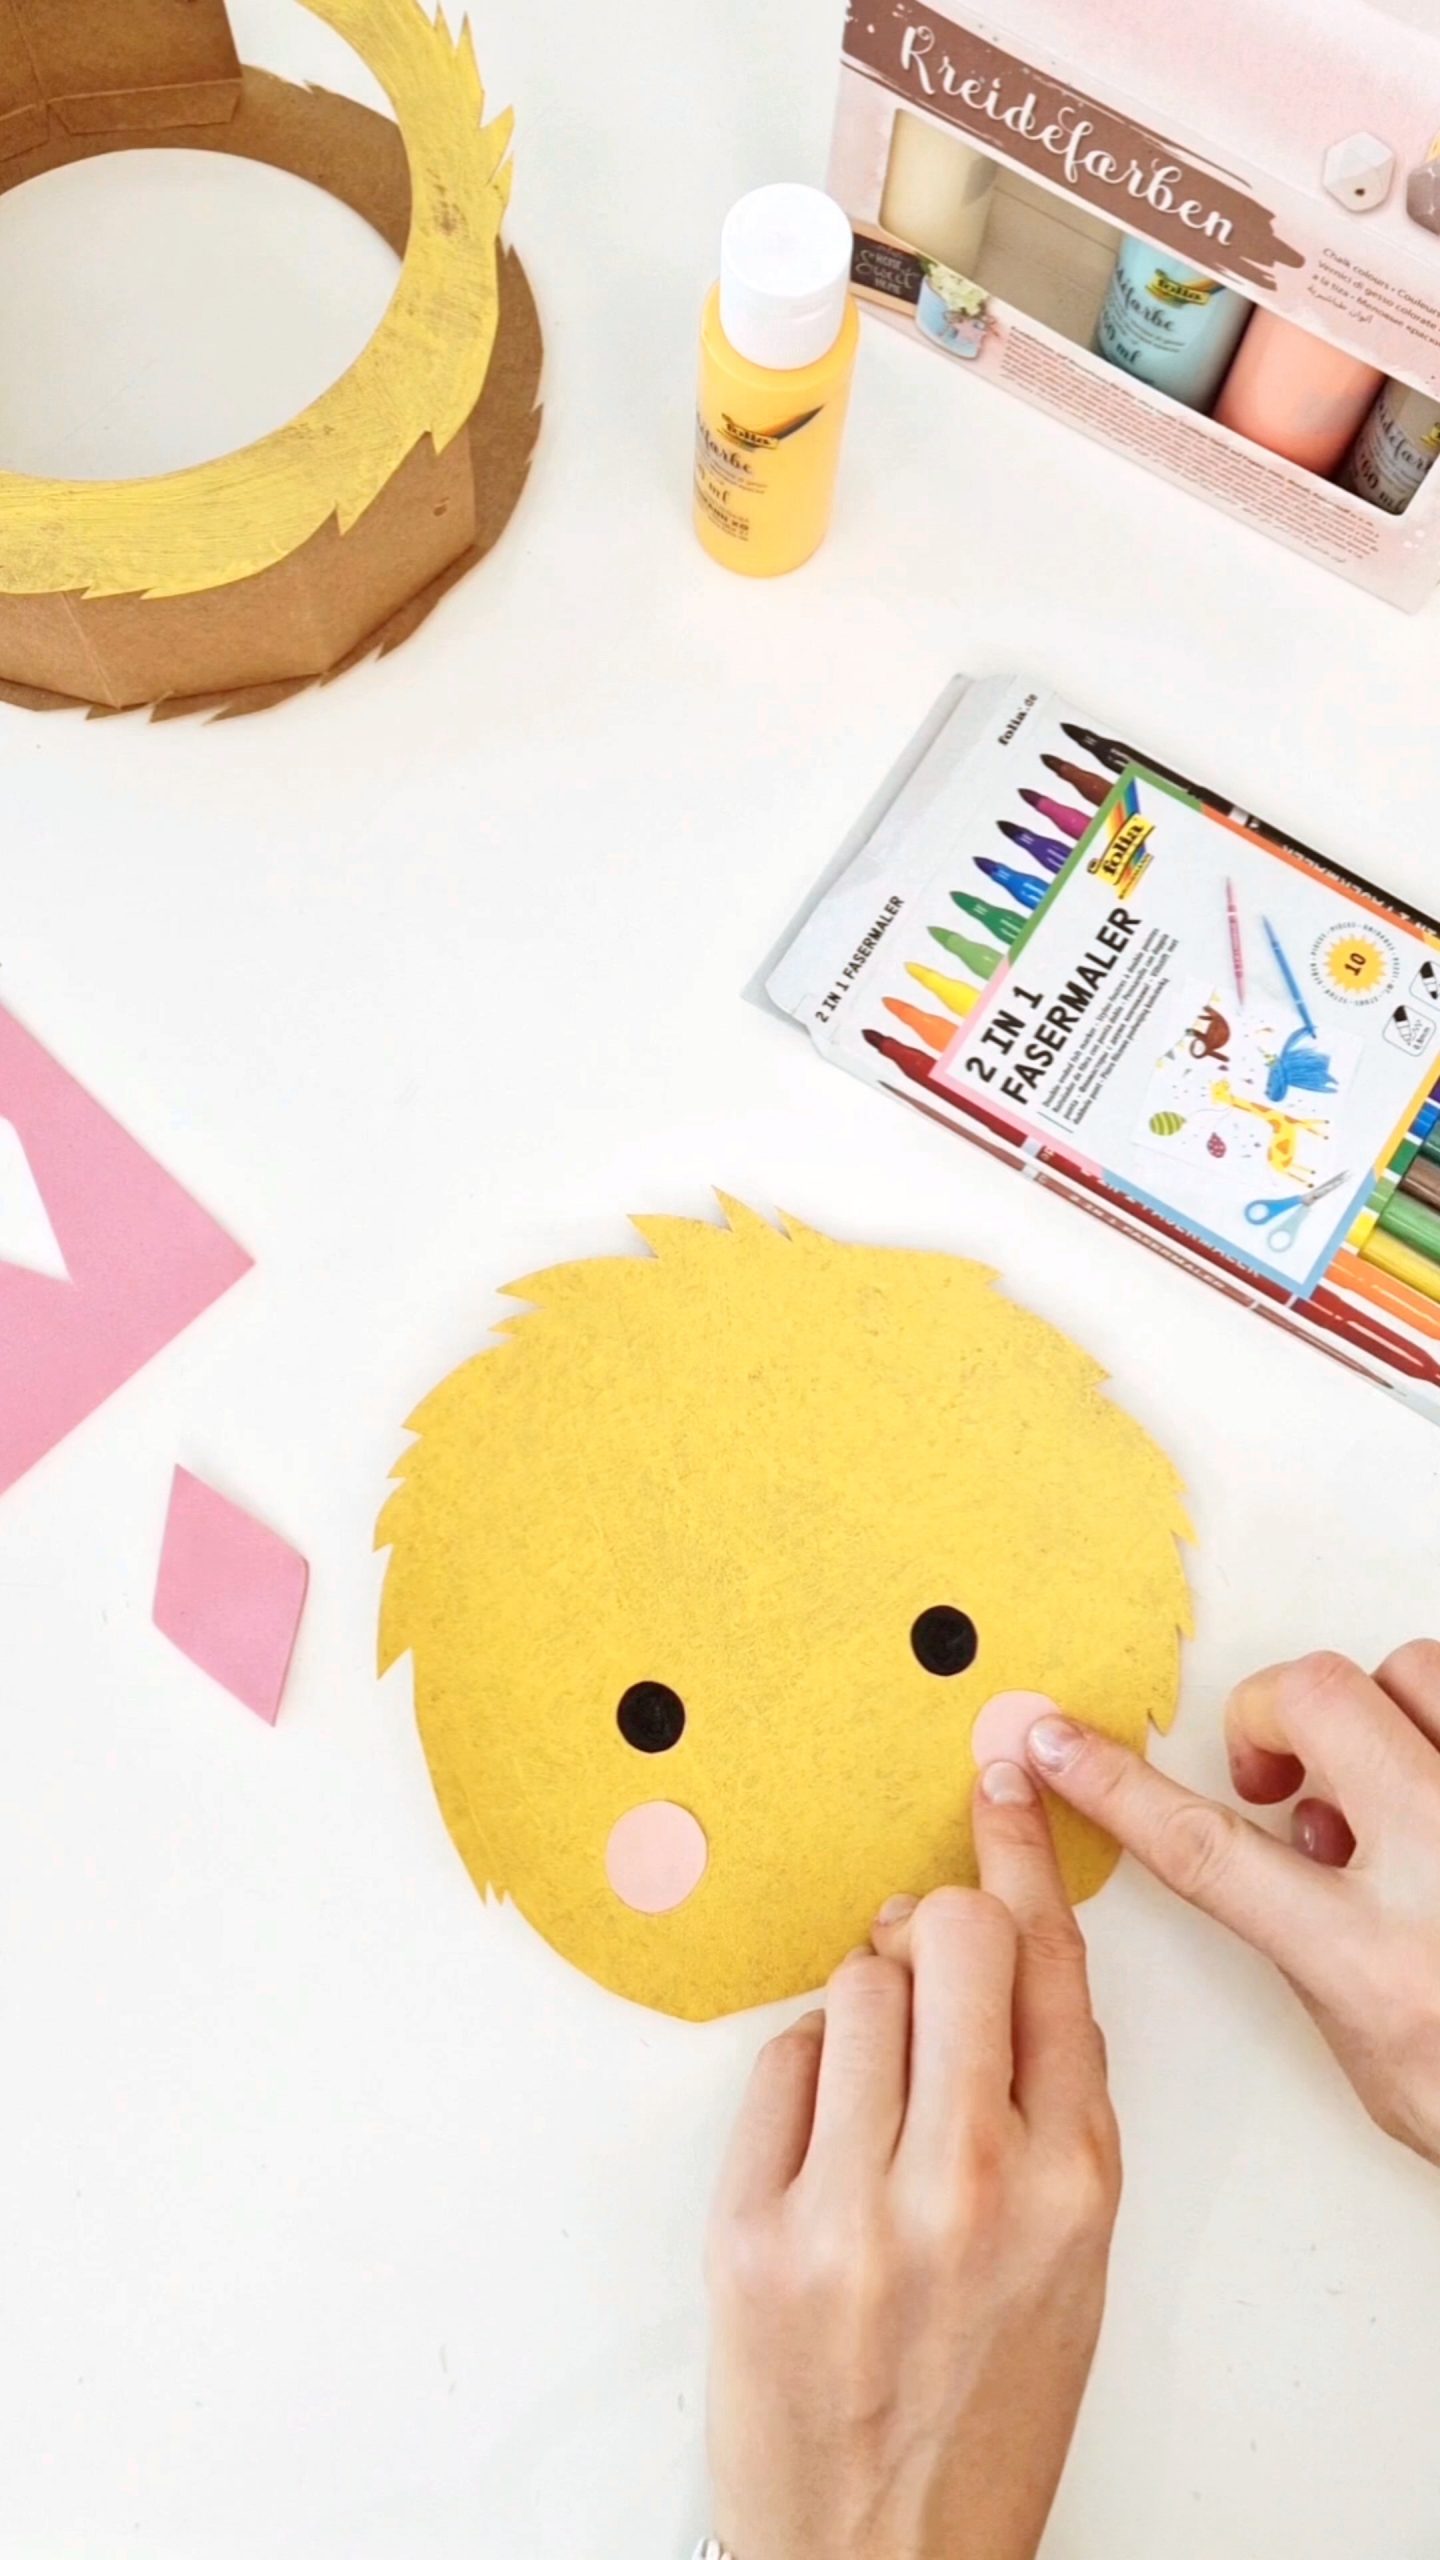
1.) Prepare the lantern First craft the lantern out of kraft paper as usual using hot glue and then cut small spikes all around. Afterwards, dab the yellow chalk paint on the front and back with a sponge. Let everything dry well.
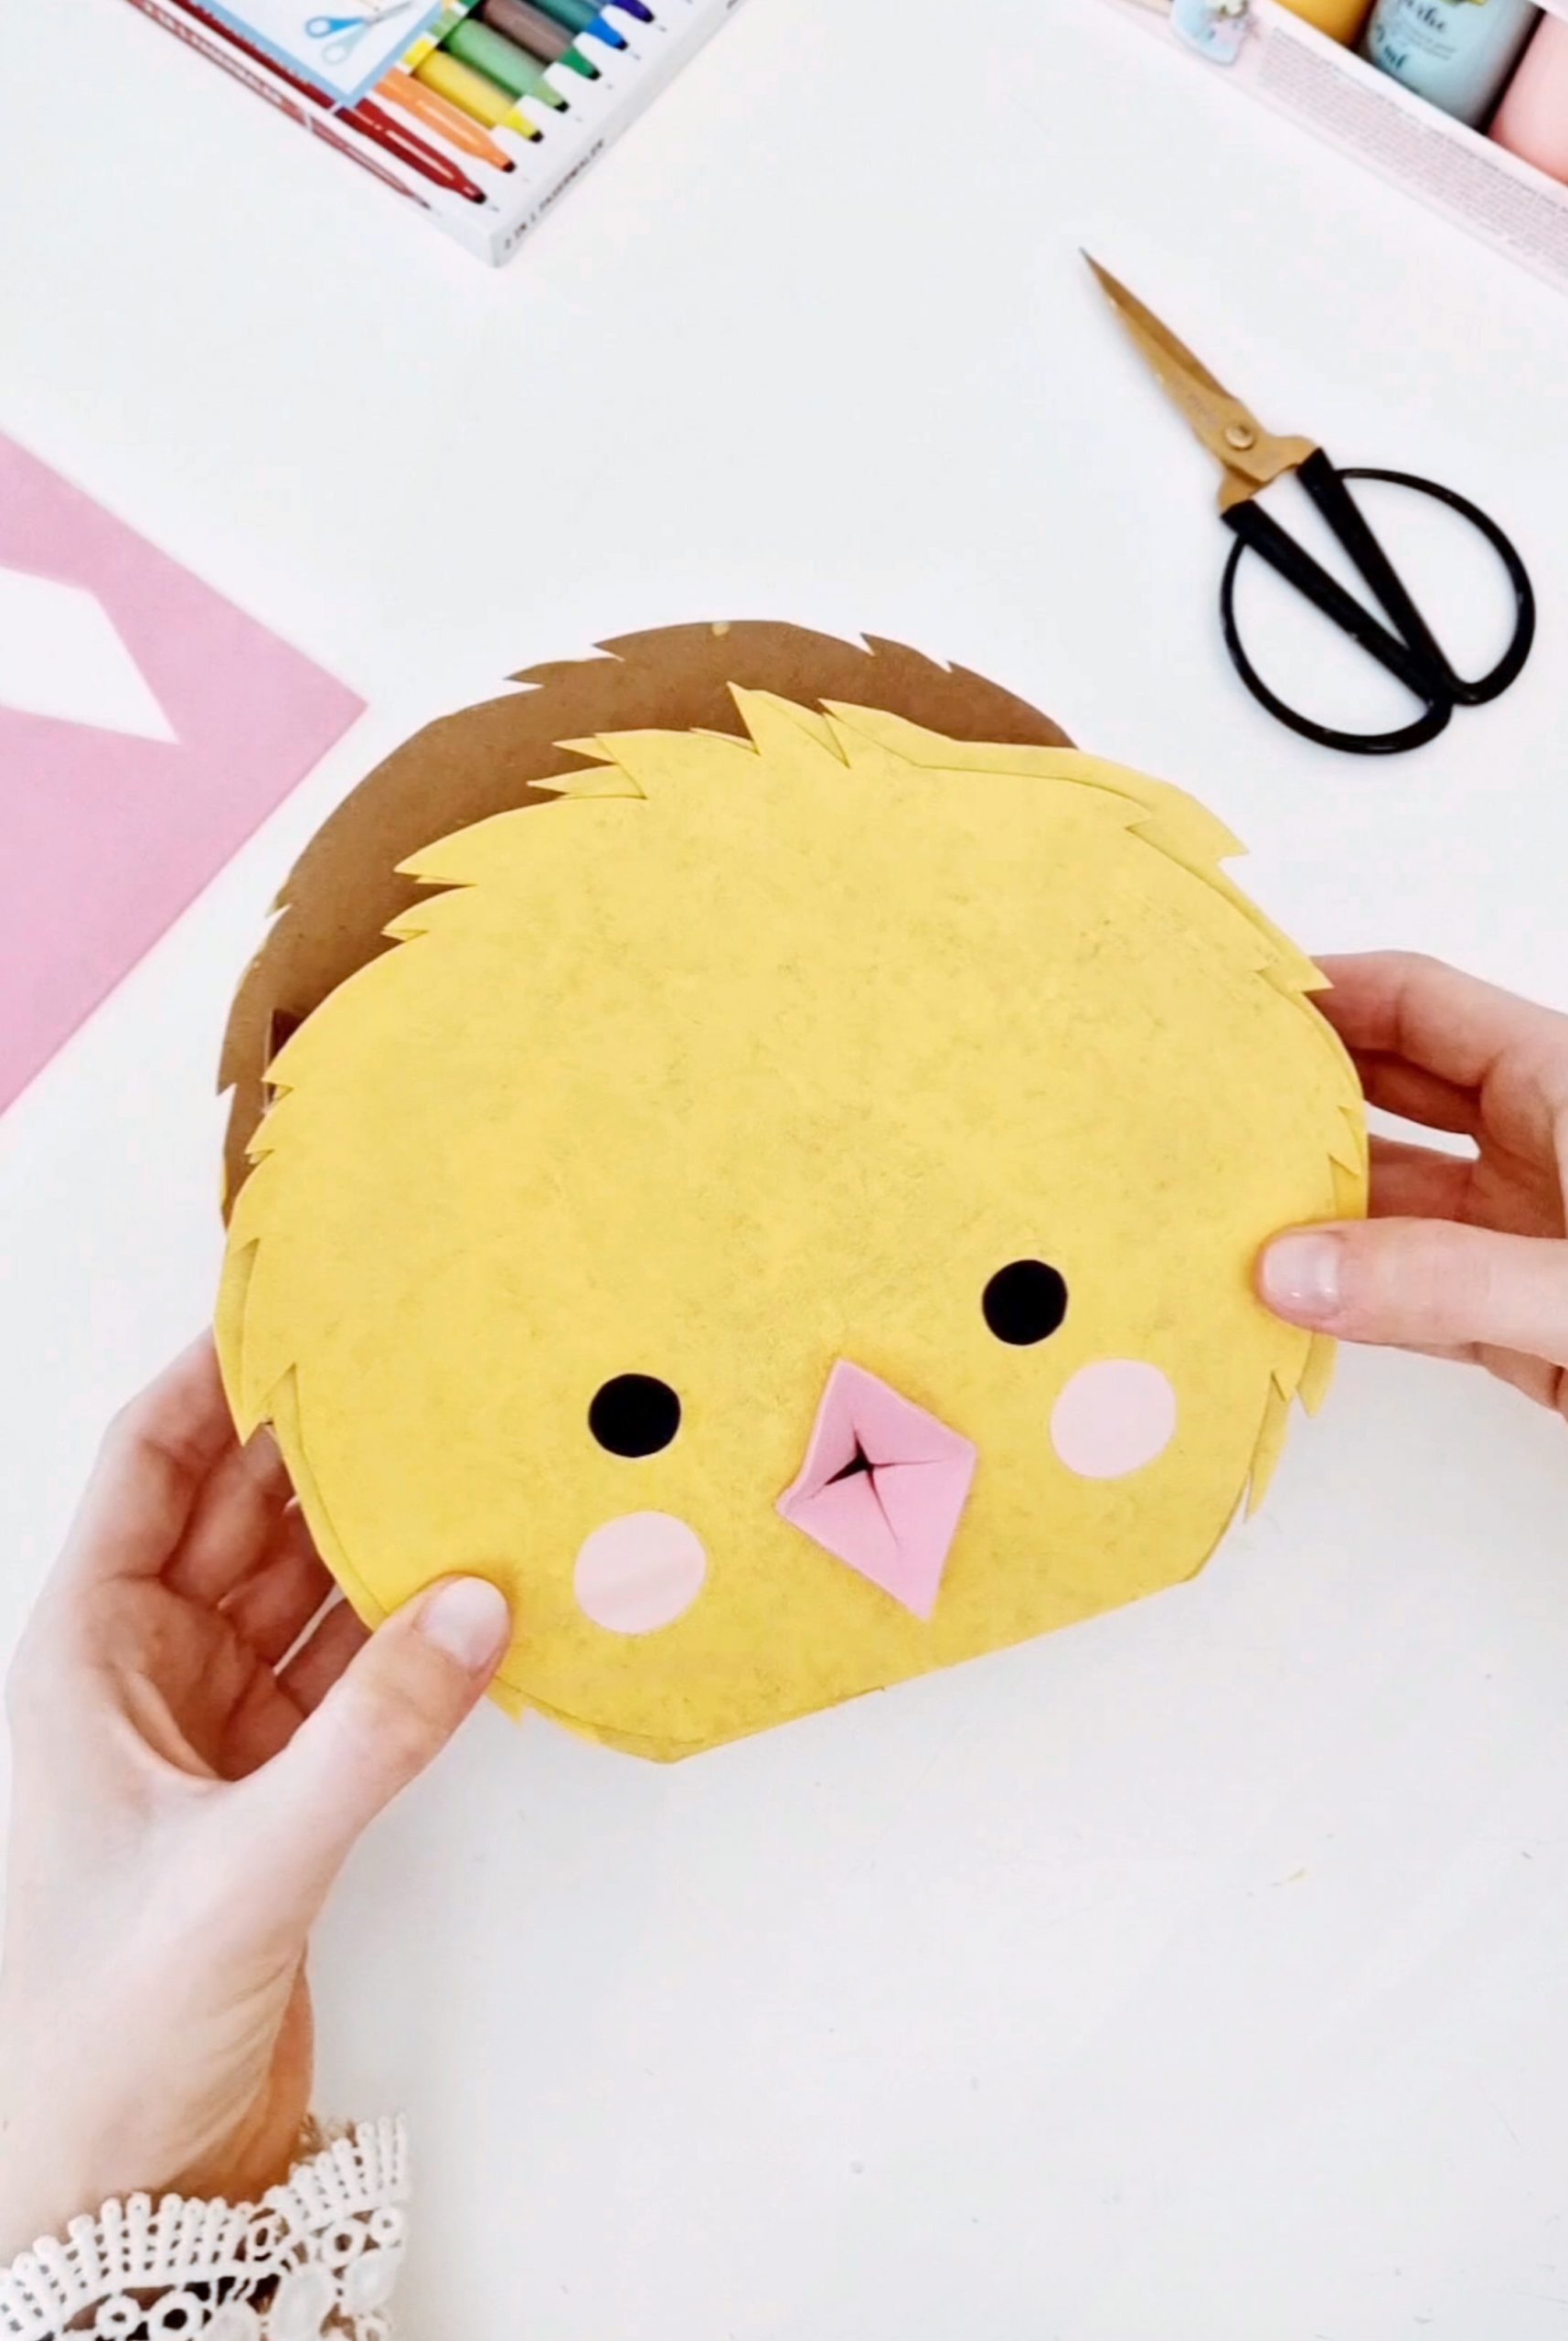
2.) Make chicks Using my template, cut out the face shape of the chick twice from the kraft paper and then dab it again with a sponge and the yellow chalk paint. When everything has dried well, draw on the eyes with a black felt-tip pen and glue on cheeks made of pink tona paper.
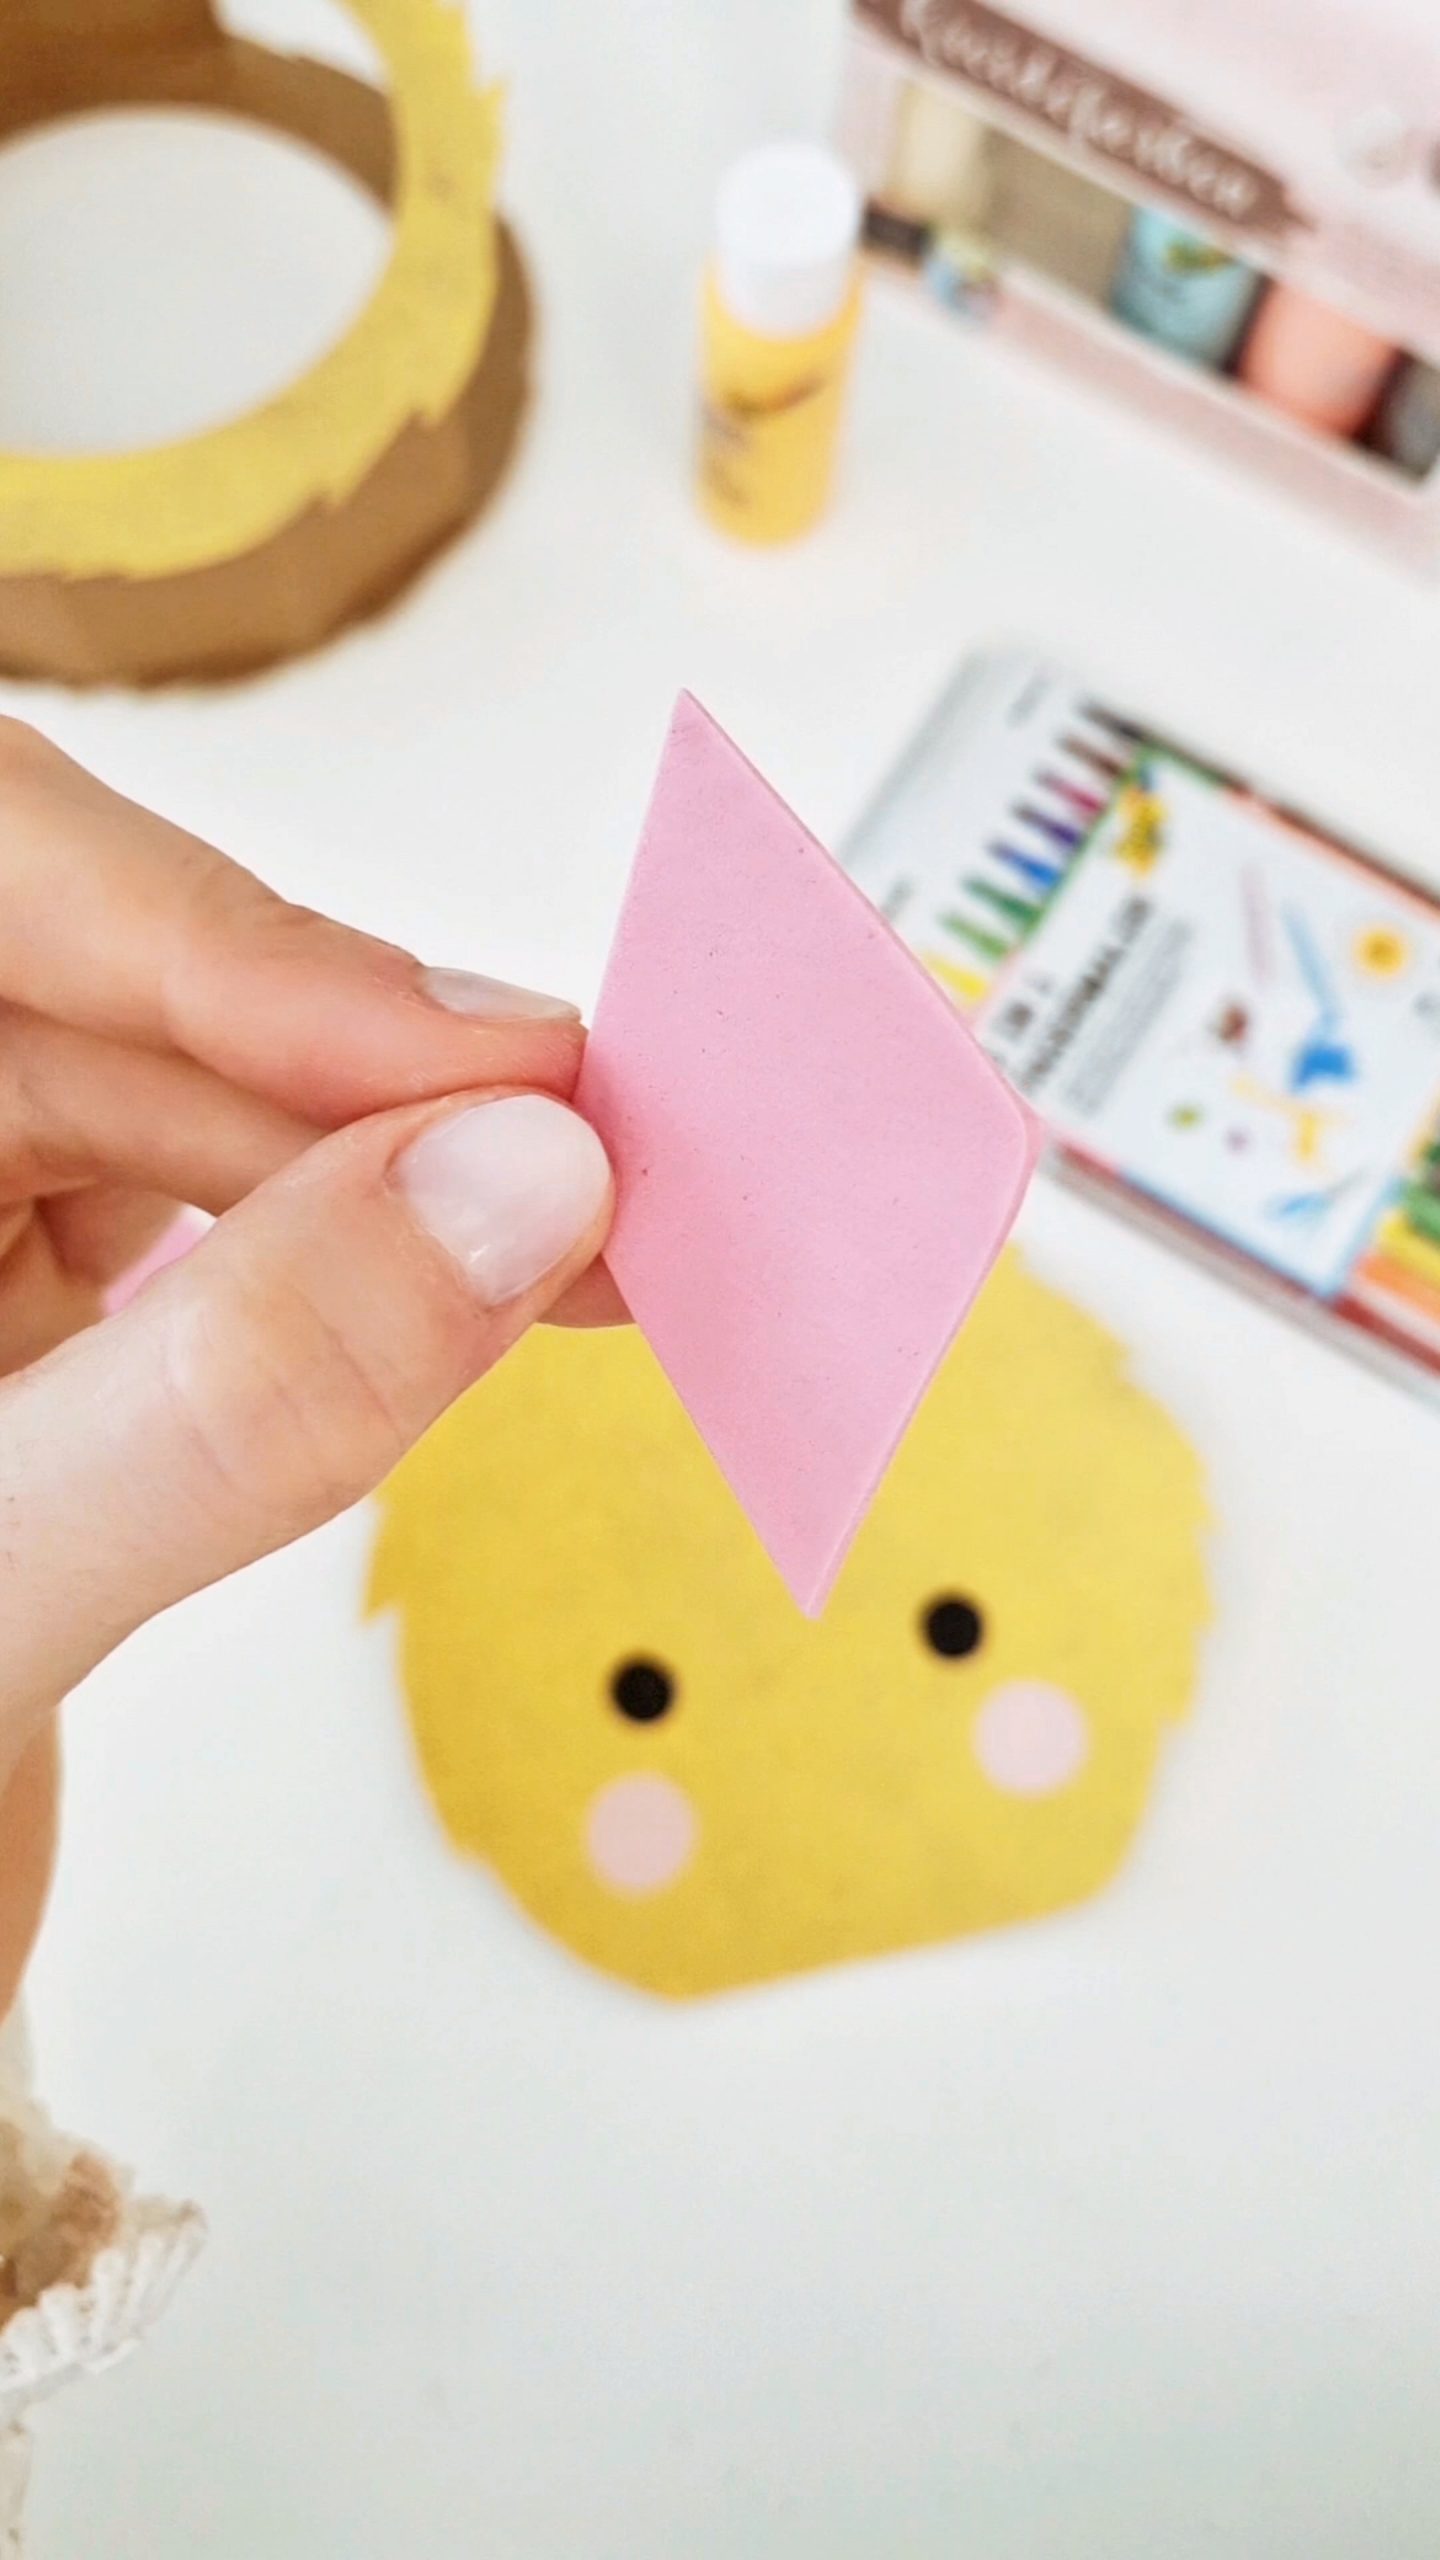
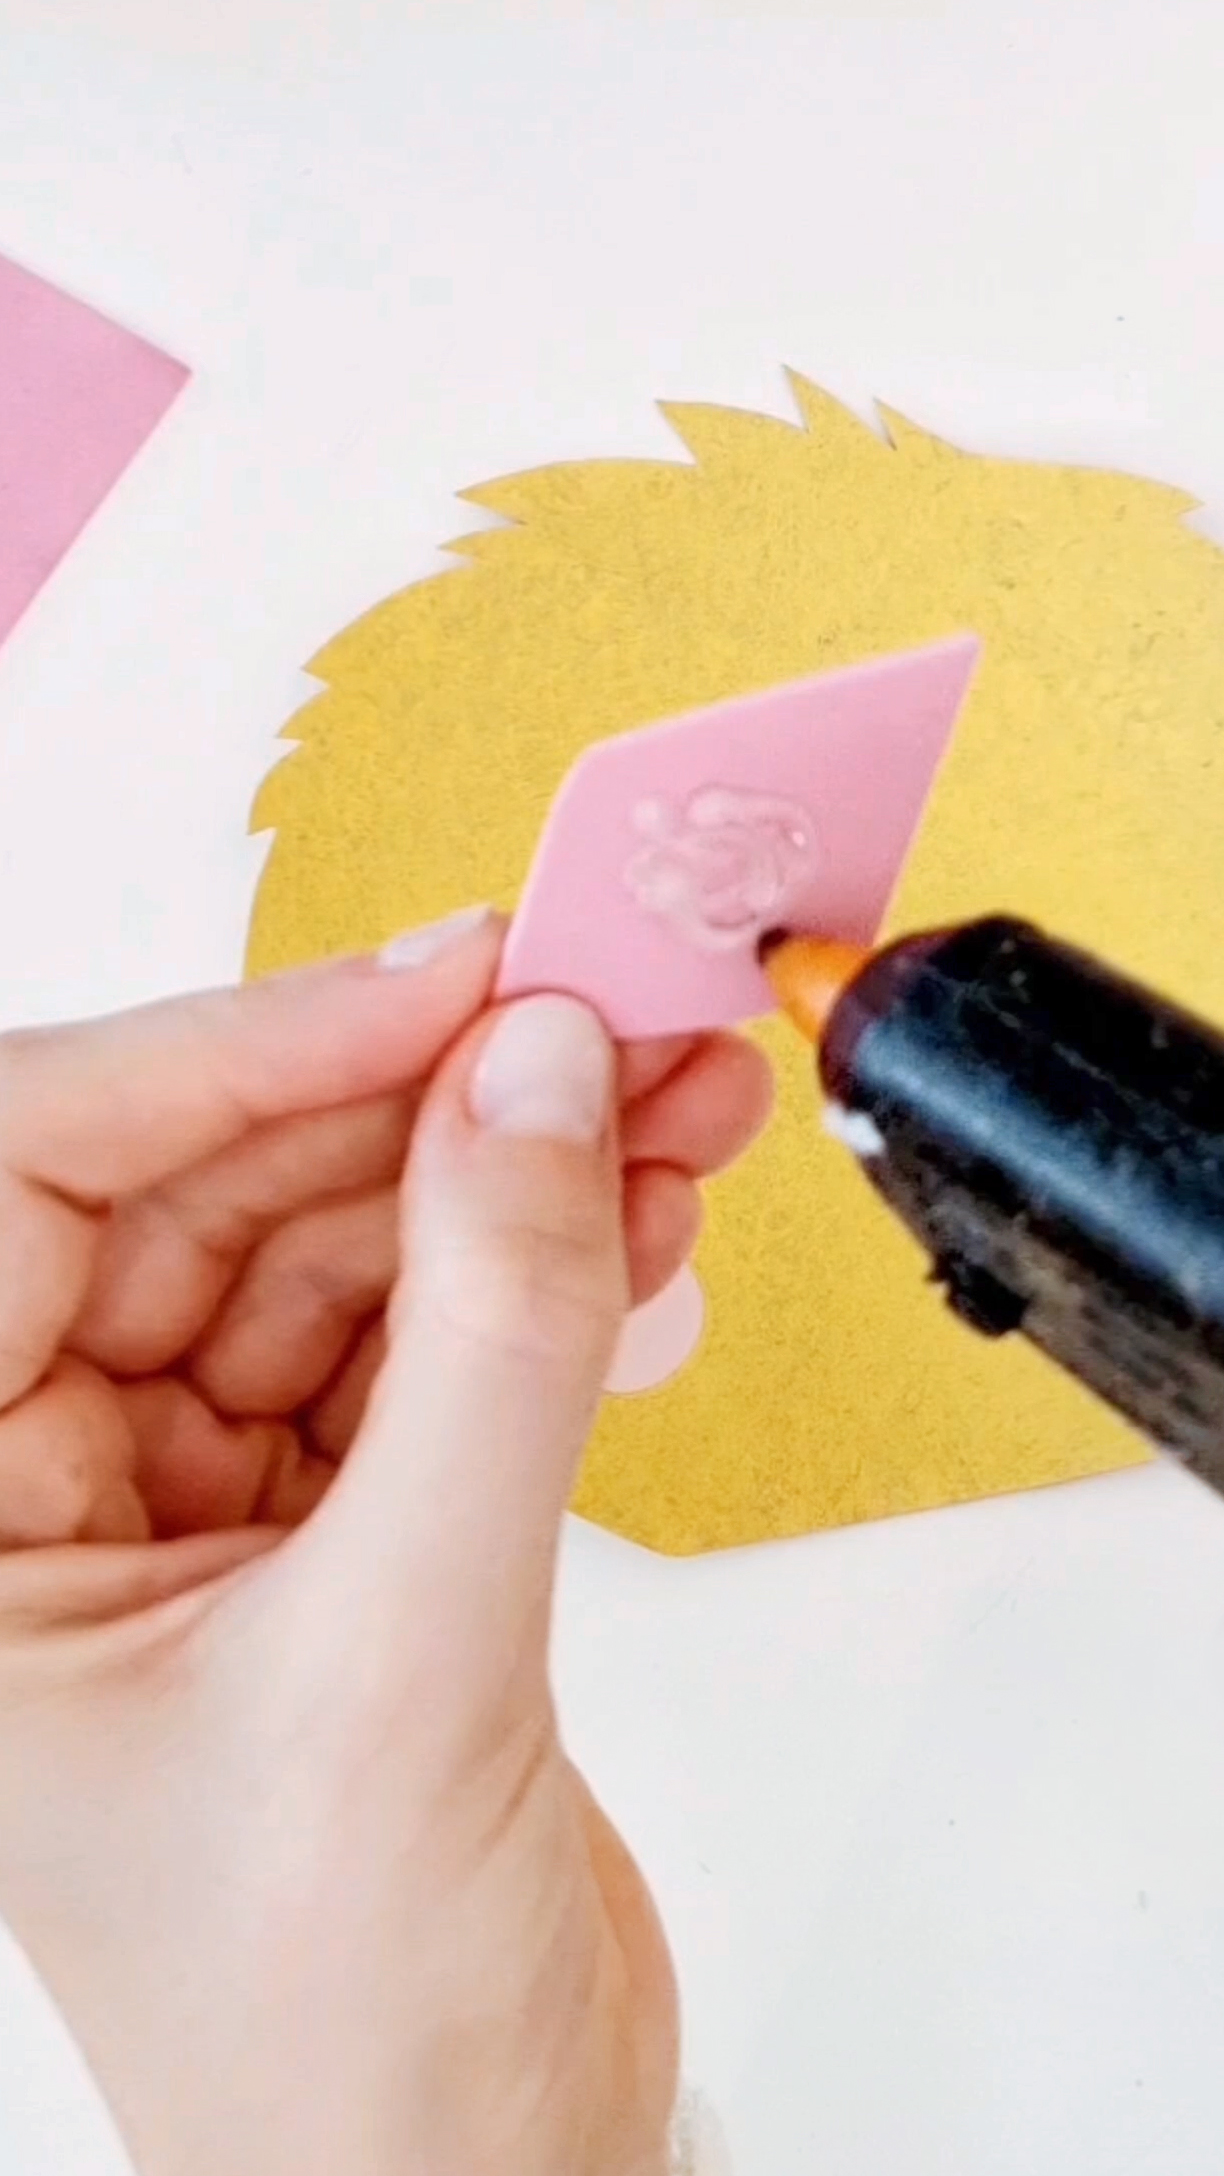
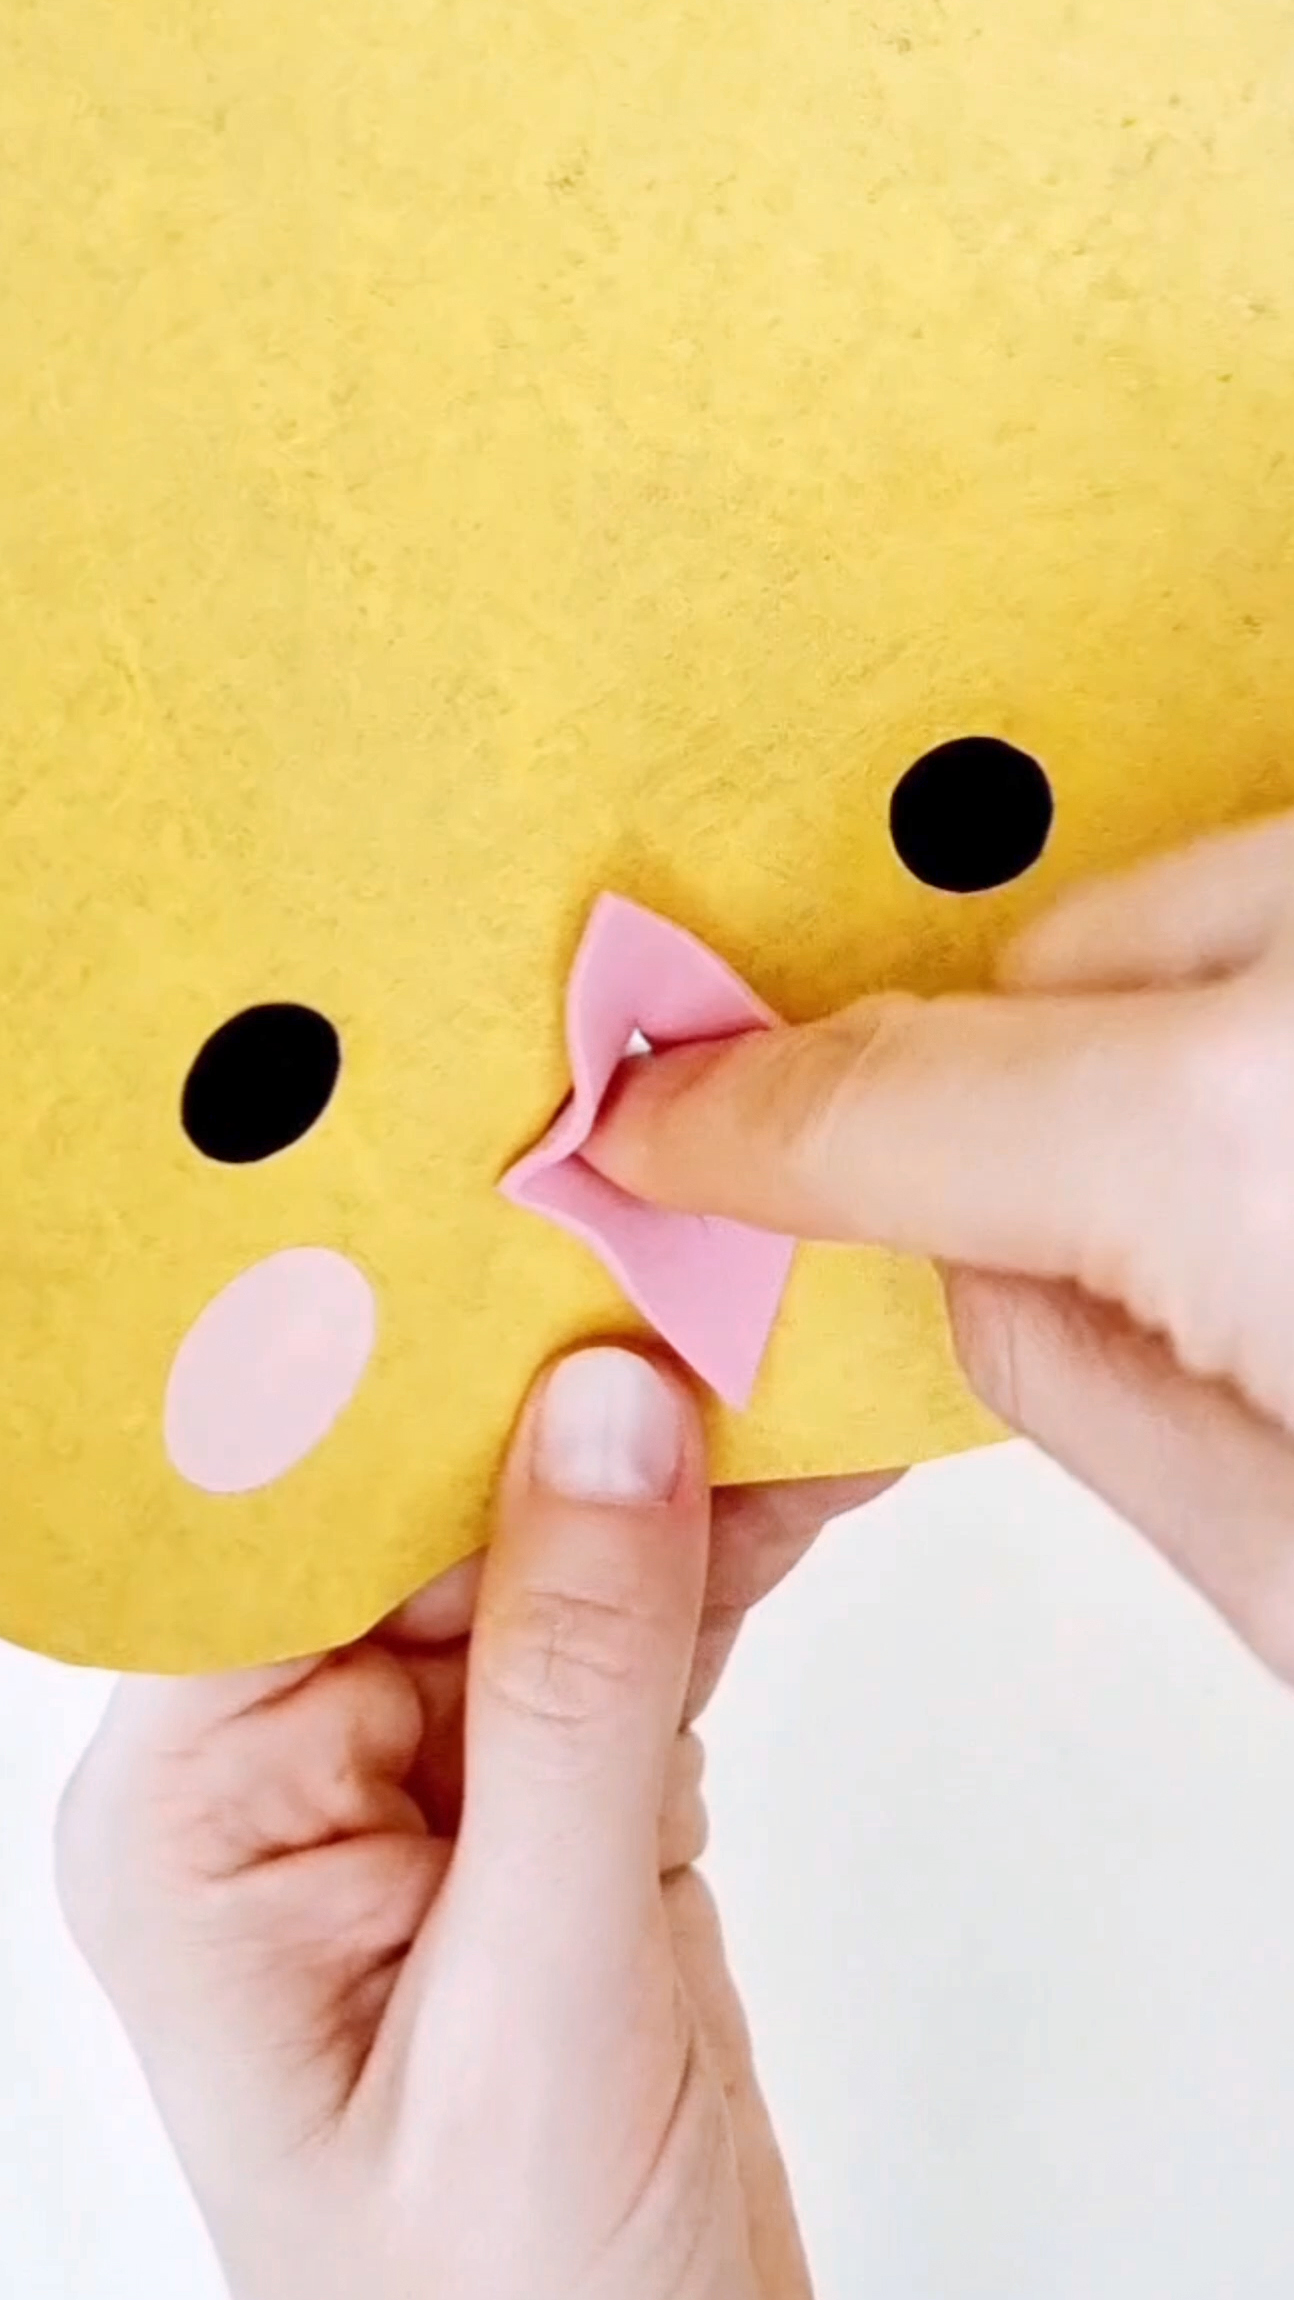
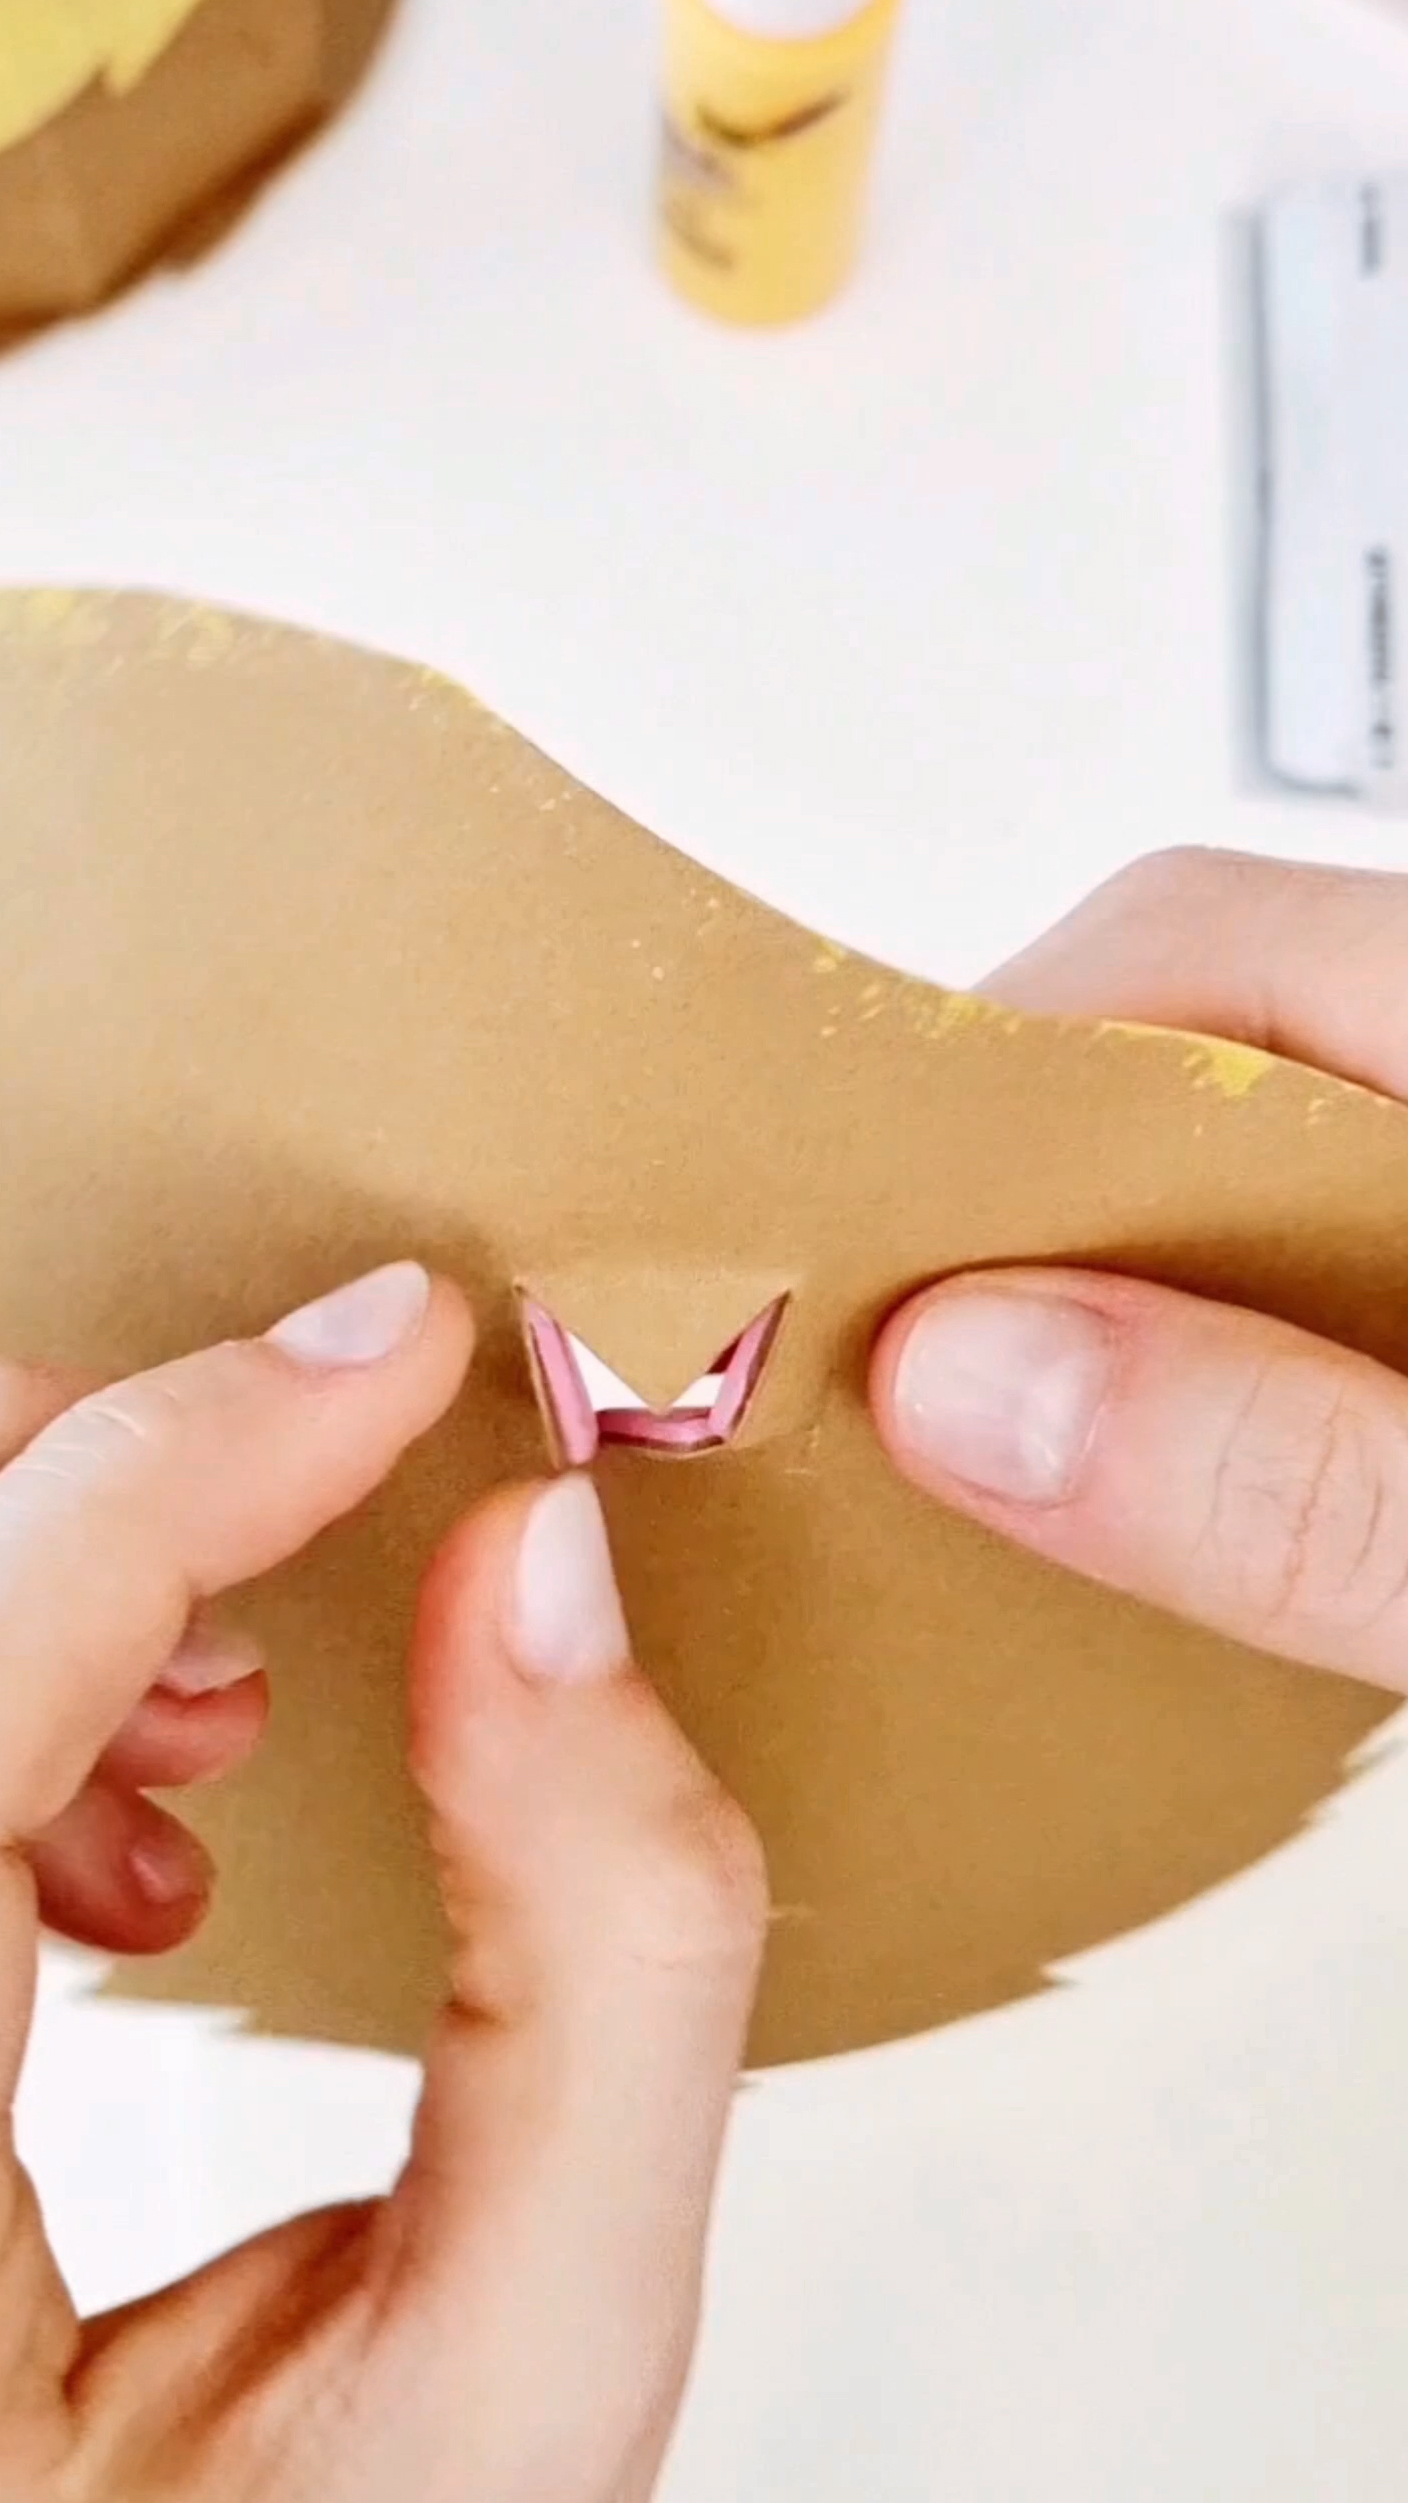
3.) Make a beak Now we come to the beak, which is supposed to be interactive and therefore elastic. Use foam rubber for this and cut out the shape using my freebie. Then apply a good layer of hot glue in the middle, as shown here. Then glue the beak on and carve a cross on it with a craft knife.
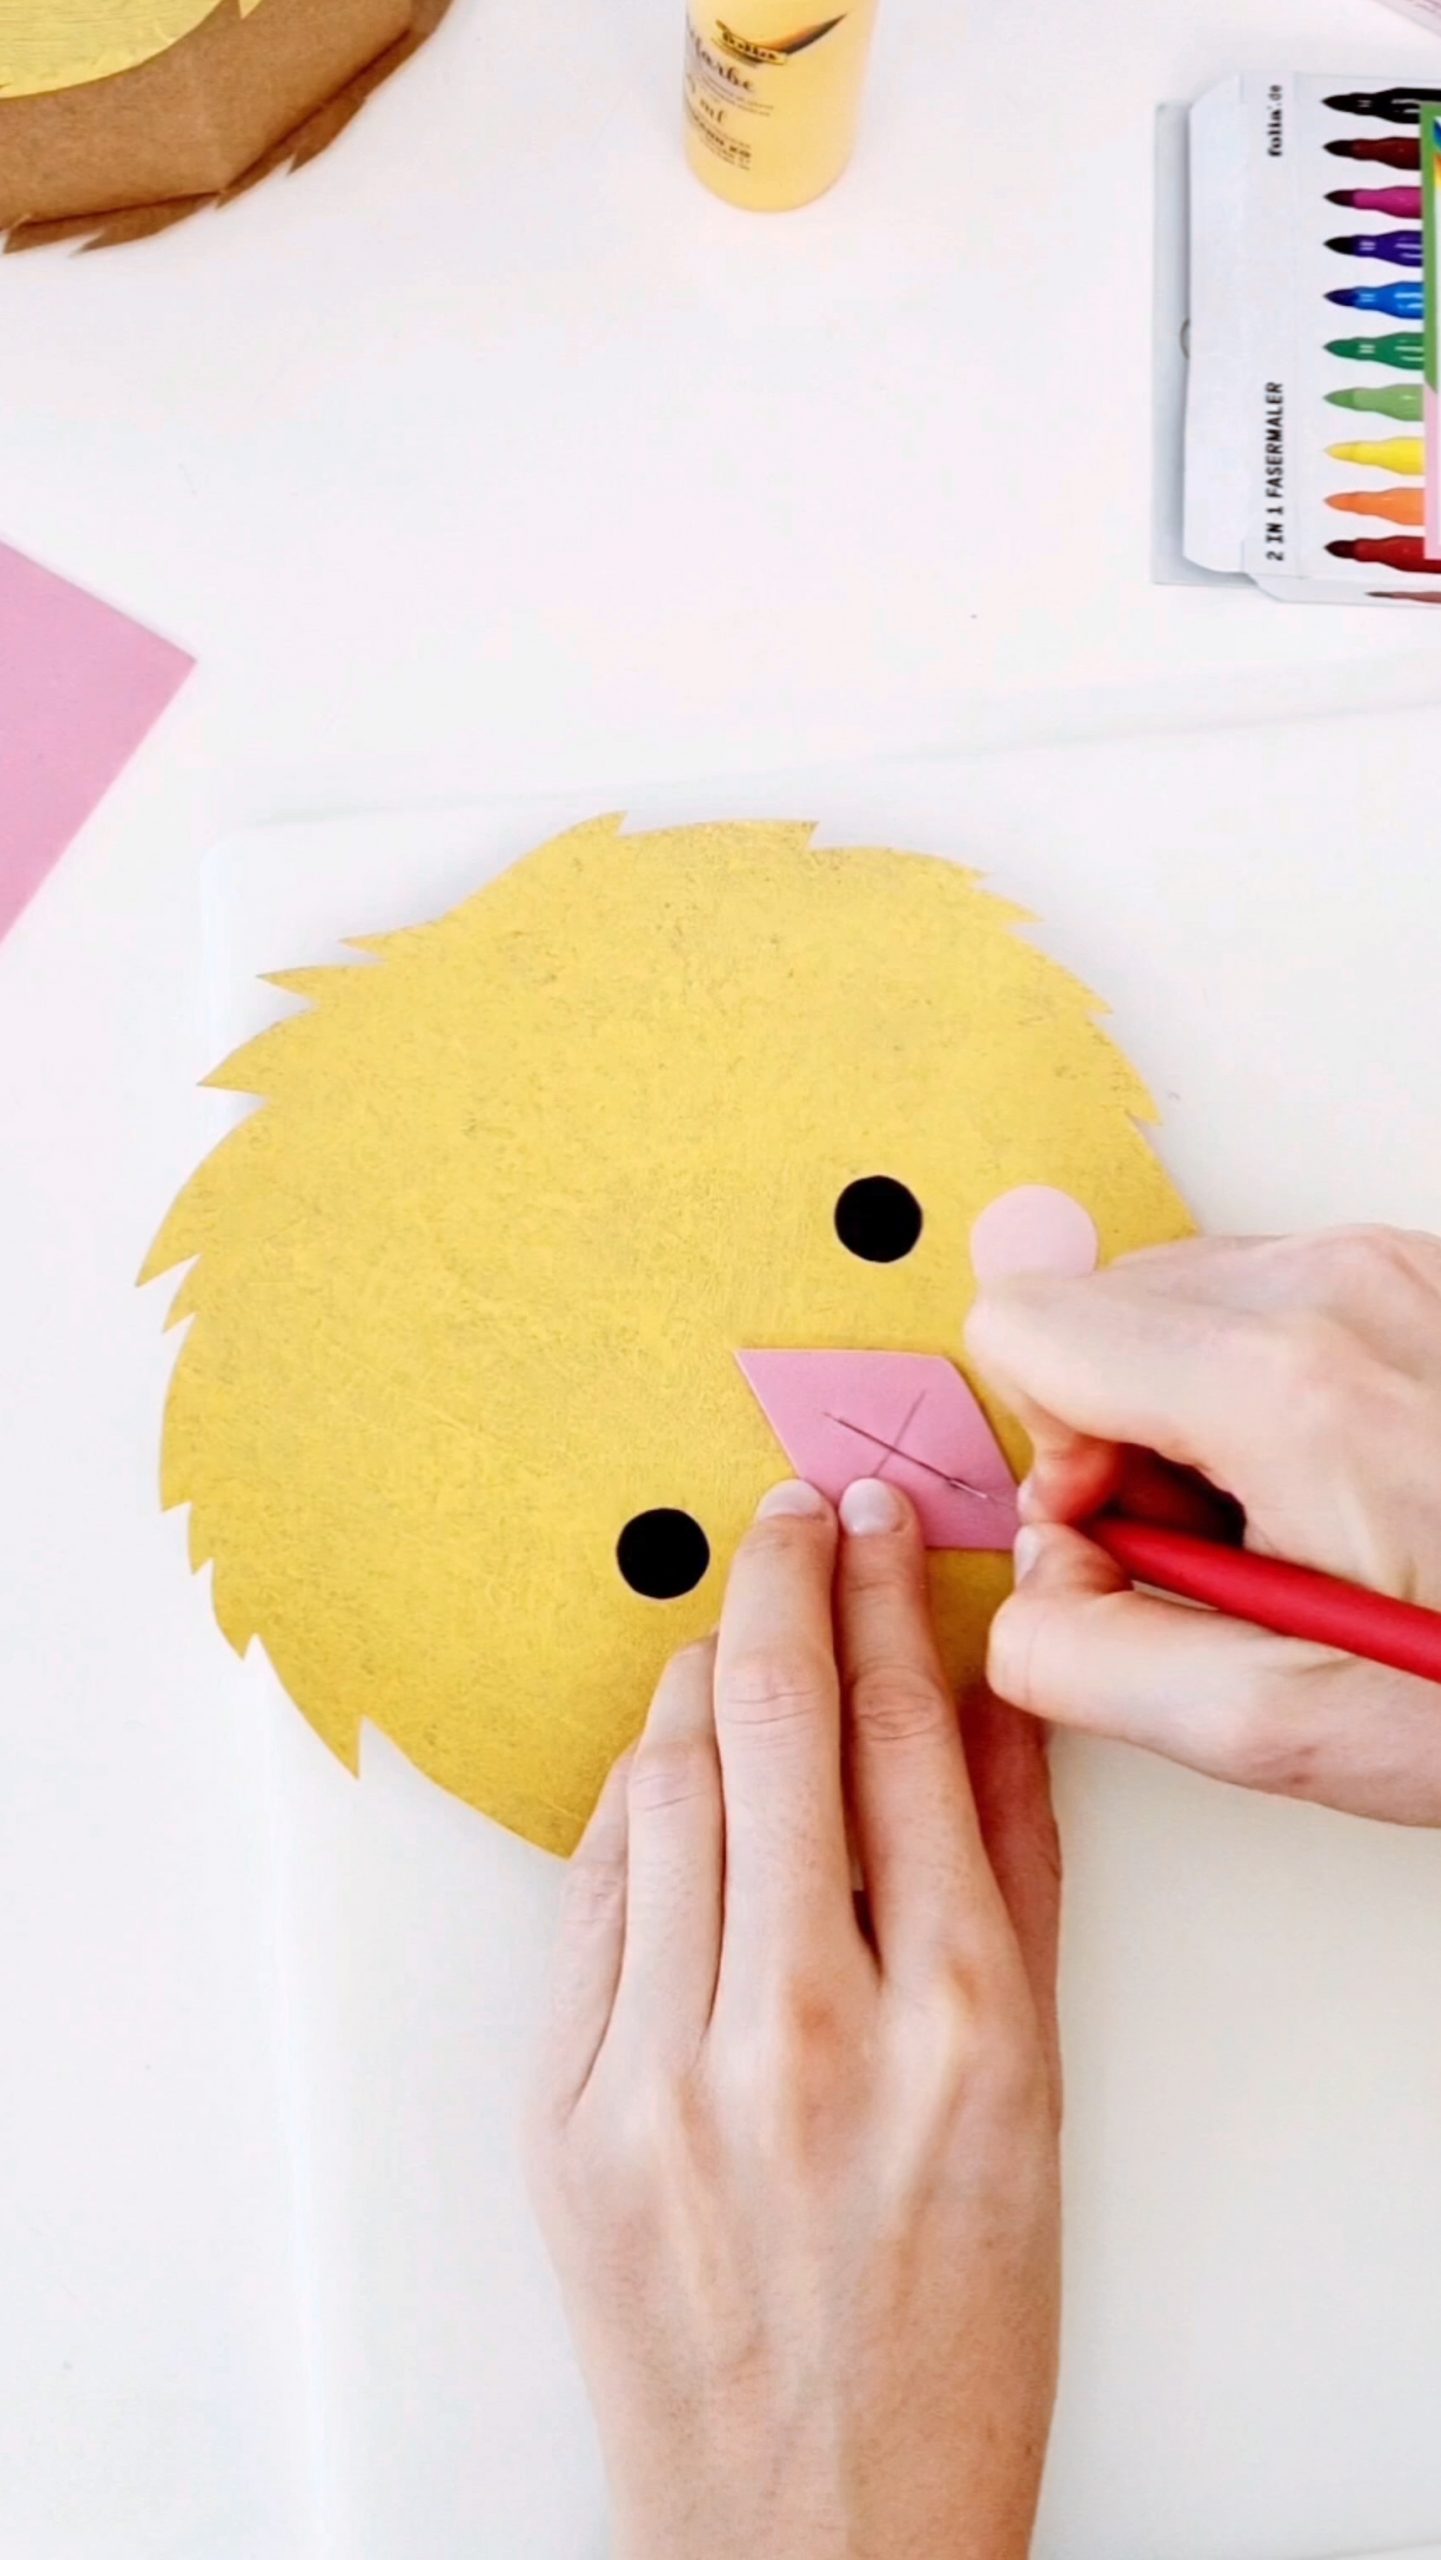
From the front you now carefully pierce the hole with your finger and fold the triangles over a little. This is what it looks like from both sides:
4.) Glue parts together Now glue the finished front and back to the lantern with hot glue. You can bend the spikes on the edge a bit to make it look more plastic and create a feather look.
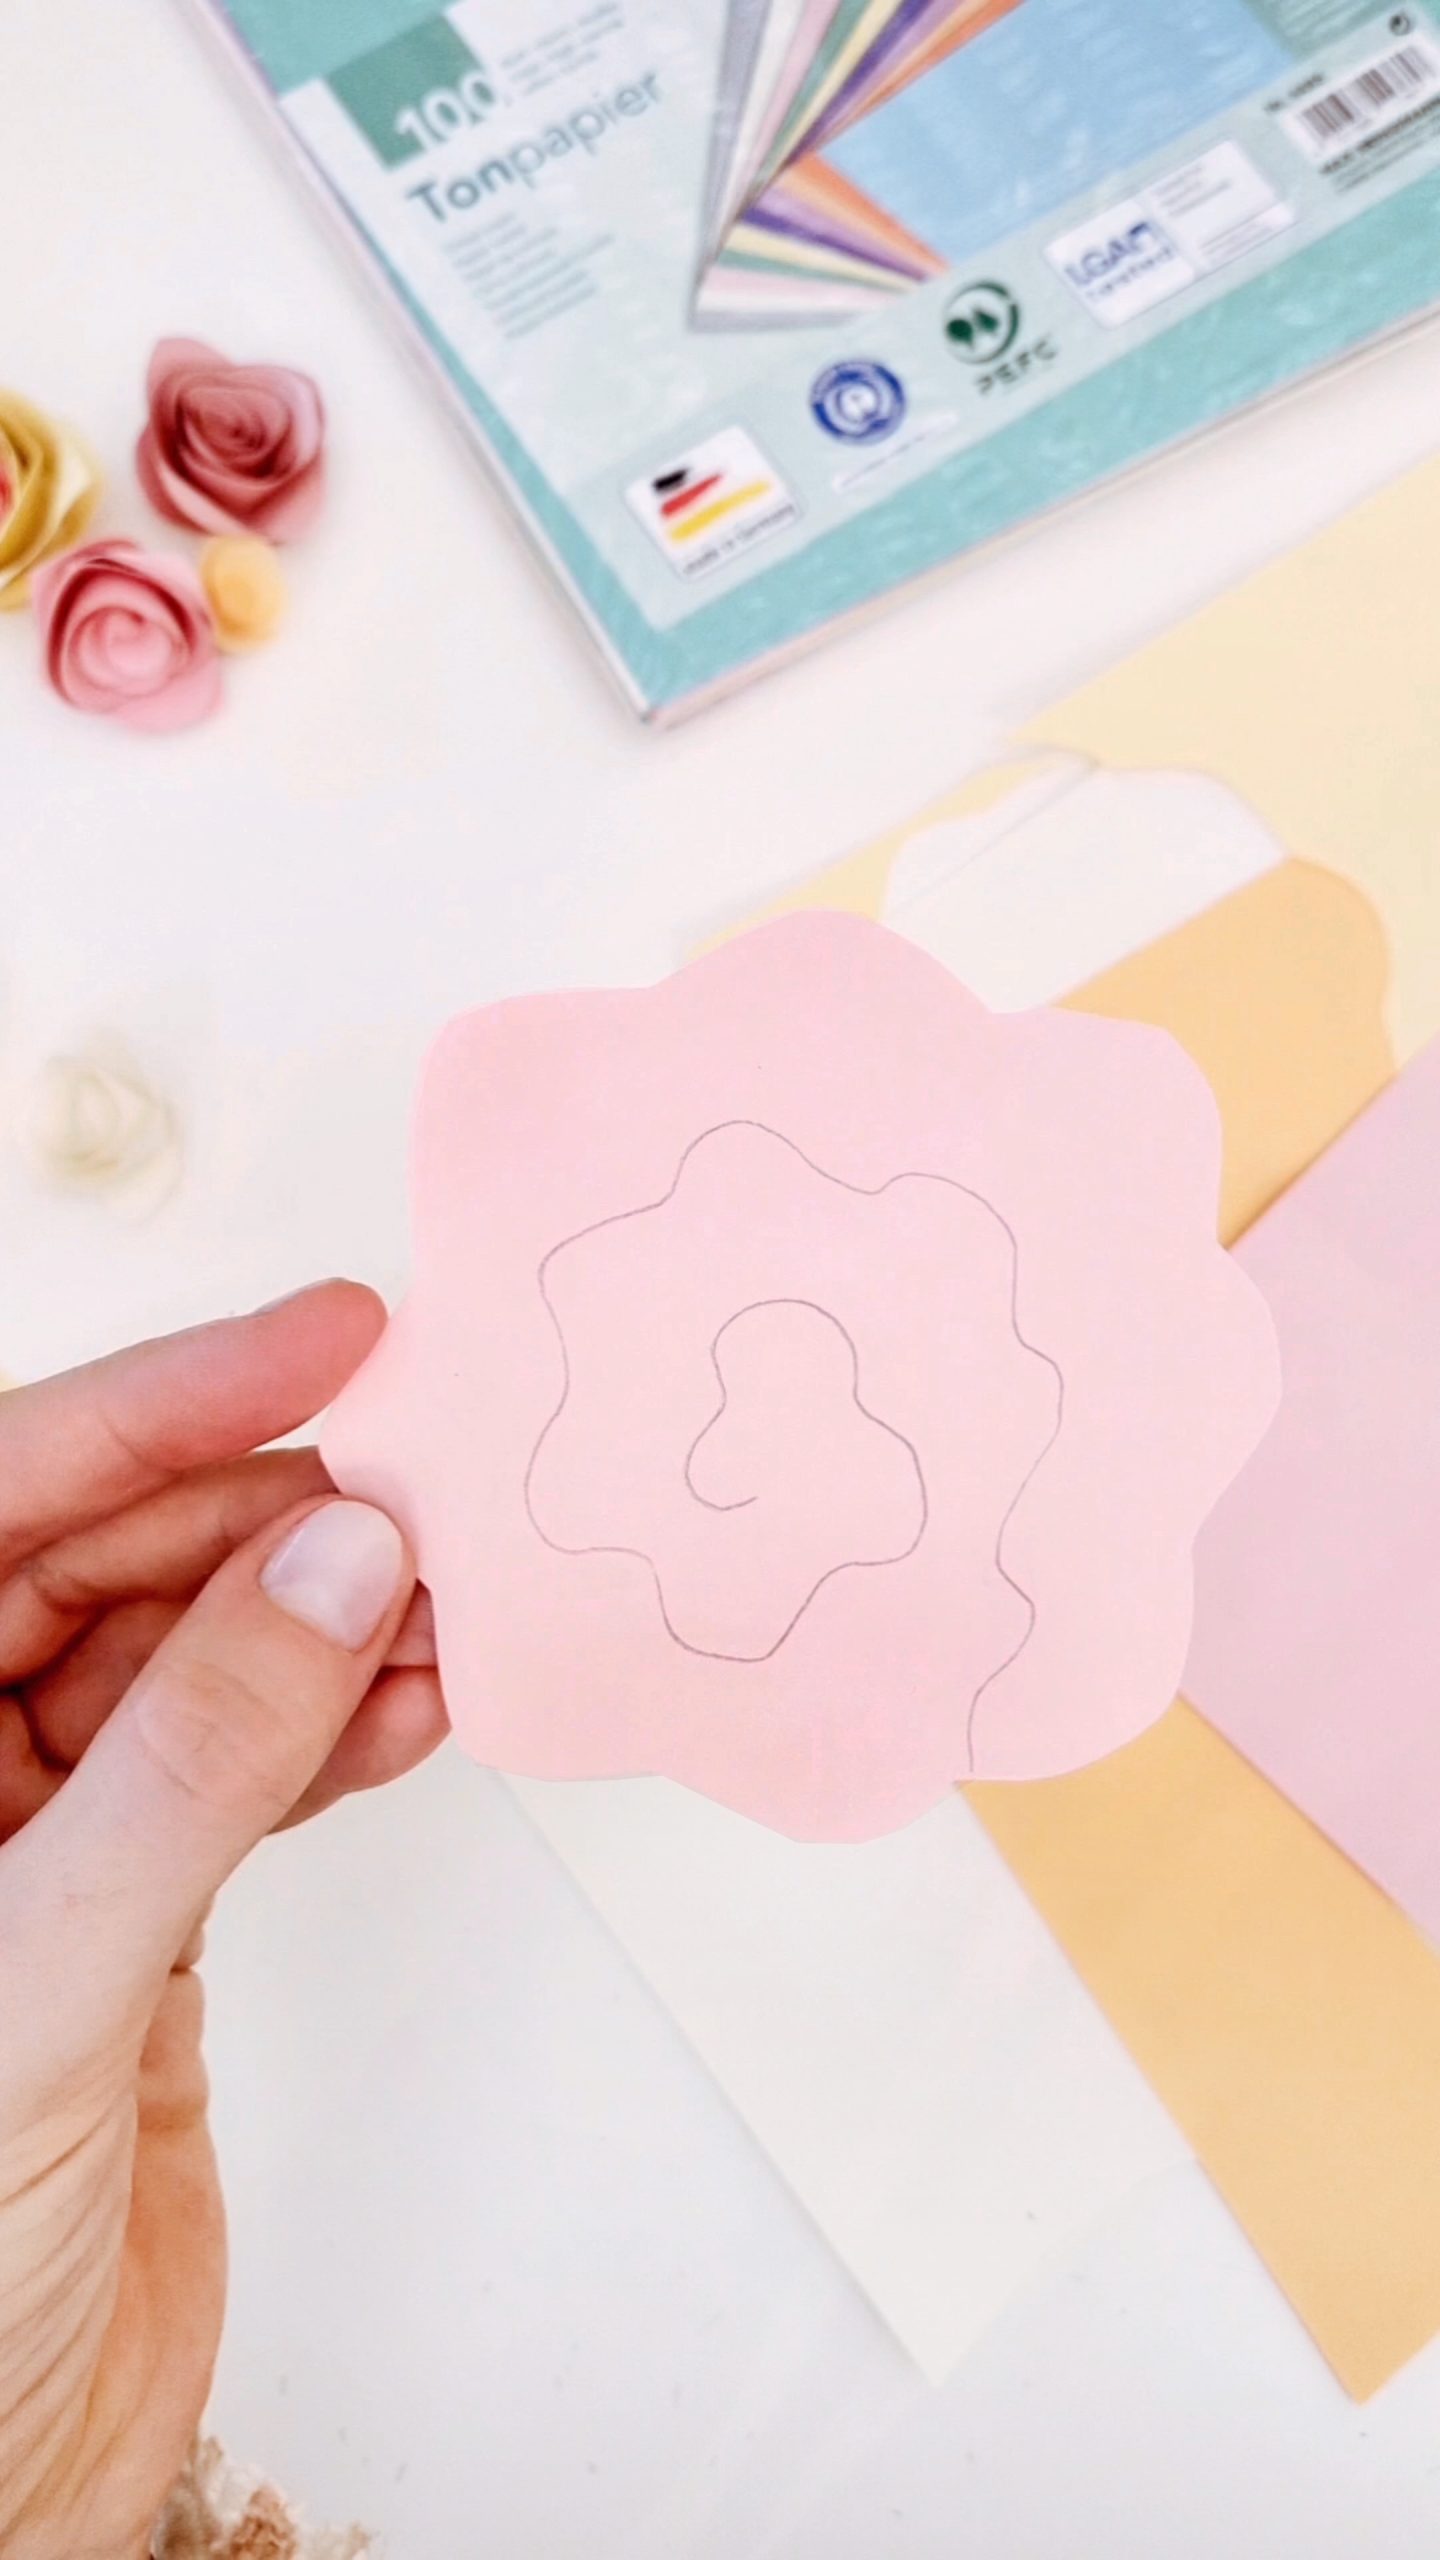
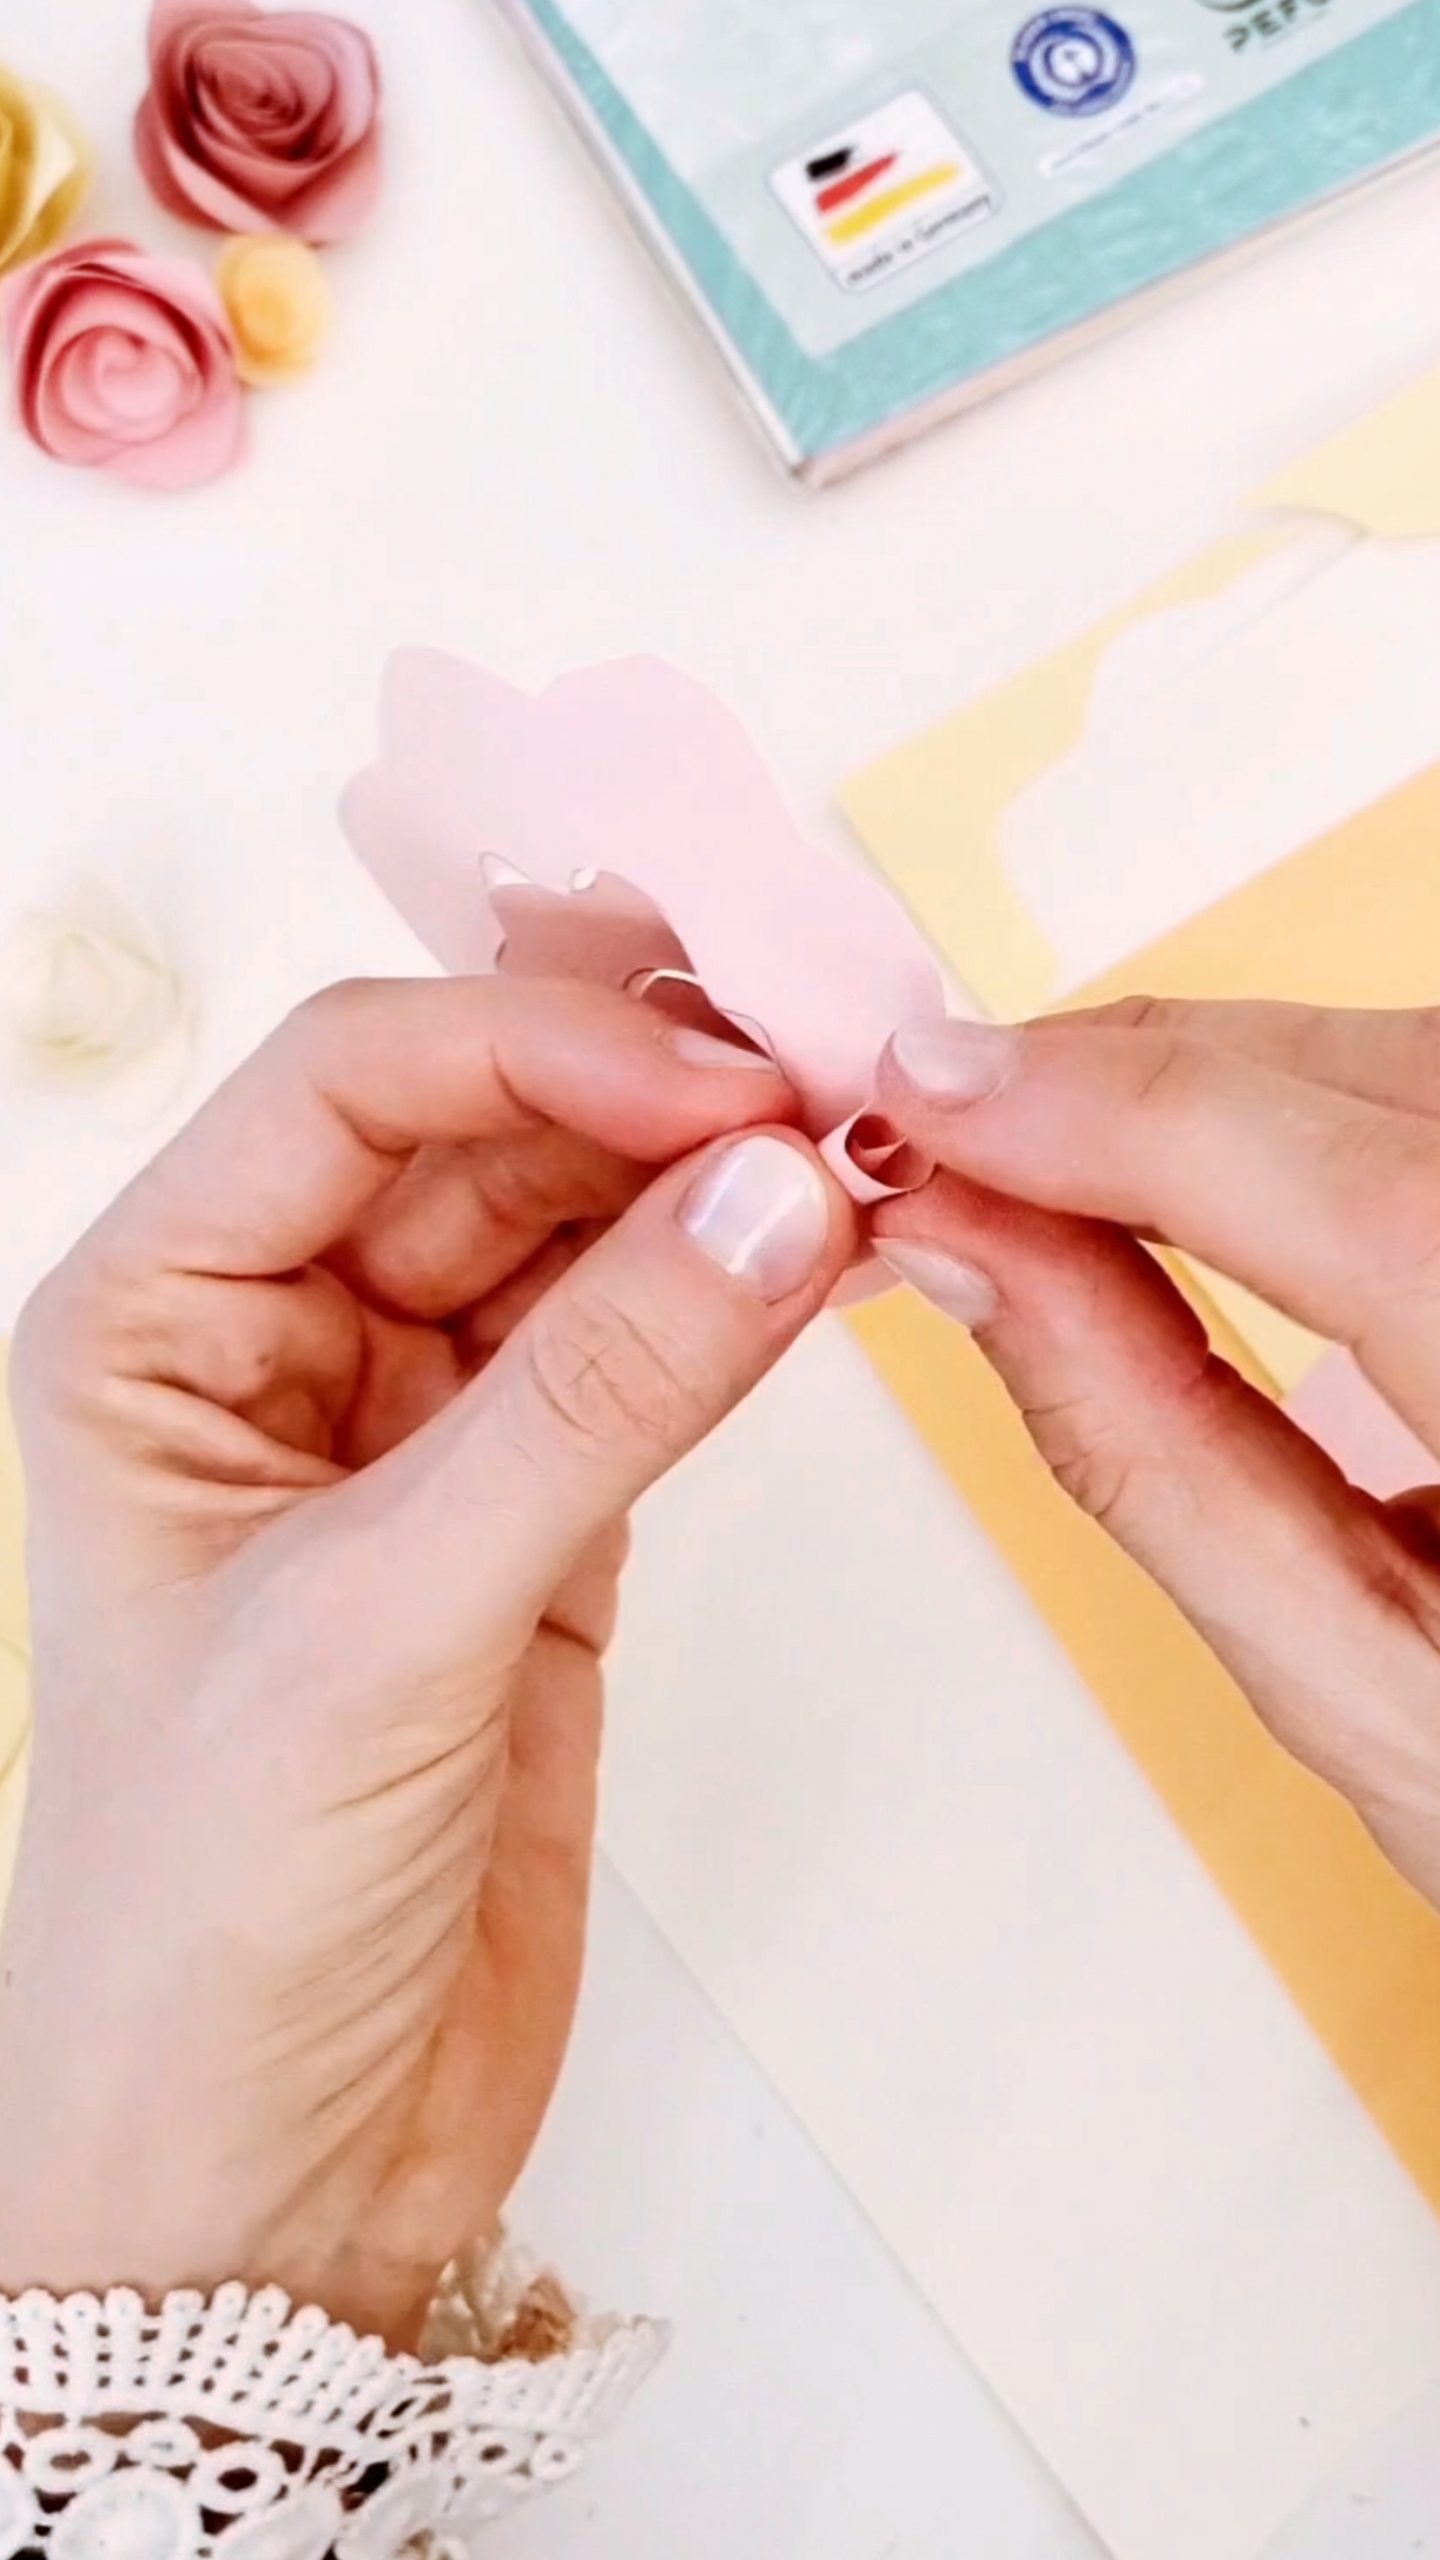
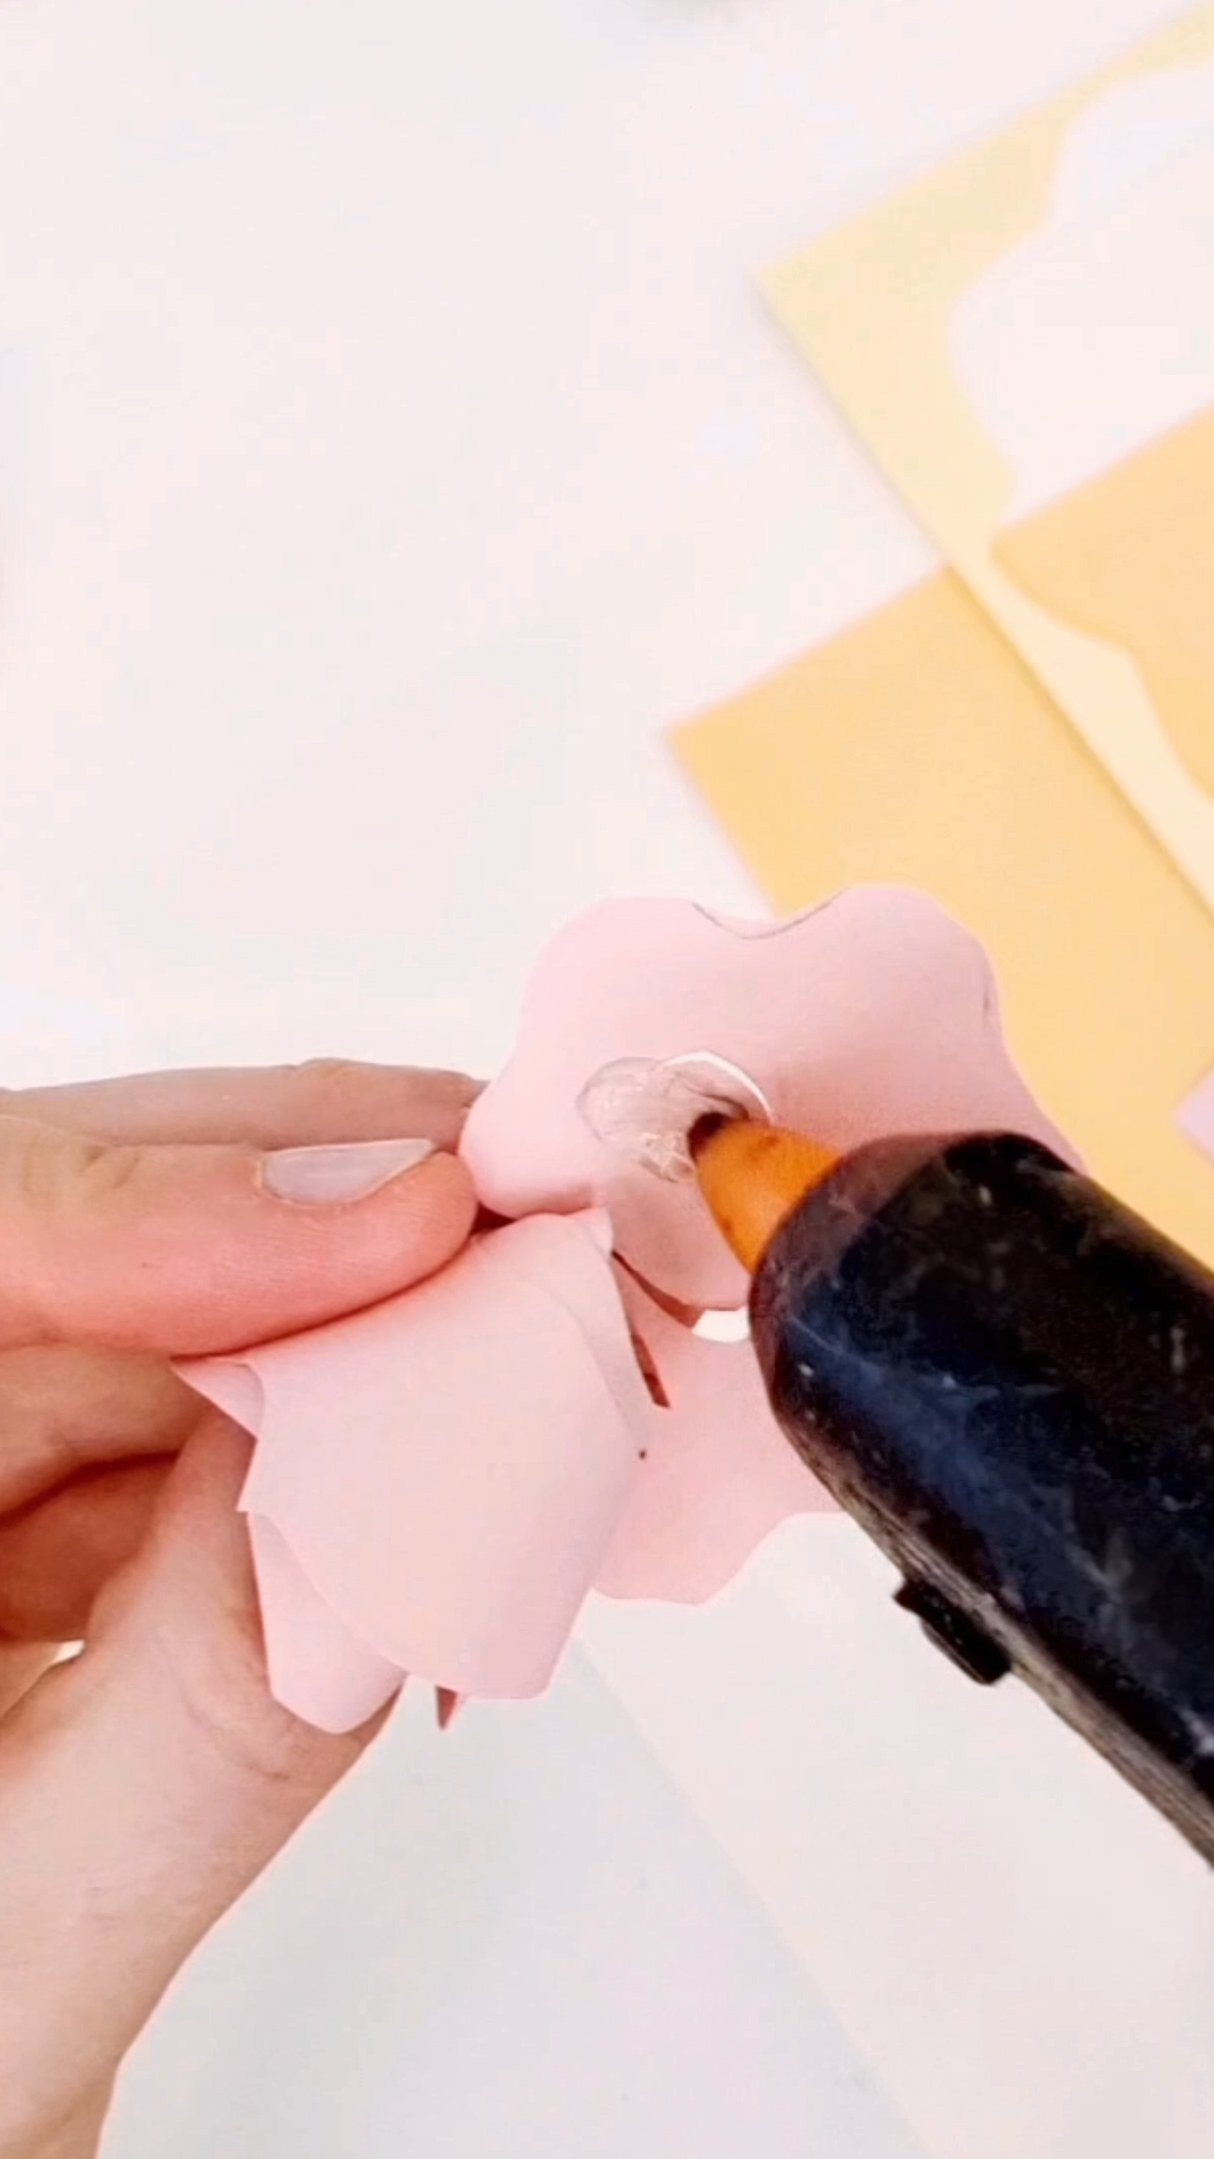
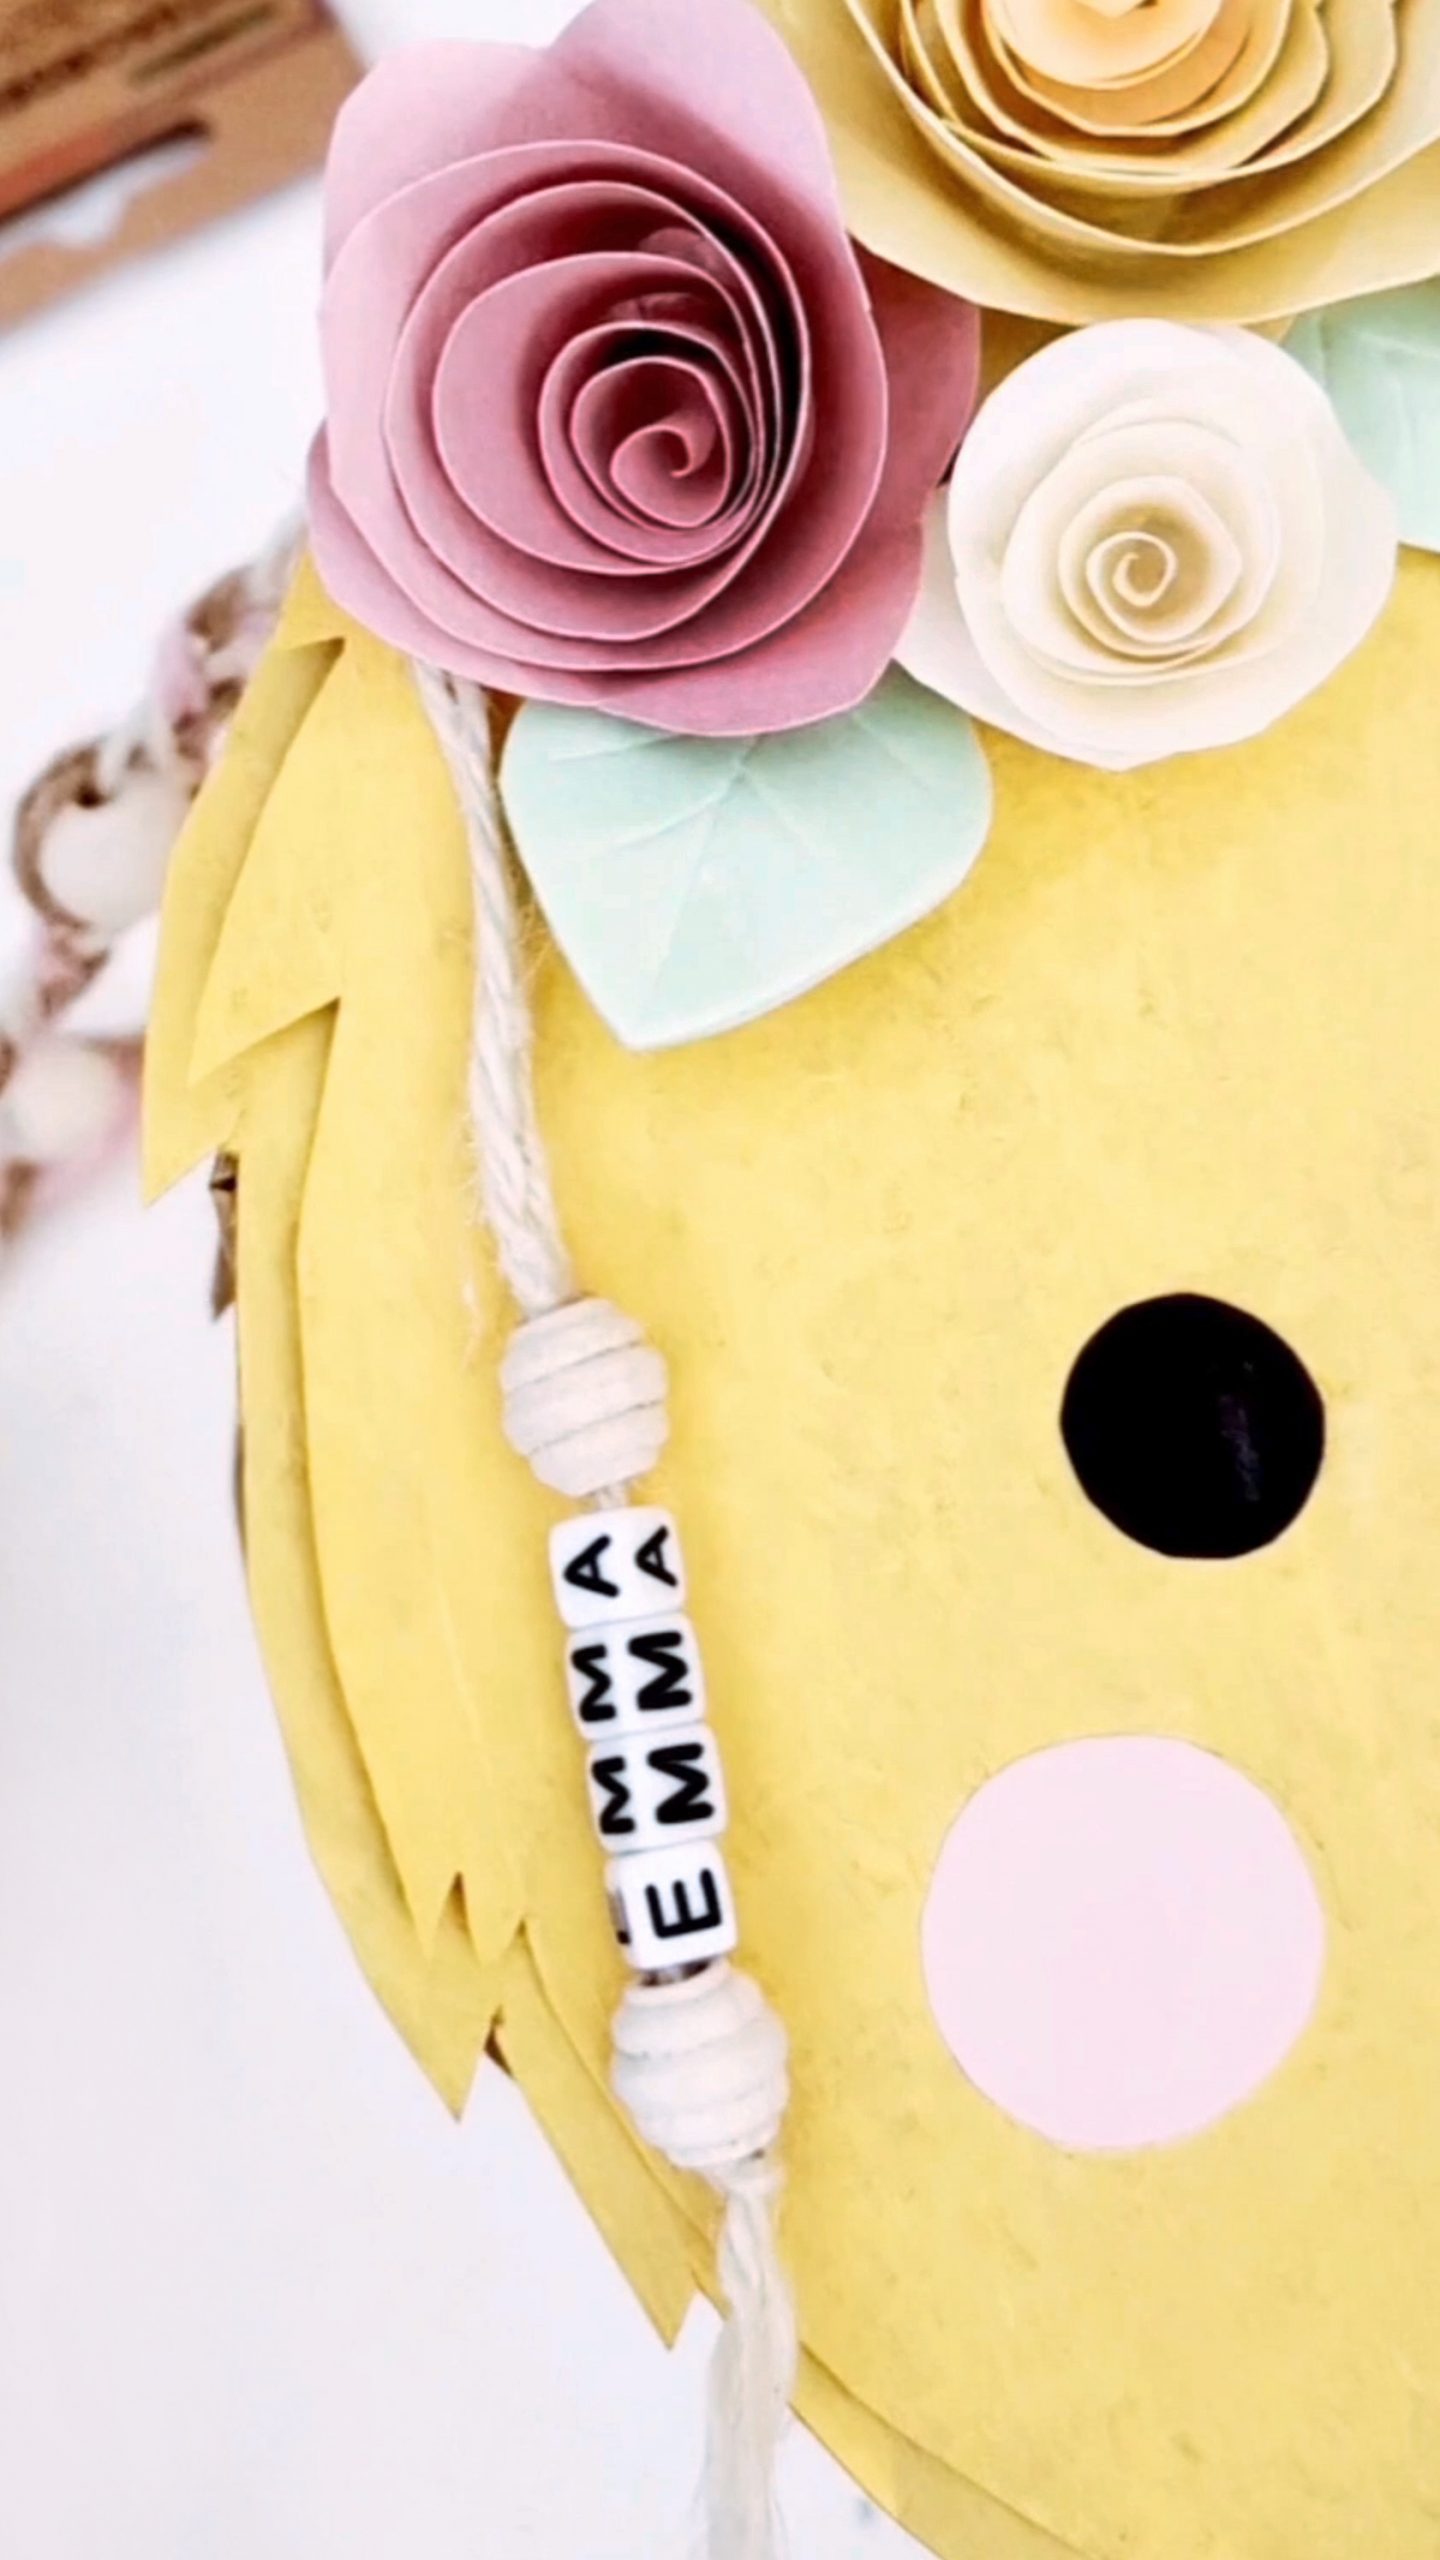
5.) Make paper flowers Cut different sized circles and wavy circular shapes from the construction paper. Now cut each individual shape in a spiral. Then you roll up the paper from the outside in. For larger flowers, glue the paper together with hot glue from time to time. When you have finished rolling up the spiral, apply hot glue to the remaining inner piece and place the flower on the glued surface. Hold the shape briefly until the glue dries. Tip: You can also make the flowers two-tone by loosely rolling up the inside of the paper and then gluing a mini paper flower into the hollow center.
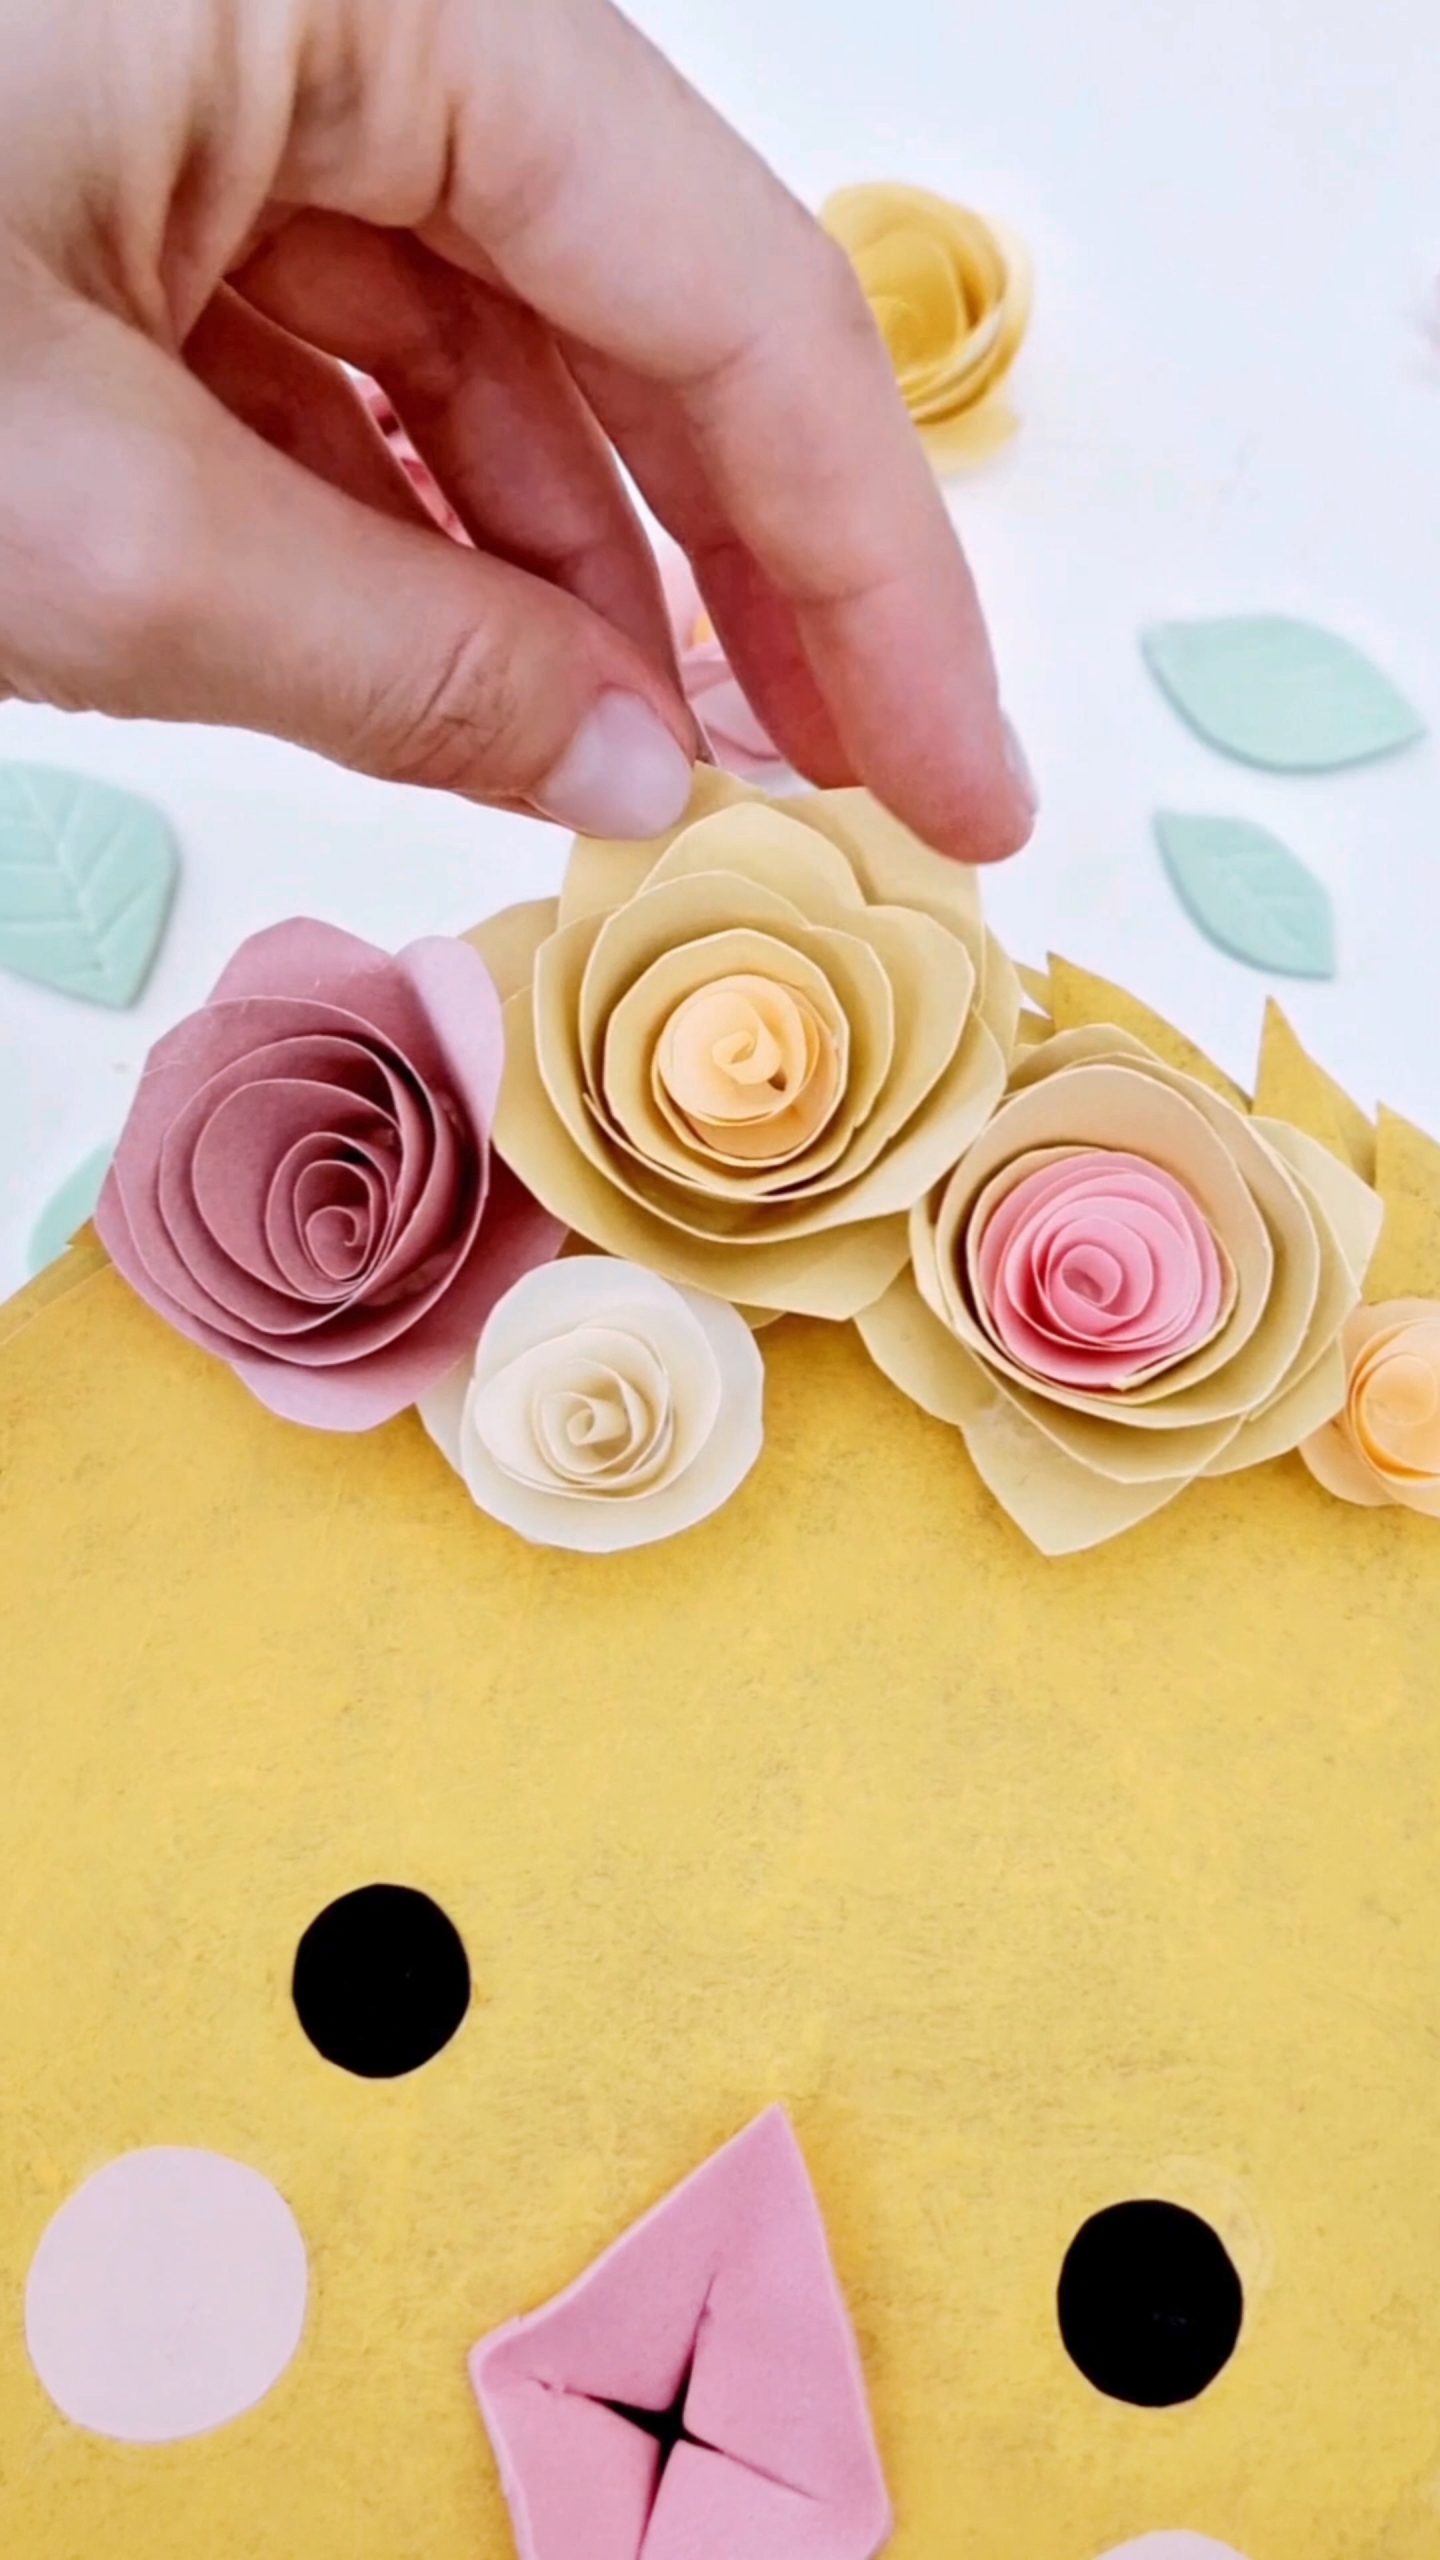
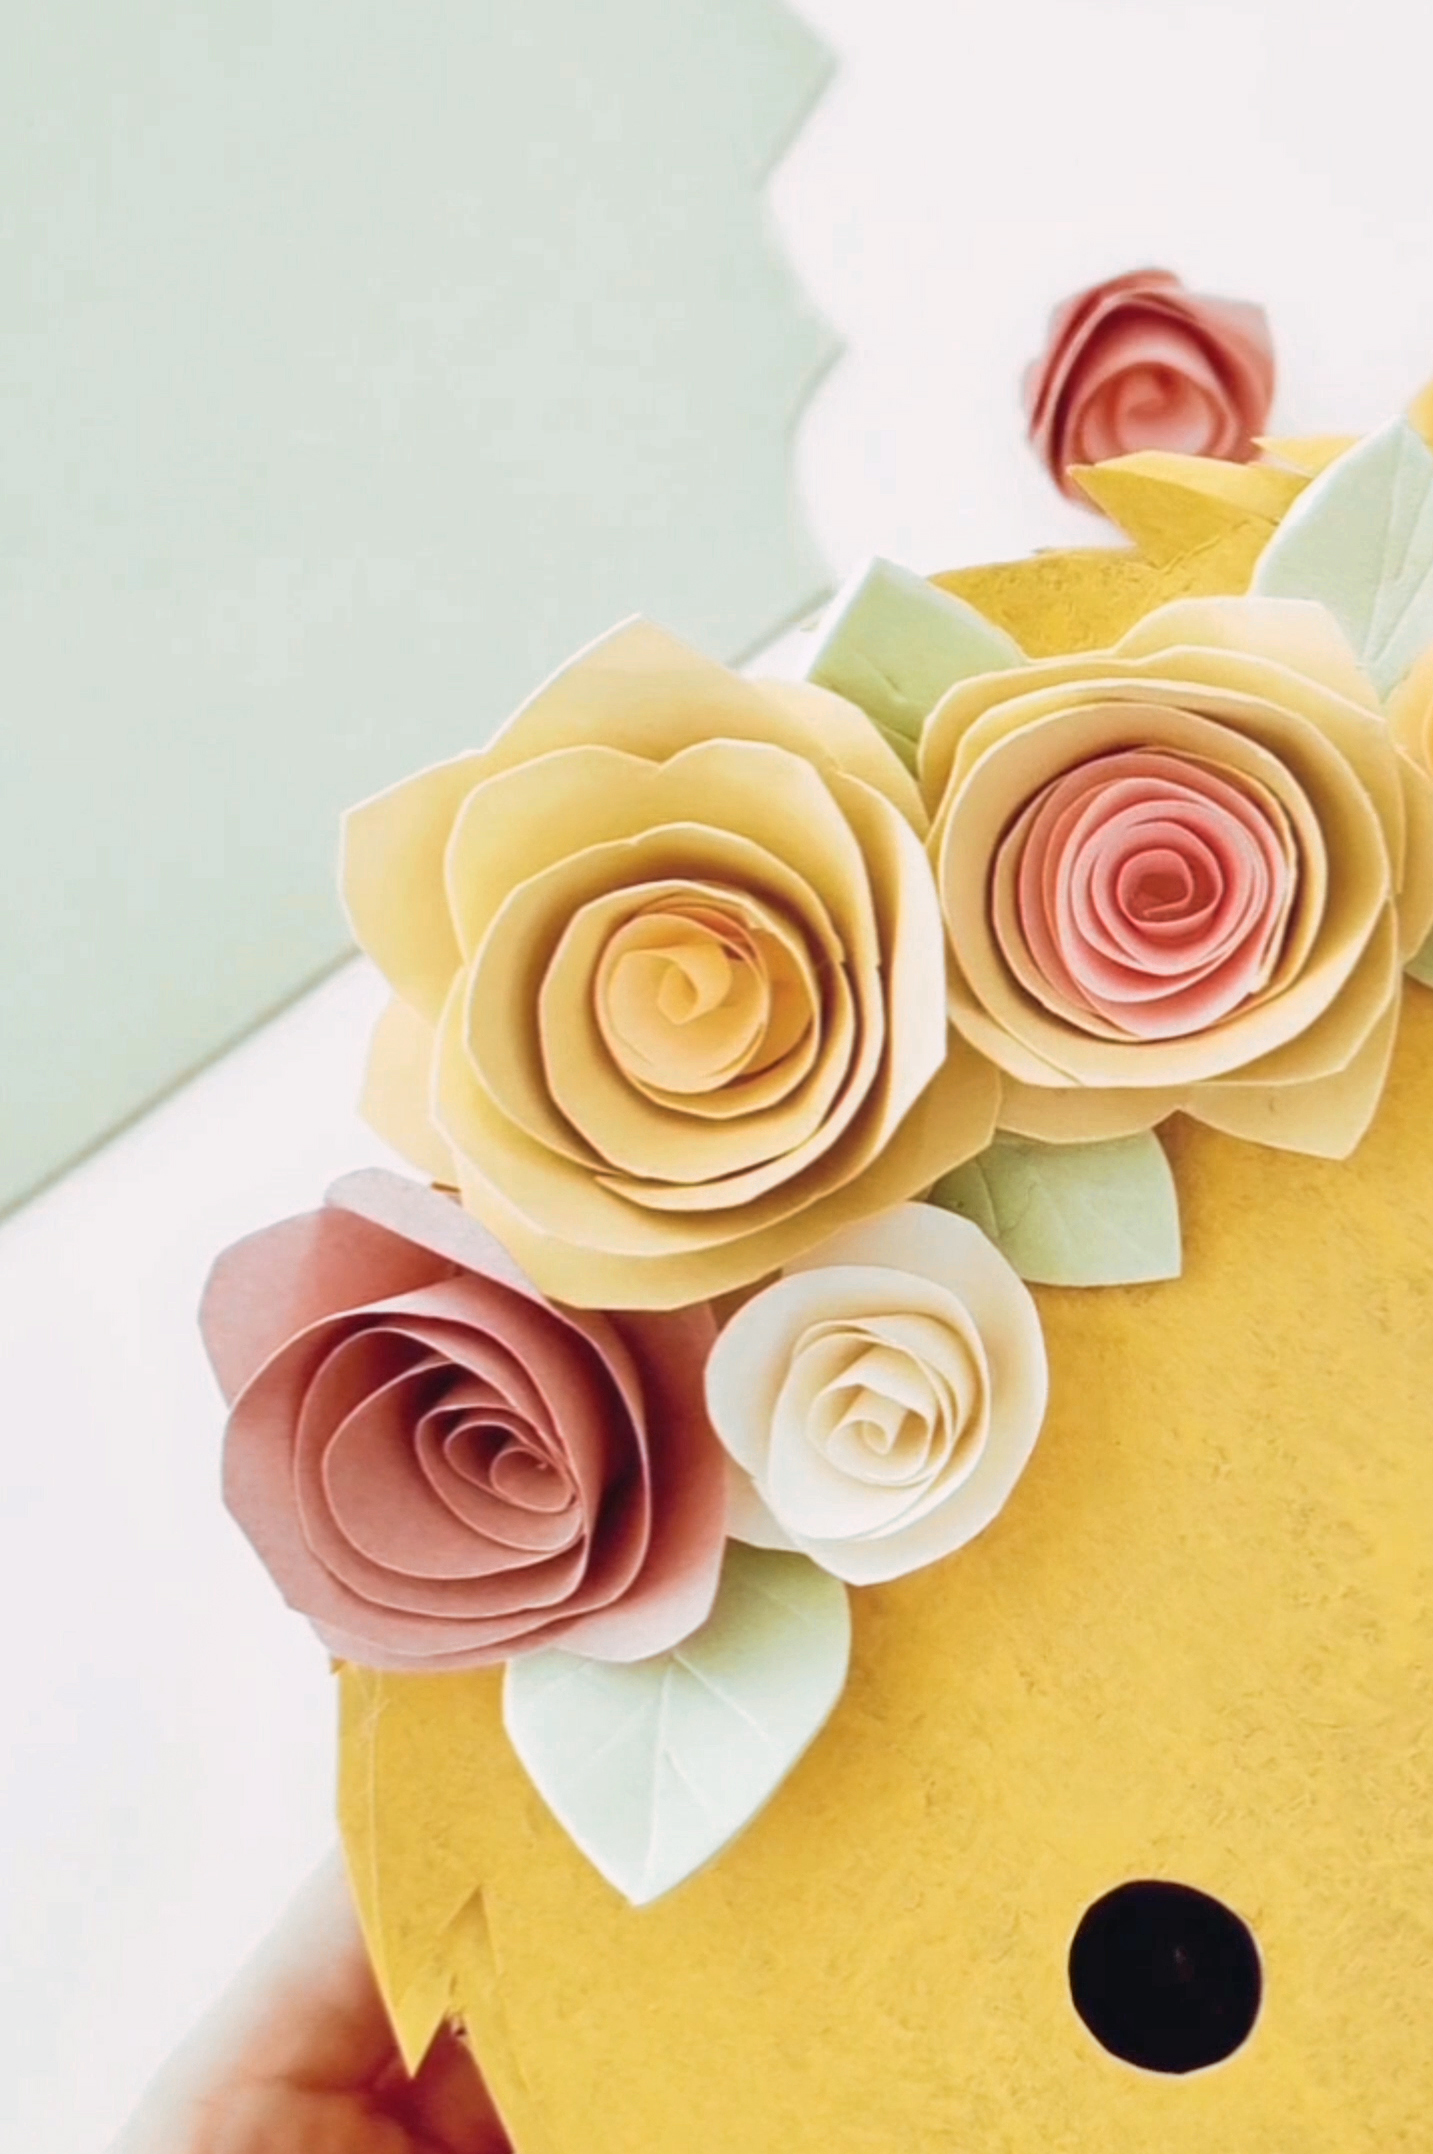
6.) Glue on flowers and leaves Glue the finished paper flowers to the chick’s forehead with hot glue. Cut leaves out of mint-colored foam rubber and glue them in place as well.
6.) Lanyard and name tag Finally, braid a carrying cord and thread in a few wooden beads in between. Also use the letter beads to make a small pendant, which you then attach to the side of the chick.

Ready is the sweet DIY Easter basket in the shape of a chick that your kids can even feed with small treats 😉
Have fun tinkering,
Your Sammy
Source: www.sammydemmy.de