

(Advertising/unsolicited – I have used Miss Pompadour products, but this is not a partnership, all self-purchased!)
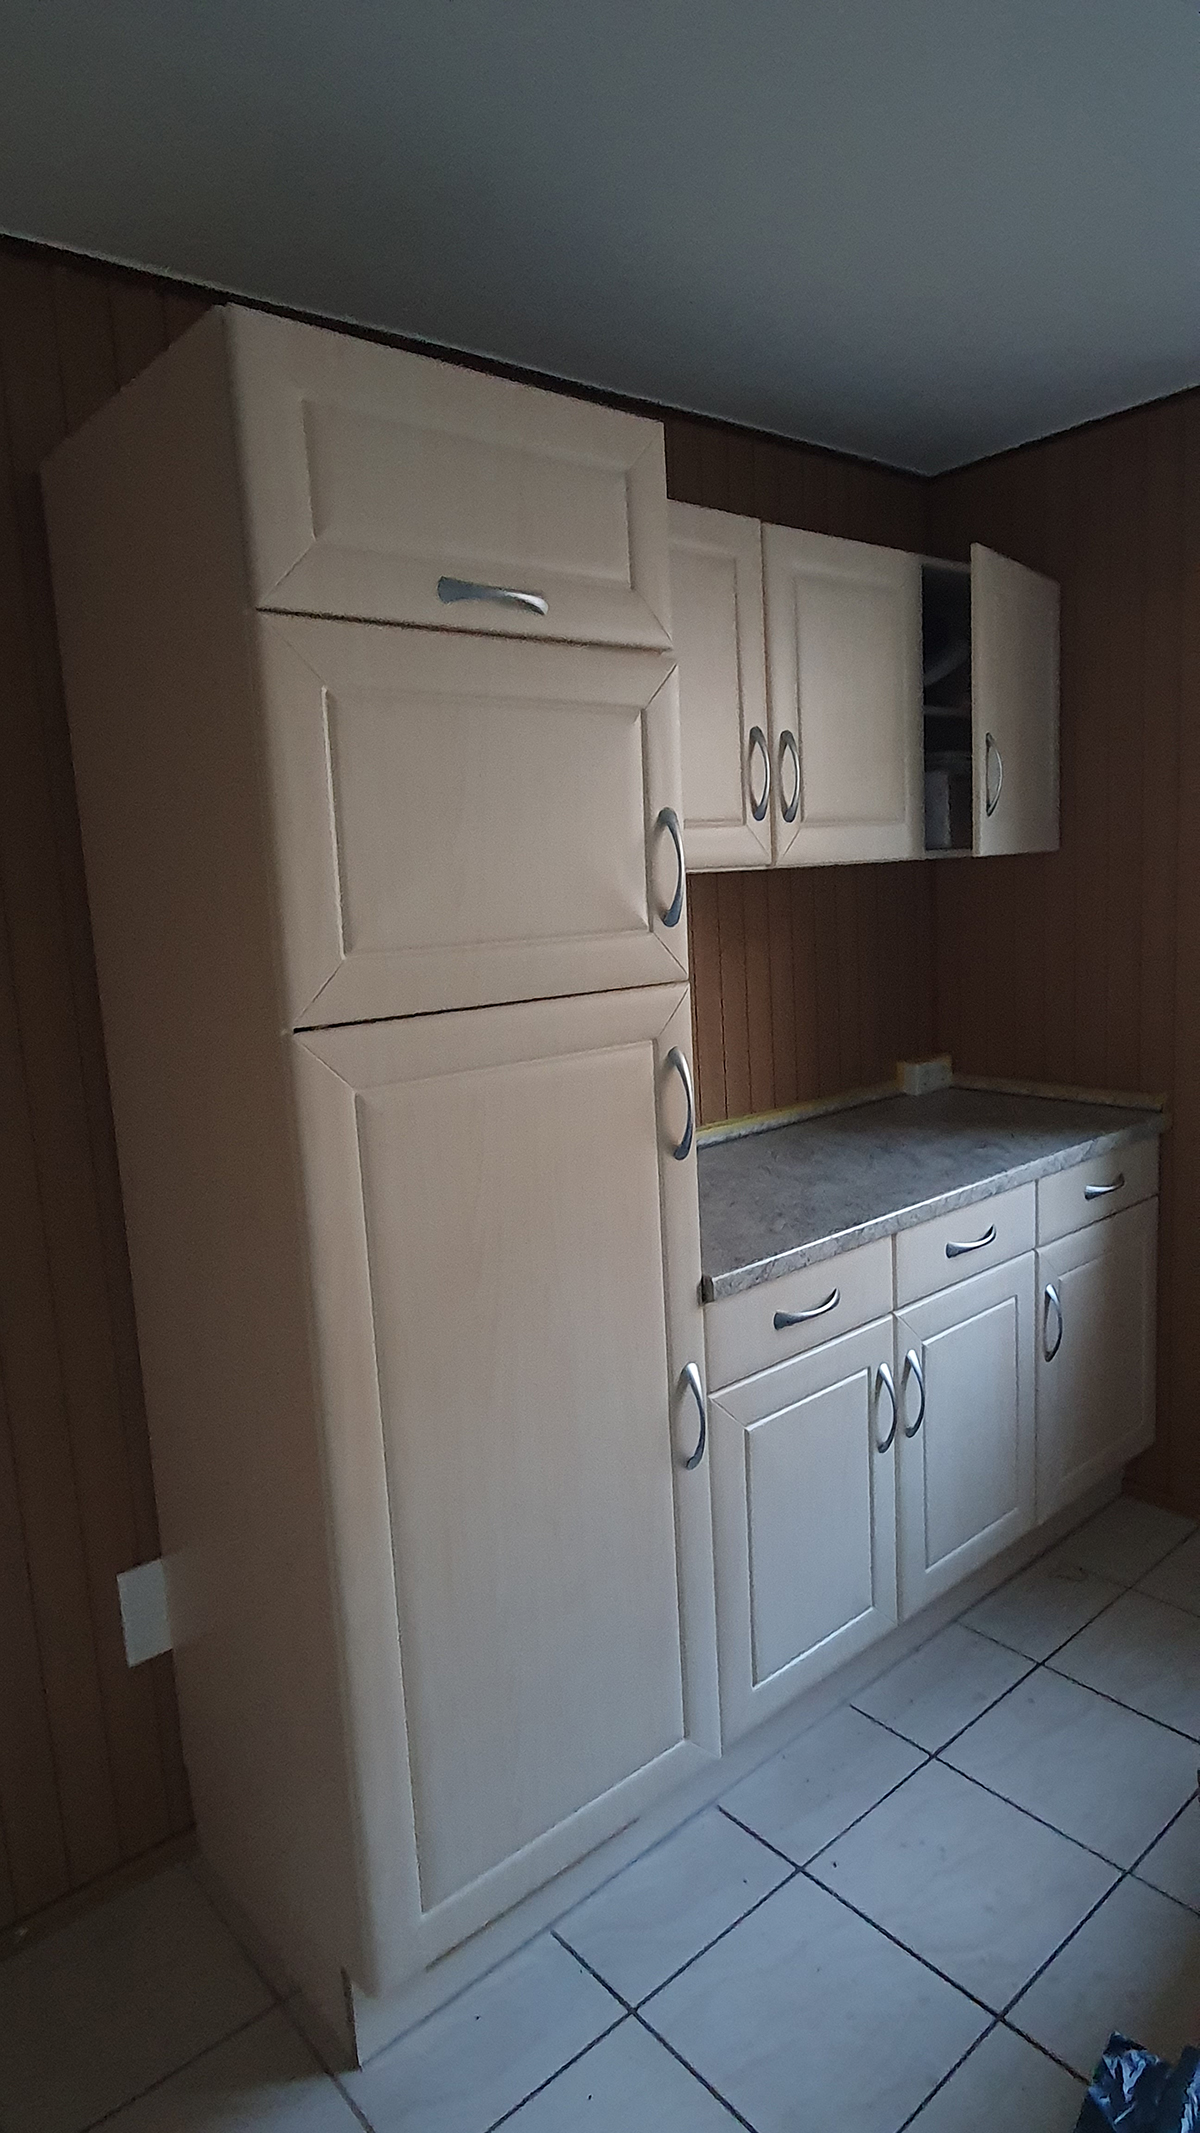
Today I show you mine big kitchen makeover! I moved – and there was already a fitted kitchen here that had a bit of the charm of days gone by: old-fashioned and much too dark for me. I always want my surroundings to feel like me – and I want to feel comfortable.
Of course, there’s always the thought of tearing out the kitchen and (having) put a completely new one in? Or see if you can still get something out of the existing kitchen and renovate it? It wasn’t just about the kitchen itself, but also the unsightly beige tiles and brown wooden wall. Luckily, I have a pretty good imagination, so I usually don’t see how it is, but what you could make of it. And you could still get a lot out of it!
This is my biggest “make new from old” project so far – and I haven’t had any experience with painting furniture with chalk paint without sanding. I had already done smaller projects with chalk paint, but I hadn’t painted furniture fronts before.
I really wanted to try that. So I decided to keep the kitchen in and give the whole room a makeover. But now the “before” photos come first – I love before and after! Get ready for a really good before and after comparison.
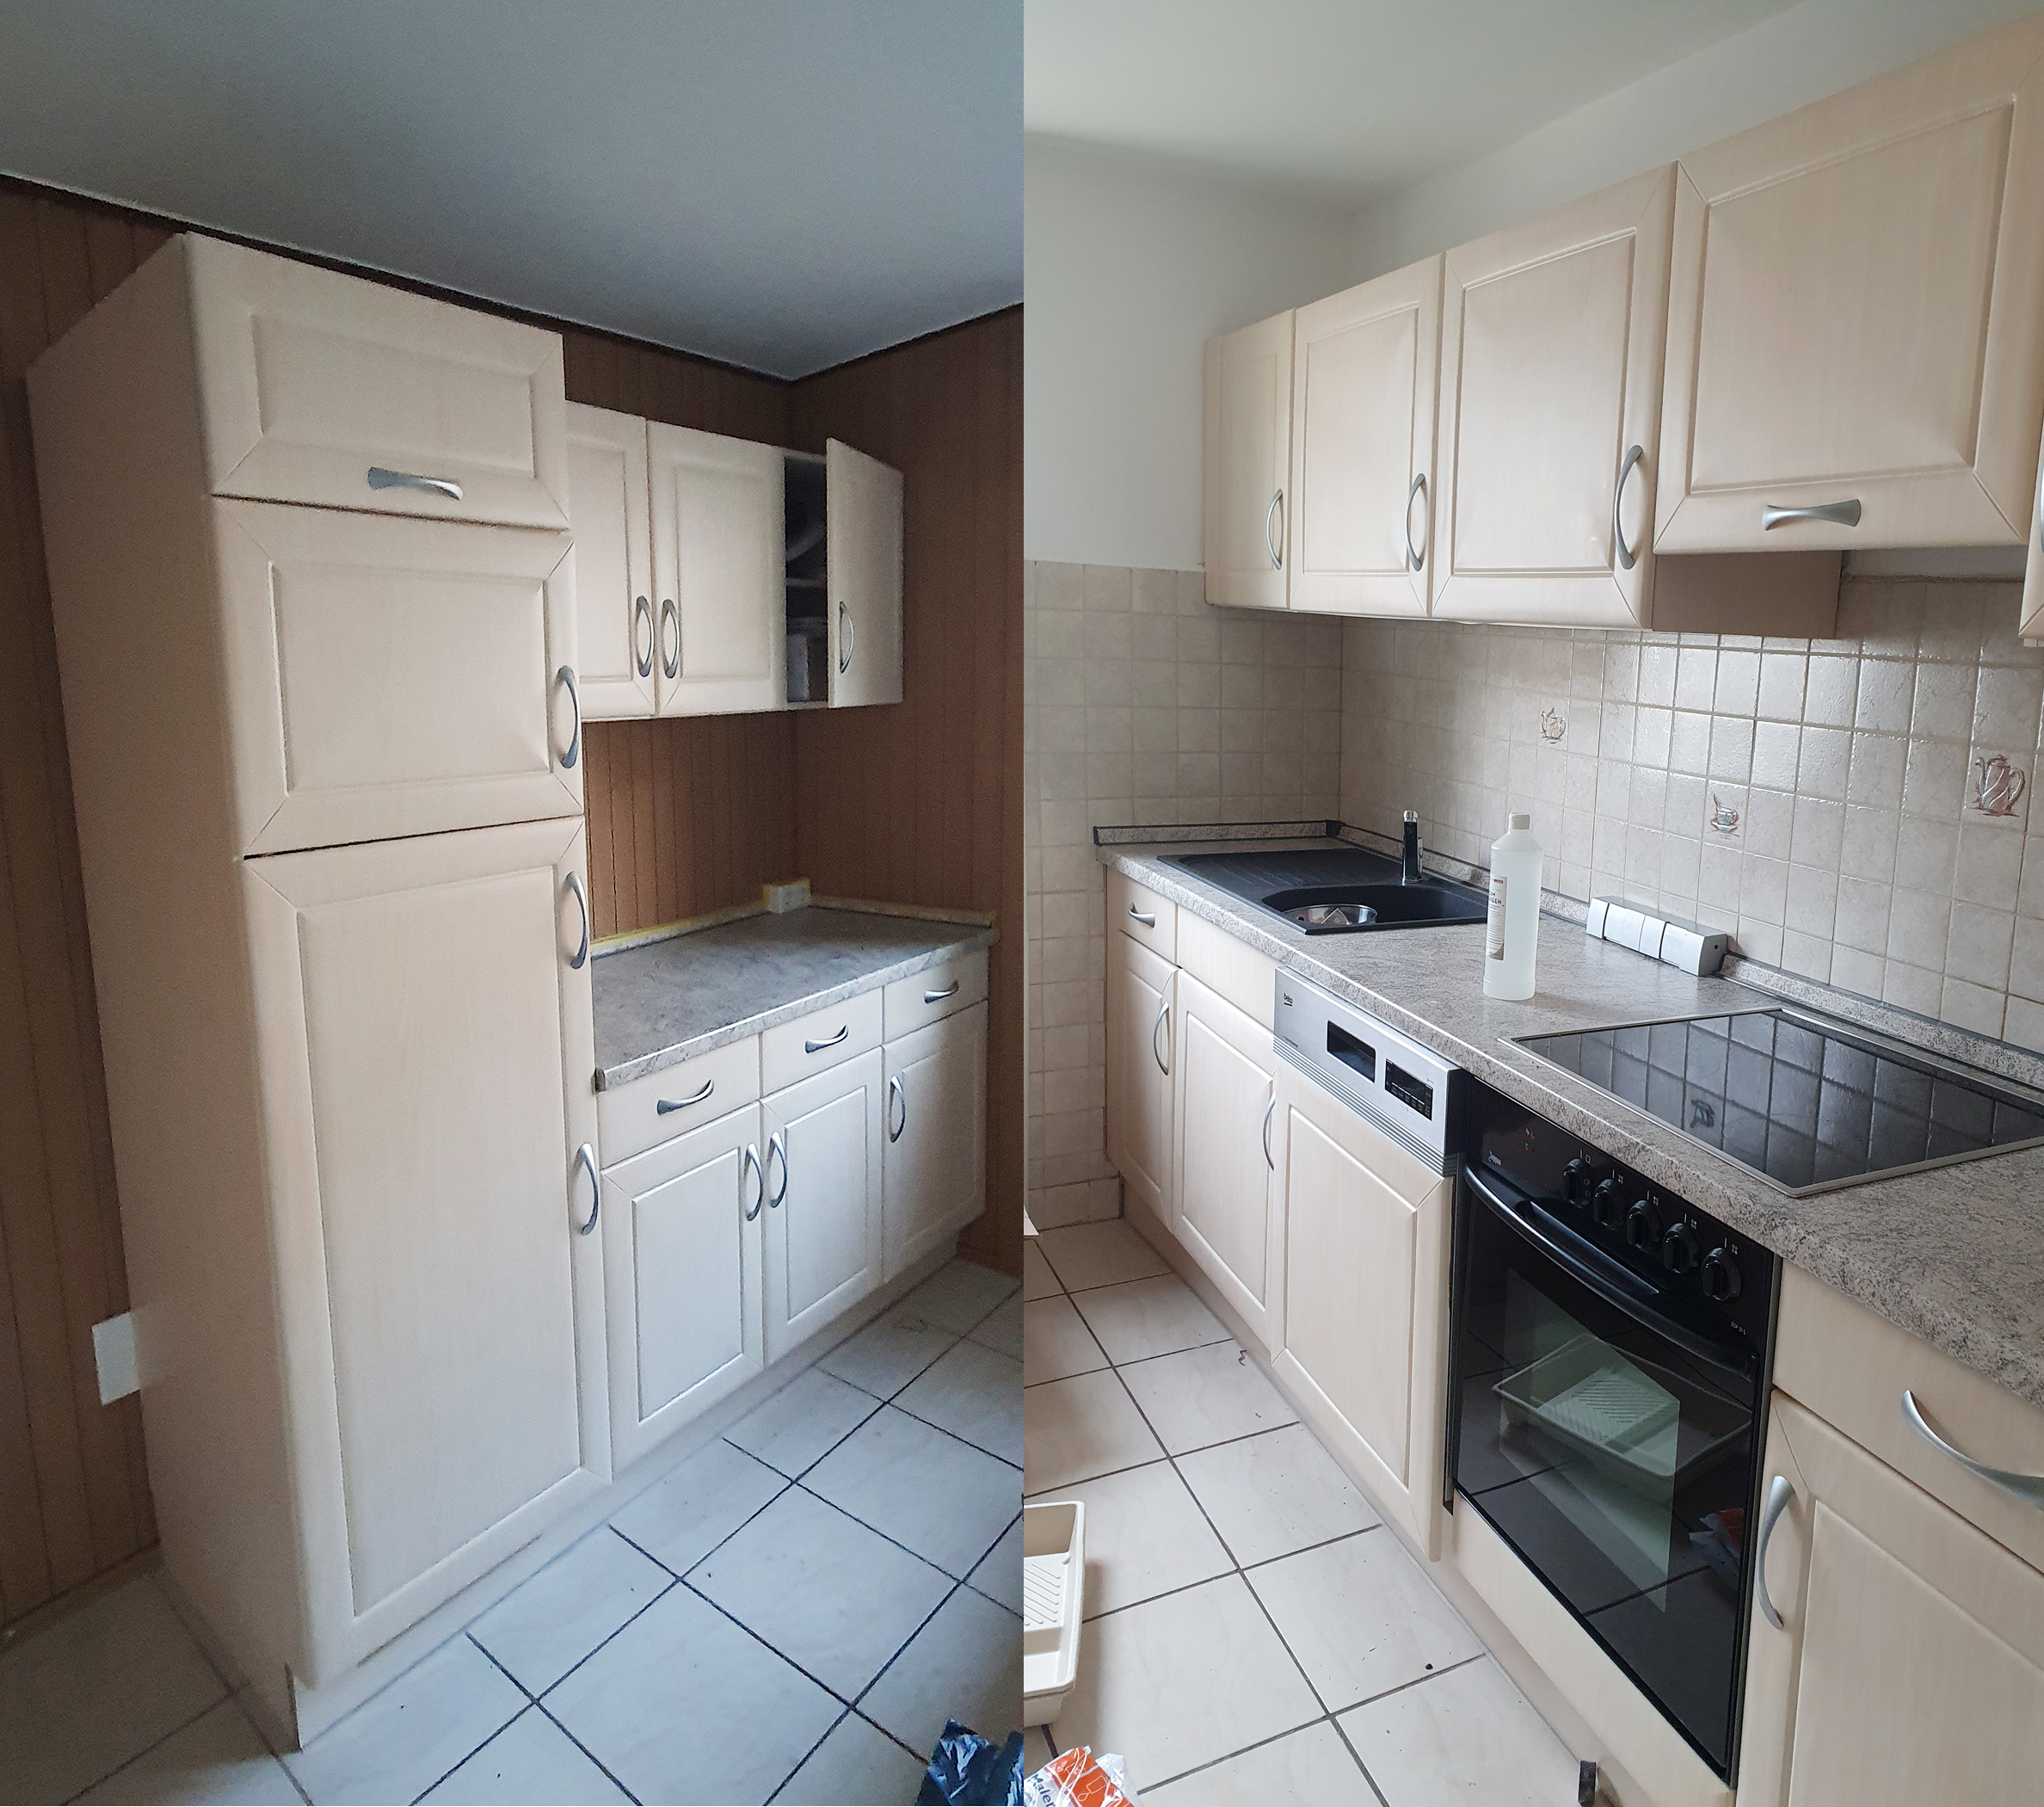
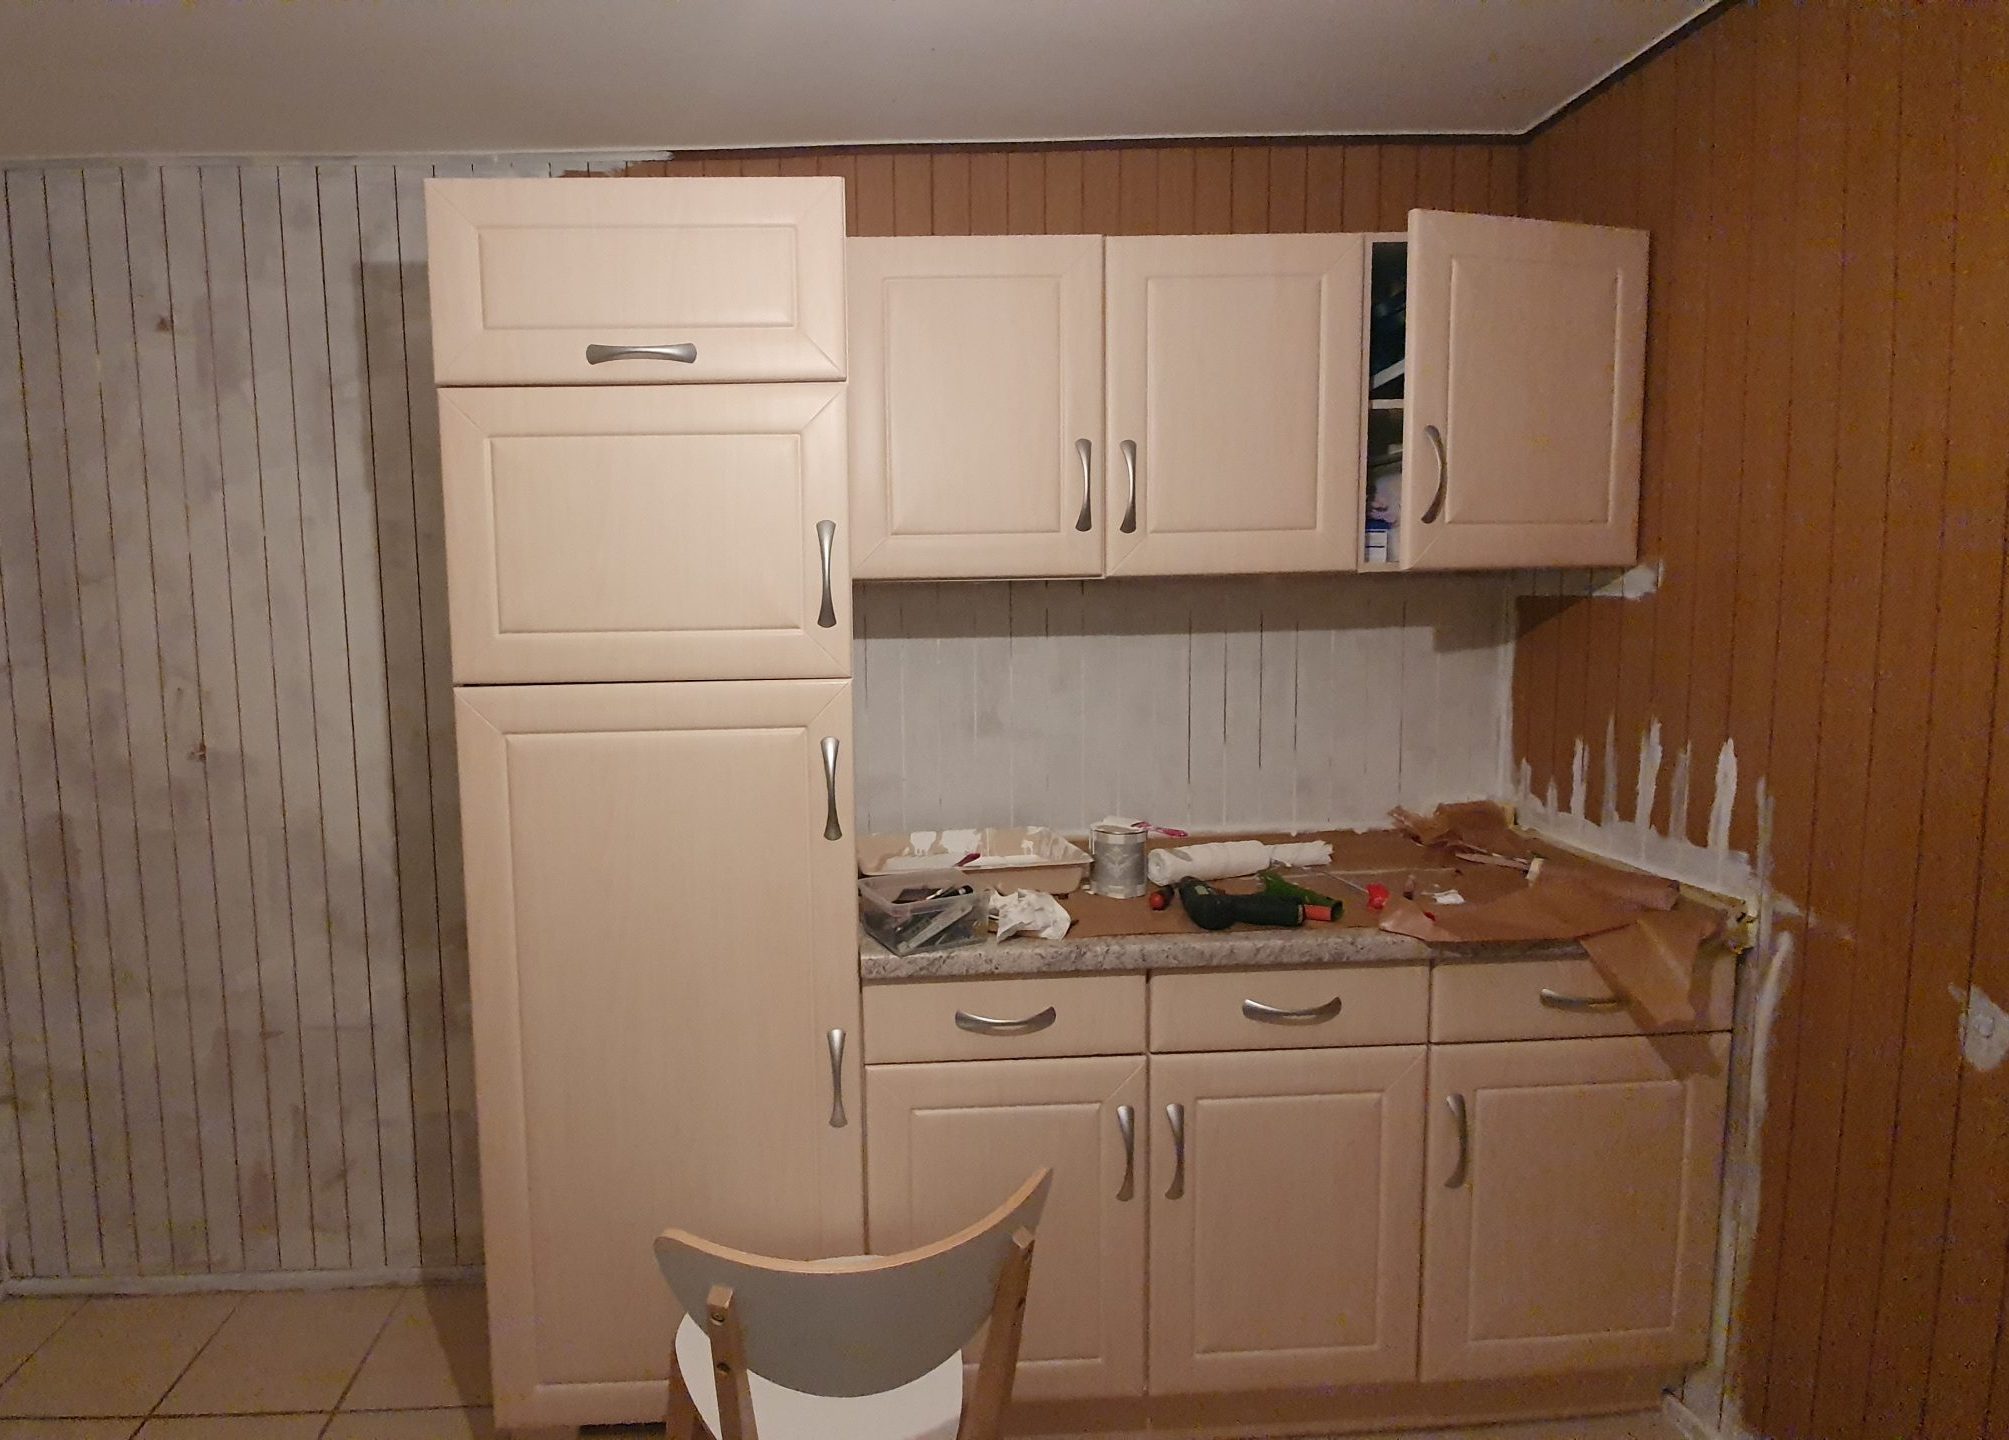
These are the left and right sides of the kitchen before I was done with that. The room is square – oblong, but my lens just can’t get a complete picture together.
You can see my challenges: the brown wooden wall on the left, the tiles on the right.
The projects I had in mind:
- Paint wooden wall white
- Paint the backsplash white
- Paint kitchen fronts in a nice color
- Replace kitchen handles
In fact, I thought about the tiles the most, because you would like to be able to wipe them off. I pondered that for a long time. Luckily, there is a special tile paint that is suitable for painting tiled backsplashes. An alternative would have been tile foil. However, the tiles have a three-dimensional cup pattern in 3 places, which would not have worked well with a foil.
So I just asked on Instagram what tile color I would recommend. The answer that came up the most by far was the tile color of “Miss Pompadour”. (Advertising unsolicited) The Insta channel is also super inspiring, by the way, there are so many great before and after projects. That really motivated me to tackle my kitchen project.
The tile paint can also be wiped off when dry. Very convenient!
Miss Pompadour not only has tile paint, but also a whole range of other paints, including chalk paints, which I had in mind for the fronts. Chalk paint means: Painting the kitchen without sanding! I really didn’t want to sand down the fronts beforehand. And you can simply brush over the (clean) fronts with chalk paint. That’s going really well.
Important NOTE: If you live in a rented apartment or house for rent, you should clarify this with the landlord. My landlady agreed, since the kitchen is supposed to come out at some point anyway. So: Definitely clarify beforehand!
1. Paint tiles white
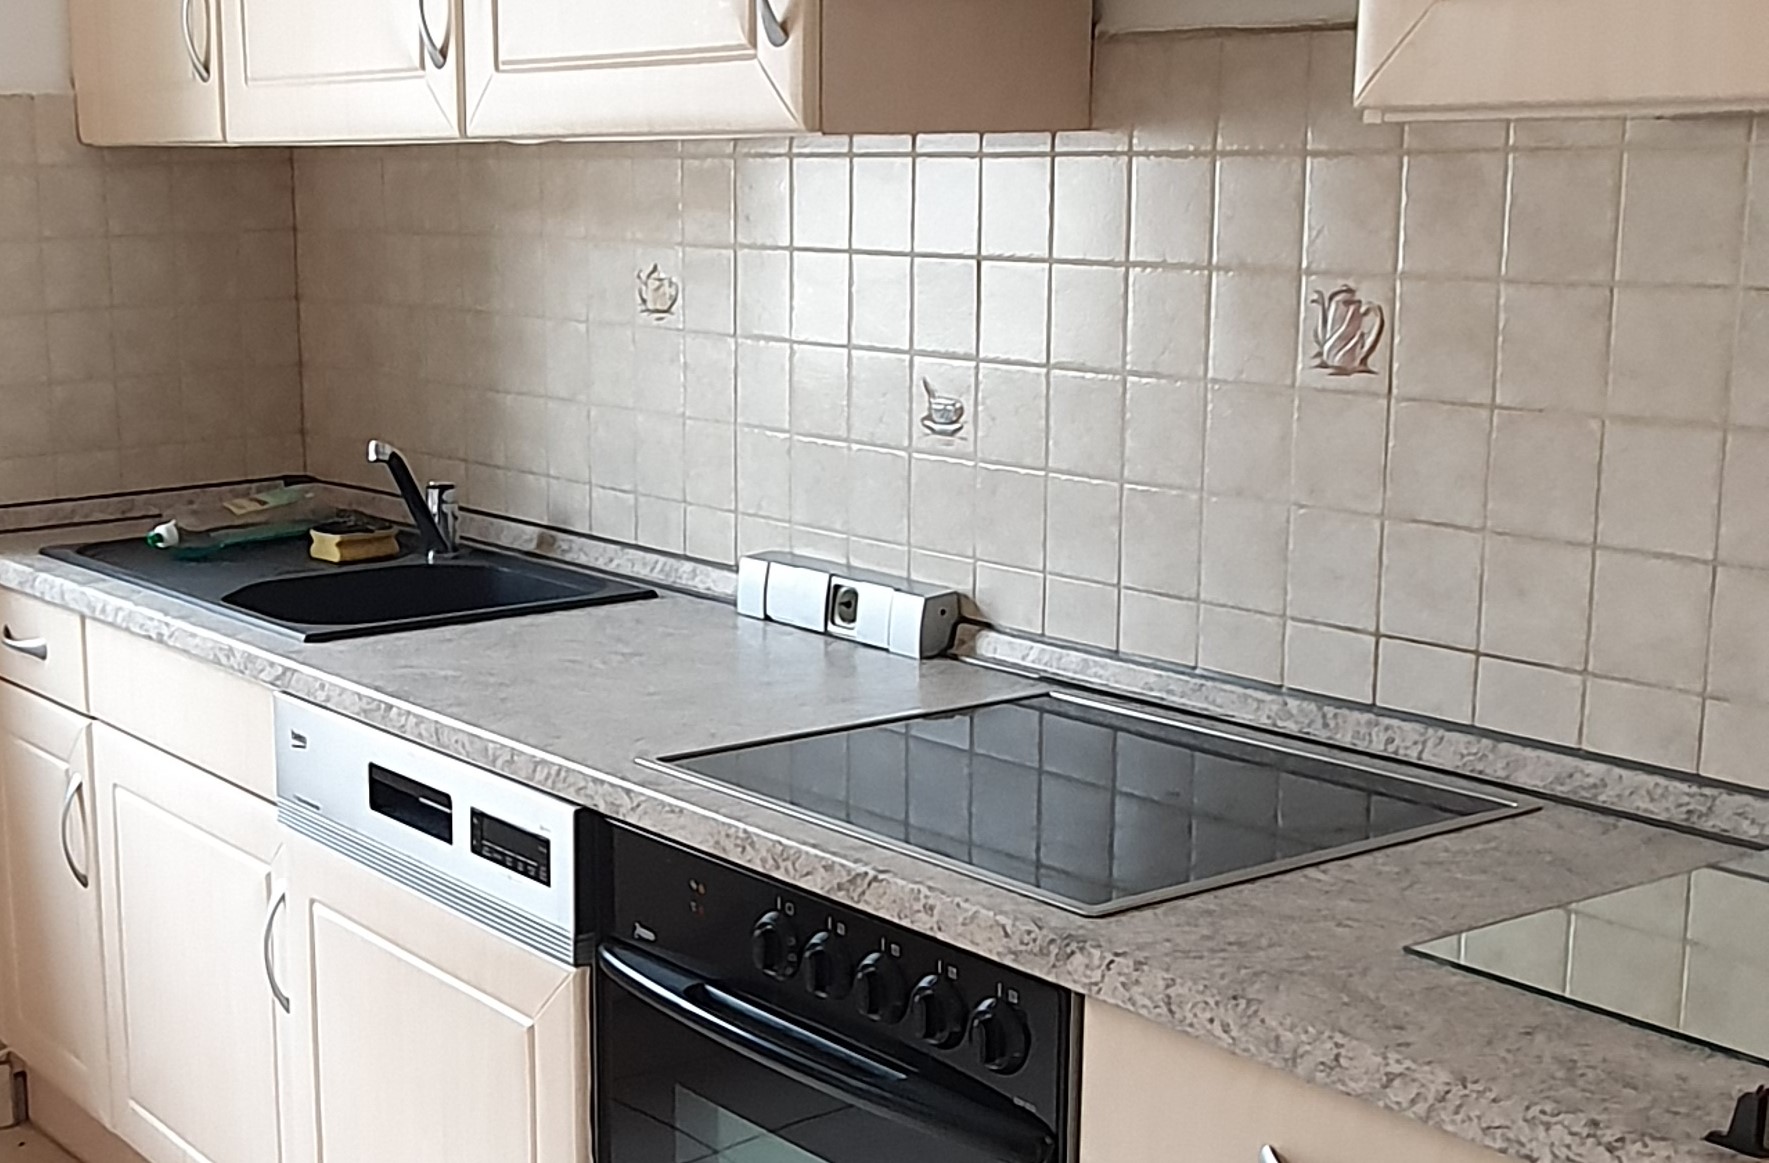
Here you can see the tiles again very nicely, as they looked before:
After some research I then have the following products for the tiles ordered:
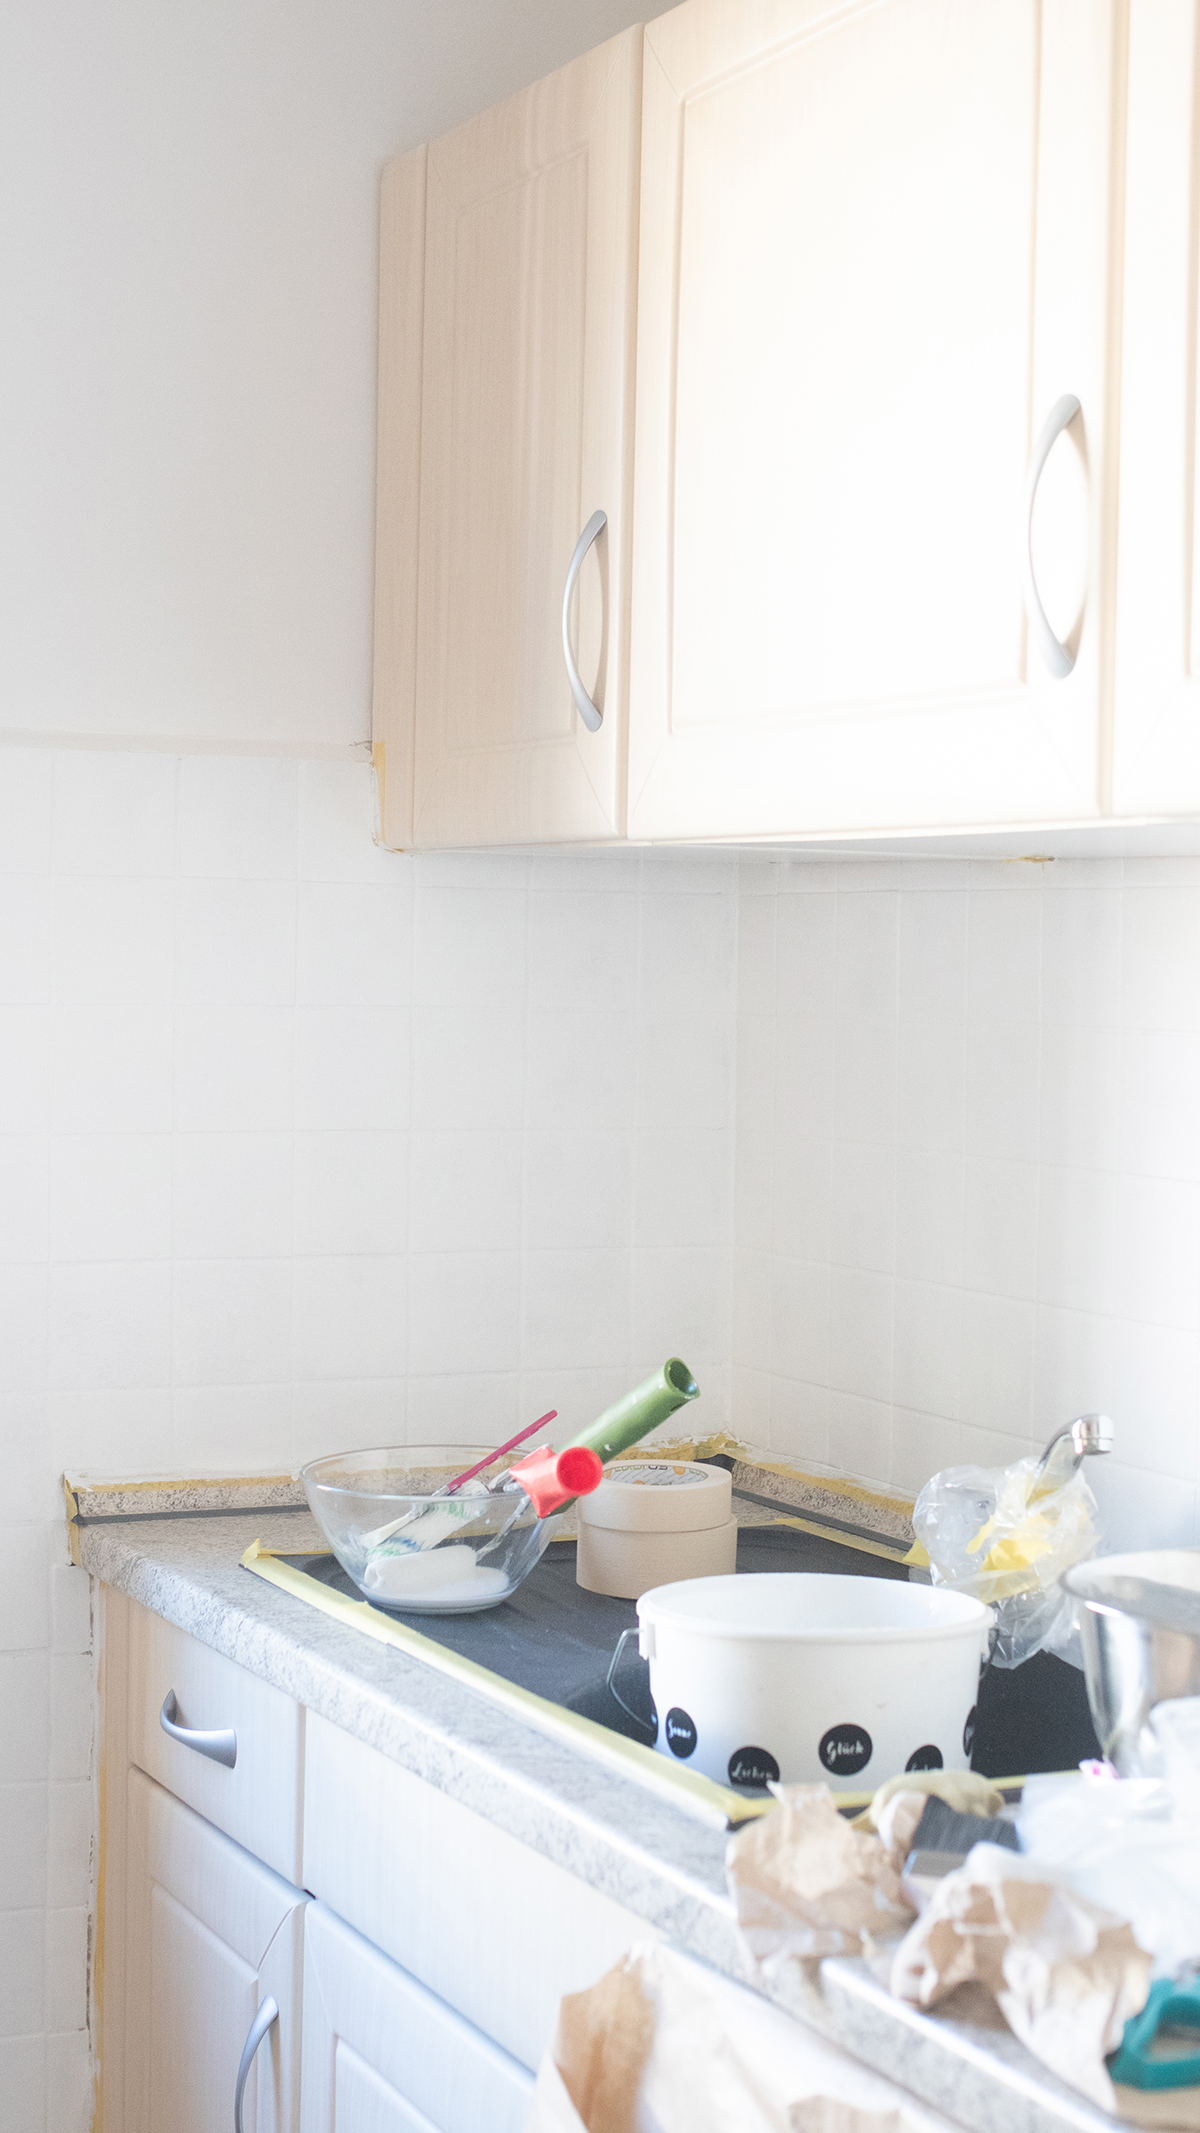
My brother gave me a lot of support for the campaign. We have that first Tile mirror well cleaned. Then we have applied the primer with paint rollers. We let this dry for 4 hours.
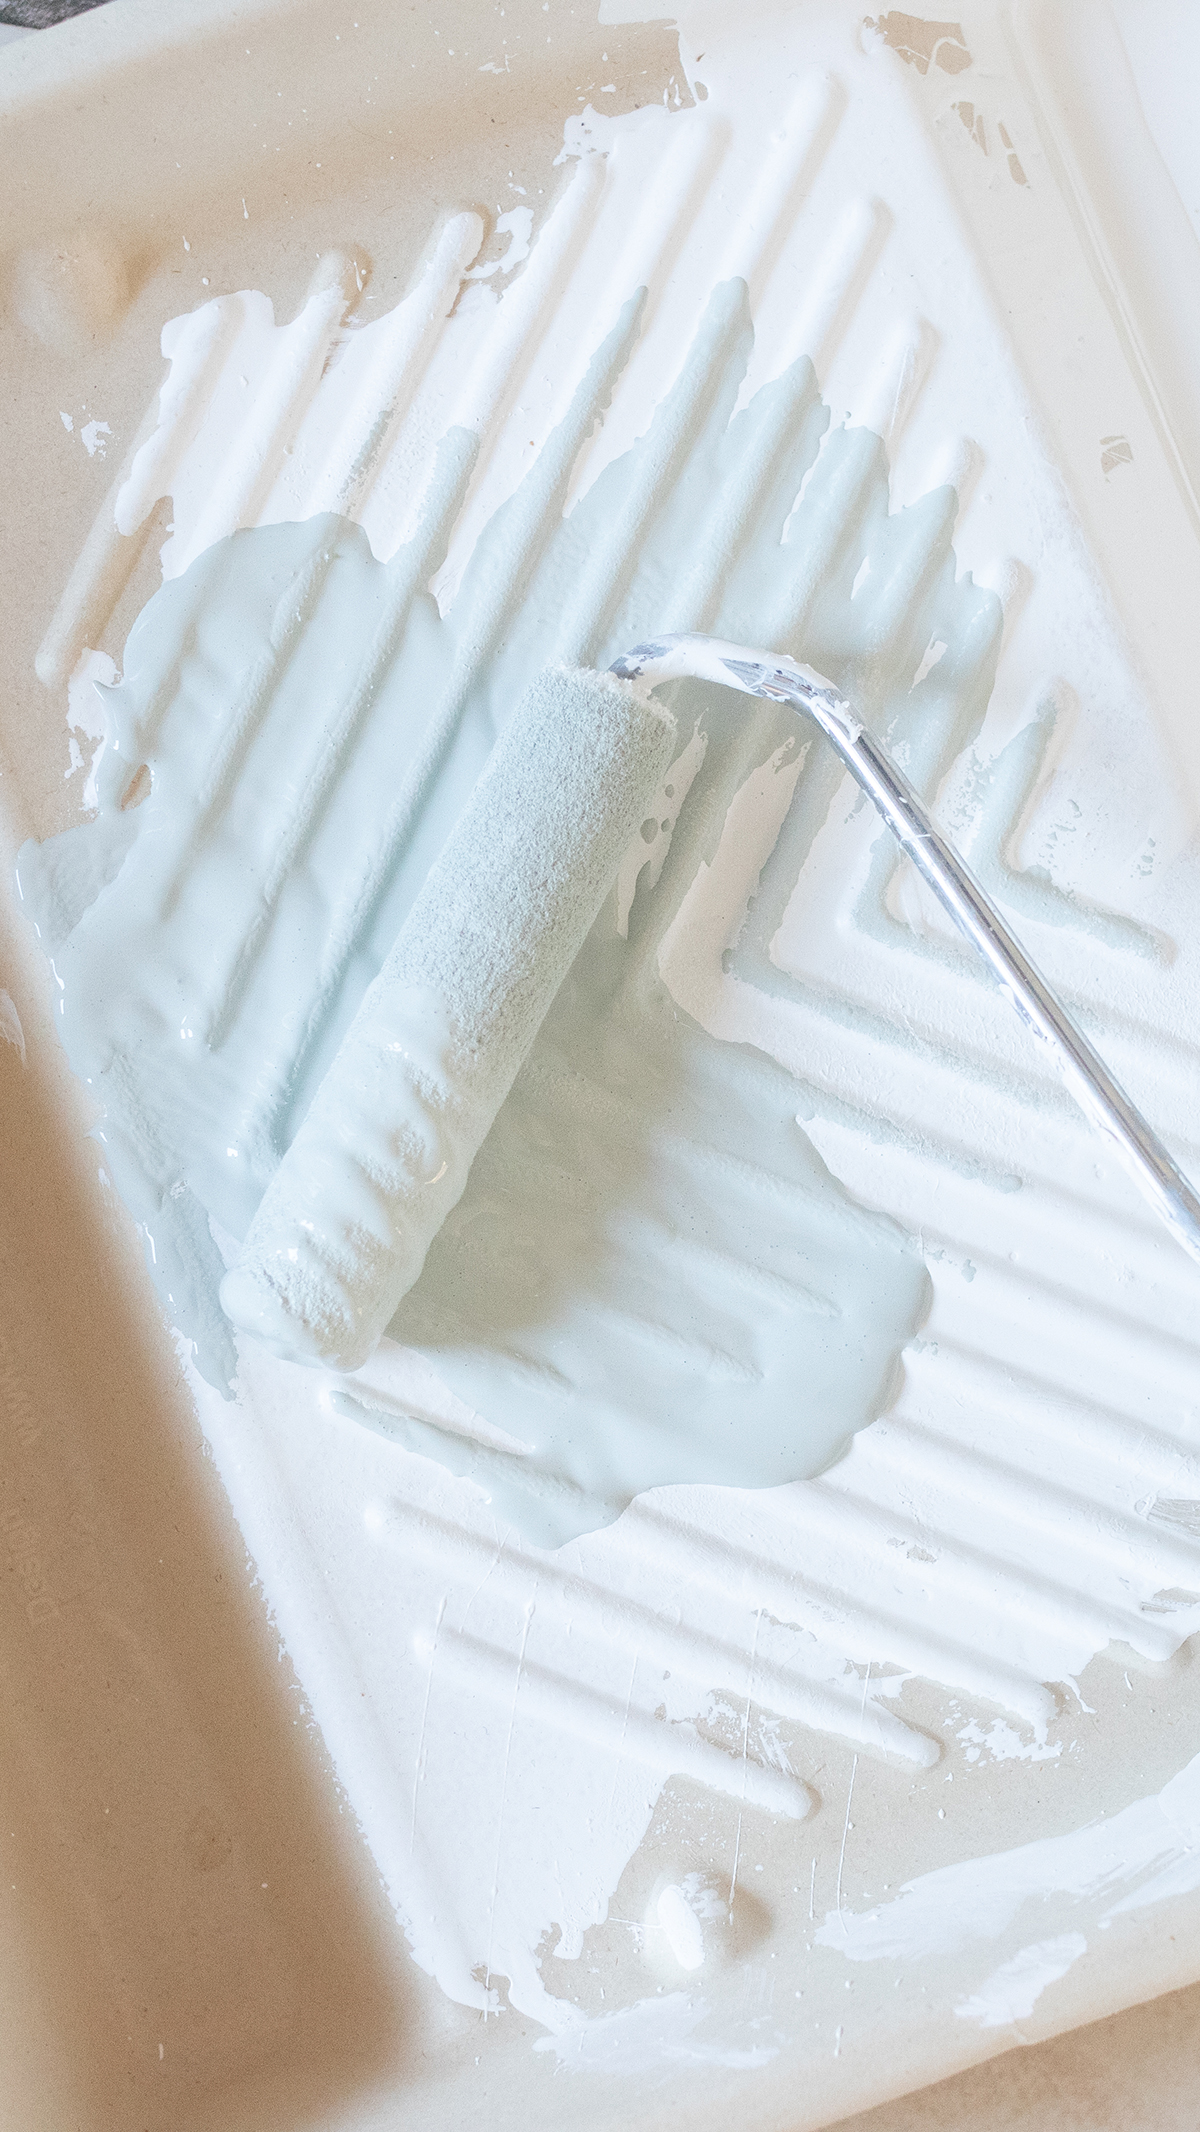
In the next step we have the first layer of tile paint applied – again with paint rollers. It is advisable to first paint the joints with a brush and then go over them with paint rollers.
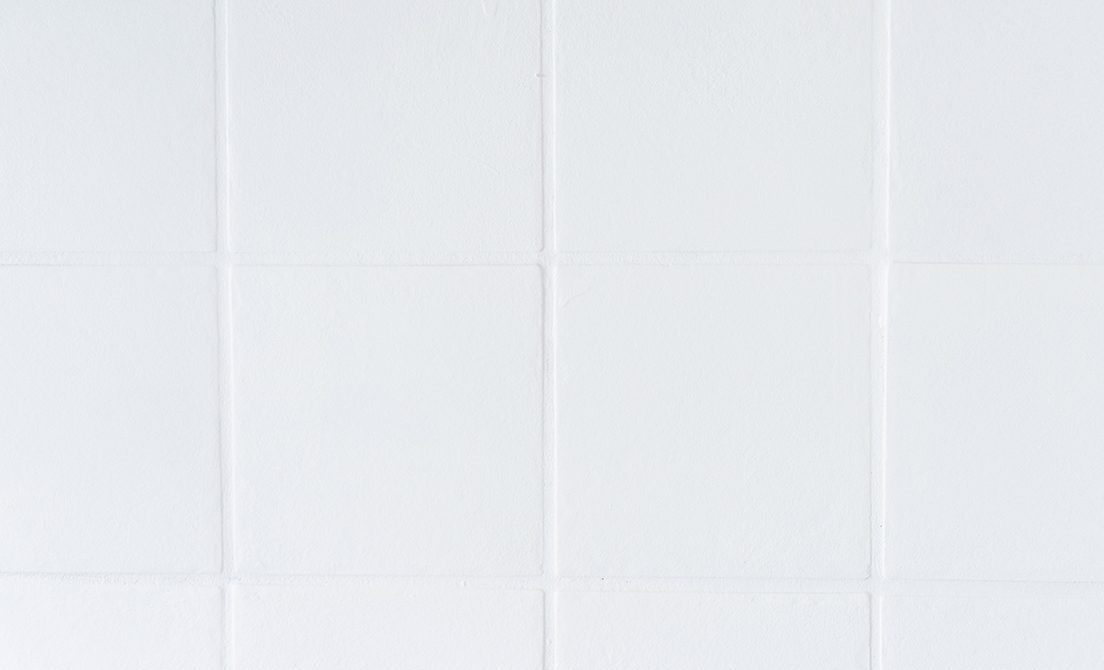
With white tile color you probably always need several coats of paint. We went over it a total of 3 times. In between we always let the paint dry for 2-3 hours. After that, the color is really good coverage.
(The photo is only an interim result, but I think you can see VERY GOOD how great the result is!)
Here you can see the result – I think it’s really, really good. It has become wonderfully even and the tiles feel really smooth:
I also bought “For Sealing” by Miss Pompadour. I haven’t applied that yet, though, because I wanted to let the tiles dry thoroughly first. That’s how I go about my days.
But painting the tiles wasn’t enough for me – I wanted a completely new look for the kitchen with chalk paint!
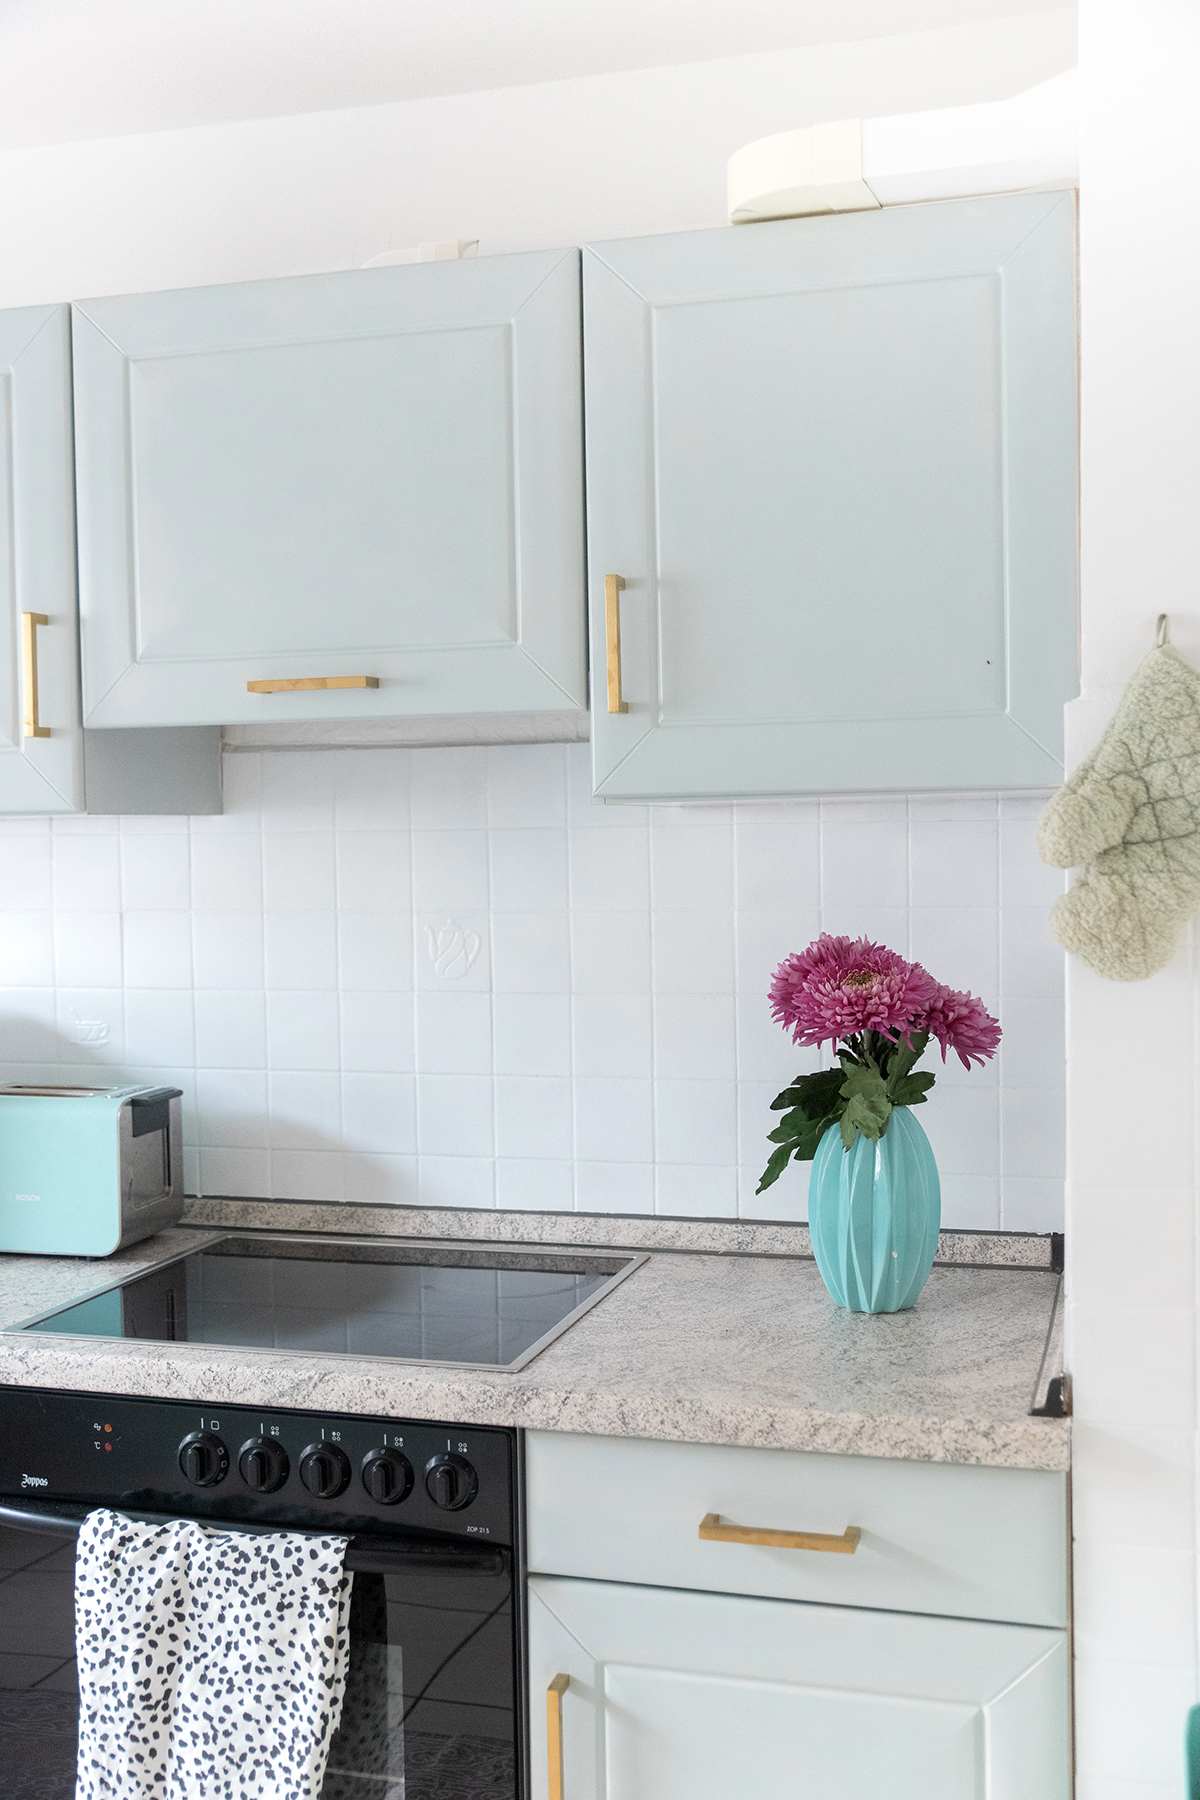
2. Paint the kitchen fronts with chalk paint in mint green
The next step was to go to the fronts. In terms of color, I definitely wanted a pastel color here. I chose Mint (unsurprisingly, I know.).
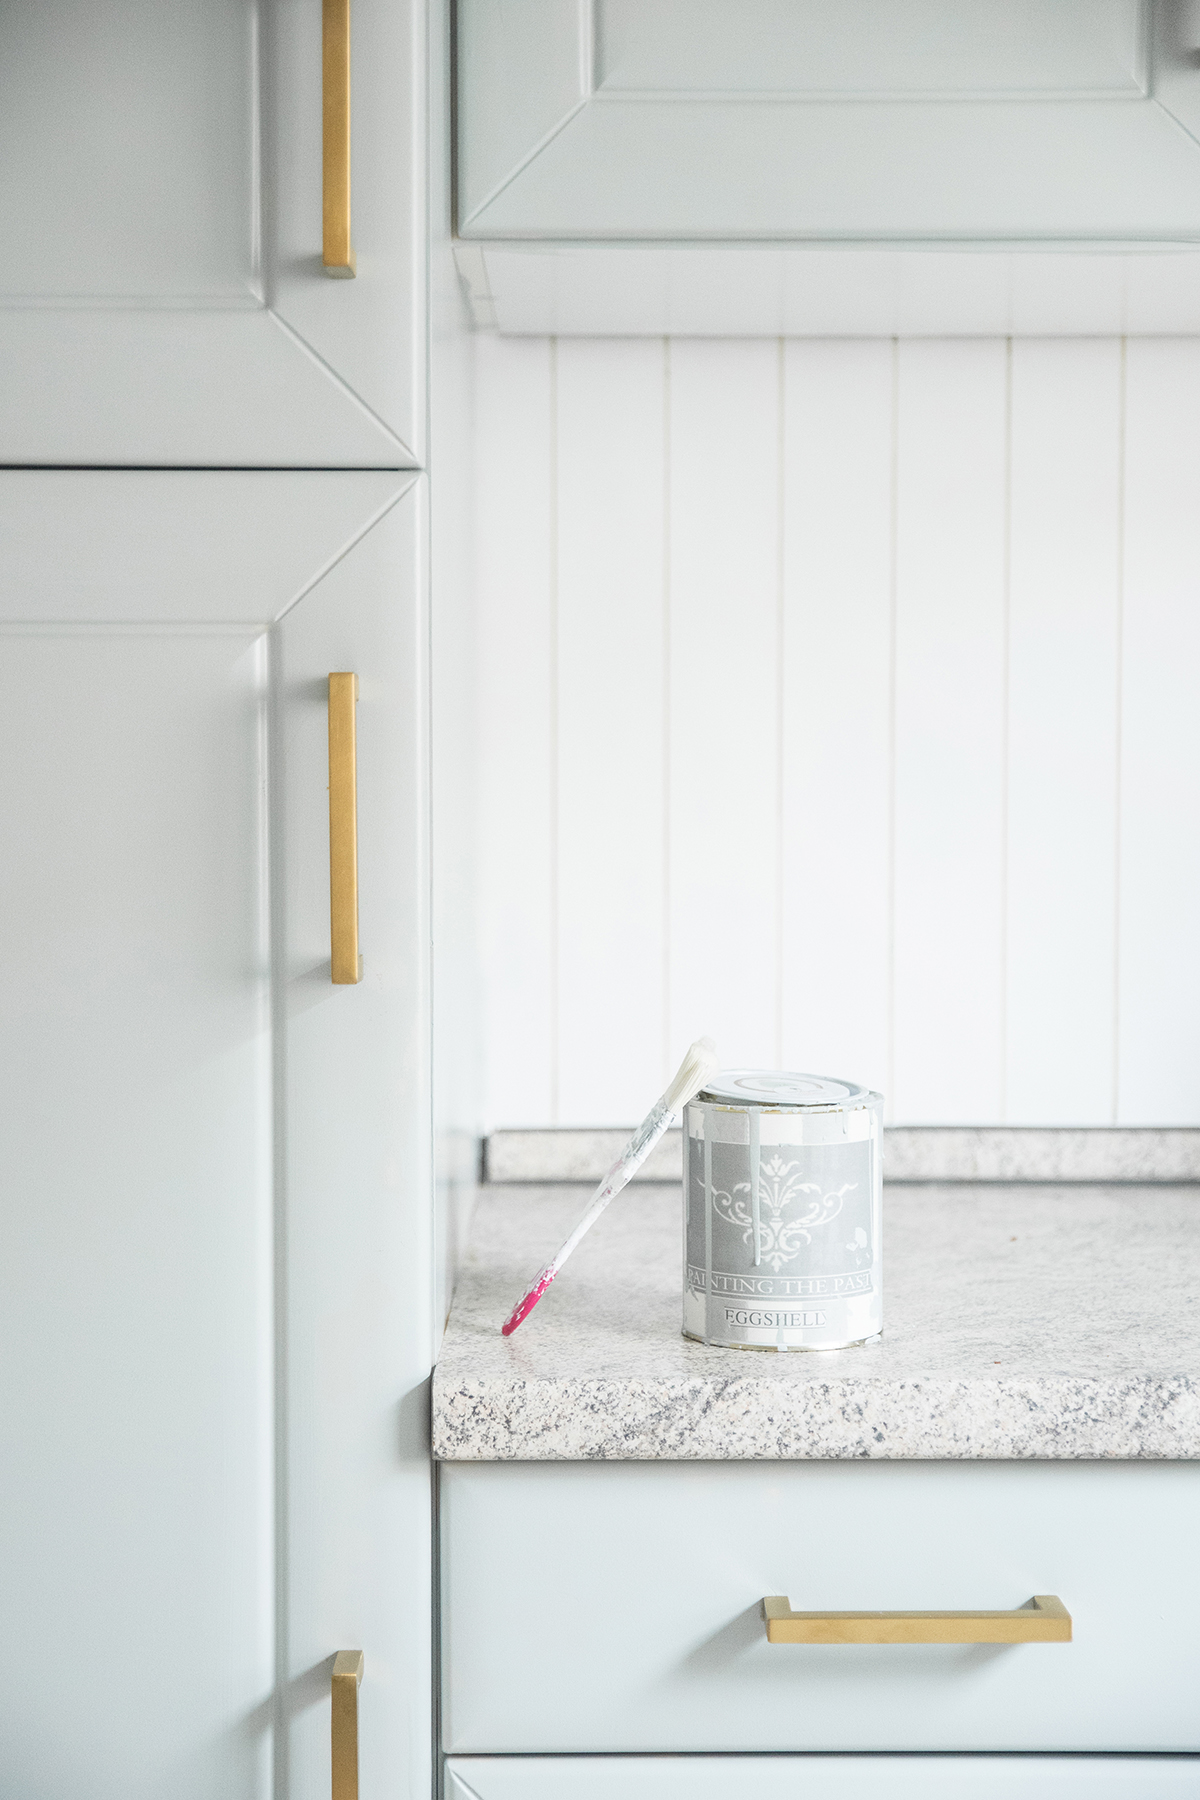
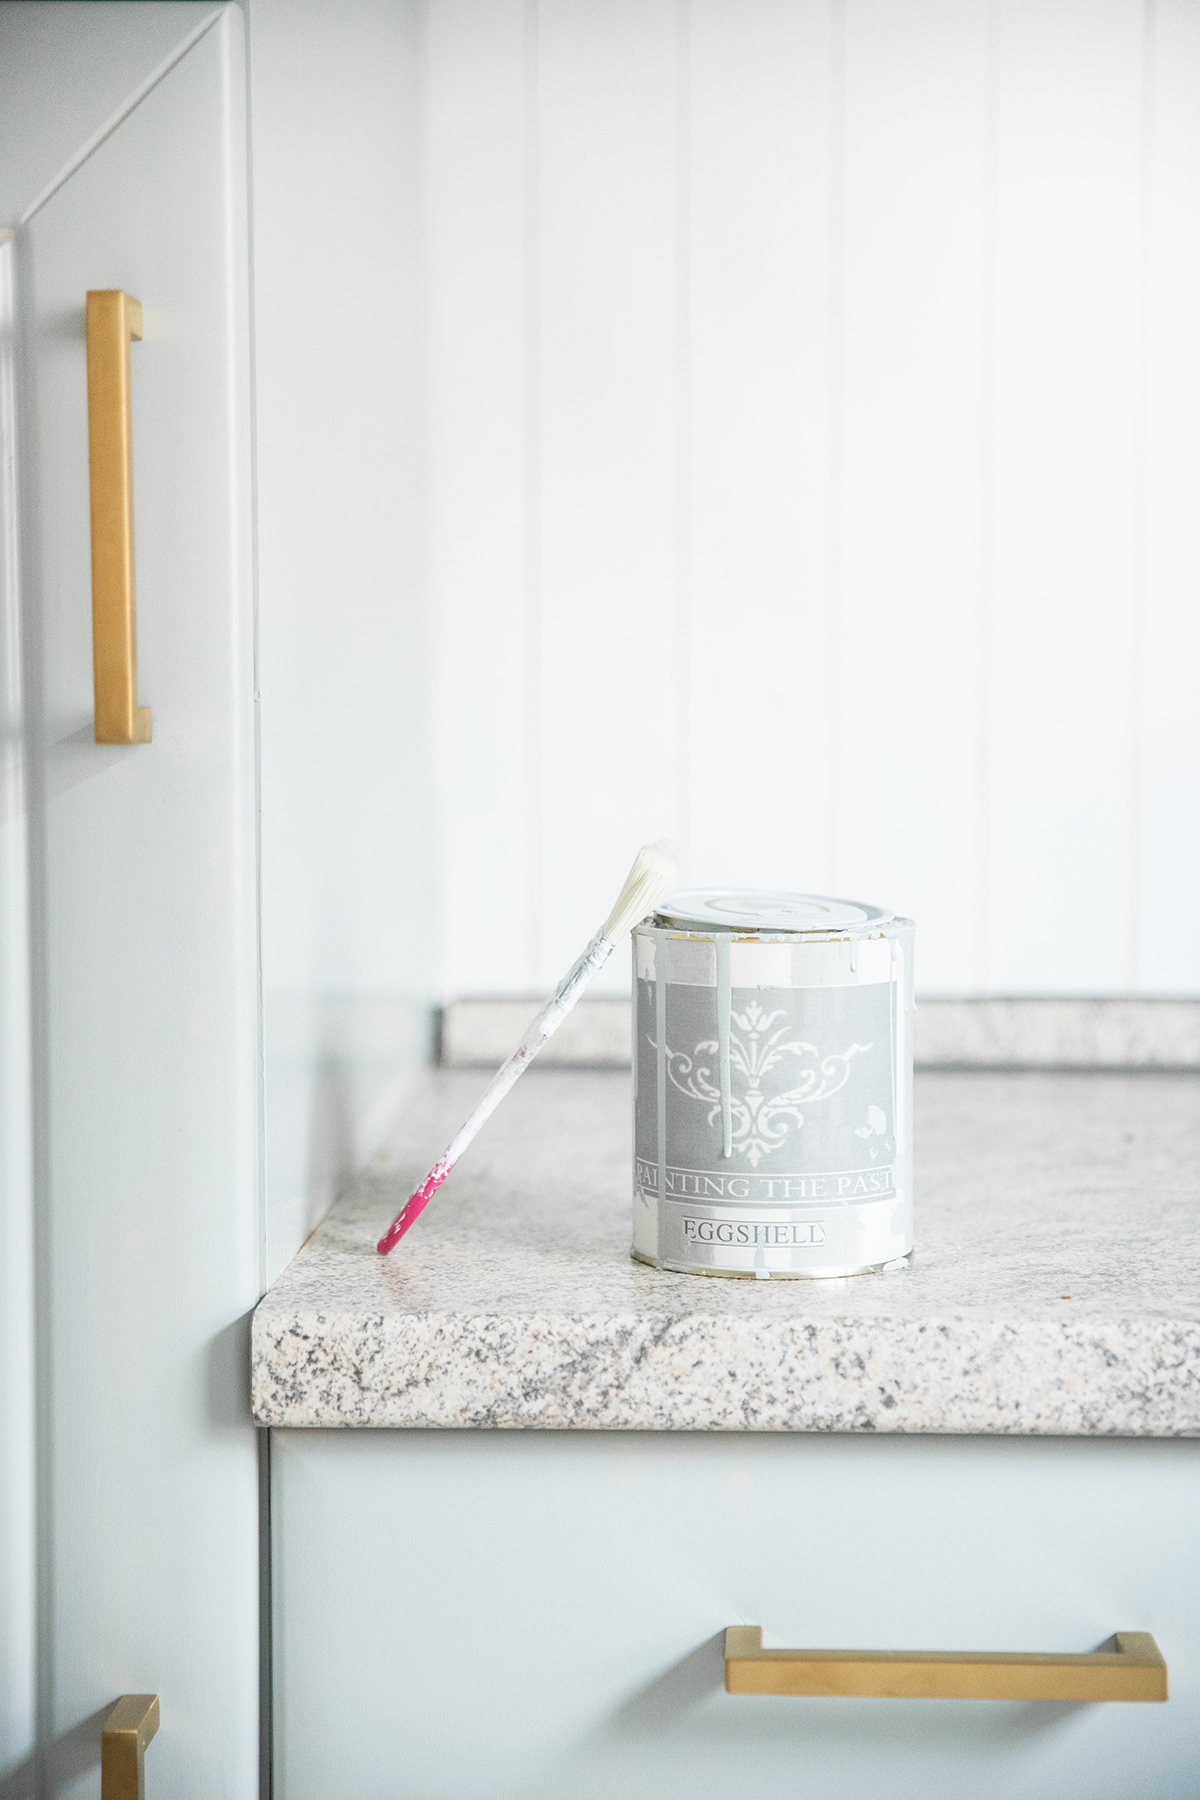
We also cleaned the kitchen fonts well first. Here I used the chalk paint “Painting the Past” in Sage of Miss Pompadour. The great thing about it: it is Chalk paint, that means you can paint the kitchen WITHOUT sanding – just paint over it!
After cleaning, I simply painted the kitchen fronts with a roller, details with a brush. In some cases, we removed the doors, but the drawers, for example, could also be wonderfully painted while they were installed.
Depending on the surface, I needed 1-2 coats of paint. I had to go over the grooves twice, on the smooth surfaces 1x was sometimes enough. That worked perfectly!
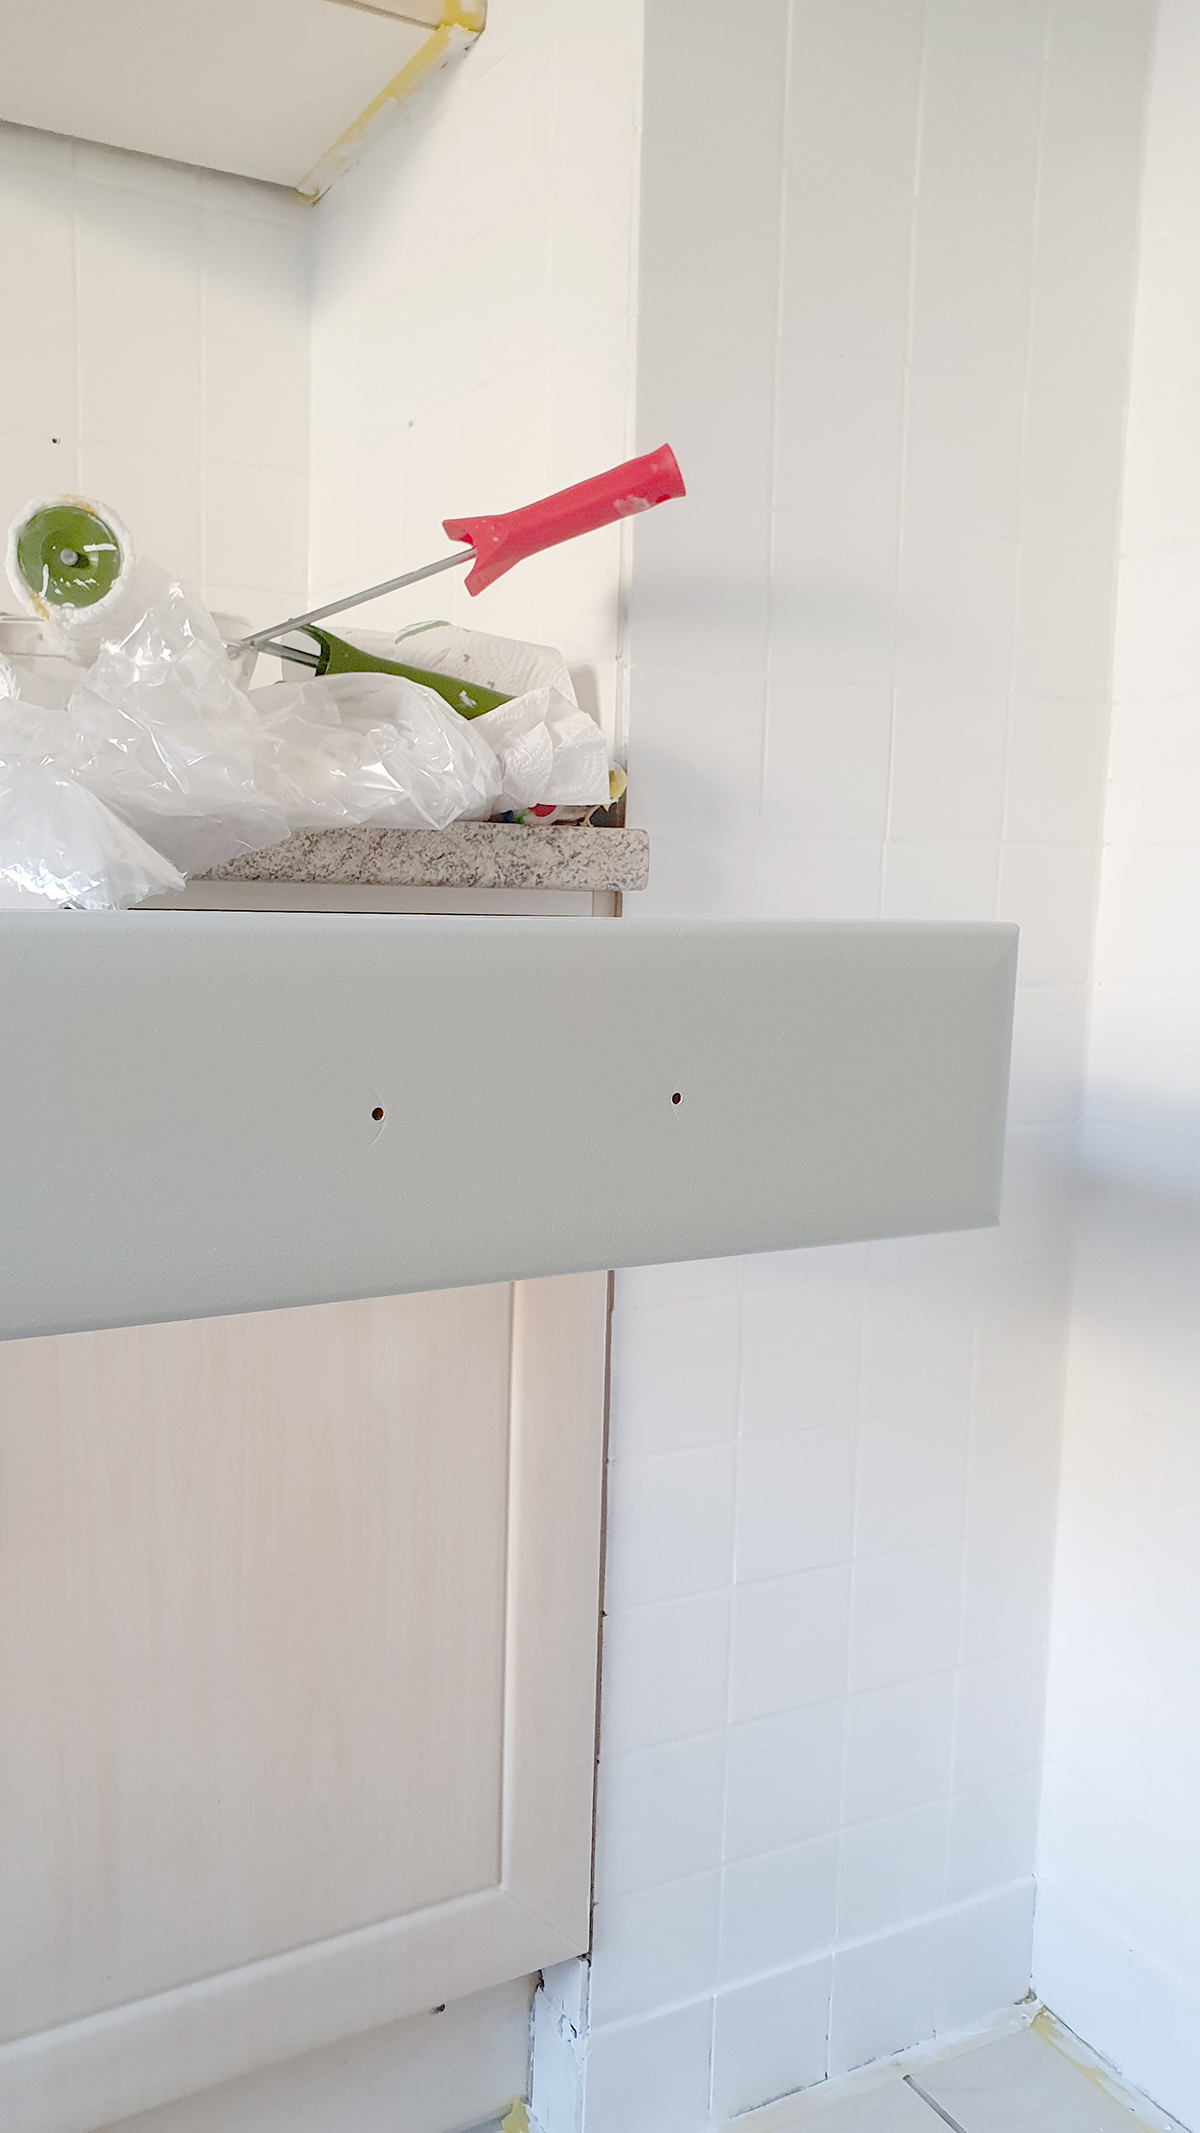
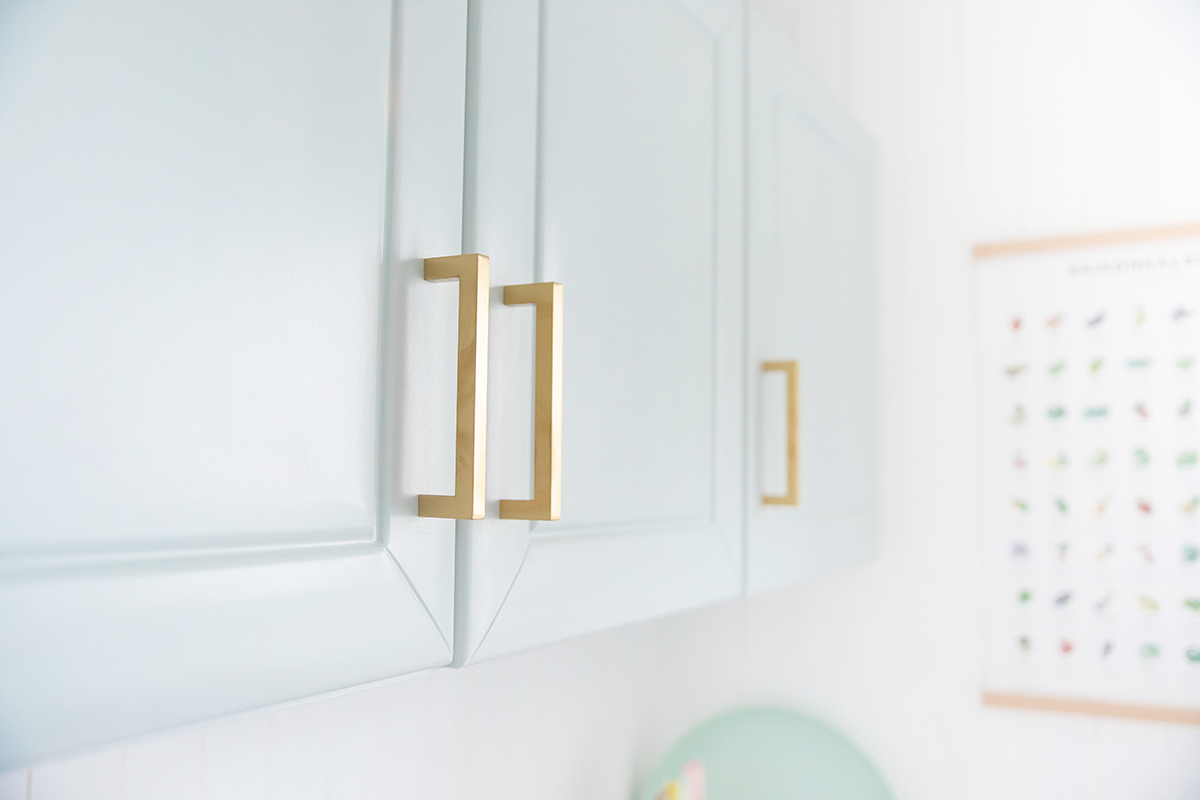
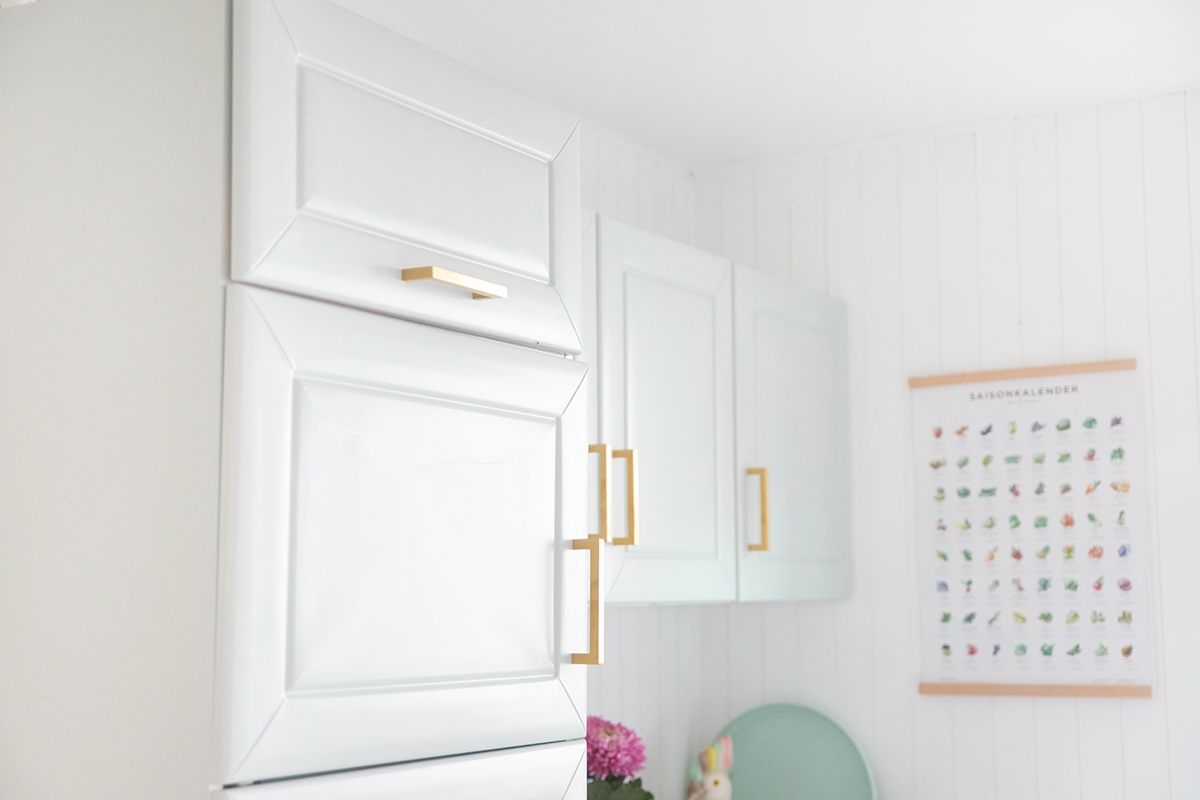
After everything had dried well, I attached new handles. For this I measured the hole spacing of the previous handles and simply got handles in the right size:
It became these handles. (advertising/affiliate link)
I think the golden handles are really classy, I like it so much!
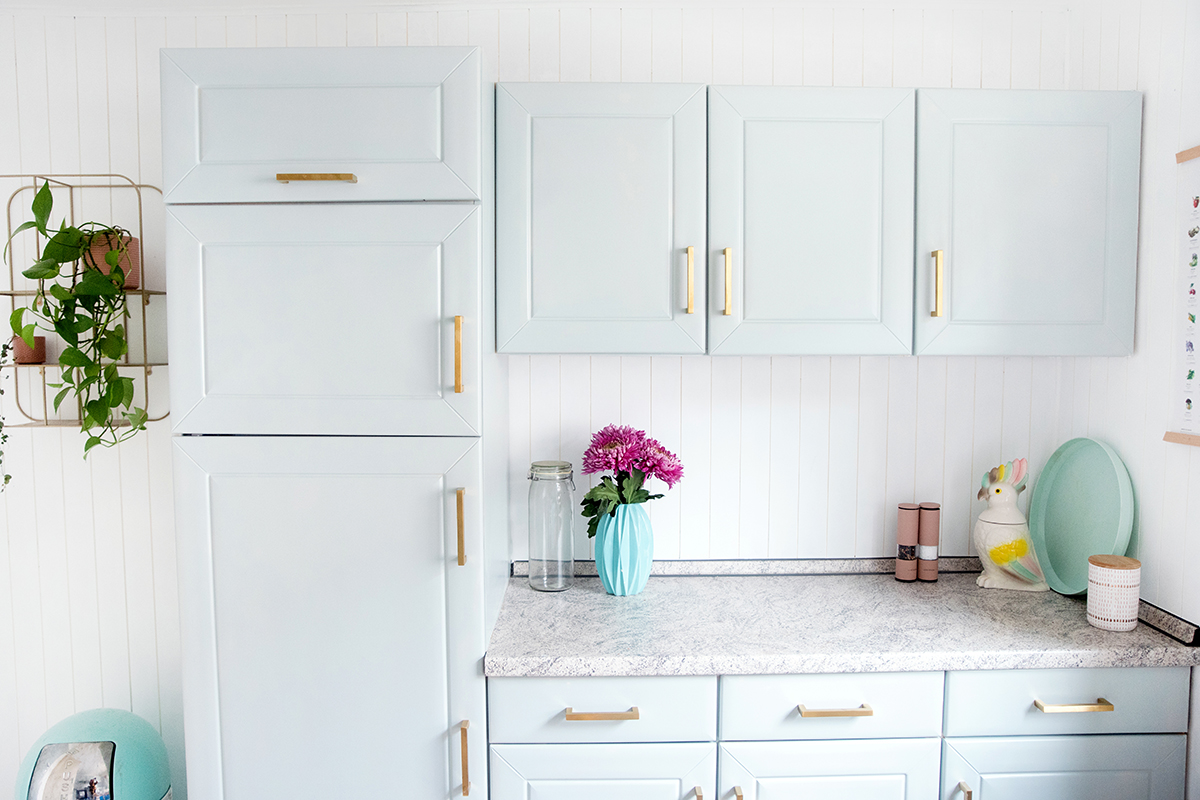
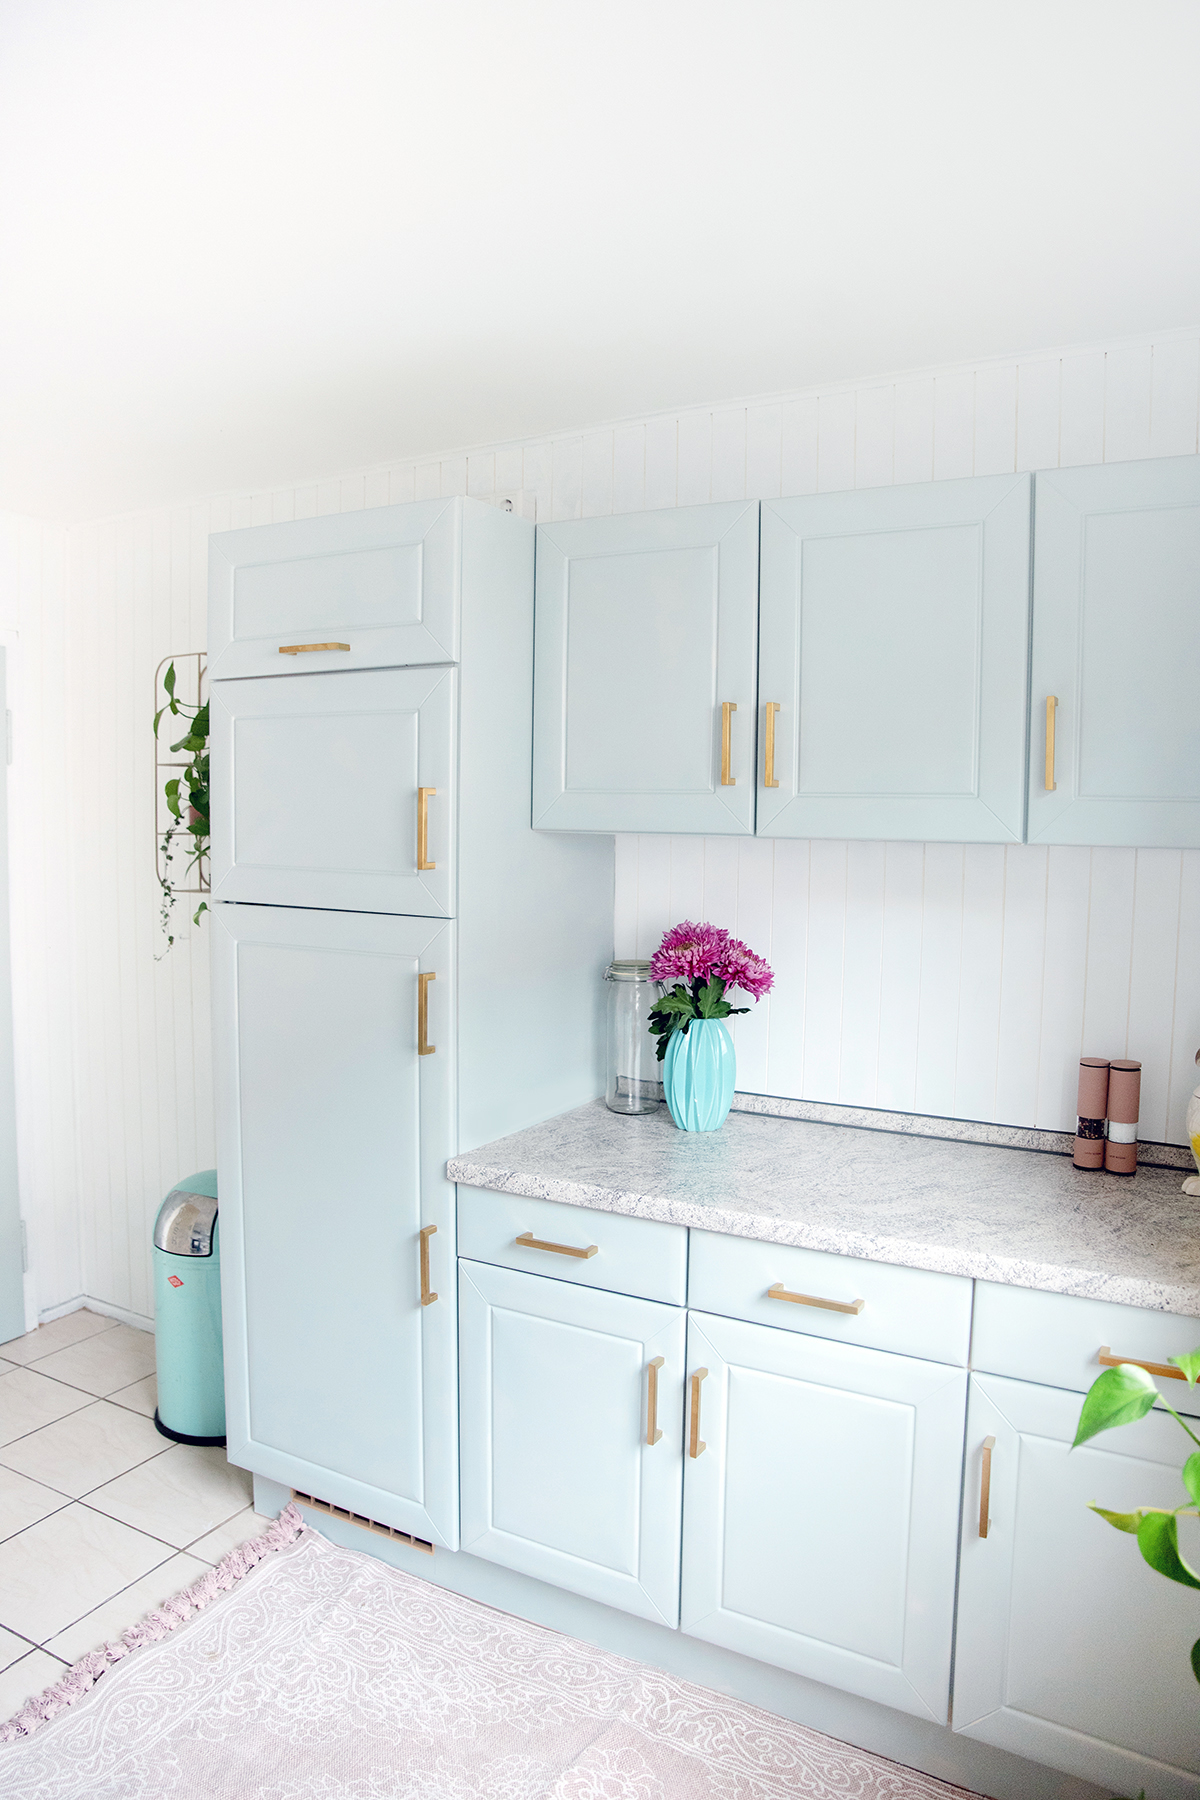
And here is the before and after result of the right side of the kitchen – I can’t get enough of it at all, I think it’s SO beautiful:
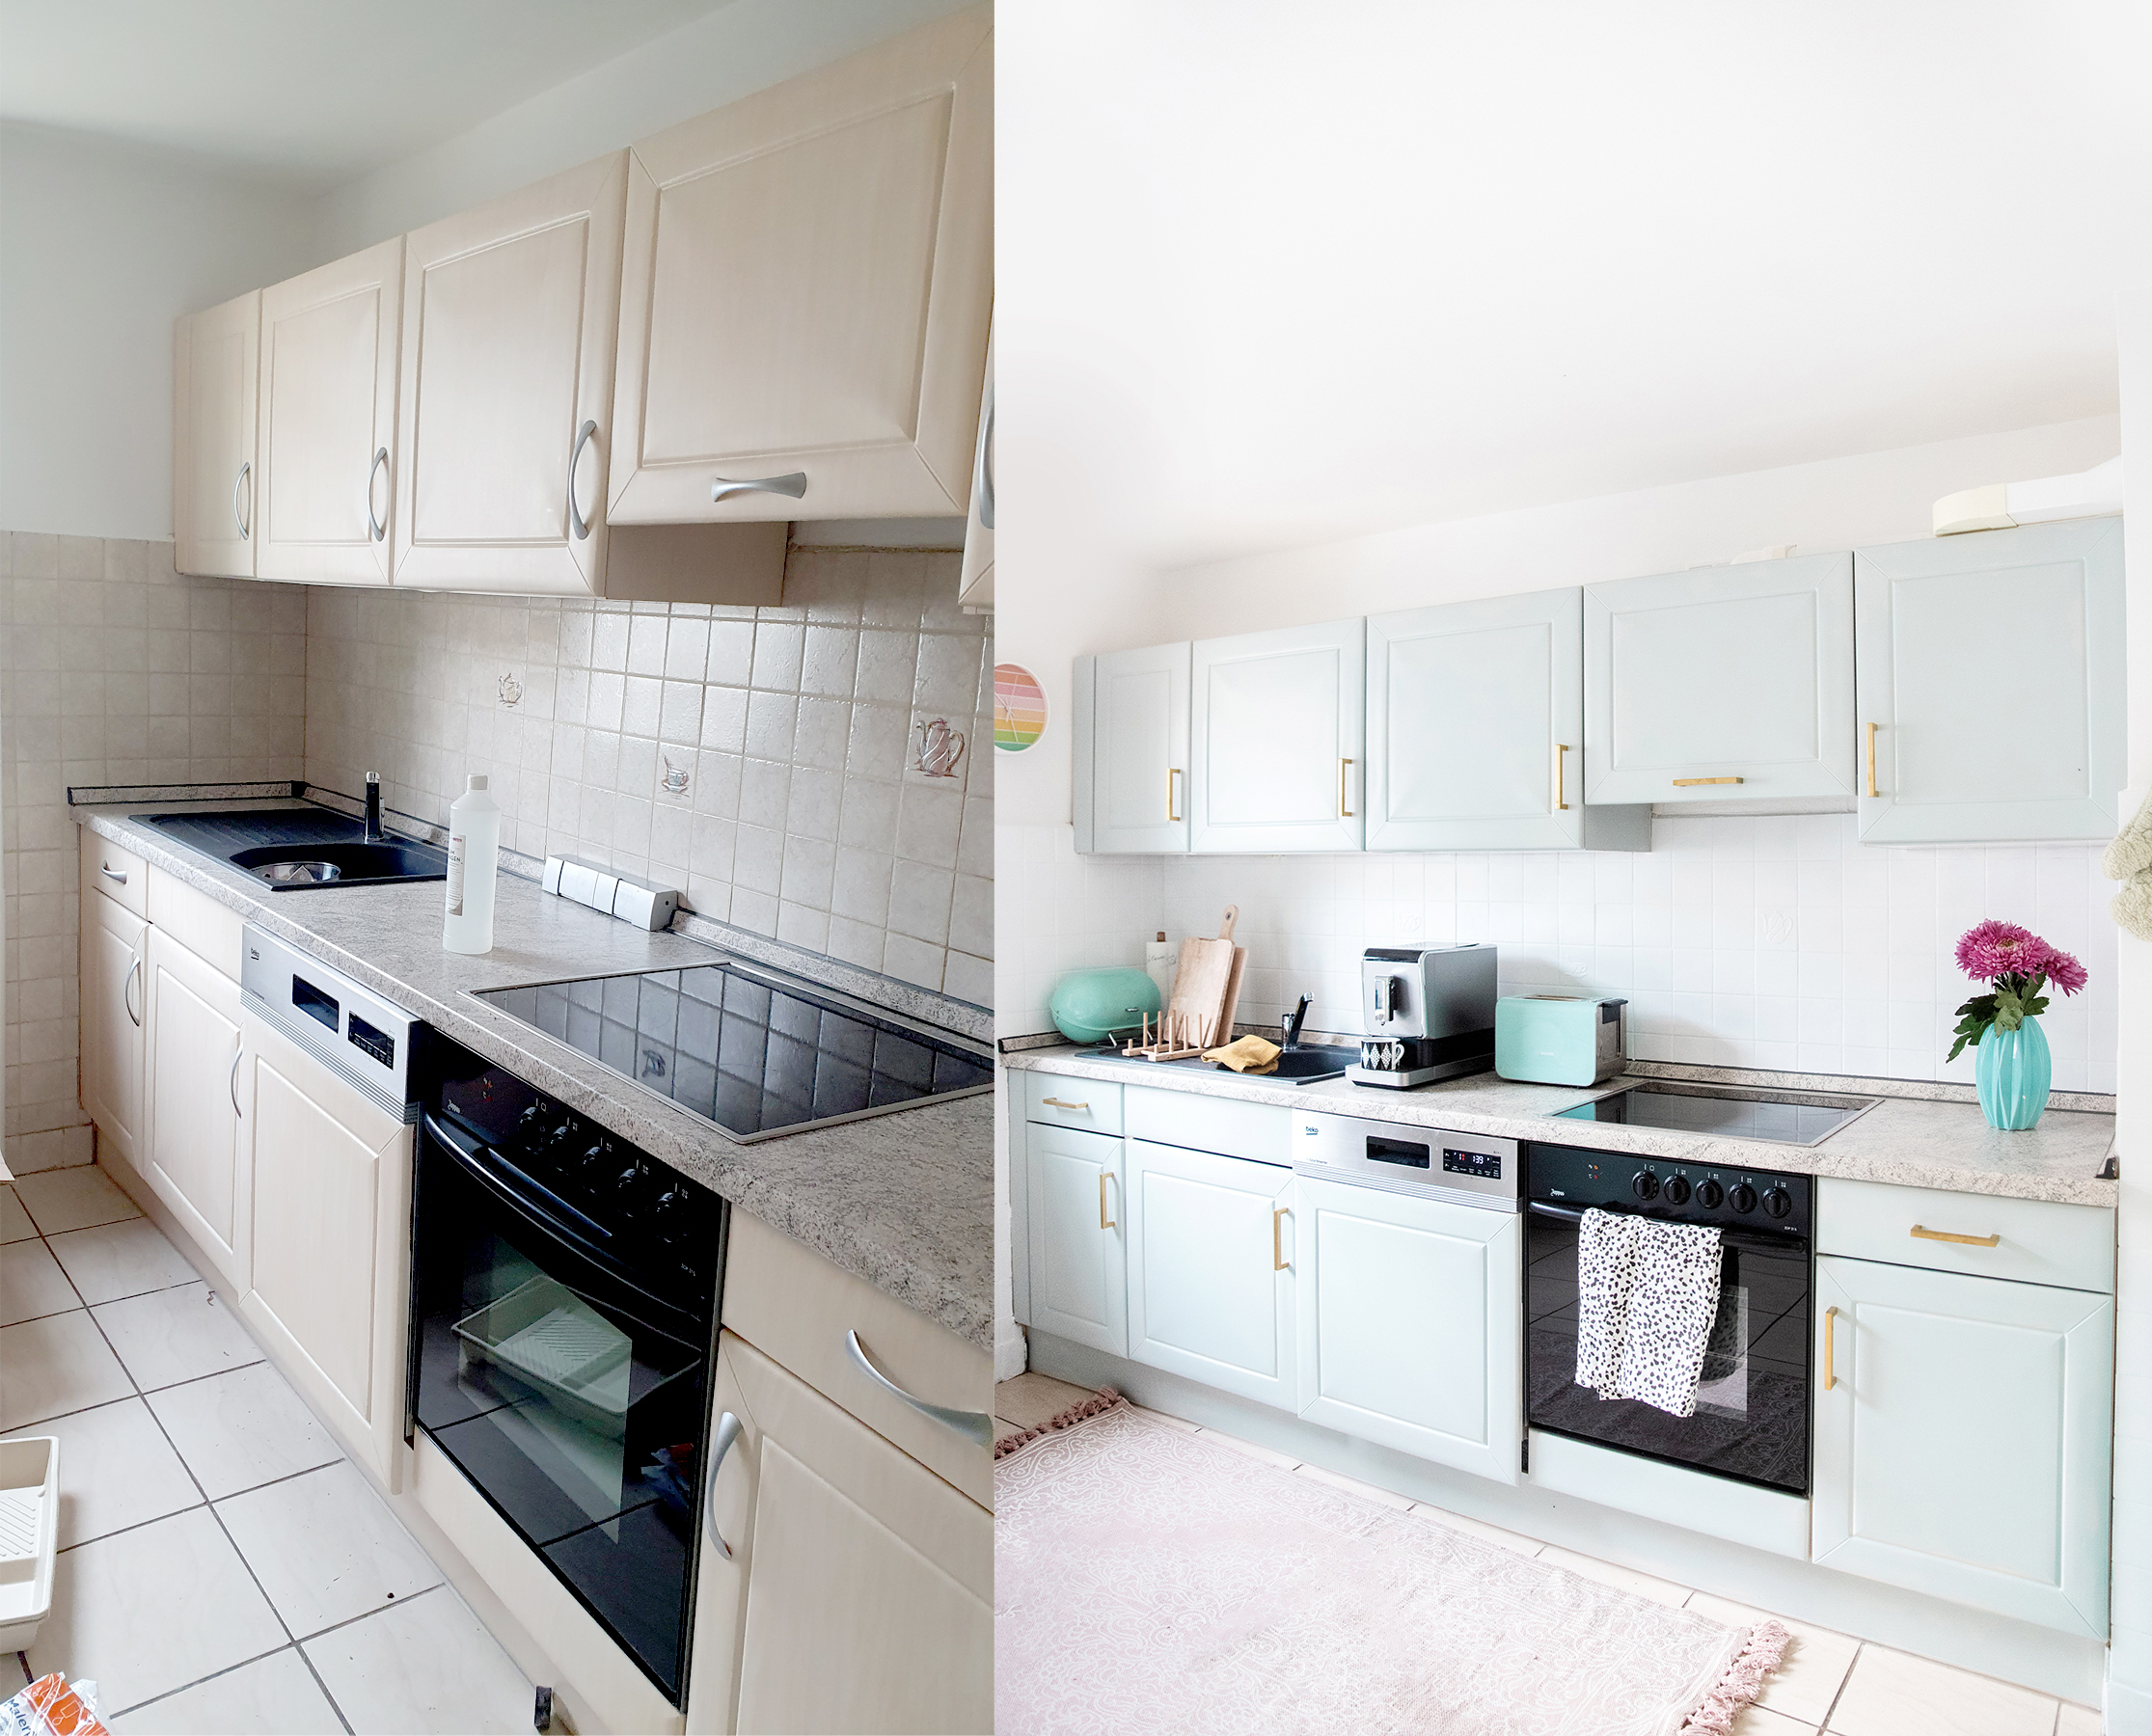
I think the kitchen looks so classy and friendly now. The painting was incredibly fun. The kitchen used to be the most unattractive room, now it is one of the most beautiful.
3. Paint brown wooden wall
Then, of course, we went to the other, left side of the kitchen. The big challenge: the brown wooden wall!
For this I used “Miss Pompadour” in Soft & Matt “White with White”. (2 buckets) Also here: First everything was masked off and then it was rolled and brushed like crazy. The challenge here: the color was sinking in, so I needed a lot of layers. Here it would have been smarter to first apply a primer. I hadn’t done that, so I needed multiple coats.
The brown wooden wall was actually the most challenging thing in the whole kitchen, it took forever. The white is (it’s already in the description and I was prepared for that!) not so opaque, so it had to be several layers anyway.
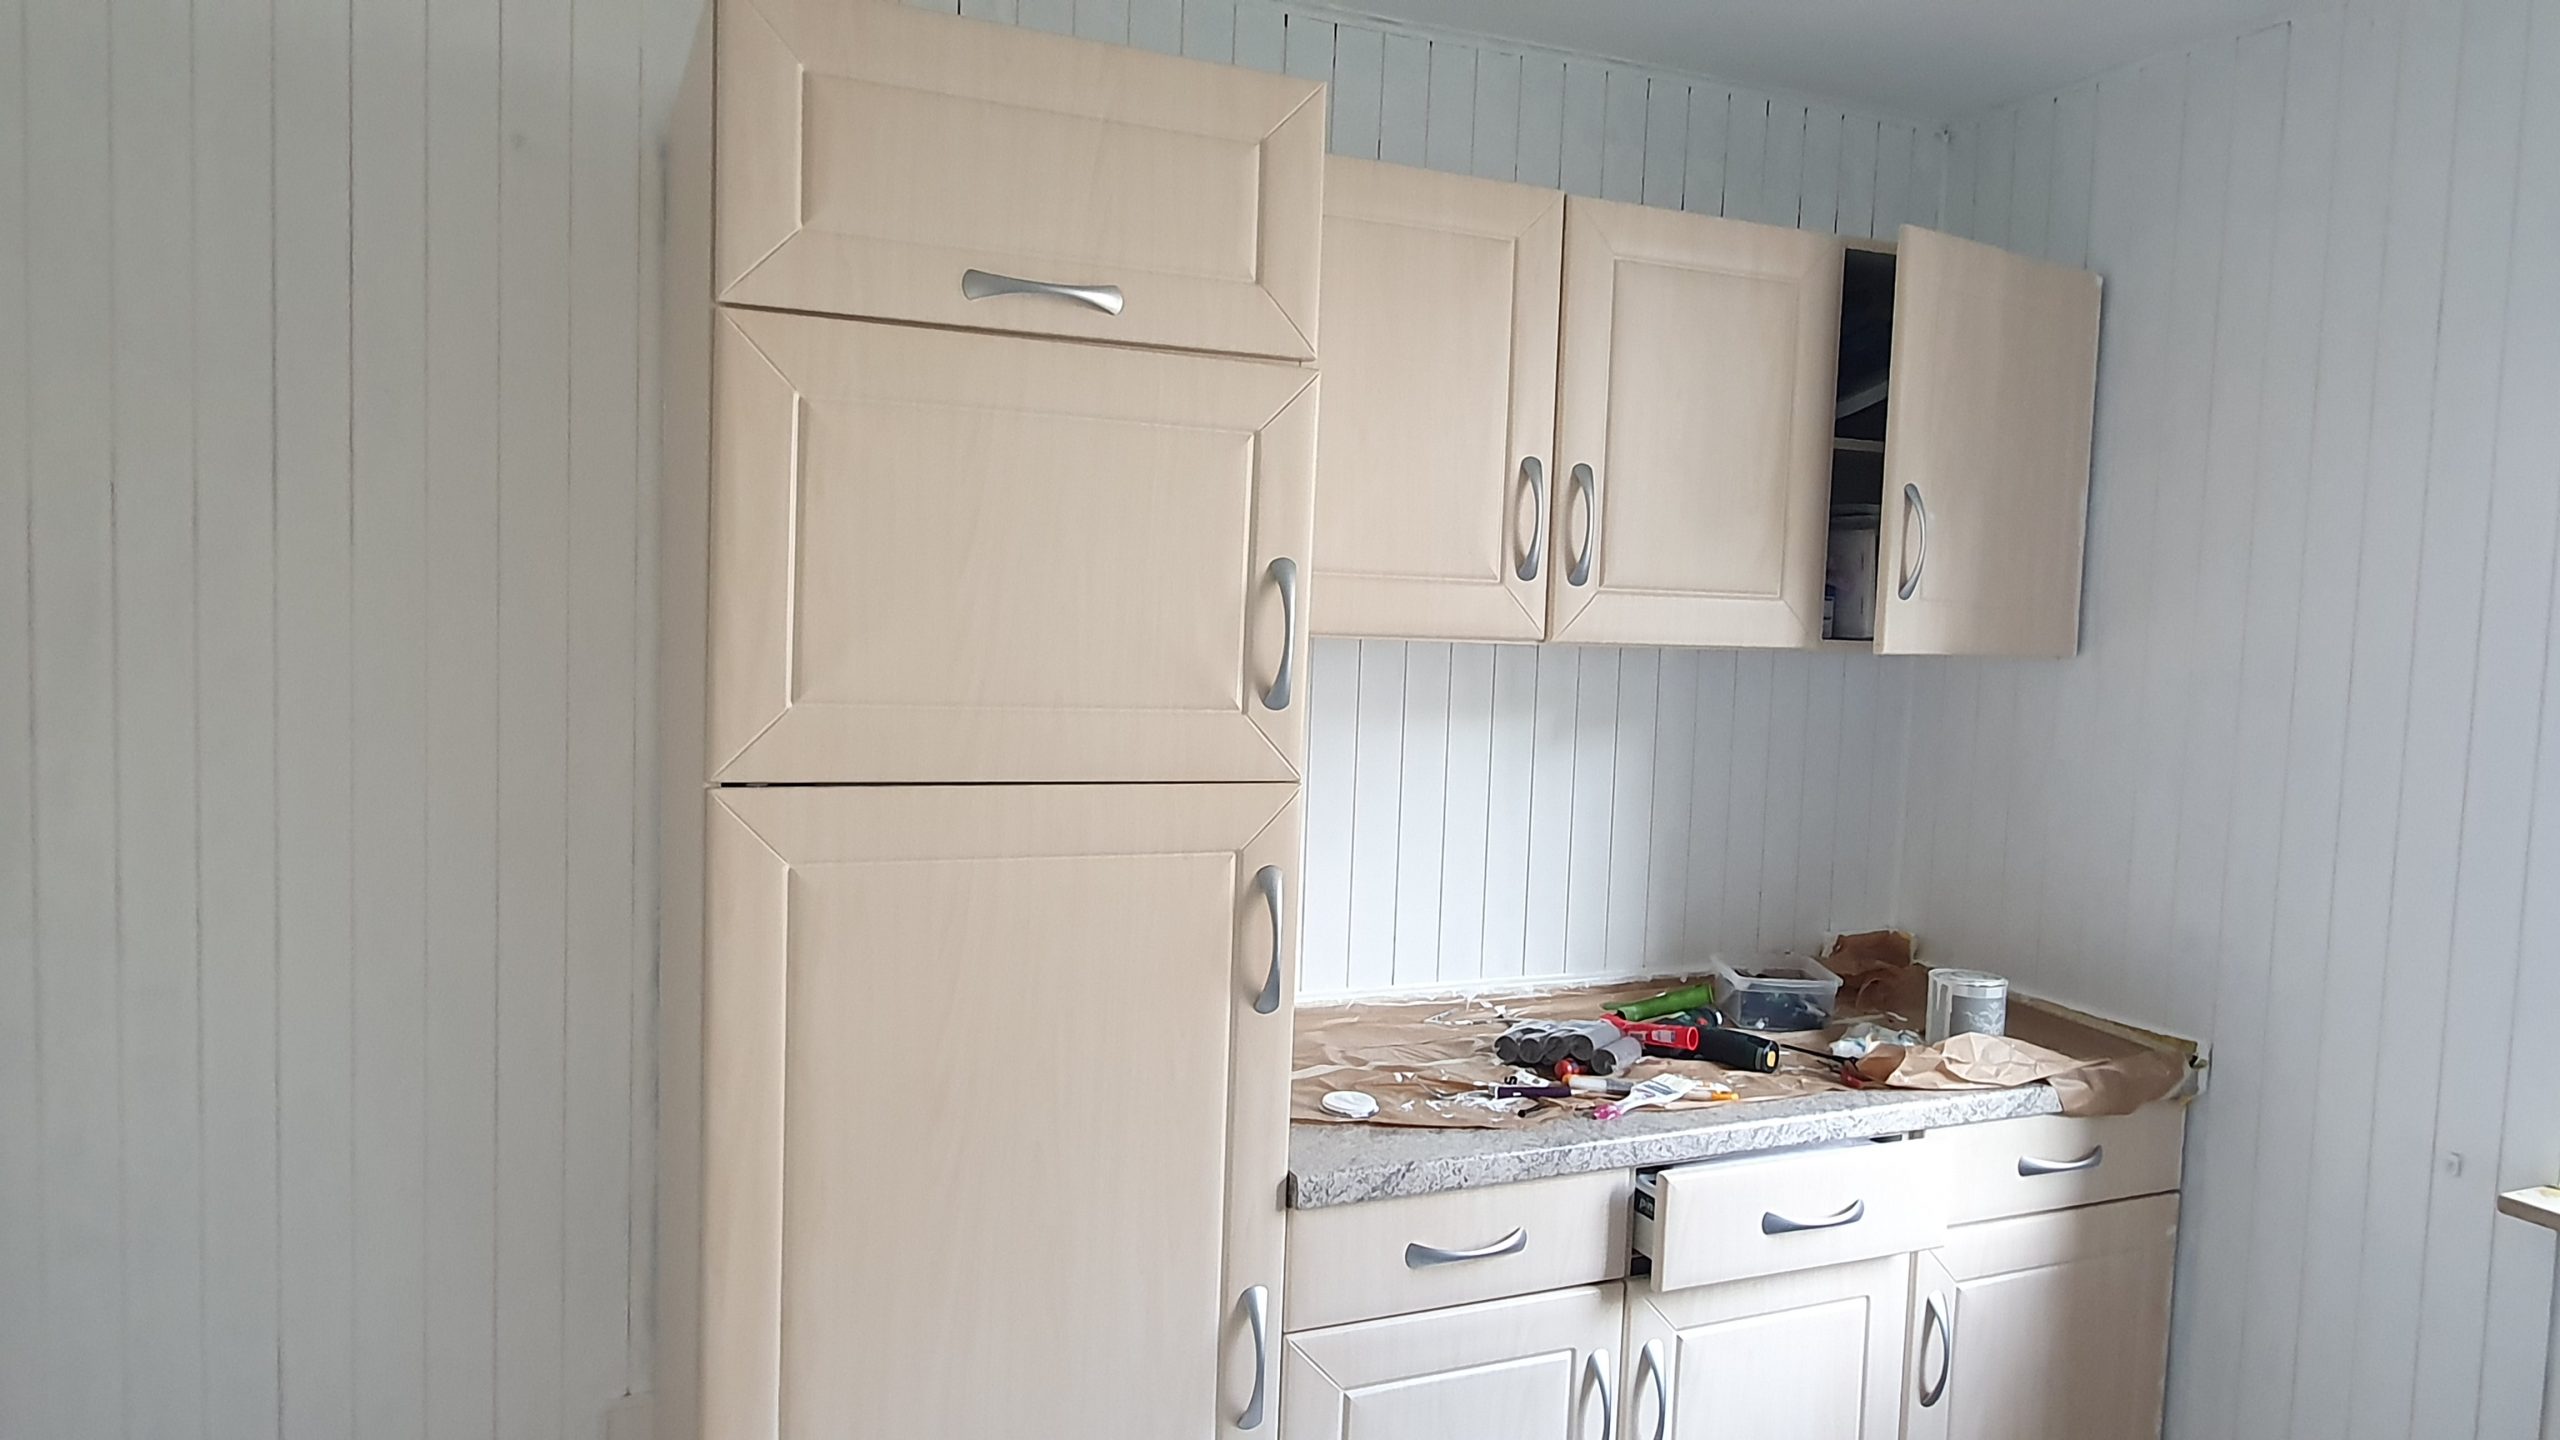
Here you can see what it looked like in the meantime: It was super exhausting, but it was so worth it!
(I didn’t cover the fronts because they were painted afterwards anyway!)
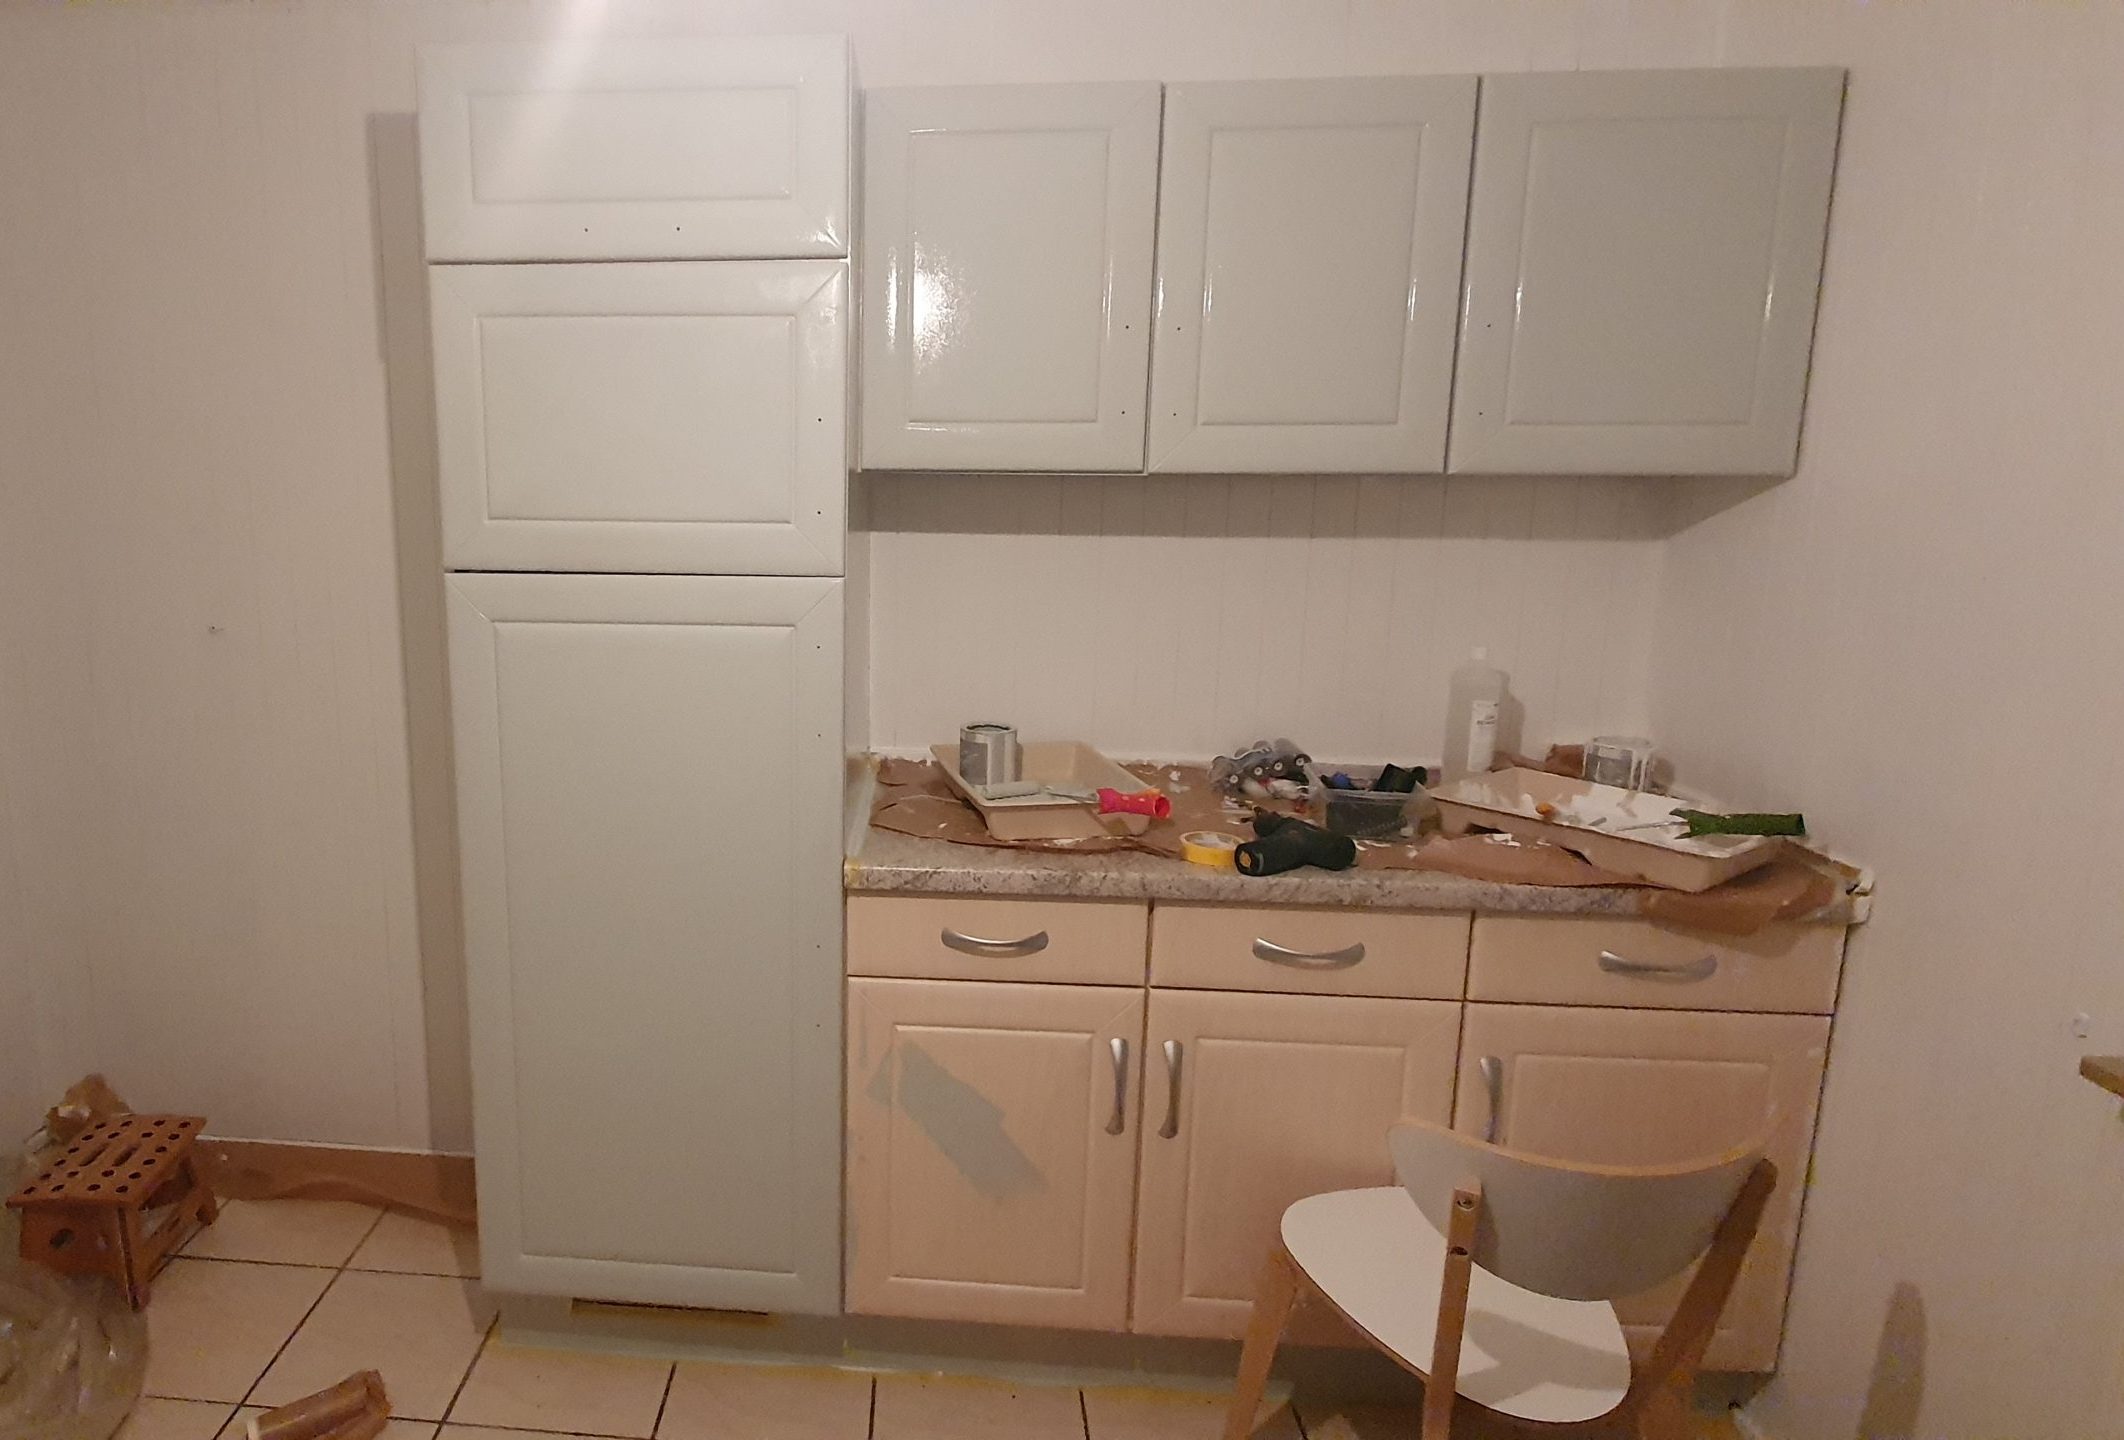
Here you can see the kitchen with the penultimate layer of white paint, it is almost opaque:
4. Paint the kitchen fronts with mint chalk paint
And of course I painted the fronts in the great color “Sage” from Miss Pompadour:
Almost finished!
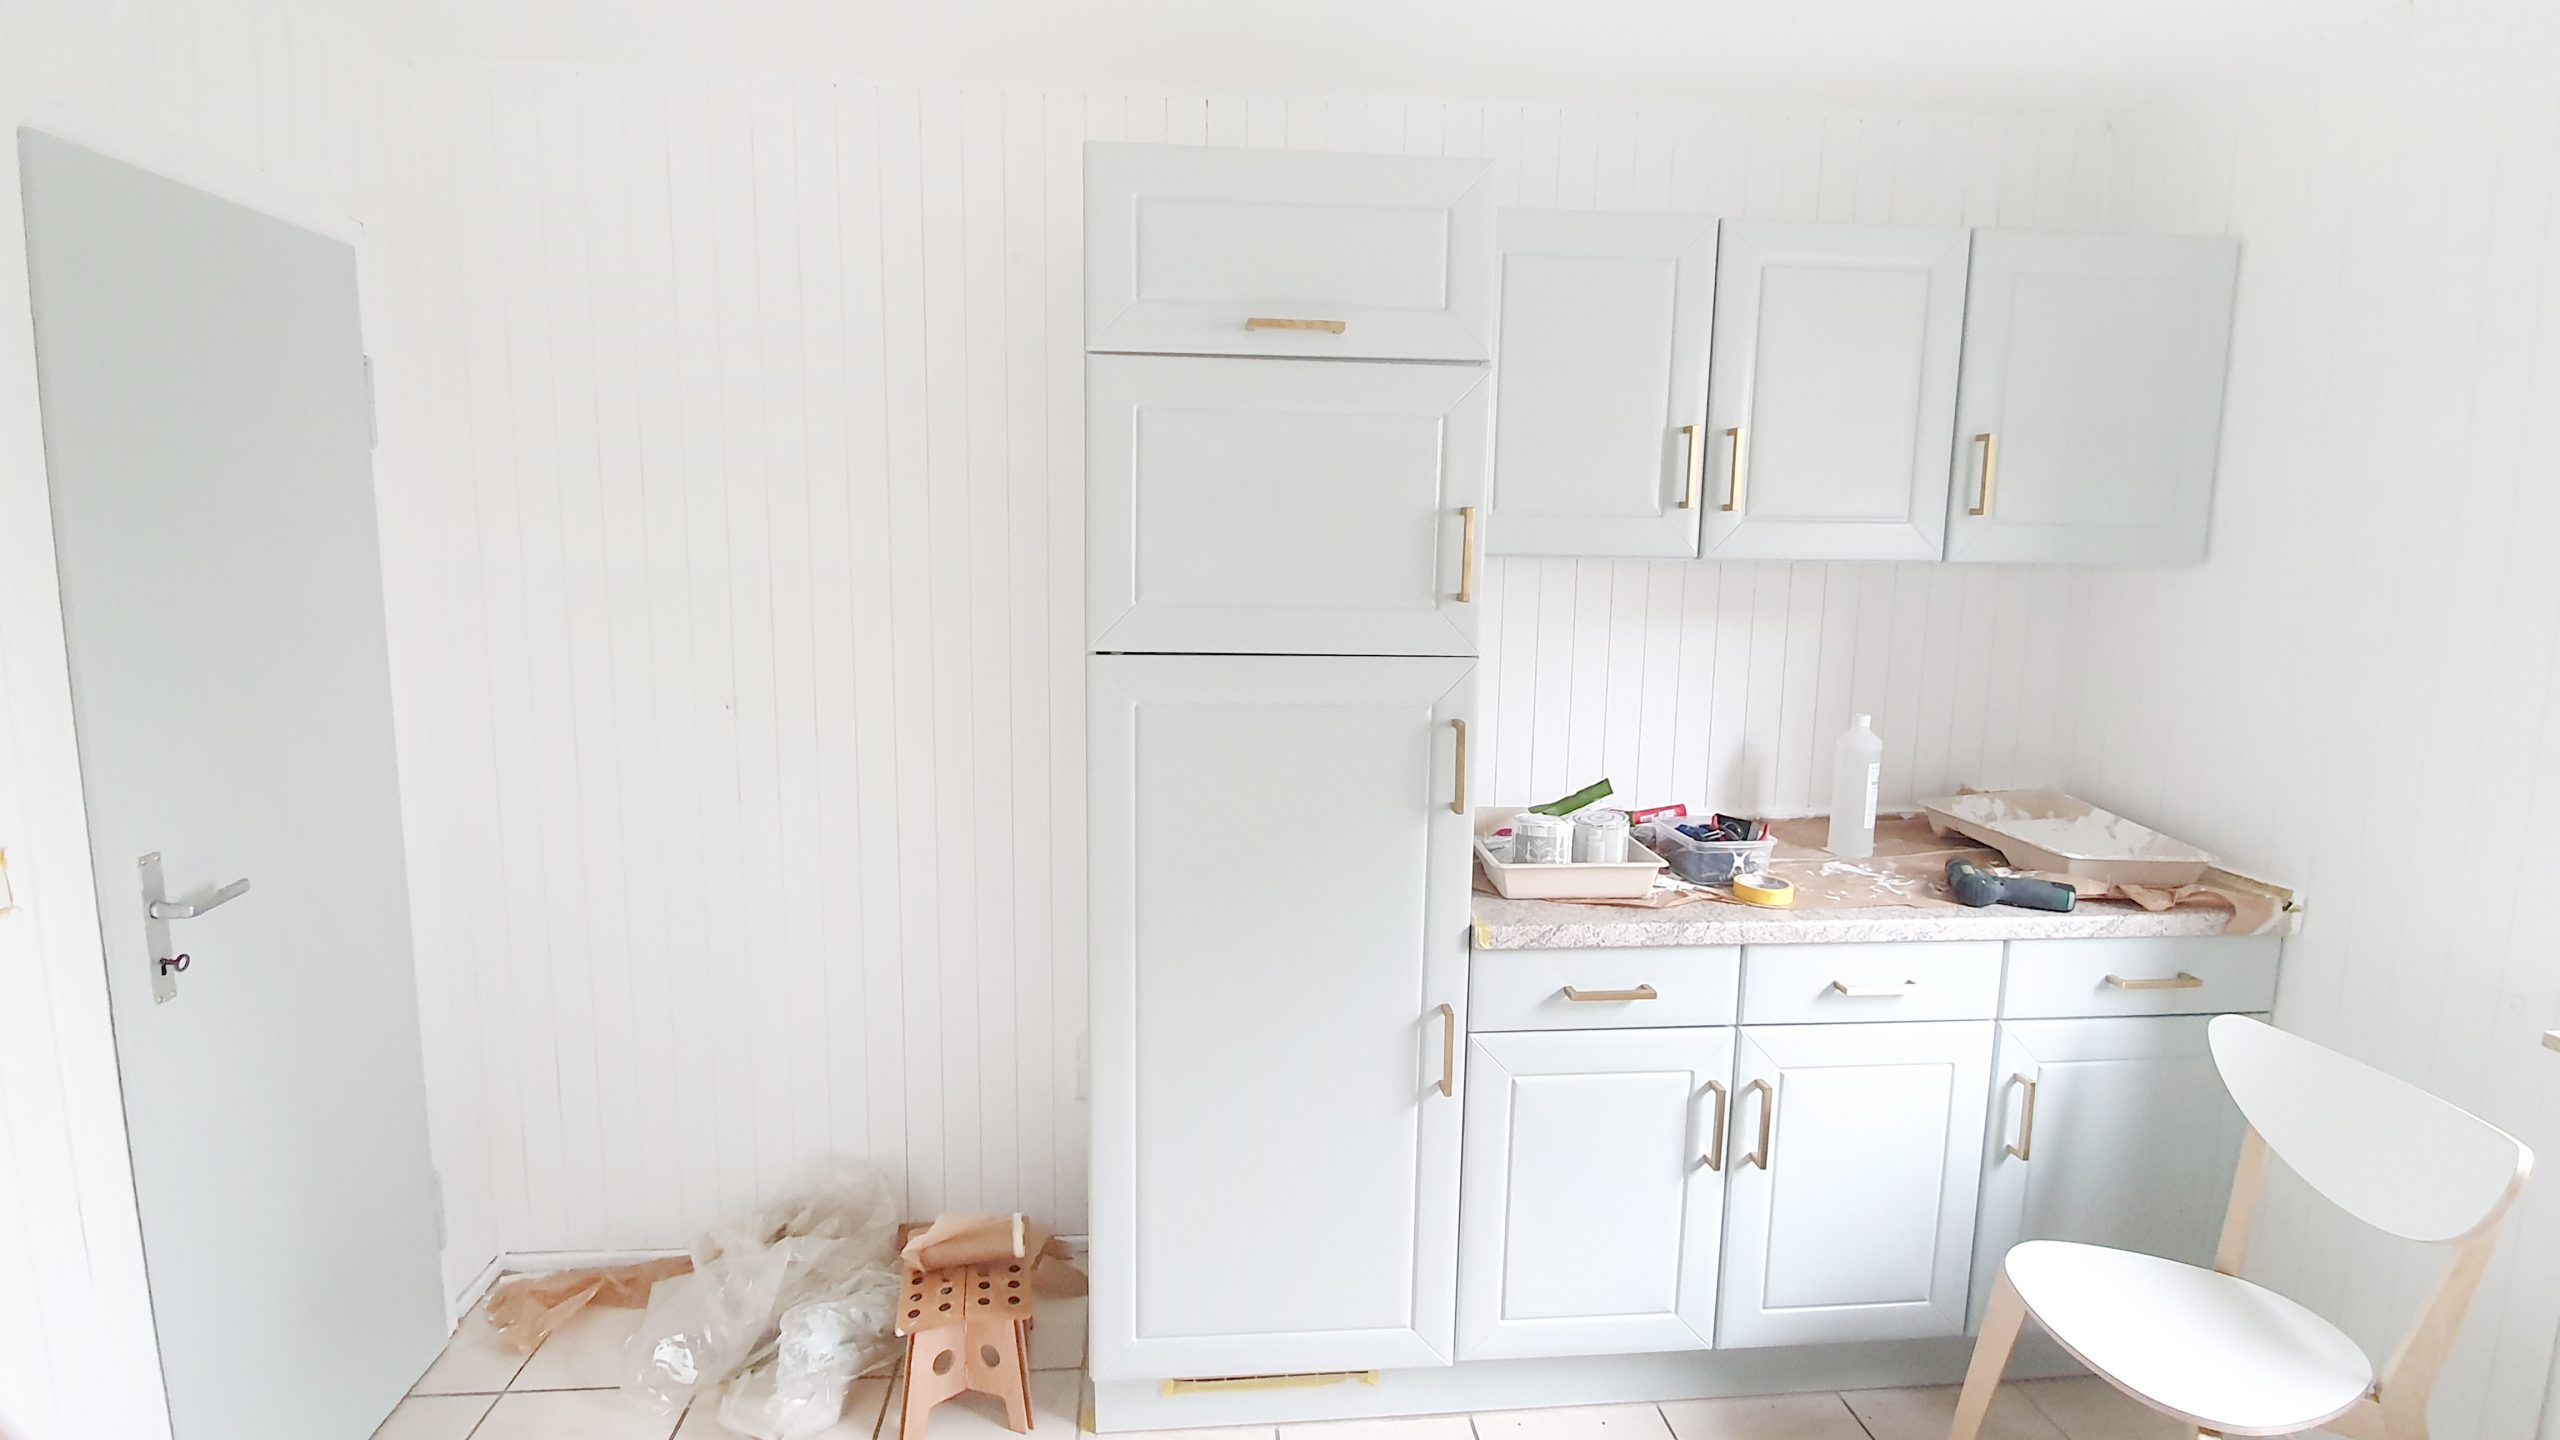
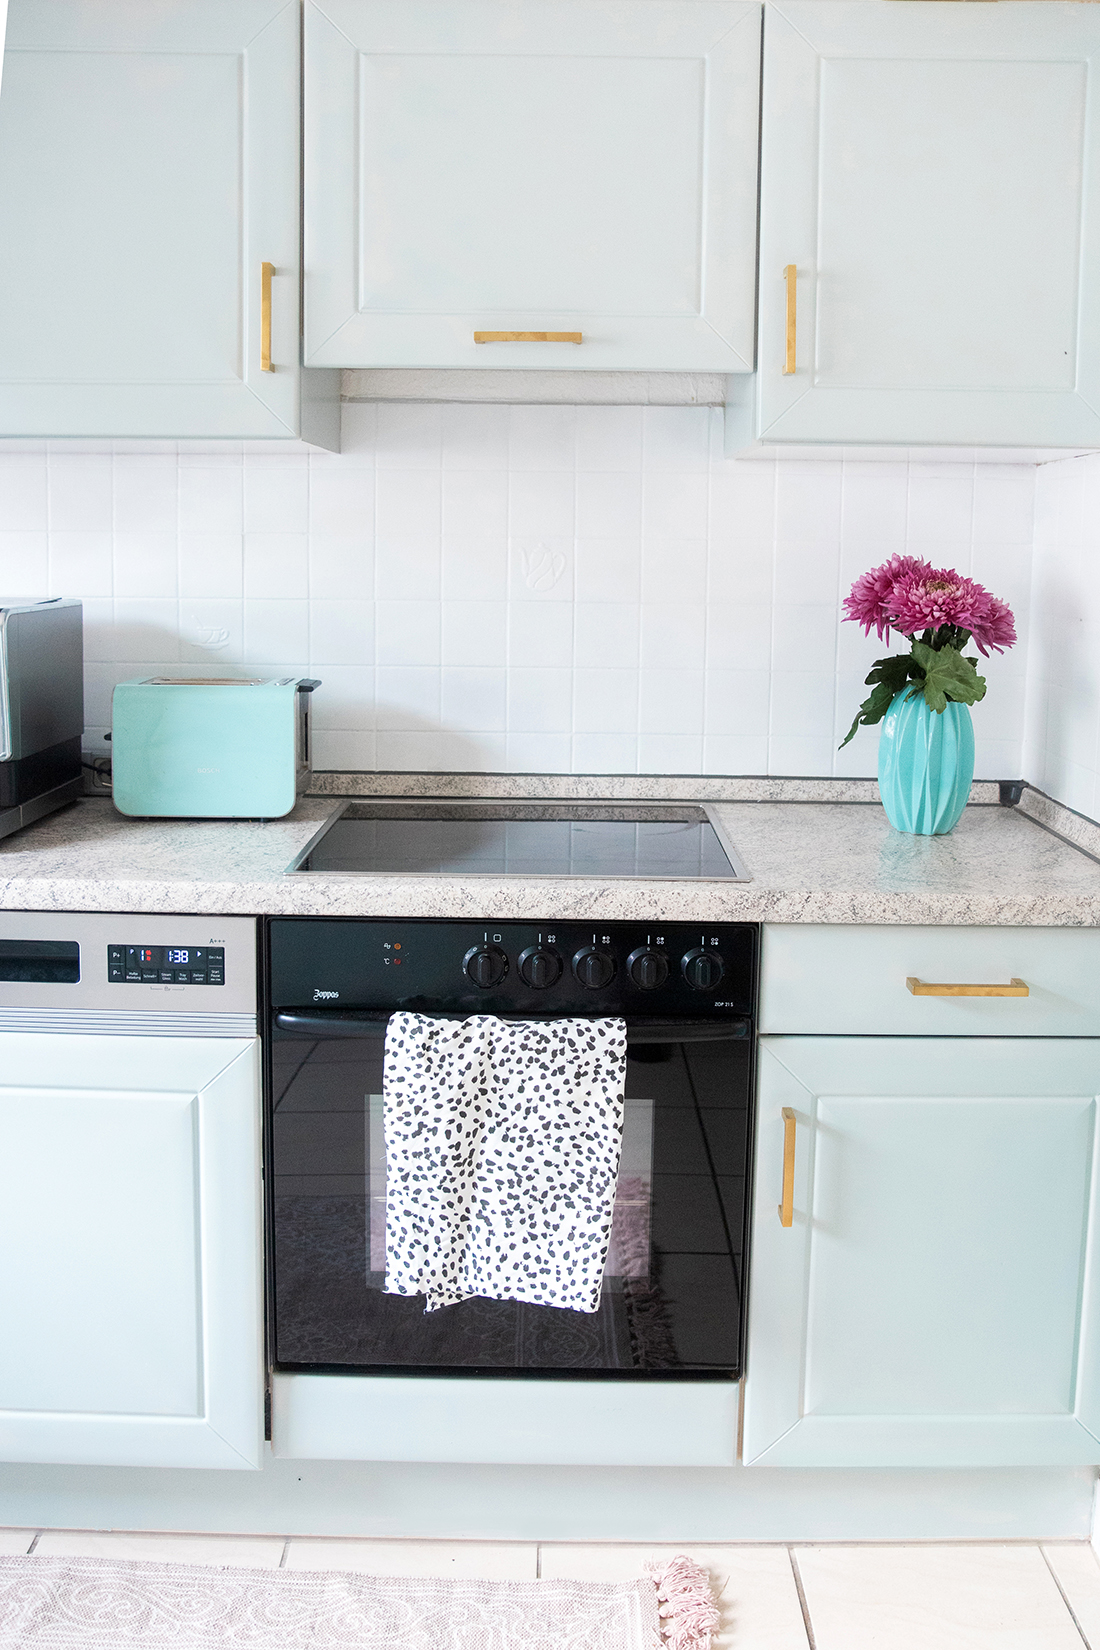
I am absolutely thrilled with the result – please look at the beautiful white wood, the mint-blue fronts together with the elegant golden handles – this kitchen has absolutely nothing to do with how it used to look!
The great color of the fronts is difficult to capture in the photo. It is a light mint with a bluish tinge that is beautifully reserved and yet special.
Here is the direct comparison again – I can hardly believe that it is the same kitchen:
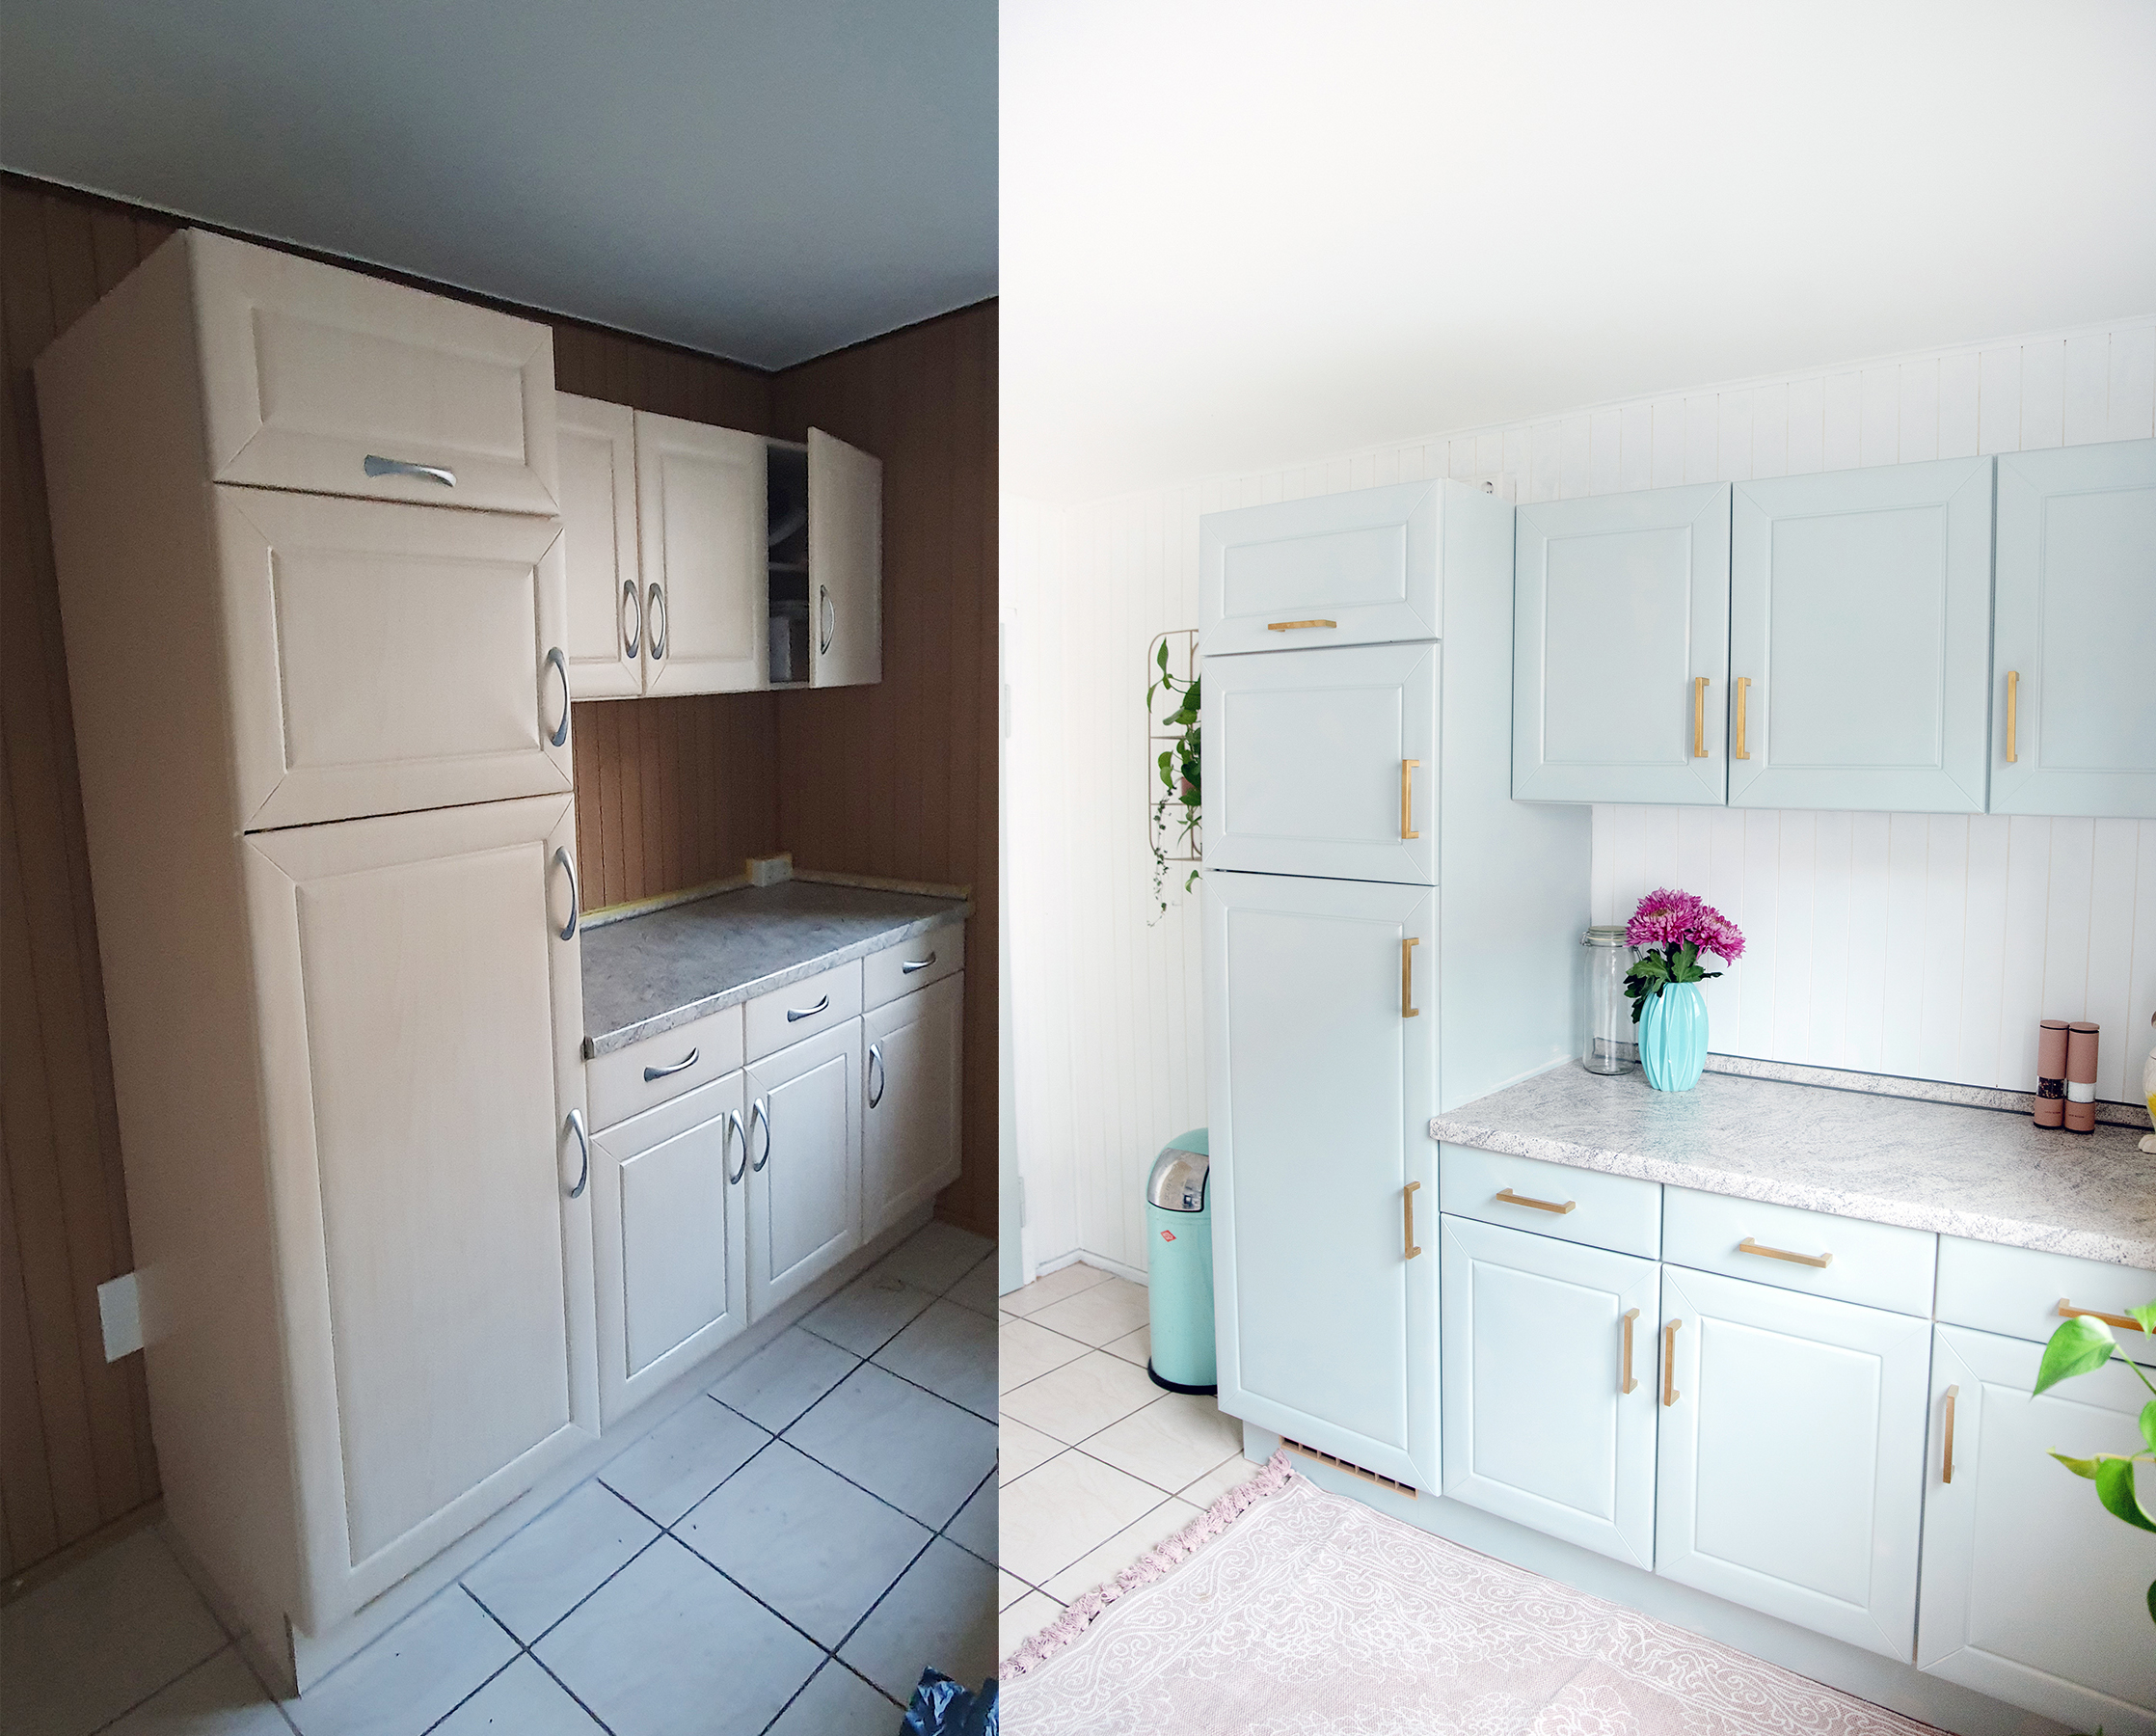
I’m so glad I decided to keep the kitchen in. The room itself is pretty big. It just didn’t come out at all beforehand, because the dark wood was totally oppressive. Now the kitchen looks incredibly bright and friendly!
Do you like my kitchen makeover? Please save it on Pinterest so you can look at it again later:

I’m Lisa – and I can never sit still. I’ve been blogging about my passions on my fairy dust since 2013: These are great DIY ideas, chic designs and very special illustrations. The main thing is homemade! More about me.
Source: meinfeenstaub.com

