Every summer there is a new trend to make bracelets yourself. This year the Katsuki beads are very popular. In this article I will explain to you how you can melt these beads from fuse beads and therefore do not have to spend money on new beads.
What are Katsuki beads
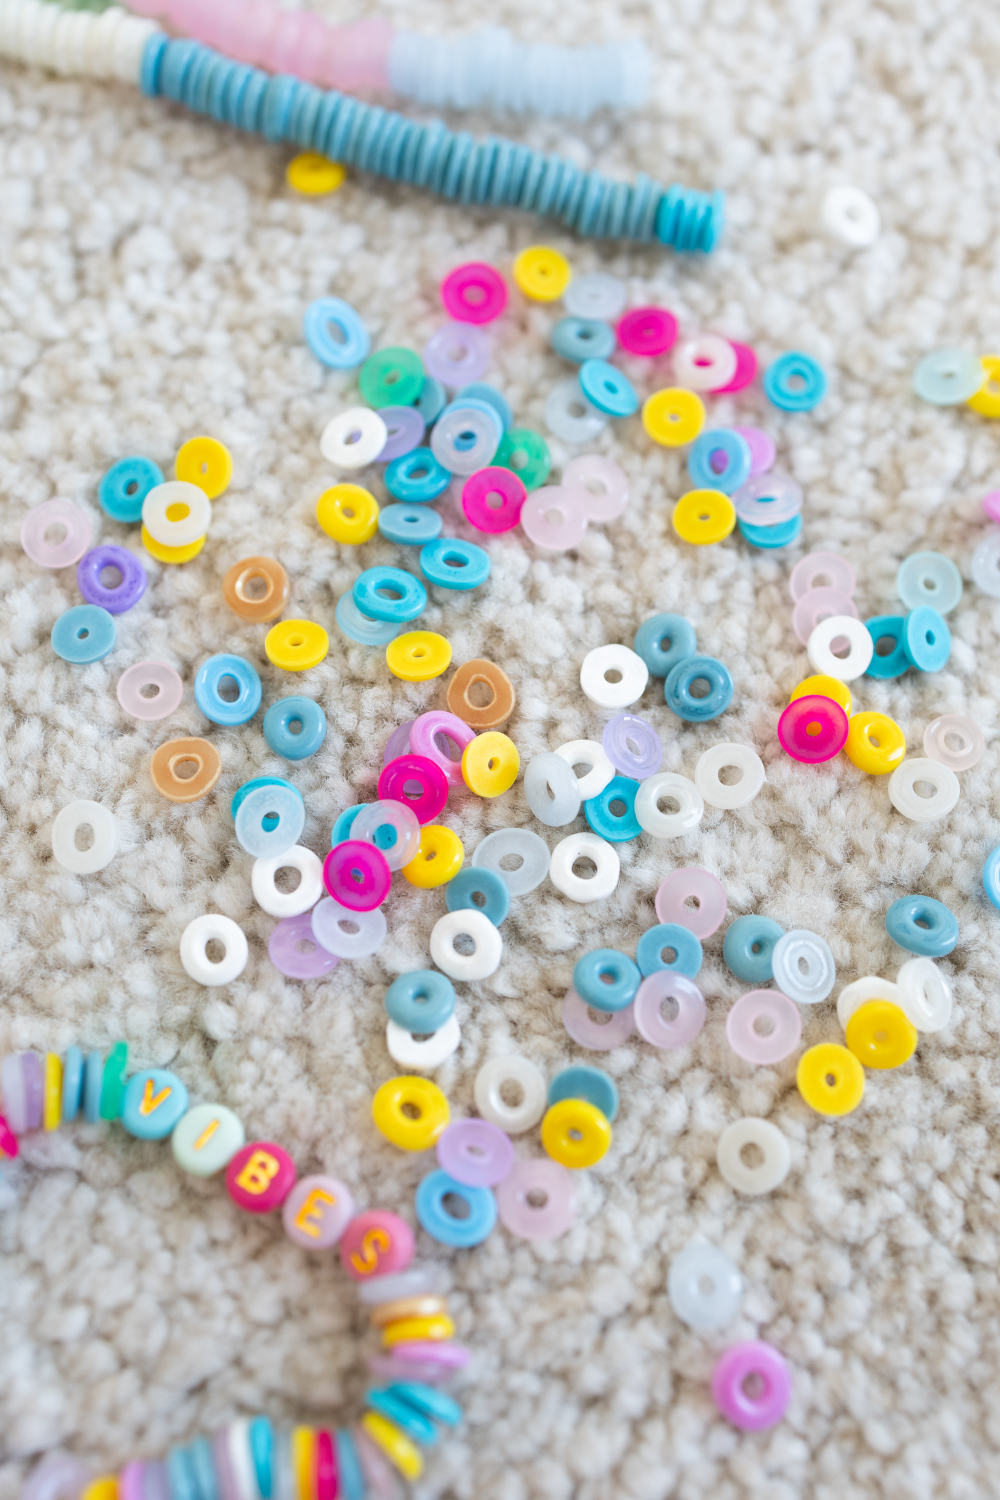
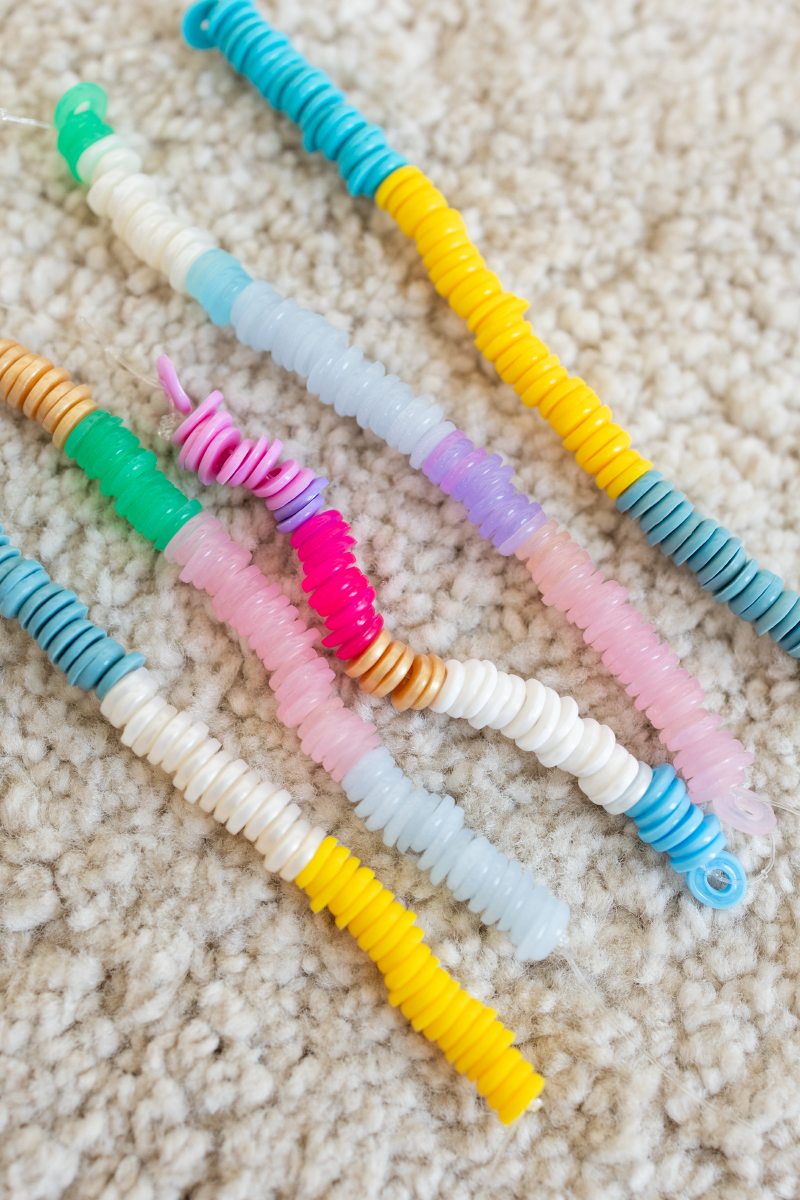
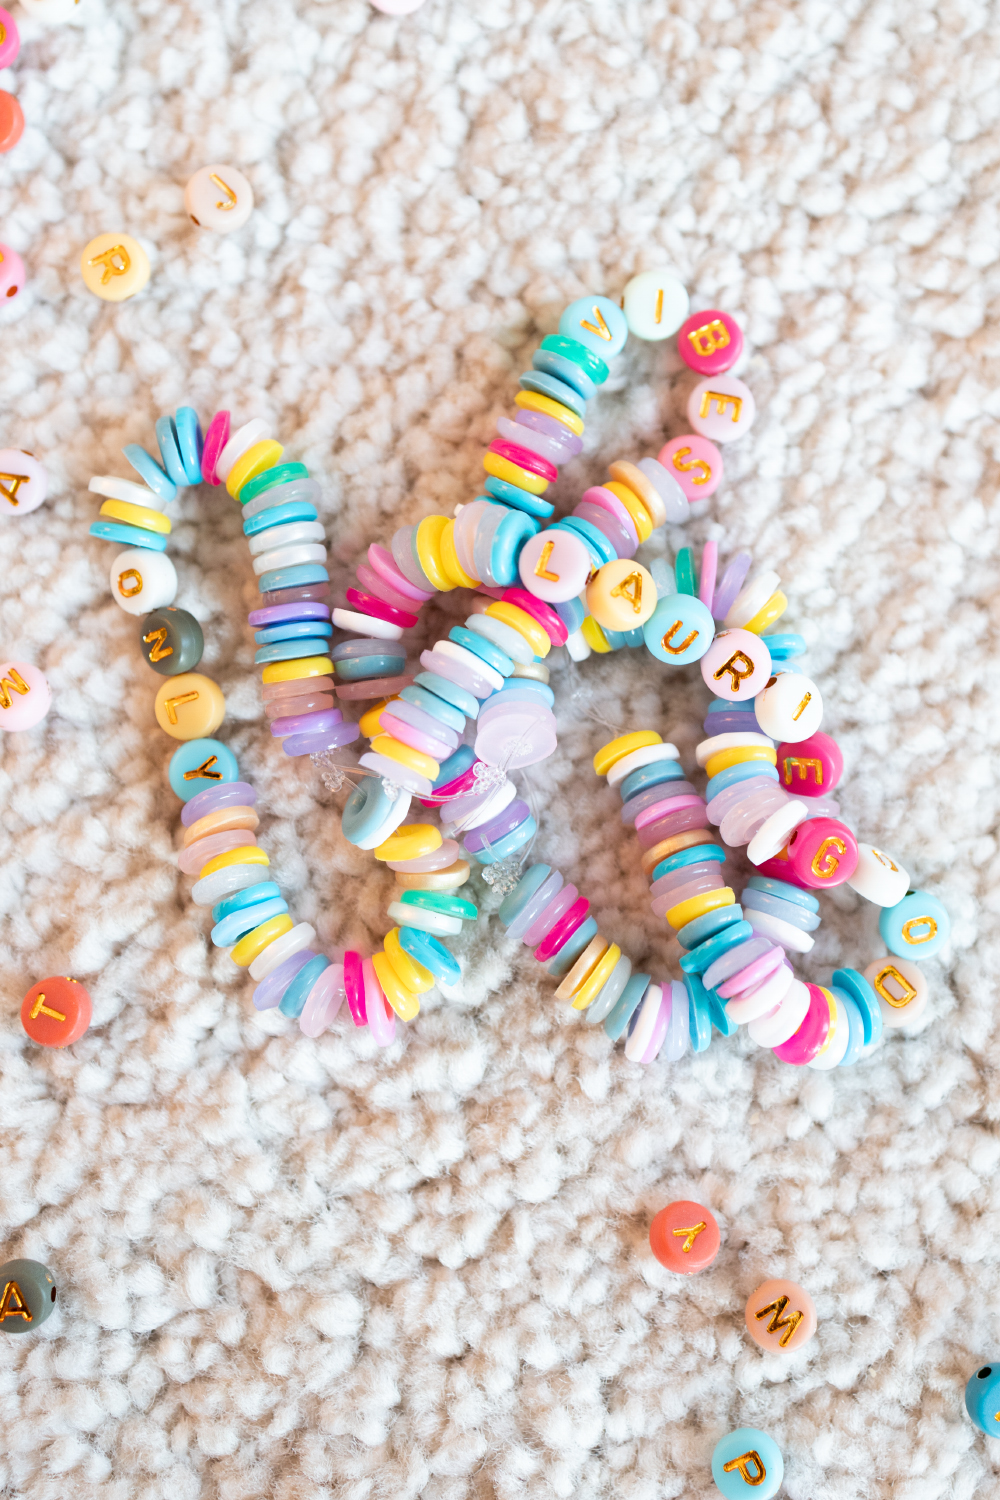
The Katsuki beads (or Heishi beads) are small discs made of plastic. They can be used to make bracelets and necklaces. Especially in combination with round beads or letter beads, you can make colorful bracelets for the summer with your best friend.
How do I melt fuse beads?
Surely you still know iron beads. These pearls from our childhood are probably still unused somewhere in the closet. You can of course stick them on pegboards and iron them in the classic way, or you can melt them and use them to make Katsuki beads yourself at home. This way you can save some money and finally use up your fuser bead supplies! In the following instructions, I will explain how you can flatten the iron beads quickly:
* Advertising // Amazon Affiliate Link: If you buy something through these links, I get a small commission. For you, the product does NOT cost more!
Instructions
First comes the hardest part: Deciding on your favorite colors that you would like to melt.
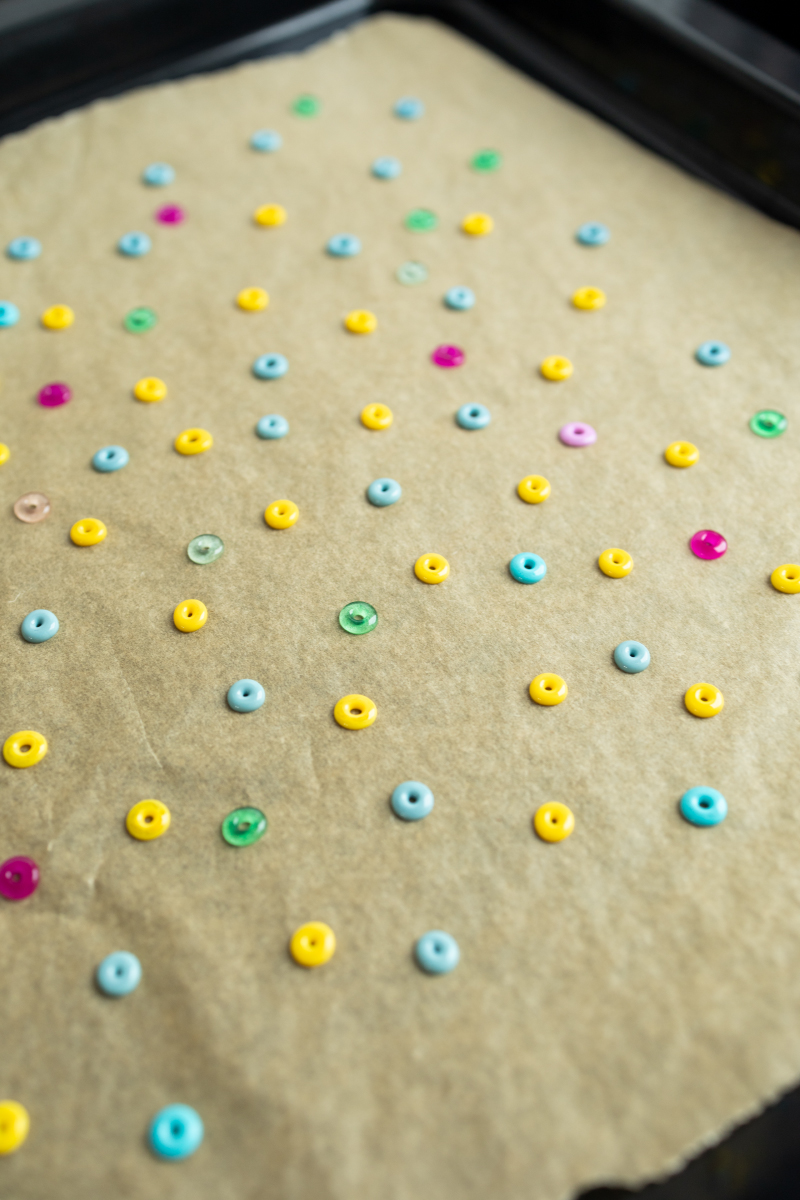
Next, line a baking sheet with parchment paper. Now place the beads on the parchment paper with a little spacing and the hole facing up so that they cannot roll away.
When the entire baking paper is full of pearls, place them in the preheated oven and bake them at 200 ° C top/bottom heat for 3-5 minutes. The time depends somewhat on the size of your beads.
They’re done when they’ve flattened out. Don’t wait too long as they will eventually melt and become bulky. You’ll quickly get a feel for how long you’ll have to wait for your pearls.
Now take them out of the oven and let them cool completely. As long as they are still hot, they can still deform.
Then carefully remove from the baking paper and start tinkering with your new Katsuki beads!
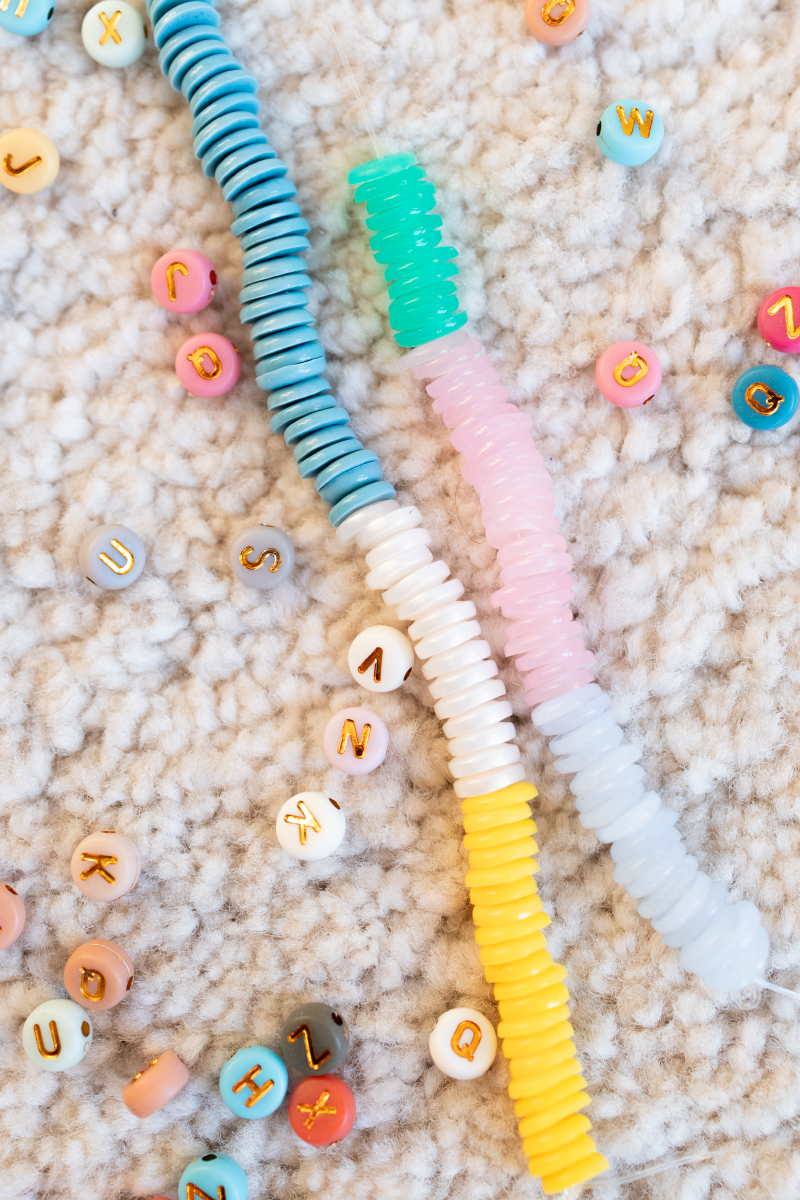
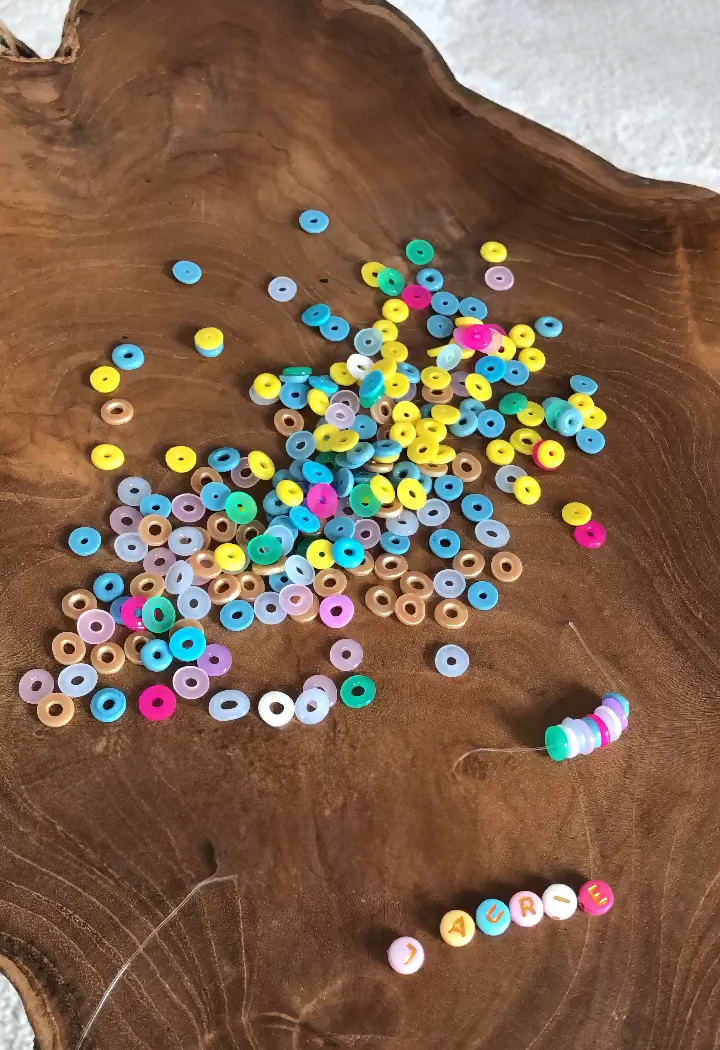
As you can see, it’s really easy to make yourself with very few materials. The best thing to do is to get started right away so that you can then make lots of bracelets out of it! Of course you can also make necklaces or other jewelry with it.
That’s it with my idea for ironing beads. Haven’t you had enough of ironing beads yet? Then try my other ideas. Do you already know my articles about invitation cards with iron bead wreaths #DIYYearChallenge, donut clock made of iron beads or 10 iron bead ideas – simple ideas for adults and children.
See you then. Your Laura
Source: trytrytry.de