
Advertising
{Partner: Cricut // Information about advertising at mein feenstaub}
Next I go to #DIYYearChallengethat I organize every month with Laura from trytrytry! Our topic today is “Let us celebrate”. It’s all about ideas for parties, celebrations and gifts.
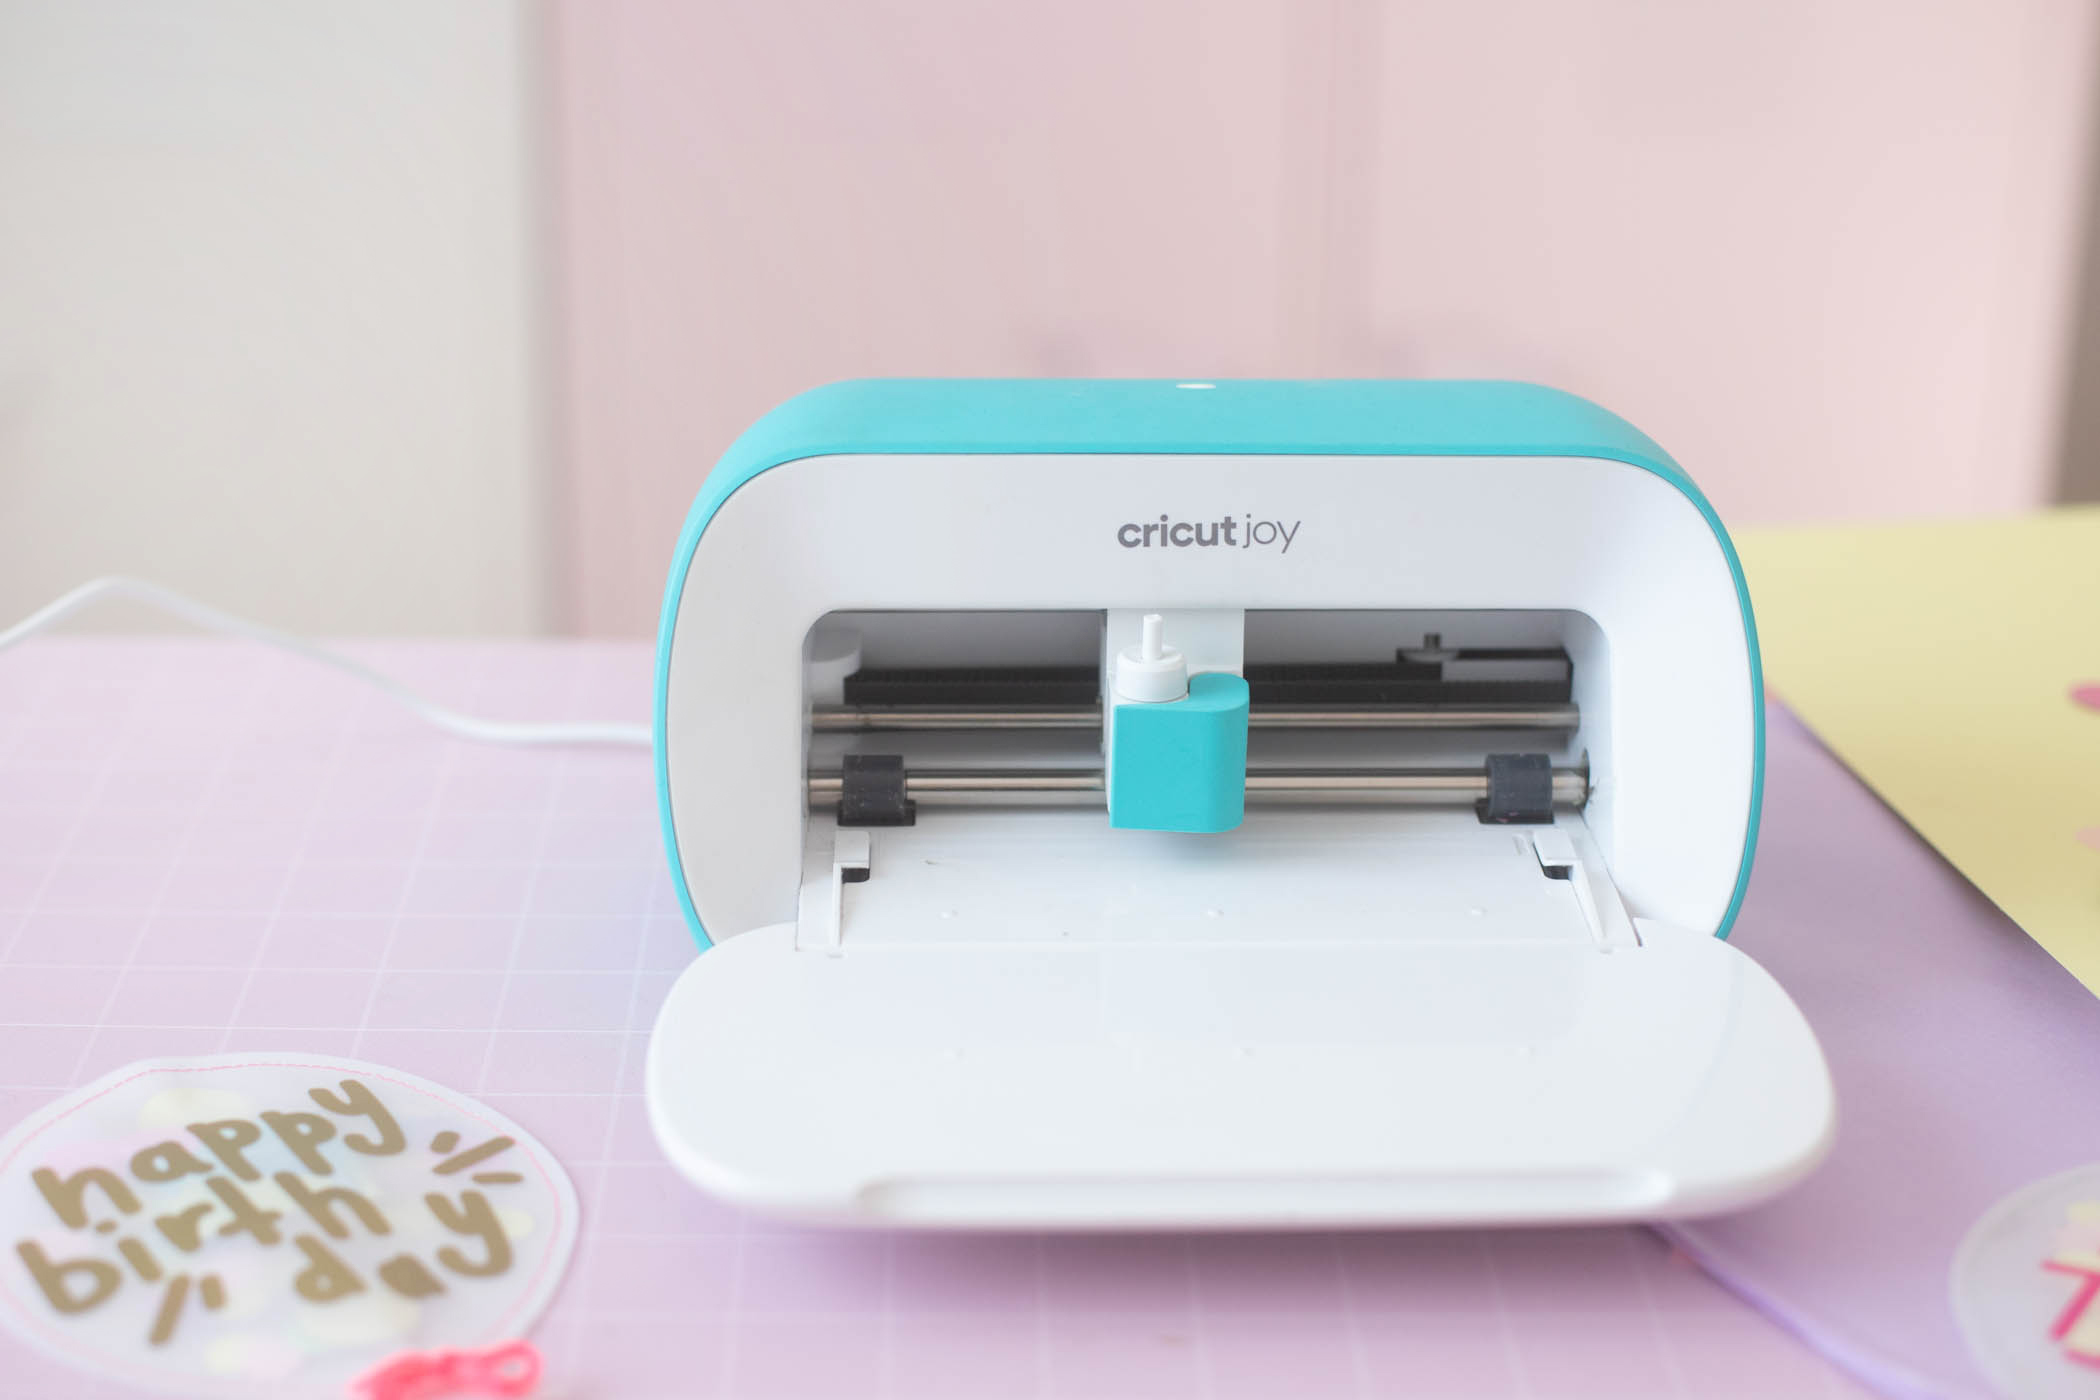
Our sponsor for the month of June is Cricut. Cricut has a great range of intelligent cutting machines that make it easy to create wonderful gift ideas.
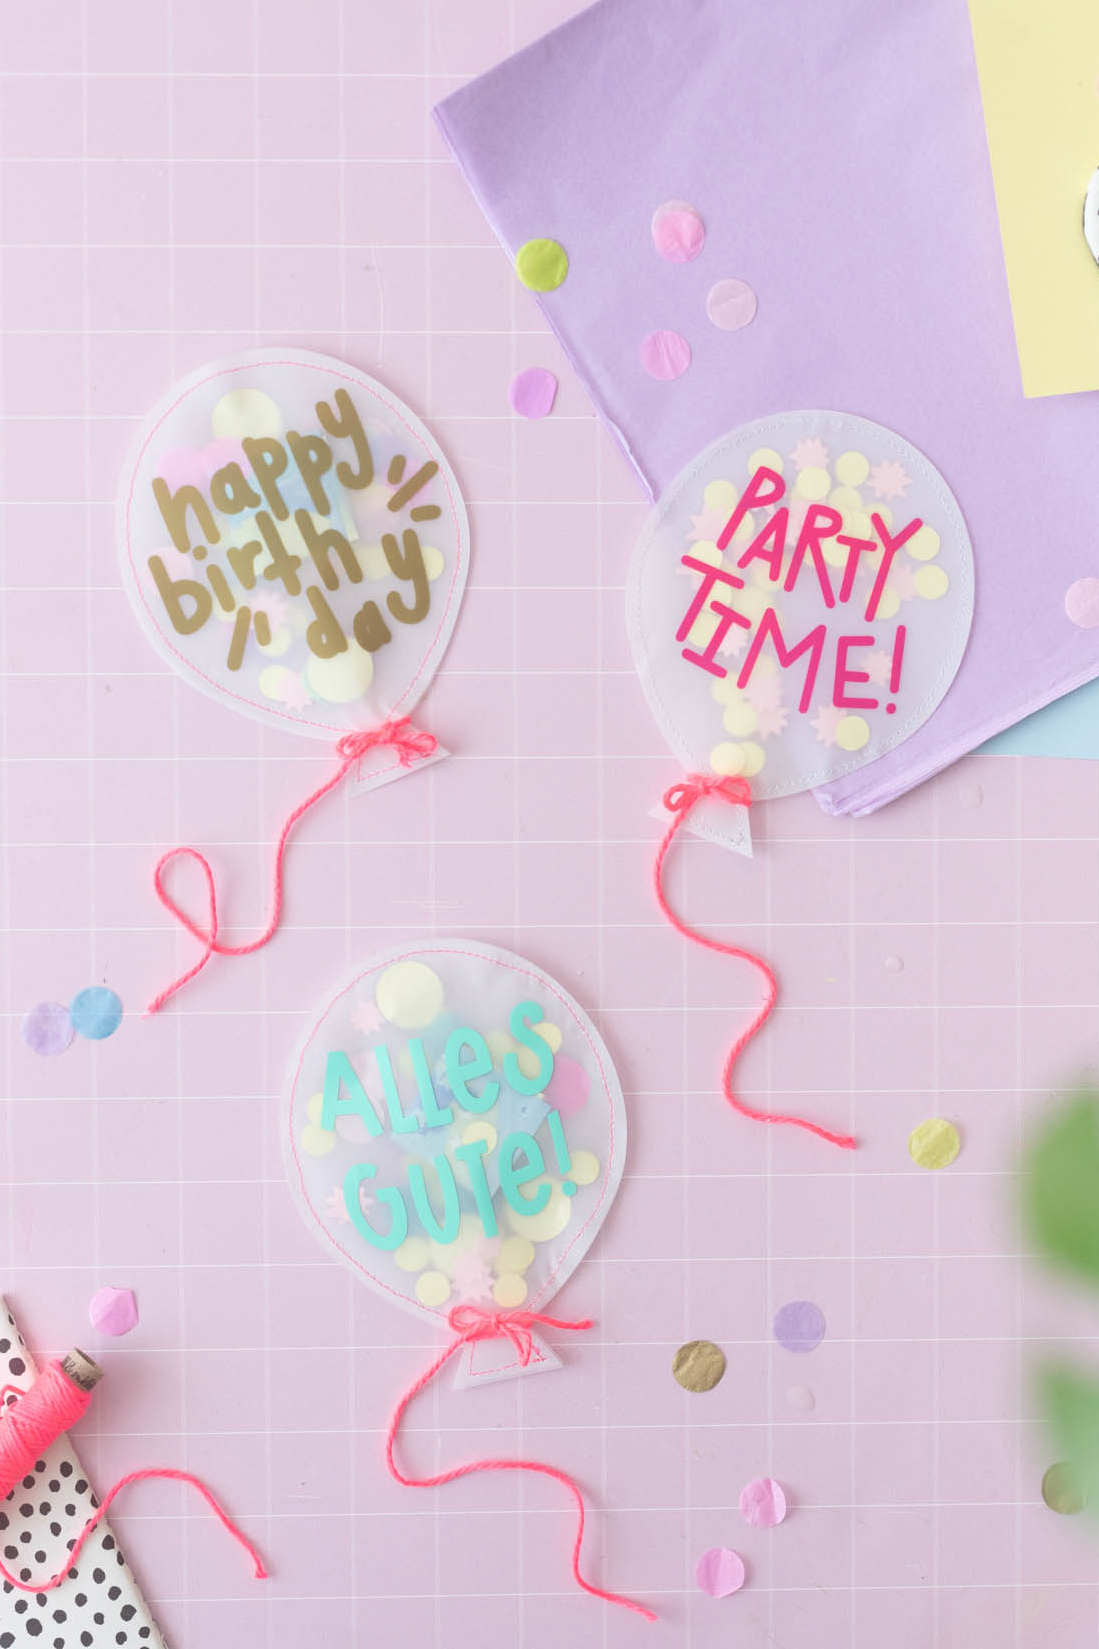
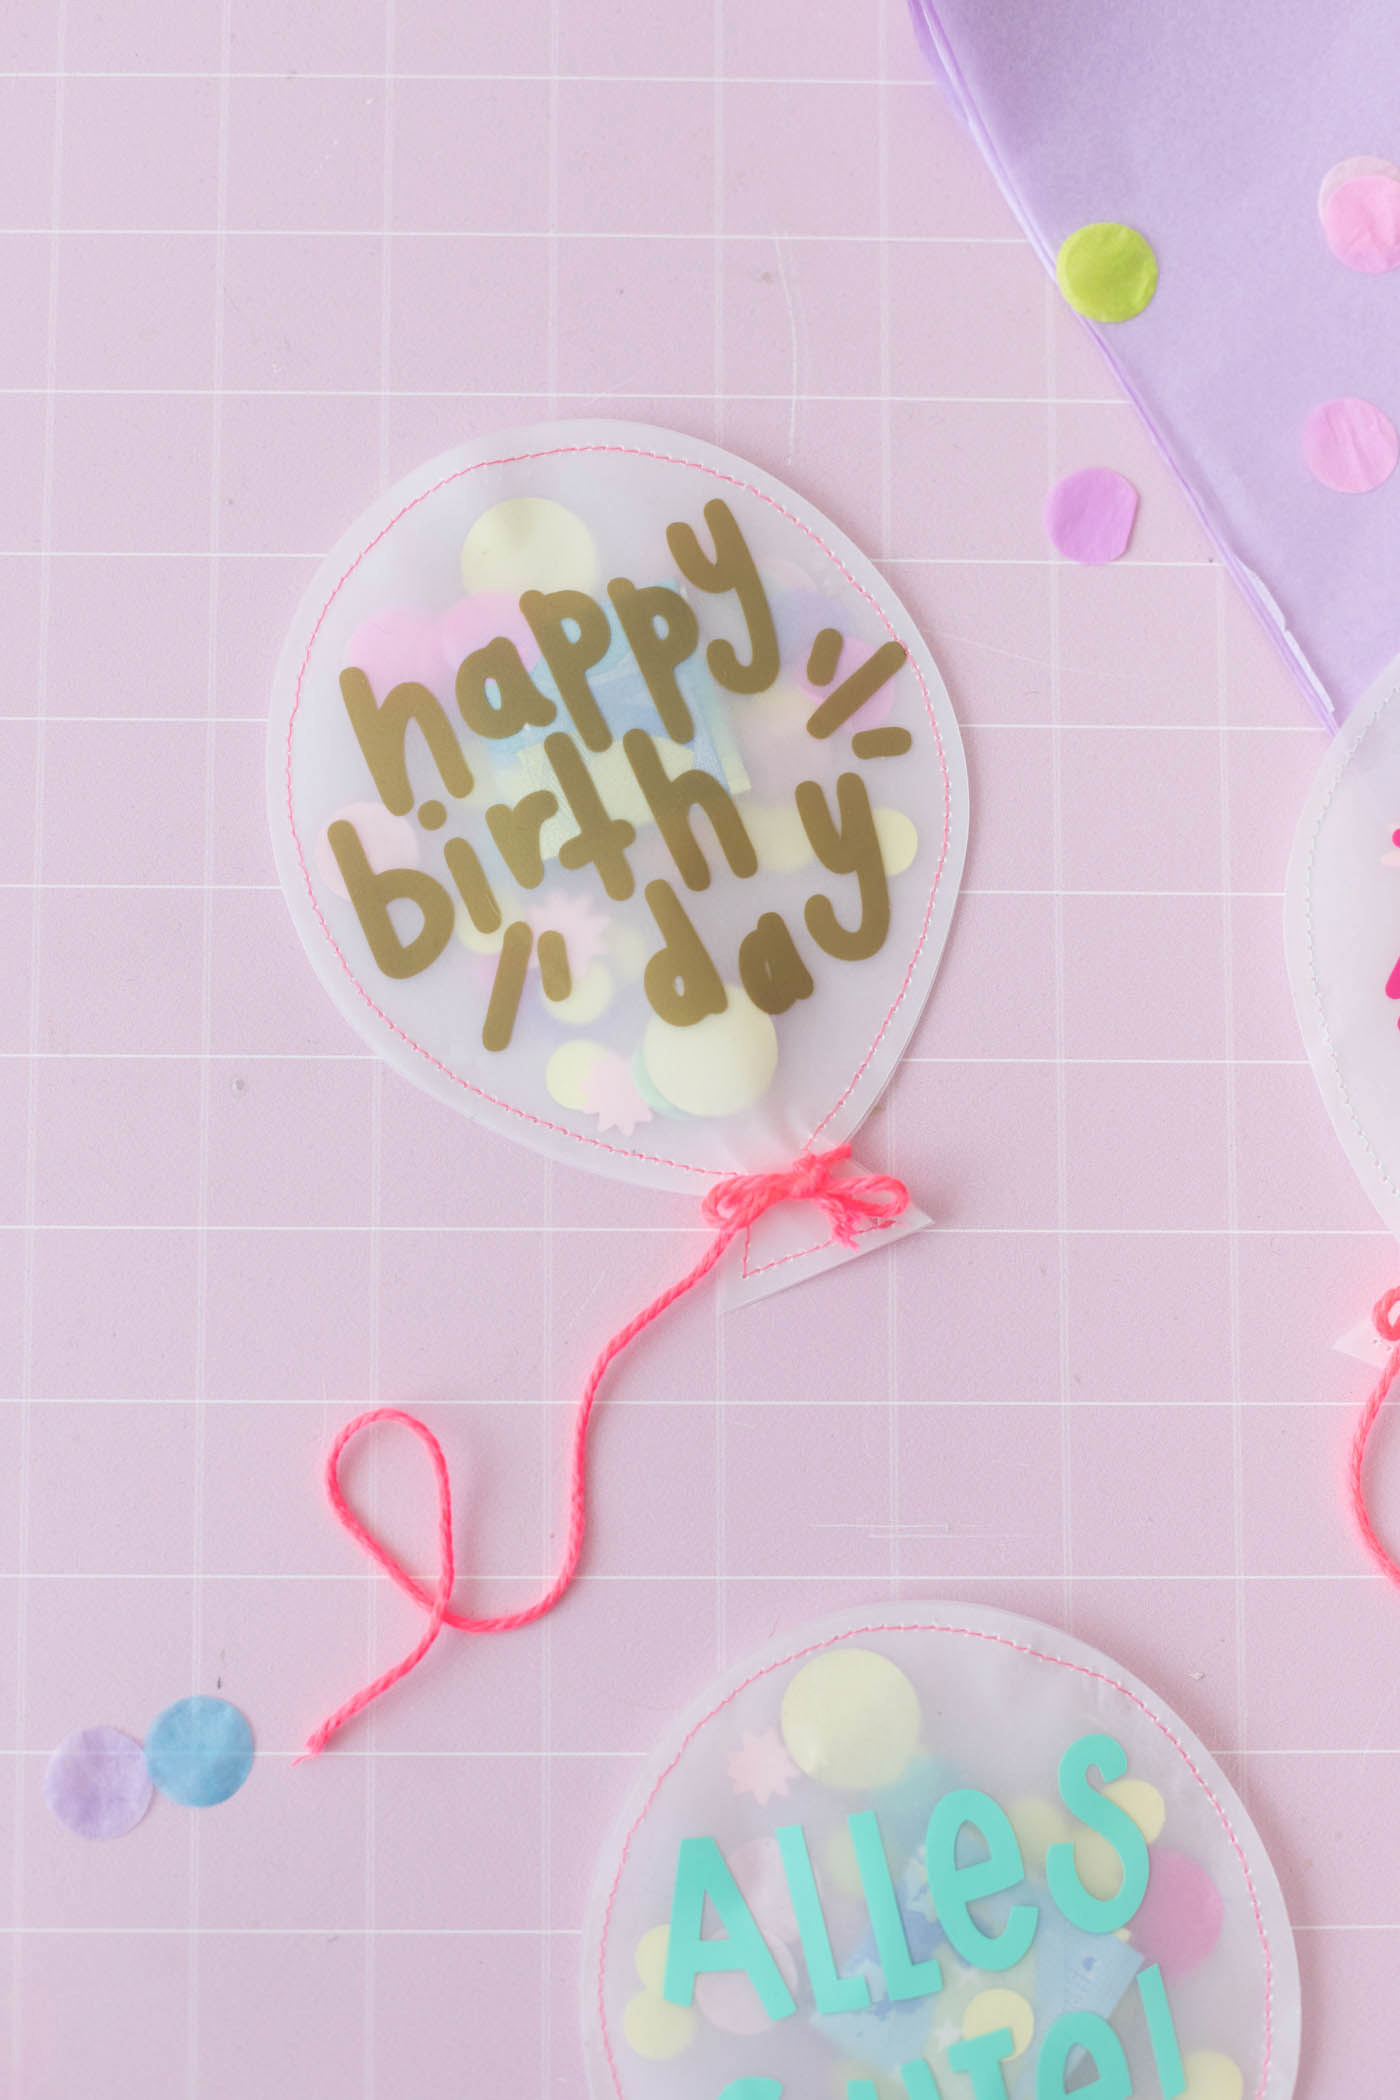
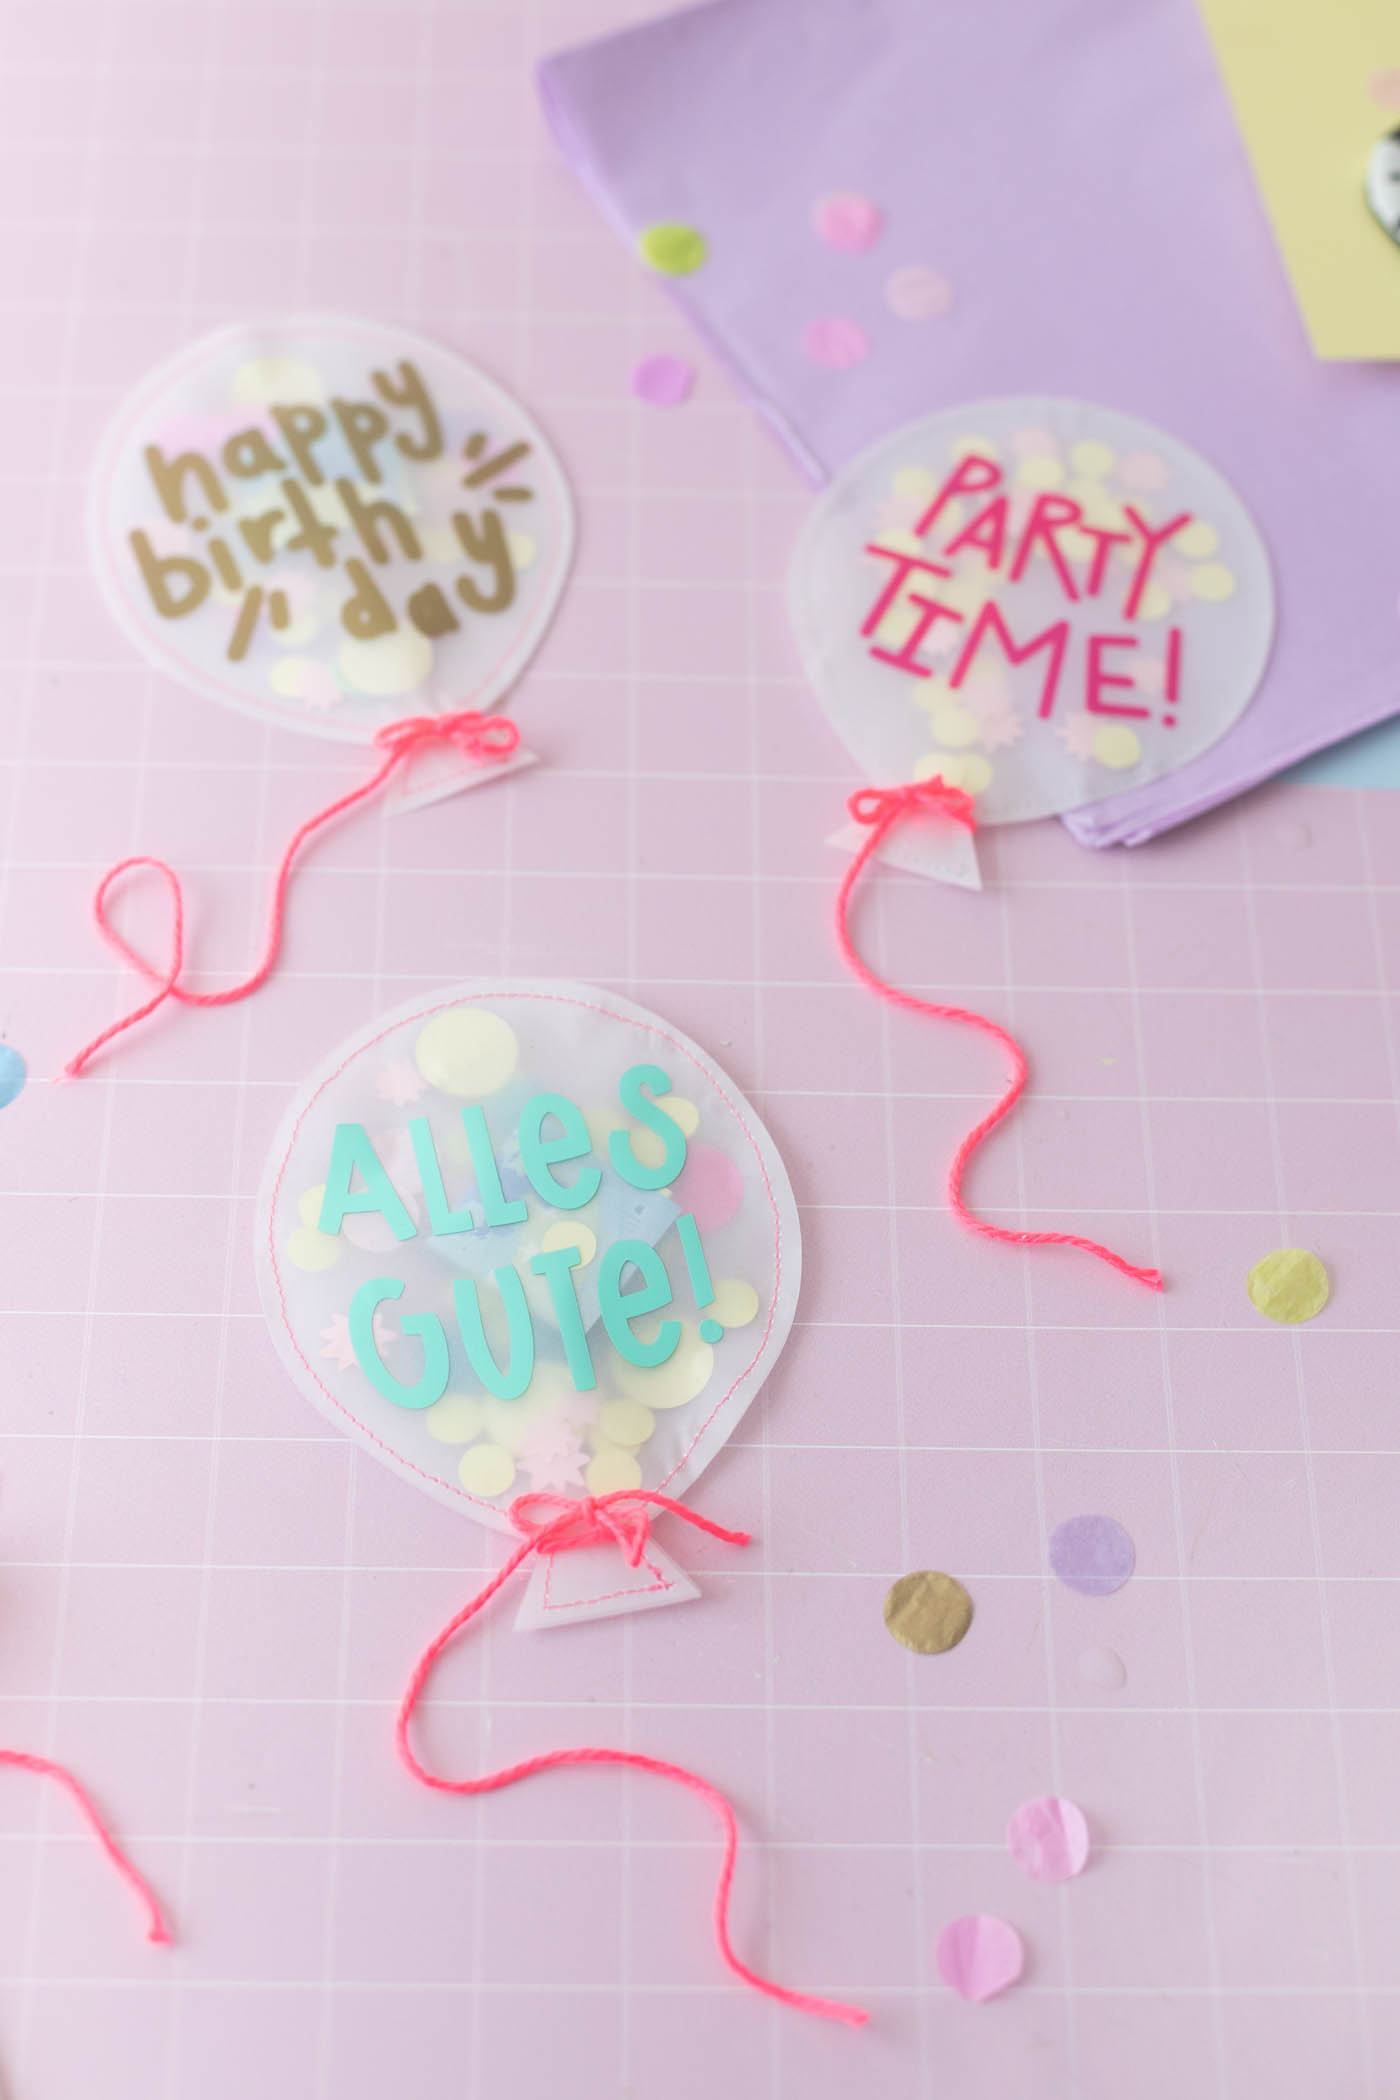
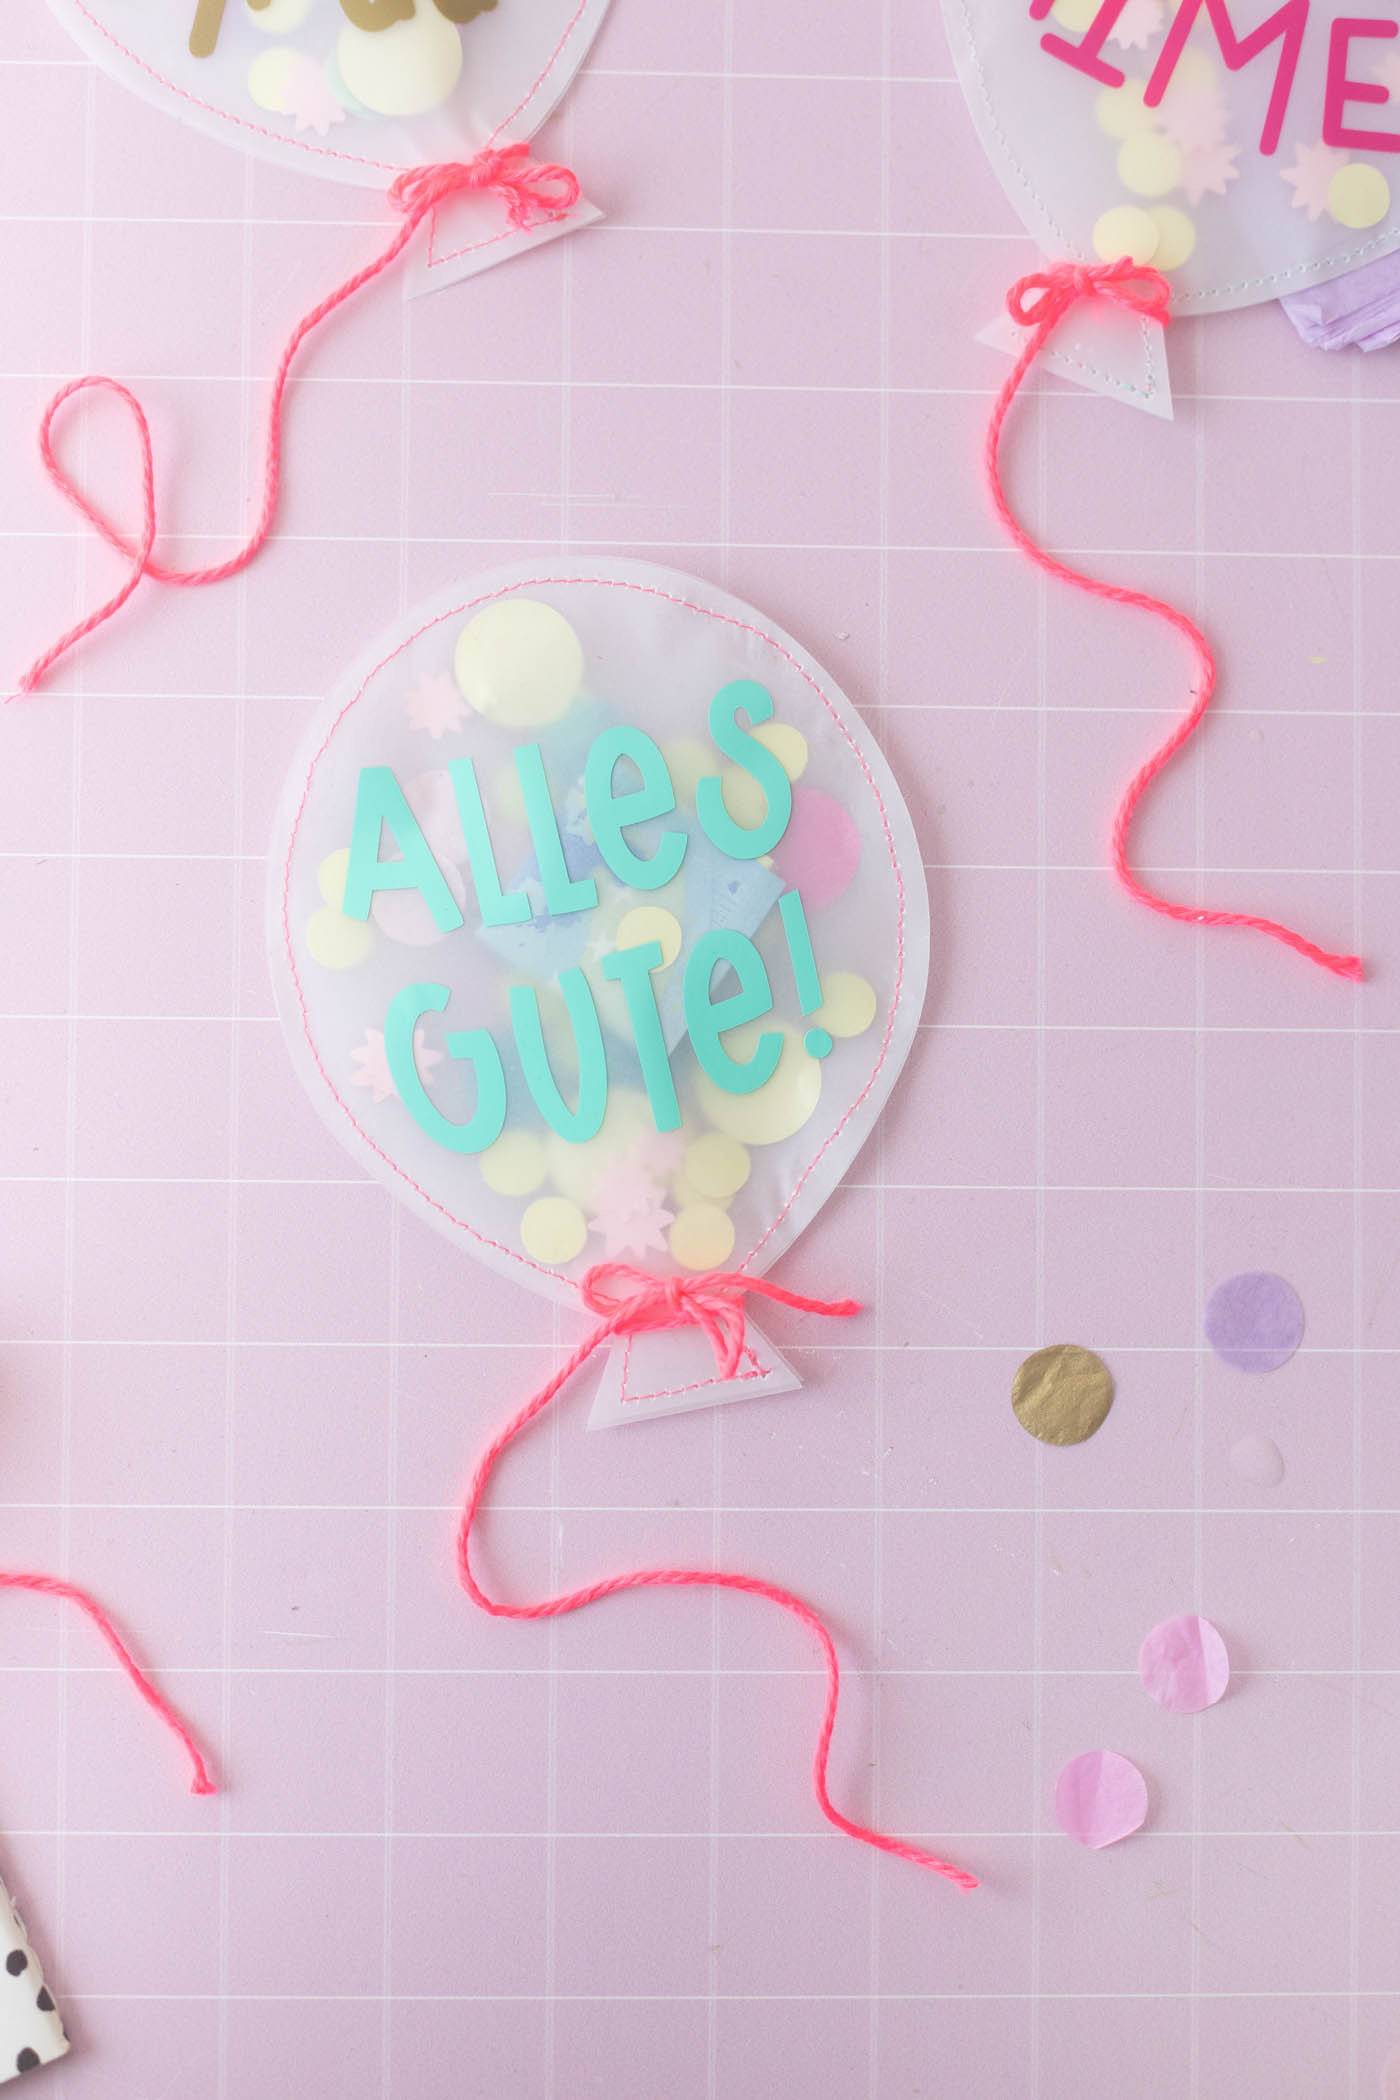
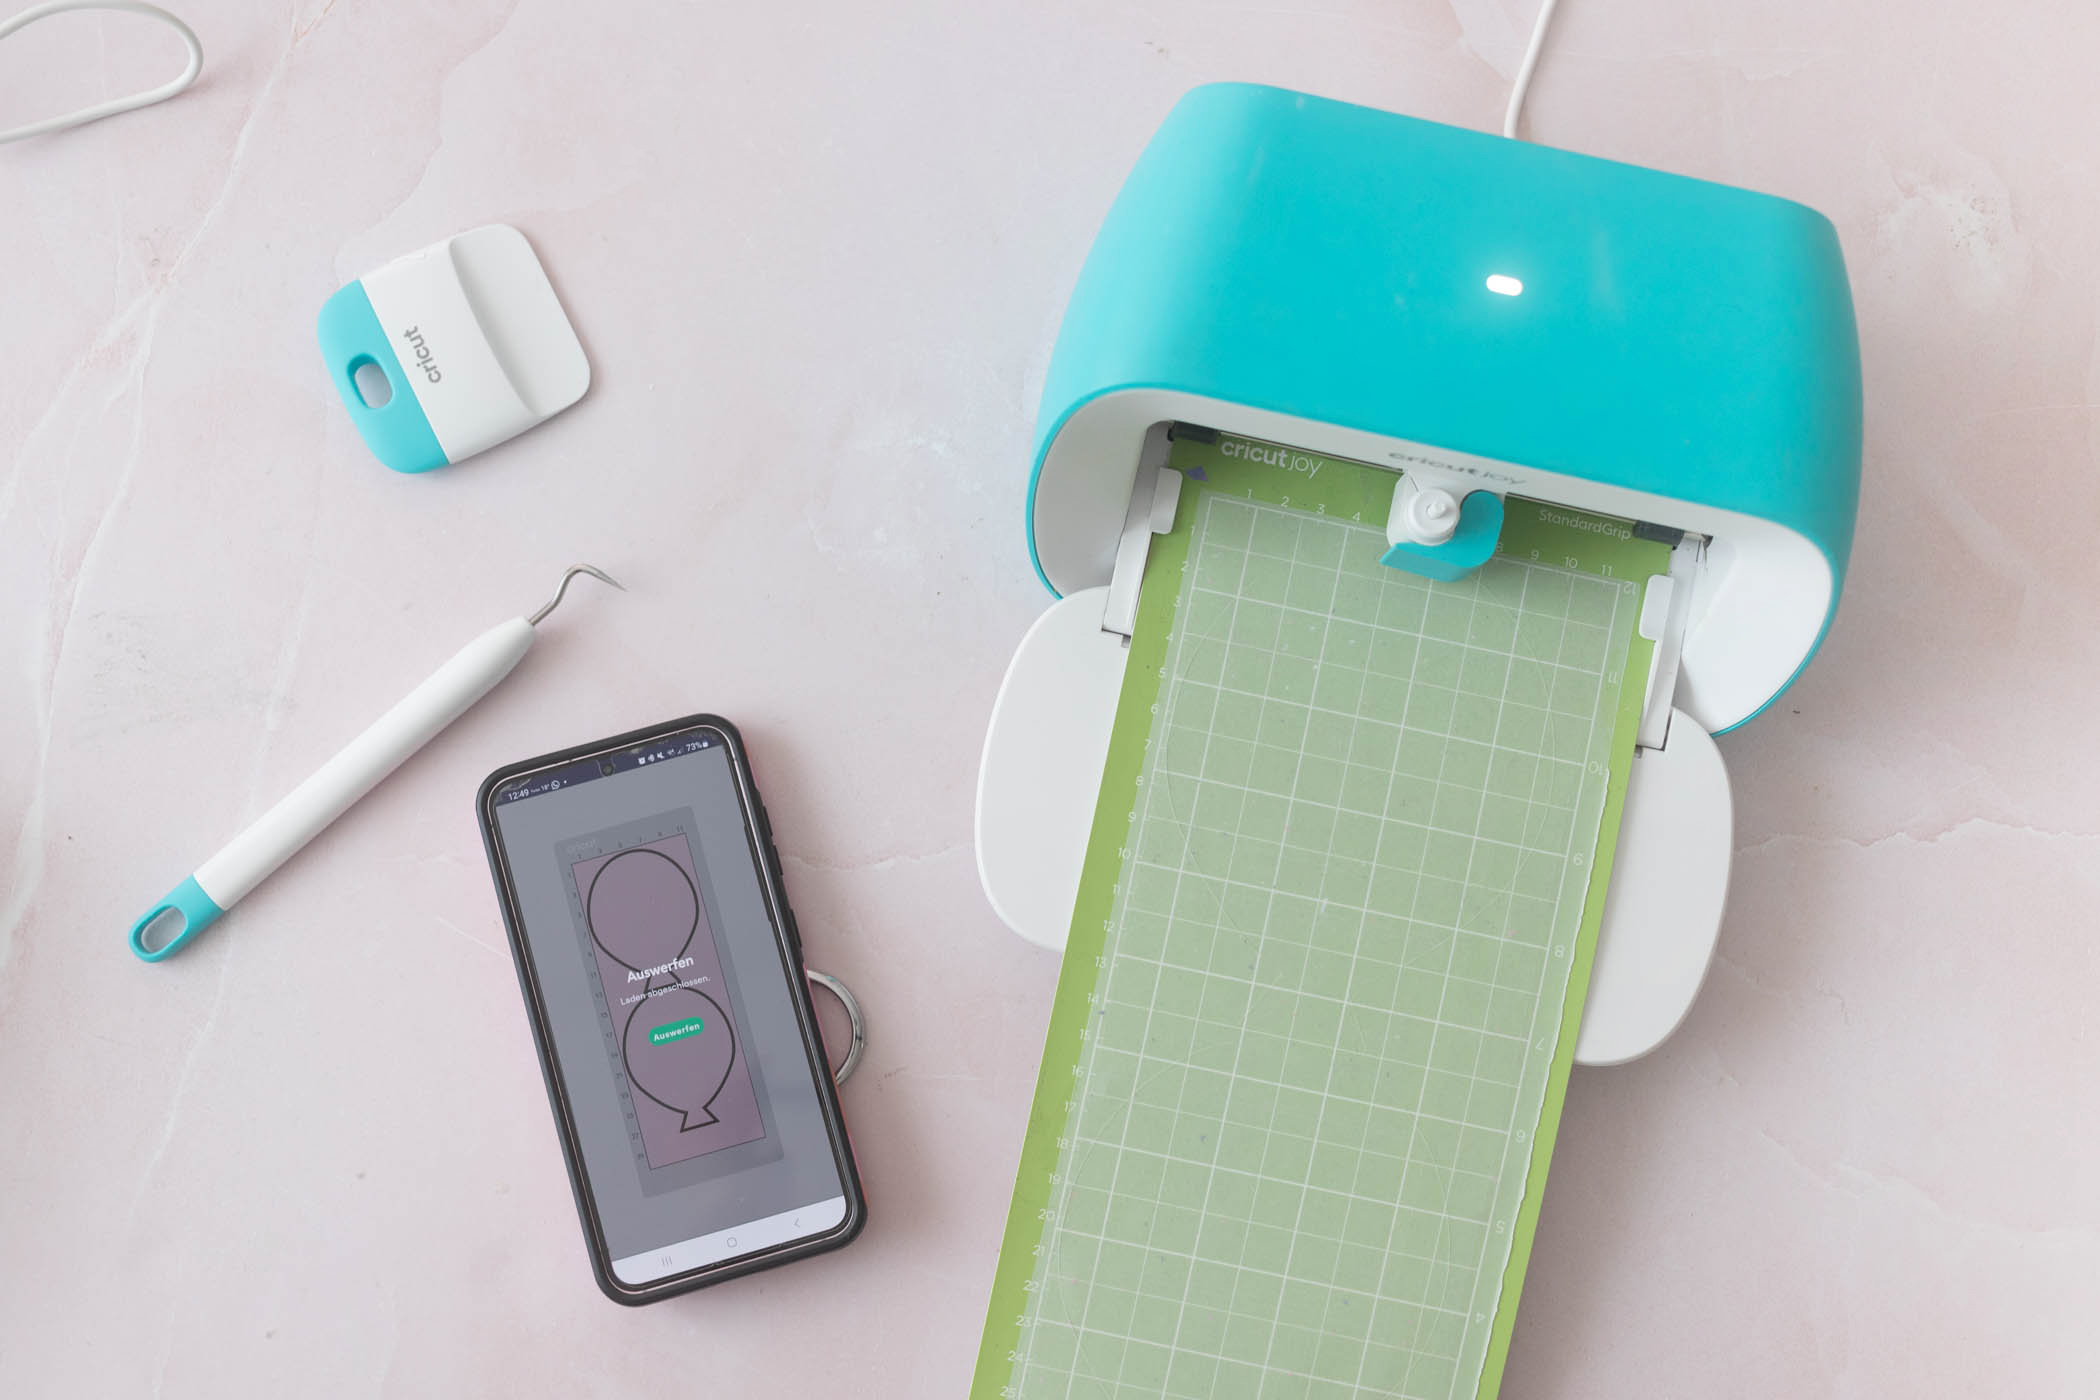
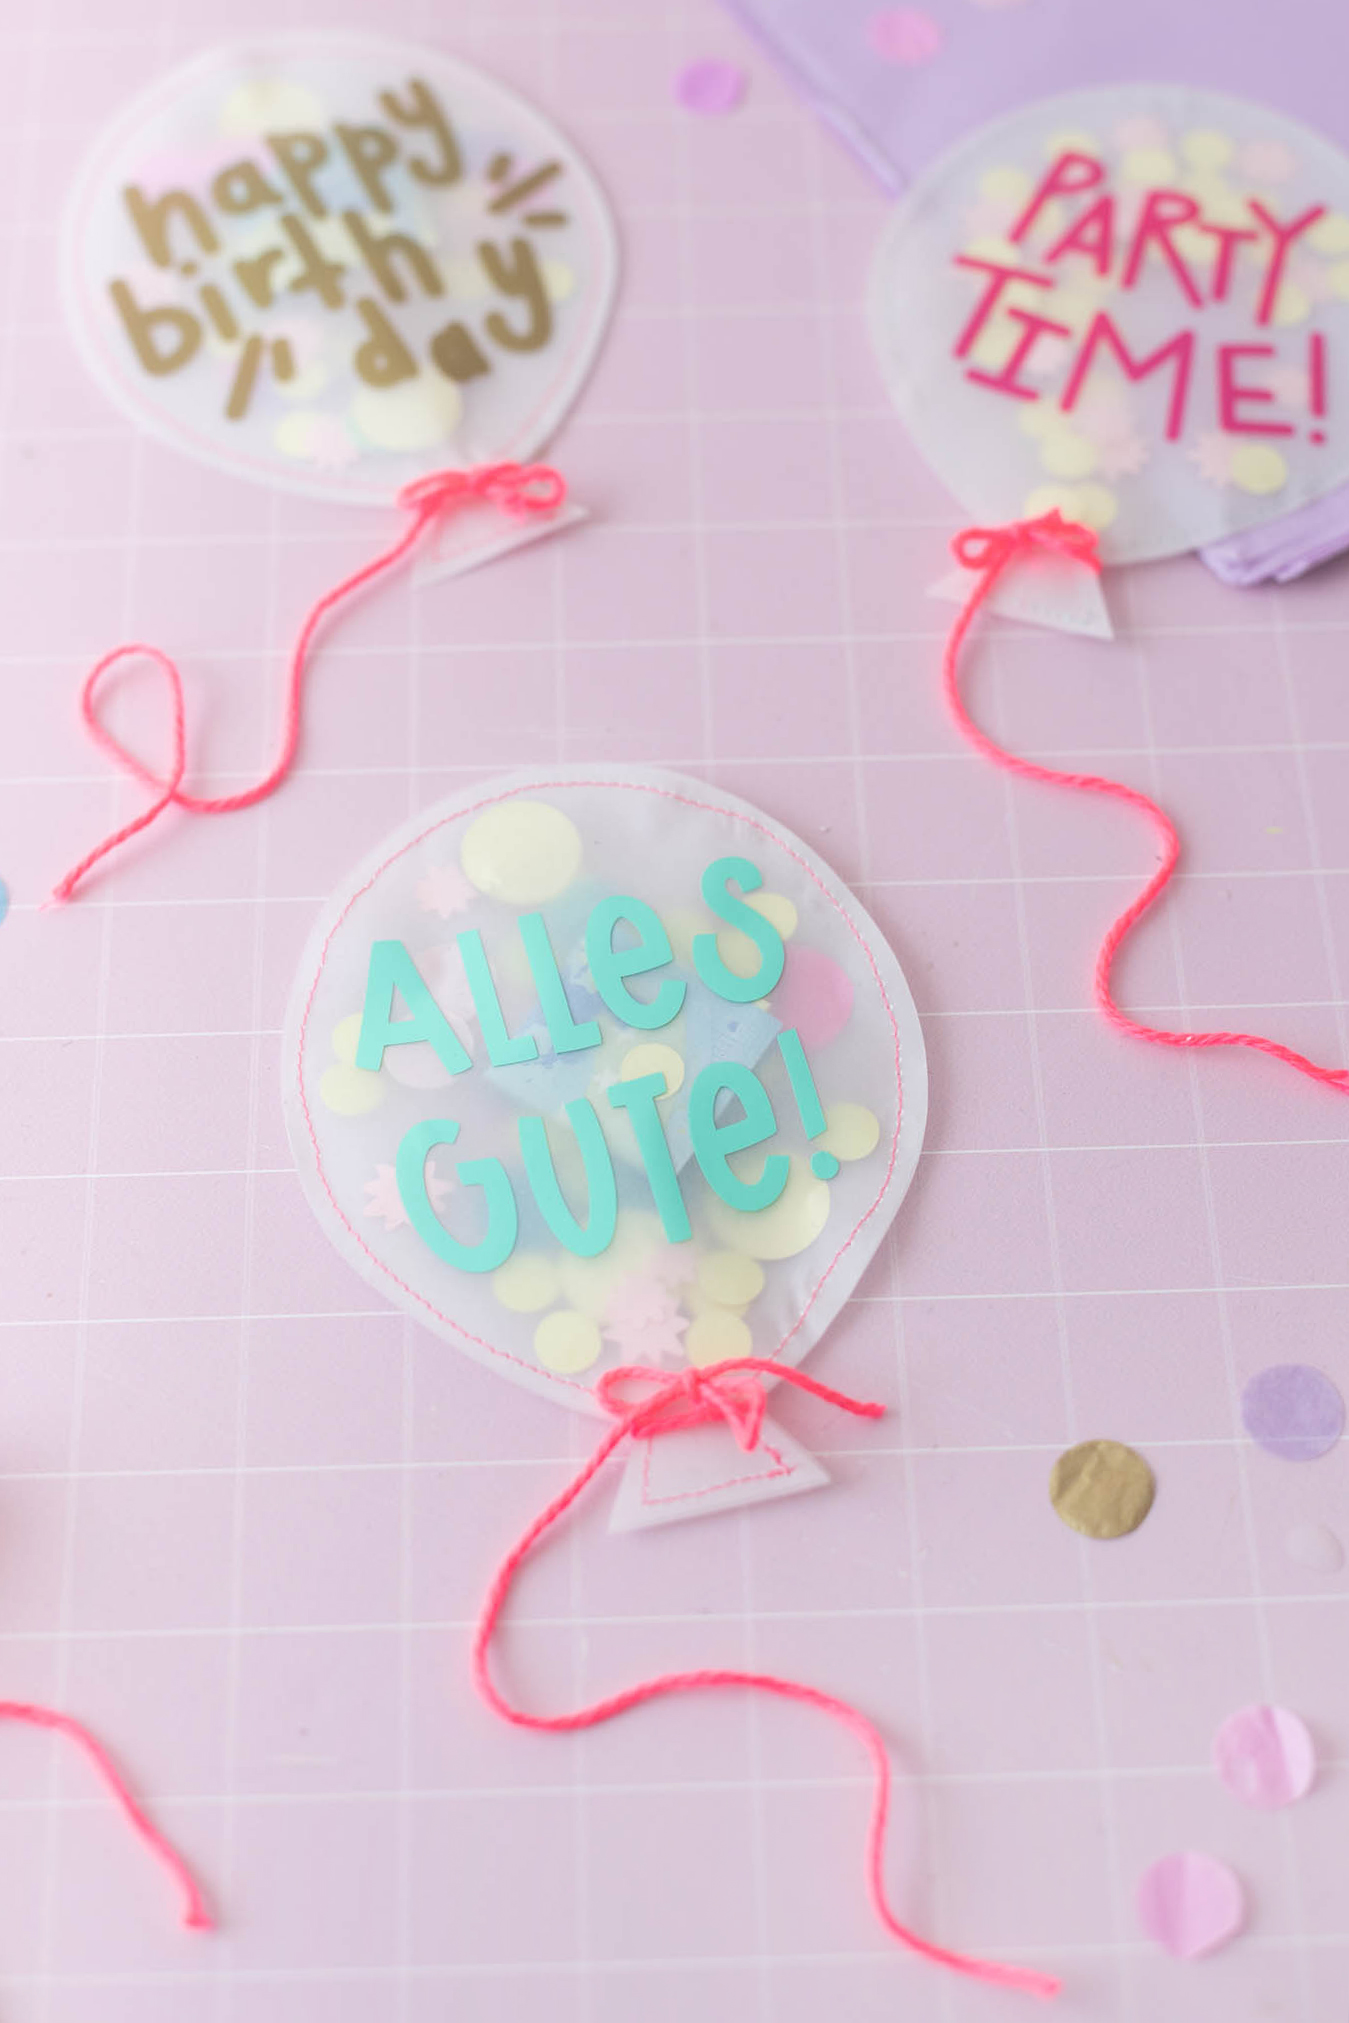
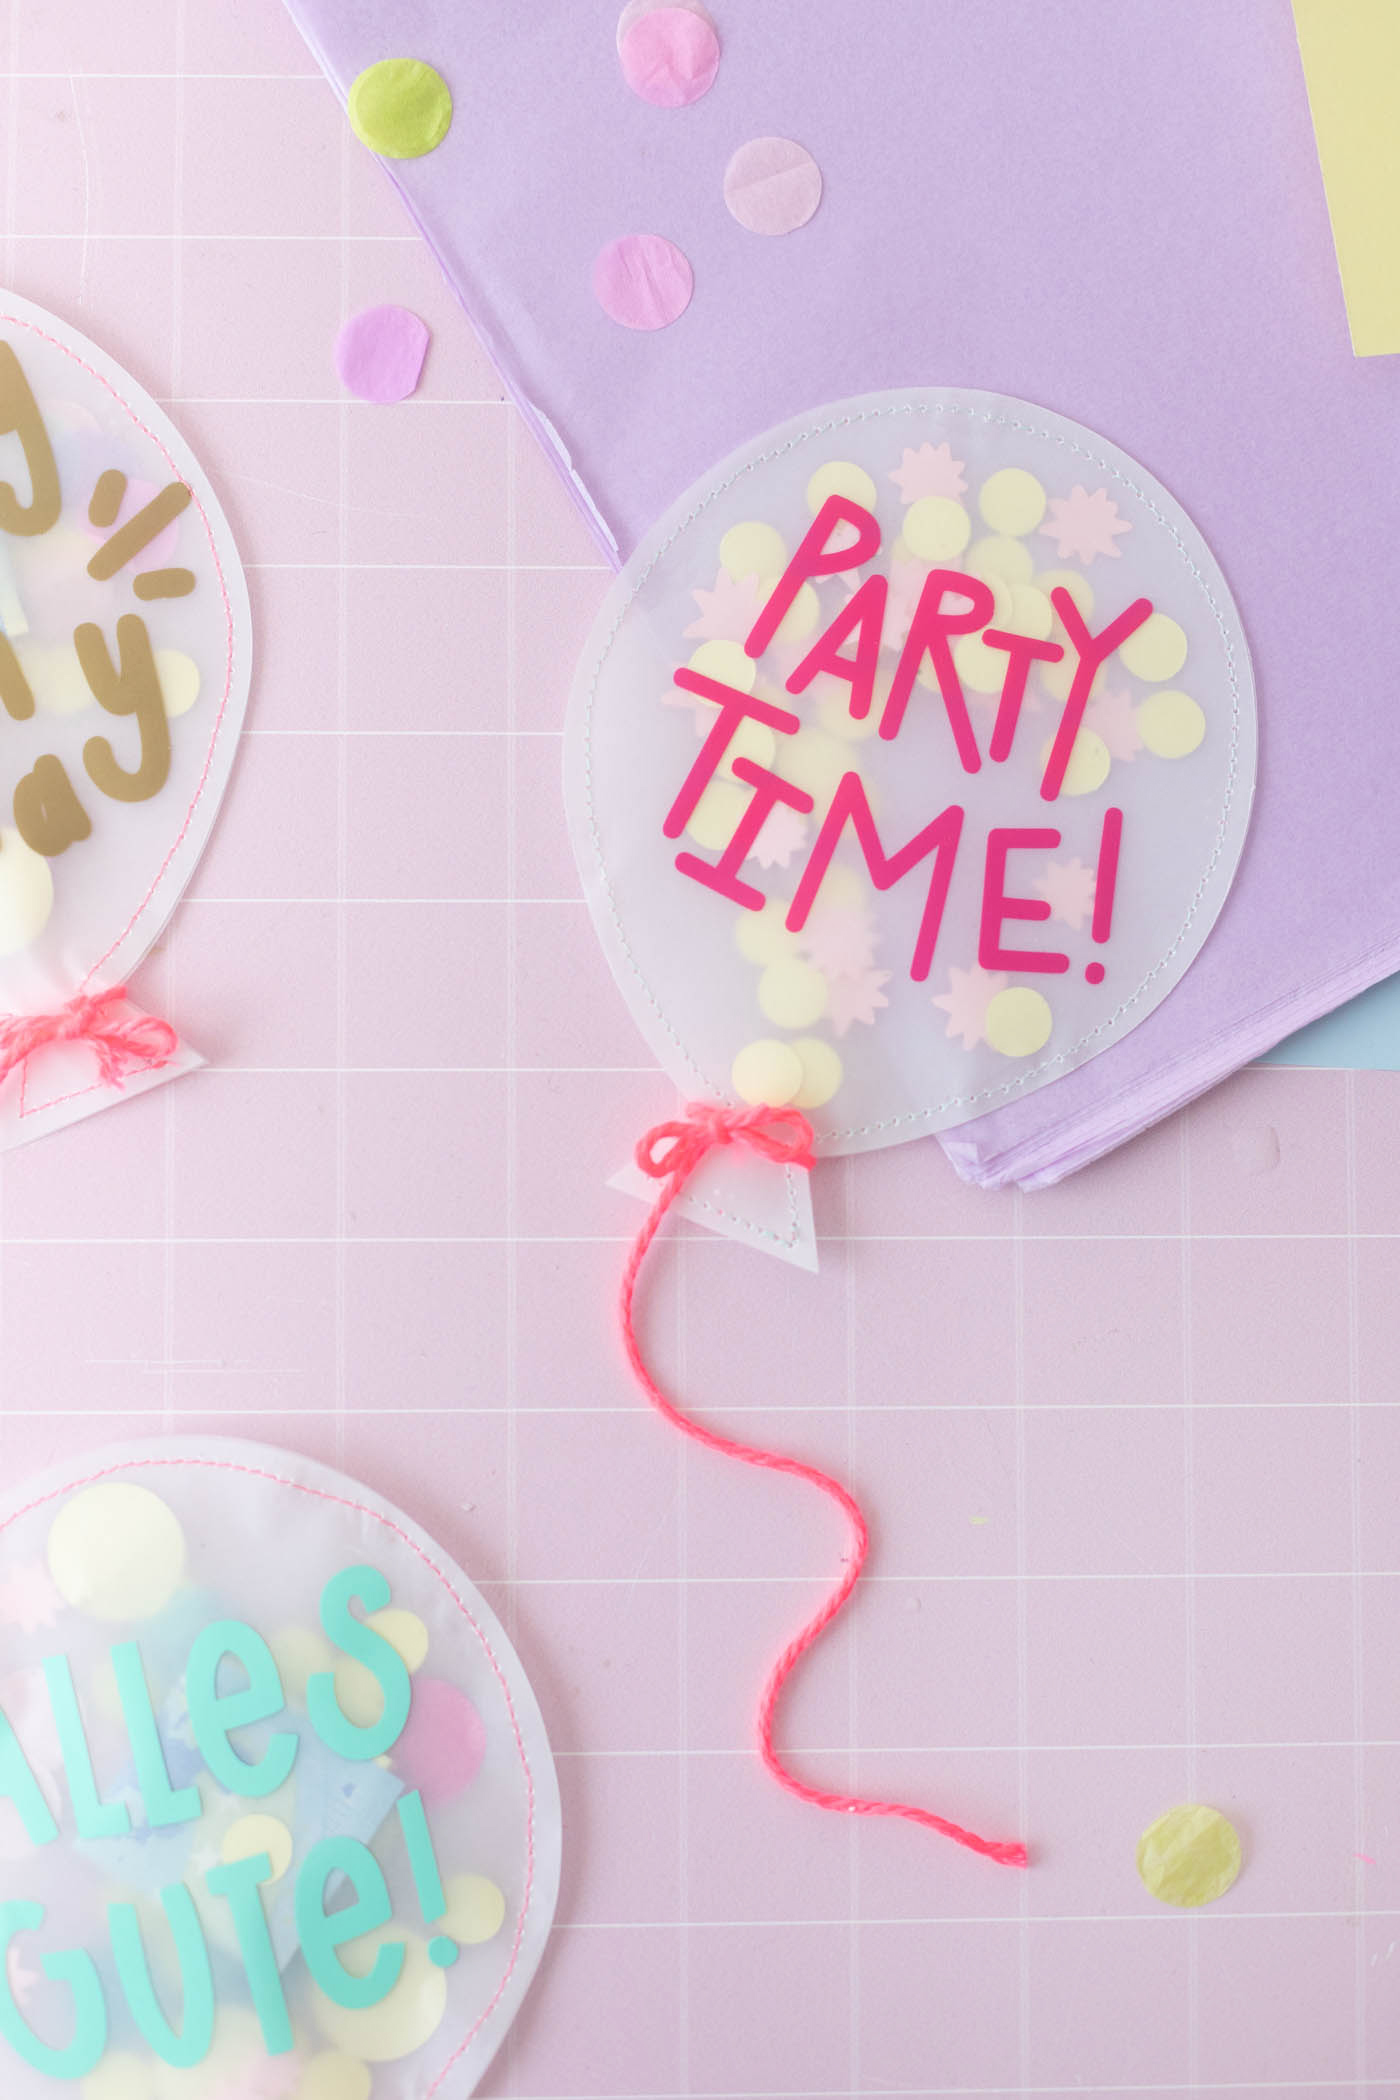
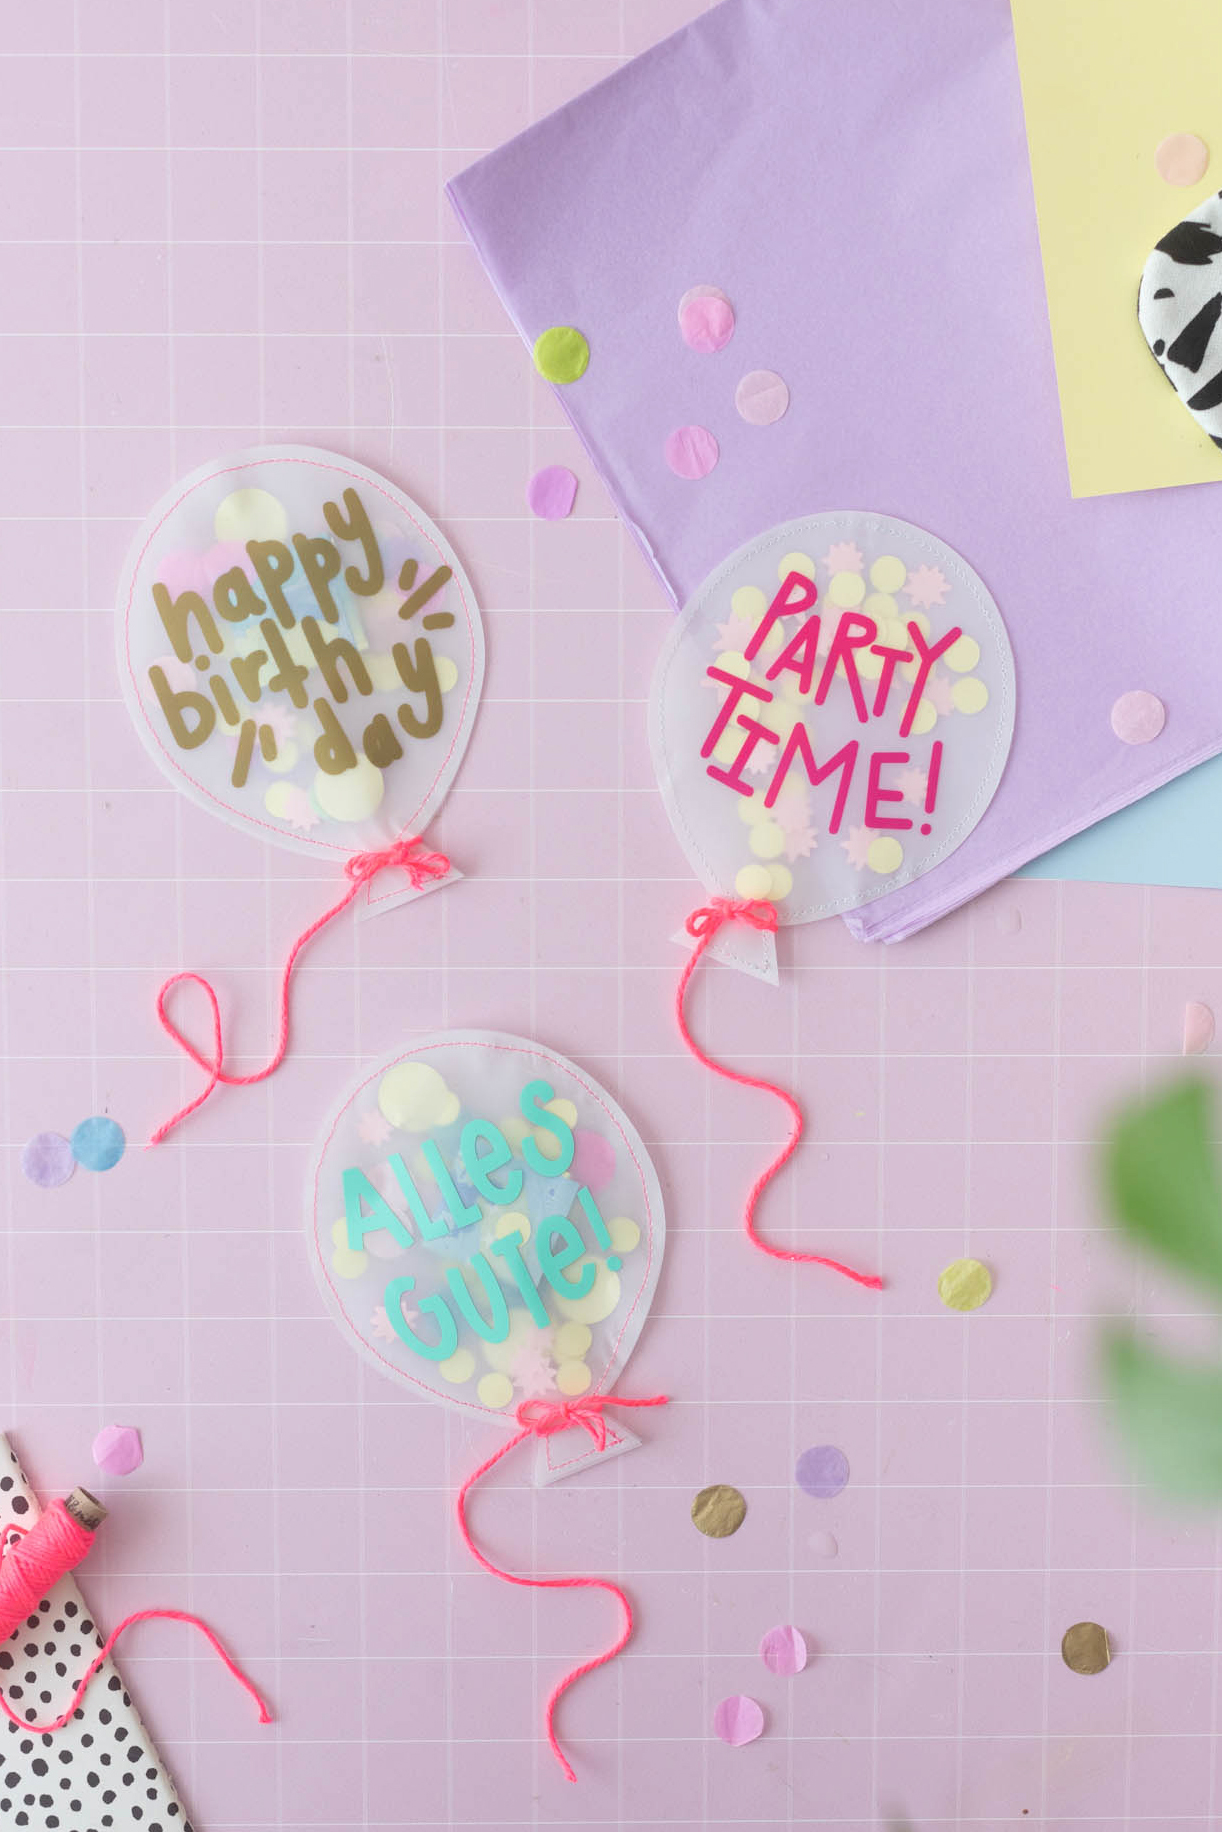
With the Cricut Joy I cut cardboard, tracing paper and vinyl for my project on the theme “Let’s celebrate” – this resulted in an idea for a original cash gift created: small Balloons made of tracing paper, in which a banknote hidden. That looks much better than a boring money envelope. 🙂

ABOUT OUR PARTNER CRICUT & THE CRICUT JOY
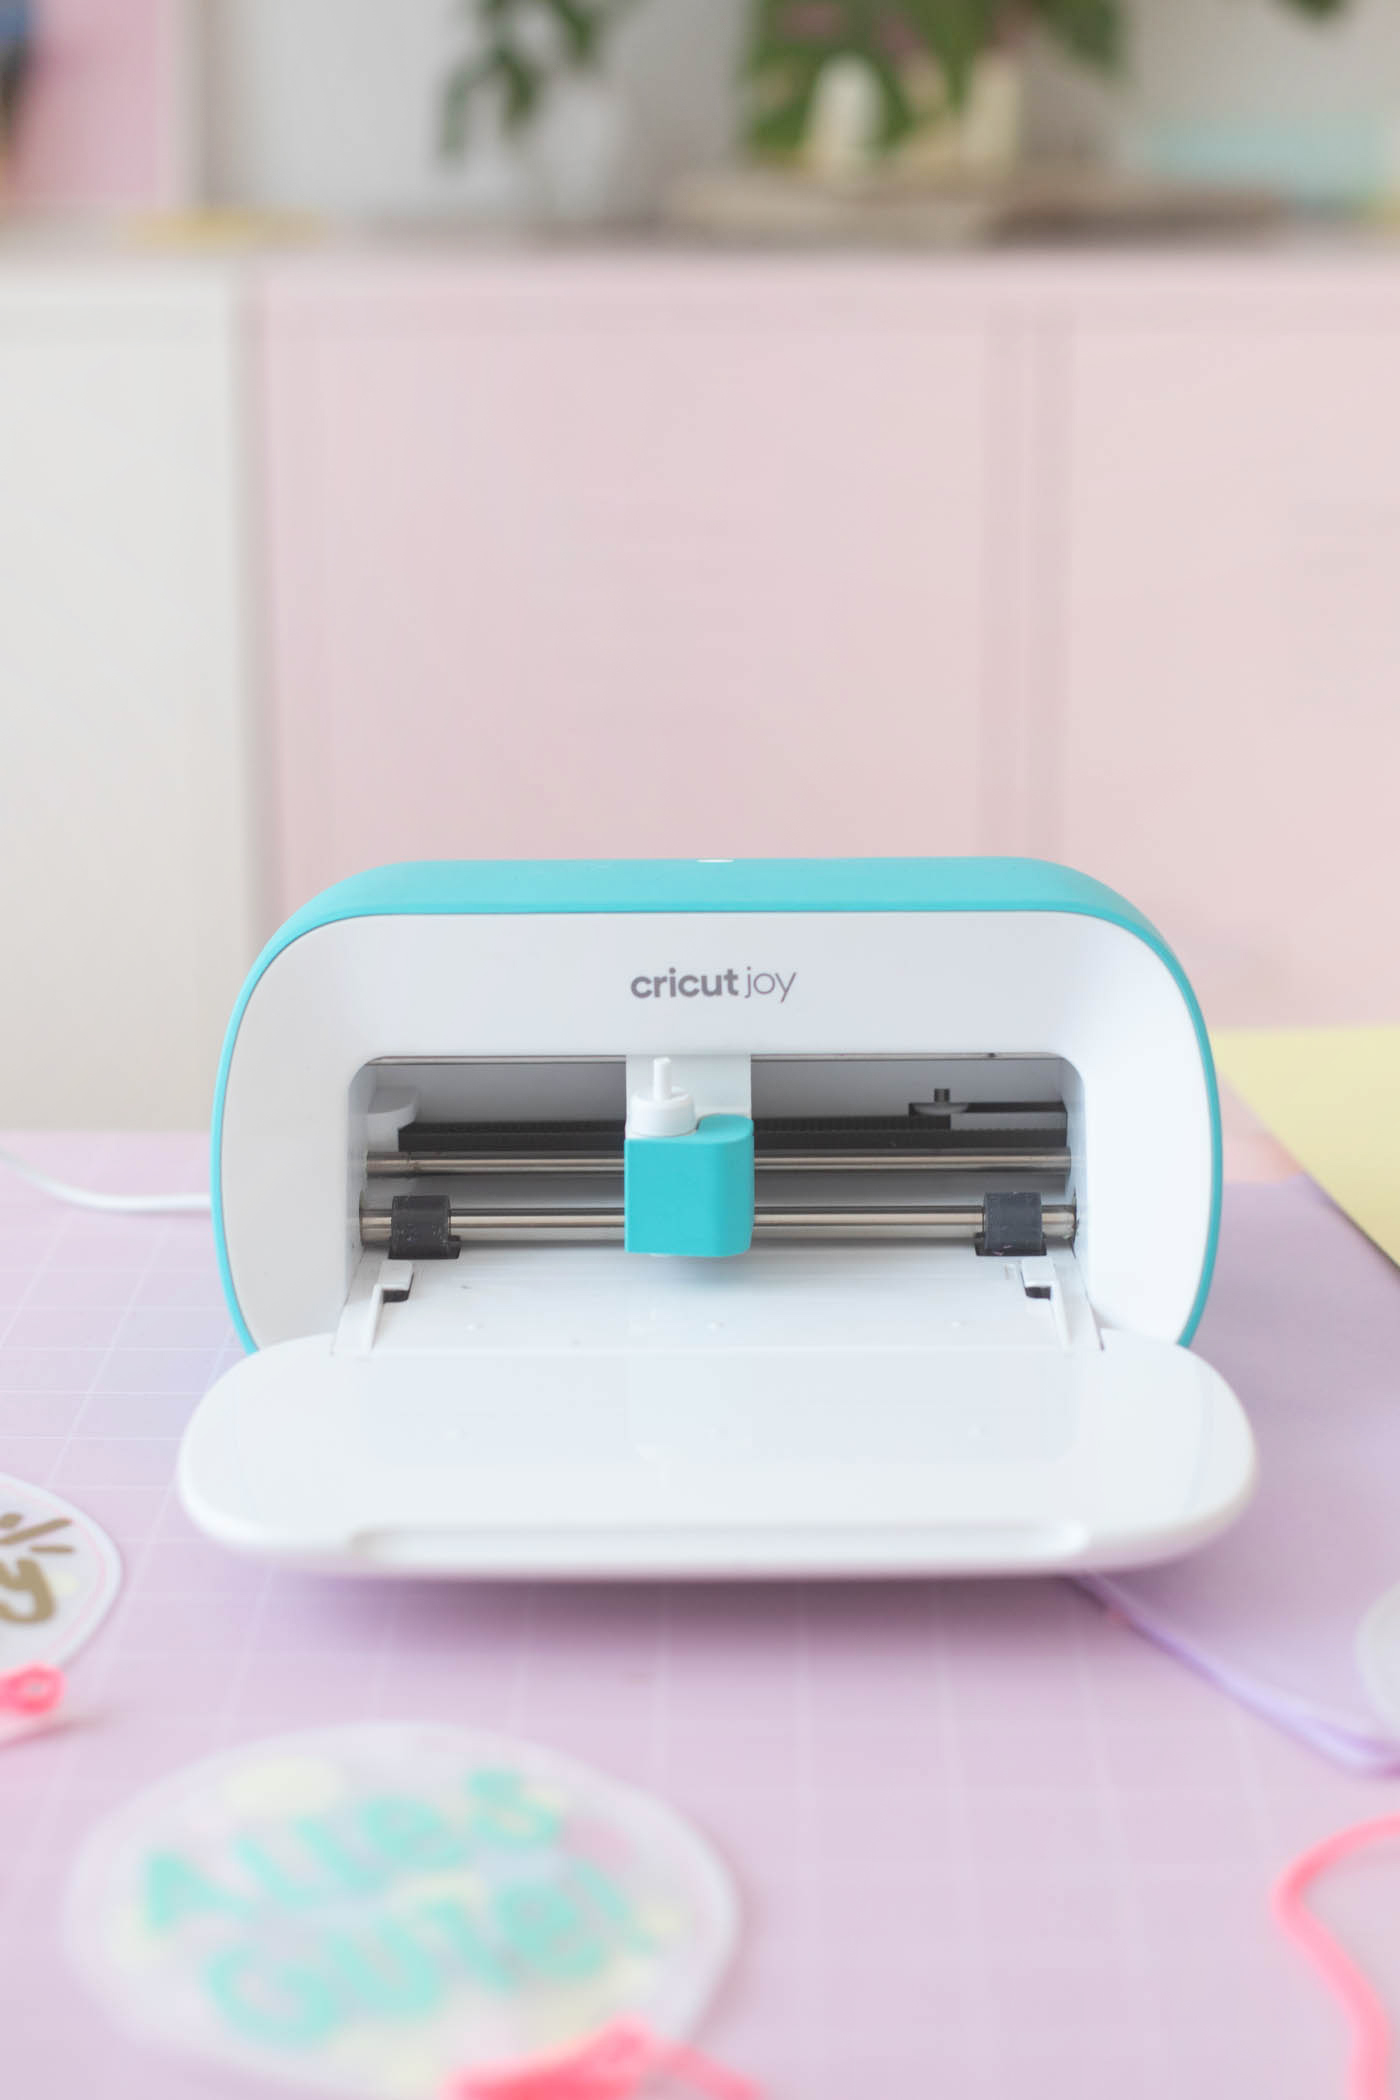
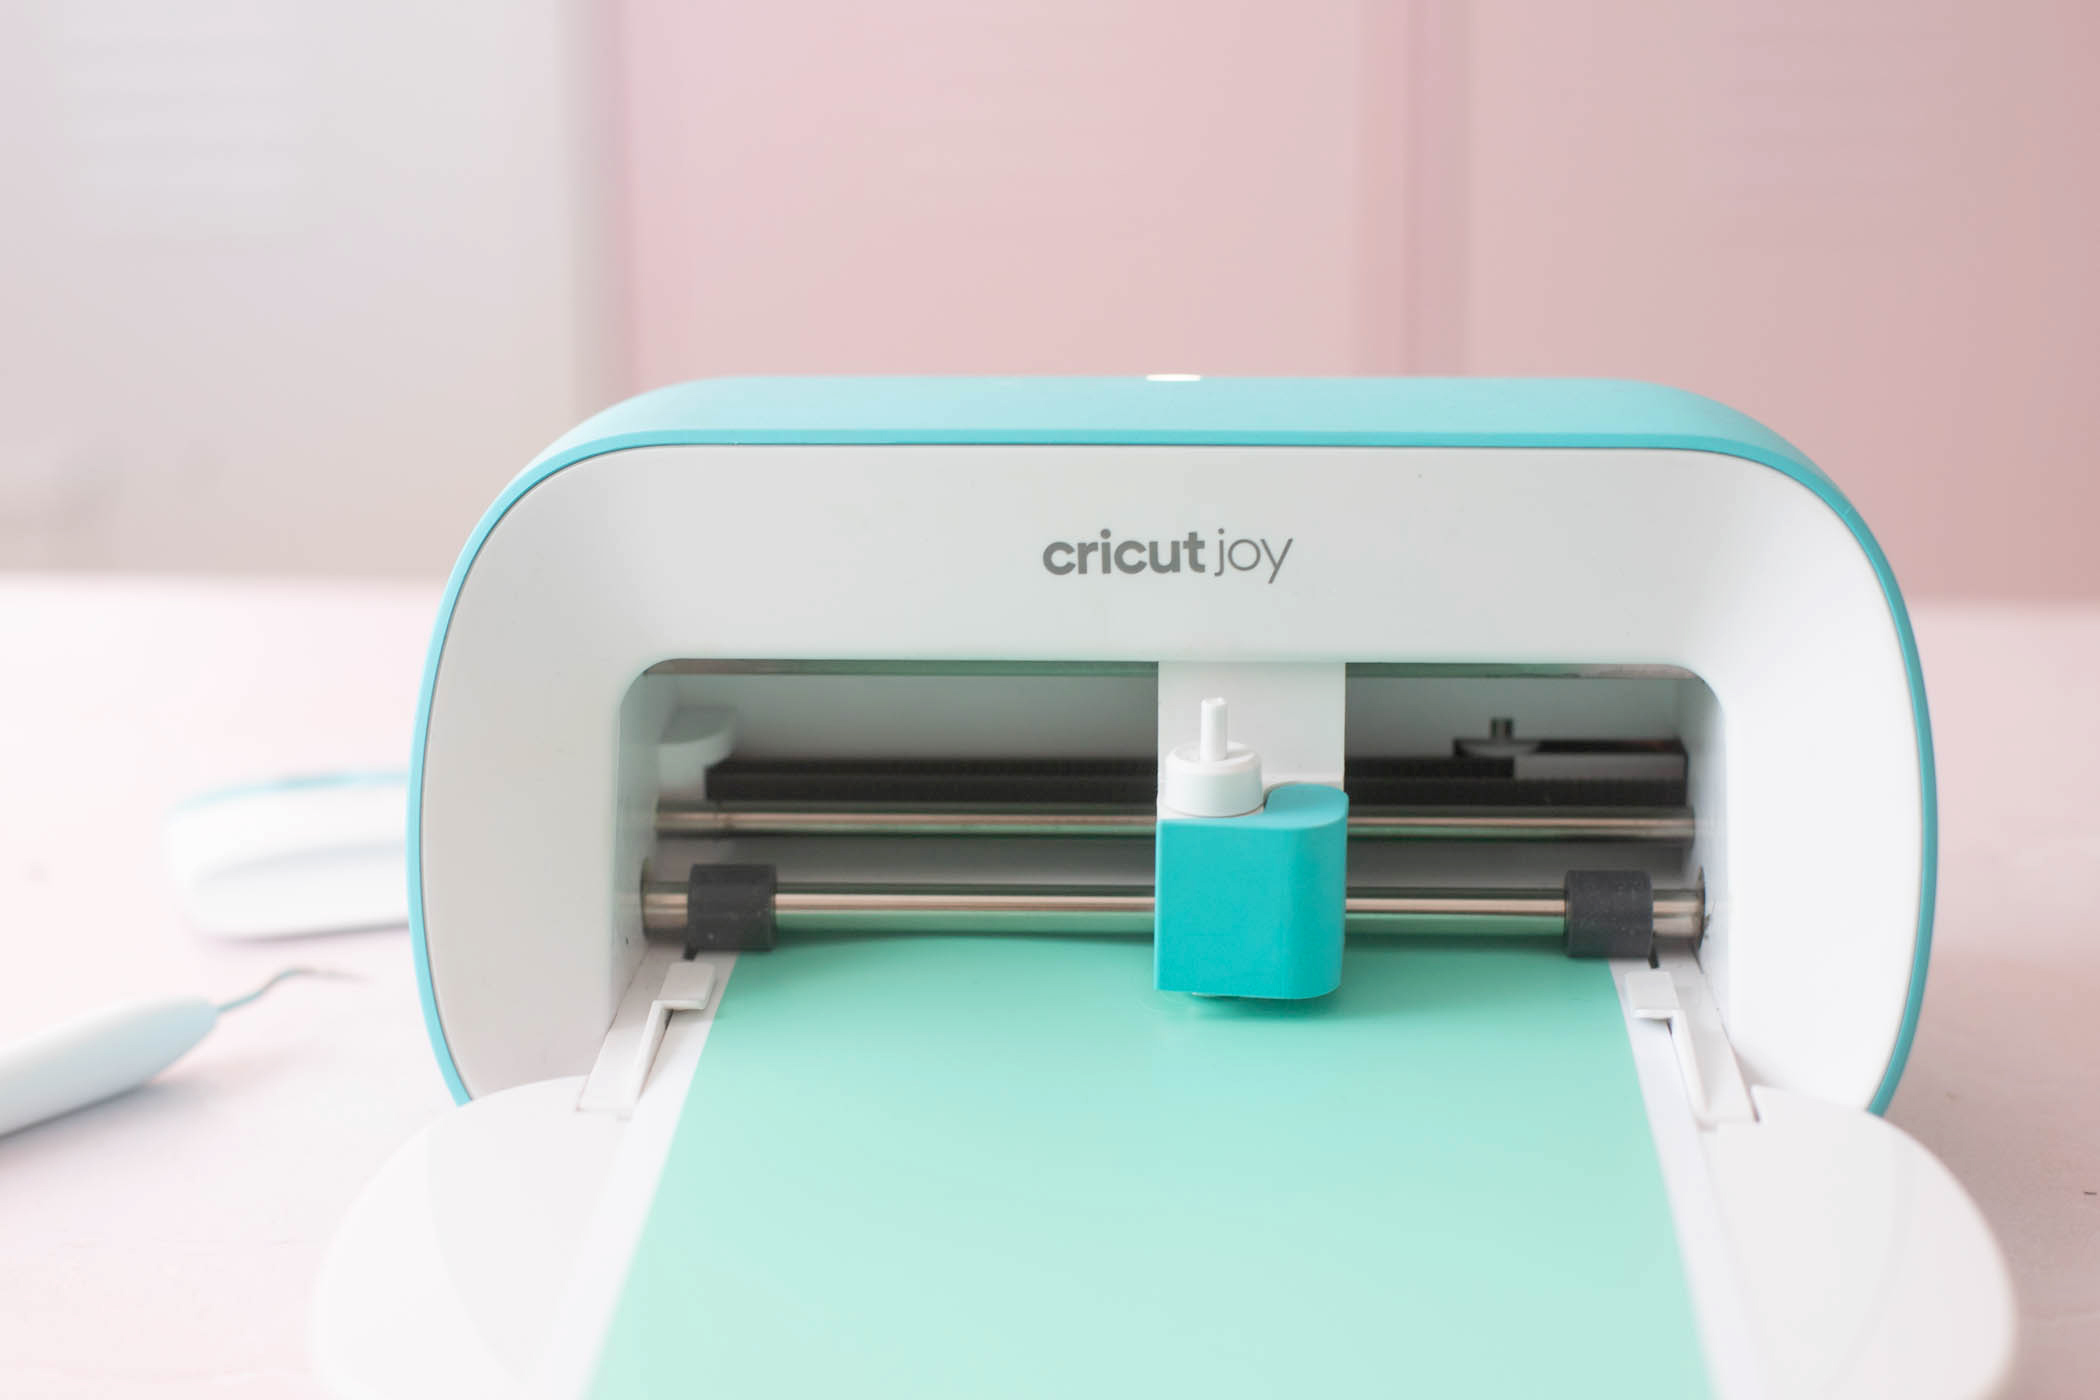
The Cricut Joy is an intelligent cutting machine – the smallest and most compact in the Cricut range. But the small Cricut Joy has a lot to offer. You can use it to cut vinyl, paper, card stock and iron-on film.
To get started, simply select a design or project from Cricut Design Space (Cricut’s program) and place your material into your Cricut Joy.
You can also create your own projects, combine different motifs and fonts and create a completely individual design. This is really easy to do in the Design Space.
Depending on which material you use, you place it on a cutting mat. With Cricut’s Smart Materials (e.g. Smart Vinyl, Smart Paper, etc.) you can even do this without a cutting mat.
Then you insert a blade if you want your Cricut Joy to cut – or a pen if you want your Cricut Joy to write.
ABOUT THE DIYYEARCHALLENGE
Every month, Laura from trytrytry and Lisa from meinfeenstaub take on a new DIY challenge on a given topic with the #DIYYearChallenge. Our monthly sponsor sends us the same material – and each of us comes up with a DIY idea using the same material – the community then votes on who wins and has implemented the topic better!
Every month you can win the DIY pack we’ve been creative with by voting on Instagram to see who won. It’s definitely worth checking out Instagram because today there’s a big set with the Cricut Joy up for grabs.
There you will always find our ideas as a DIY video.
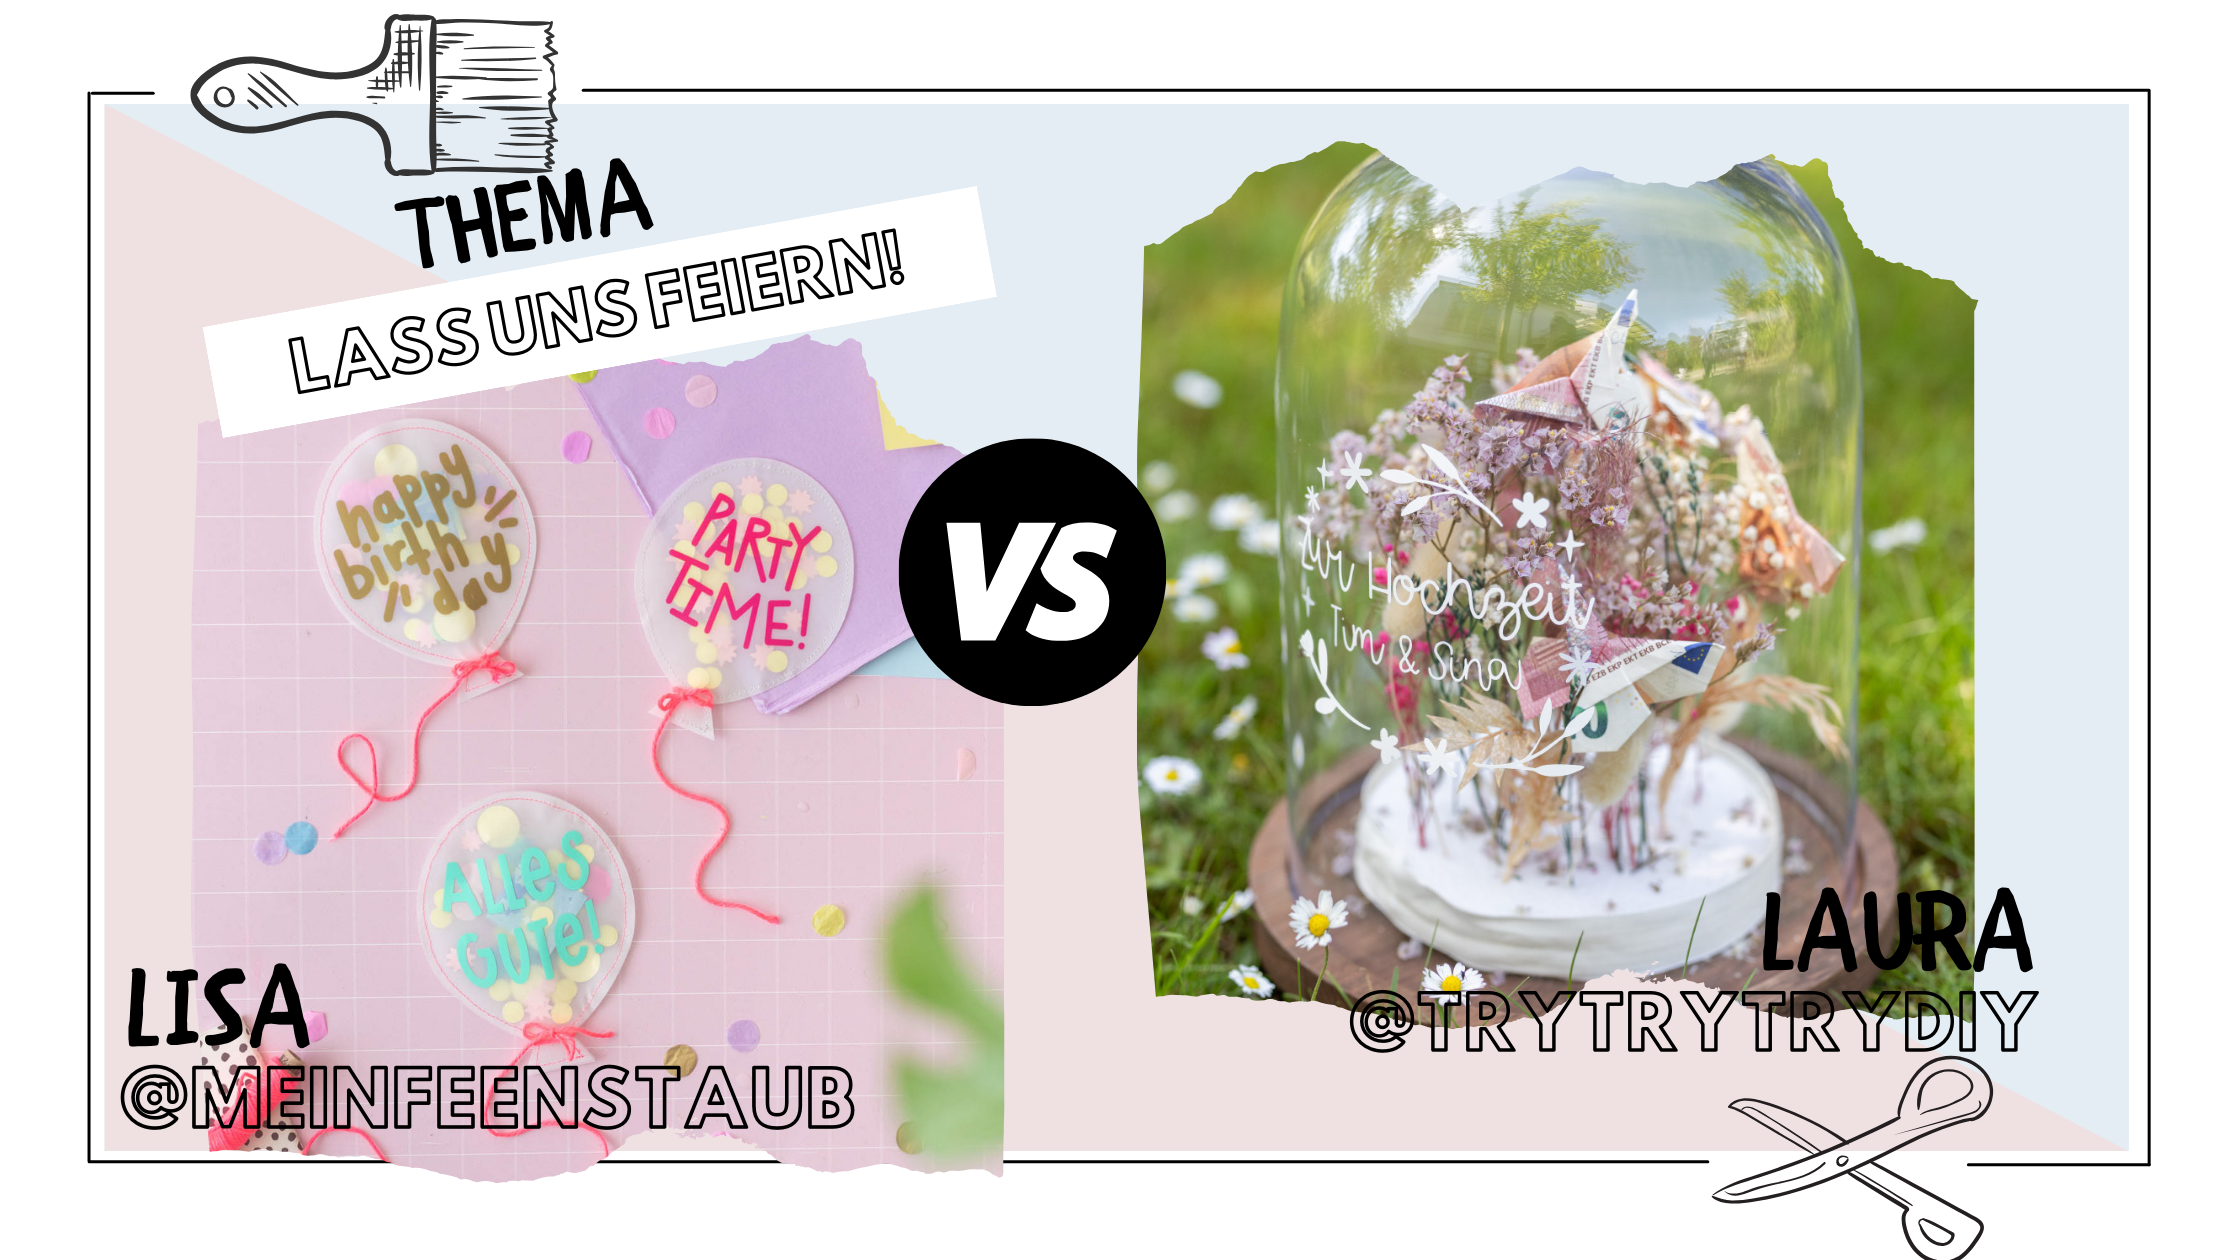
I always find it amazing how different Laura’s and my ideas for the #DIYYearChallenge are. Two cash gift ideas, but still completely different. One for a birthday and one for a wedding. This shows you how versatile the Cricut Joy is.
Now I will show you how you can make the money gift balloons yourself.

How to make an original money gift from tracing paper
*The links are affiliate links. This means that I get a tiny commission when you make a purchase, but the price doesn’t change at all for you.
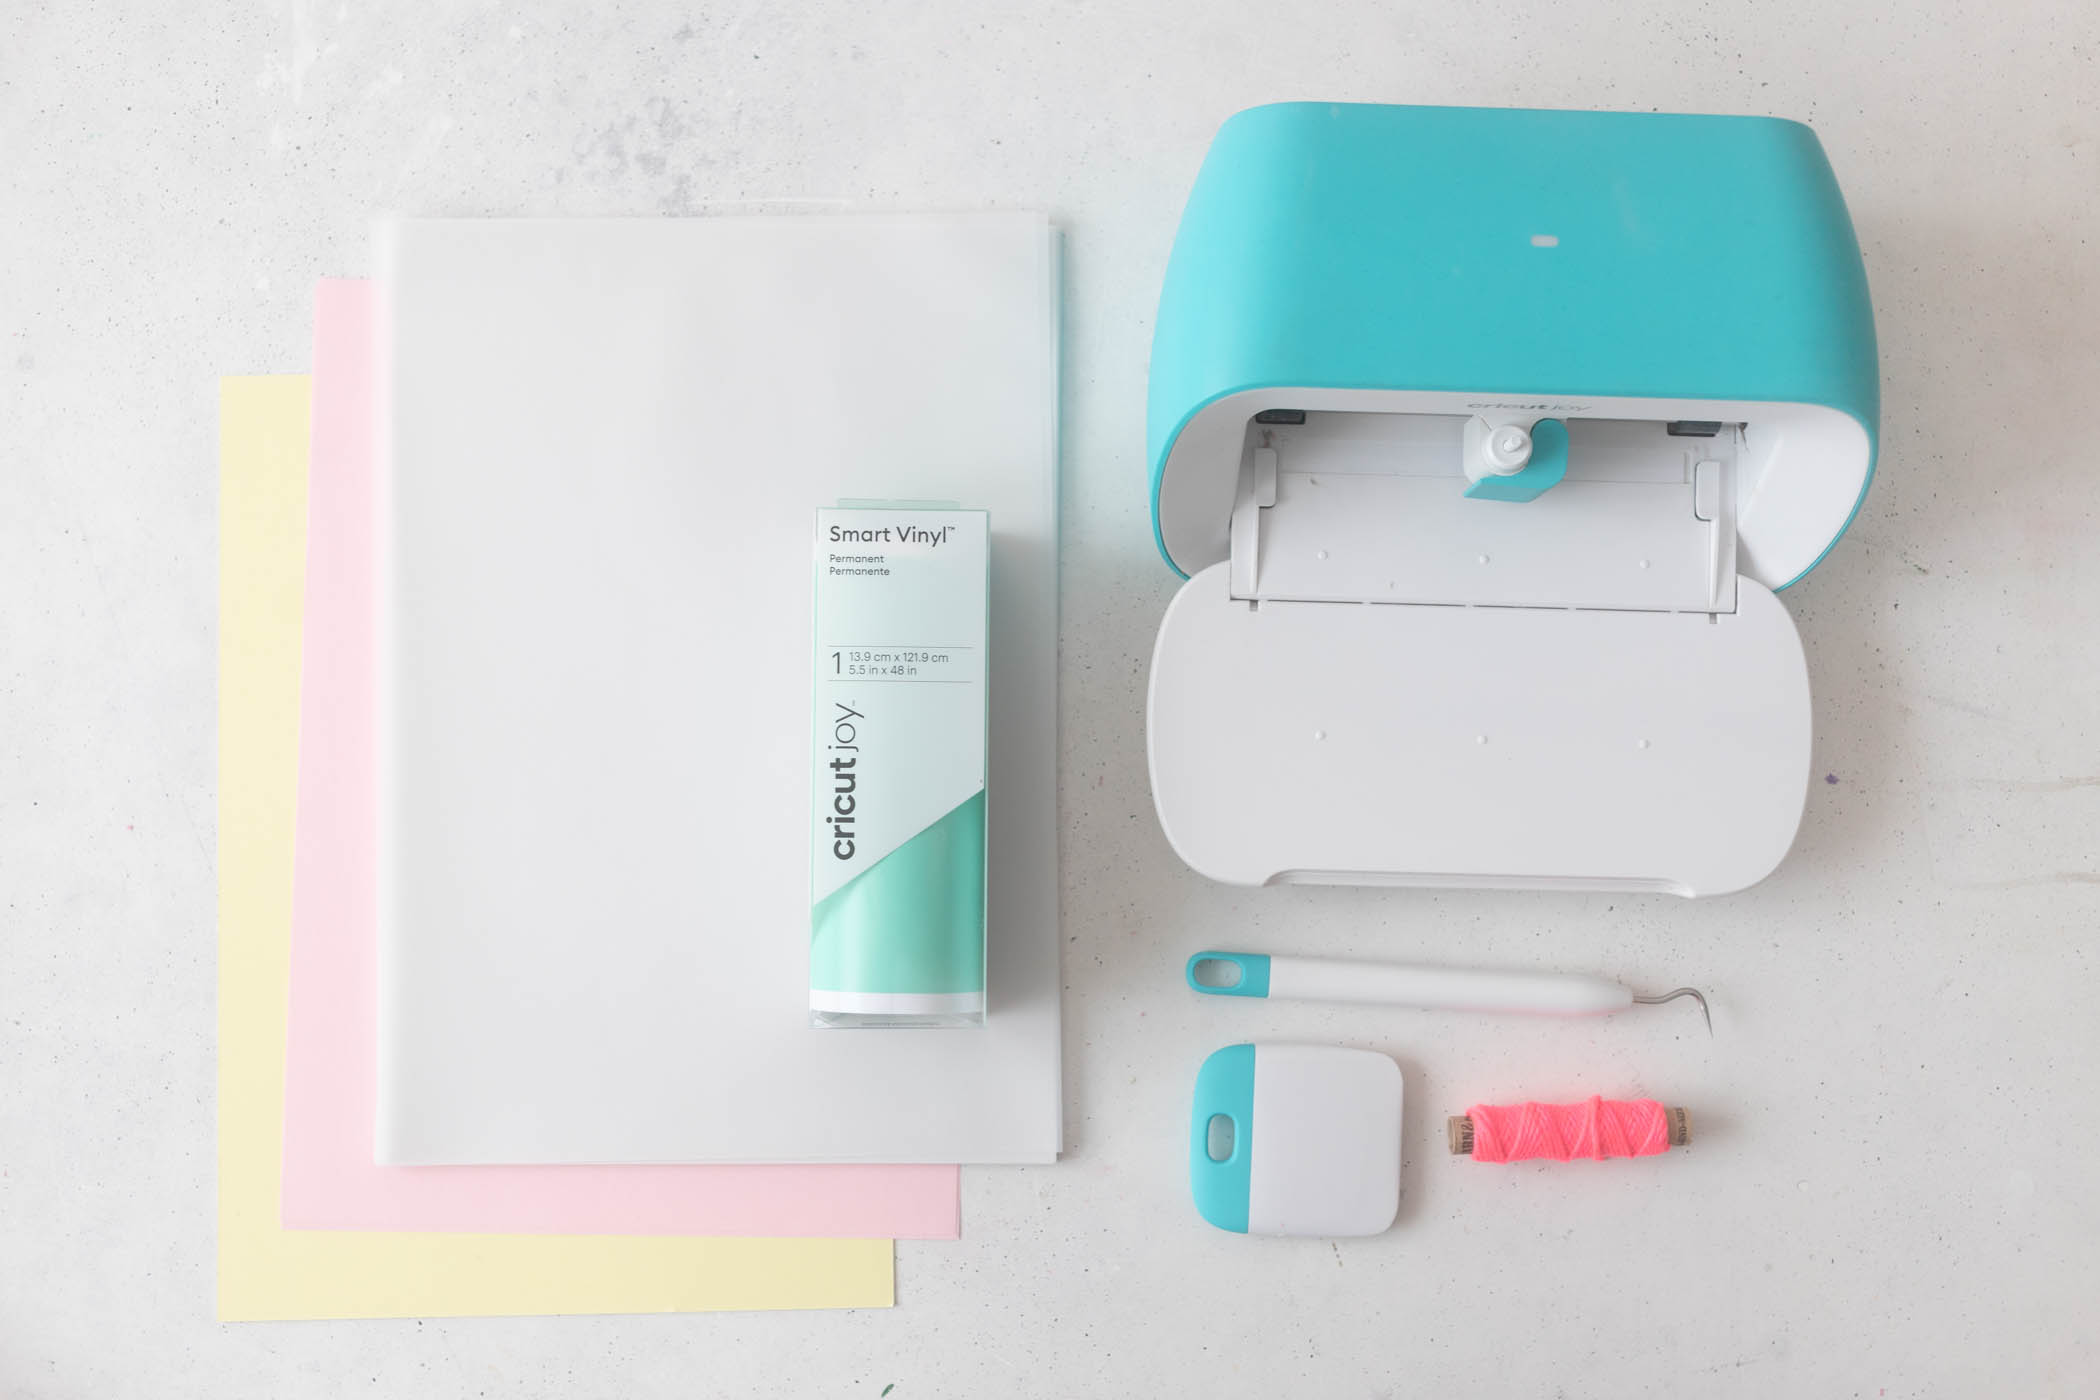
Files used from Cricut Design Space:
- Balloon: #M2282794
- Lettering “Party Time”: #M85583A3
- Confetti round: #M50597721
- Confetti Stars: #M4D4338F7
Step 1: Open project in Cricut Design Space
First, open the project in Cricut Design Space. That’s where I created the project that you can use to implement the idea.
>> Go to the project in Cricut Design Space
Step 2: Cut balloons from tracing paper
Now the balloons are cut out of tracing paper using the Cricut Joy. For a money gift balloon, you will need two cut-outs from tracing paper.
(If you don’t have a Cricut Joy, you can also cut out the balloon with scissors.)
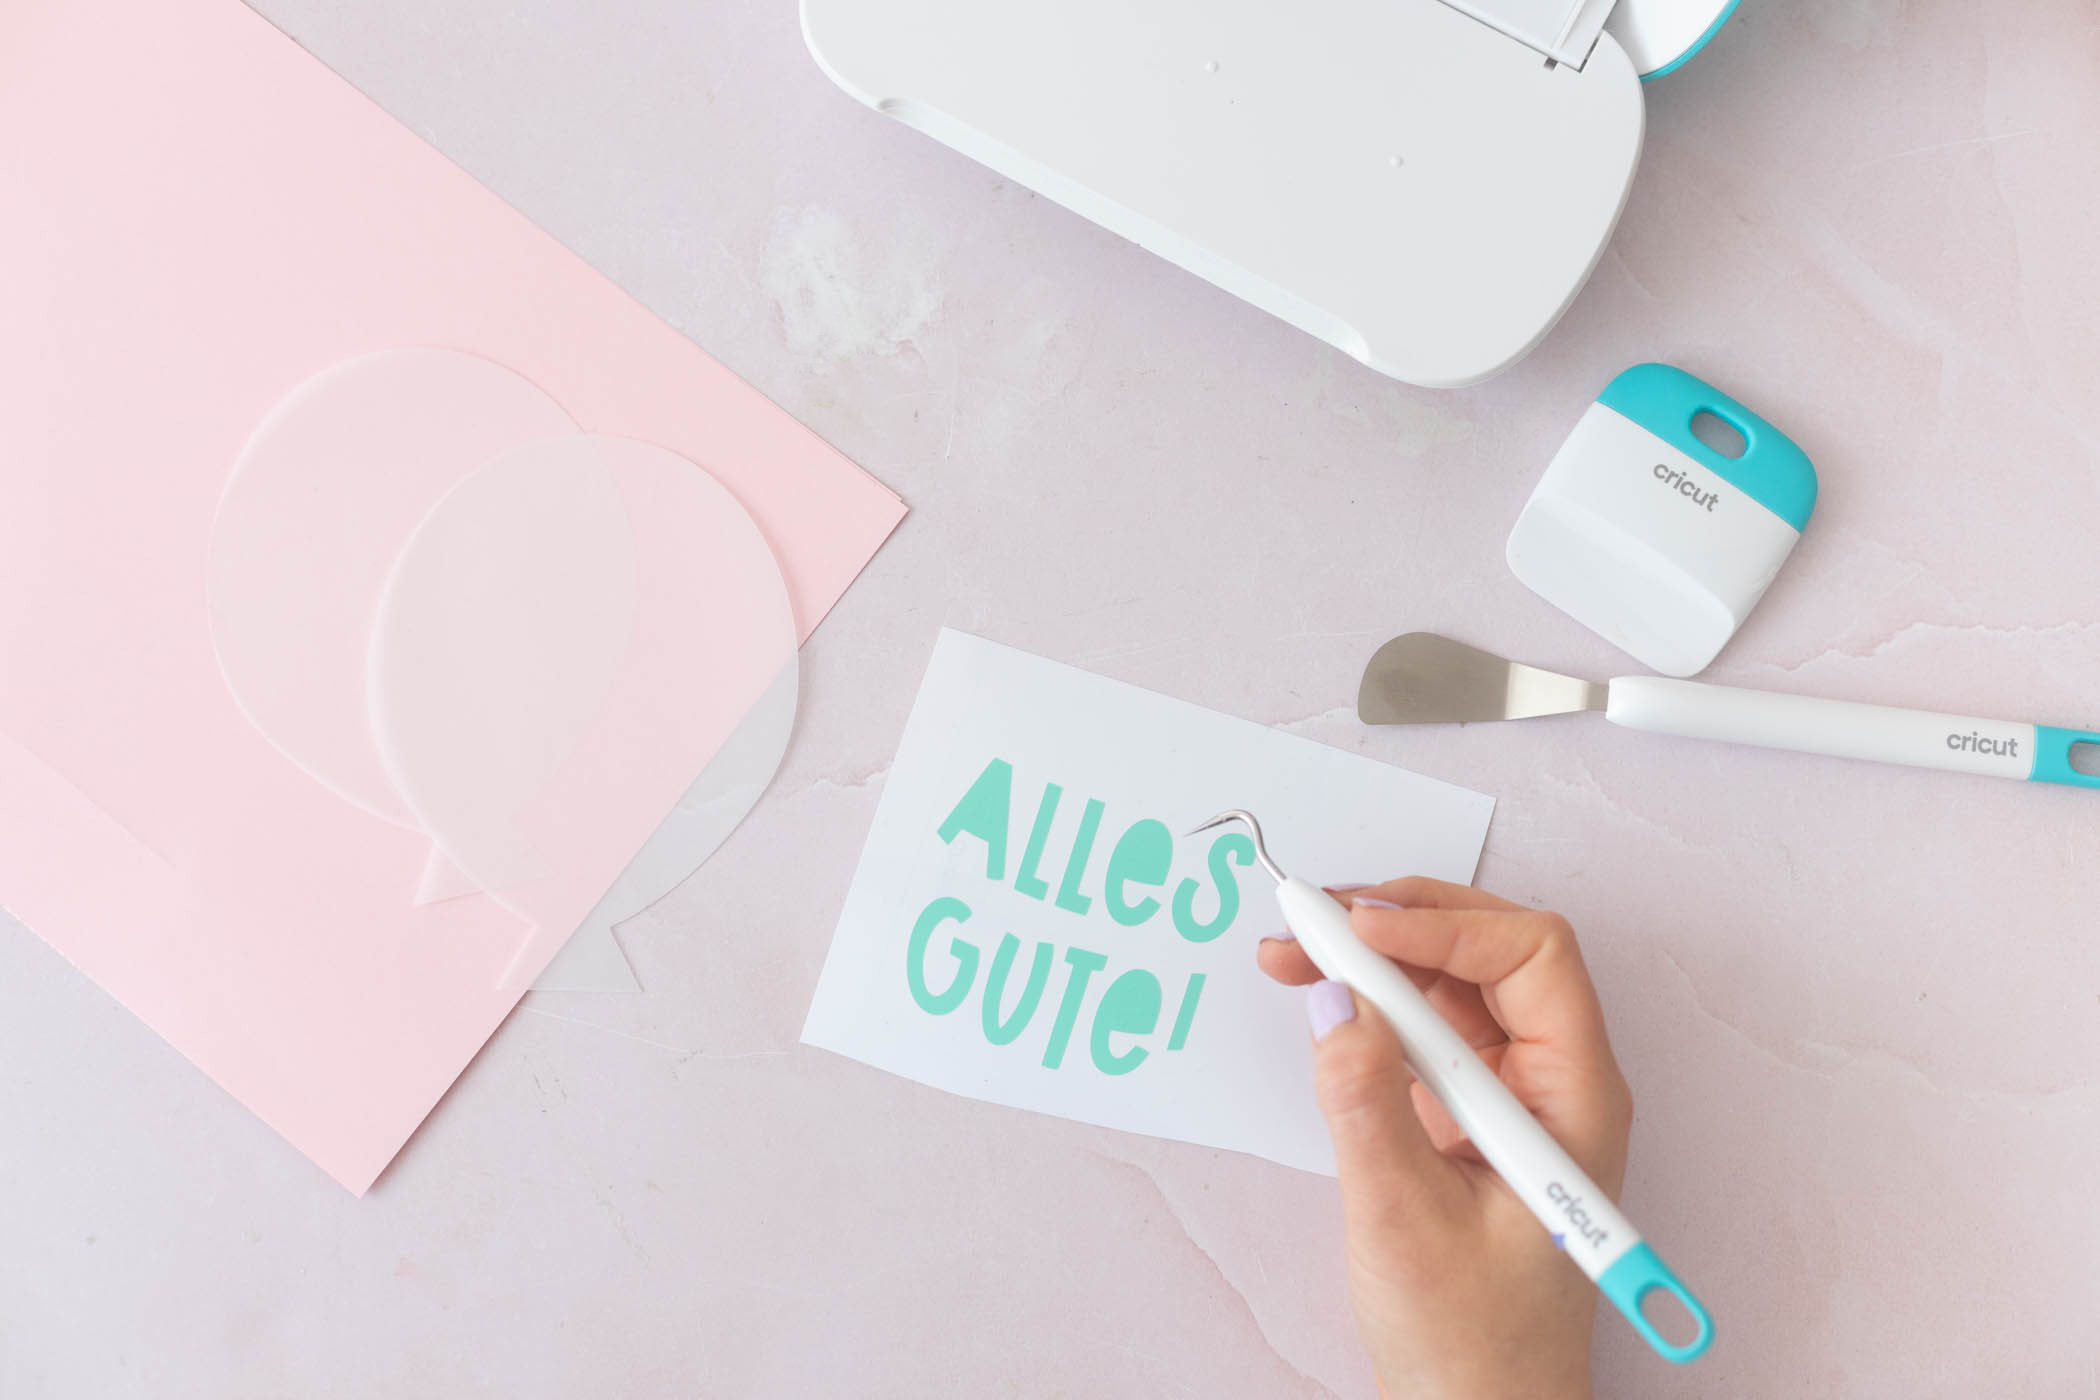
Step 3: Cut lettering from Smart Vinyl
Then cut out your lettering from Smart Vinyl using the Cricut Joy. You can use the lettering that is included in the project or create your own lettering in Cricut Design Space.
Make sure that the lettering fits the size of the tracing paper balloon.
After cutting the lettering, you weed it. This means that you use the tool to remove the excess parts, such as the filled areas in the “A” or “e”.
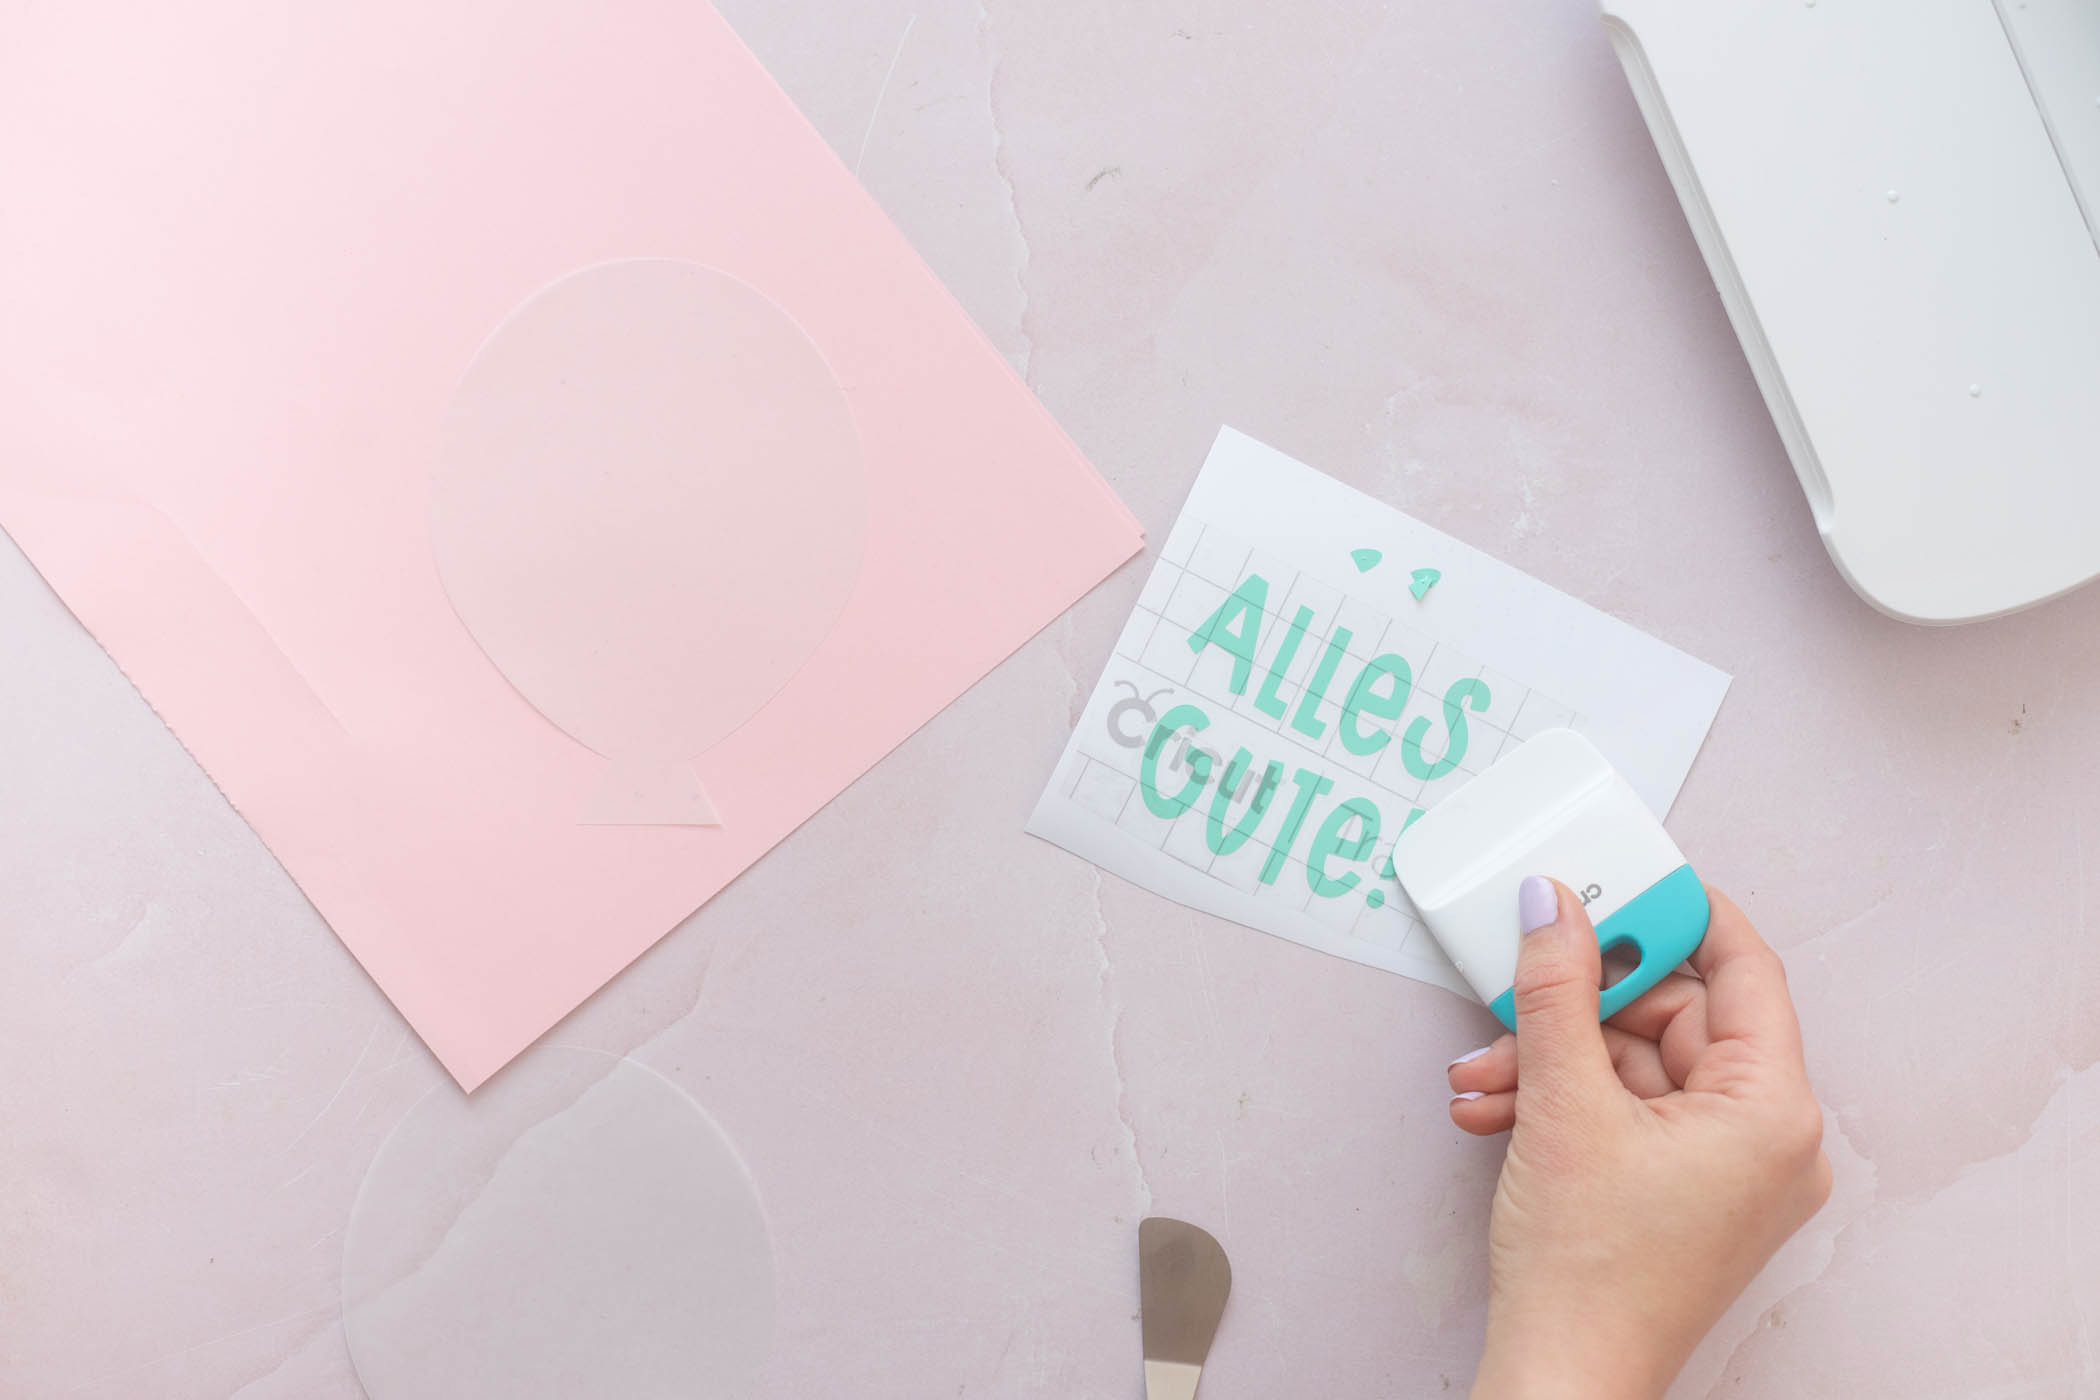
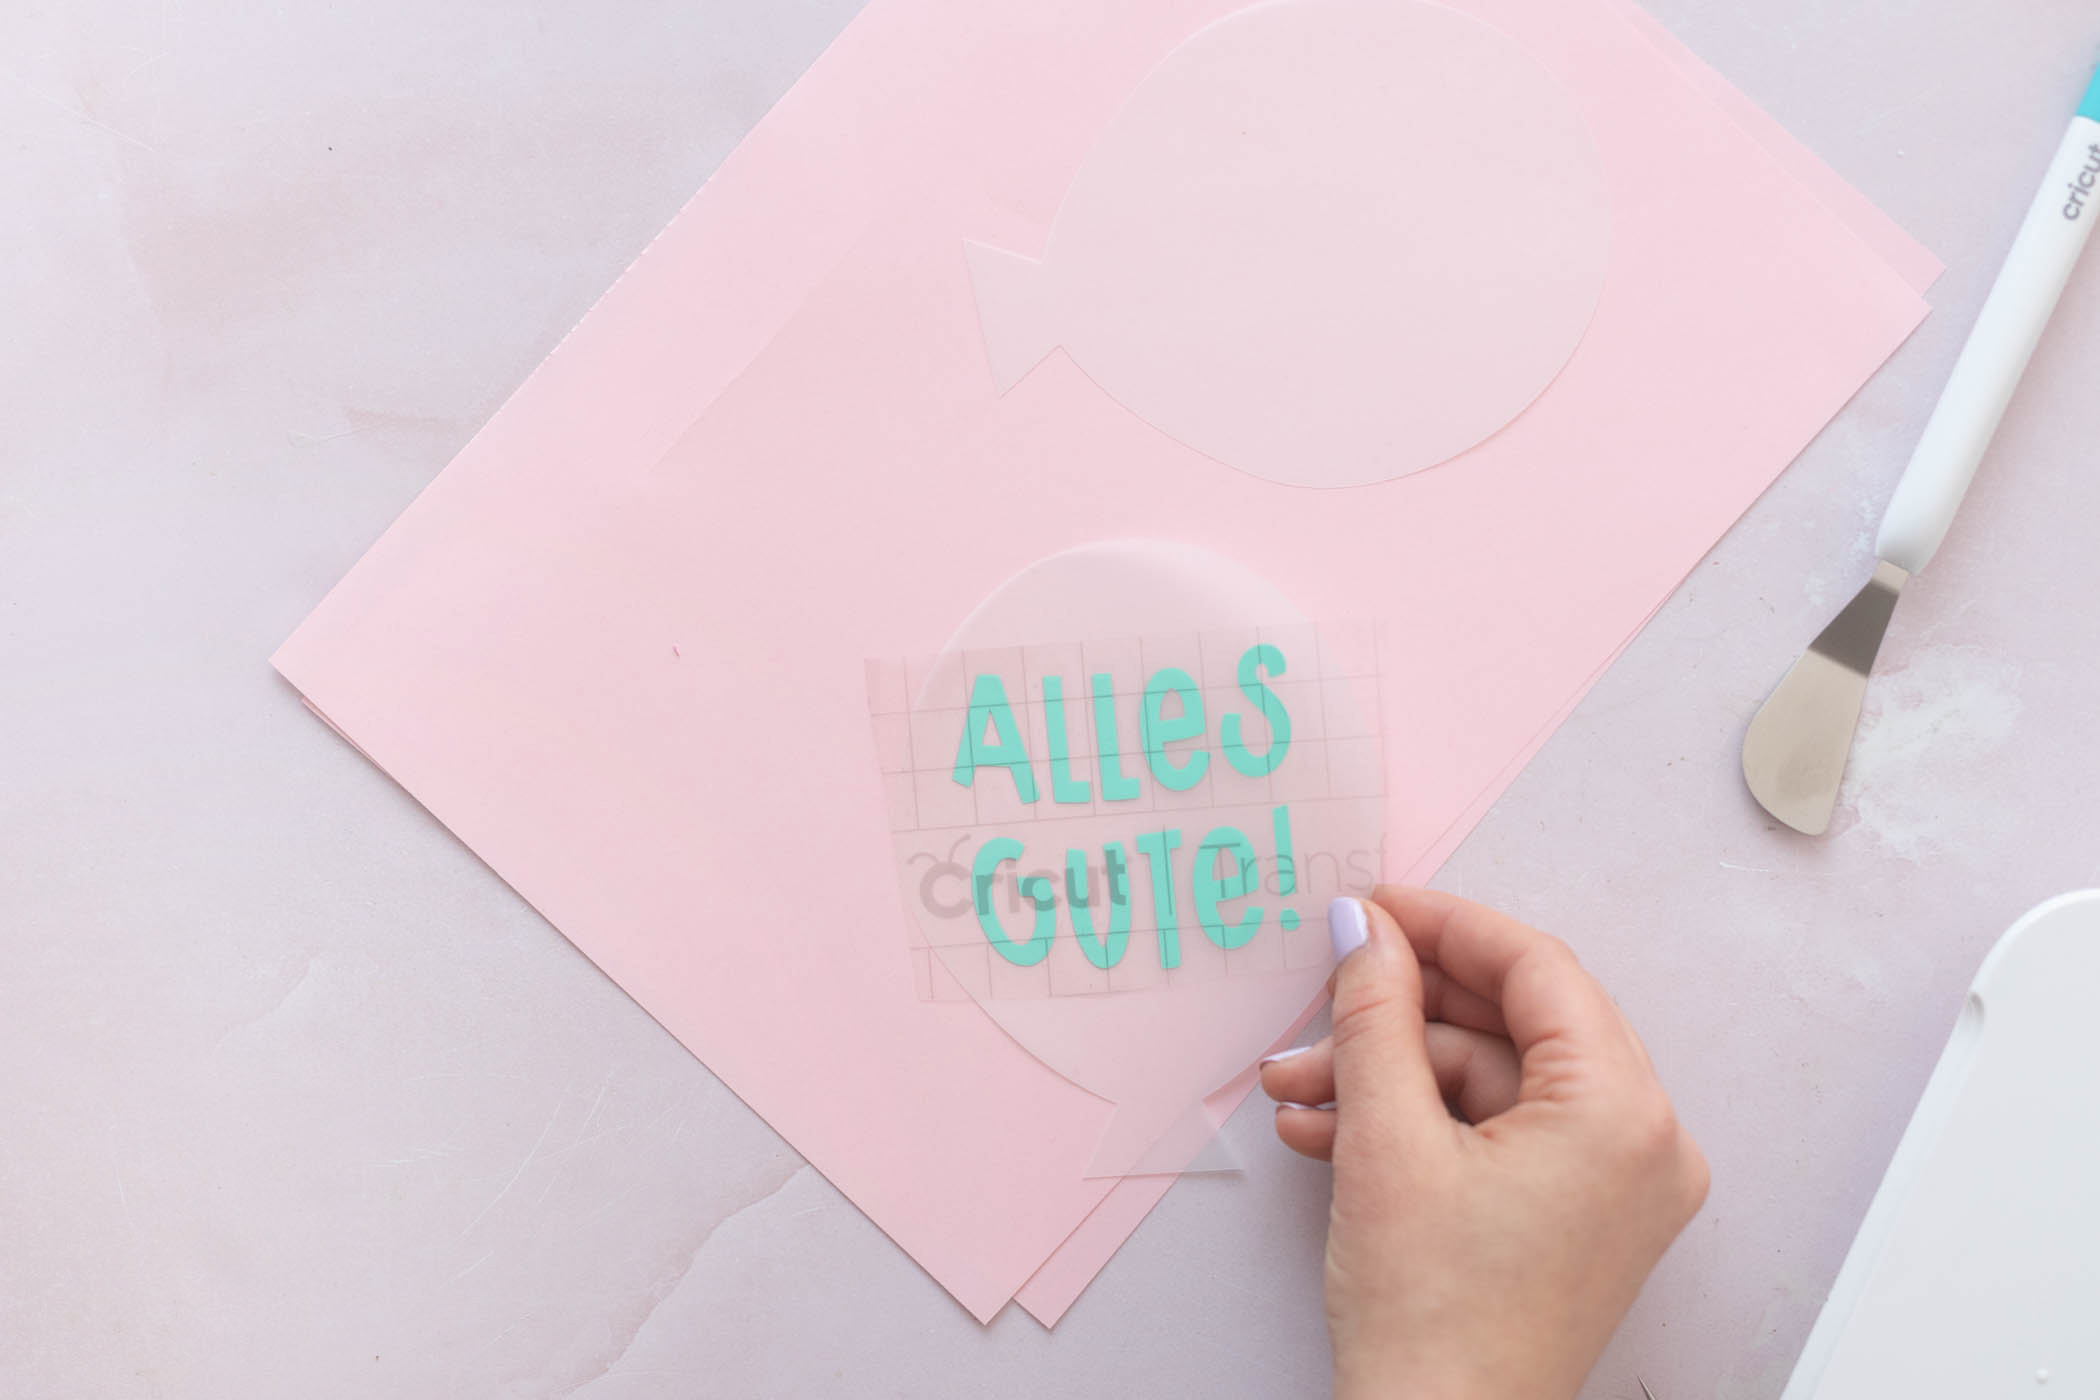
Step 4: Transfer lettering
Next, transfer the lettering onto the balloon. Use transfer foil or transfer tape for this. The transfer foil is first applied to the lettering using the squeegee. This makes it easy to remove the lettering from the carrier foil and place it on the balloon.
Be careful not to tear the tracing paper when you peel off the foil. If you peel off the foil slowly, nothing will happen.
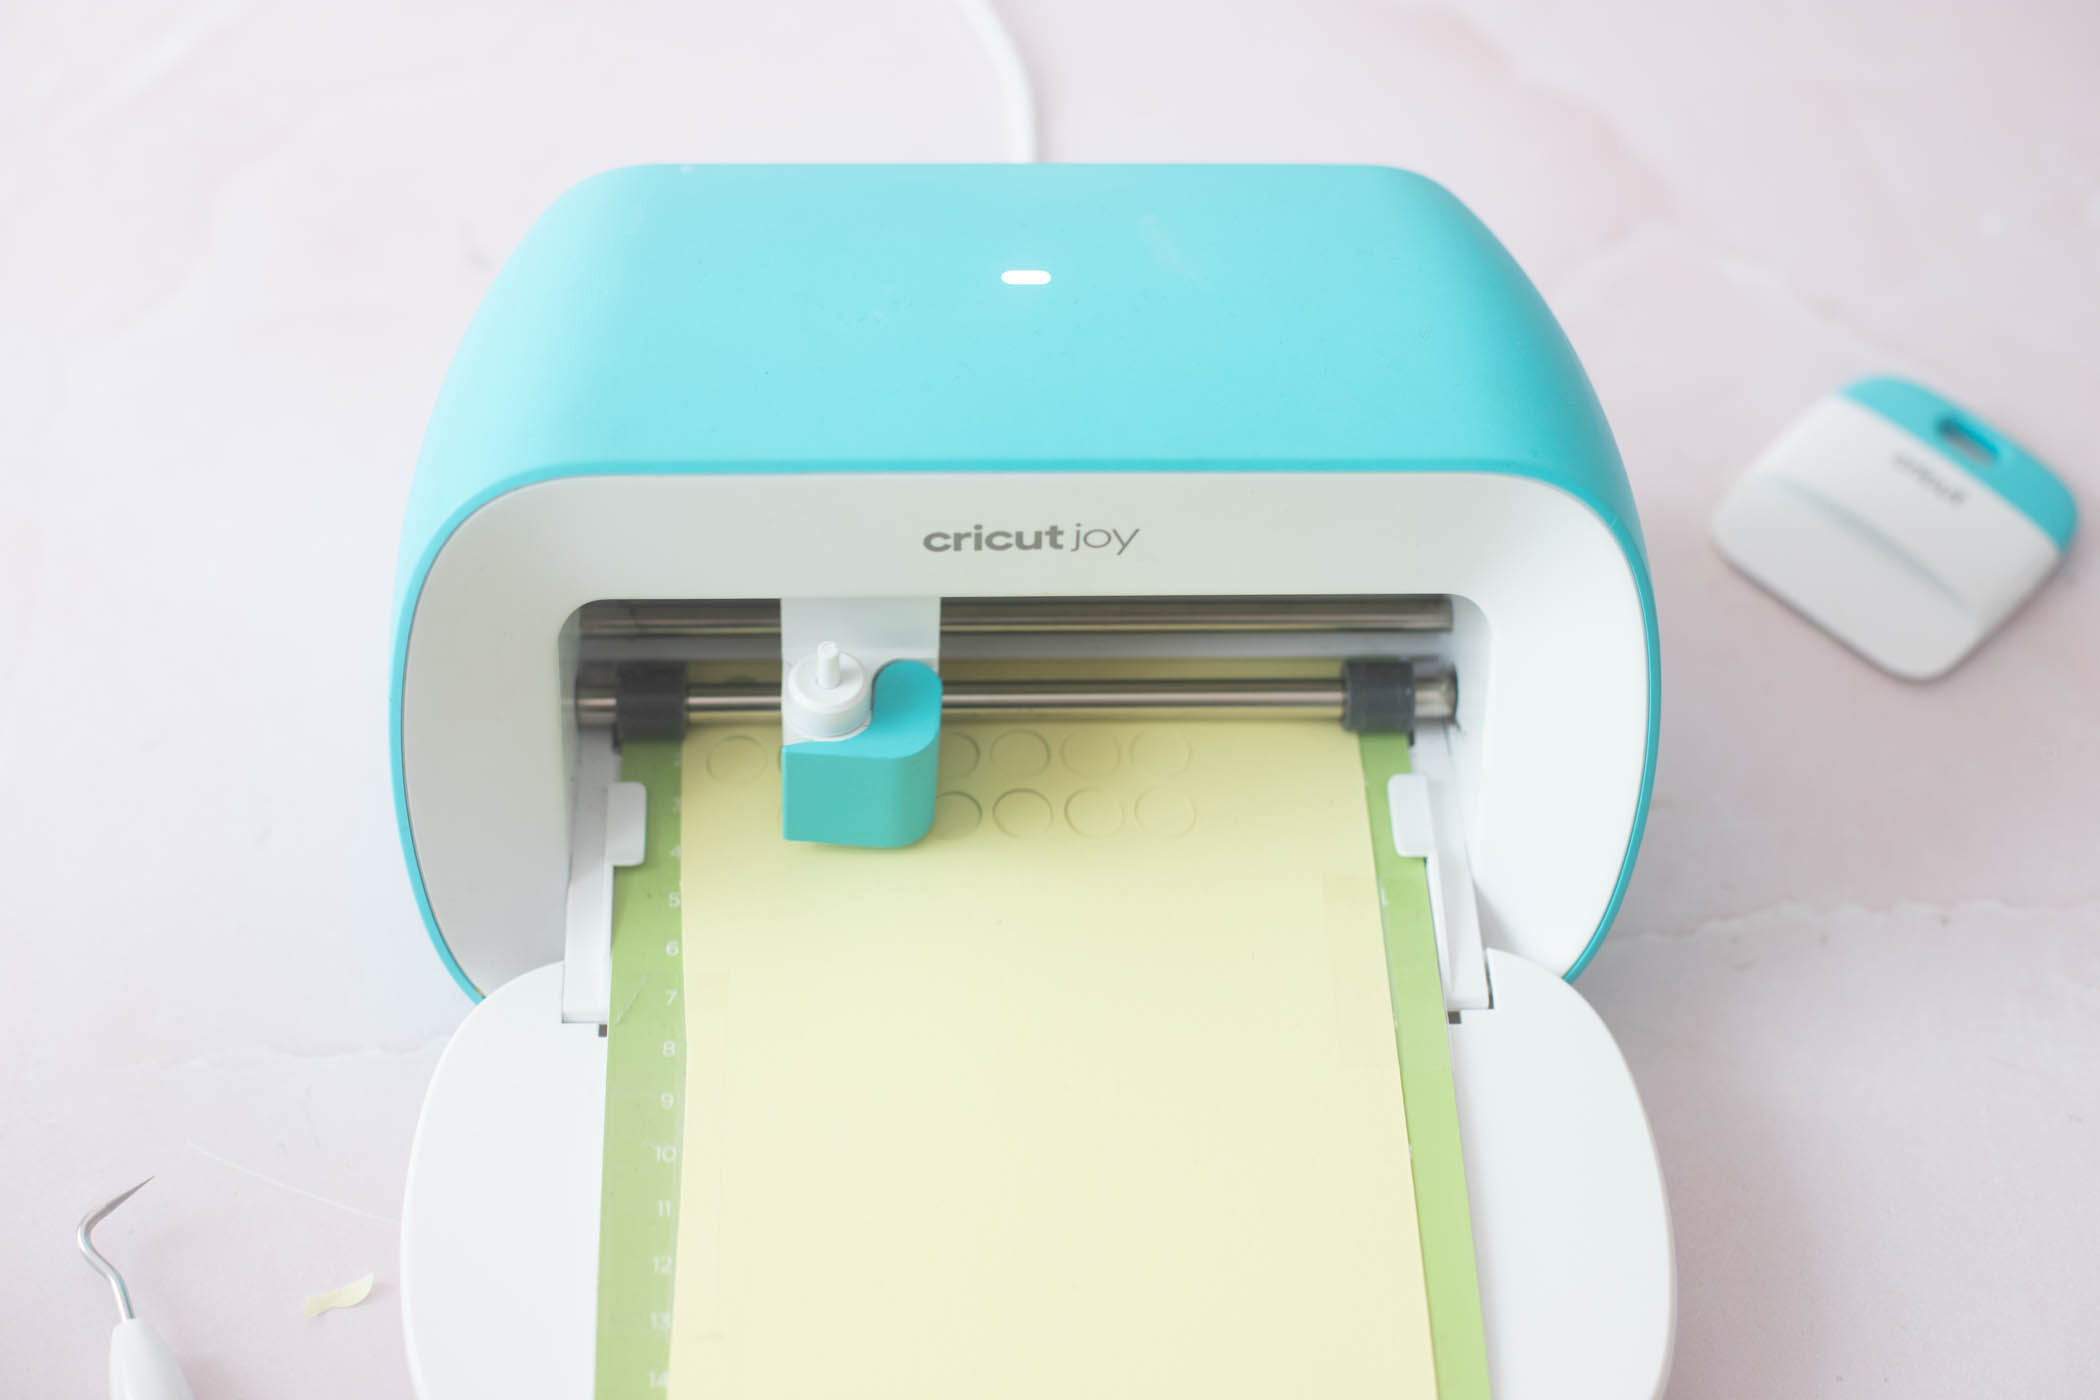
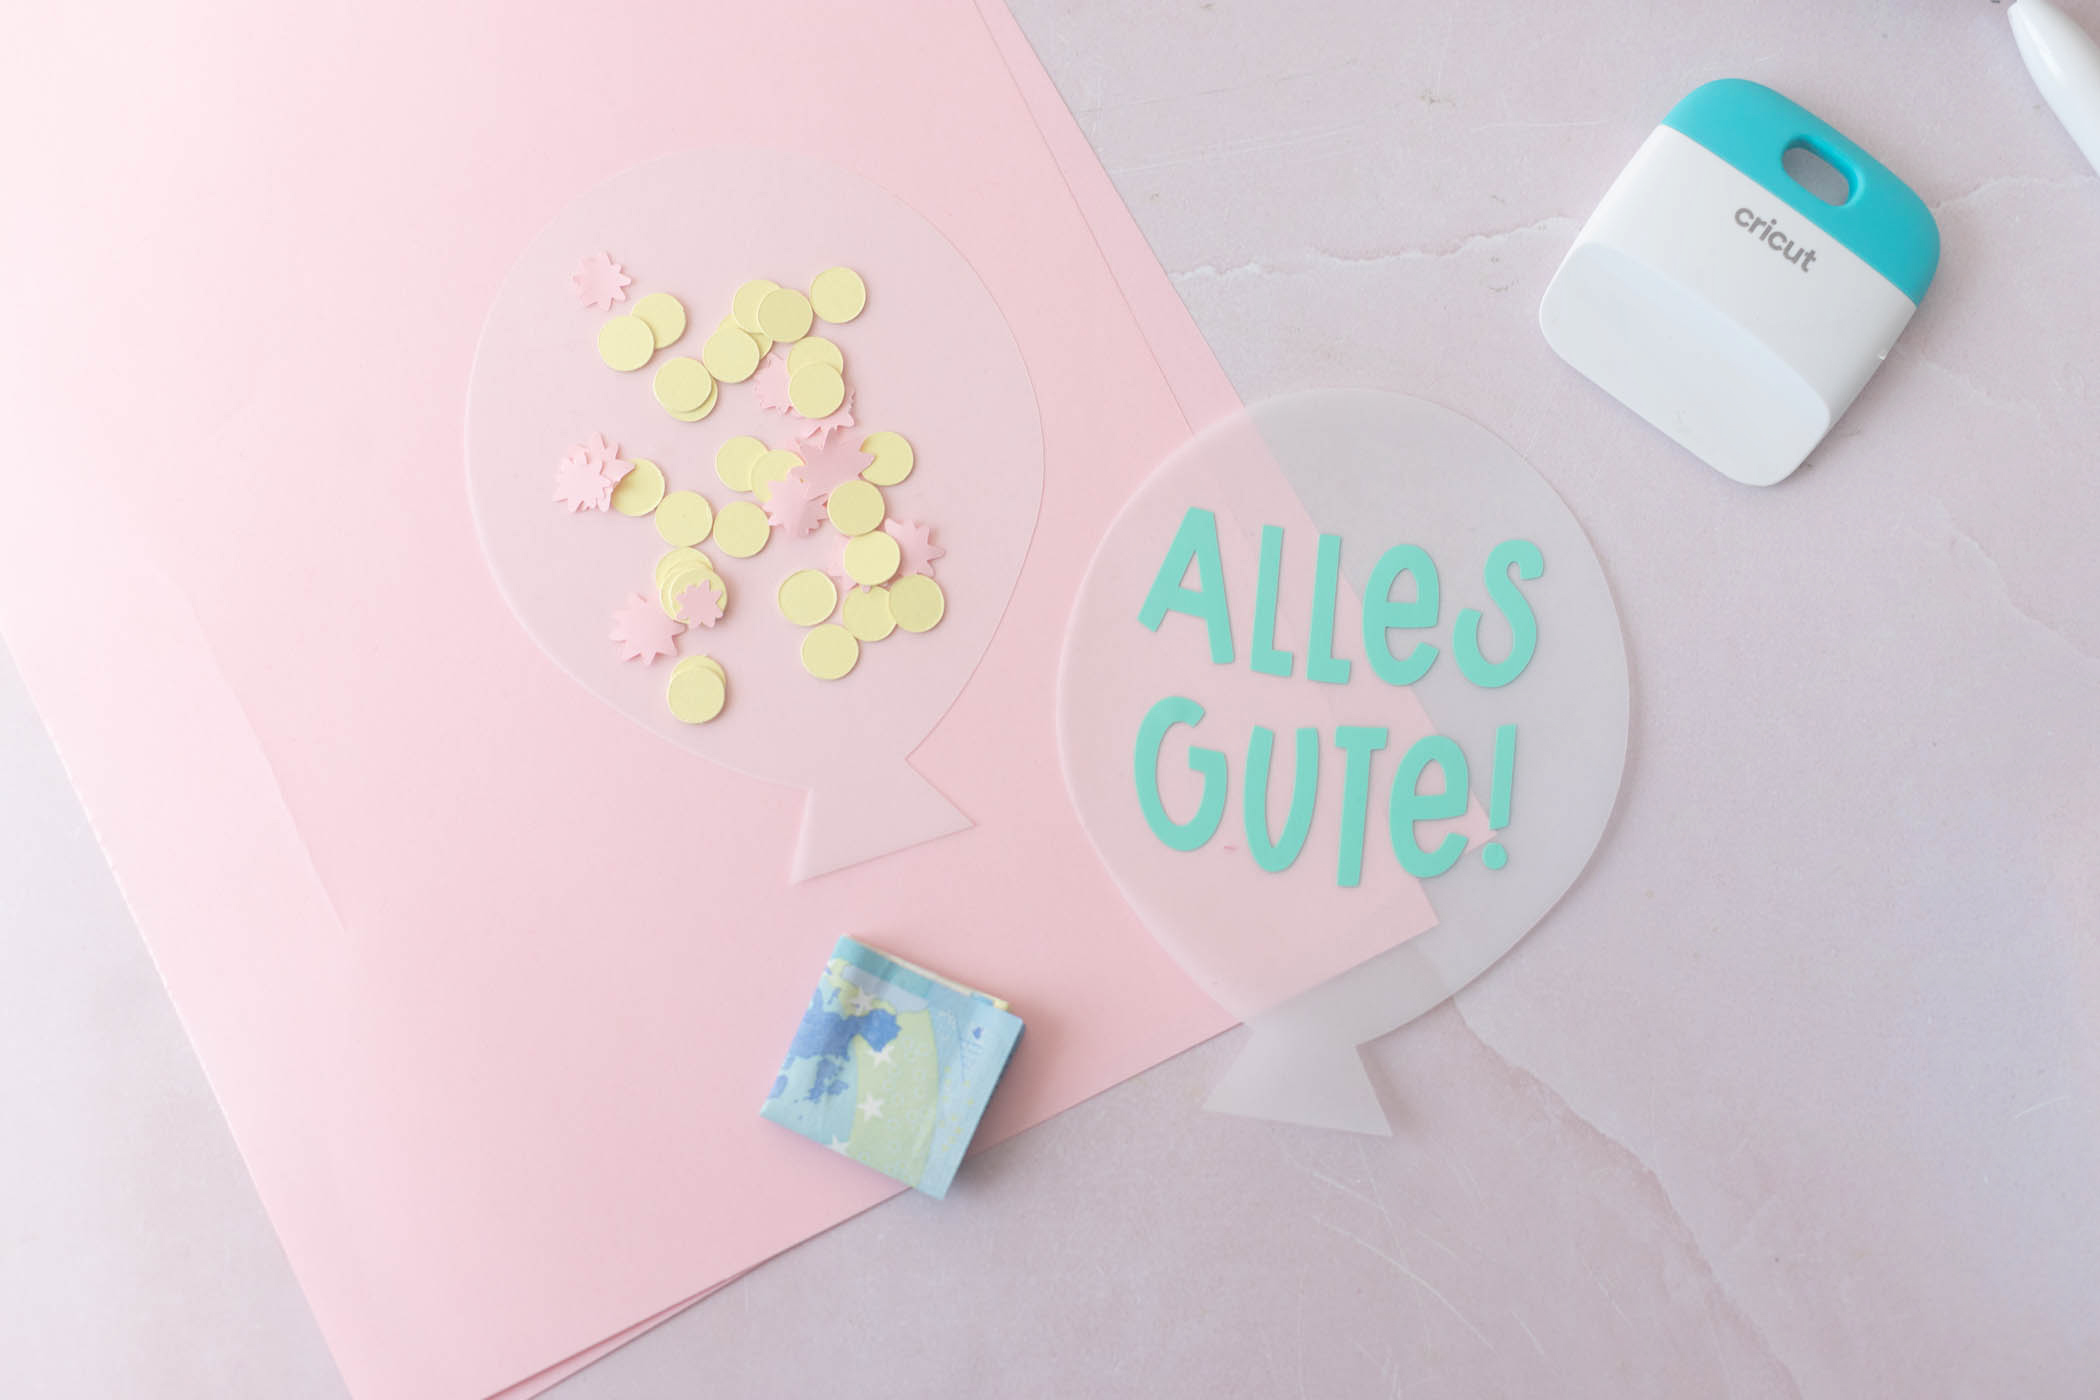
Step 5: Cut confetti
Place your paper scraps on the cutting mat. Optionally, use tape to secure the paper to the mat so it doesn’t slip while cutting.
The Cricut Joy will then cut out the confetti. Once the cutting process is complete, you can remove the confetti from the cutting mat. I used round and star-shaped confetti in pink and yellow – you can of course use your favorite color combinations here.
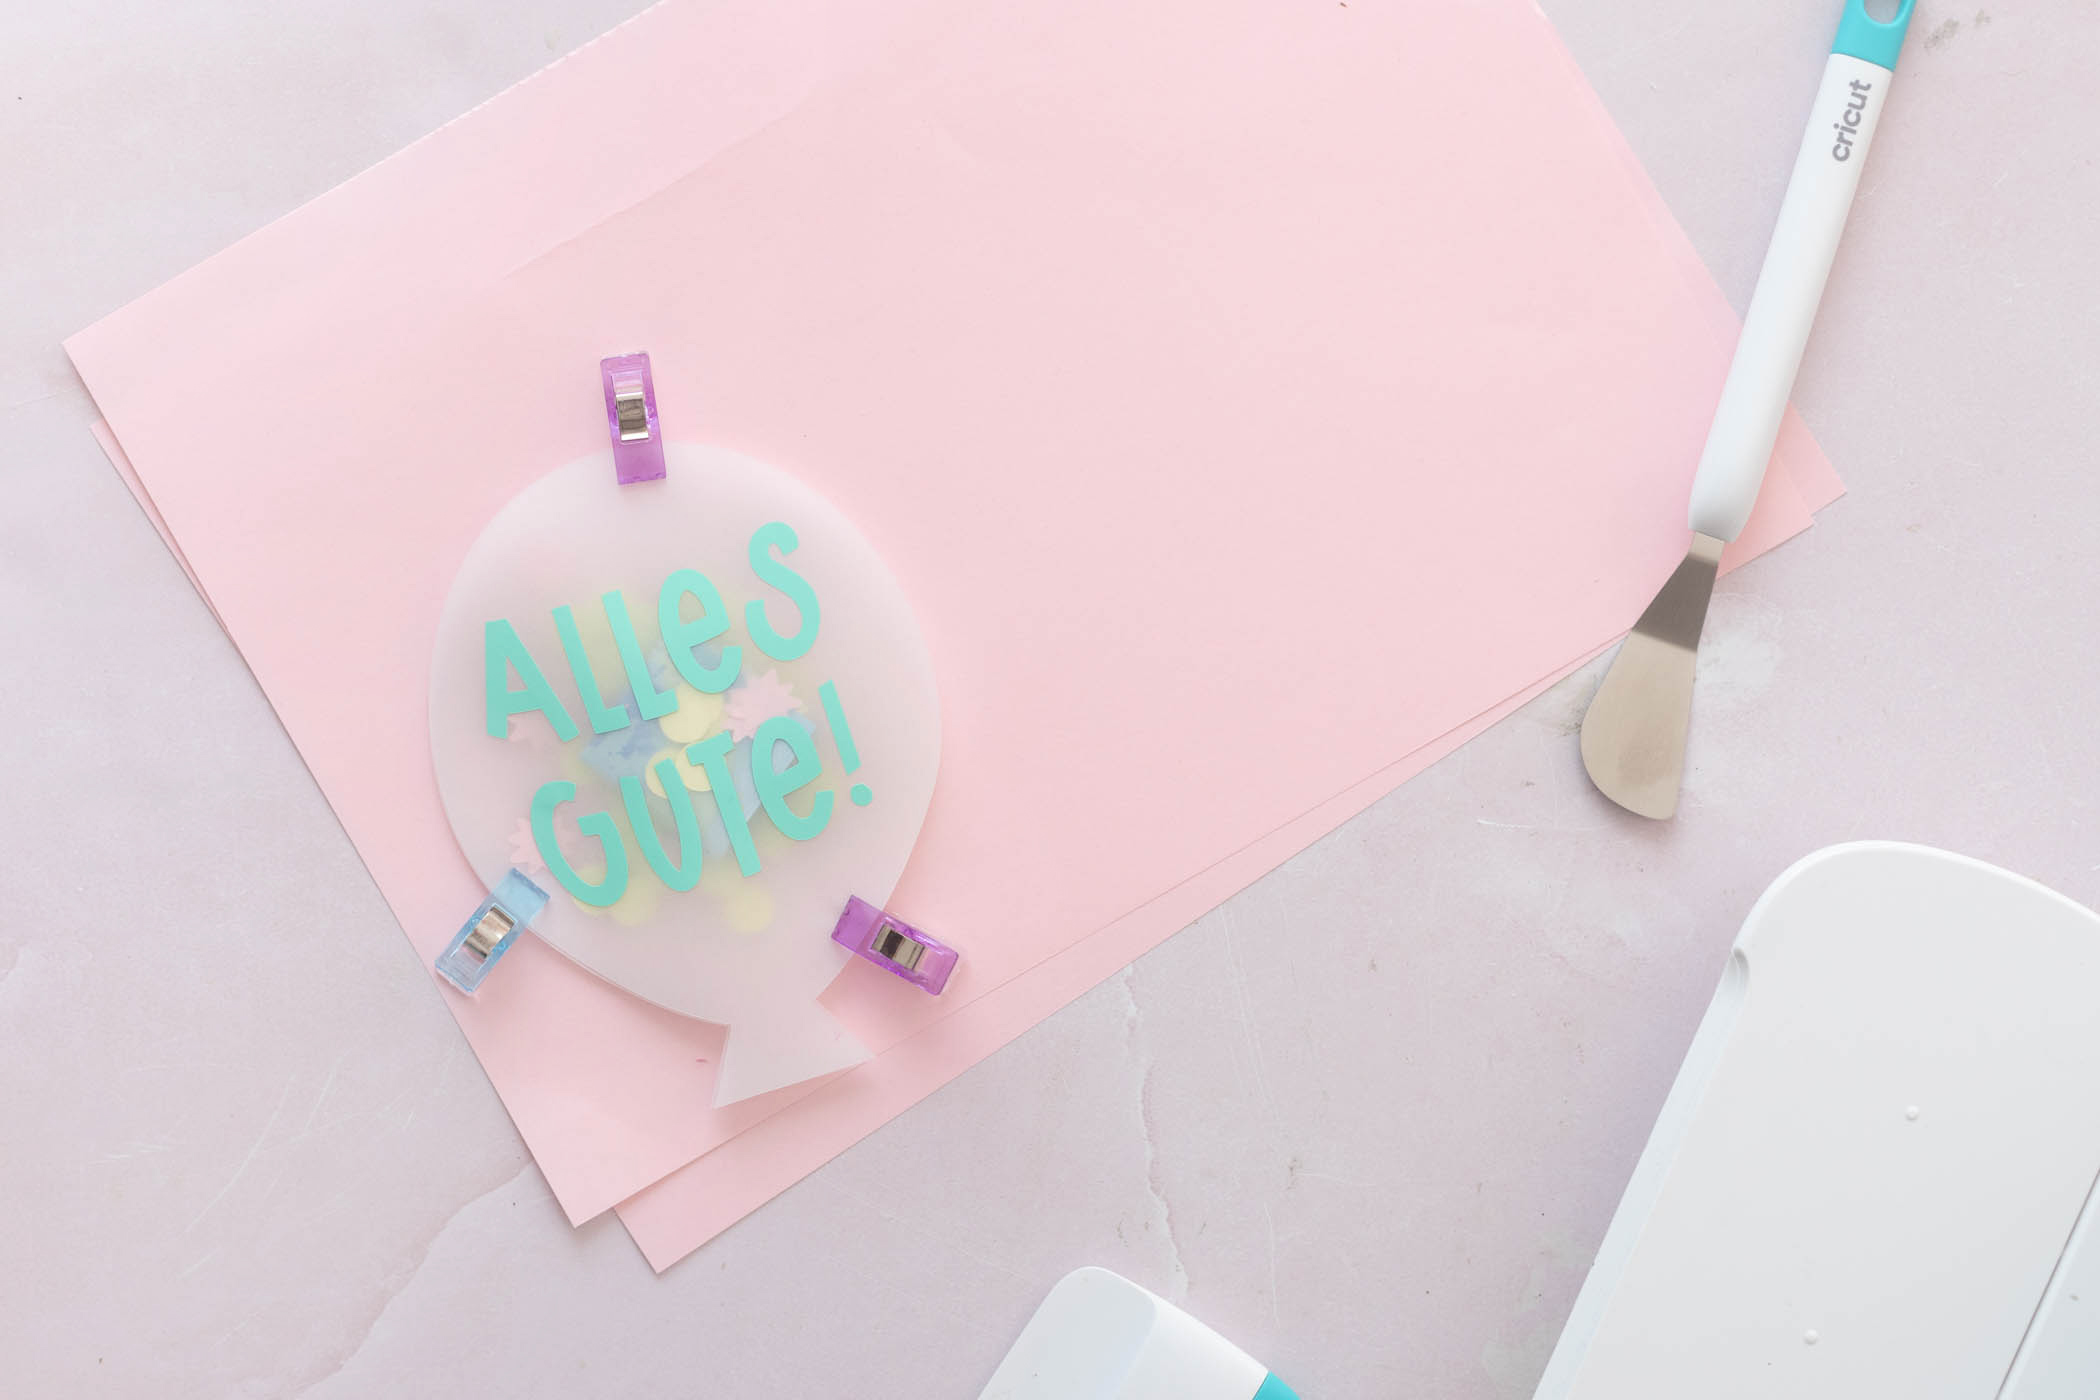
Step 6: Sew the balloon
Now fold a banknote a few times until it is nice and small. Then place the confetti and the banknote on part 1 of the balloon. Place part 2 of the balloon on top and make sure that the edges are flush with each other.
Staple the two balloons together. Fabric clips are good for this. Now sew the two pieces together all the way around with a straight stitch.
If you don’t have a sewing machine, you can also glue the edge together with craft glue or sew it by hand.
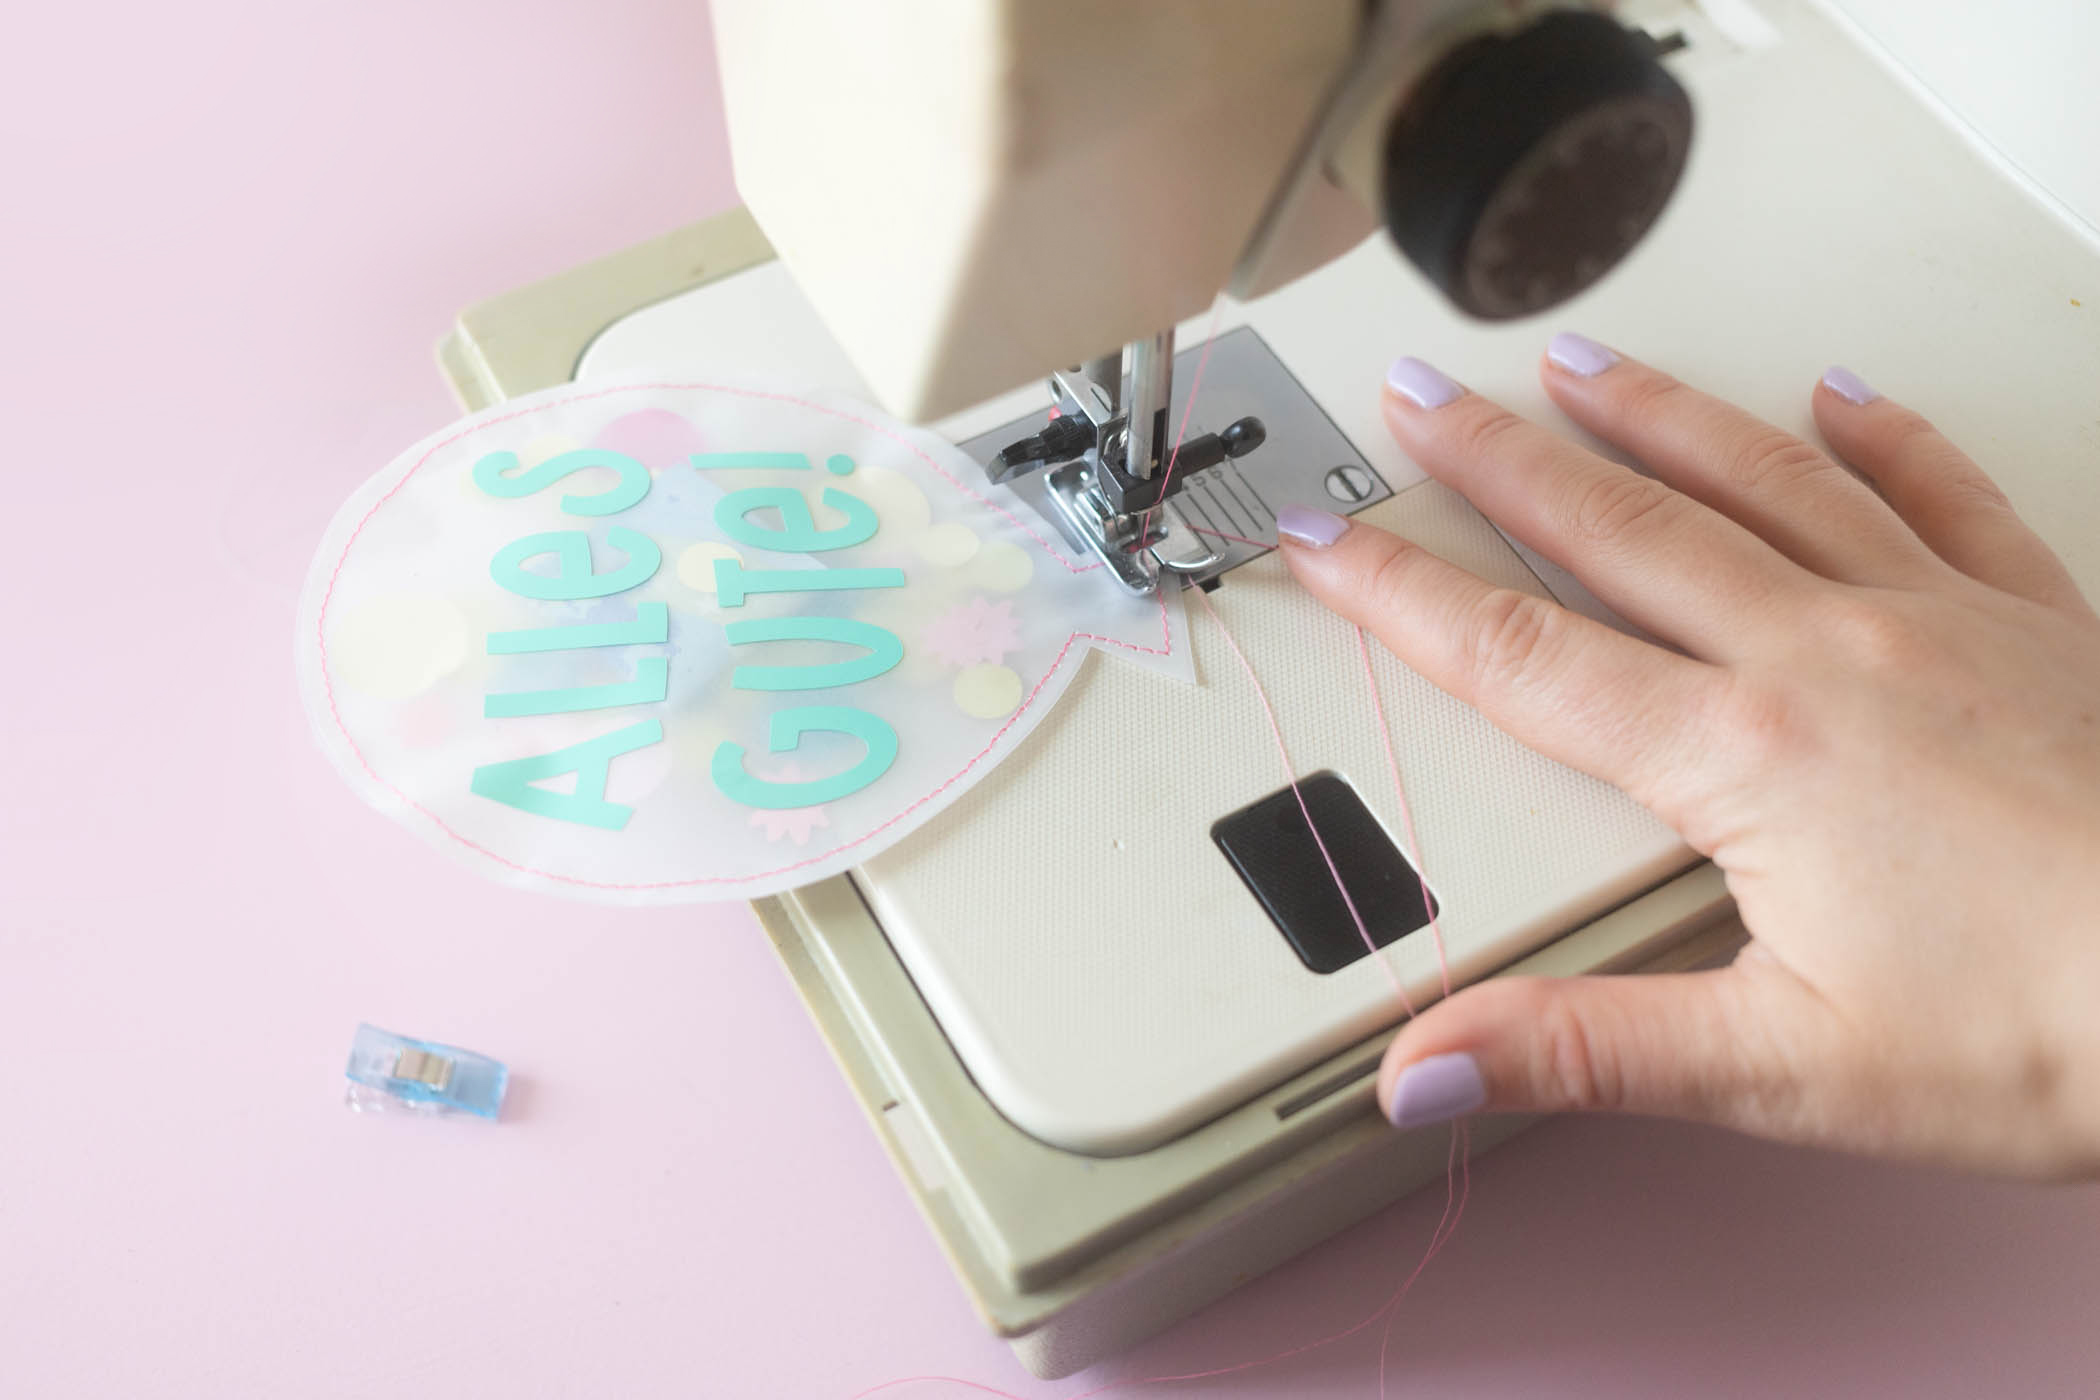
Now all that’s missing is a balloon string. I used a great neon pink yarn, which I tied to the balloon money gifts.
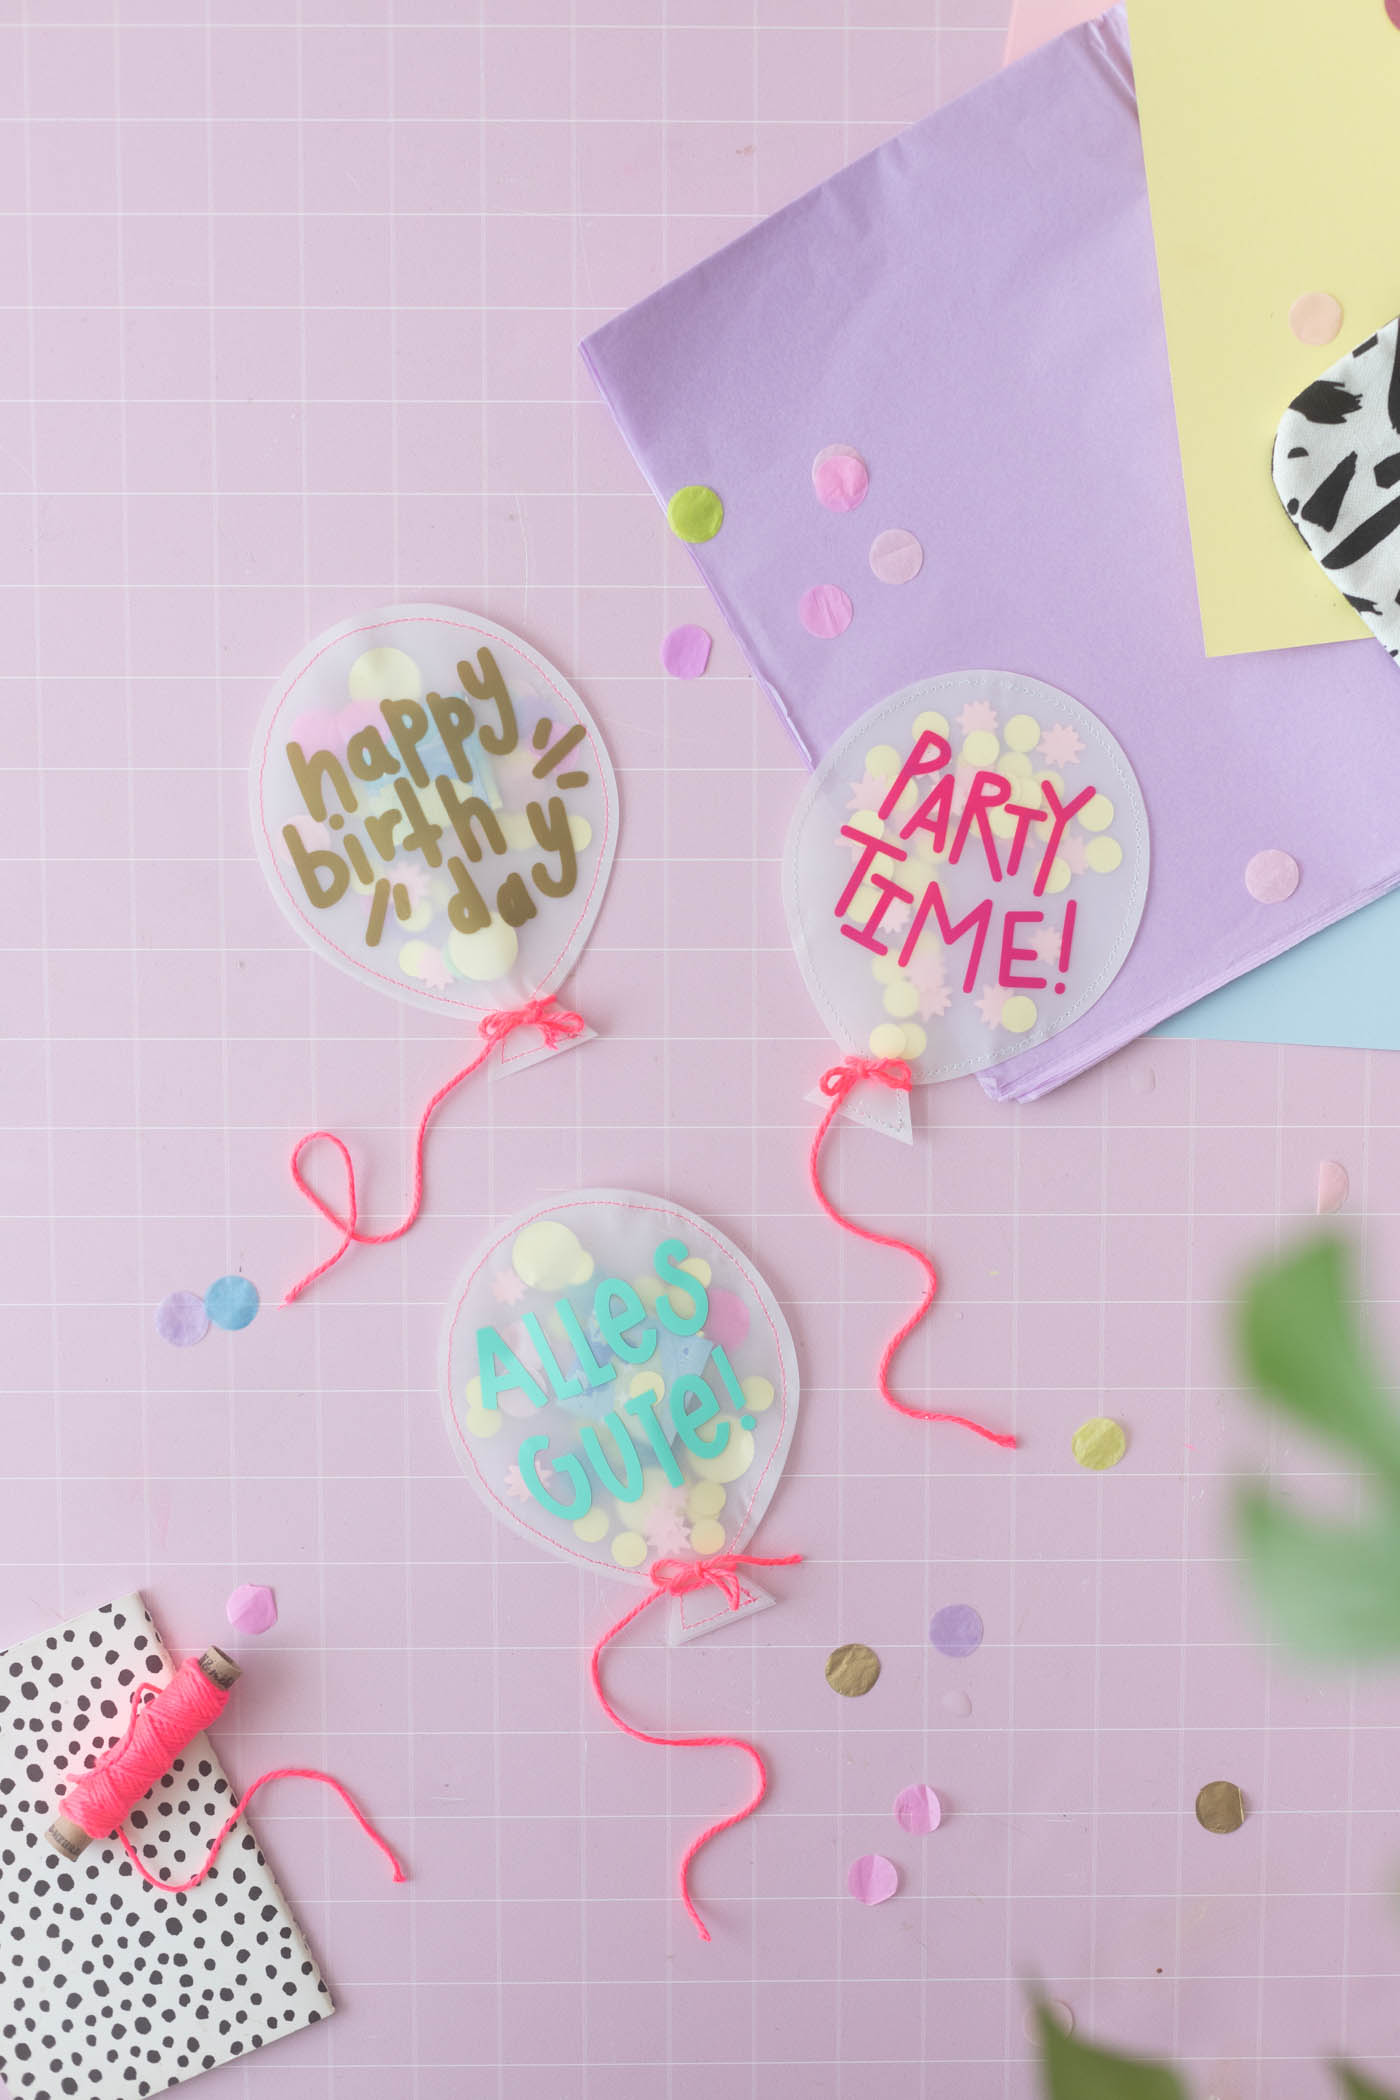
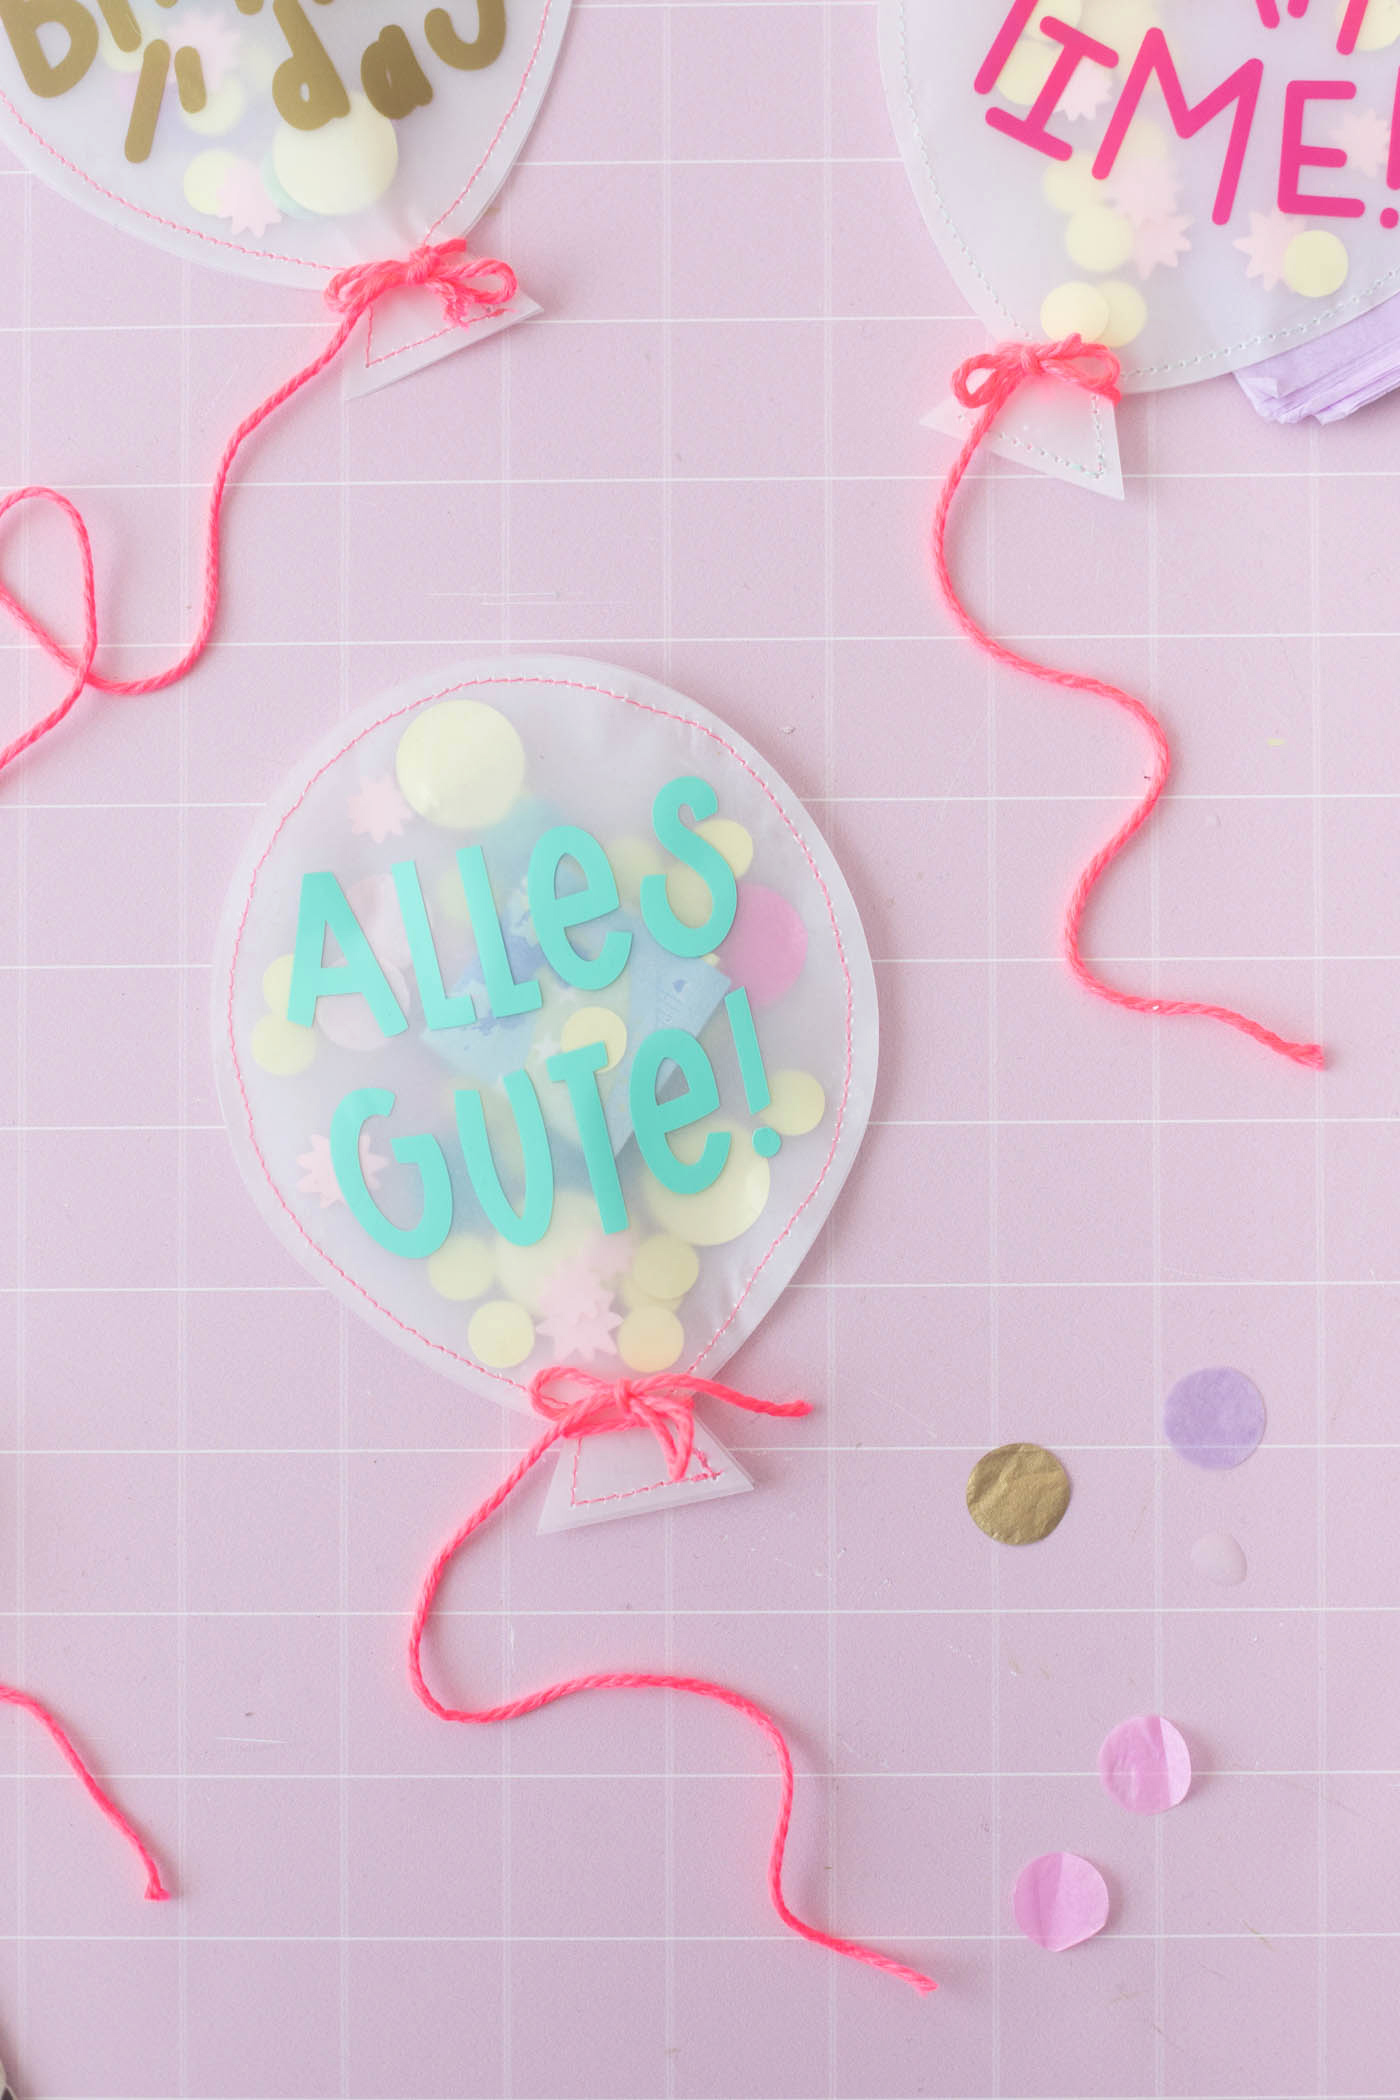
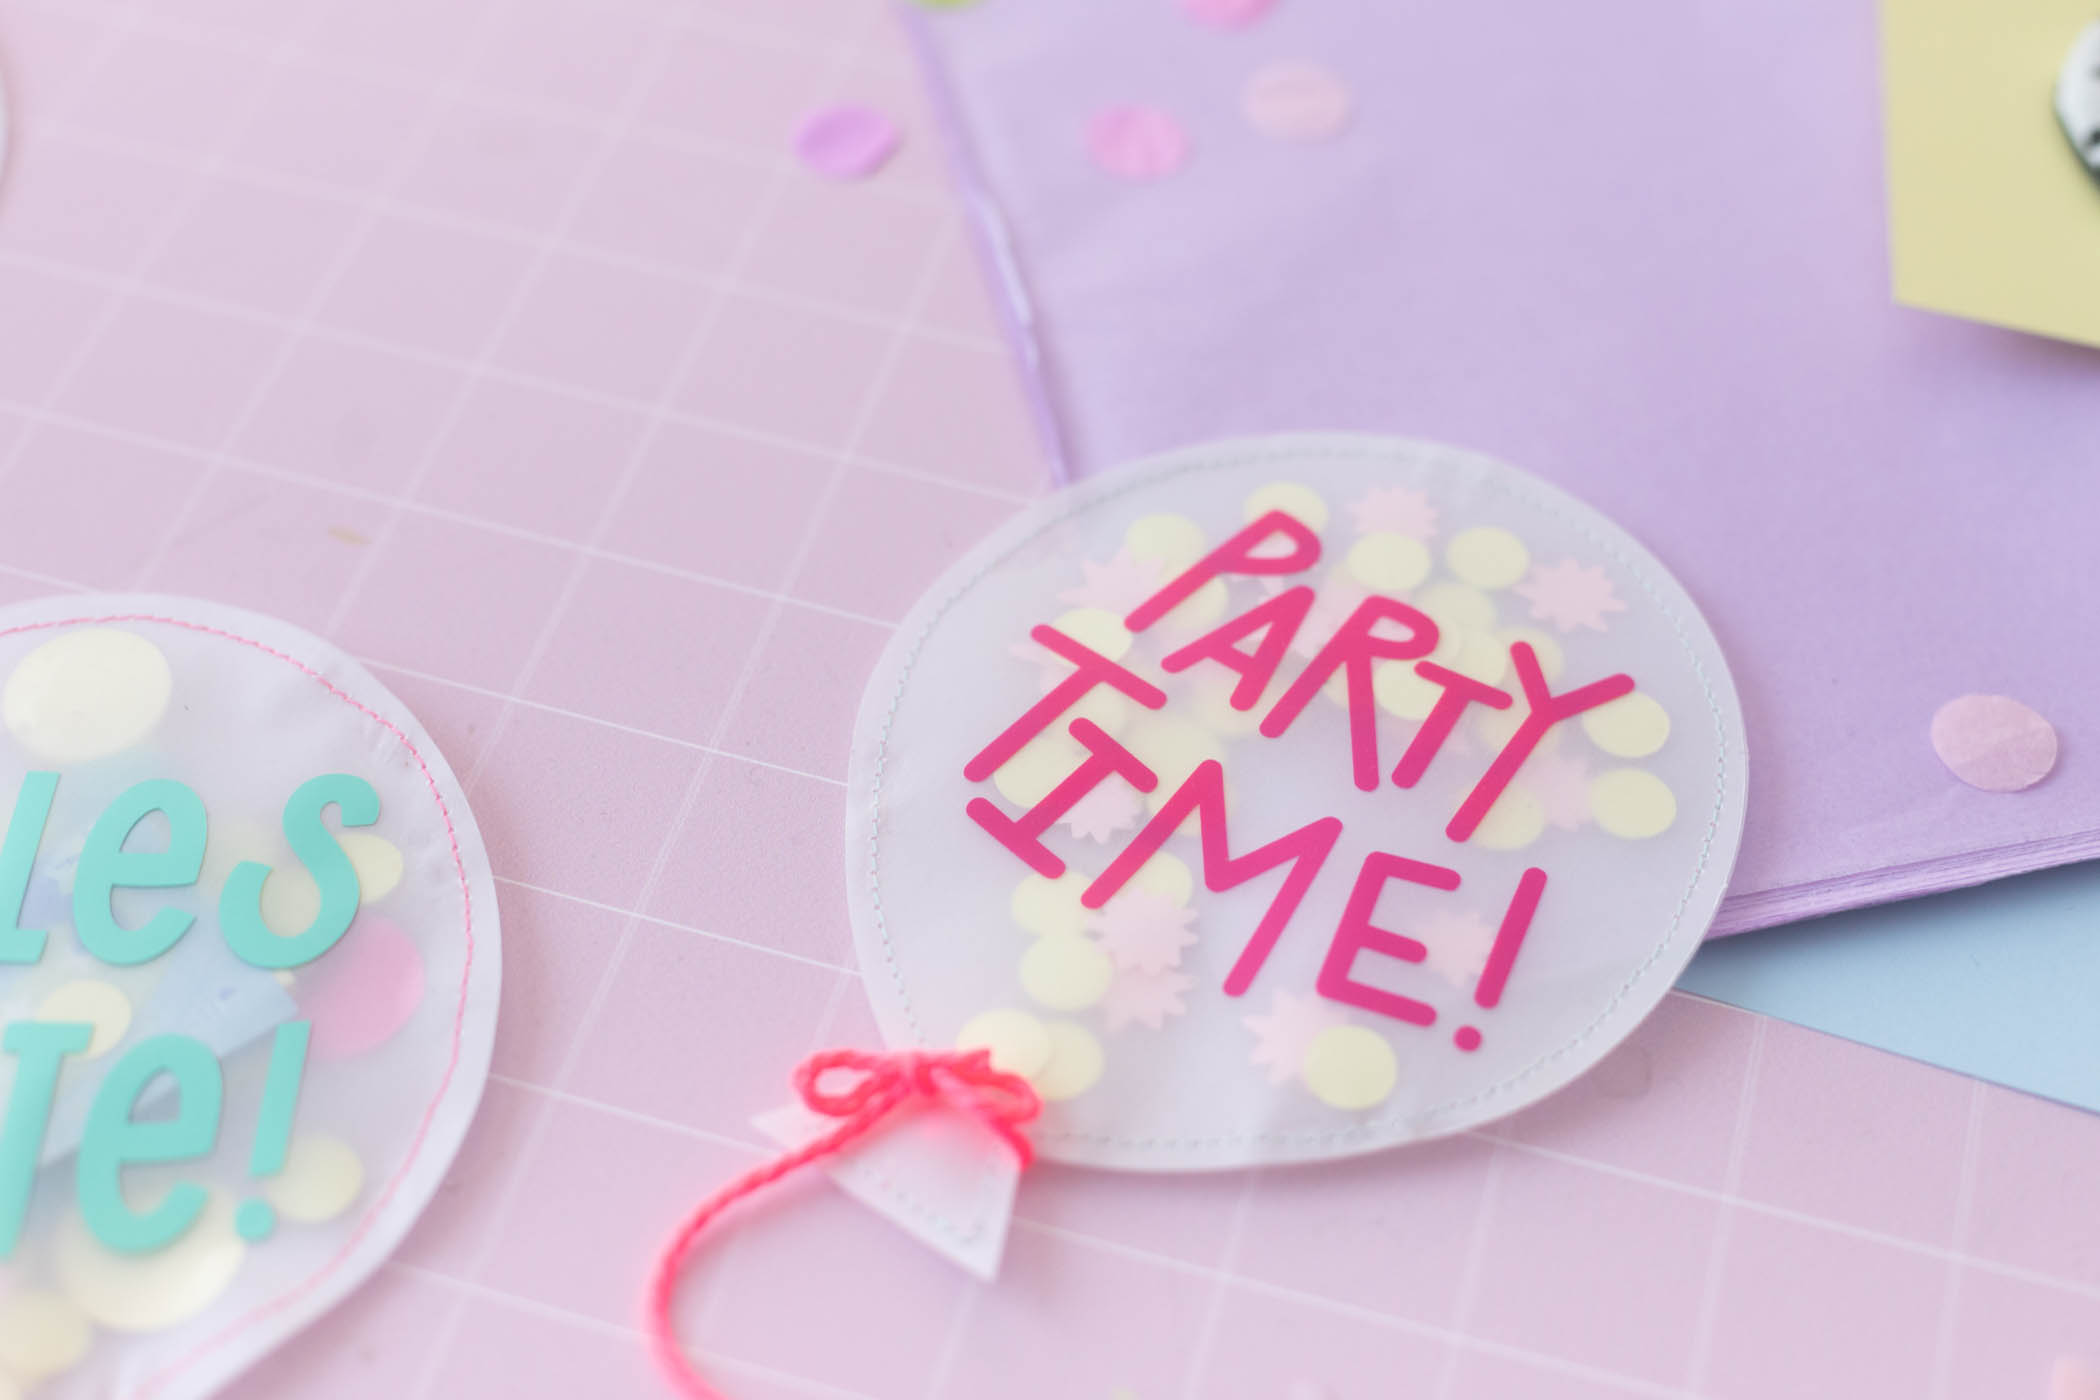
Your creative and original money gifts are ready. A small money balloon looks much better than a boring card with cash. You can of course also put a personal message in the balloons – there are no limits to your imagination.
Do you like the DIY idea? Then take it with you to Pinterest and save it to one of your pinboards:

I’m Lisa – and I can never sit still. I’ve been blogging about my passions on my feenstaub since 2013: great DIY ideas, chic design and very special illustrations. The main thing is that they’re homemade! More about me.
Source: meinfeenstaub.com

