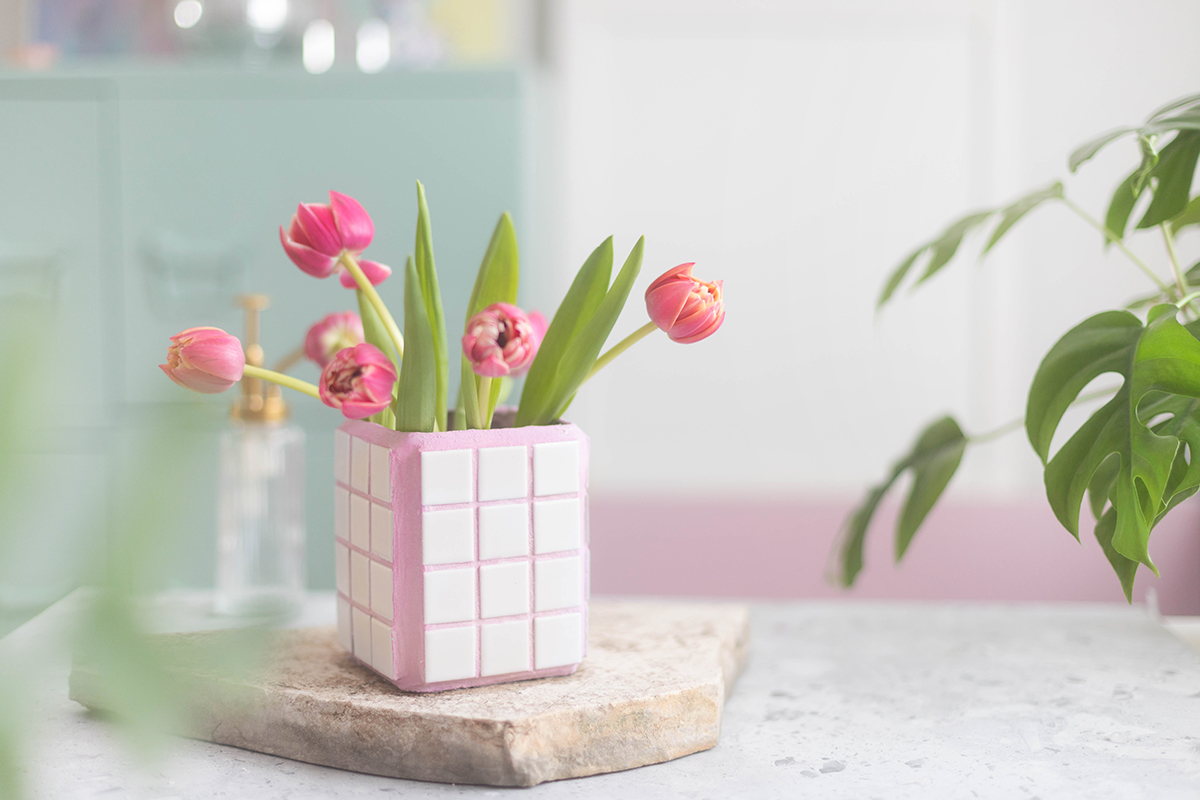
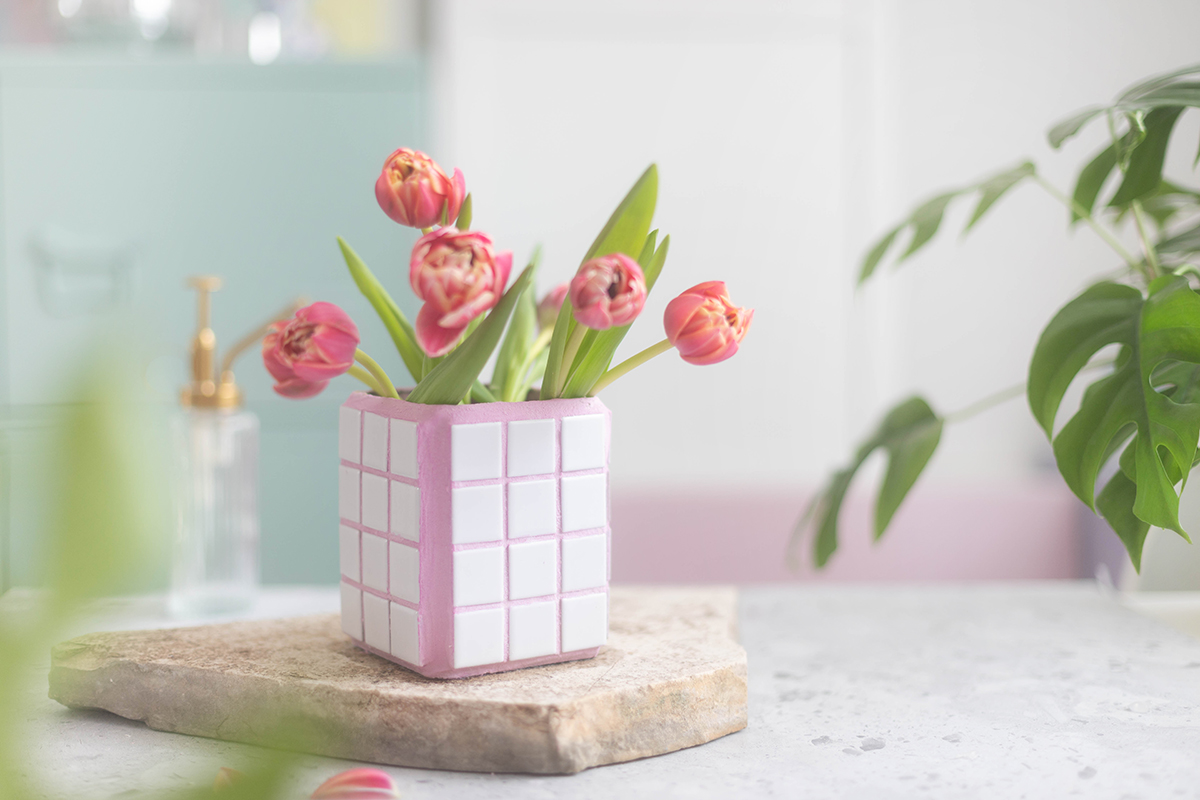
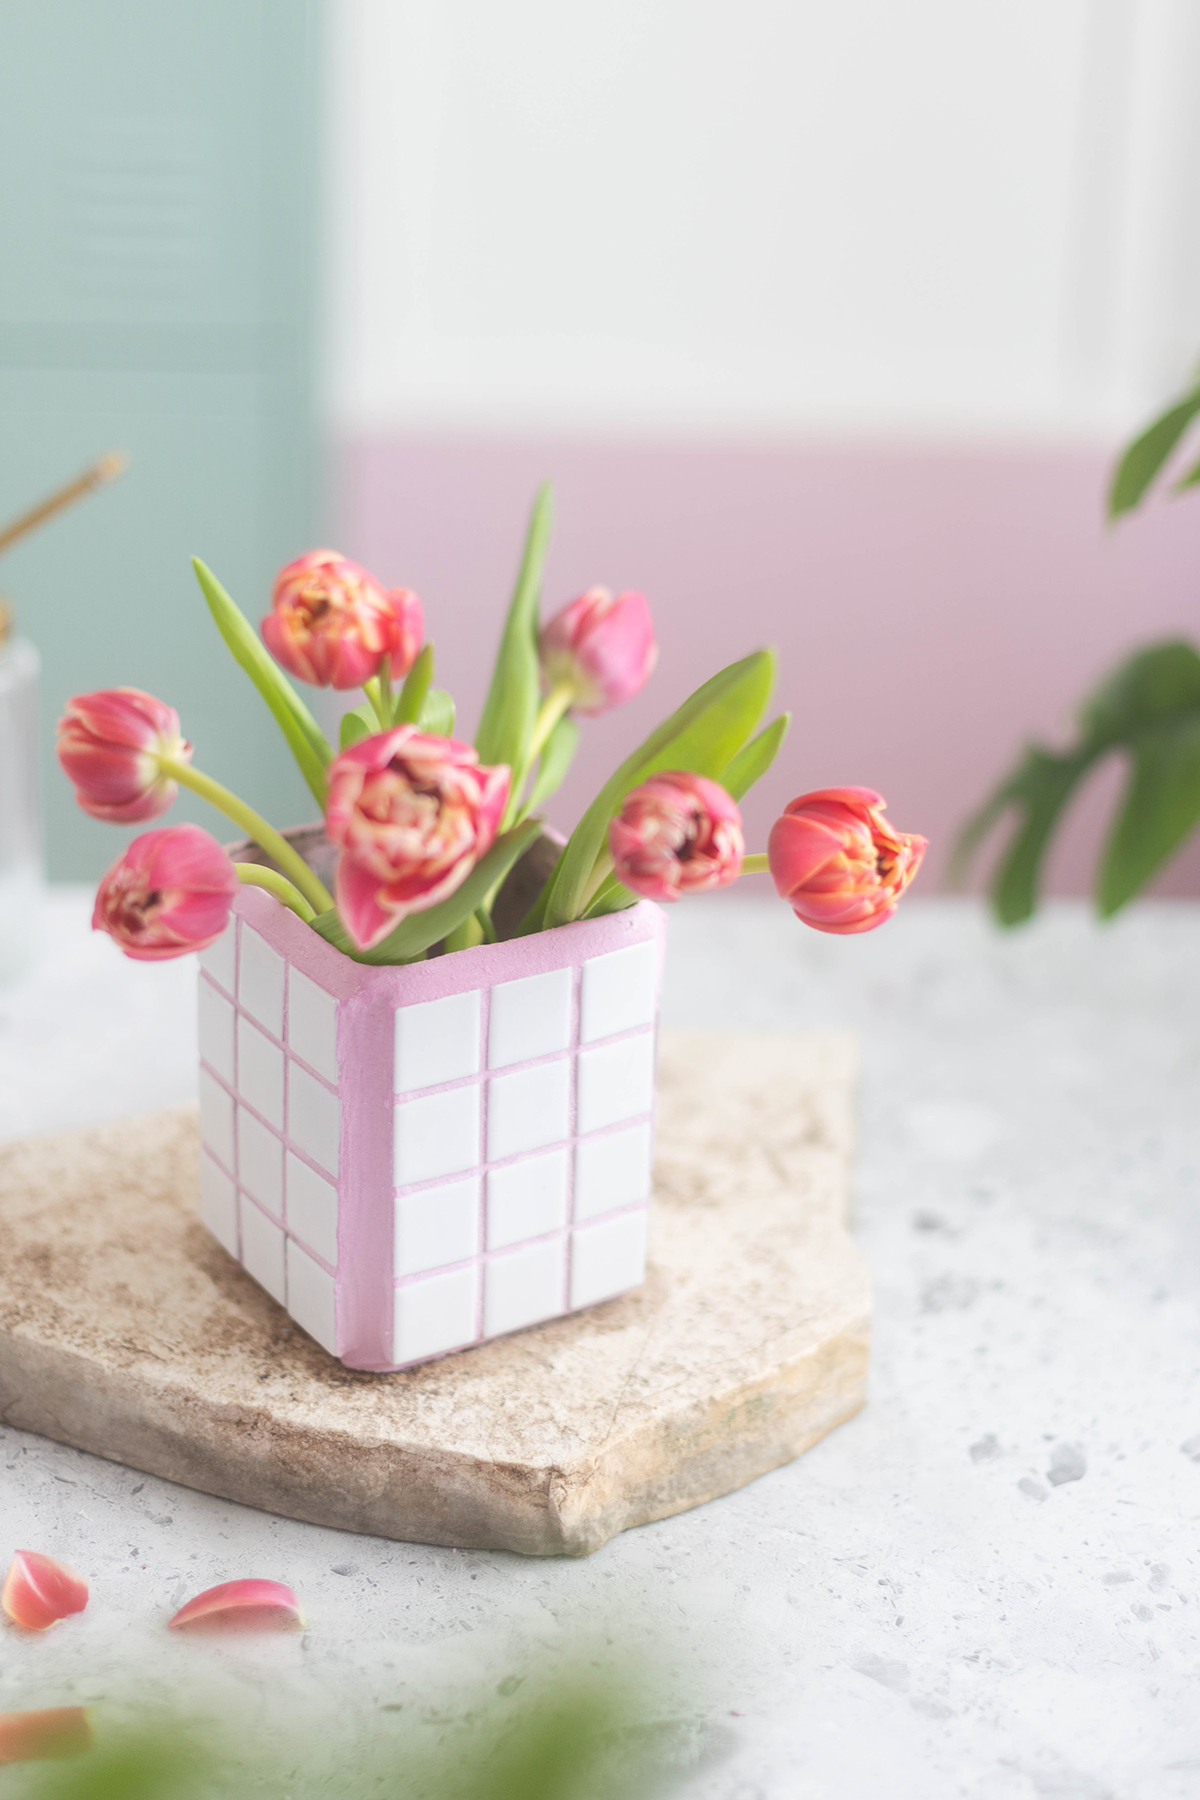
The topic of the ARD buffet today was “Living & Decoration” and I was allowed to think of a suitable idea. I’m a very big fan of checked patterns and (plain) tiles and so I thought I’d make a chic vase out of mosaic tiles.
A rectangular box is simply used as a base and the tiles are easily glued on and then grouted. As a special highlight, the grout is colored pink.
Do you want to catch up on the ARD buffet show? Here you go to the media library.
Material:
- Mosaic ceramic tiles
- square can
- White grout (used here: mosaic grout)
- Pigment in an optional color
- hot glue
- Mixing container
- sponge
- spatula
- Scissors
- rubber gloves
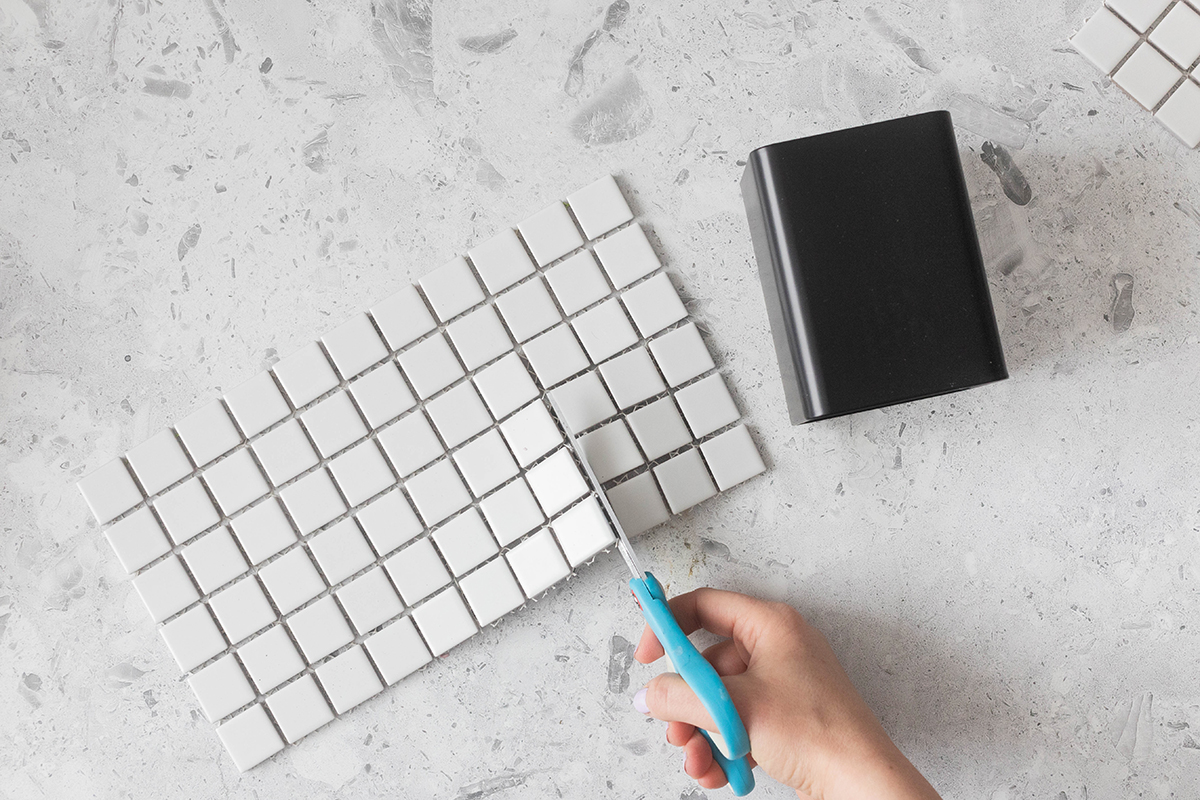
Step 1: Cut tiles and stick them on
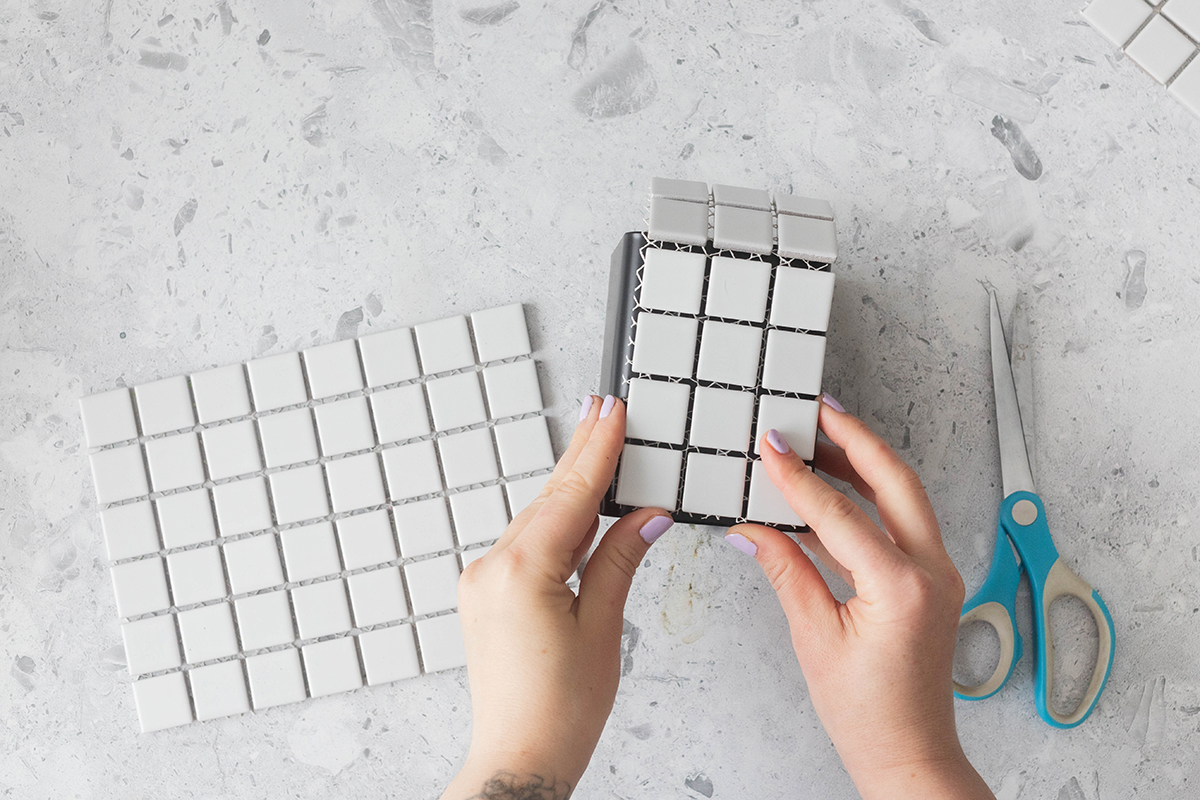
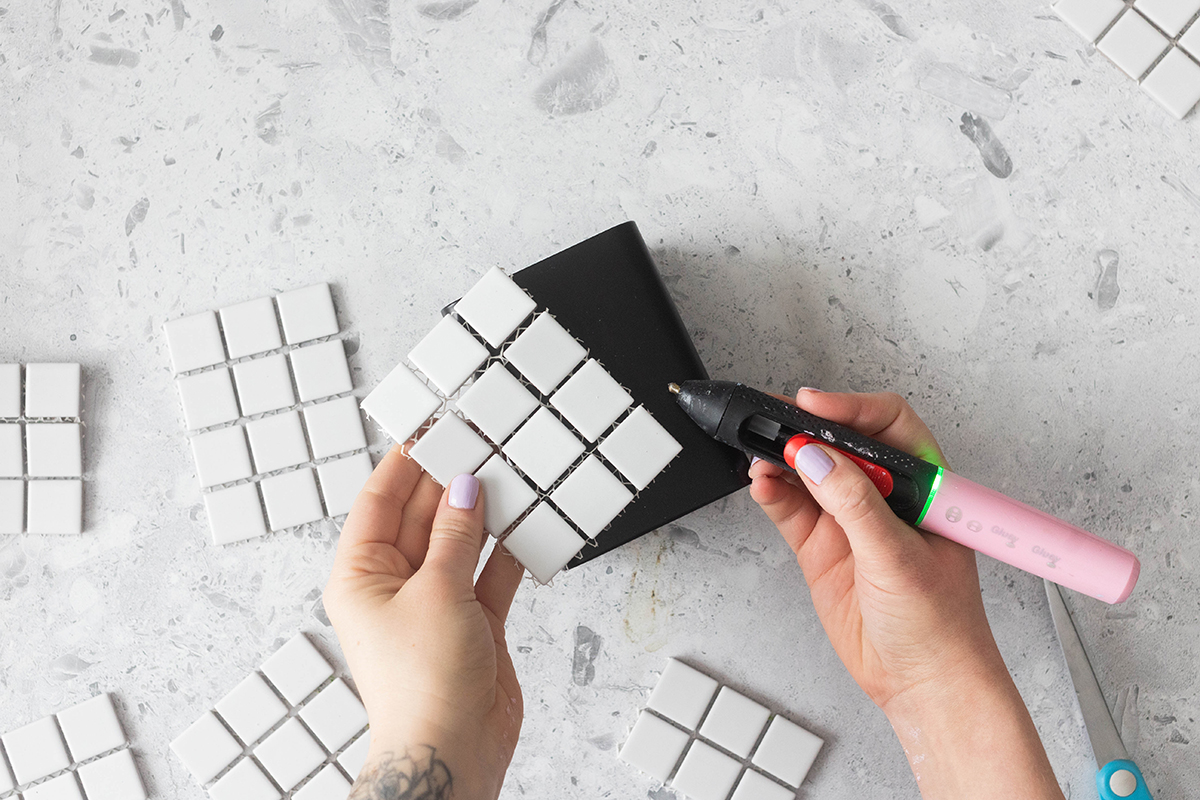
In the first step, the mosaic tiles are cut to fit the can used. A total of four pieces are cut, one piece for each side of the can.
The tiles are glued to the can with hot glue. There is no need to prime the surface with cement or something similar, as the tiles only have to hold on to the vase – it’s just standing there anyway. 🙂

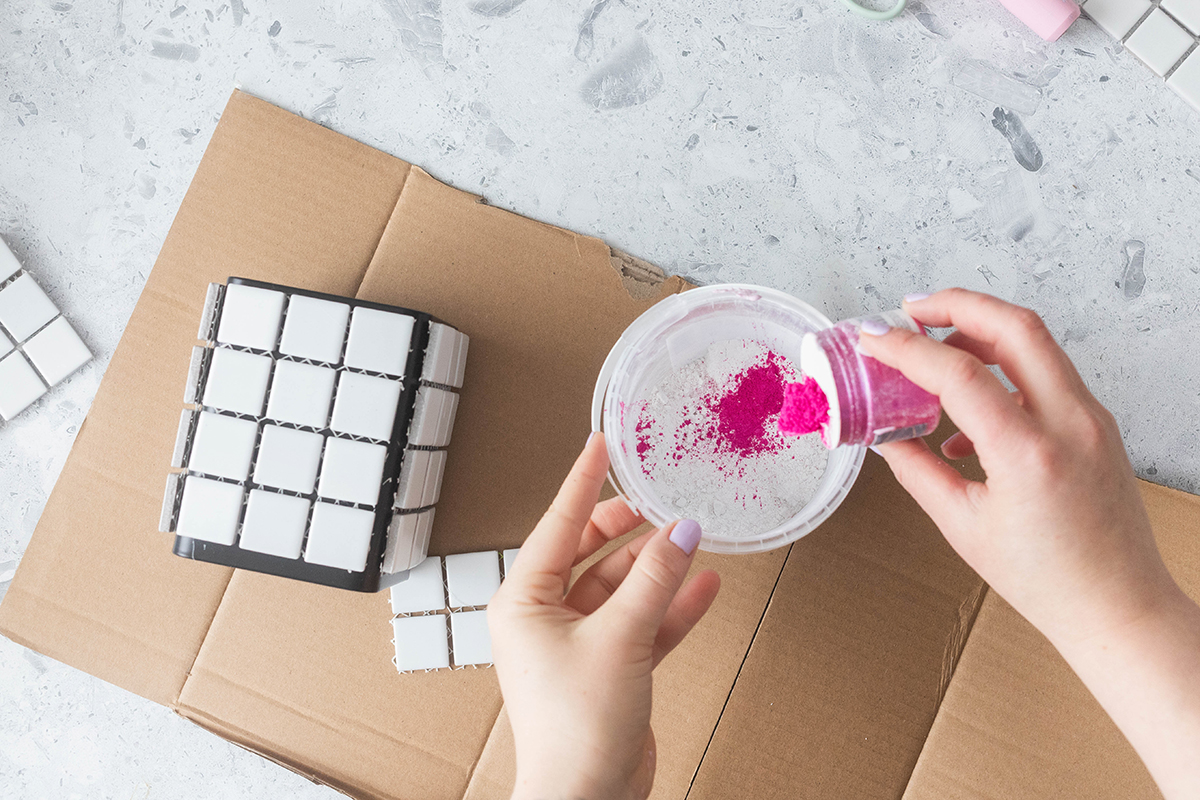
Step 2: Mix the joint compound
Now the joint compound is mixed according to the manufacturer’s instructions. Color pigment is added and stirred until a uniform mass is created.
You choose the amount of color pigment depending on how strong you want the color to be. The less pigment, the more delicate the color will be.
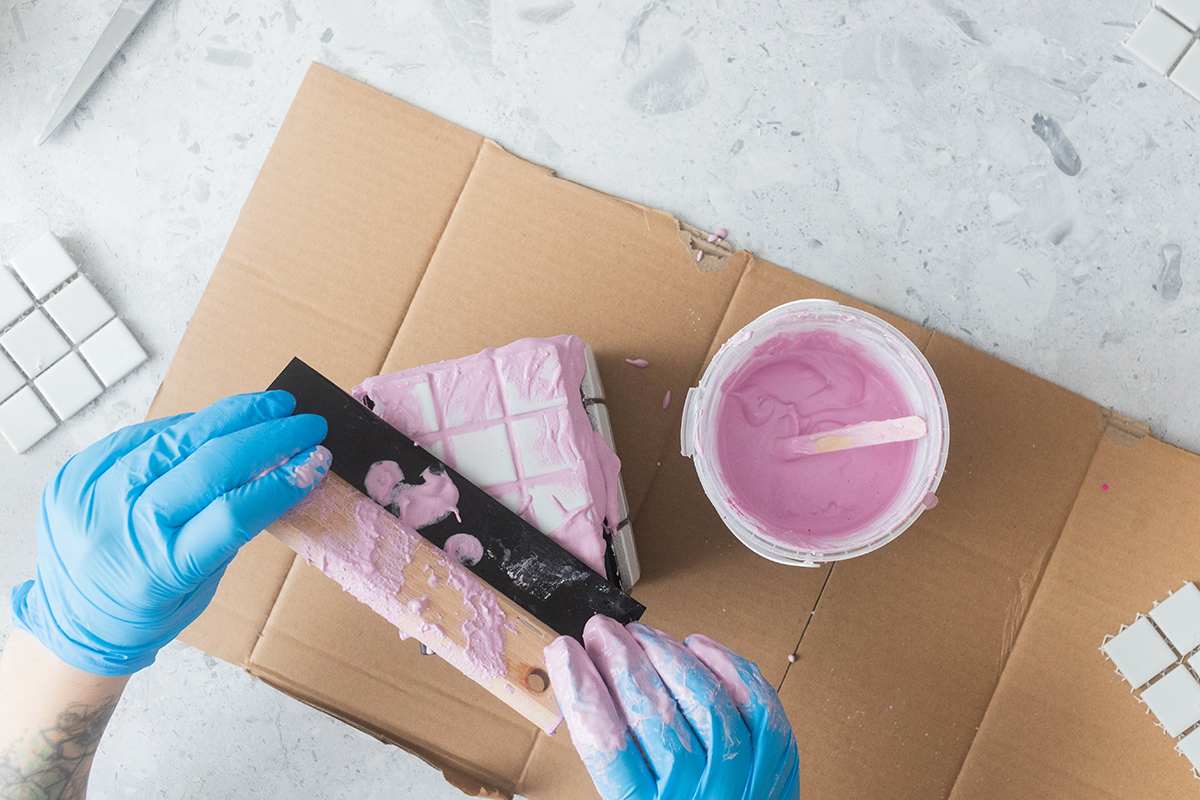
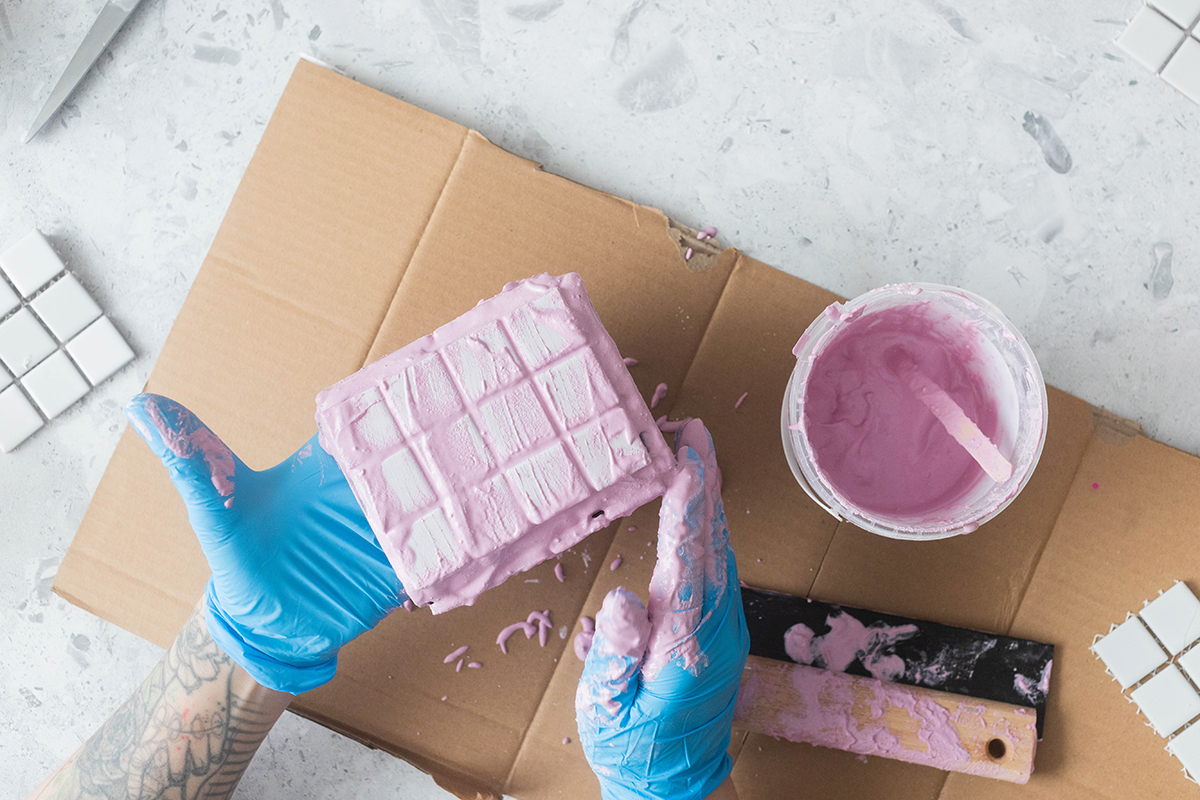
Step 3: Apply grout
The colored grout is then applied to the can: Make sure that the grout gets into every joint of the tiles well and that there are smooth transitions at the corners.
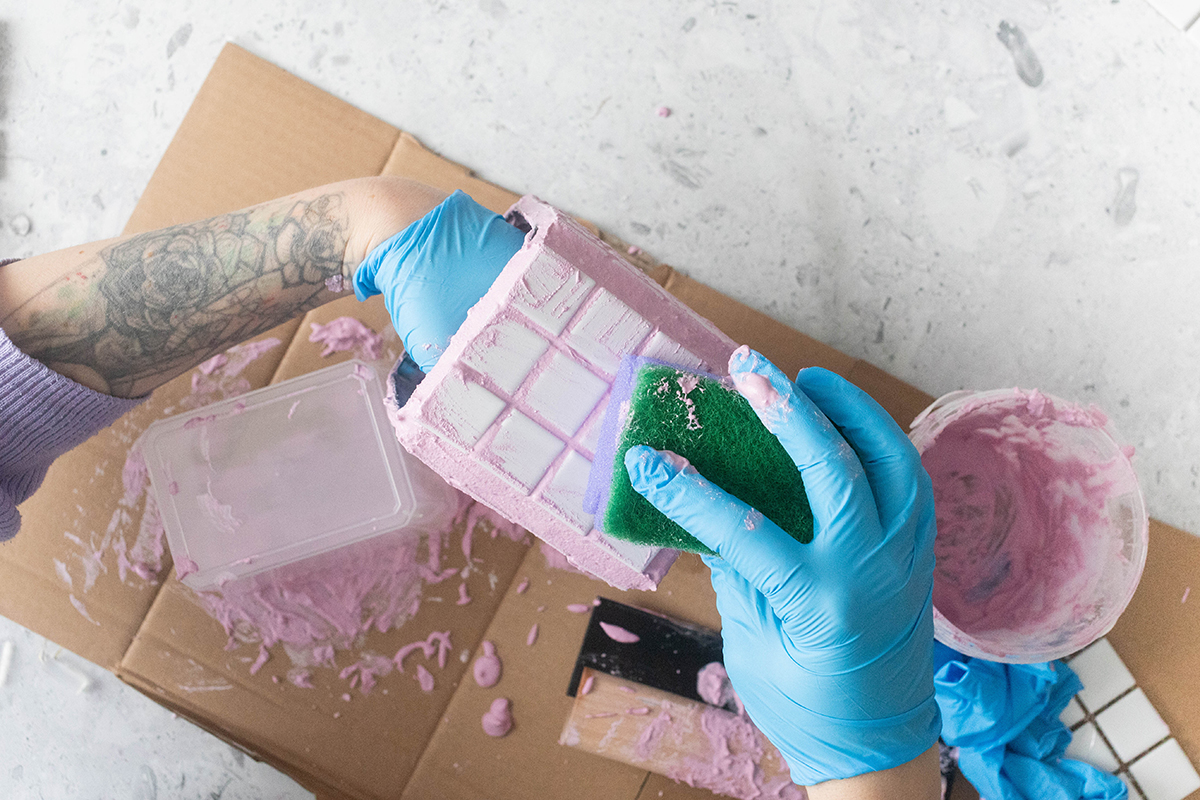
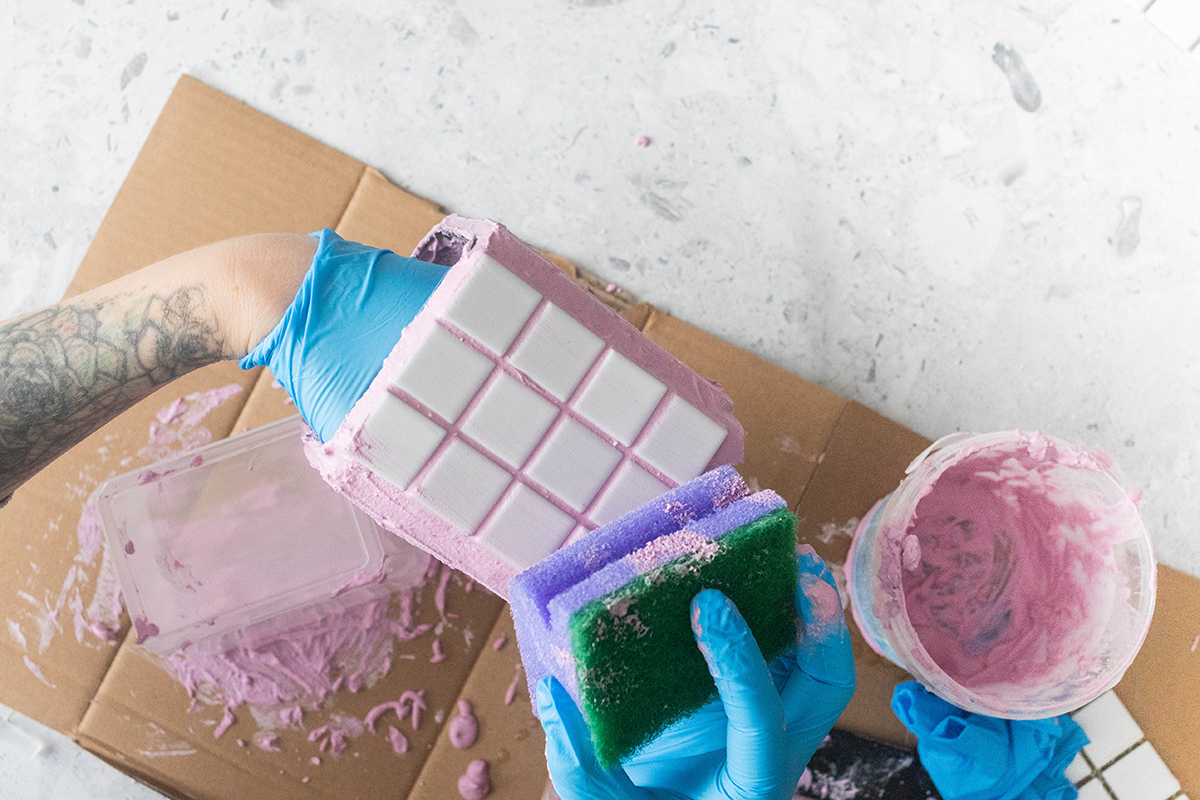
Step 4: Wipe off excess grout
After about 10 minutes, the excess grout can be removed with a wet sponge. Optionally, you can now work again with the remaining joint compound to close holes or smooth edges.
Now the vase just needs to dry – your homemade designer piece is ready.
Do you like the DIY idea? Then take it to Pinterest with this picture and mark it on one of your pin boards:

I’m Lisa – and I can never sit still. I’ve been blogging about my passions on my fairy dust since 2013: These are great DIY ideas, chic design and very special illustrations. The main thing is homemade! More about me.
Source: meinfeenstaub.com