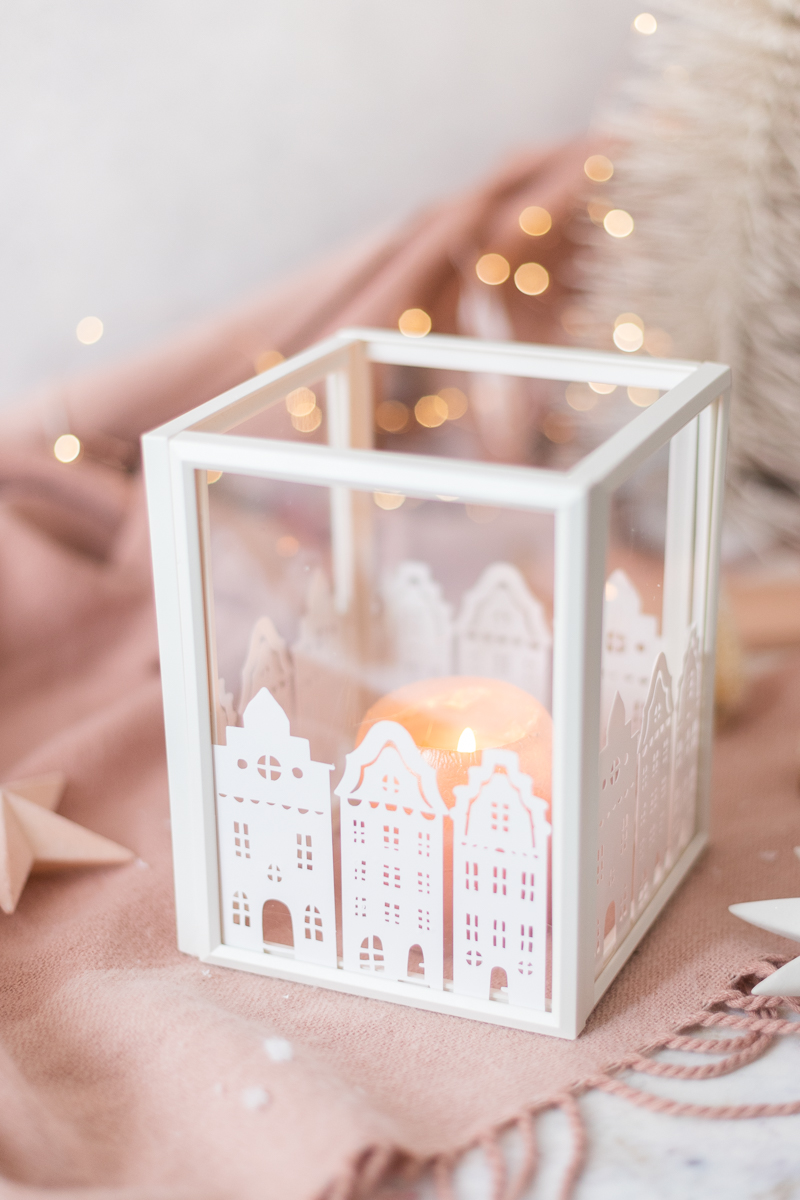
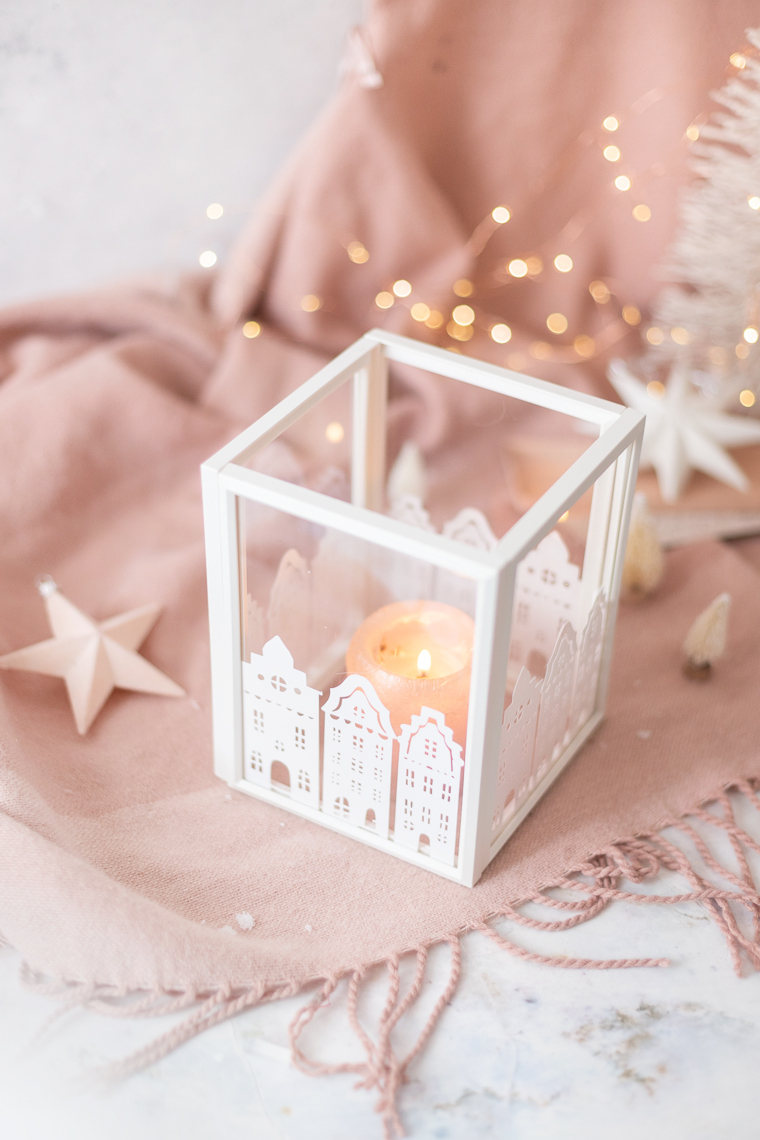
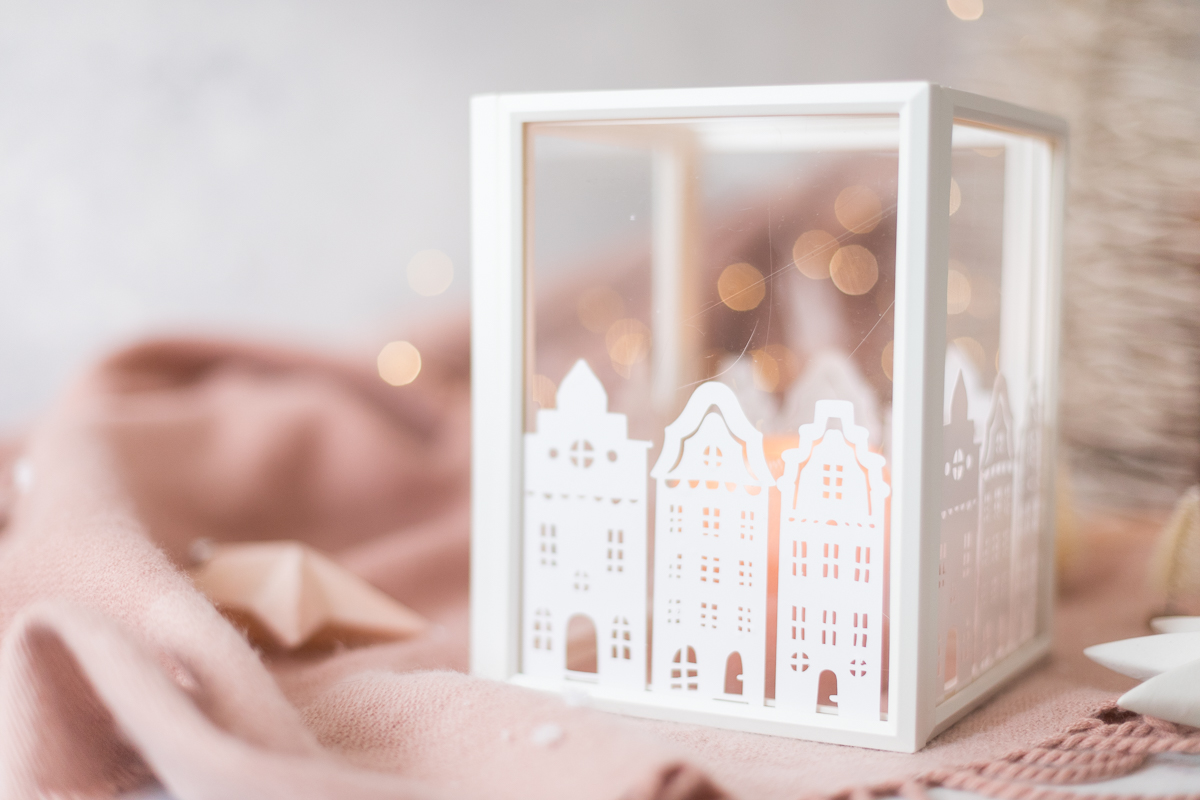
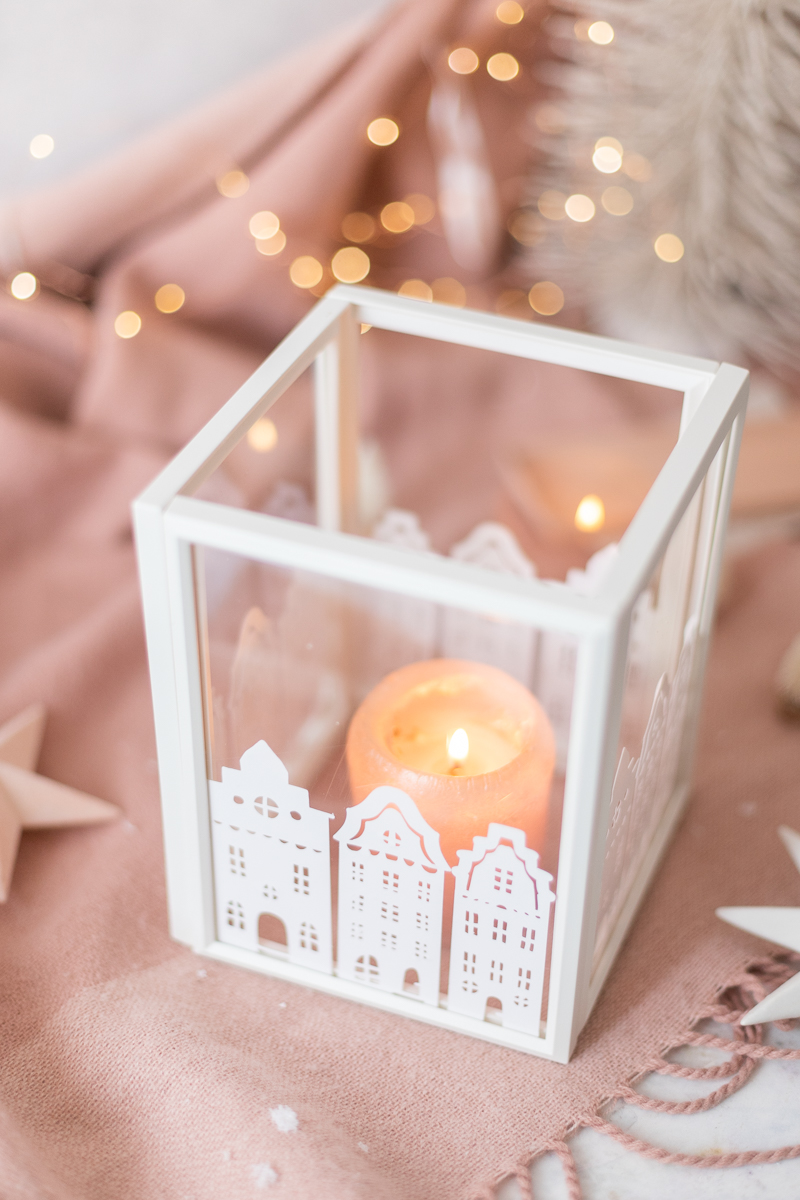
Today I’ll show you a simple and really beautiful Ikea hack: How you can turn 4 inexpensive picture frames into a great DIY lantern with trendy house motifs.
I painted the houses myself and then plotted them on Smart Vinyl. You can also download it as a plotter template – you can find the template below in the material overview.
I can also imagine the DIY idea being a great Christmas present. I always think it’s particularly good to have gifts that you can leave even after Christmas. And the houses just look beautiful in winter.

For the DIY lantern made of picture frames you need:
The links are partner links. This means I receive a small commission if you order through it. Nothing changes in price for you.
Download the template by clicking on one of the two images and then saving it:


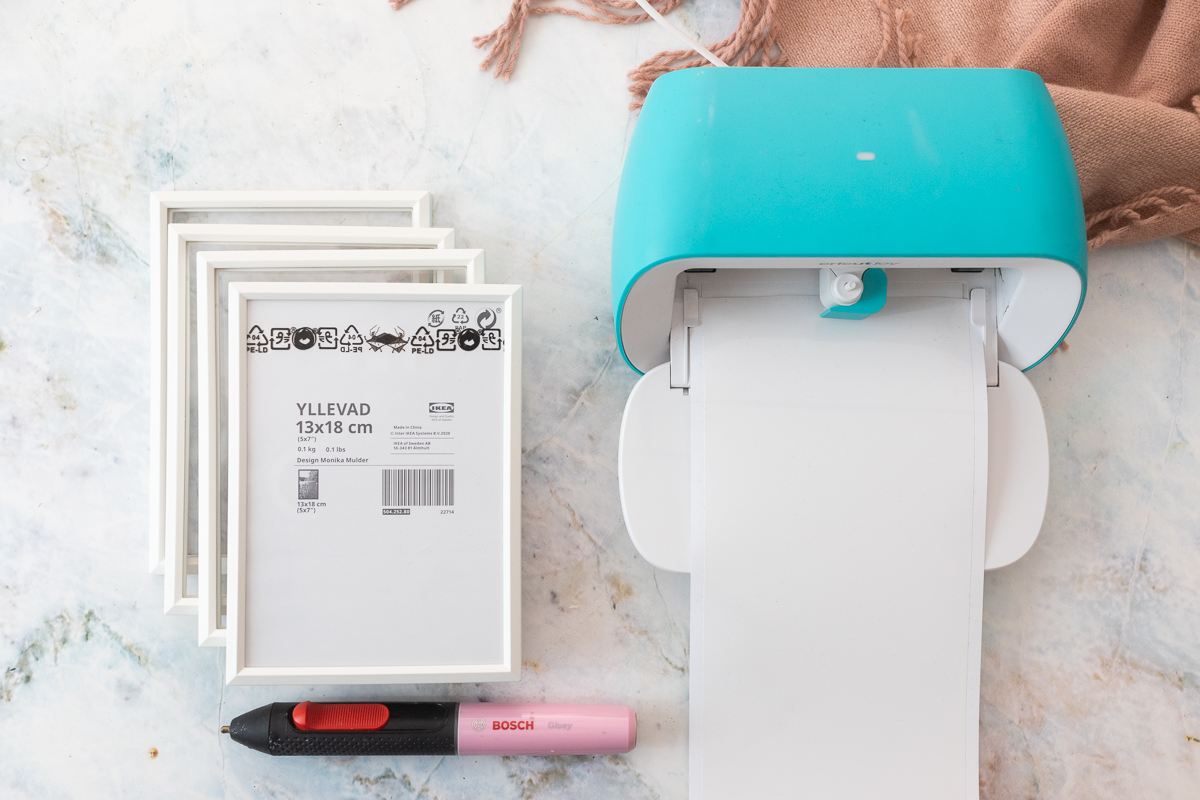
1. Open the picture frames and remove the cardboard. All you need are the two plastic frames and the clear plastic in the middle.
2. Now plot the motif 4x onto white Smart Vinyl.


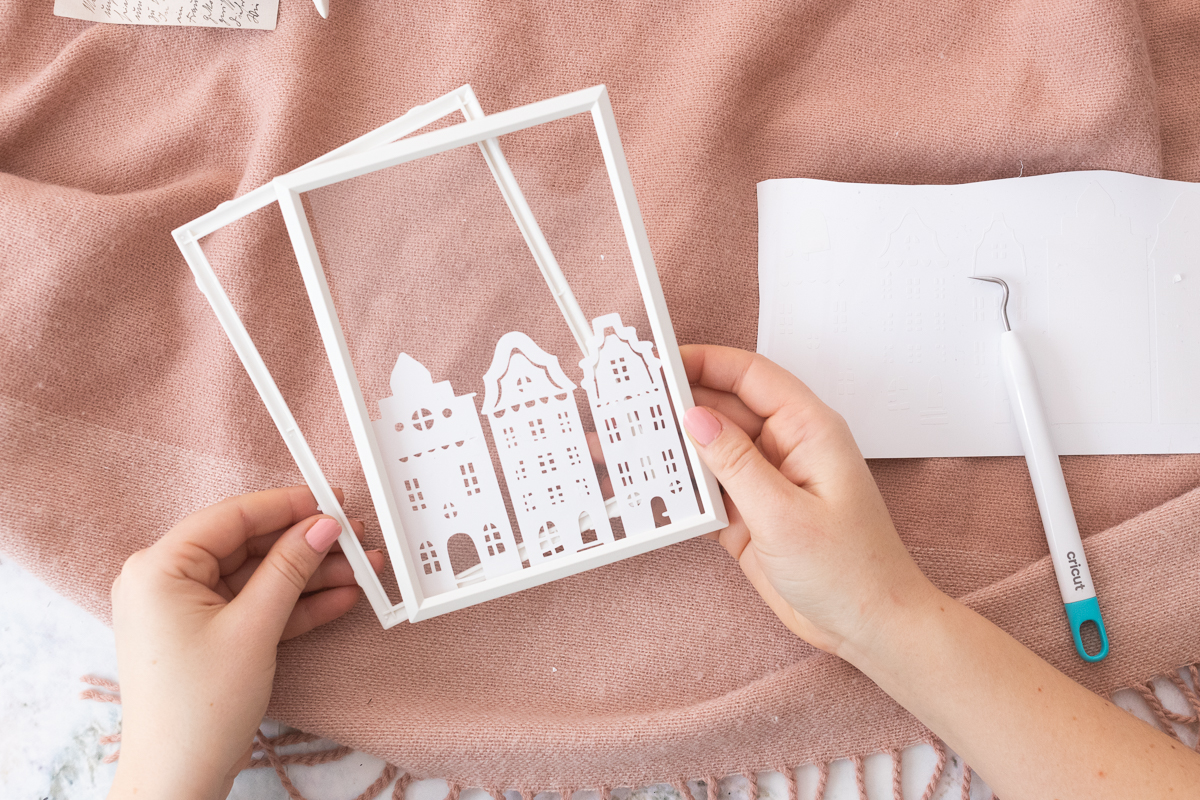
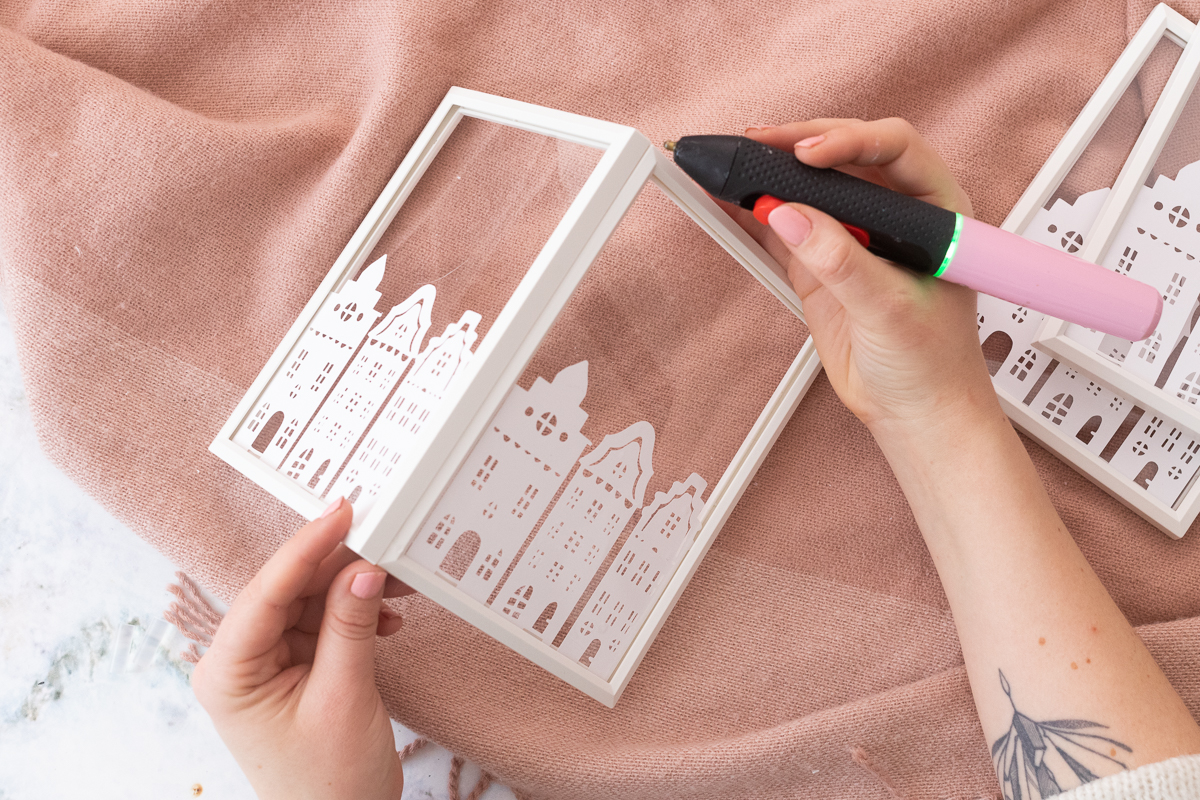
3. Weed out the motifs and glue the houses side by side onto the clear plastic of the picture frames. It’s easiest if you take the plate out of the white frame.
I did it without transfer foil because the houses stick on so well. But you can also do this step with transfer foil.
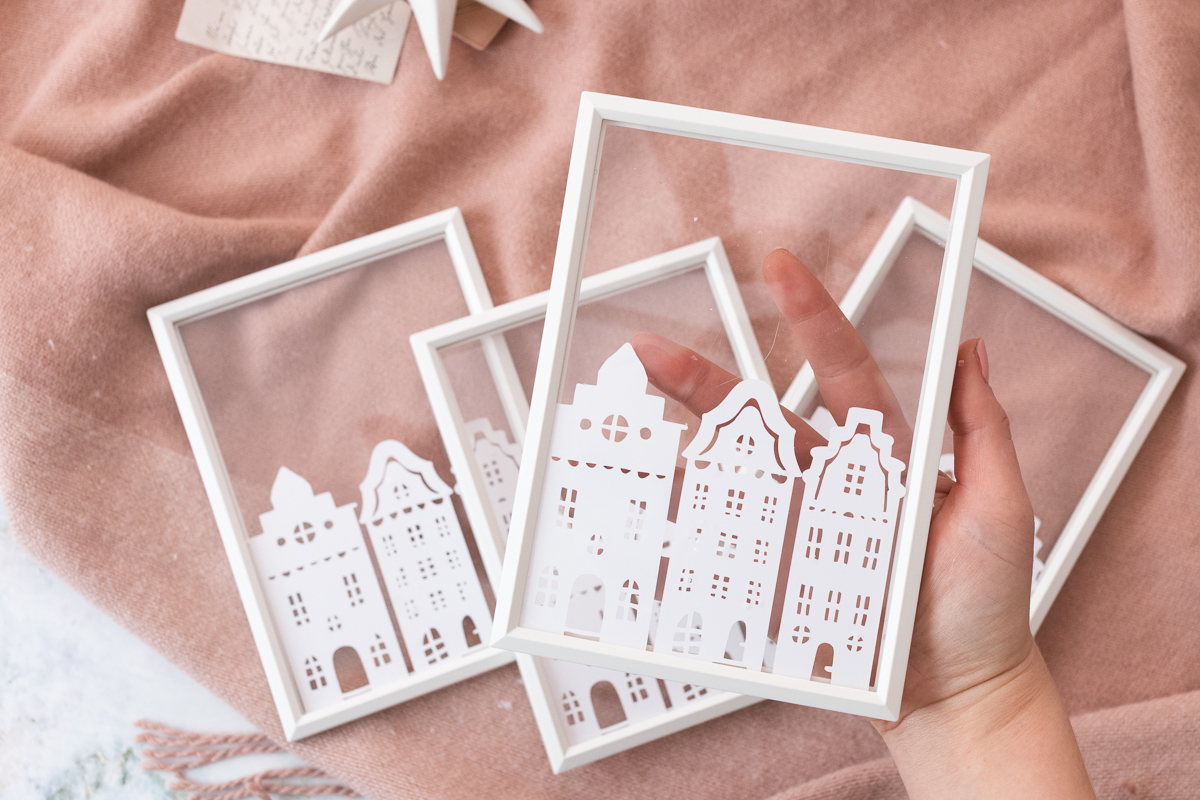
Repeat for all 4 frames.


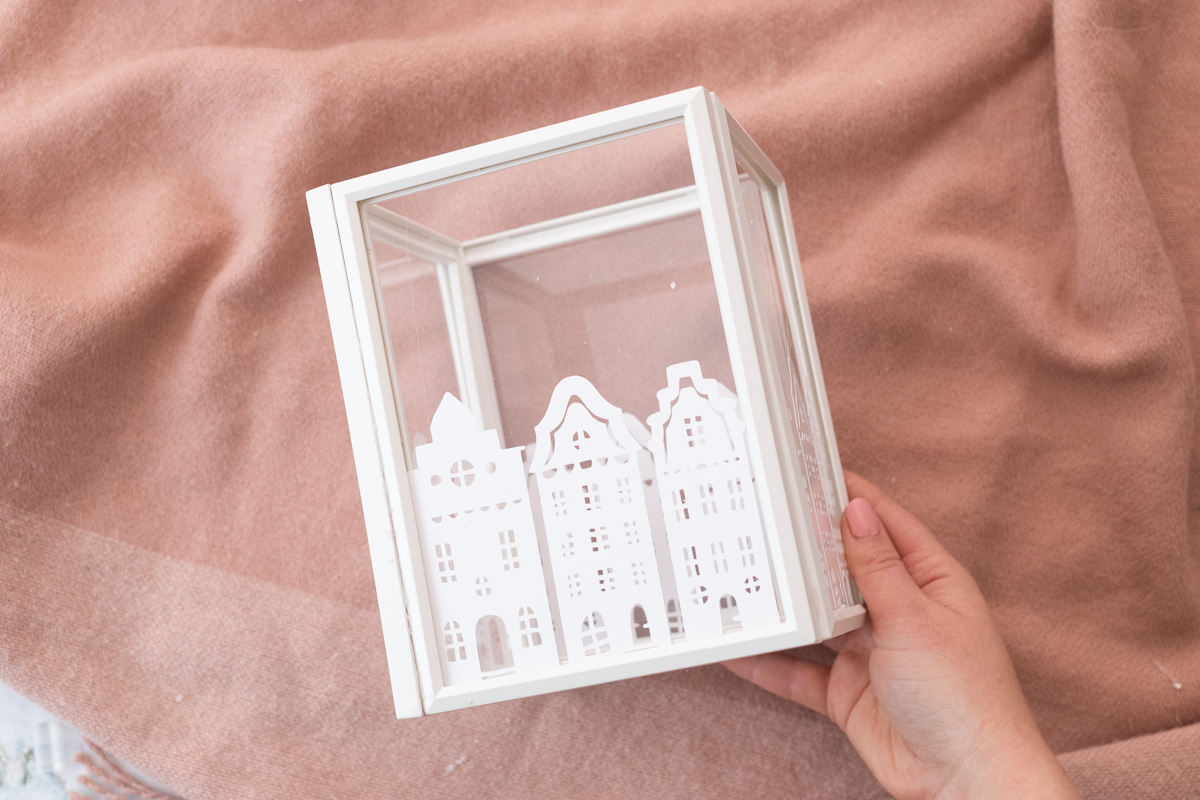
4. There are 3 houses on each frame. Of course you can arrange them however you like.
When you’re done gluing, put the frames back together.
5. Now it’s time to glue them together: Now glue the 4 frames together to form a lantern by applying hot glue to the edges and joining the frames together at right angles.
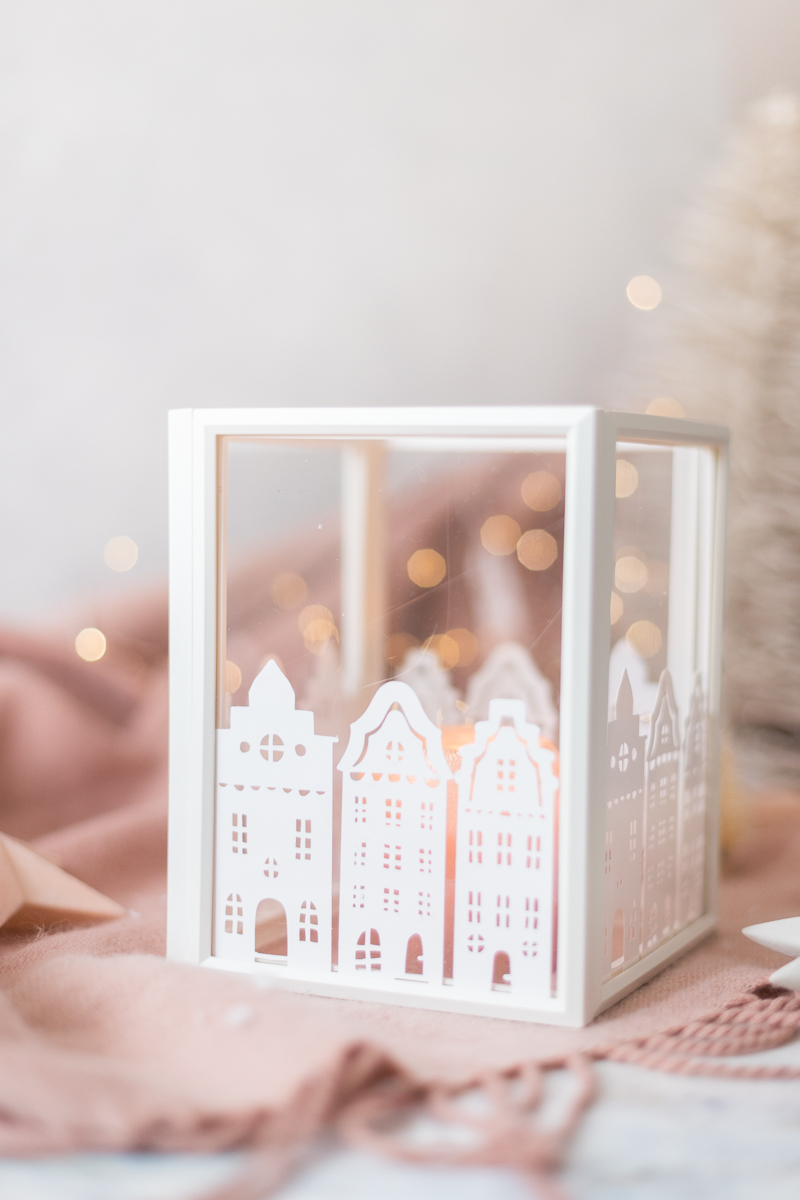
Your beautiful homemade lantern made of picture frames is ready. I find them beautifully elegant and am happy about this great winter decoration!
Do you like the idea? Then feel free to take them to Pinterest and note them on one of your pin boards:

I’m Lisa – and I can never sit still. I’ve been blogging about my passions on my fairy dust since 2013: These are great DIY ideas, chic design and very special illustrations. The main thing is homemade! More about me.
Source: meinfeenstaub.com