

Recently I finally got a plotter – now I can finally implement all the delicate ideas that I would otherwise be far too impatient for. (I would never cut this out by hand, haha!)
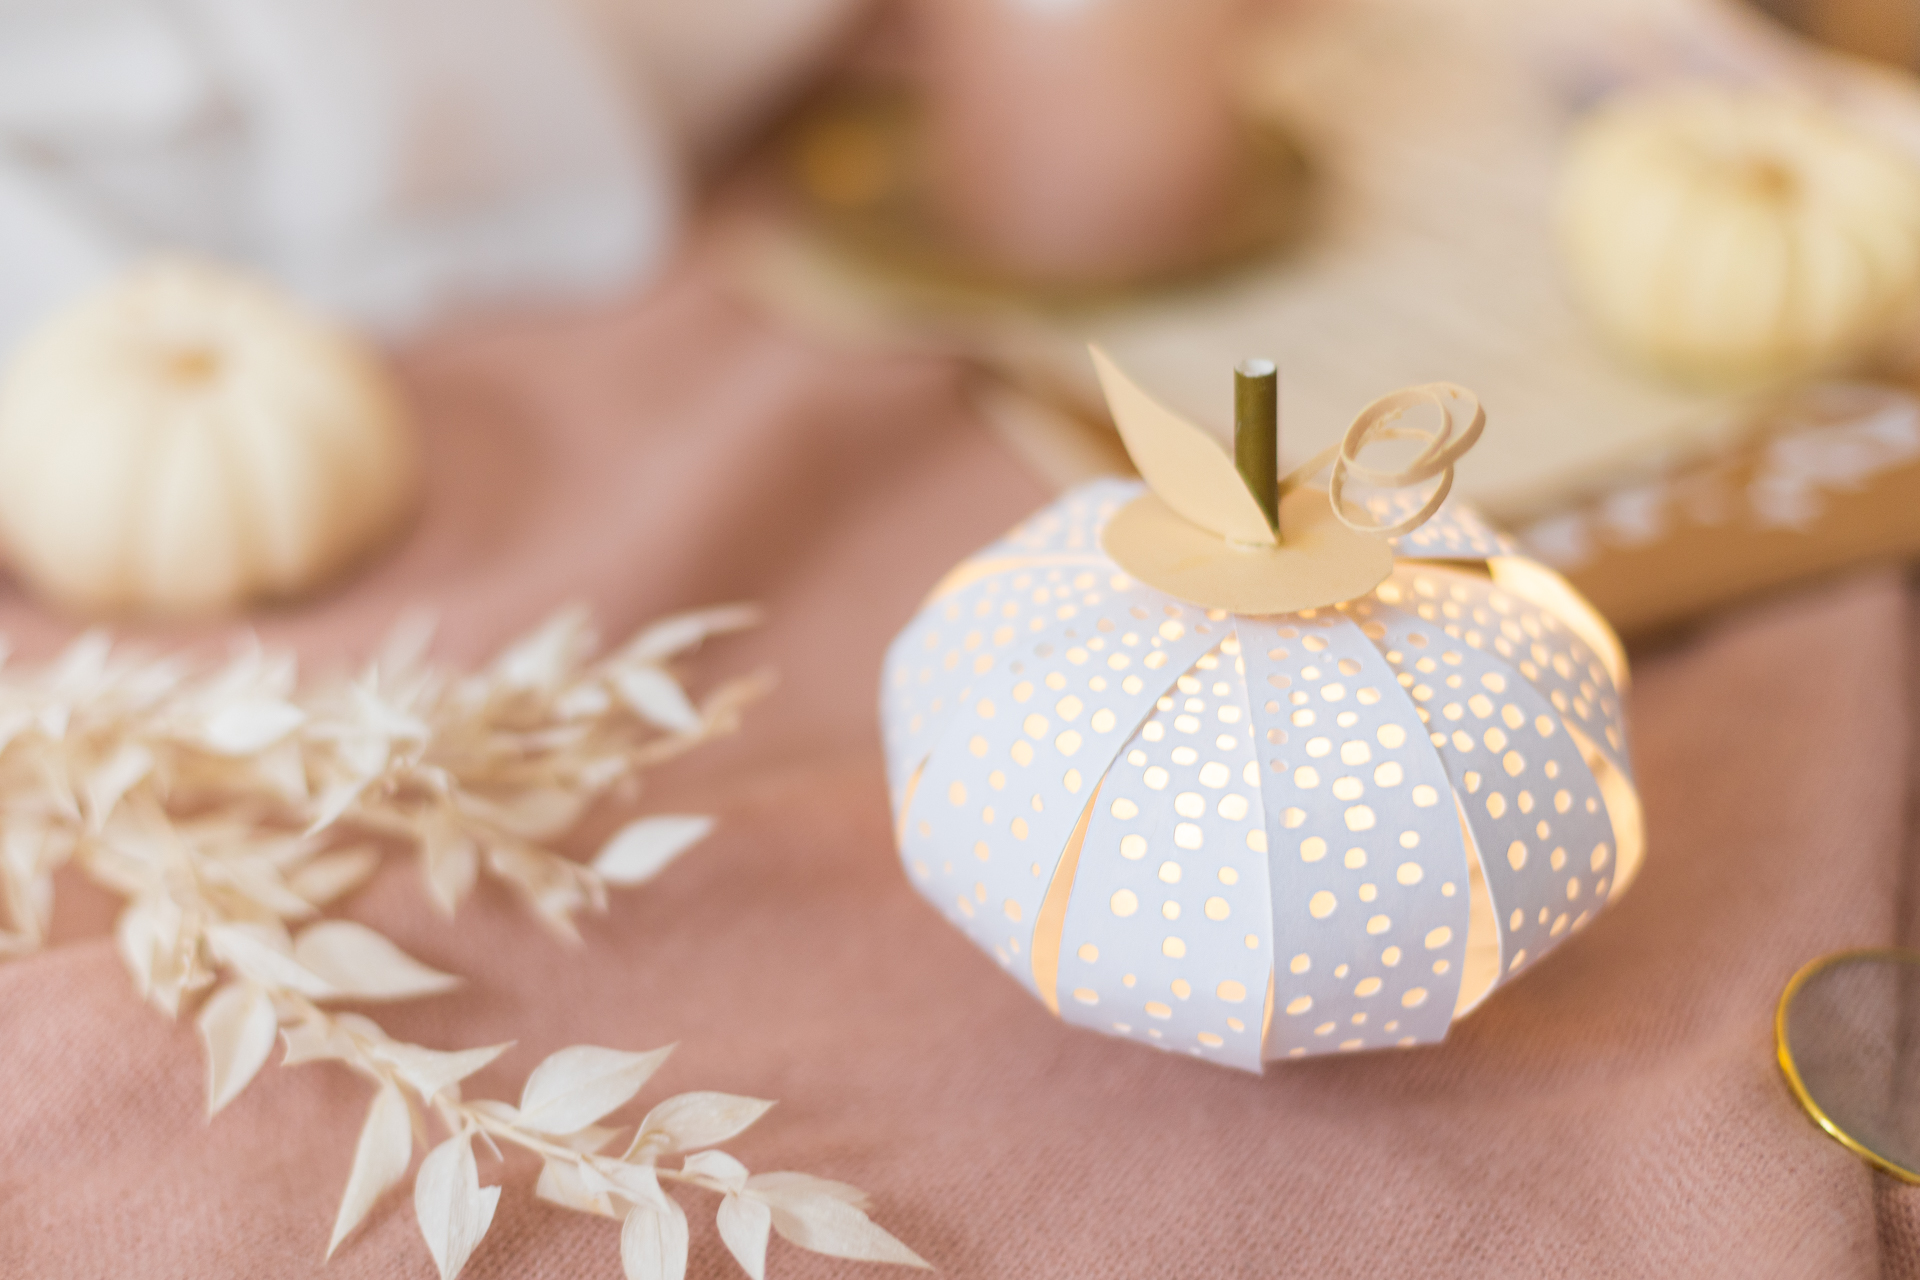
I created a template for DIY paper pumpkin lights that look beautifully elegant – and are really impressive. To do this, cut 9 strips of paper with the Cricut Joy and then simply staple them together with staples at the top and bottom. Put in an LED light and the perfect autumn decoration is ready.
You can even download the template! It’s not an .SVG, but you can easily upload the JPG to Cricut Design Space and then use it for your decoration.
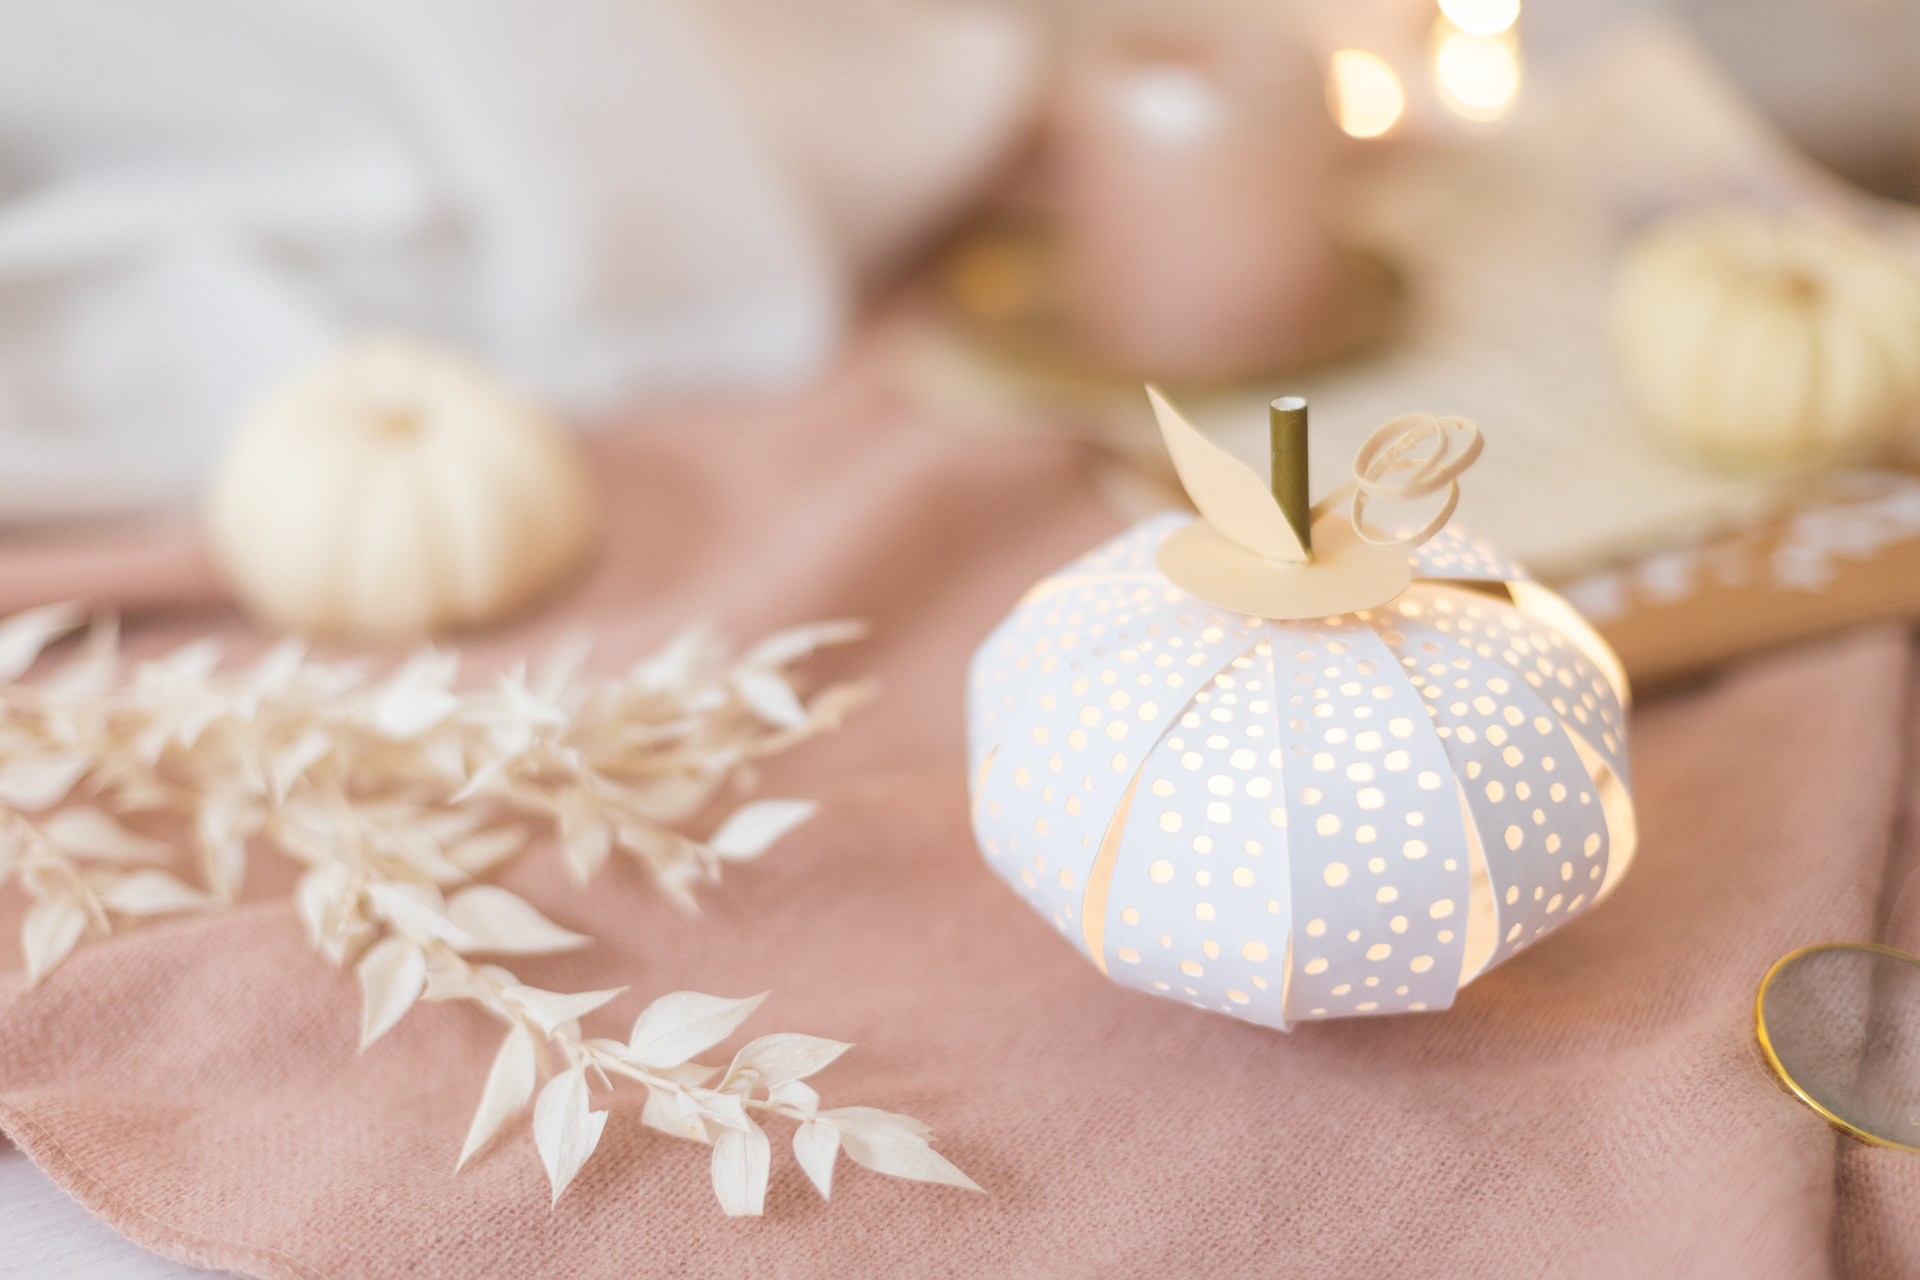
Make DIY pumpkin lights out of paper with the plotter
(The links are affiliate links. This means that if you purchase via this link, I will receive a tiny commission, but the price will not change for you.)
You can download the template here, which you can upload to Cricut Design Space:
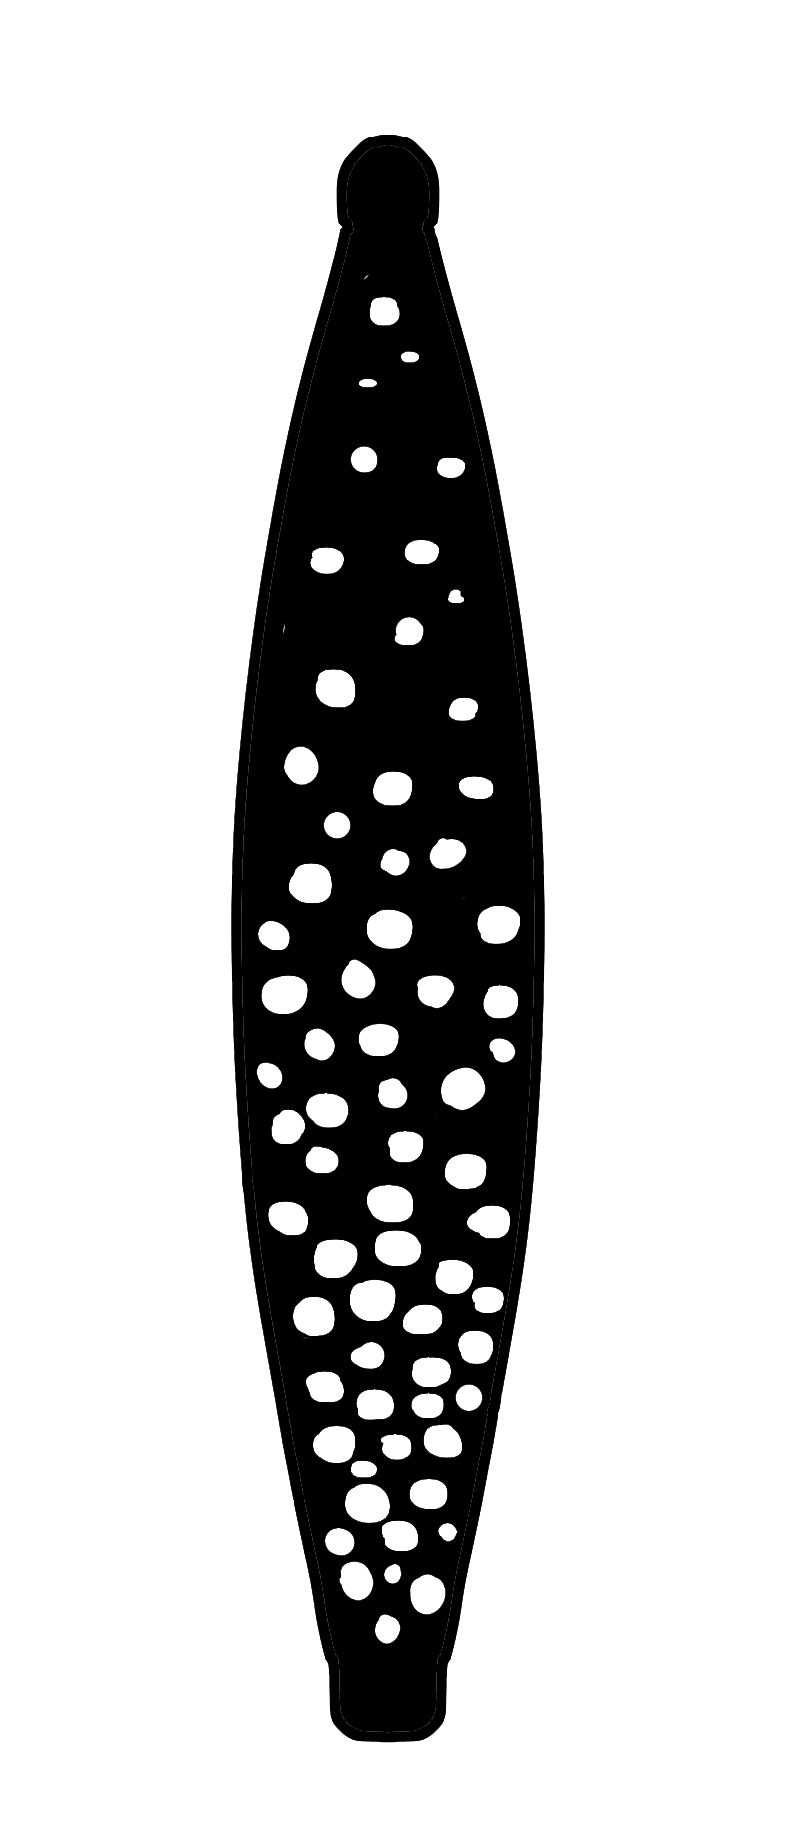
(The template is intended for private use only.)
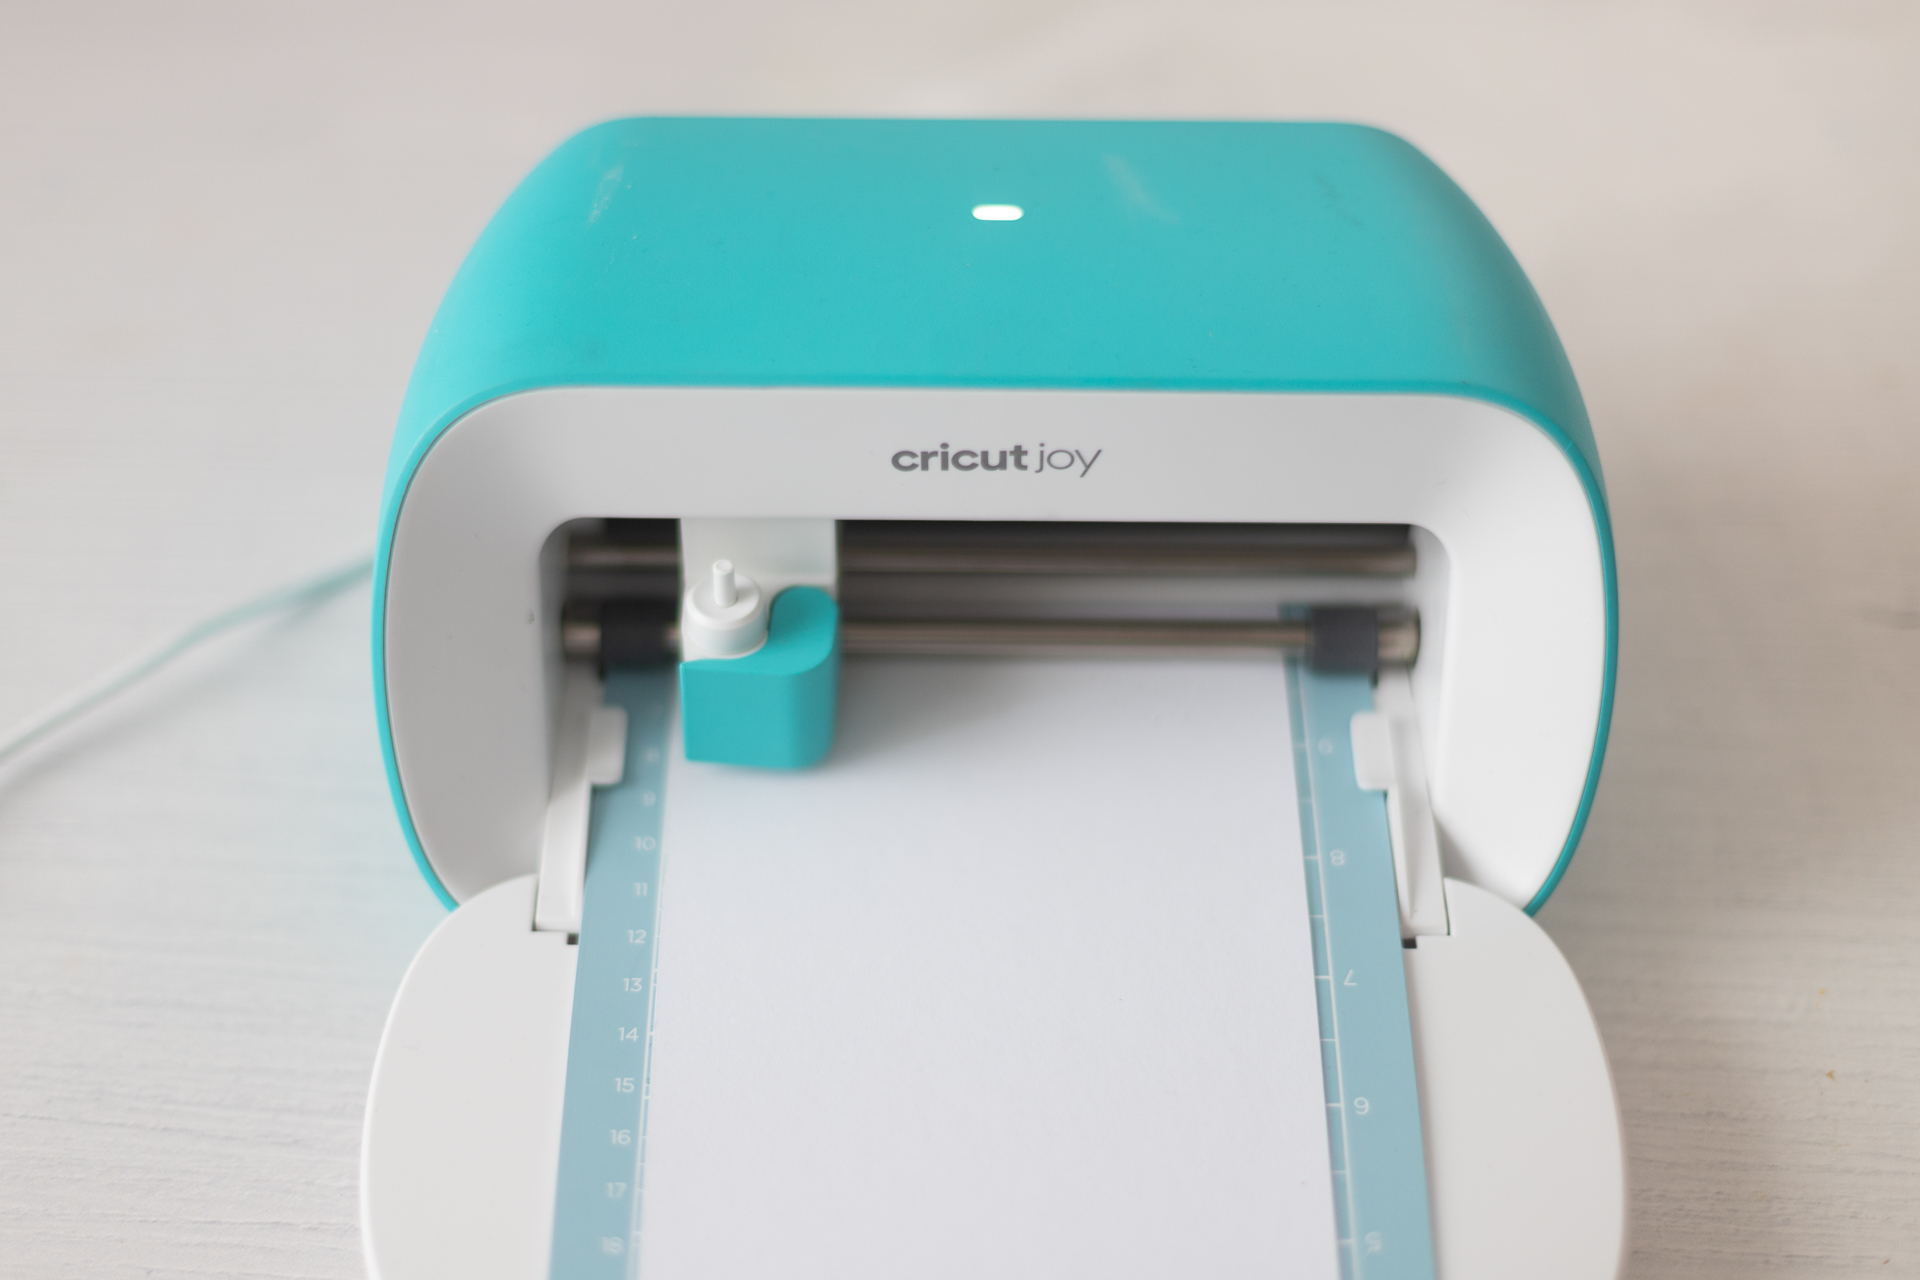
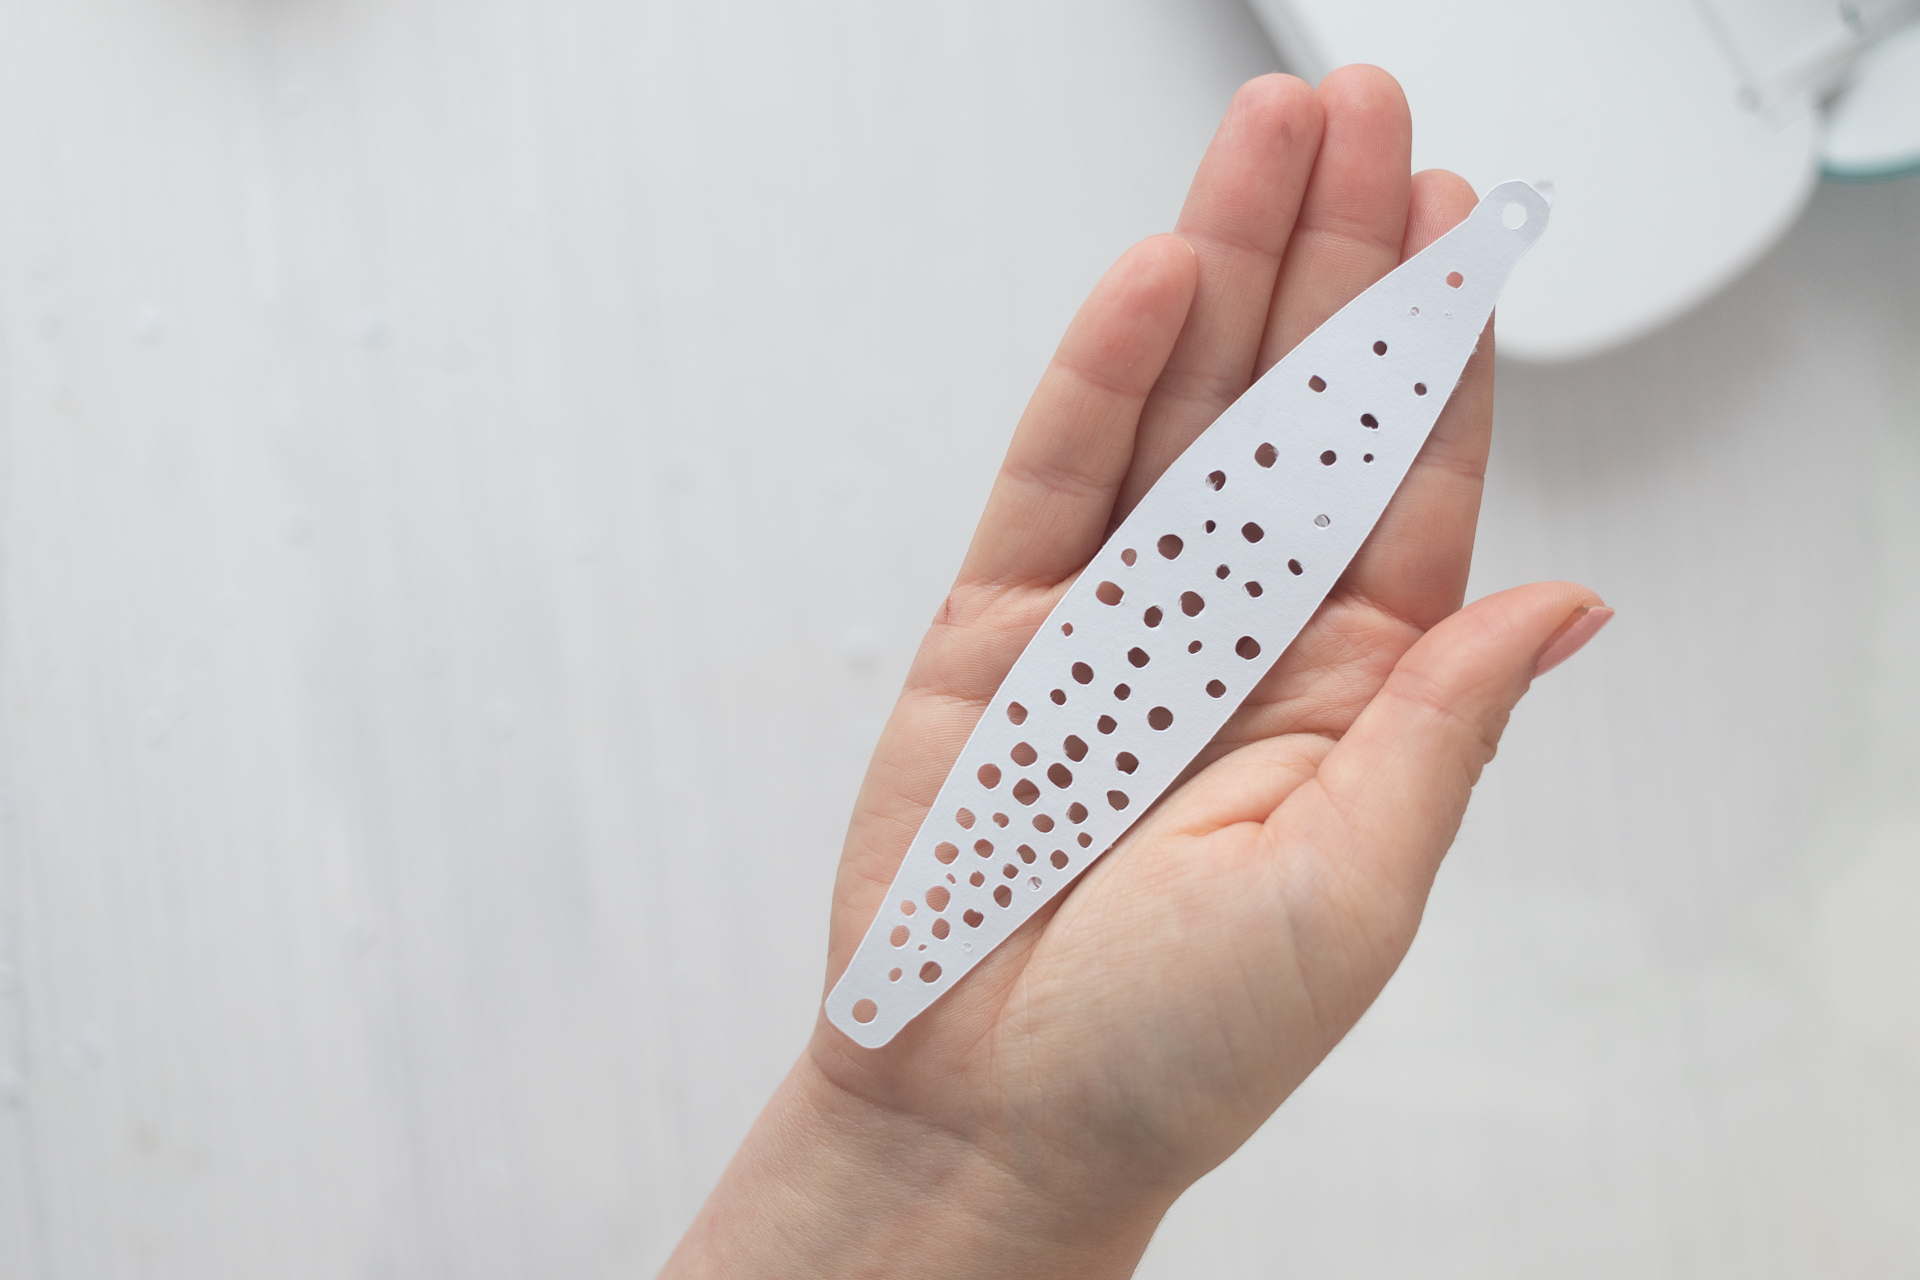
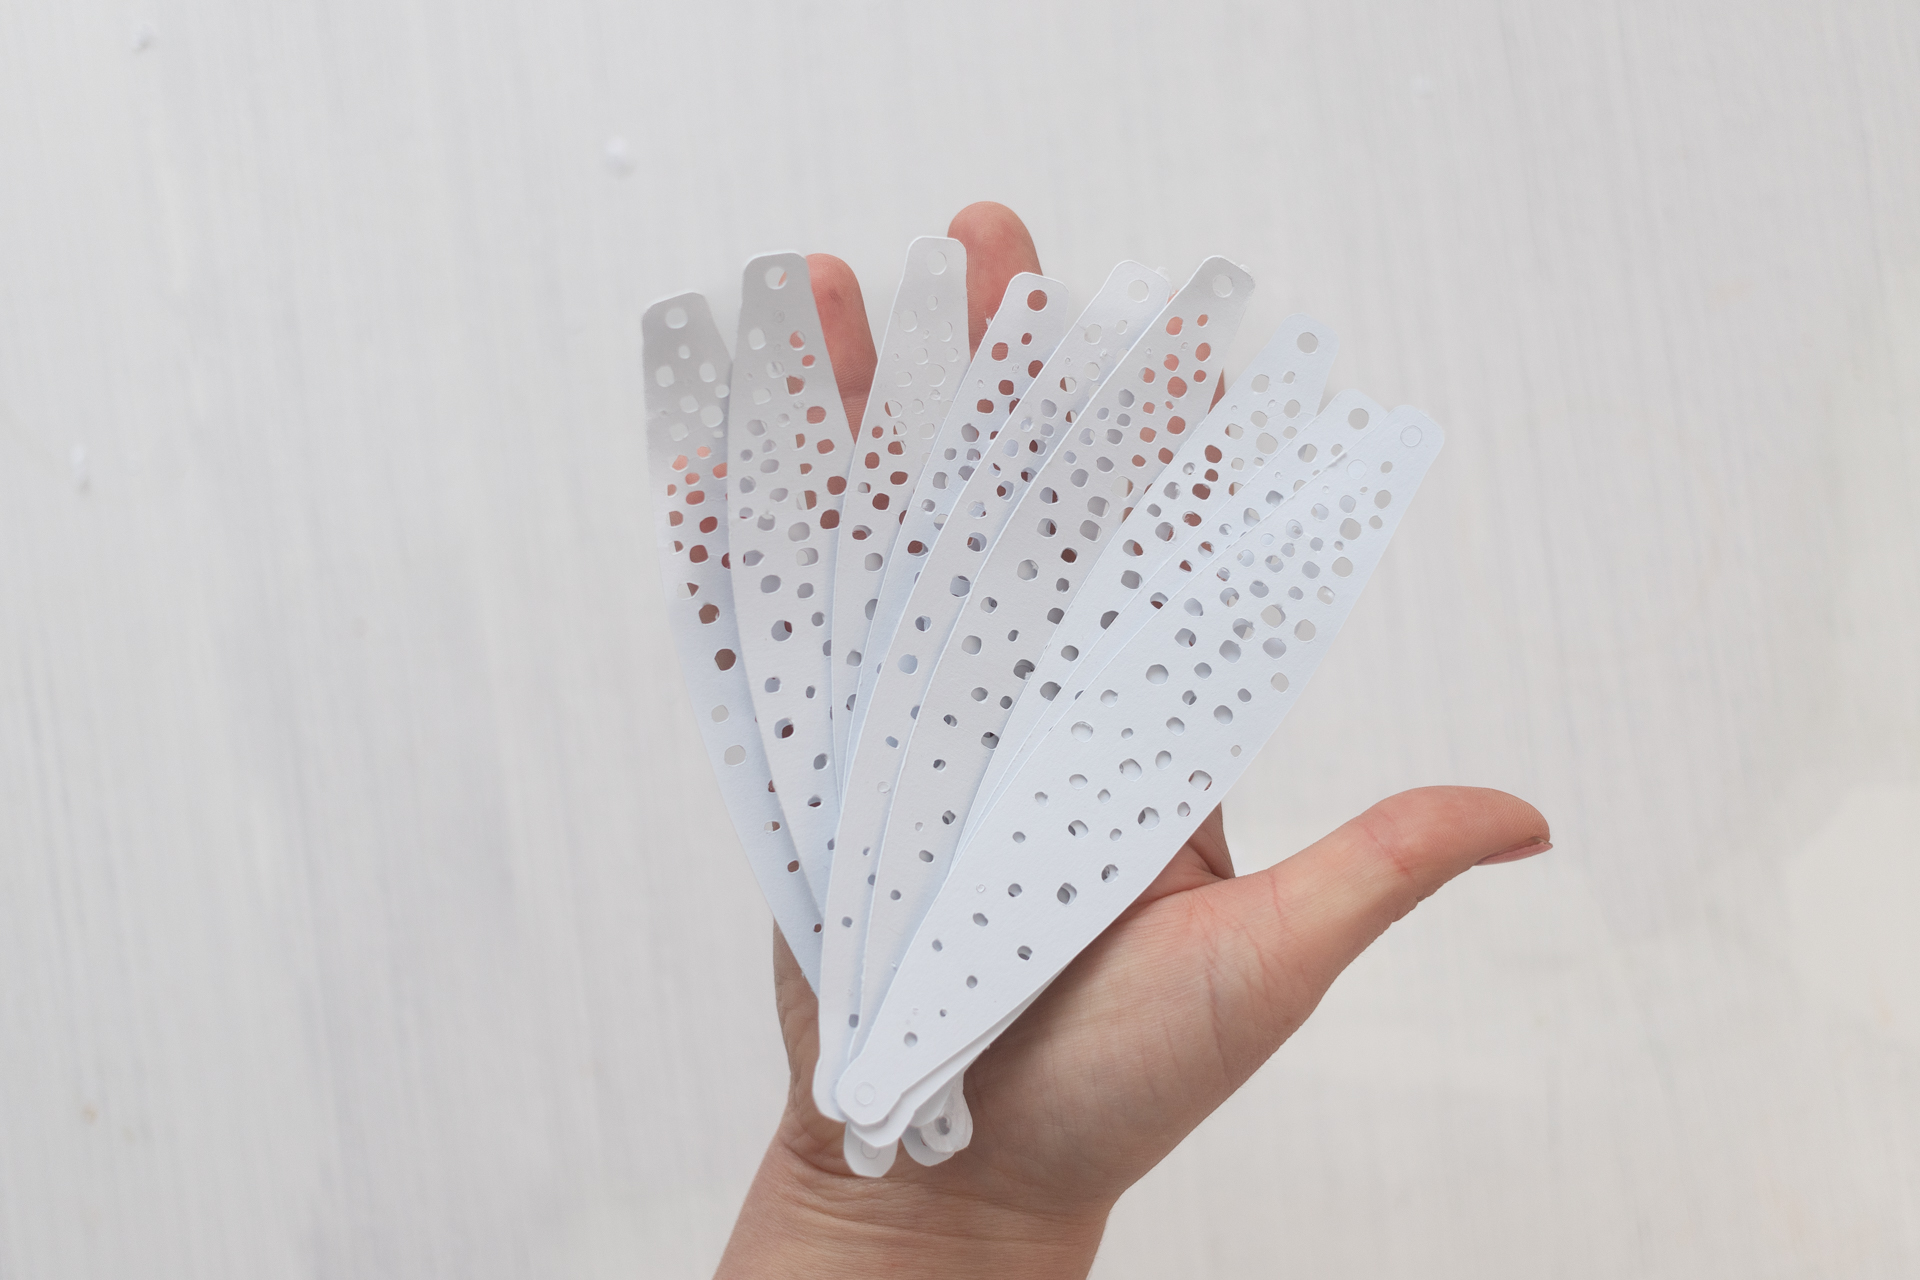
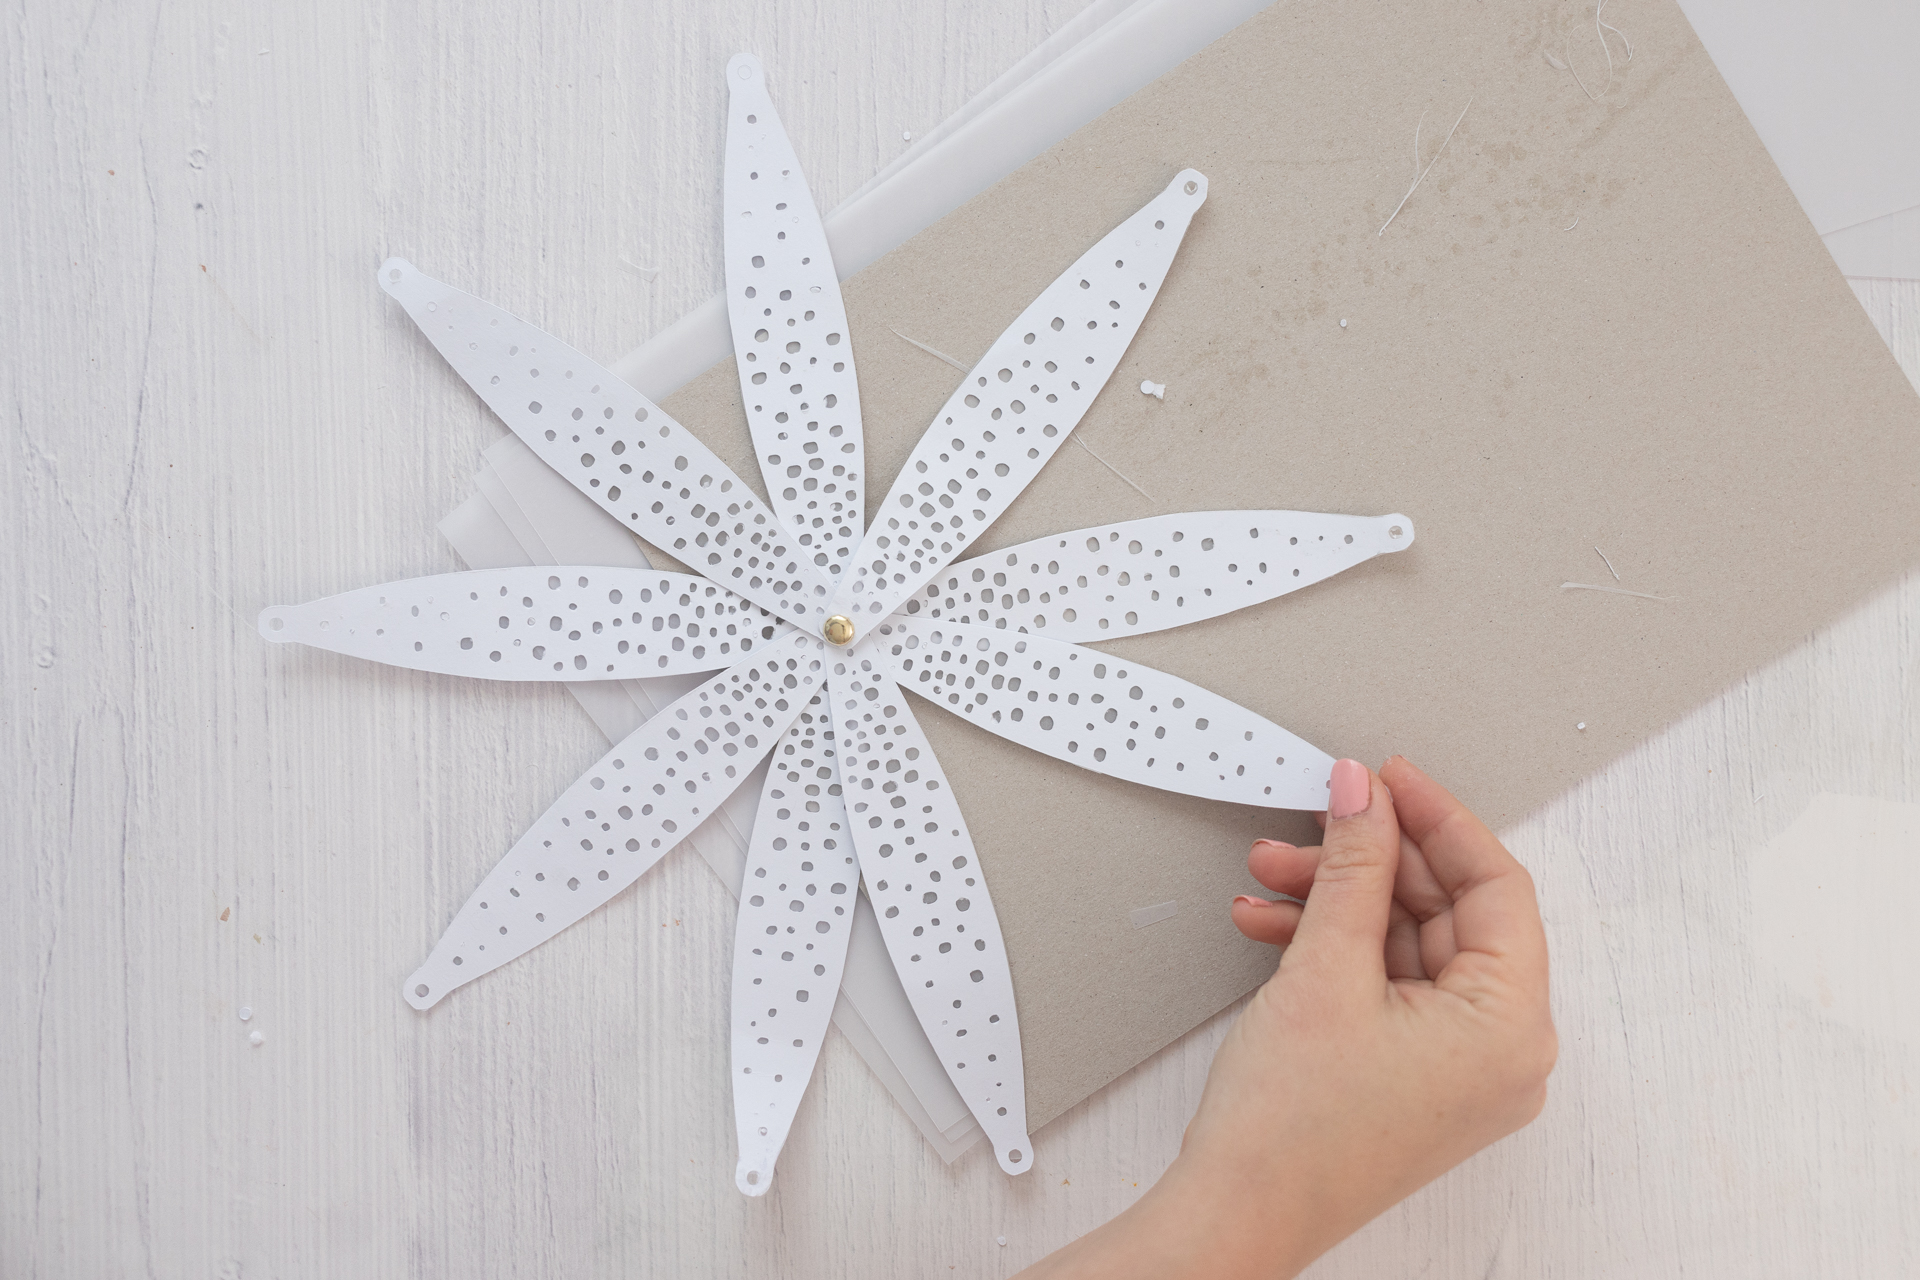
1. Cut at least 9 strips using the Cricut Joy.
2. Weed the strips and work out the hole pattern.
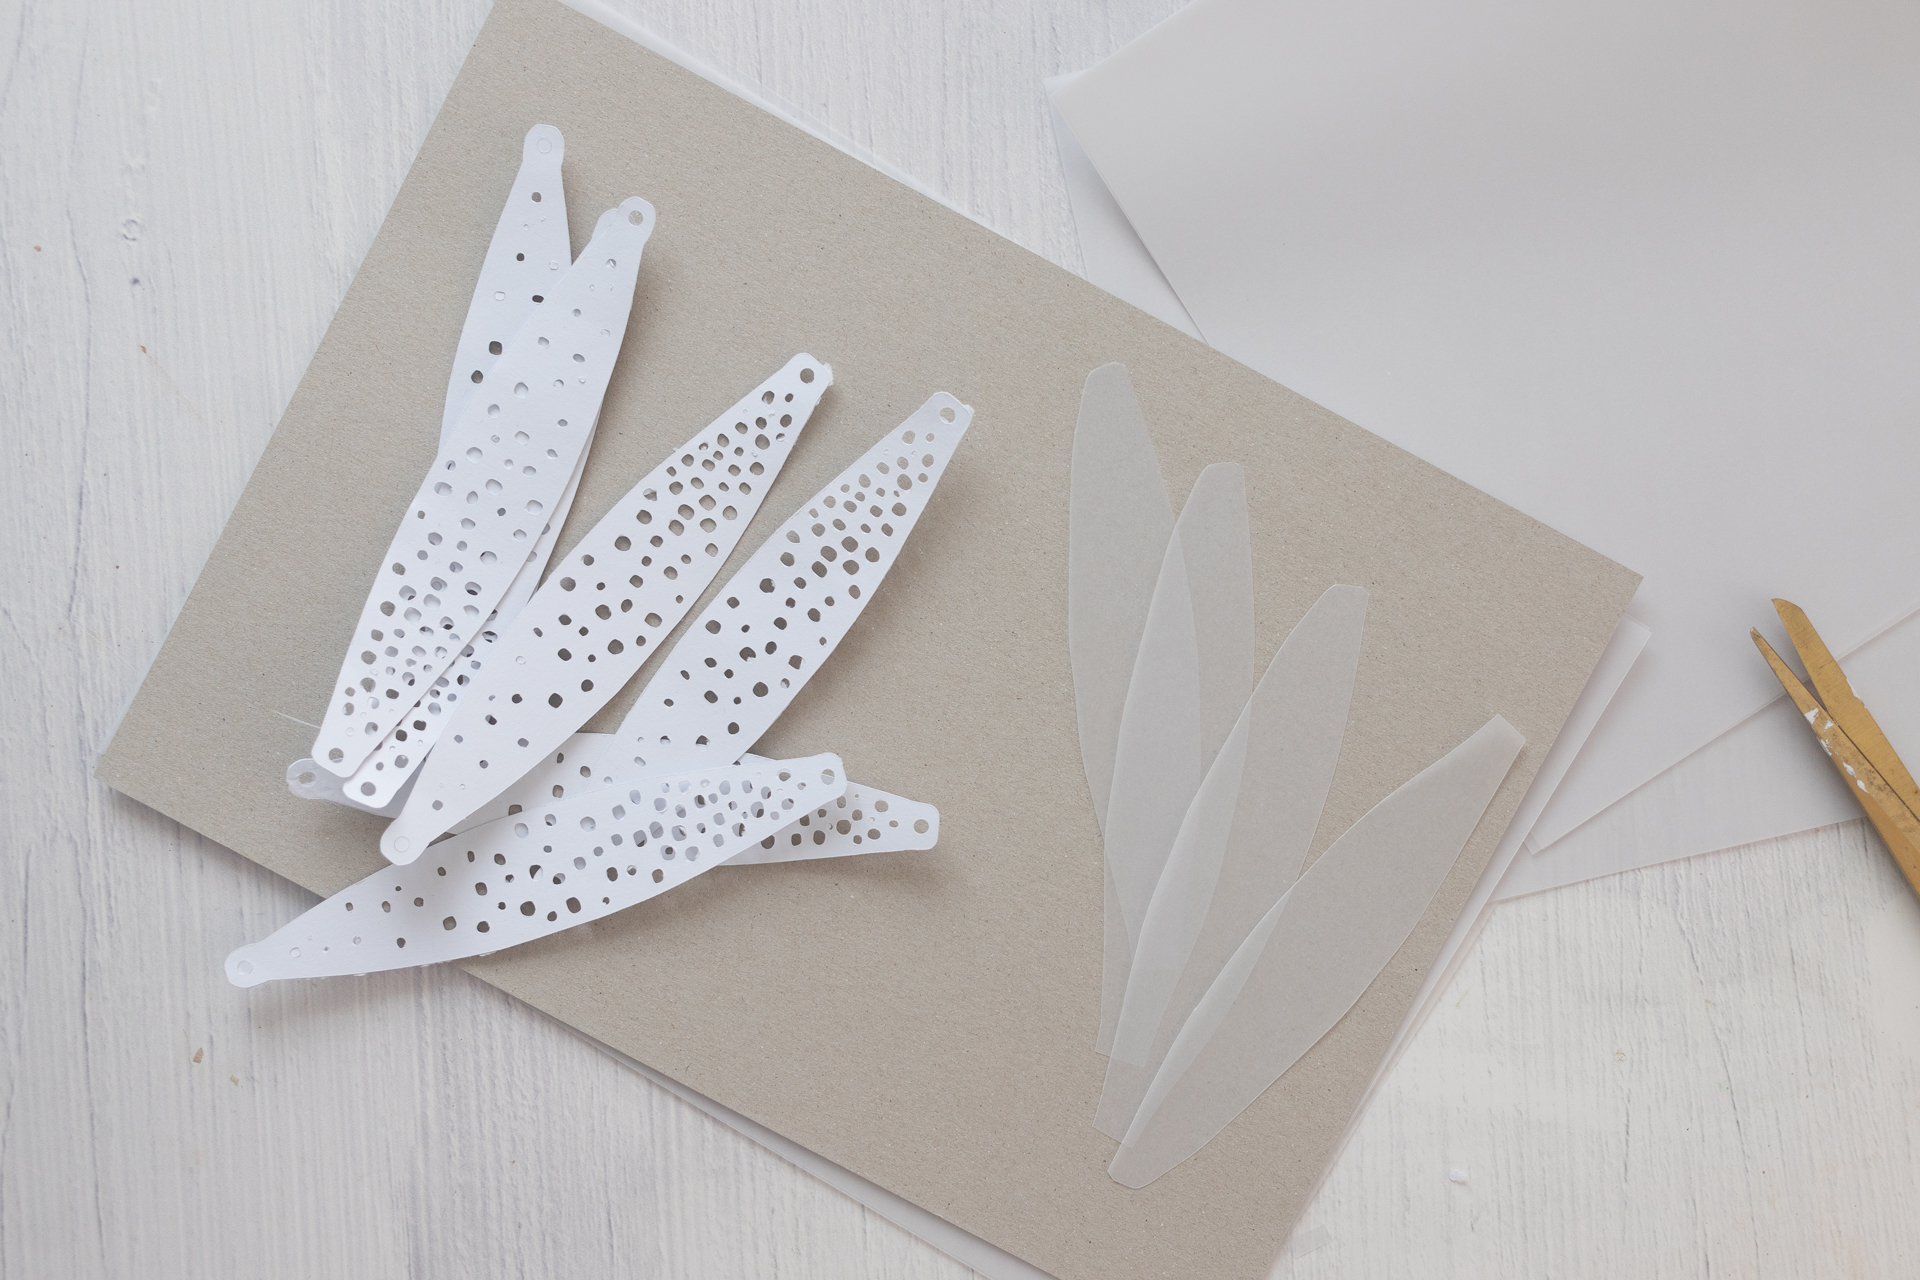
3. In the next step, cut the same amount of strips from the tracing paper. You can simply use the cardboard strips as a template. Since the tracing paper is very thin, you can cut several at the same time.
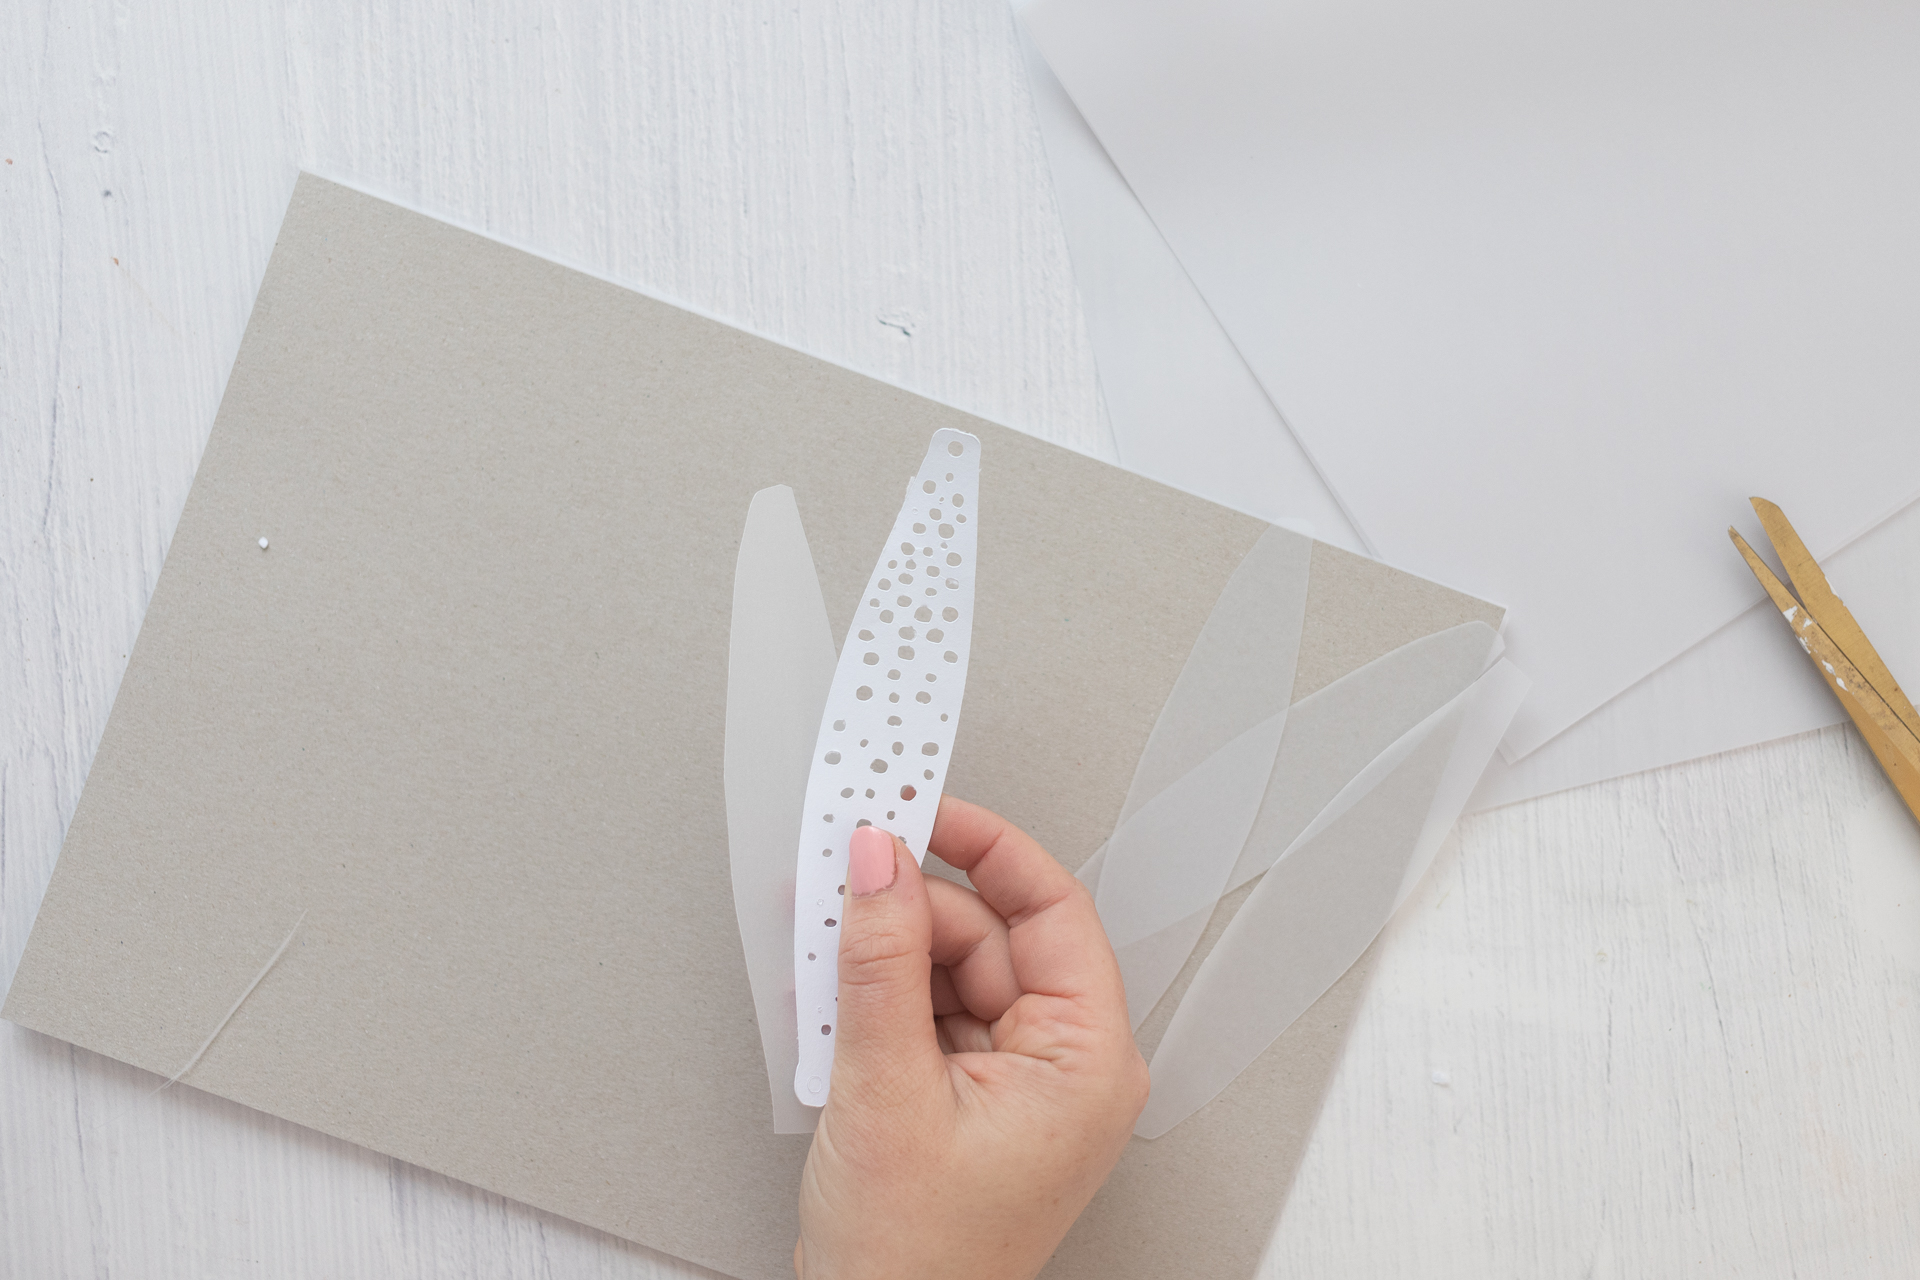
4. Then glue the tracing paper strips onto a white strip each.
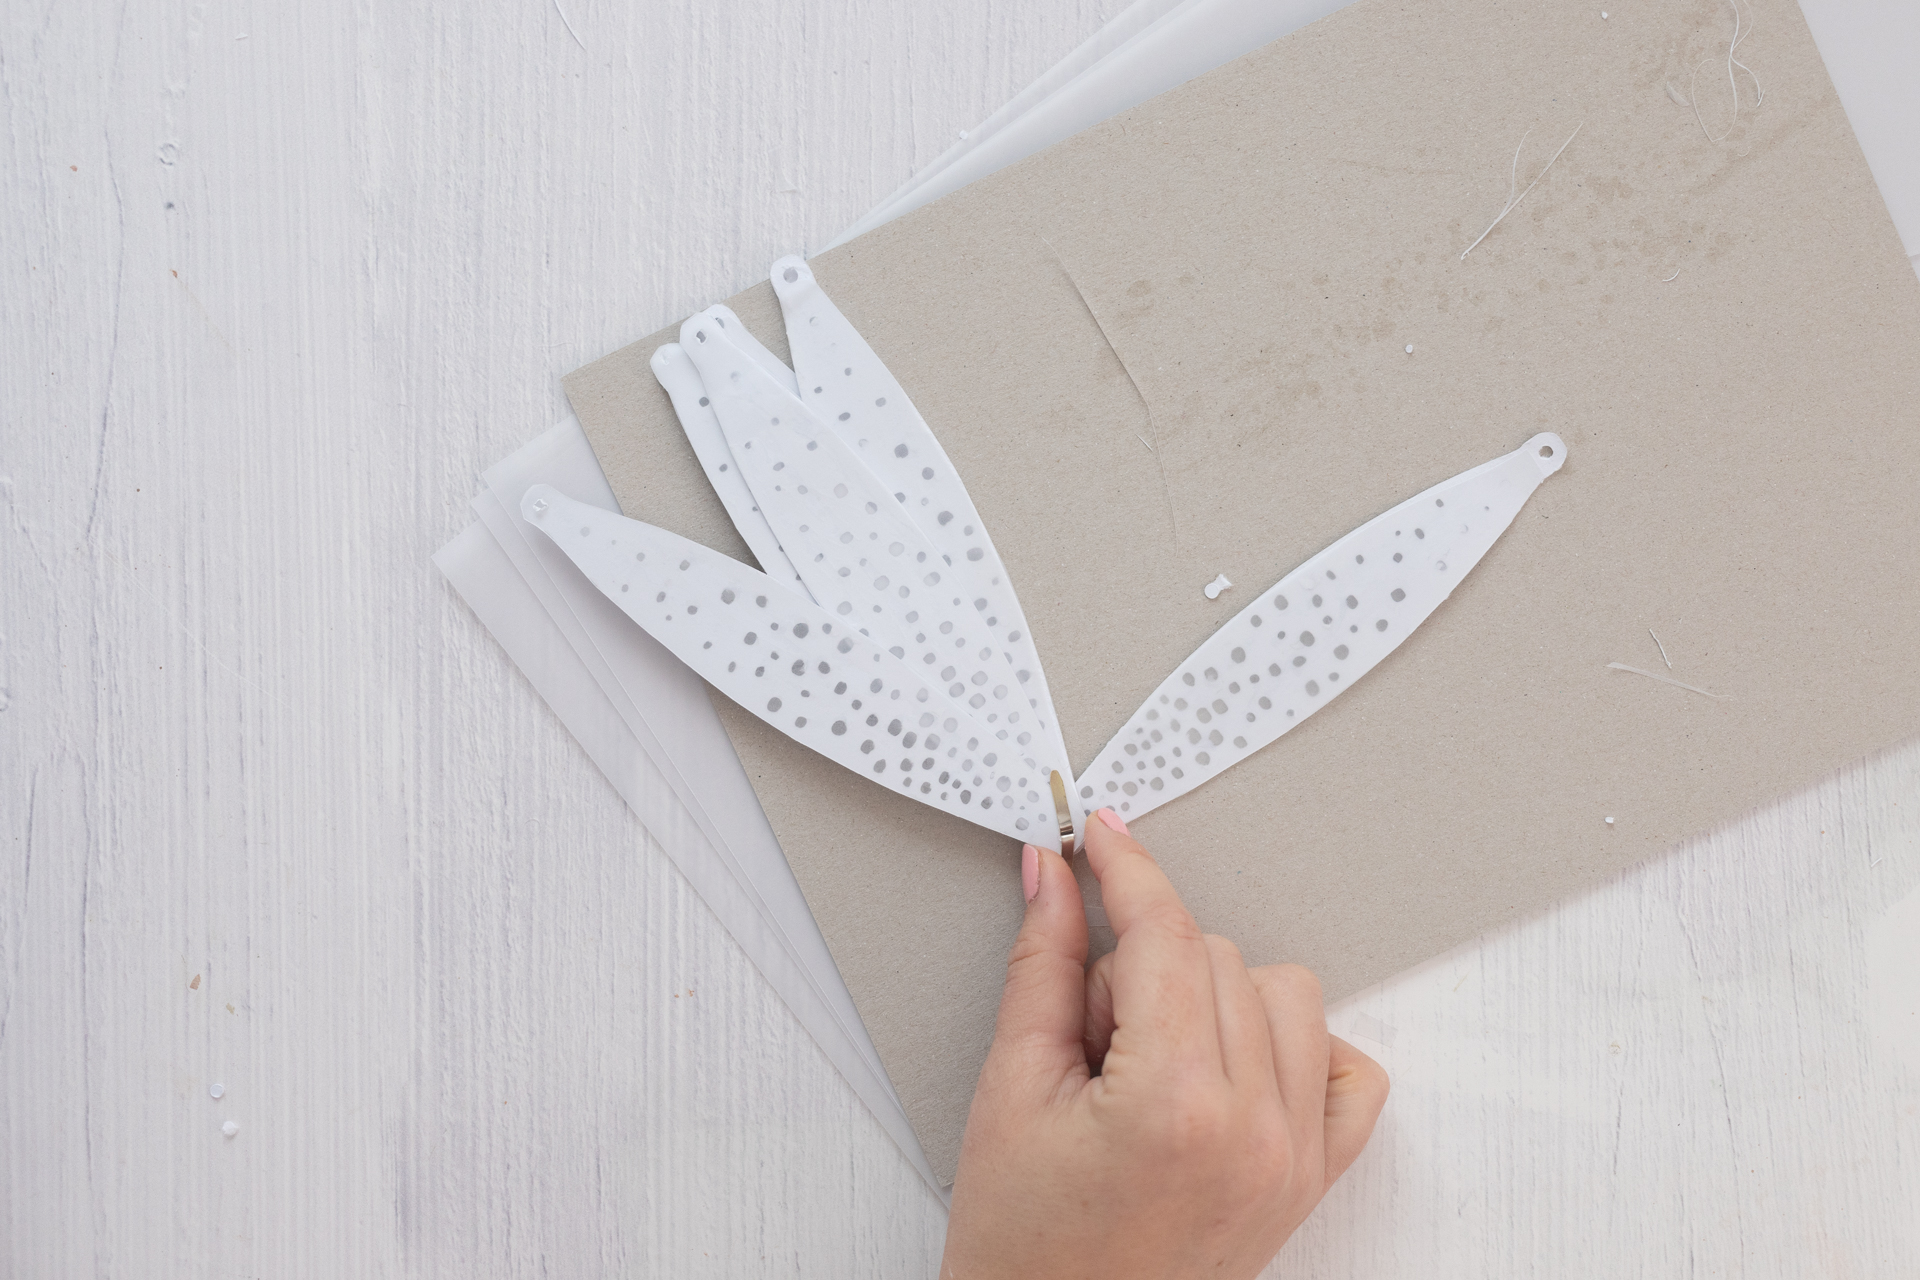
4. Now take the paper clips. Put it through one of the holes and then put all 9 strips on it. Then push the two pins of the clip apart.
5. Now fan the strips.
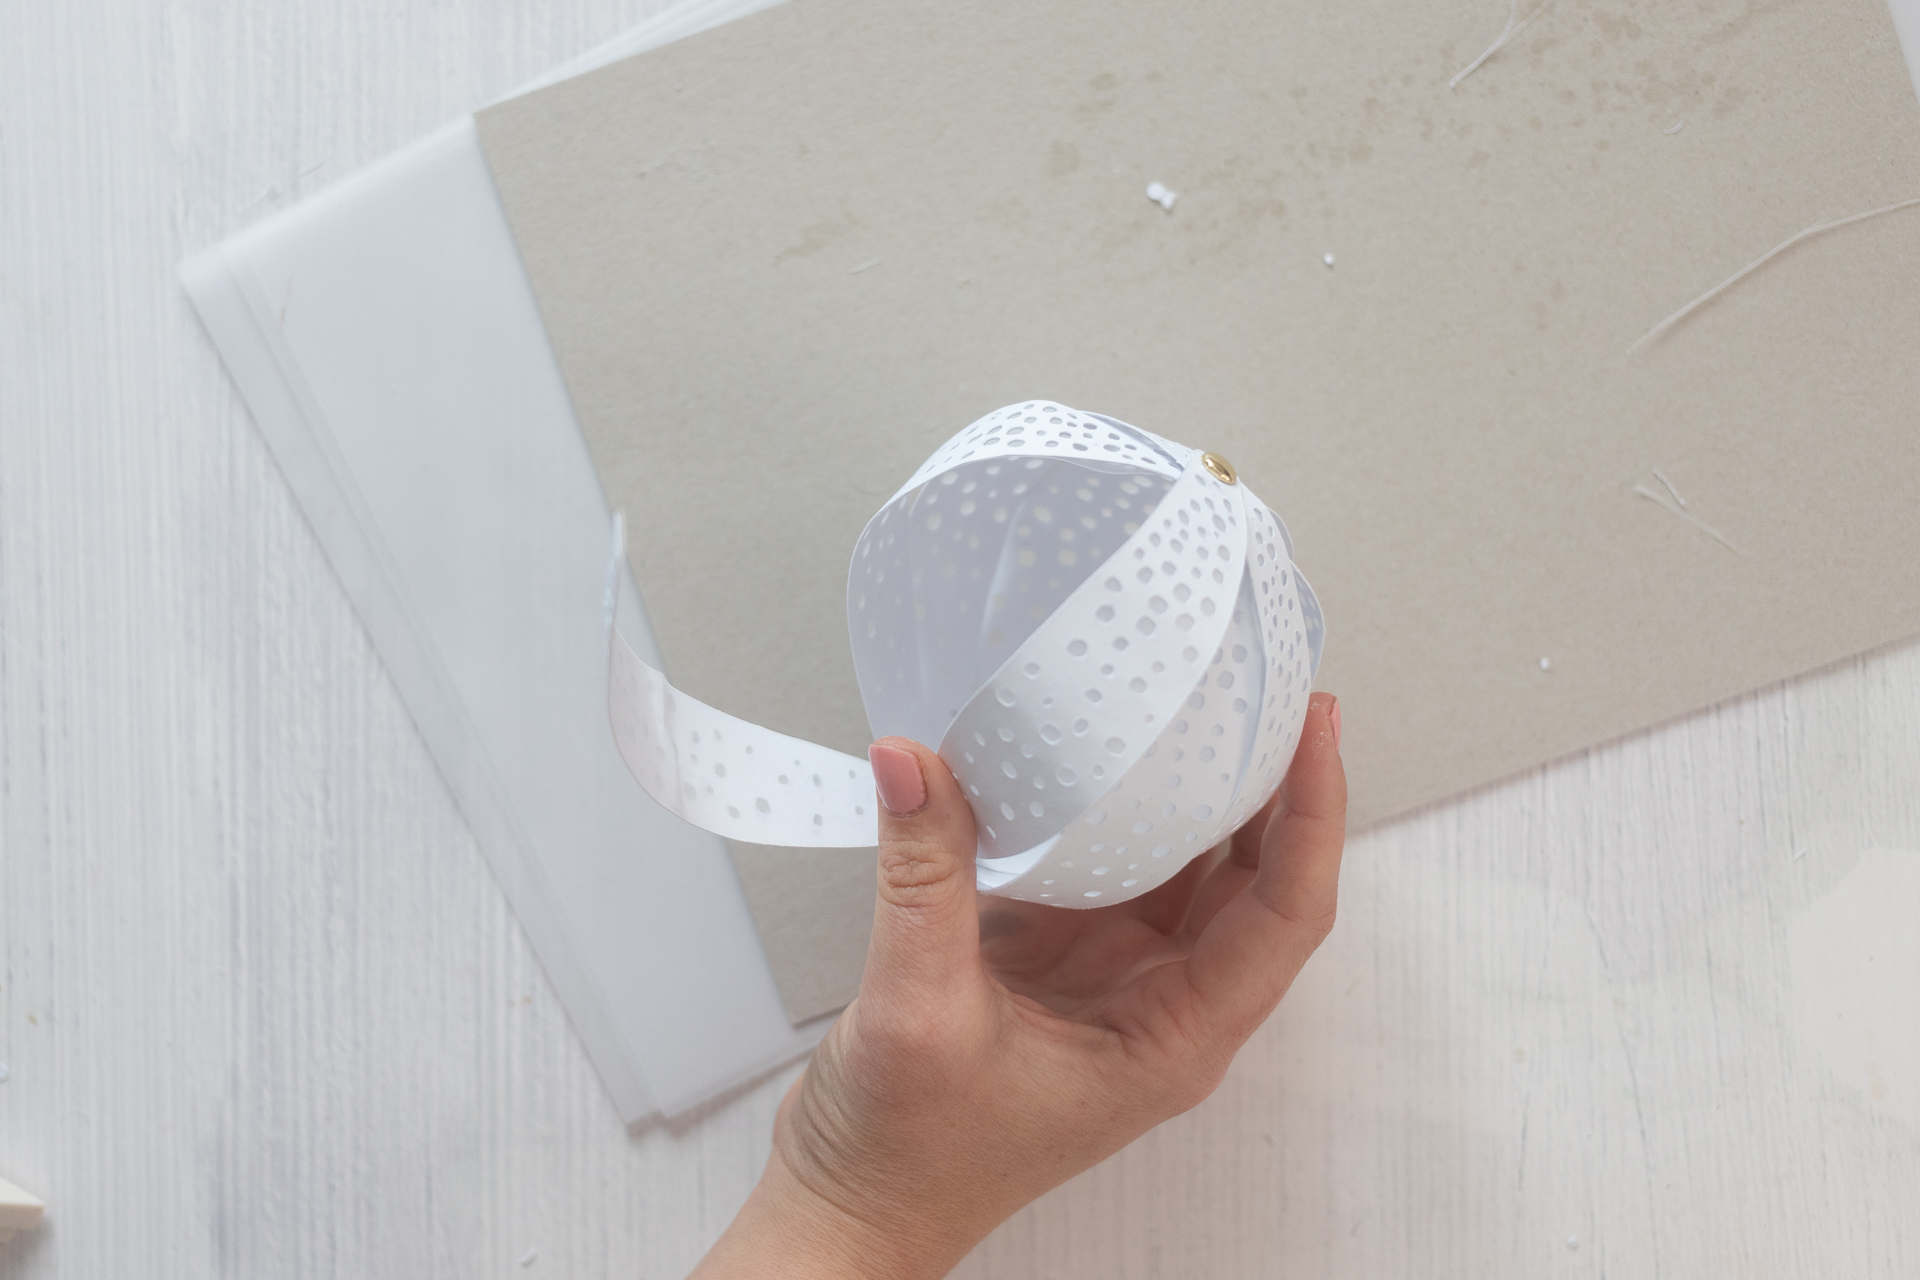
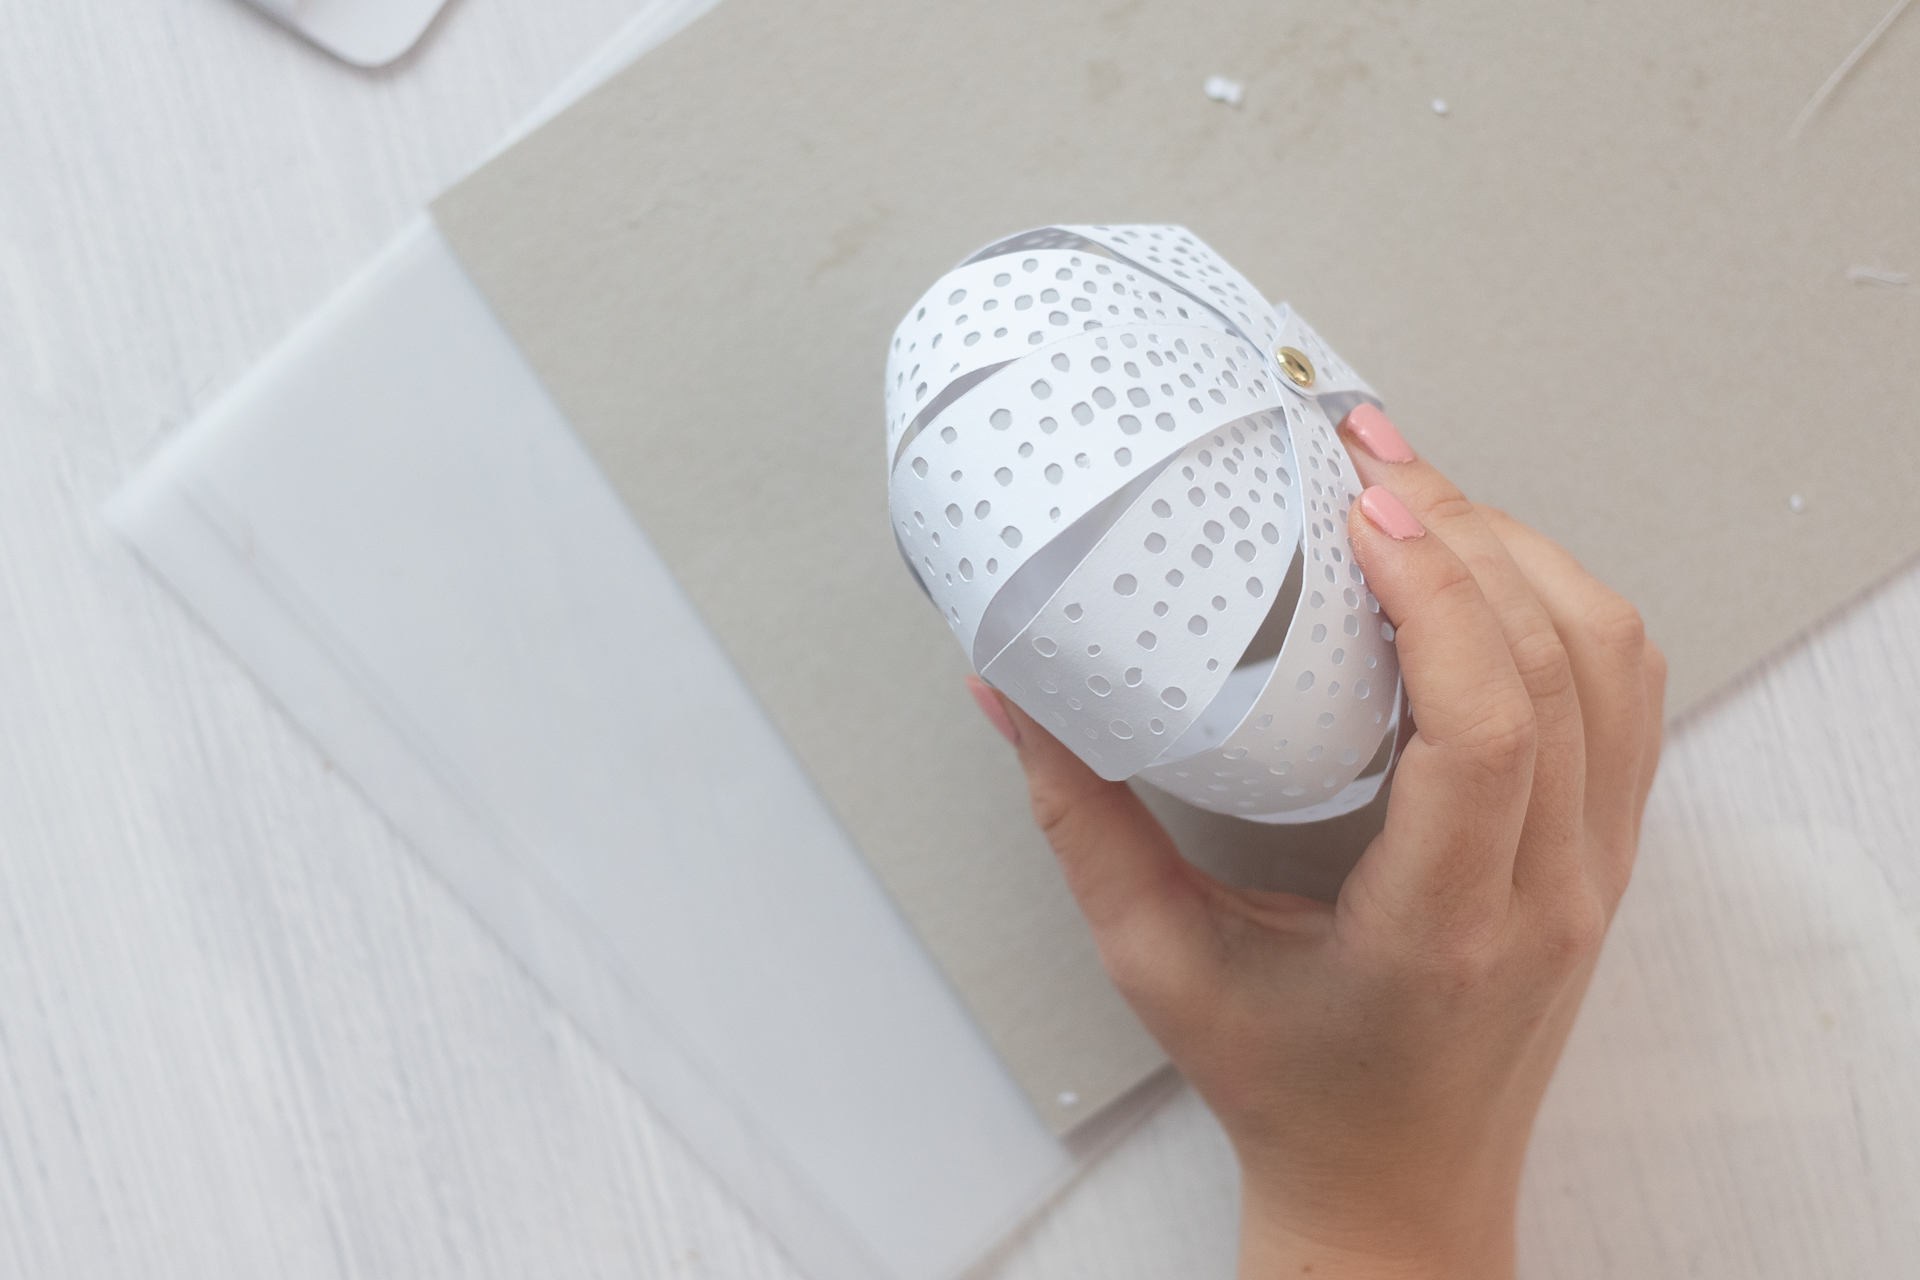
6. Now do the same on the other side: Put the paper clip through the top hole and stick the other ends of the strips on it until you have a ball. You can move the strips at any time so that you can close the clip from the inside.
7. Now it’s time to decorate: I cut a piece of paper straw and stuck it onto a yellow circle. Add another leaf and the pumpkin lid is ready!
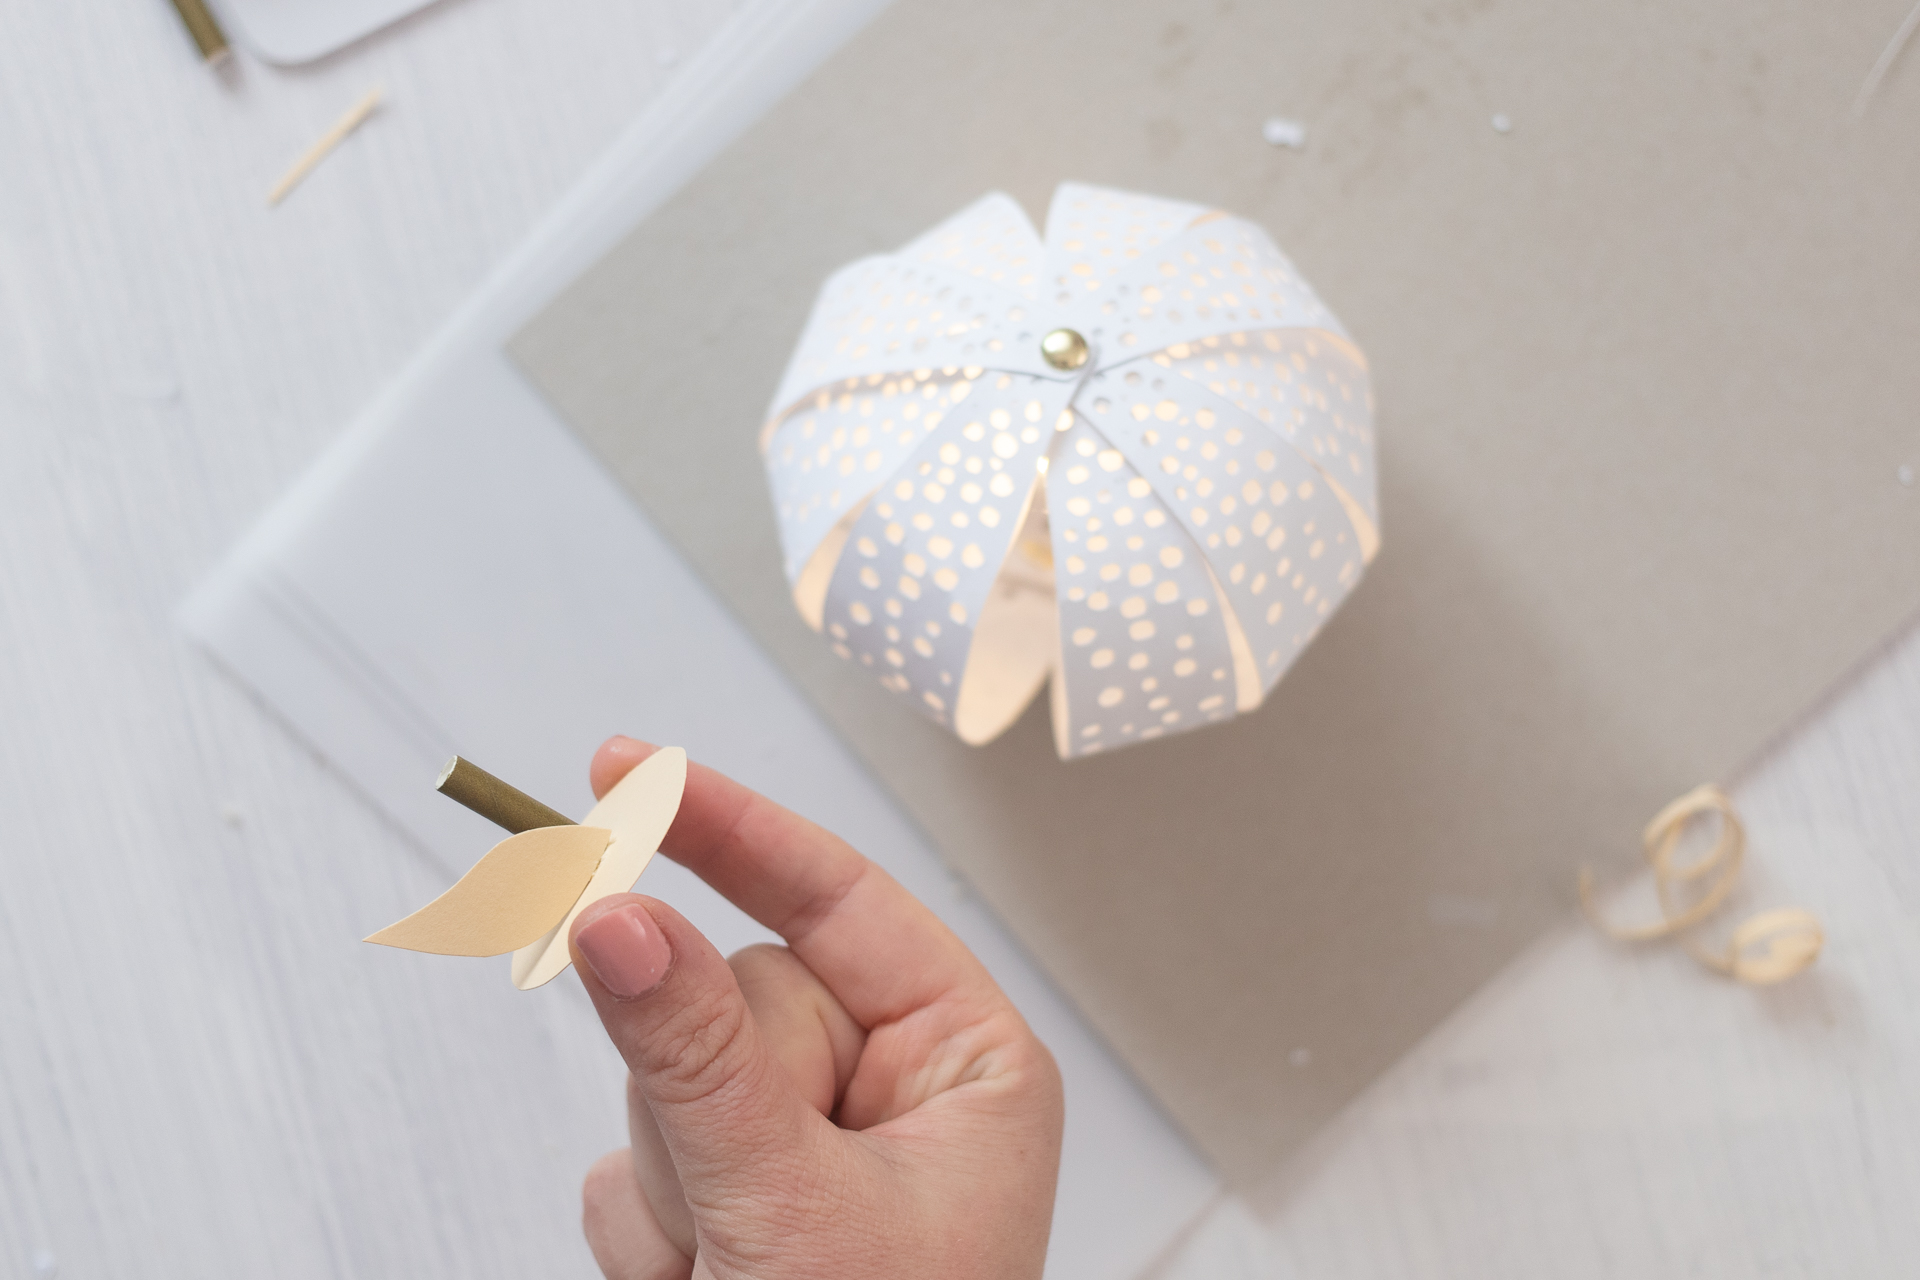
At the end, simply put an LED tea light into the pumpkin and the great DIY pumpkin autumn decoration is ready. The practical thing is that you can easily move the strips because they are only joined together at the top and bottom with brackets. This means you can take out the LED light at any time.


Do you like the DIY idea? Then feel free to take it to Pinterest with this picture and note it on one of your pin boards:


I’m Lisa – and I can never sit still. I’ve been blogging about my passions on my fairy dust since 2013: These are great DIY ideas, chic design and very special illustrations. The main thing is homemade! More about me.
Source: meinfeenstaub.com

