
Are you looking for a simple pop-up card for Mother’s Day? This Mother’s Day card is easy to make and still has a WOW effect. It works with this guide.
Make a Mother’s Day card with a WOW effect
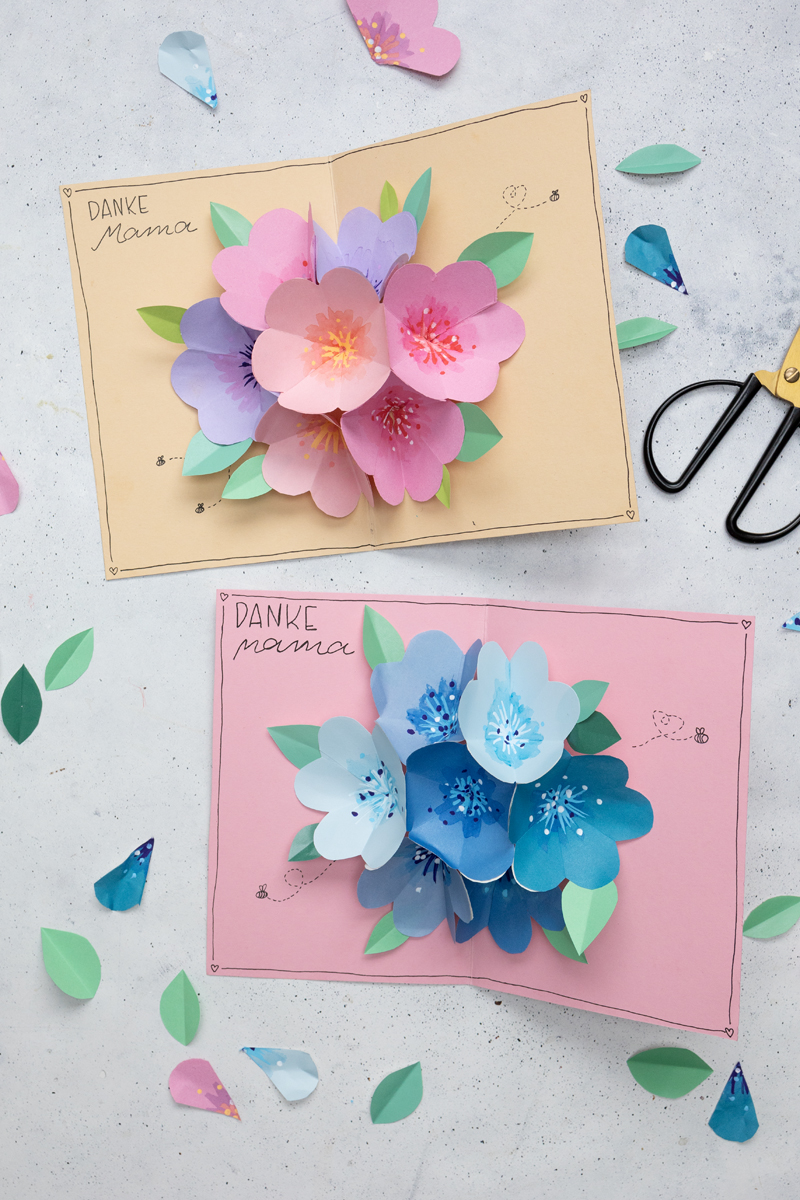
Your mom will be amazed at this card and maybe even think how you managed it. Every opening is something very special and at the same time it is really not difficult to make this 3D flower pop-up card yourself. In this article I would like to explain to you exactly and step-by-step how it works.
It’s so easy to make the pop-up card yourself:

* Advertising // Amazon Affiliate Link: If you buy something through these links, I get a small commission. For you, the product does NOT cost more!
Ingredients
- construction paper
- Scissors
- Paint brush
- watercolor paints
- Marker
- Black pen
- Adhesive stamp or double-sided tape
Instructions
For the Mother’s Day card, take a thick piece of construction paper and cut it to 19 x 26 cm.
Fold the construction paper in half and then set it aside.
For the flowers, cut 7 pieces of paper measuring 10 x 10 cm.
Take the square paper and fold it diagonally three times to make a small triangle.
Next, take a pencil, place the triangle in front of you, closed point down, and draw an arc on the paper.
Then take scissors and cut along the arc. Now unfold the triangle carefully and voilà: you have an eight-petalled paper petal!
Repeat with the remaining papers so that you end up with 7 flowers.
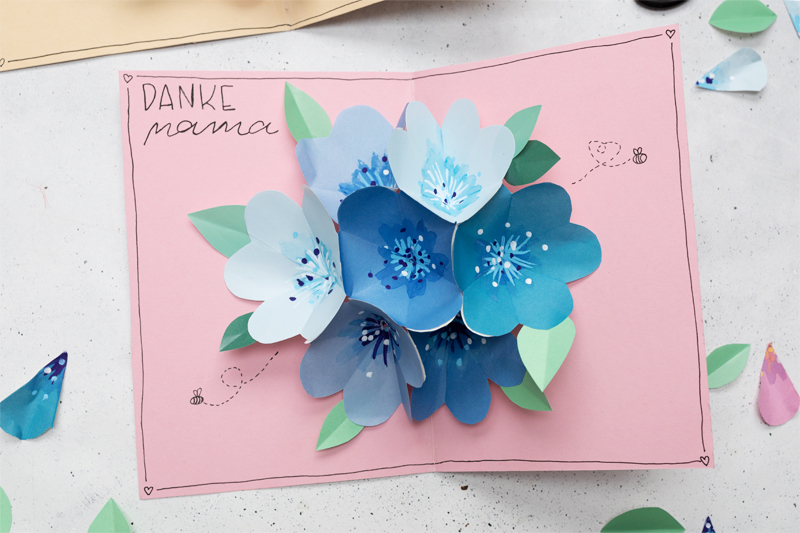
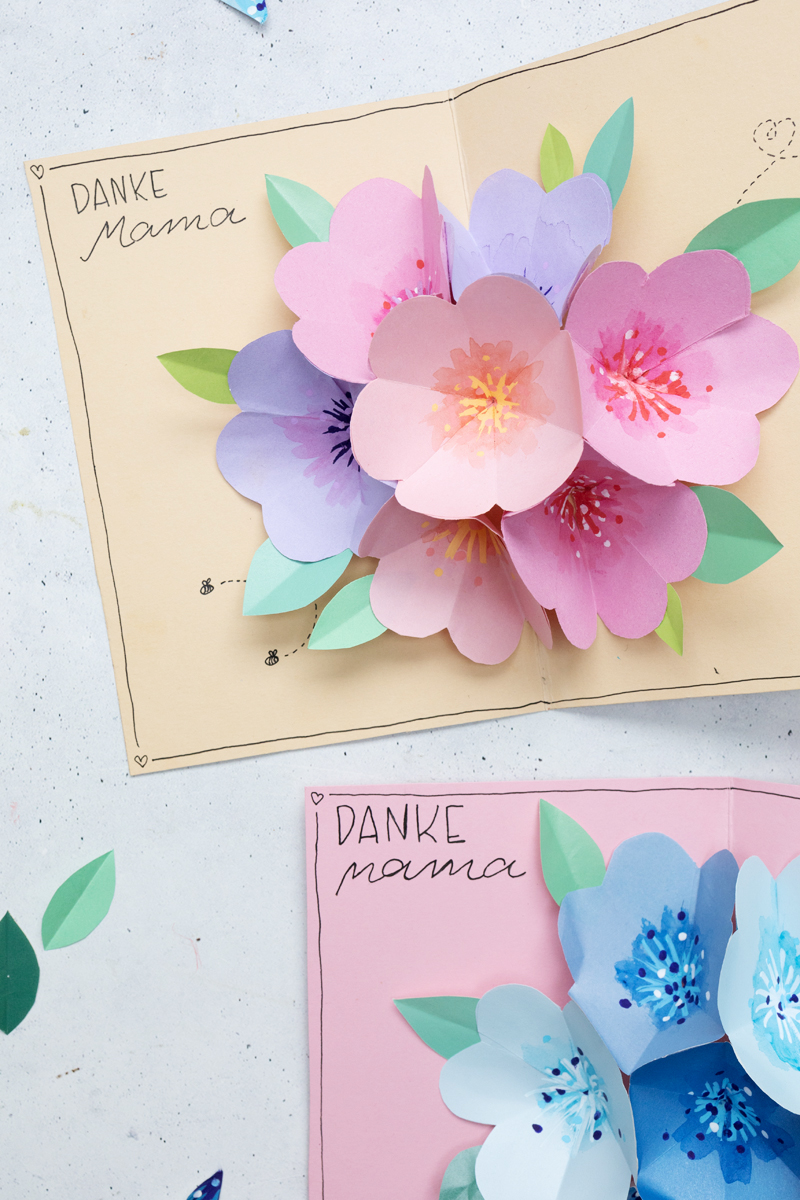
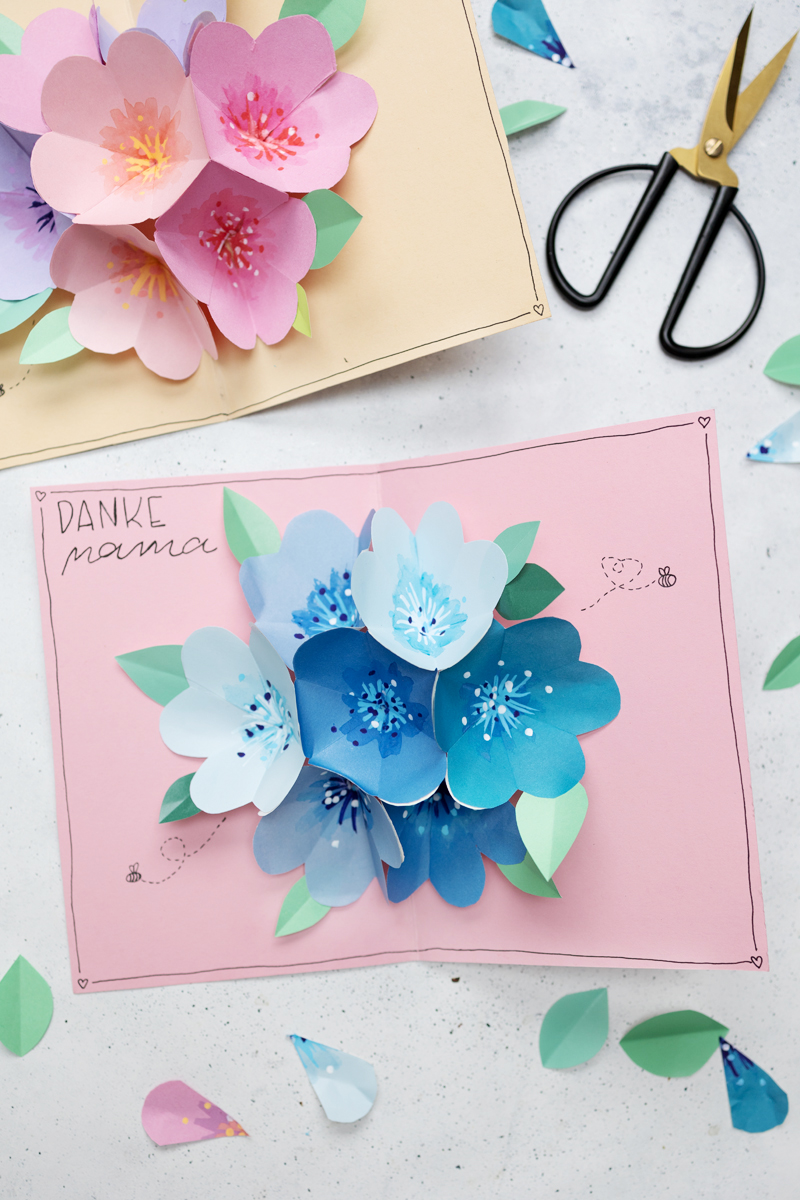
These blossoms are now lightly painted in the middle with watercolor paints. Here you can design it however you want. I painted a spot of color in the middle of each one.
When the paint has dried, you can use the marker to draw small details such as lines and dots in the middle of the flower.
The flower is folded into 8 areas. Cut out a piece from each flower so that only 7 sections are left.
Now glue the two areas that are adjacent to the gap on top of each other. This closes the flower again and creates a 3D shape.
To ensure that the pop-up effect works, you now have to glue the flowers correctly on top of each other. Note that in the photo instructions in steps XX, the crosses represent the sides that need to be glued in the respective step.
It is also important to note that only the upper edges of the flowers may be glued together. Otherwise, the bouquet will not unfold properly when you open the card. So don’t use too much glue.
Now glue the flower into the card and only spread glue on the spot, as shown in picture X.
You can now try opening the card and see if there are places where it is sticking too tightly or not sticking properly.
Now only details. You can cut out leaves from green construction paper, fold them in the middle and glue them around the flowers. Make sure that the card can still be closed properly after you have glued the leaves on.
With a black pen you can write details such as small candles, a frame, bees or a nice greeting to mom.
Your flower pop-up card is ready.
Mother’s Day with pop-up card
Now you’re ready to create a beautiful 3D flower pop-up card for Mother’s Day! With a little patience and the right instructions, anyone can make a card like this and bring joy to their mother or any other special person. So go ahead and let your creativity run wild!
More easy ideas for Mother’s Day ideas
Want more ideas for Mother’s Day gifts? Then click through here: Make a gift bag and Mother’s Day card with paper flowers, Make a Mother’s Day card with a heart made of paper flowers or DIY Mother’s Day gift: paint stones
Until then. Your Laura
Source: trytrytry.de

