

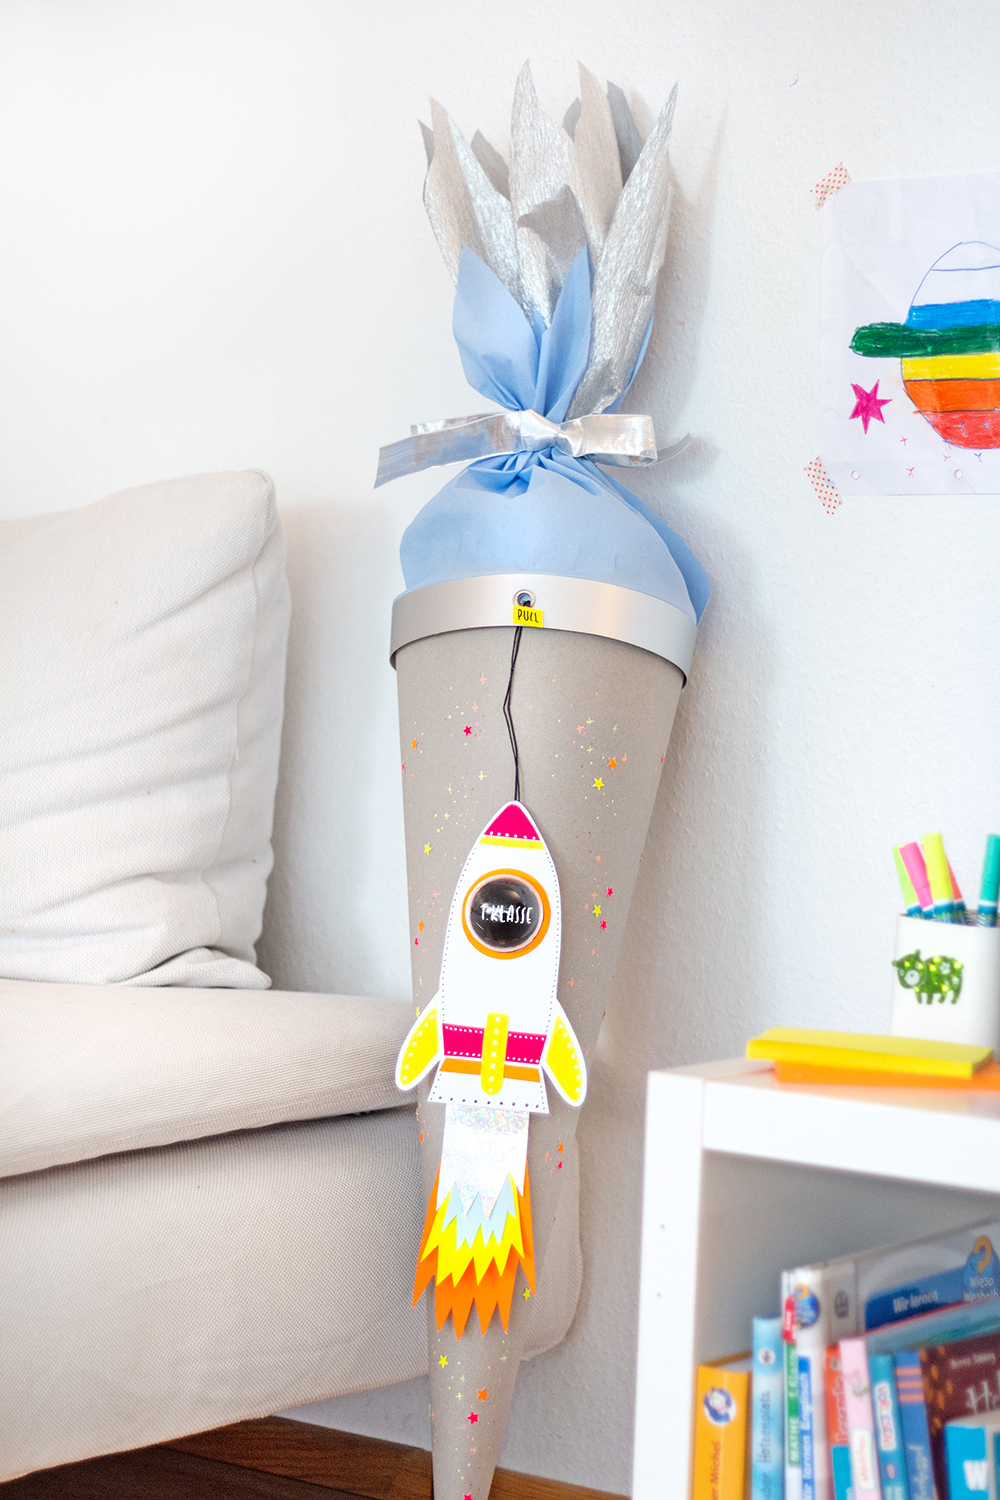
Rocket launch in first grade: DIY rocket school cone
For the third time in a row there is a nice DIY school cone here on my blog – that’s almost a tradition by now 😉 This time the motif is a rocket in space, which the school child can launch himself by pulling a string. The name of the child appears in the trail of fire. I’ll show you how you can make this interactive rocket school cone Step by Stepthe cool brand for ergonomic school bags.

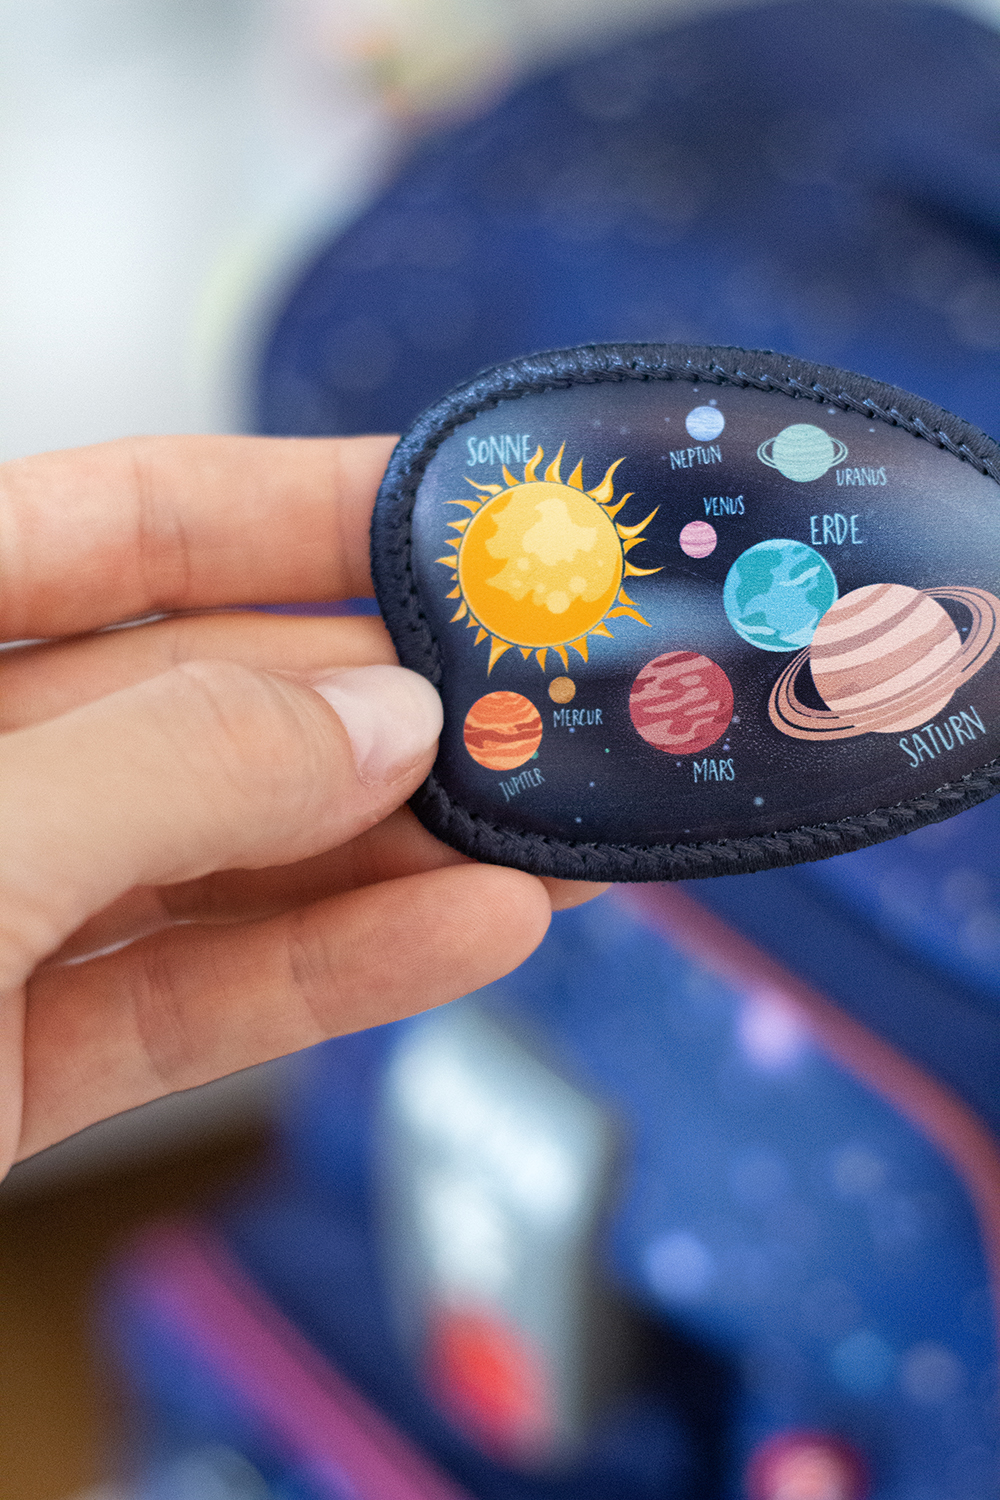
School bag SPACE REFLECT
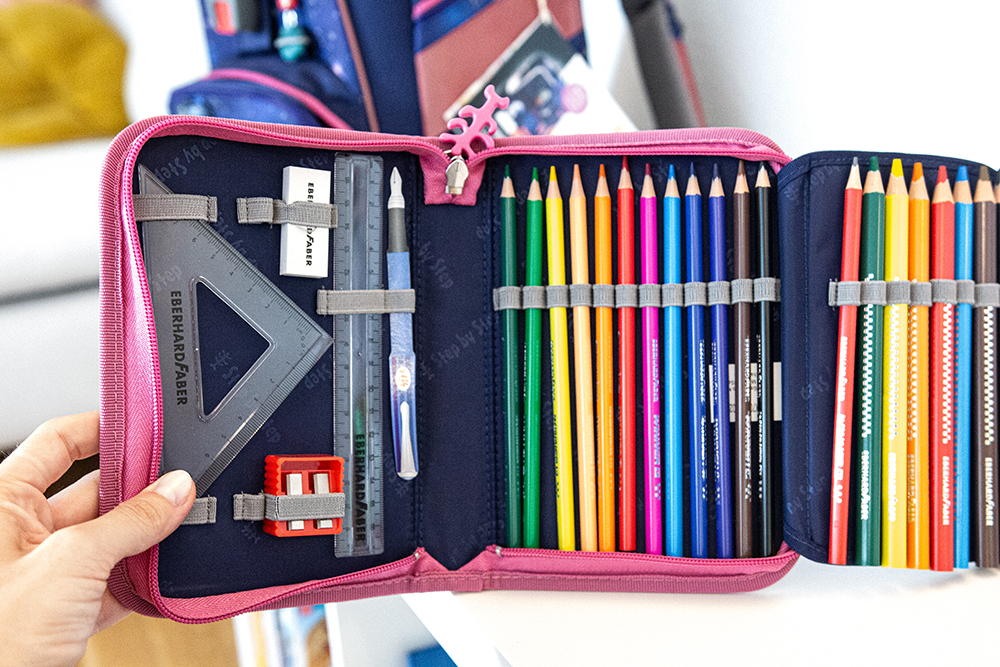
Before I start with the instructions, I would like the satchel SPACE REFLECT show who with who MAGIC MAGS Star Astronaut Cosmo goes absolutely perfectly with my DIY rocket school cone 😉 The stylish satchel comes in a set with a gym bag and pencil case. Not only does it look cool, it also offers plenty of space, grows ergonomically with you and is also sustainably produced and climate-neutral. A real all-rounder with a full four-year guarantee.
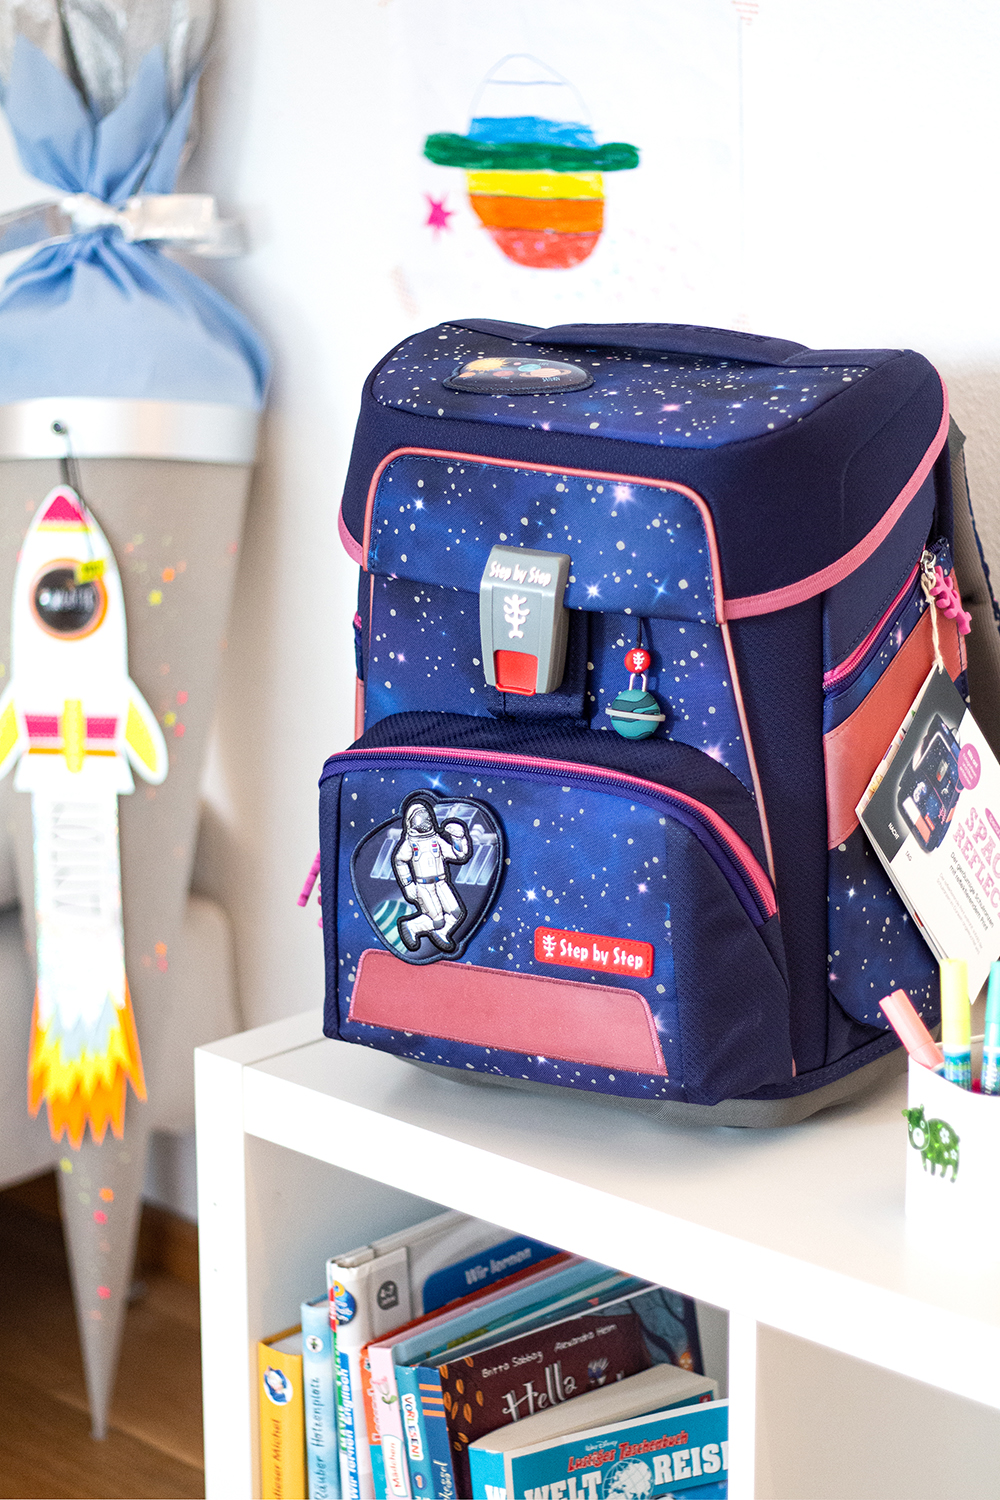
With the magnetic ones MAGIC MAGS By the way, the school children can always create a new look for little money. There is a large selection of favorite motifs.

Instructions DIY rocket school cone
And now let’s get started with the instructions for the DIY rocket school cone. Have fun crafting!
Material list:
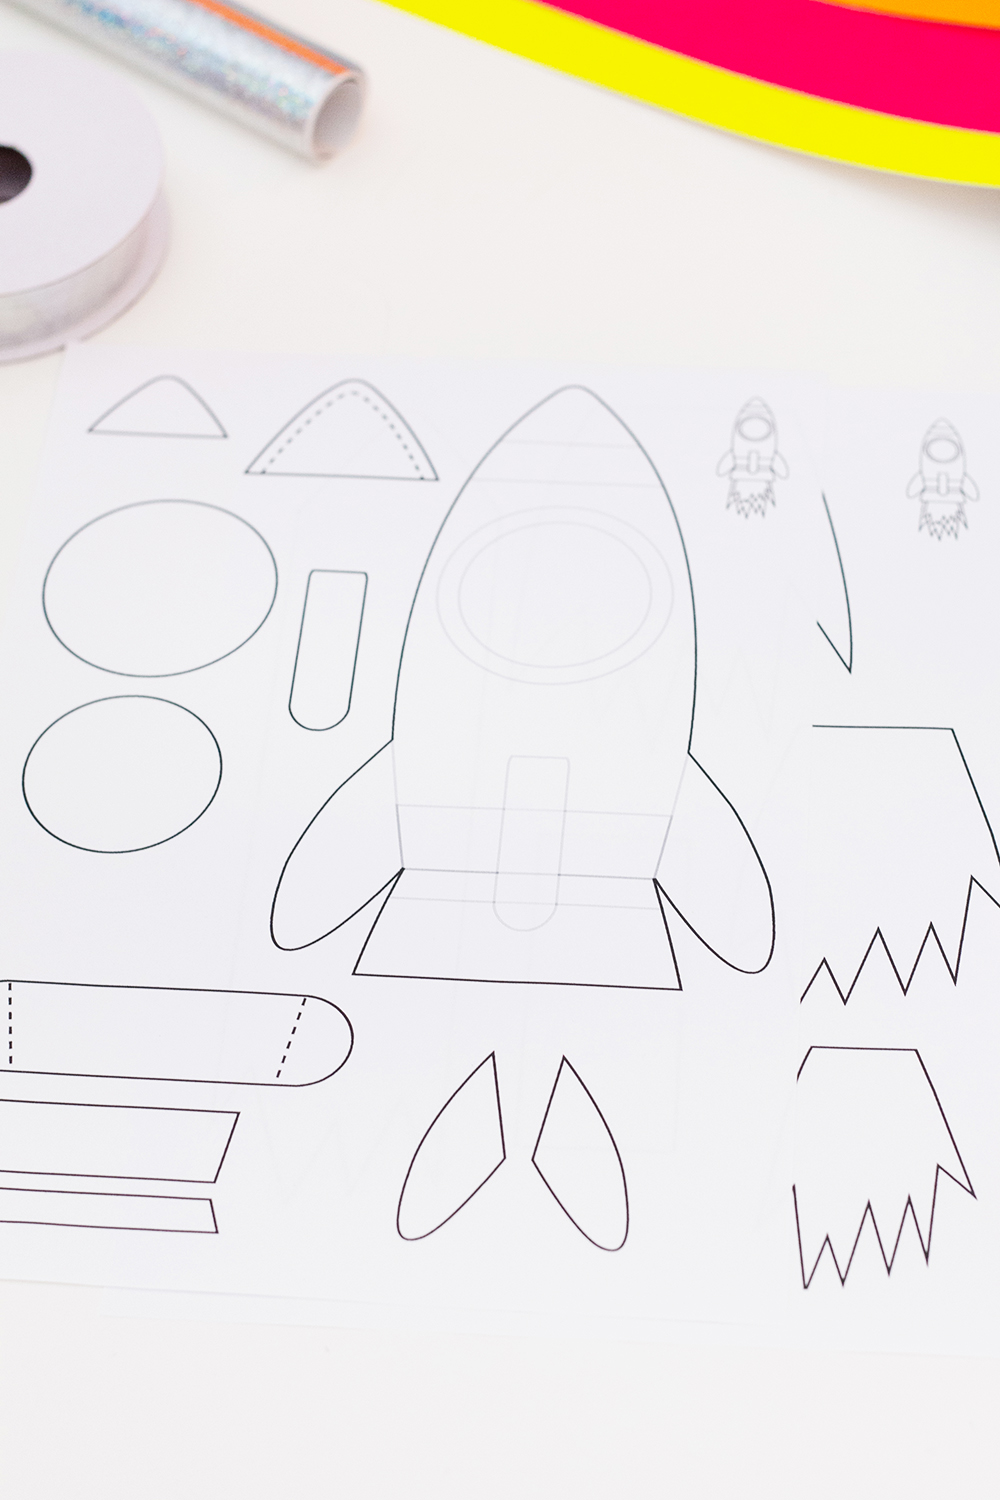
- My rocket print file: CLICK
- School cone blank 70 cm, gray : CLICK
- Neon & Silber Karton: CLICK
- Piece of construction paper light blue & black
- Holographic cardboard silver: CLICK
- Piece of white paper for name tag
- Acrylkugel 5 cm: CLICK
- Mini Star Punch: CLICK
- Neon multimarkers, I have these: CLICK
- white, black & silver edding
- Deco ribbon silver
- Crepe paper silver & light blue: CLICK
- silver eyelet
- Scissors
- Glue stick & craft glue
- hot glue
Affiliate Link
That’s how it works:
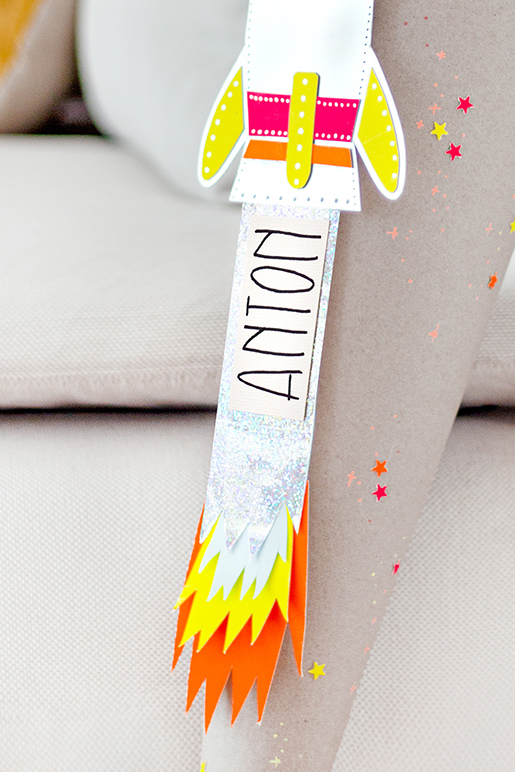
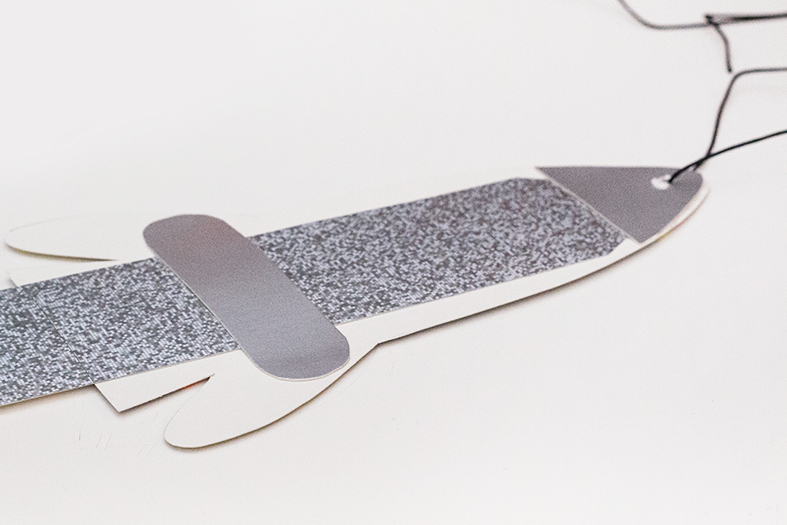
1.) Cut out individual parts Print out both sides of the pdf file and transfer all shapes to the desired colored paper. Then cut out all the pieces. I used silver for the rocket, glittering holographic card stock for the fire trail with the name, and neon, light blue, and black for the details.

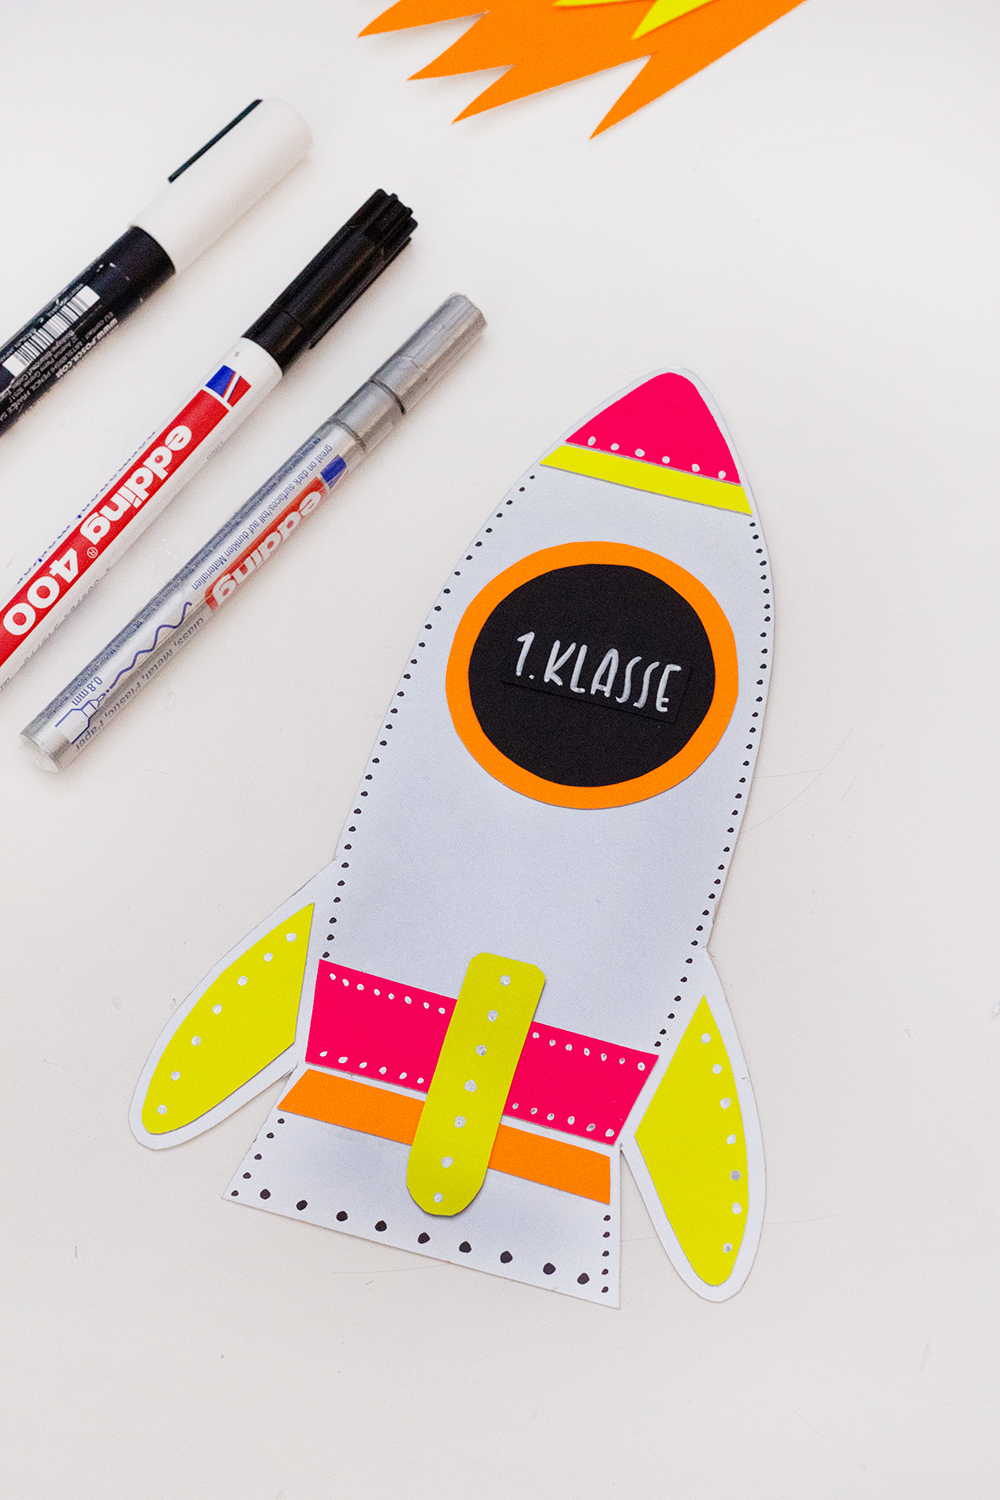
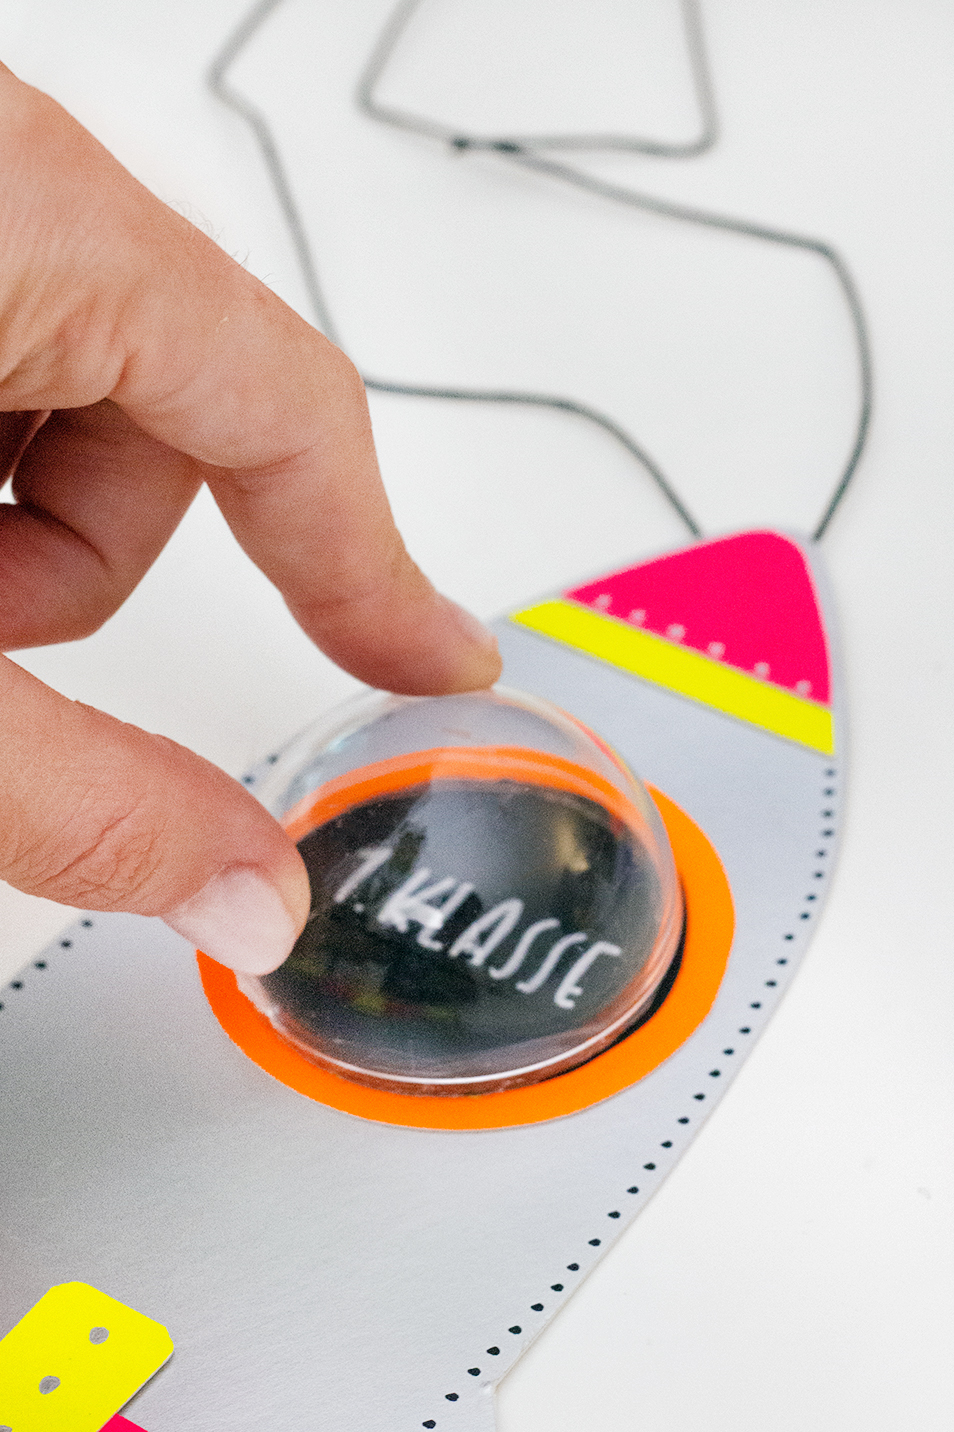
2.) Complete rocket Now glue all the individual parts of the rocket together as shown and add decorations with Edding. Then write on the black circle with a white marker pen.
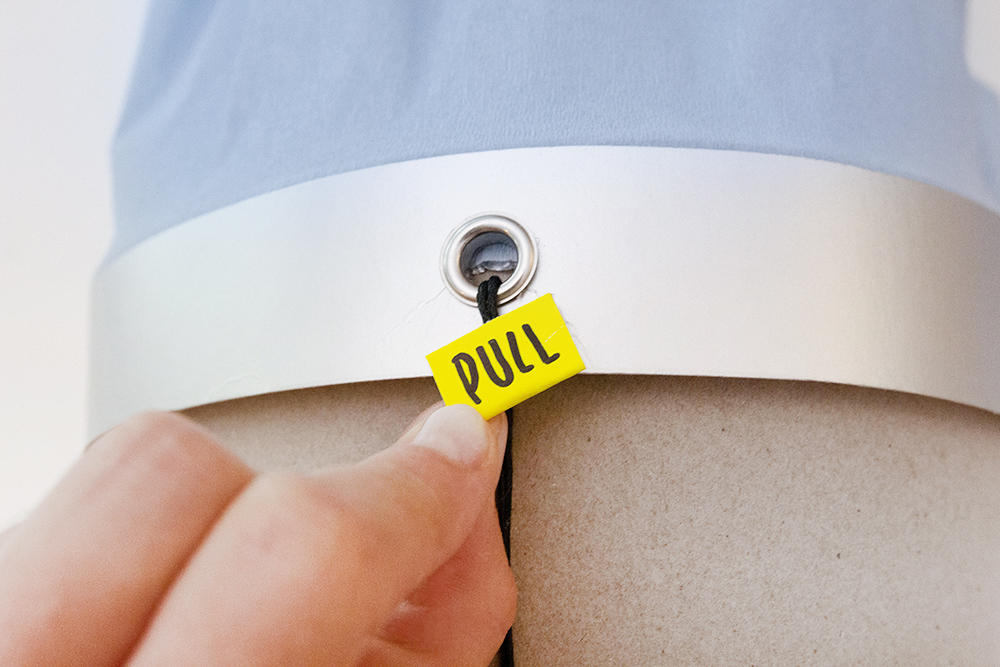
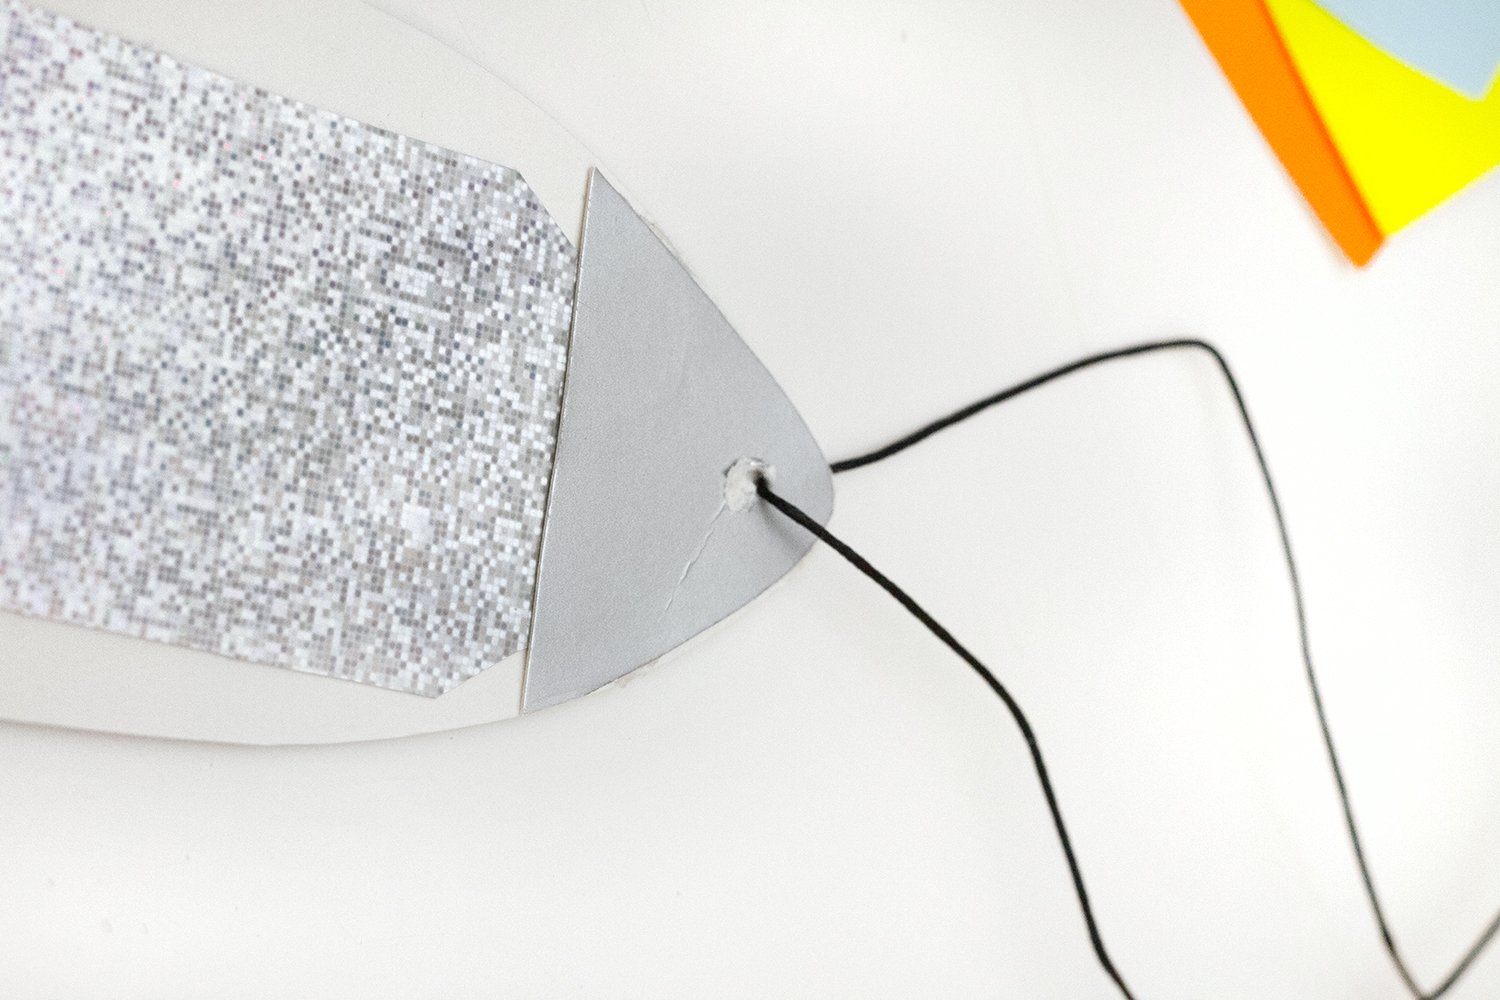
Rocket Back Take the rocket tip shape and poke a hole with the scissors through which you thread a cord about 40 cm long. Then attach the shape to the back of the rocket along the edge ONLY (see dashed line on template) leaving the center completely free for the glitter strip to slide inside. Glue the rounded rectangular shape ONLY to the left and right edge at the level of the wings, because the strip should still be able to be pushed through here:
3.) Finish fire Now you can tinker the fire with the name. To do this, stick the three colors of fire behind the glitter strip and then put it through the loops of the rocket at the back for a test – then mark where the name tag should be so that it is completely covered when closed and completely legible when open. Then write on the name tag and first stick it on with a piece of Tesa in case you have to readjust the position later.


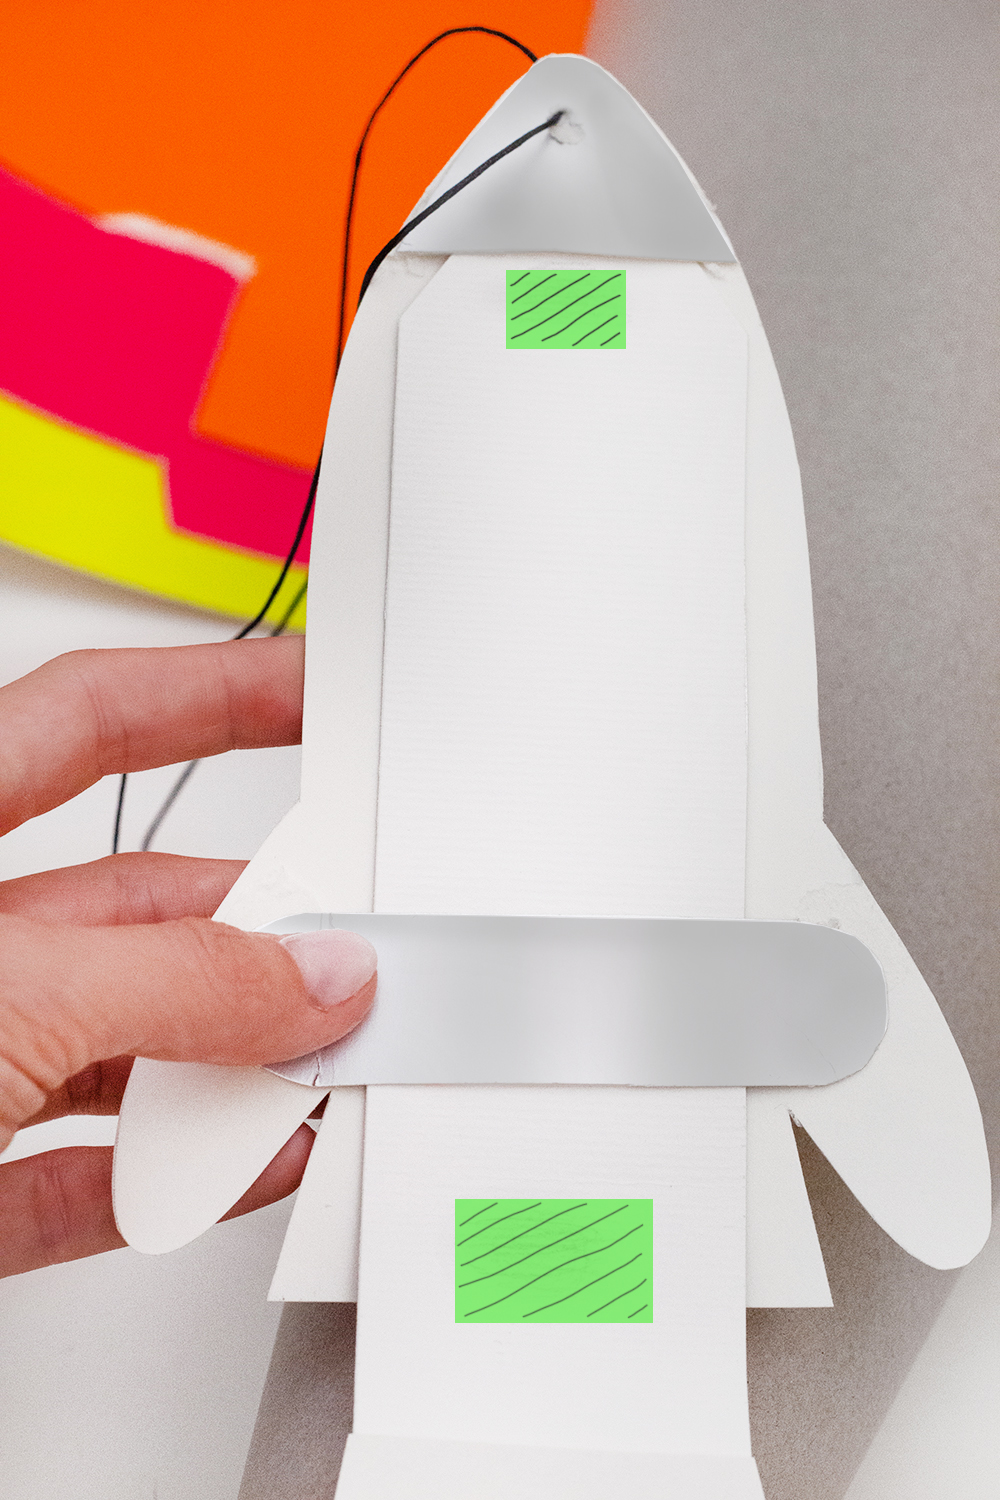
4.) Attach rocket Finally, glue the acrylic ball to the black circle by applying craft glue along the edge. Then put the glitter strip through the tabs, apply hot glue to the areas marked in green in the photo and attach the entire rocket to the middle of the school cone.
When positioning the rocket, make sure that there is still enough space at the top to pull the rocket all the way up. When the hot glue has dried, test again whether your name is in the right position when you pull it up and down and then glue it properly.
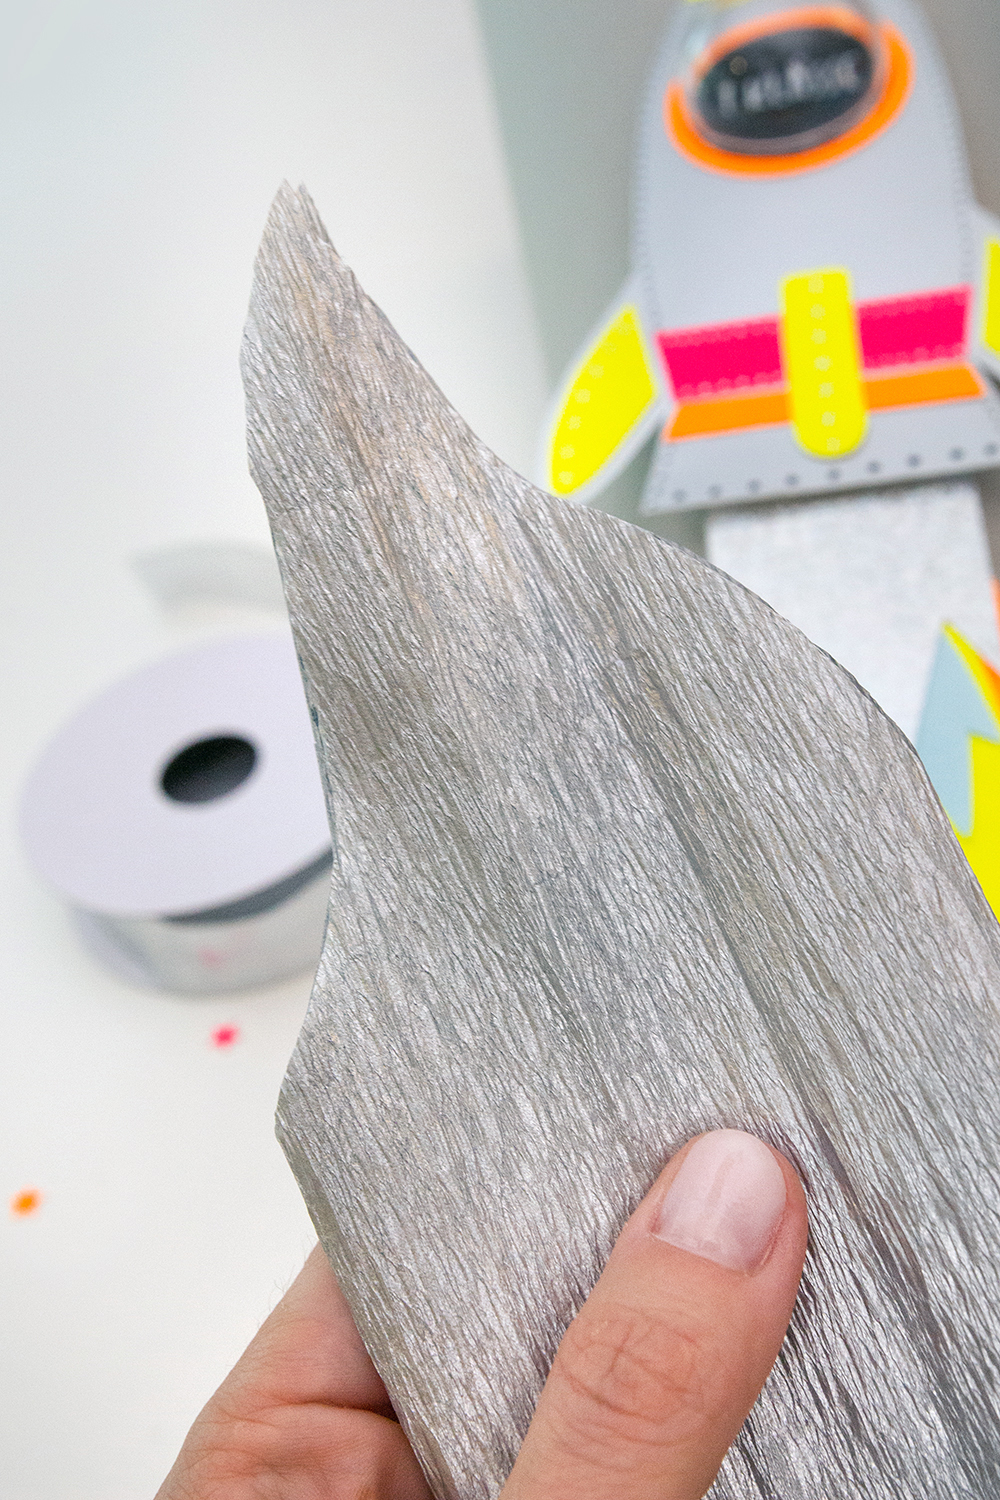
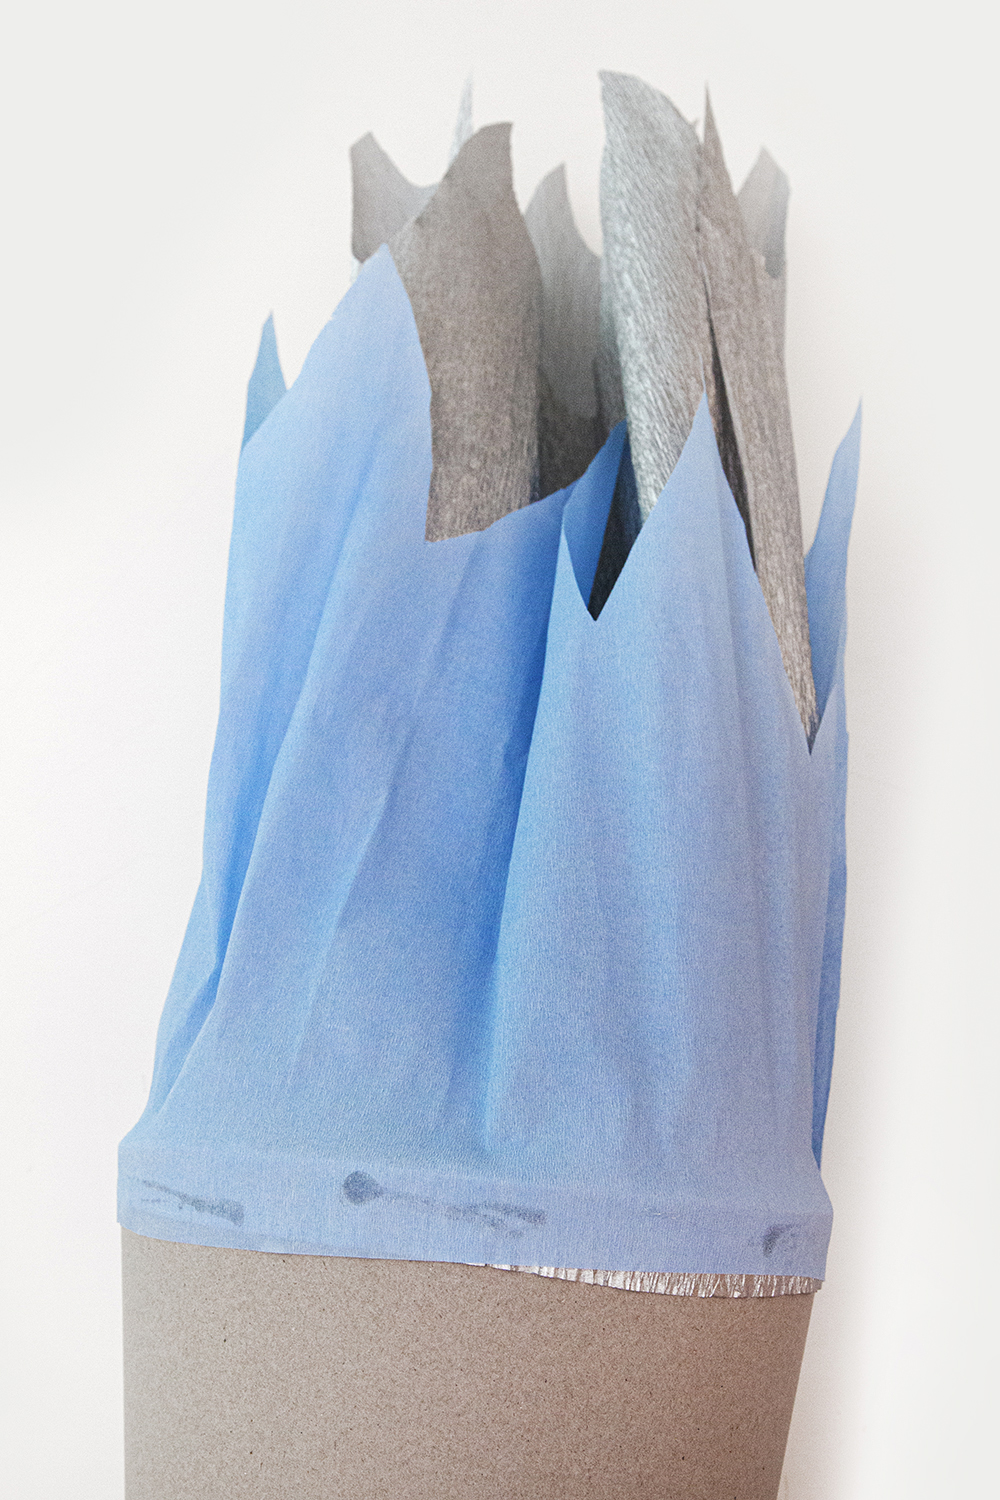
5.) Crepe paper and border Cut a flame-shaped tip at the top of the folded strip of crepe paper. Then you first attach the silver and then the slightly shorter light blue crepe paper to the outside of the school cone with hot glue.
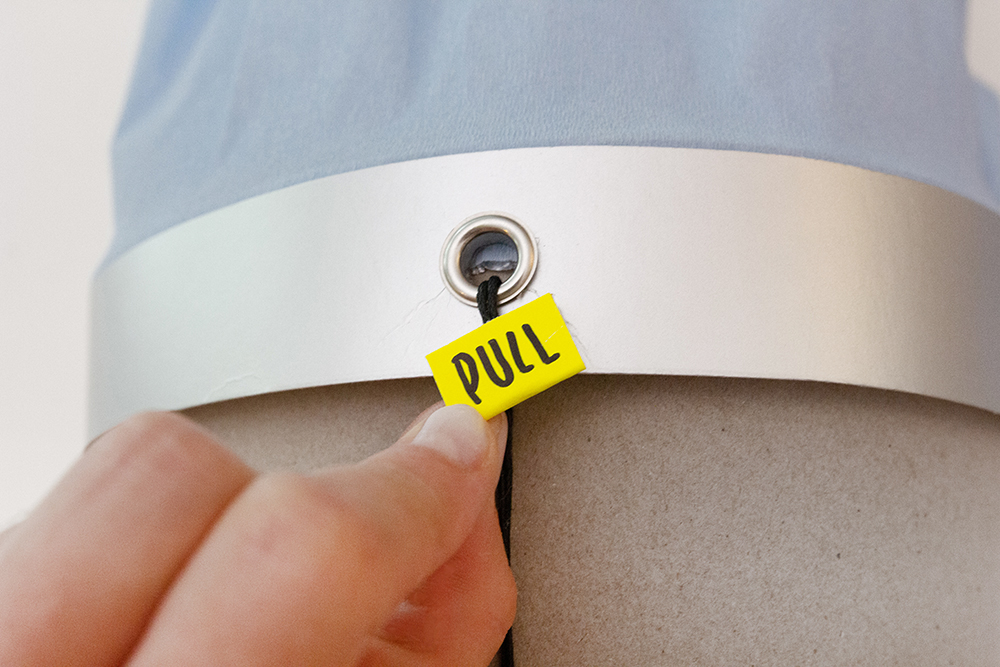
Now cut a strip about 2.5 cm wide from the silver cardboard, which should fit around the upper edge of the school cone – to achieve the length, you can also glue two strips together. Then you pierce a hole with the scissors and glue a silver eyelet with hot glue through which you thread the rocket cord. Then use hot glue to glue the silver stripe as a border, making sure to leave the eyelet and cord free. When everything is glued, you shorten the string (when the rocket is closed) and glue on a small pull tag.

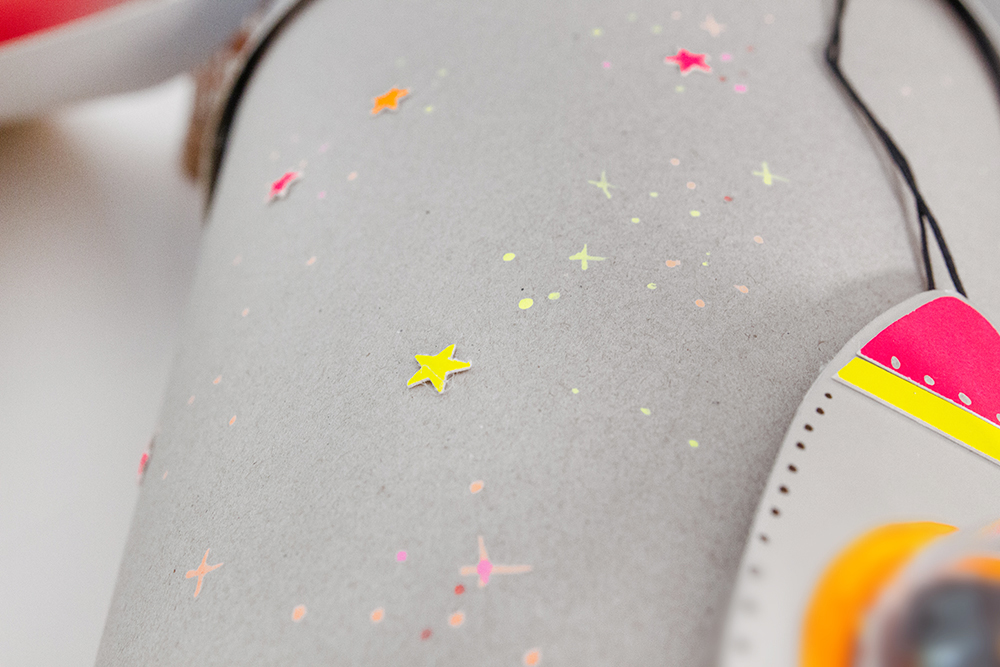
6.) Add stars Finally, use the star punch to punch out some mini stars and stick them all around the bag. In addition, you paint additional stars with the neon markers.

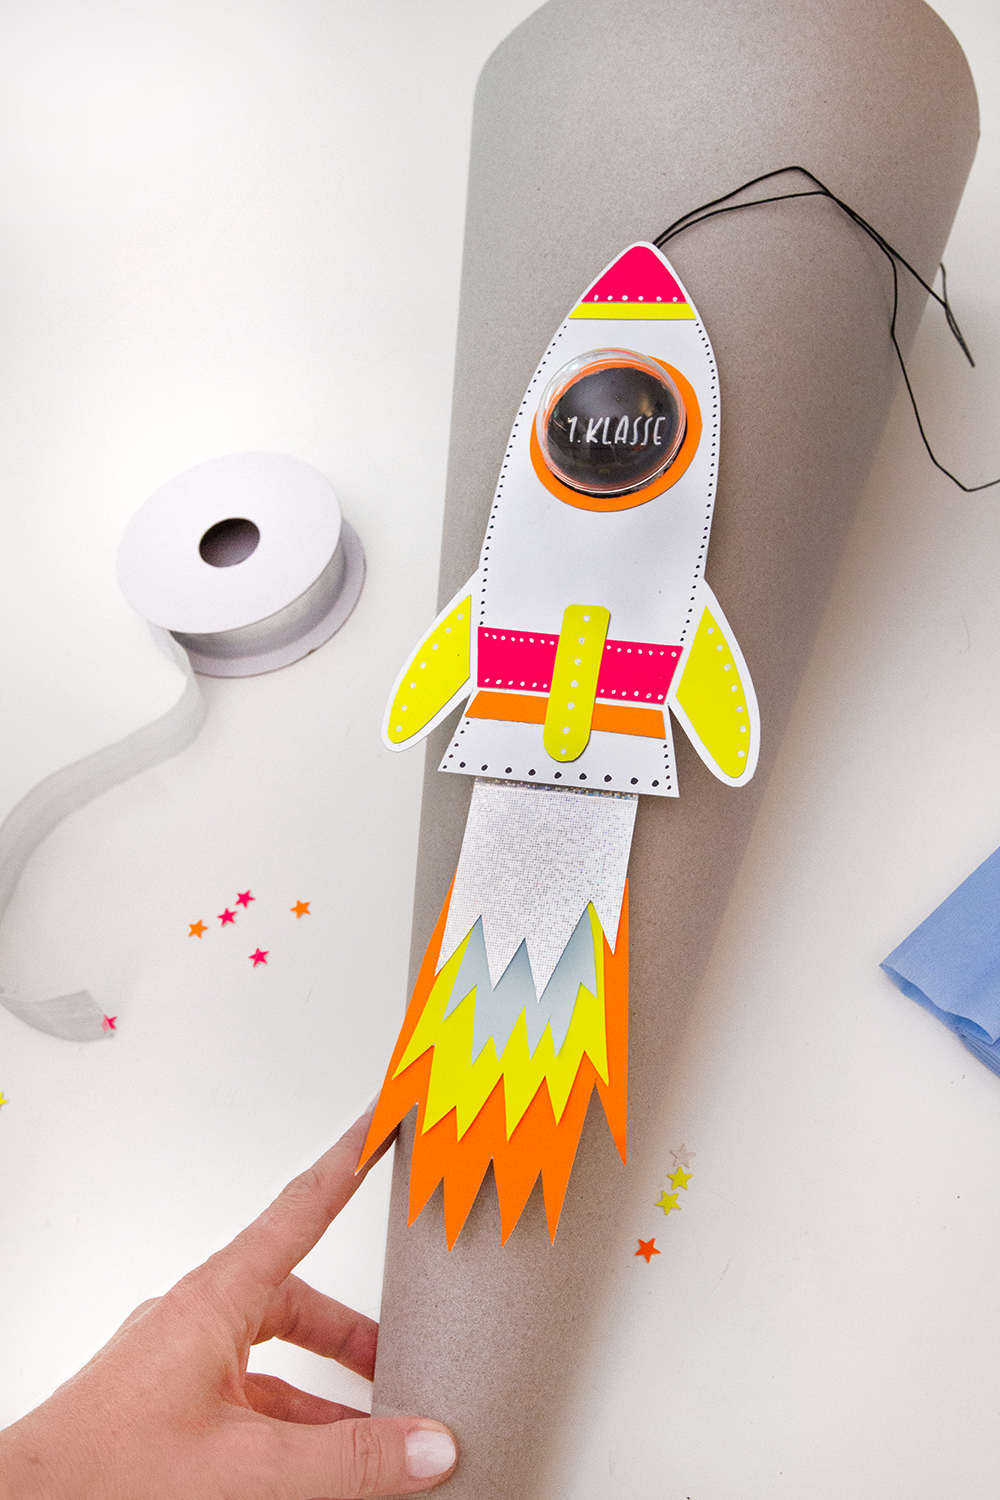
Insert gifts, add ribbon as a clasp and complete is the rocket school cone! If you now pull the cord, the rocket will start and reveal the name of the owner 😉 For a secure fit, it is best to leave the rocket closed.
Did you like my interactive rocket school cone? Then I would be very happy if you share them on your social media channels 😉 Feel free to send me your handicraft results, I am always very happy about them!
Have fun crafting and a great school enrollment for your children,
Your Sammy
Source: www.sammydemmy.de

