
Furniture upcycling has always been a topic that I have followed with great passion. Creating something new from old things is just so much fun. And it is also very sustainable: in Germany alone, millions of pieces of furniture are thrown away every year, which could actually be spiced up and reused with a little love.
I recently implemented such a furniture upcycling project again: A long time ago, my great-granduncle built a small chest of drawers out of wood himself, which has been gathering dust in the basement for decades. Unfortunately, the piece in the old-fashioned style did not fit my rather modern taste in interior design at all. Due to the elaborate carvings, I thought for a long time whether it was even okay to carry out an upcycling project with the small piece of furniture. But in the end it would just be a shame to hide it in the basement and not use it.
Upcycling closet instructions
For the project, I used the following material:
*Affiliate Links: I get a small commission if you buy something through these links. This does not make the product more expensive for you and you support me in my work.

Step 1: Remove parts
First I removed the feet from the cabinet. One of the feet was already completely loose and could easily be pulled off. I carefully sawed off the remaining feet with a Japanese saw.
Then the upper, already damaged decoration came off. I could easily remove it because it was only attached with nails.


Step 2: Sand, sand, fill
So that the paint sticks better on the cupboard, I first sanded the carvings lightly with steel wool. I tried to work as carefully as possible to preserve the beautiful details. I also sanded the inside surfaces with steel wool,
I used my small grinder to sand the top and bottom.
Since one of the feet had left a hole in the floor, I grabbed a putty and repaired the hole.
Tip: By the way, the filler can also be used to implement many other DIY and upcycling projects!


Step 3: Farbe!
While the putty was drying, I started painting the inside of the cabinet with new paint.

Now came the most important part: painting the fine carvings. Chalk paint* is usually particularly good for painting old wooden furniture. However, this has a very viscous structure and I was concerned that the fine details of the carvings could be lost as a result. Theoretically, spray paint would also have been a possibility for upcycling this furniture. This would have saved me a lot of time, but the color is difficult to dose when spraying and it could have easily caused noses to form.
So I decided on an ordinary furniture paint, which was mixed in a soft beige tone in the color mixing center in the hardware store.

I then carefully applied the paint as evenly as possible with a very fine brush so that the paint cannot collect anywhere and all the intricacies of the carvings remain visible. For an opaque result I applied 2 coats of paint.
I then painted the rest of the cabinet with a large, slightly coarser brush.

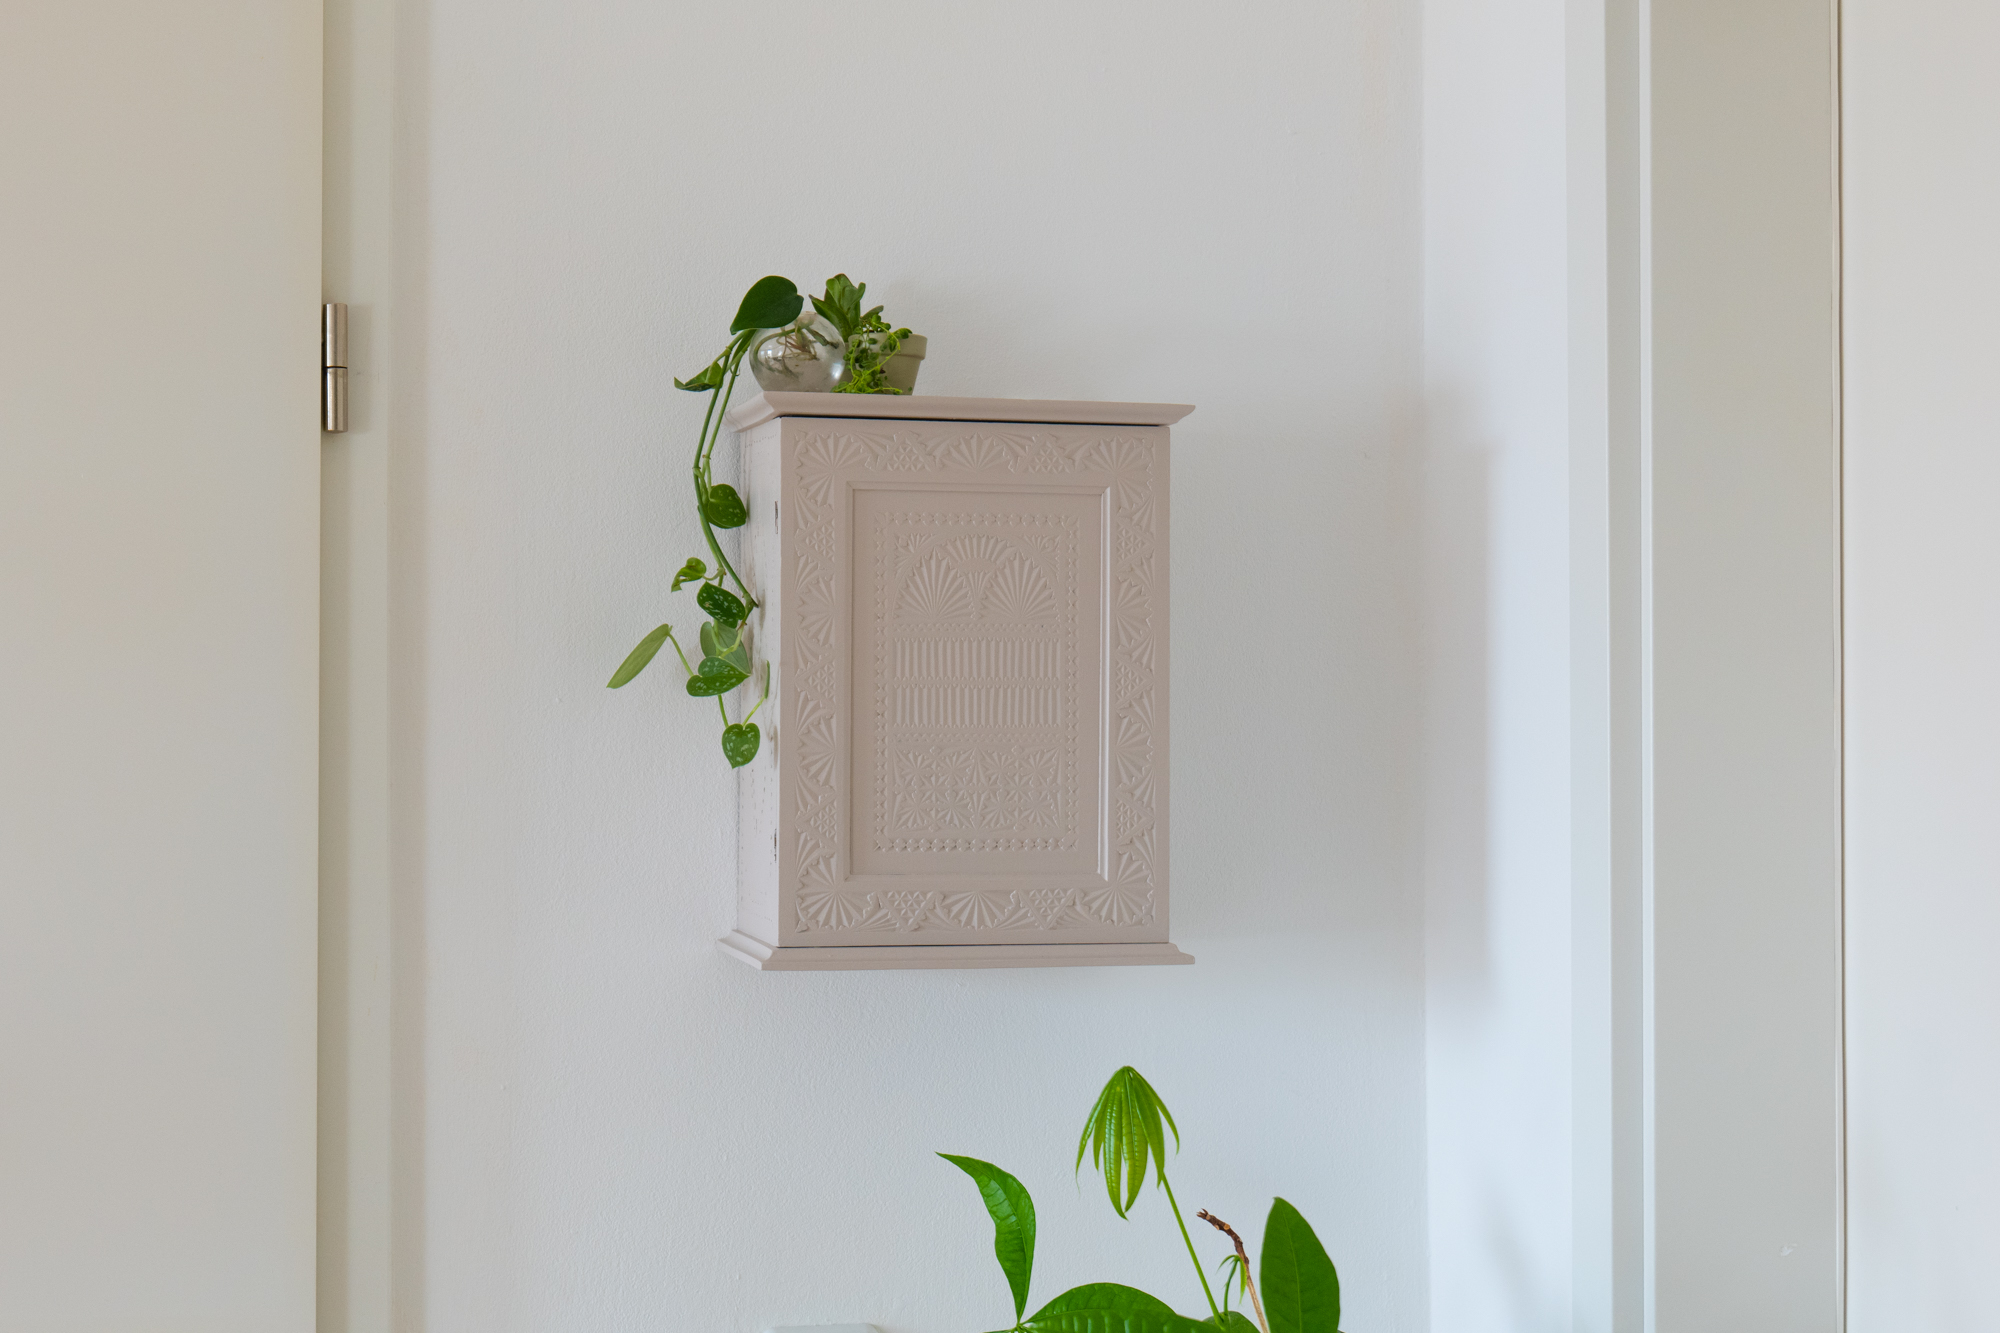
The furniture makeover is done! Instead of a small chest of drawers, I now have a closet that can be used for jewellery, keys or as a medicine cabinet.
I’m super happy with the result and I’m happy that the cabinet has been given a new lease of life. In the new style, it just fits so much better into our apartment.

DIY upcycled stool and cabinet
I would like to introduce you to 2 more DIY upcycling projects that I did a while ago and that are still part of my current interior: An old stool from the flea market & an old kitchen cabinet.
The stool was no longer usable because the entire seat was broken. The kitchen cupboard came from an apartment sale, it would probably have ended up in the bulky waste bin if I hadn’t saved it.

Click here for the complete blog article for the rope stool. I’ll show you what the stool looks like now.

This is what the old kitchen cabinet looked like before. Curious how the closet looks now? Then click here!
Video about furniture upcycling
We also presented the 3 upcycling projects in a detailed YouTube video, feel free to take a look:

By loading the video, you accept YouTube’s privacy policy.
Learn more
load video
So if you find an unloved piece of furniture somewhere, take a closer look, maybe a new, unique piece of furniture could emerge from it.
If you are looking for more upcycling ideas, take a look HERE. And if you don’t want to miss any of my new projects in the future, then follow me Instagram!

similar posts
Source: www.schereleimpapier.de

