
{Partner: PILOT // Information about advertising at my fairy dust}
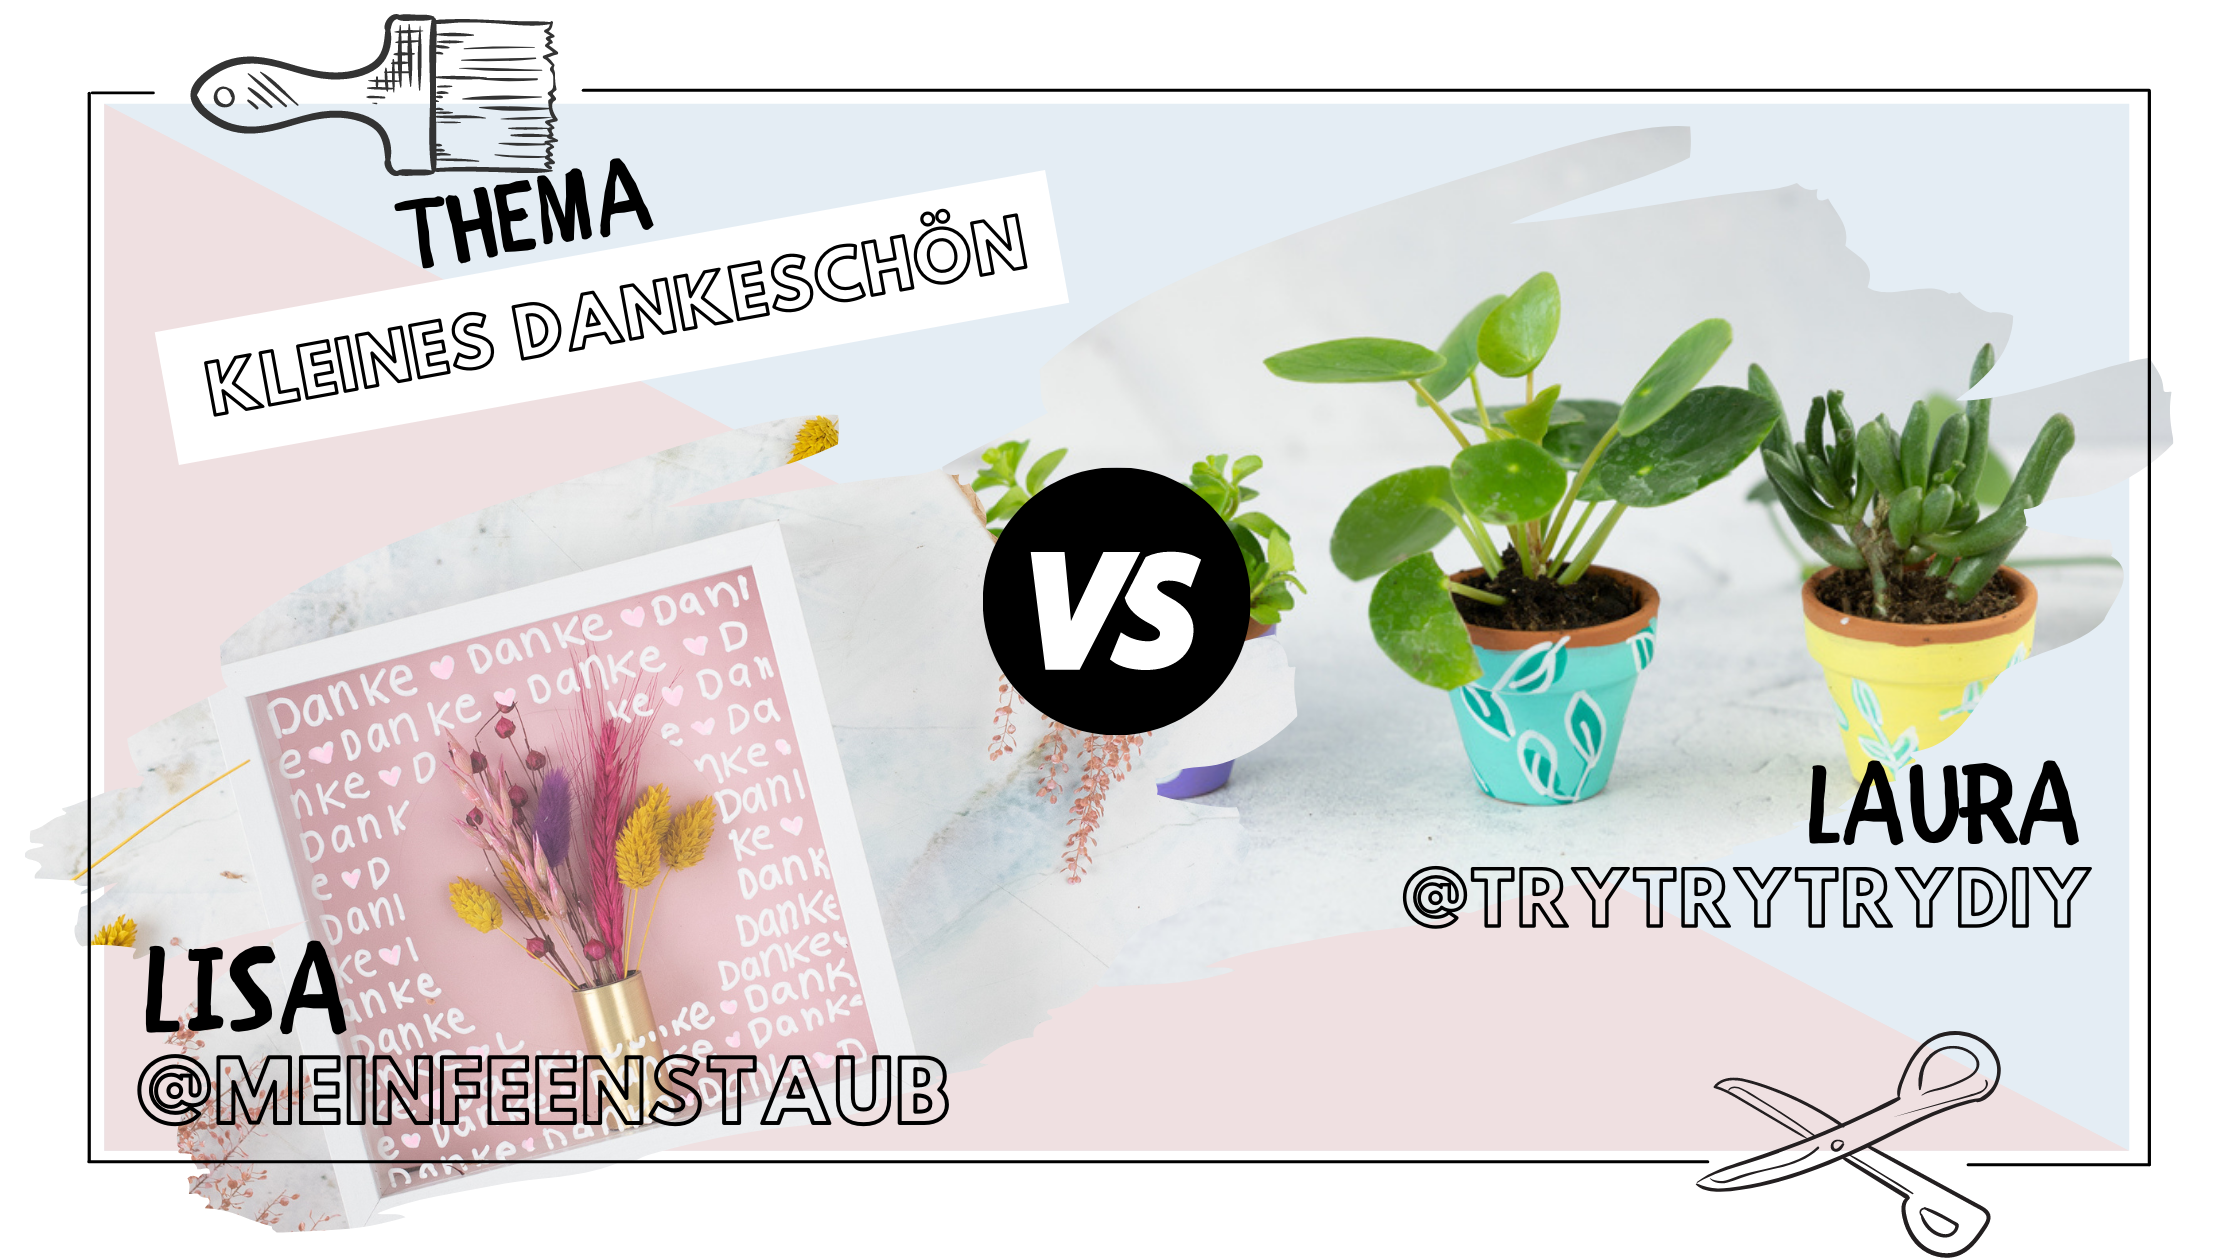
It continues with the #DIYYearChallenge, which I organize together with Laura from trytrytry! Throughout the year I get creative with Laura from trytrytry on a given topic (always on the 10th of the month) and you can vote on Instagram who has implemented the topic better (with a raffle!).
Today that is Theme “Thank you”. Laura and I have come up with creative gift ideas that can be given as a small thank you for a birthday, Mother’s Day or just because.
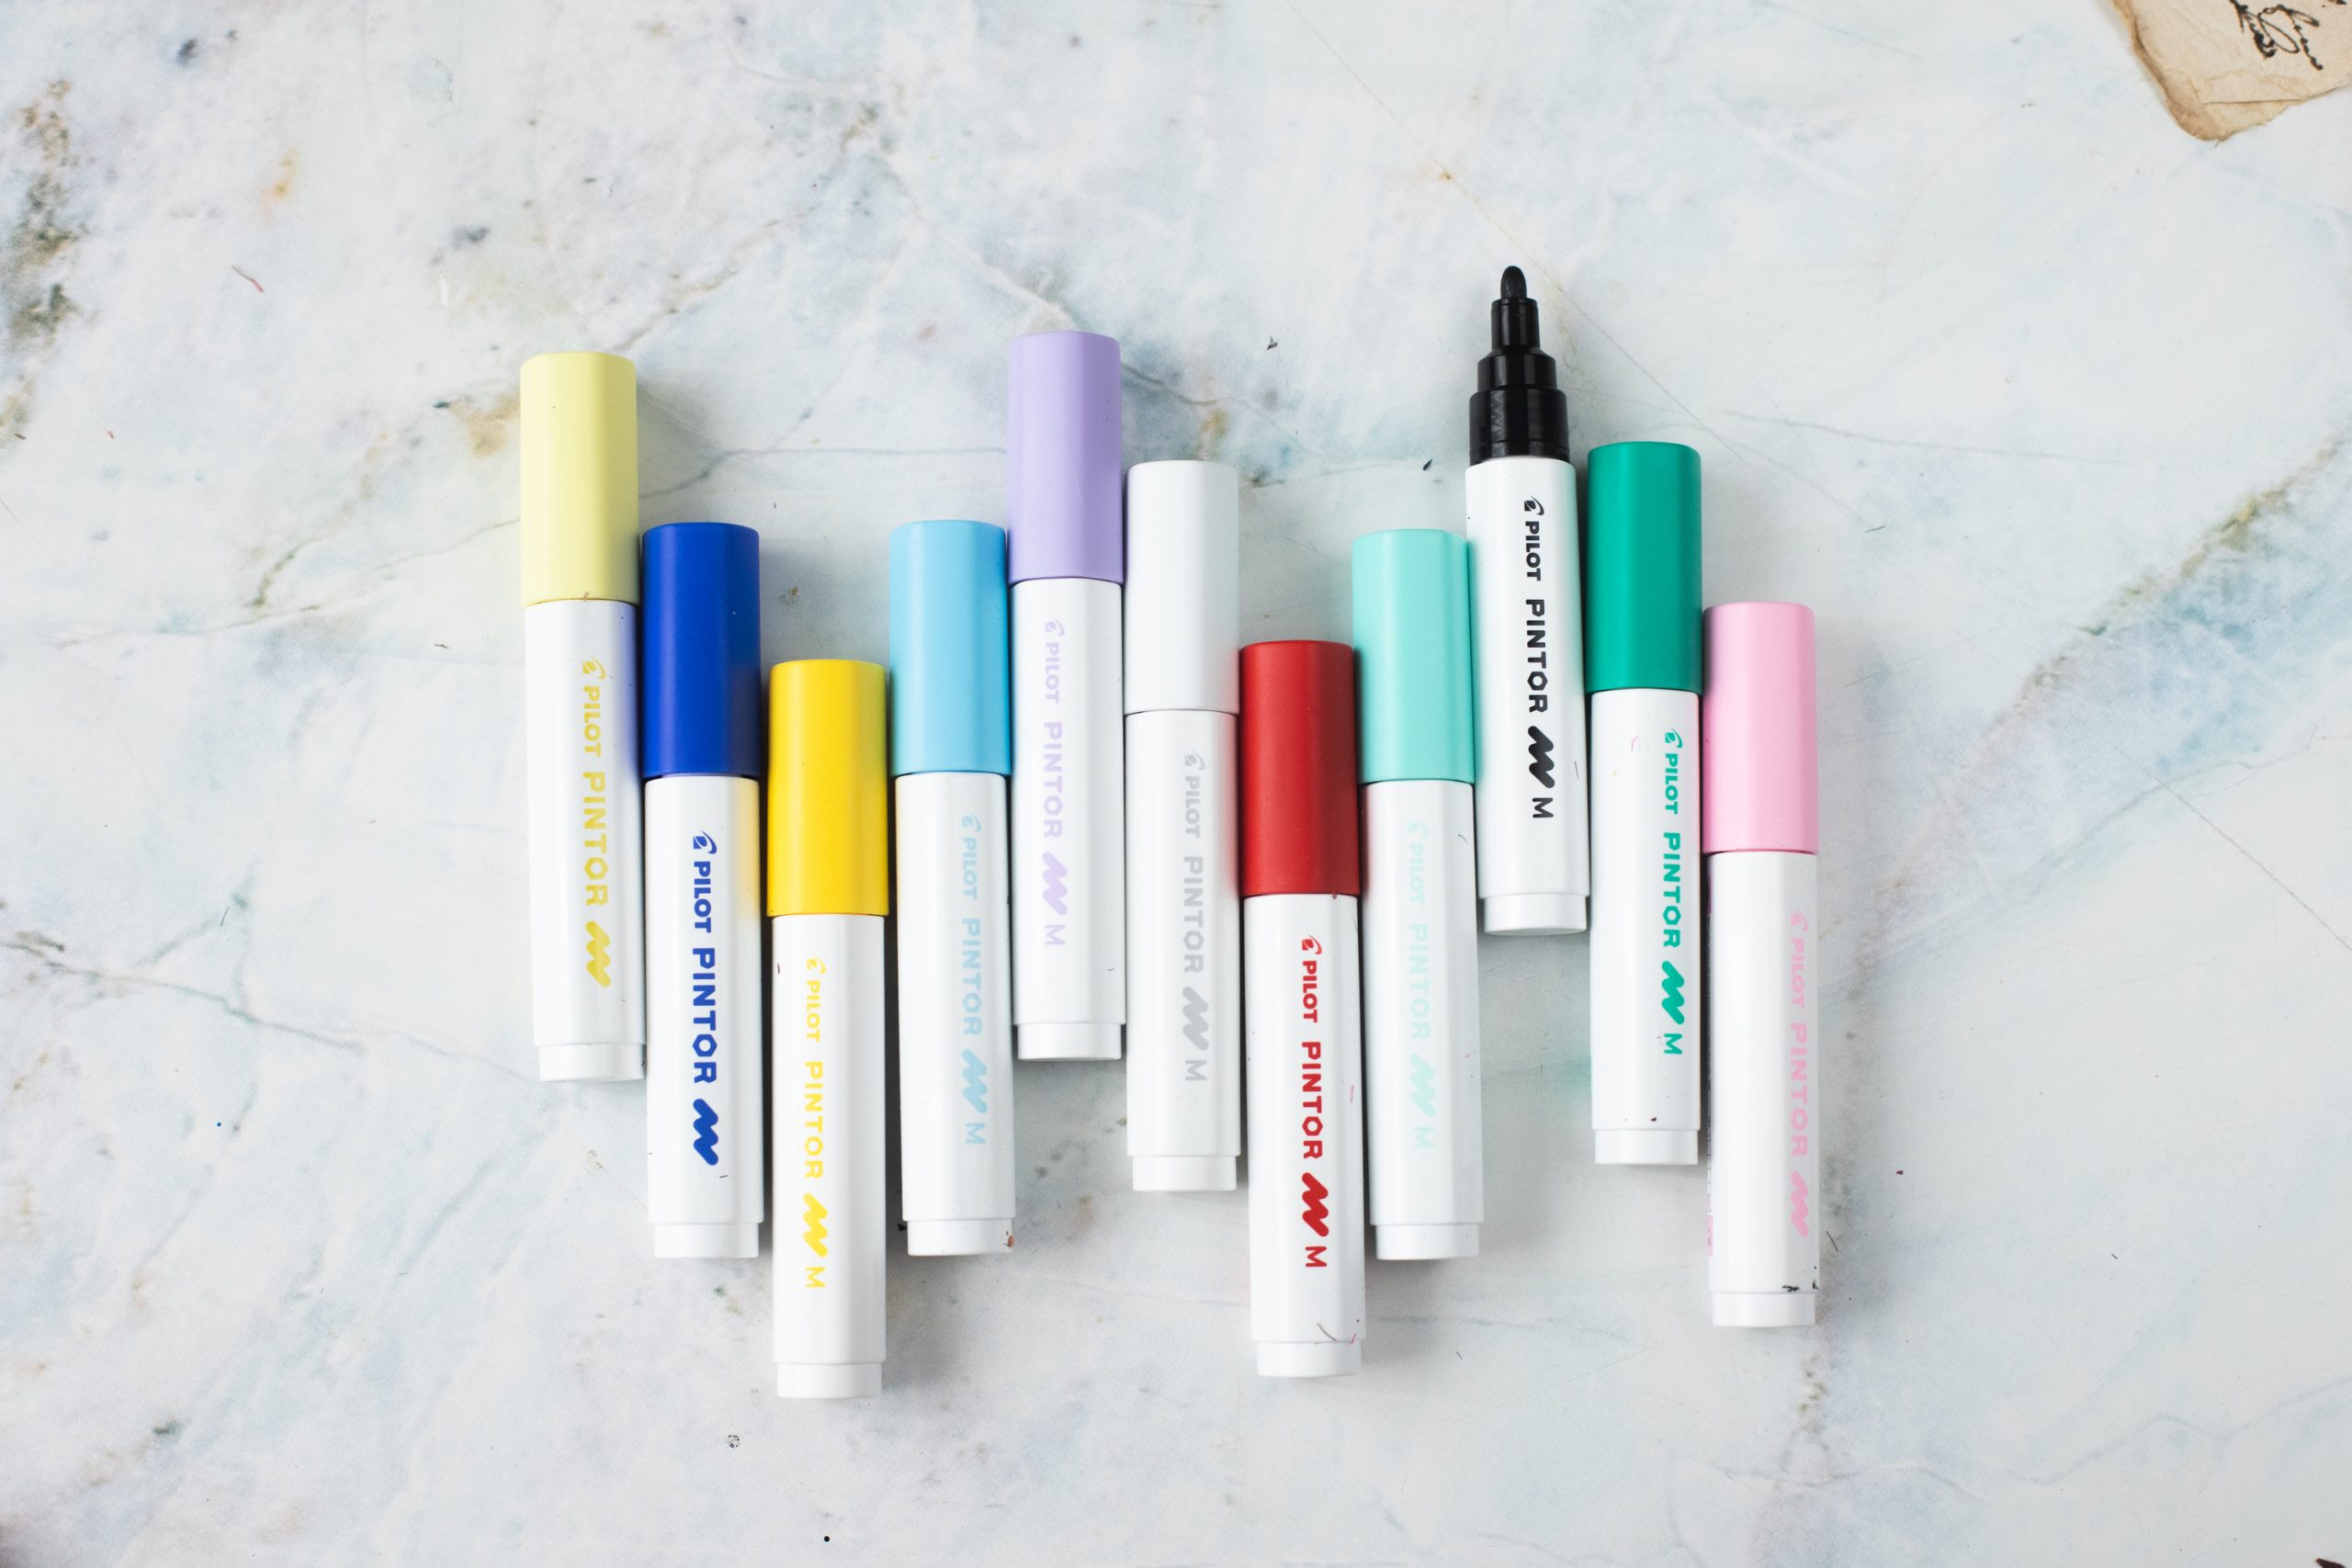
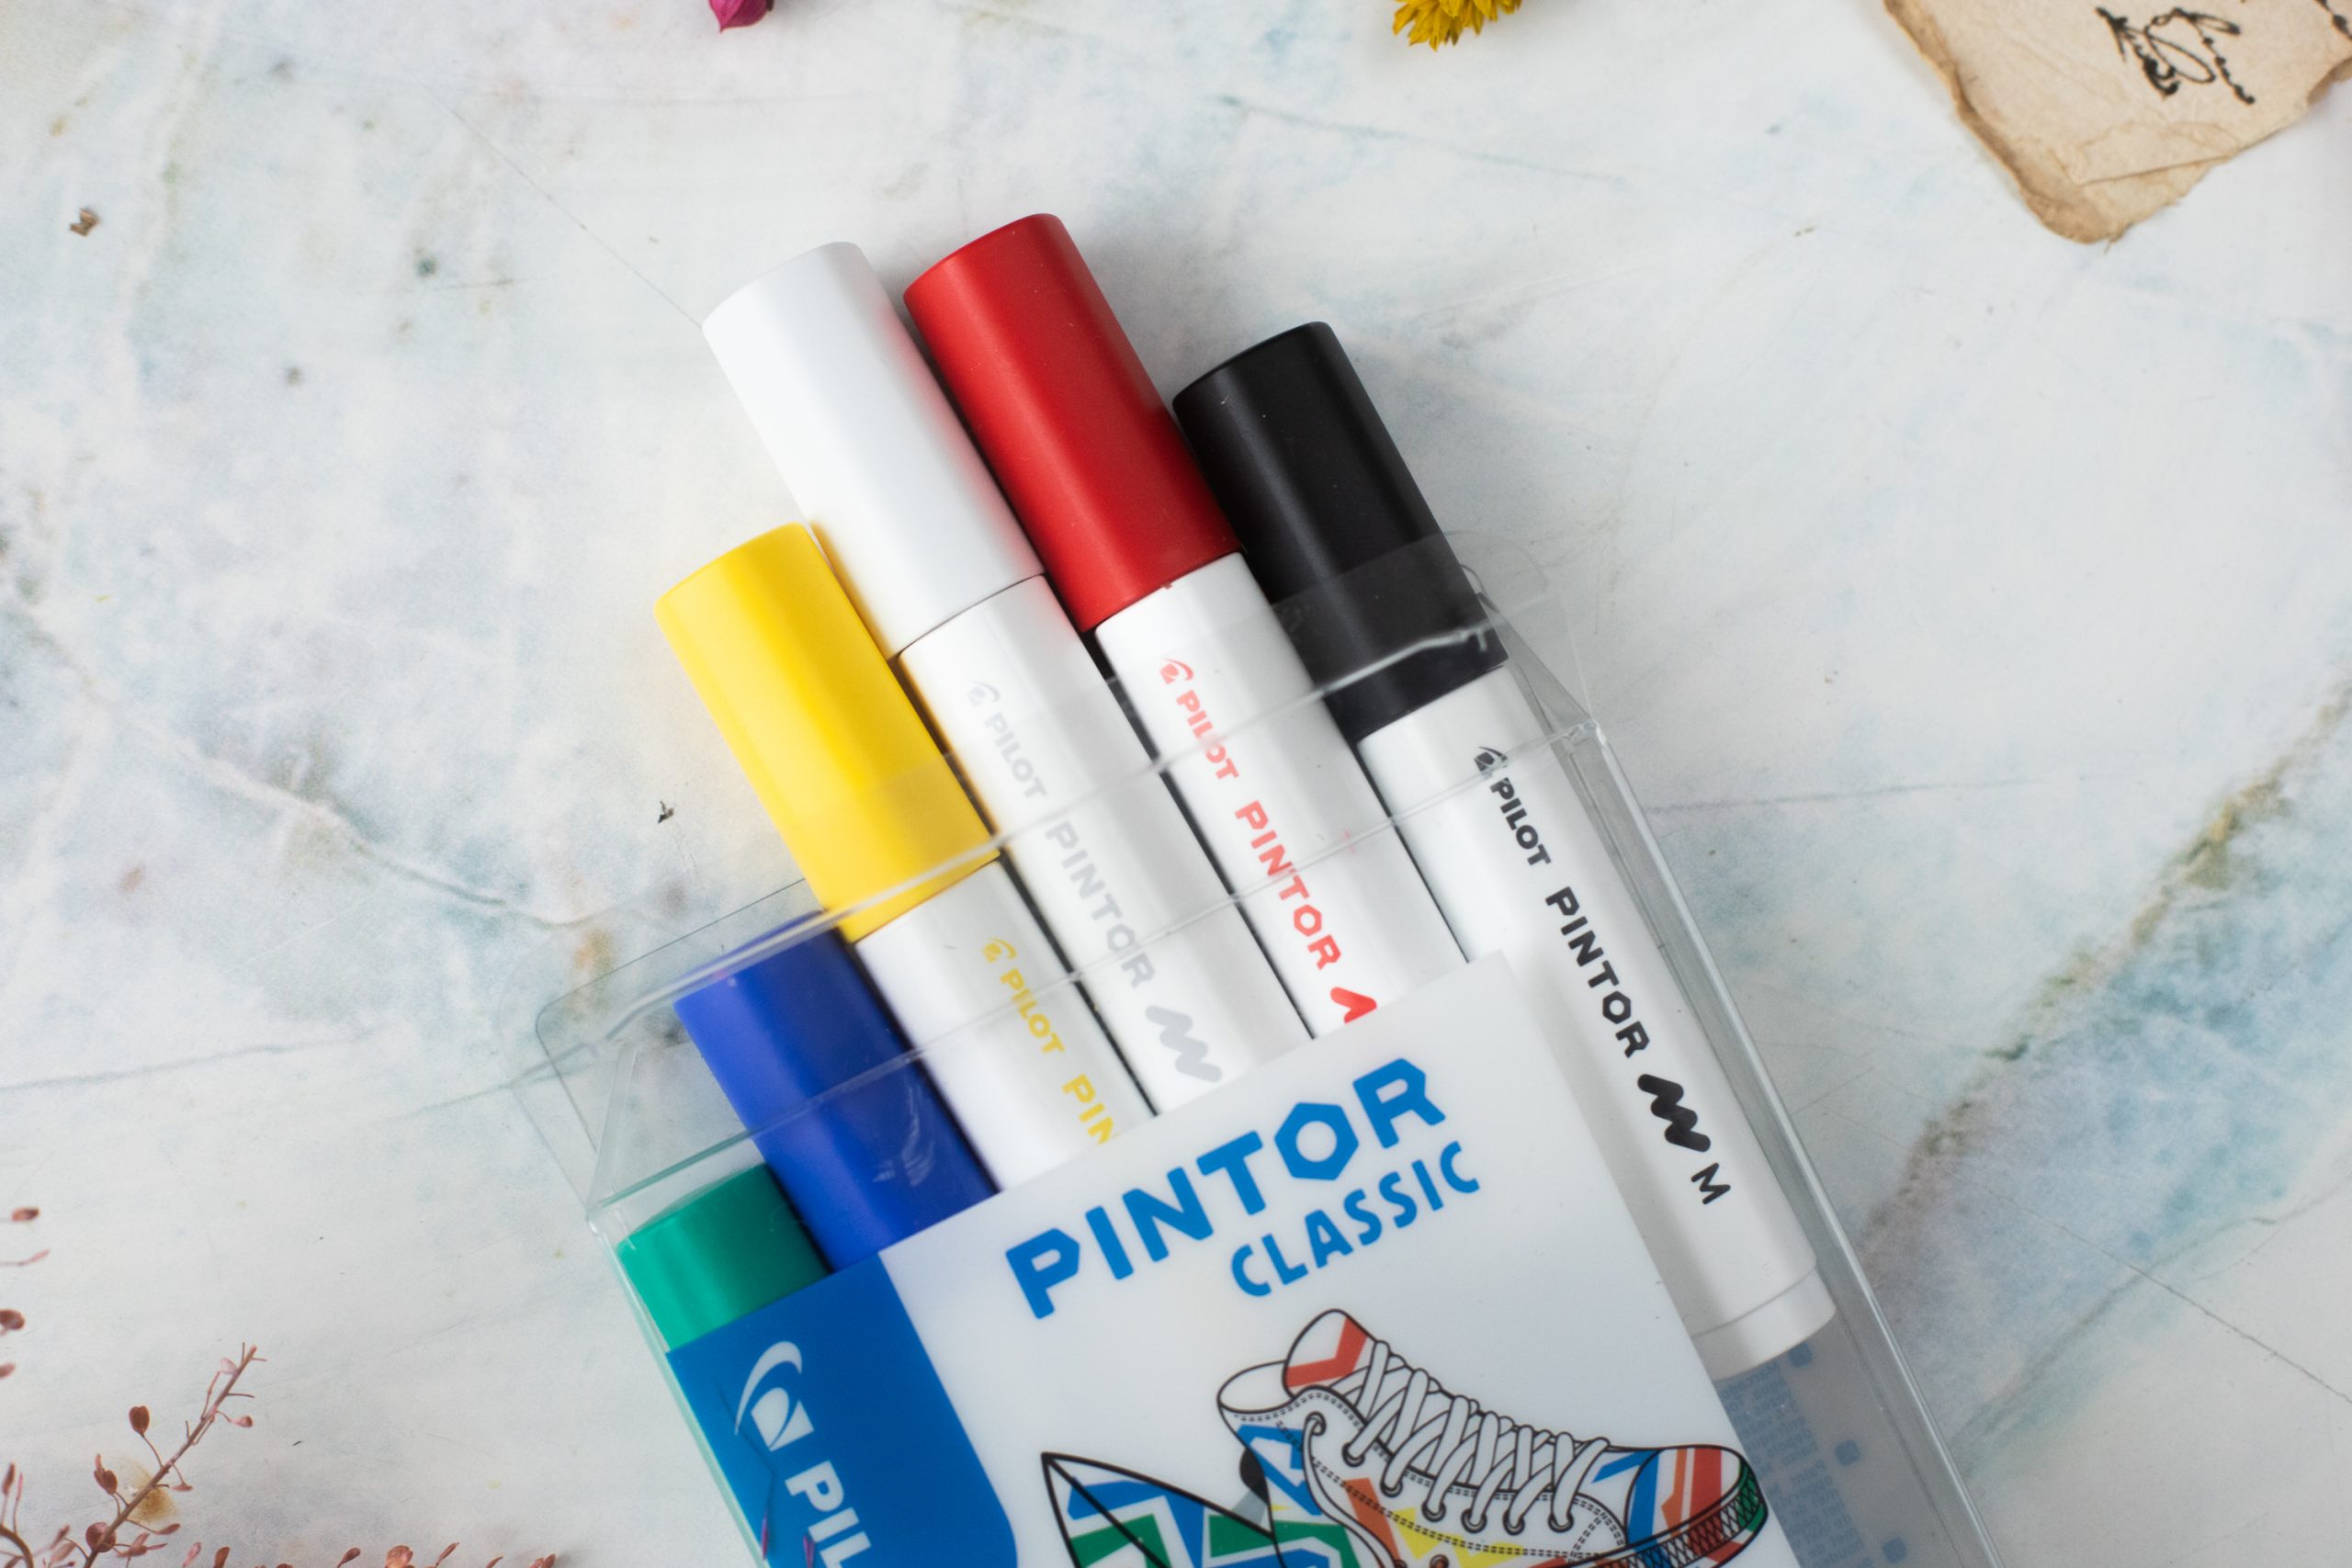
Our partner this month is PILOT. PILOT has provided us with great sets of PINTOR markers. These are creative markers that you can use to get creative on a variety of surfaces. And the color choices are so pretty!
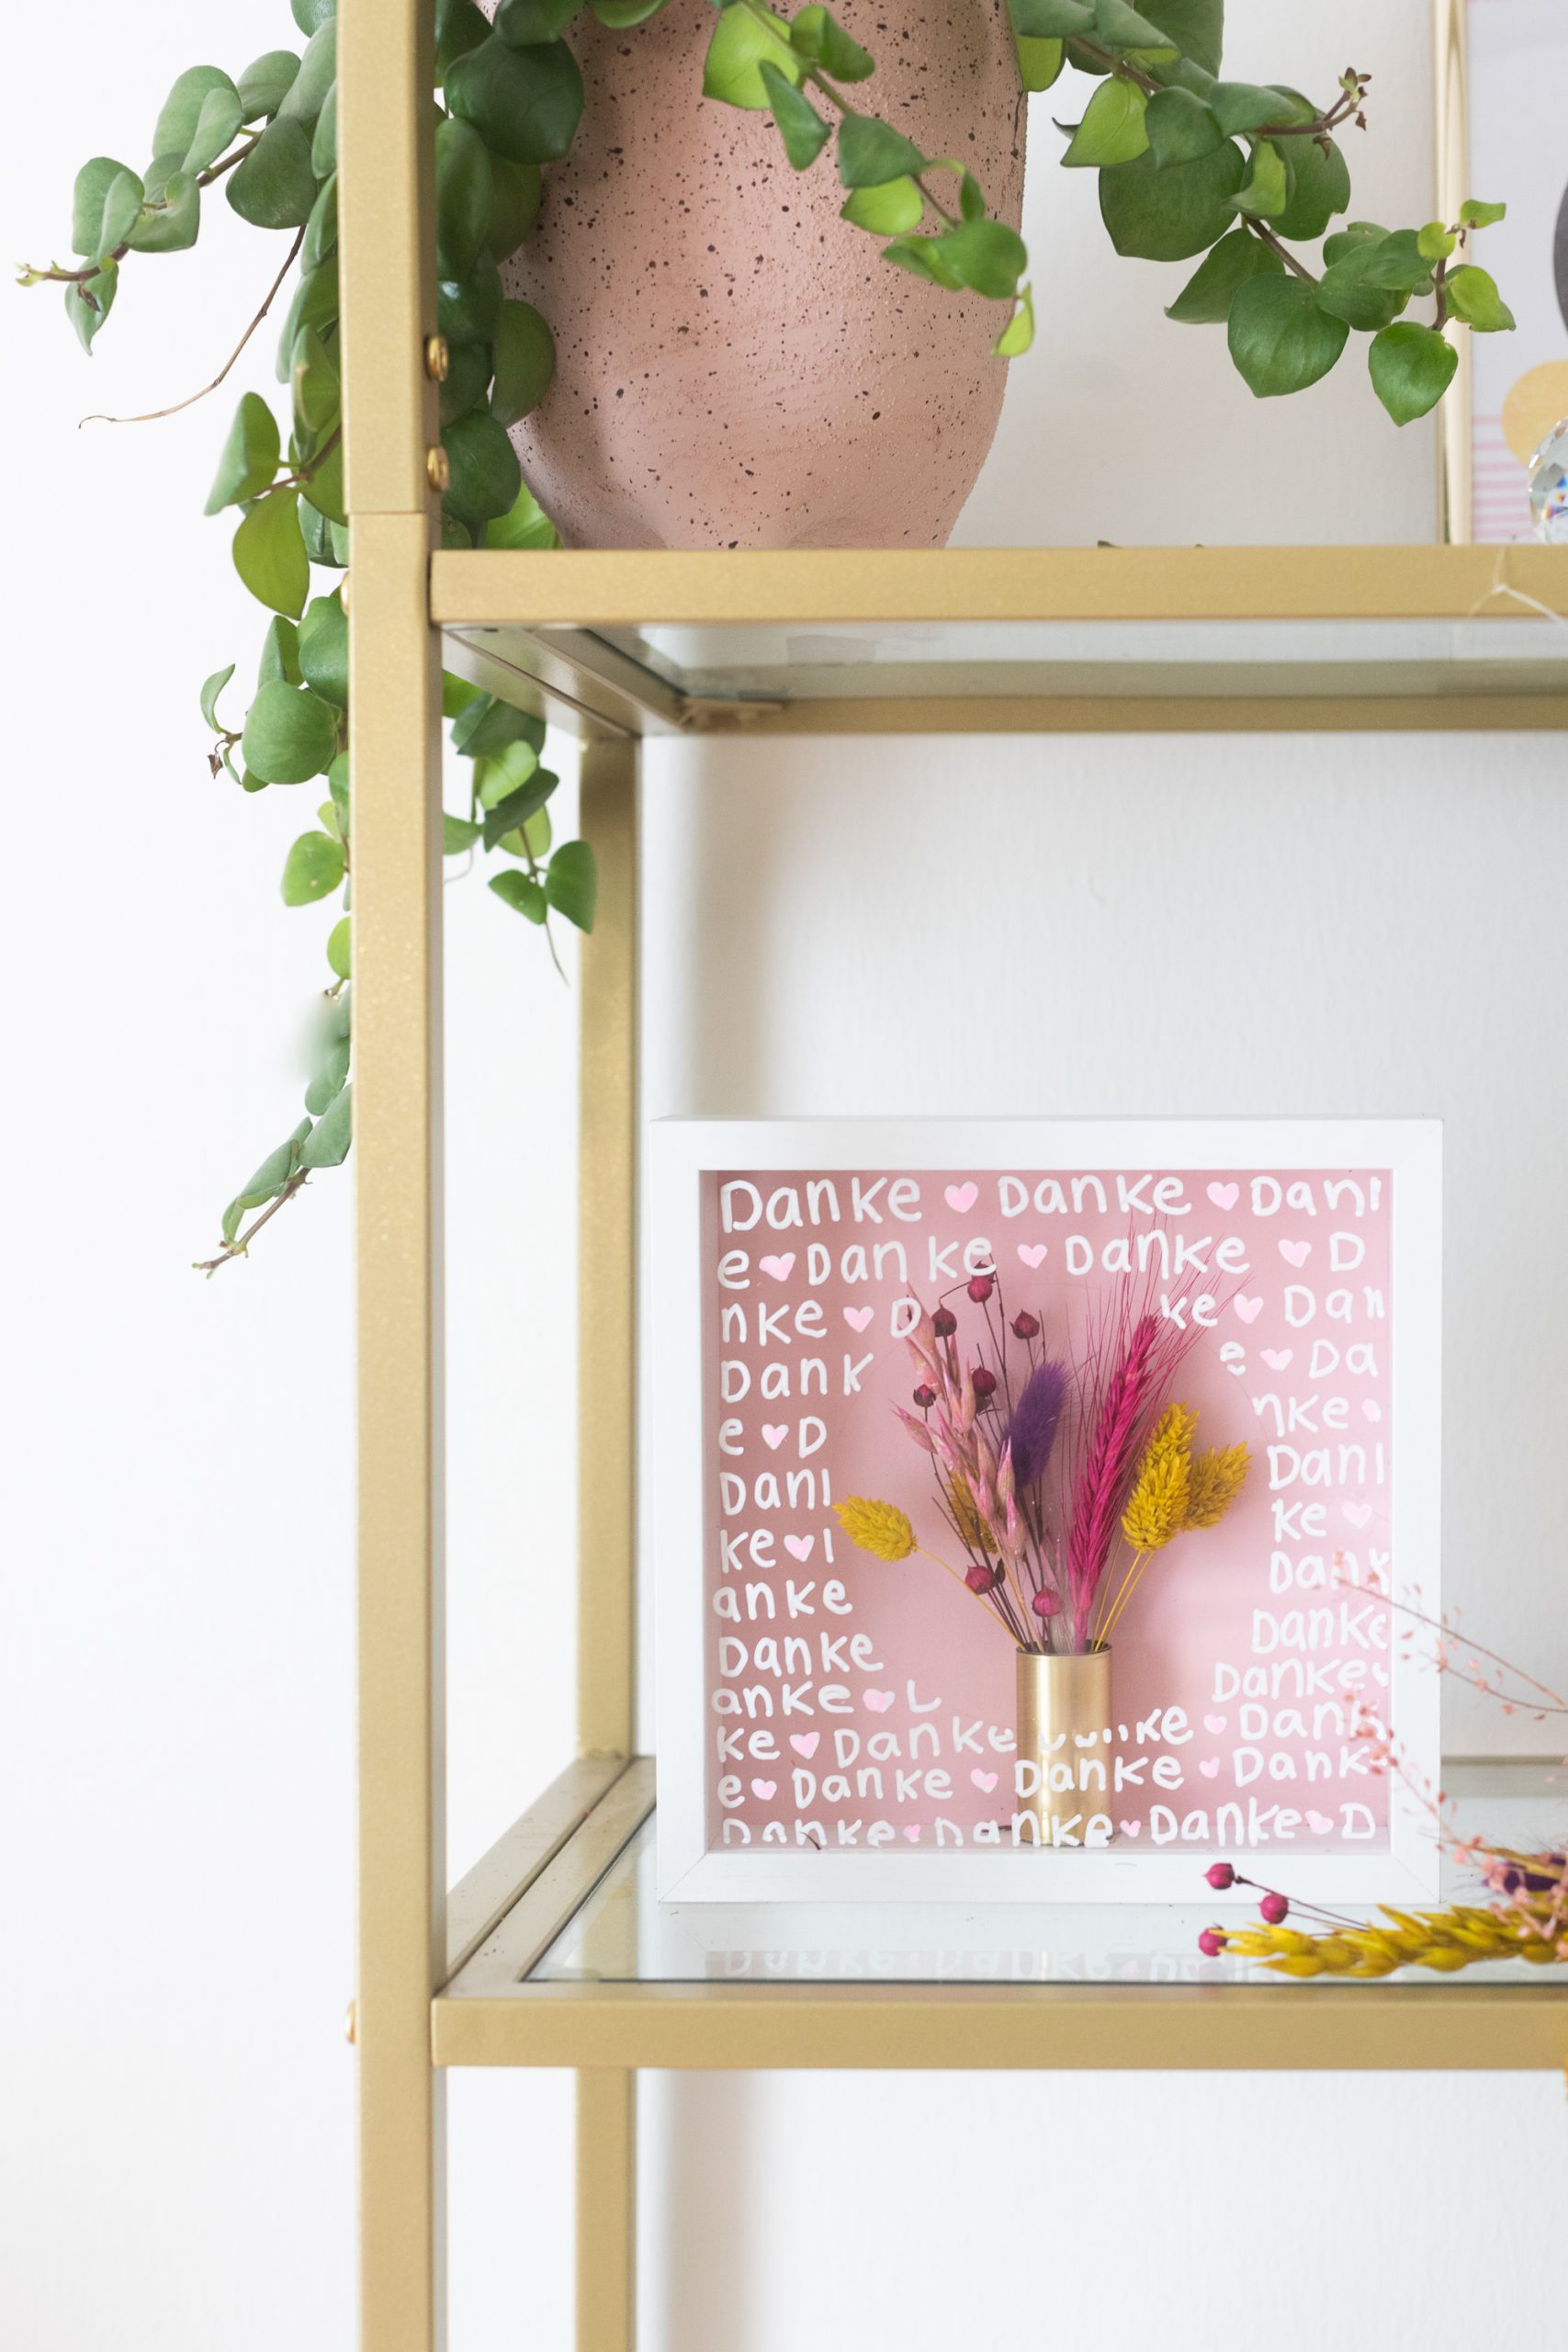
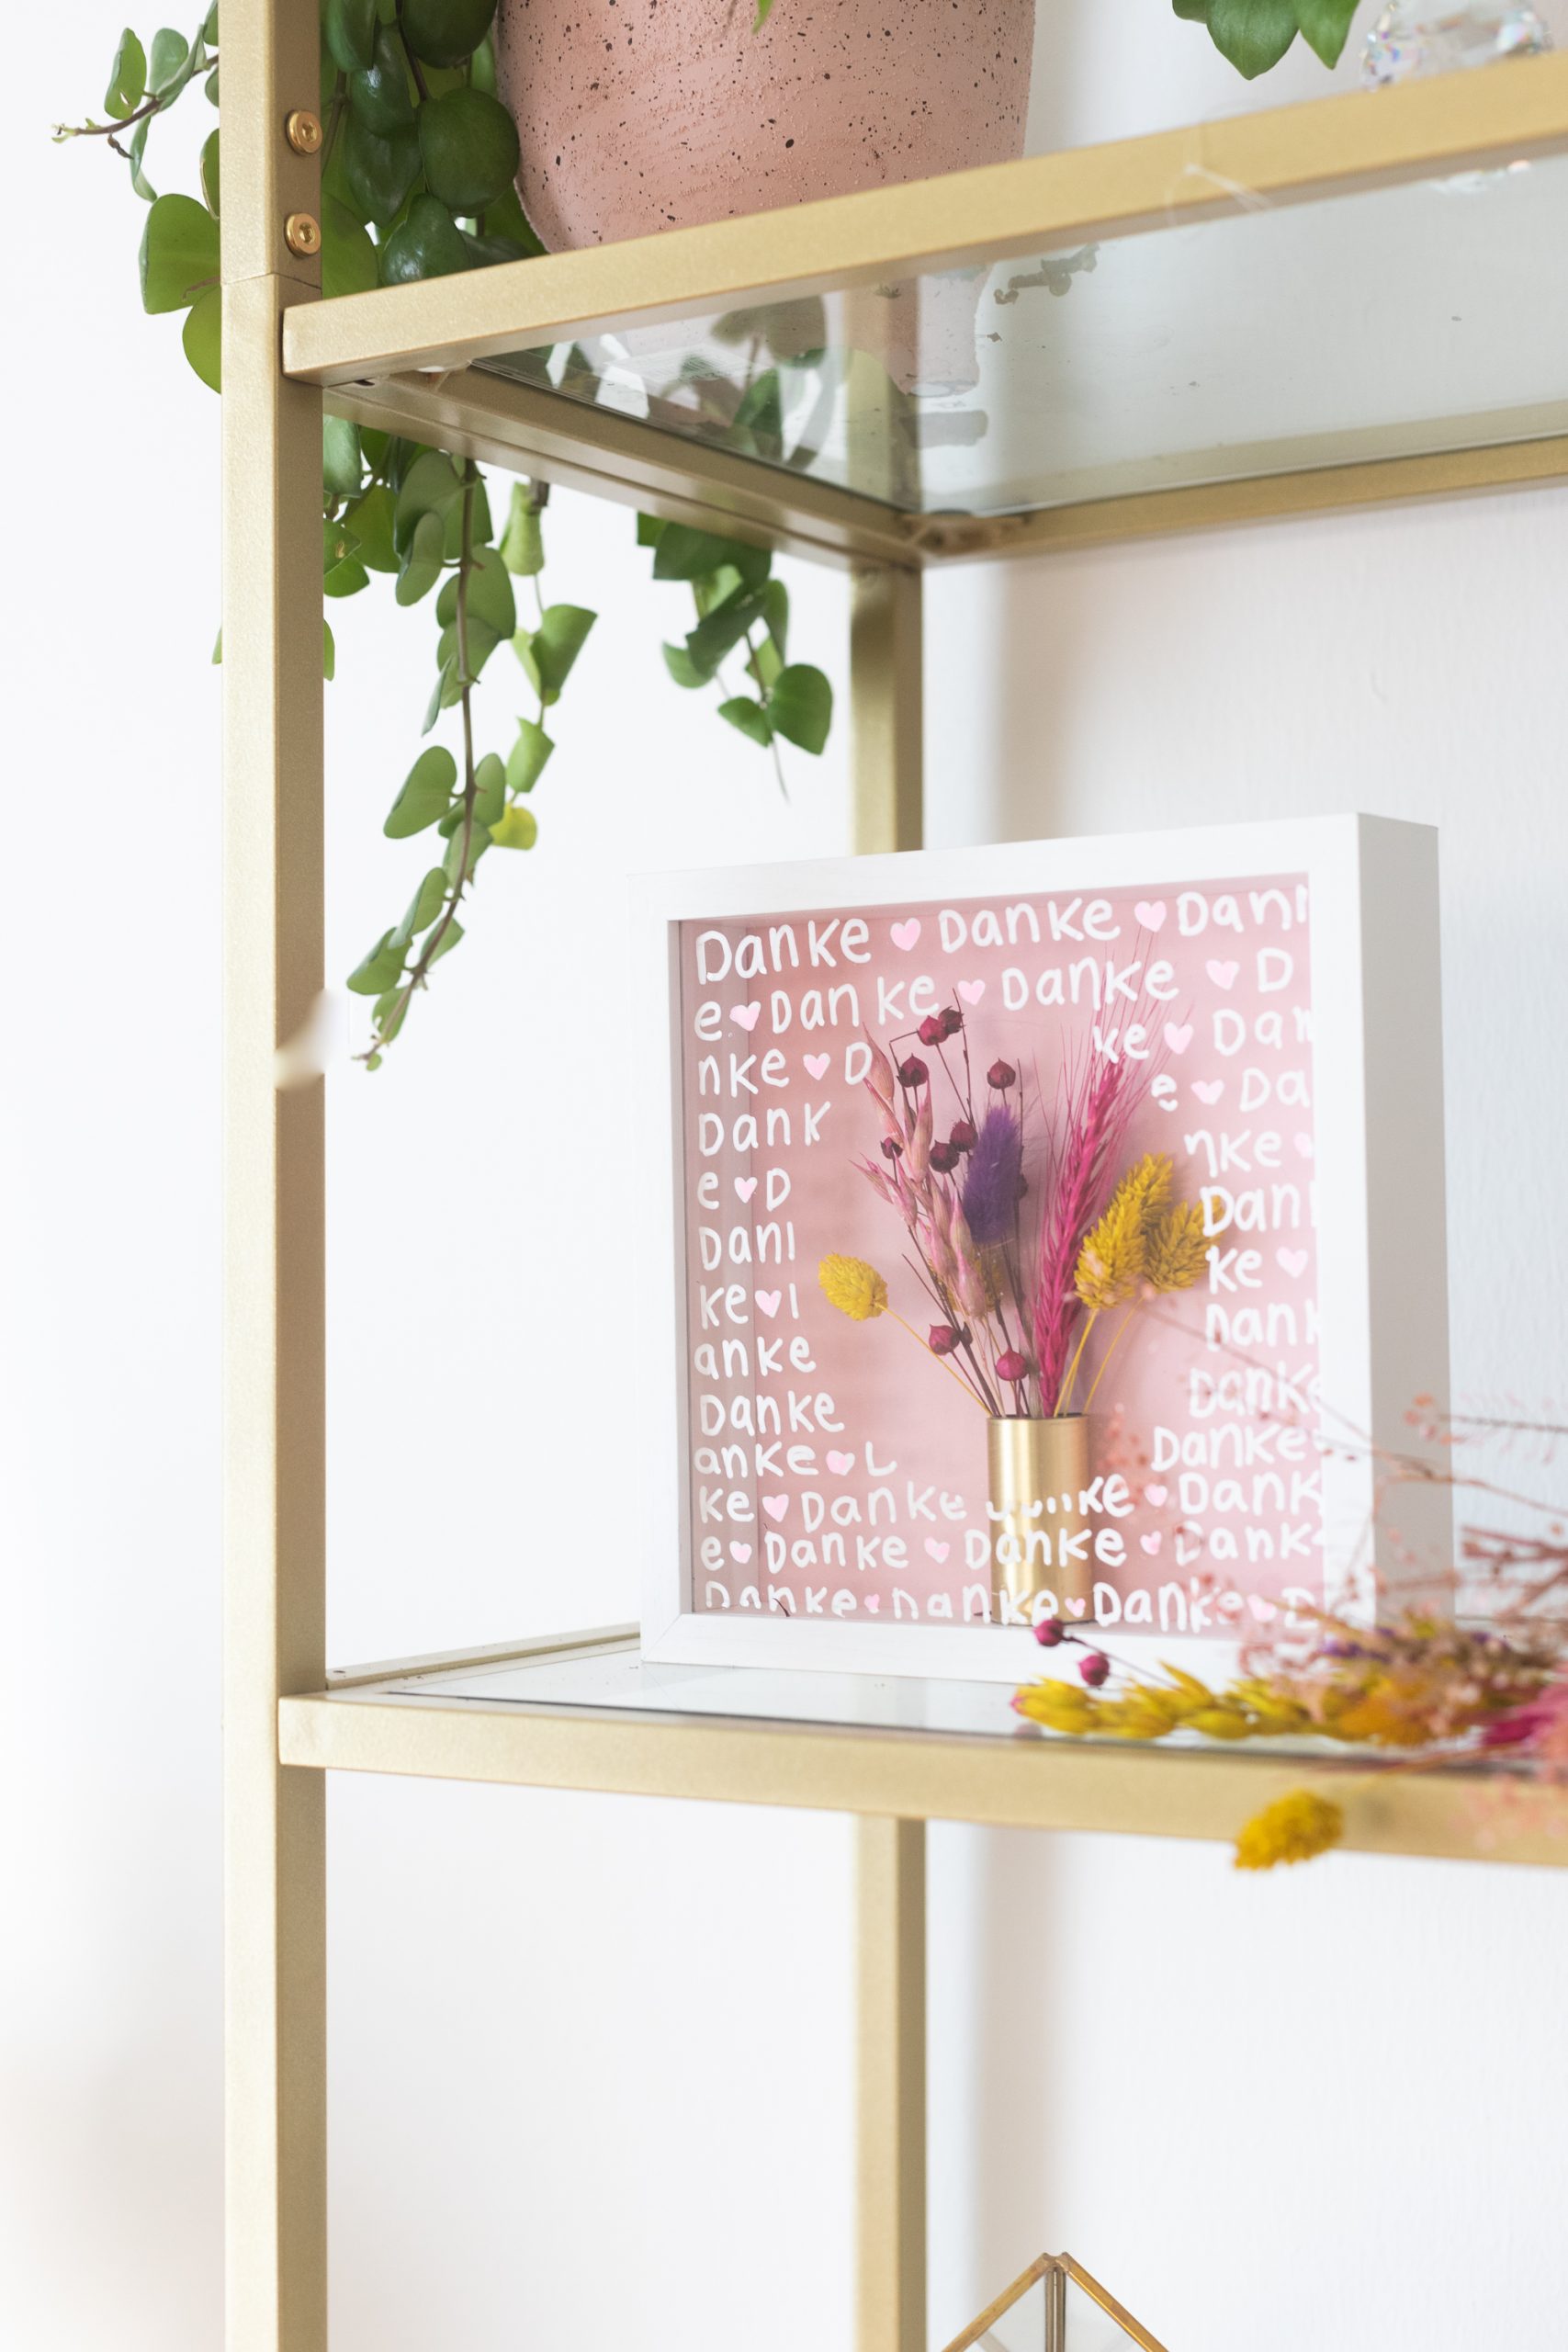
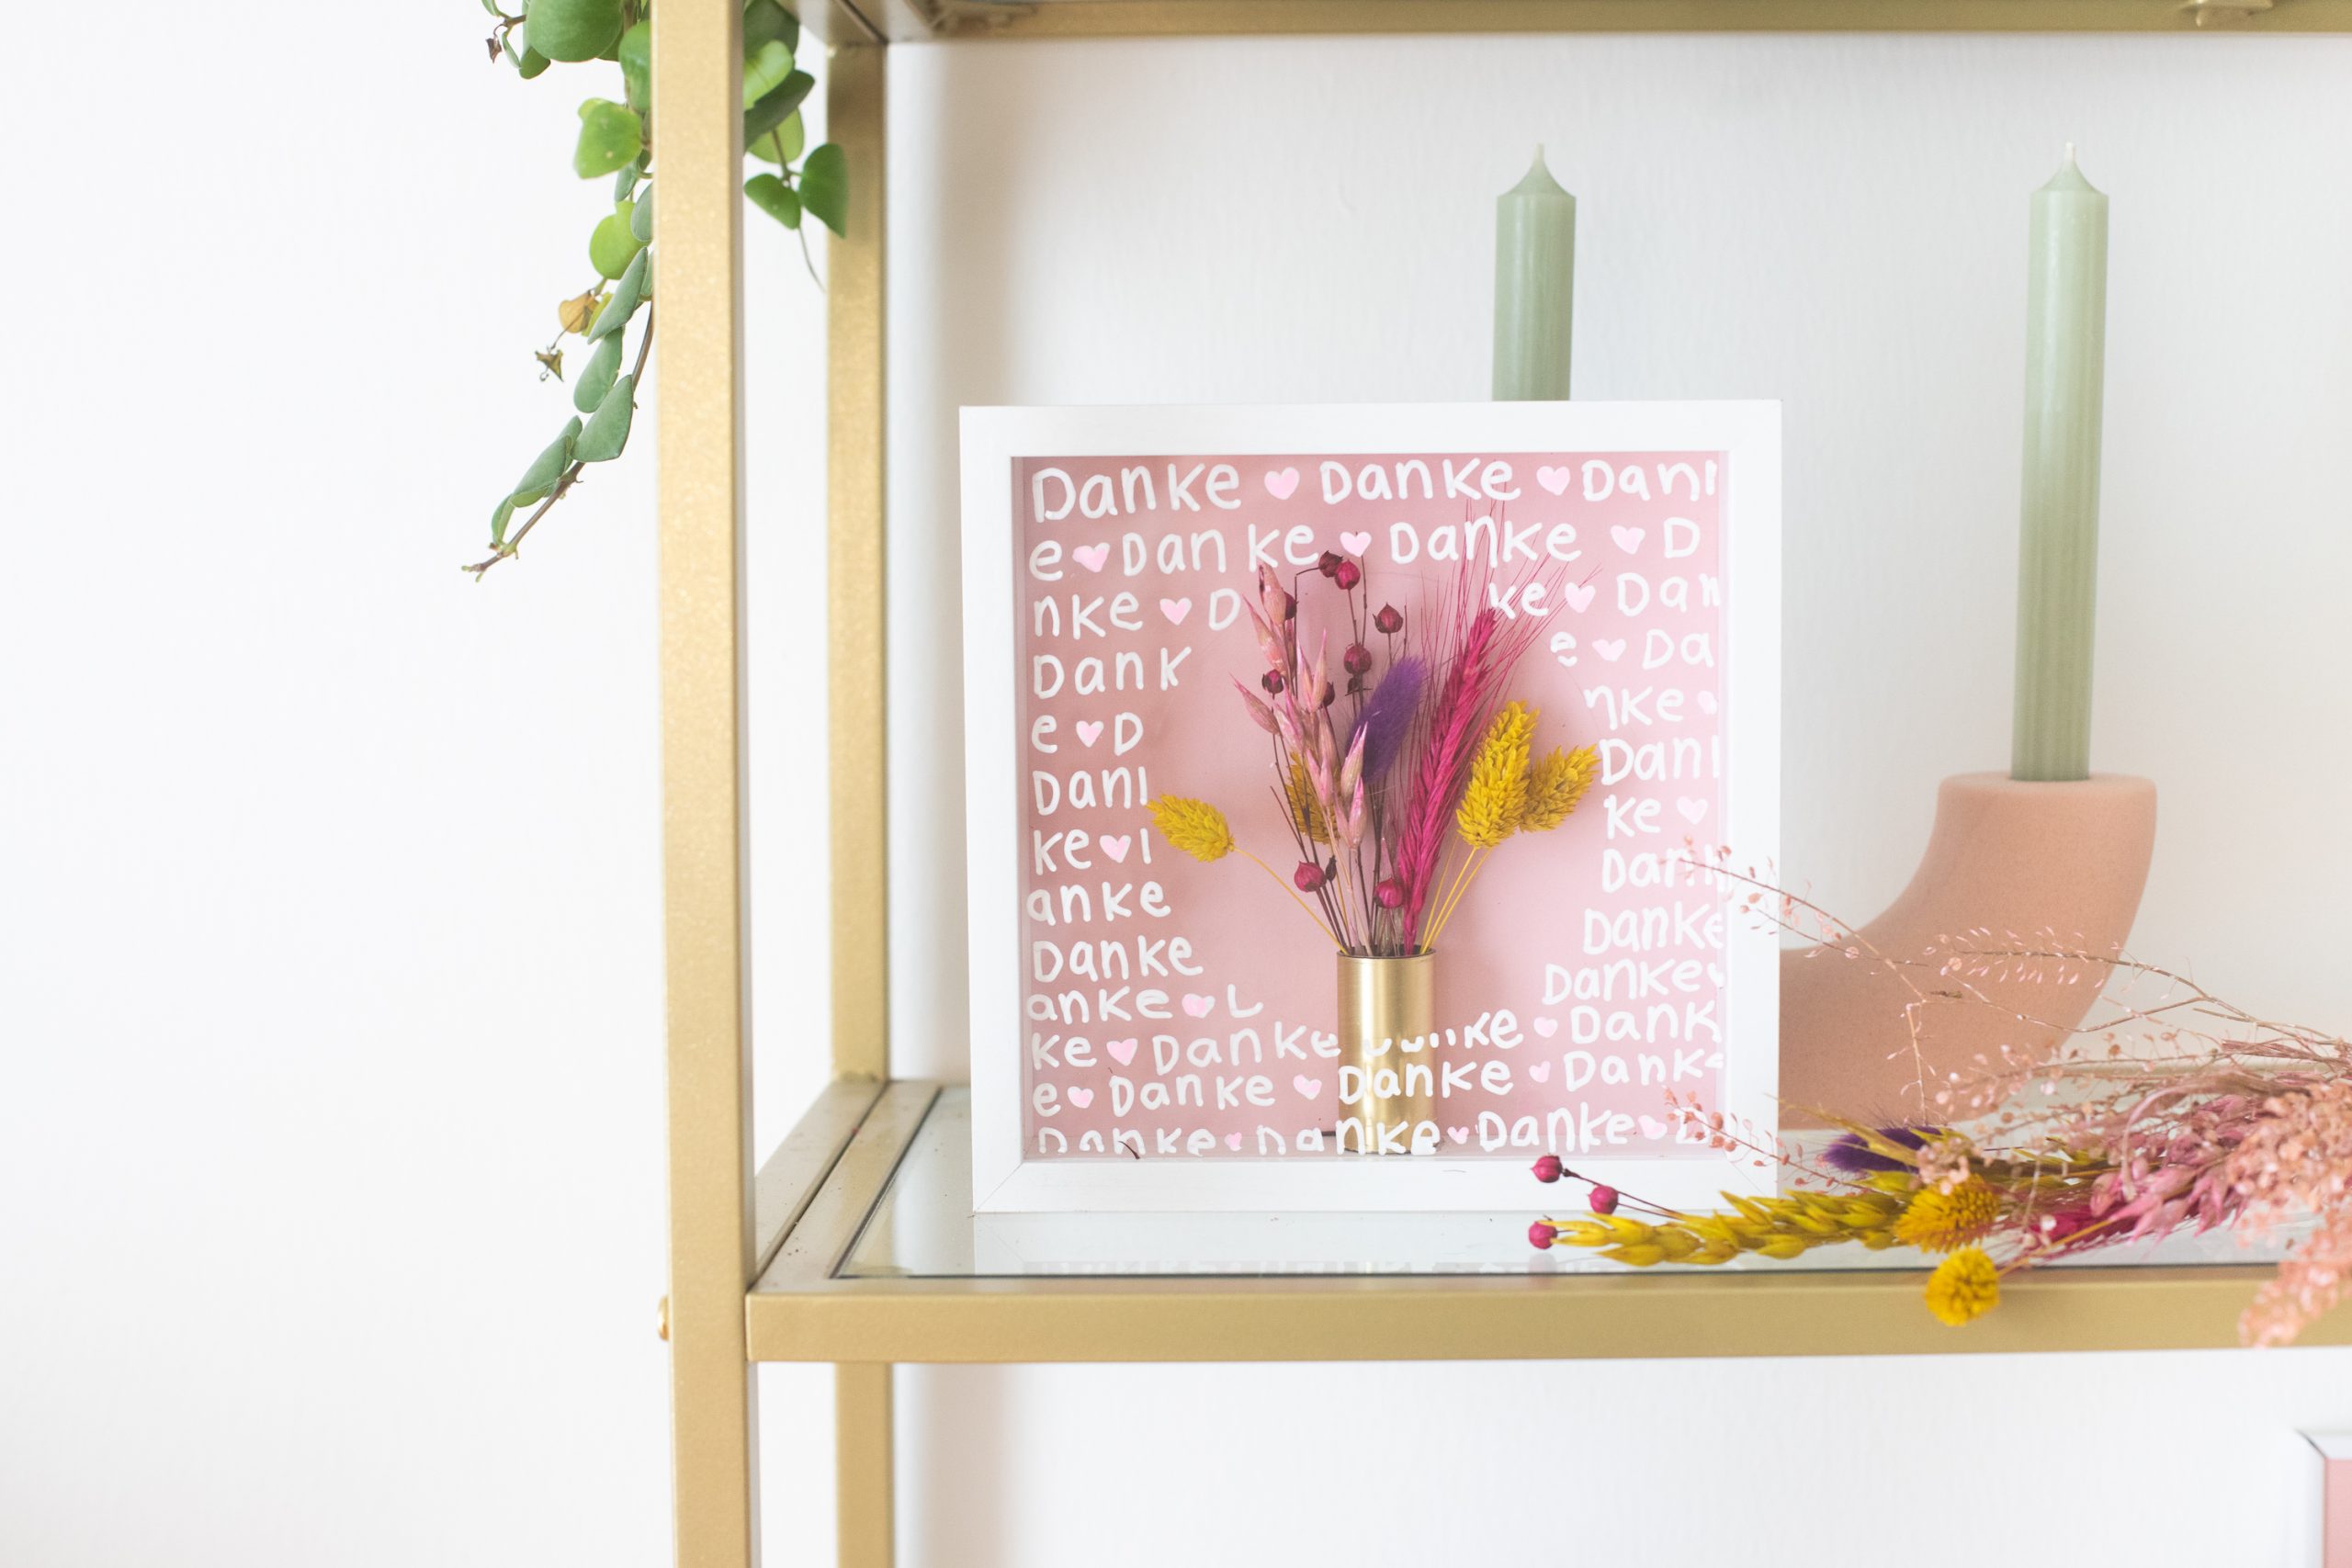
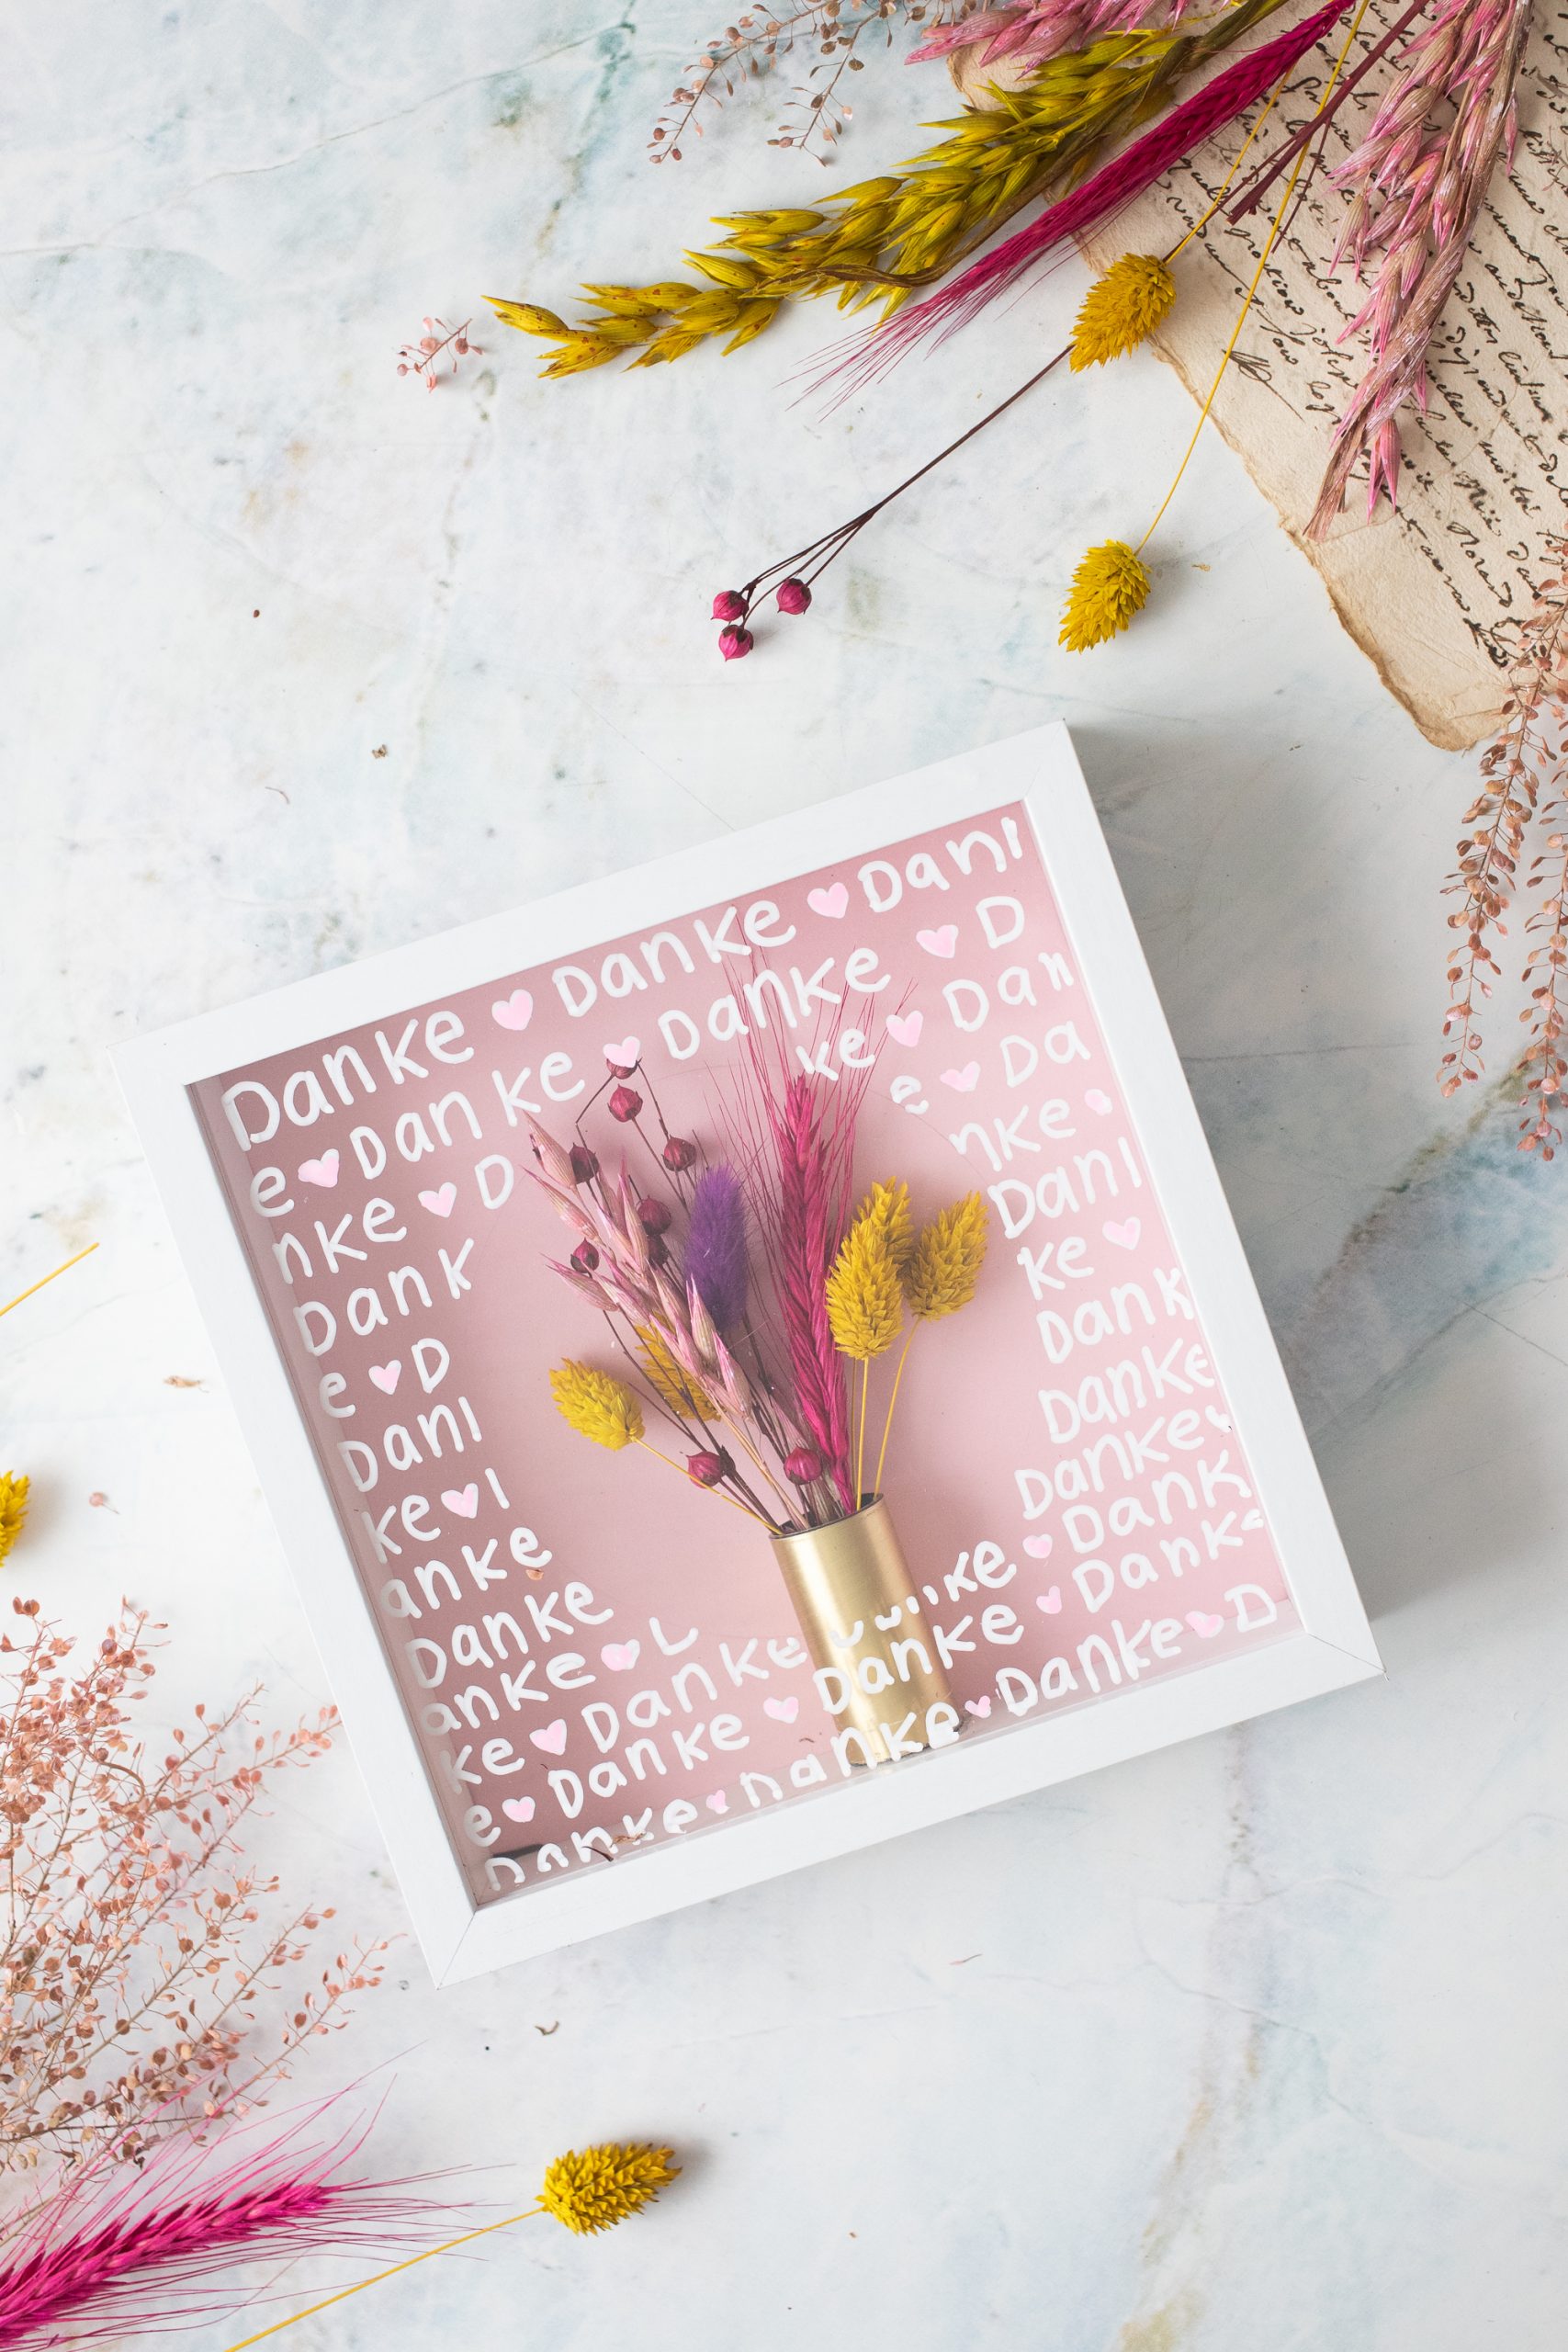
To our Theme “Thank you” I have a DIY gift idea in a picture frame with dried flowers crafted. This idea is easy to implement and looks so beautiful. The special highlight is the “Thank you” on the picture frame, which I wrote with PINTOR markers. I’ll show you how it’s done!
Laura has also implemented the topic “Little Thank You”, have a look.
ABOUT OUR PARTNER PILOT & THE PINTOR MARKER
The PINTOR markers are available in 30 colors in four different line widths (EF, F, M and B). The line widths EF and F are available in 24 colors and the line widths M and B in 30 colors.
The choice of colors is so beautiful – you can either buy the colors individually or as sets of 6 markers each: Classic, Creative, Pastel, Metallic and Neon. For this DIY I used the Classic set. I drew the hearts in pink with the PINTOR marker from the pastel set.
You can find lots of creative ideas with the PINTOR on the PILOT website, here you will find DIY inspiration for everything to do with the PINTOR marker.
ABOUT THE DIYYEARCHALLENGE
Every month, Laura from trytrytry and Lisa from meinfeenstaub face a new DIY challenge on a given topic. Our monthly sponsor sends us the same material – and everyone comes up with a DIY idea from the same material – the community then votes on who wins and has implemented the topic better! Each month you can win the DIY pack we created by voting on Instagram to see who won.
We love the concept and hope you enjoy it as much! We find it so exciting how differently a topic can be interpreted – and what you can get out of one and the same material.
Here you can see what we have come up with this month on the subject of “Little Thank You” with our partner Pilot – be sure to stop by Laura!
I’m a big fan of the two ideas as they turned out totally different. What I particularly love about our challenge: It shows how you can implement completely different ideas with one and the same product.
Here’s how it works: Tinker a little thank you in a picture frame
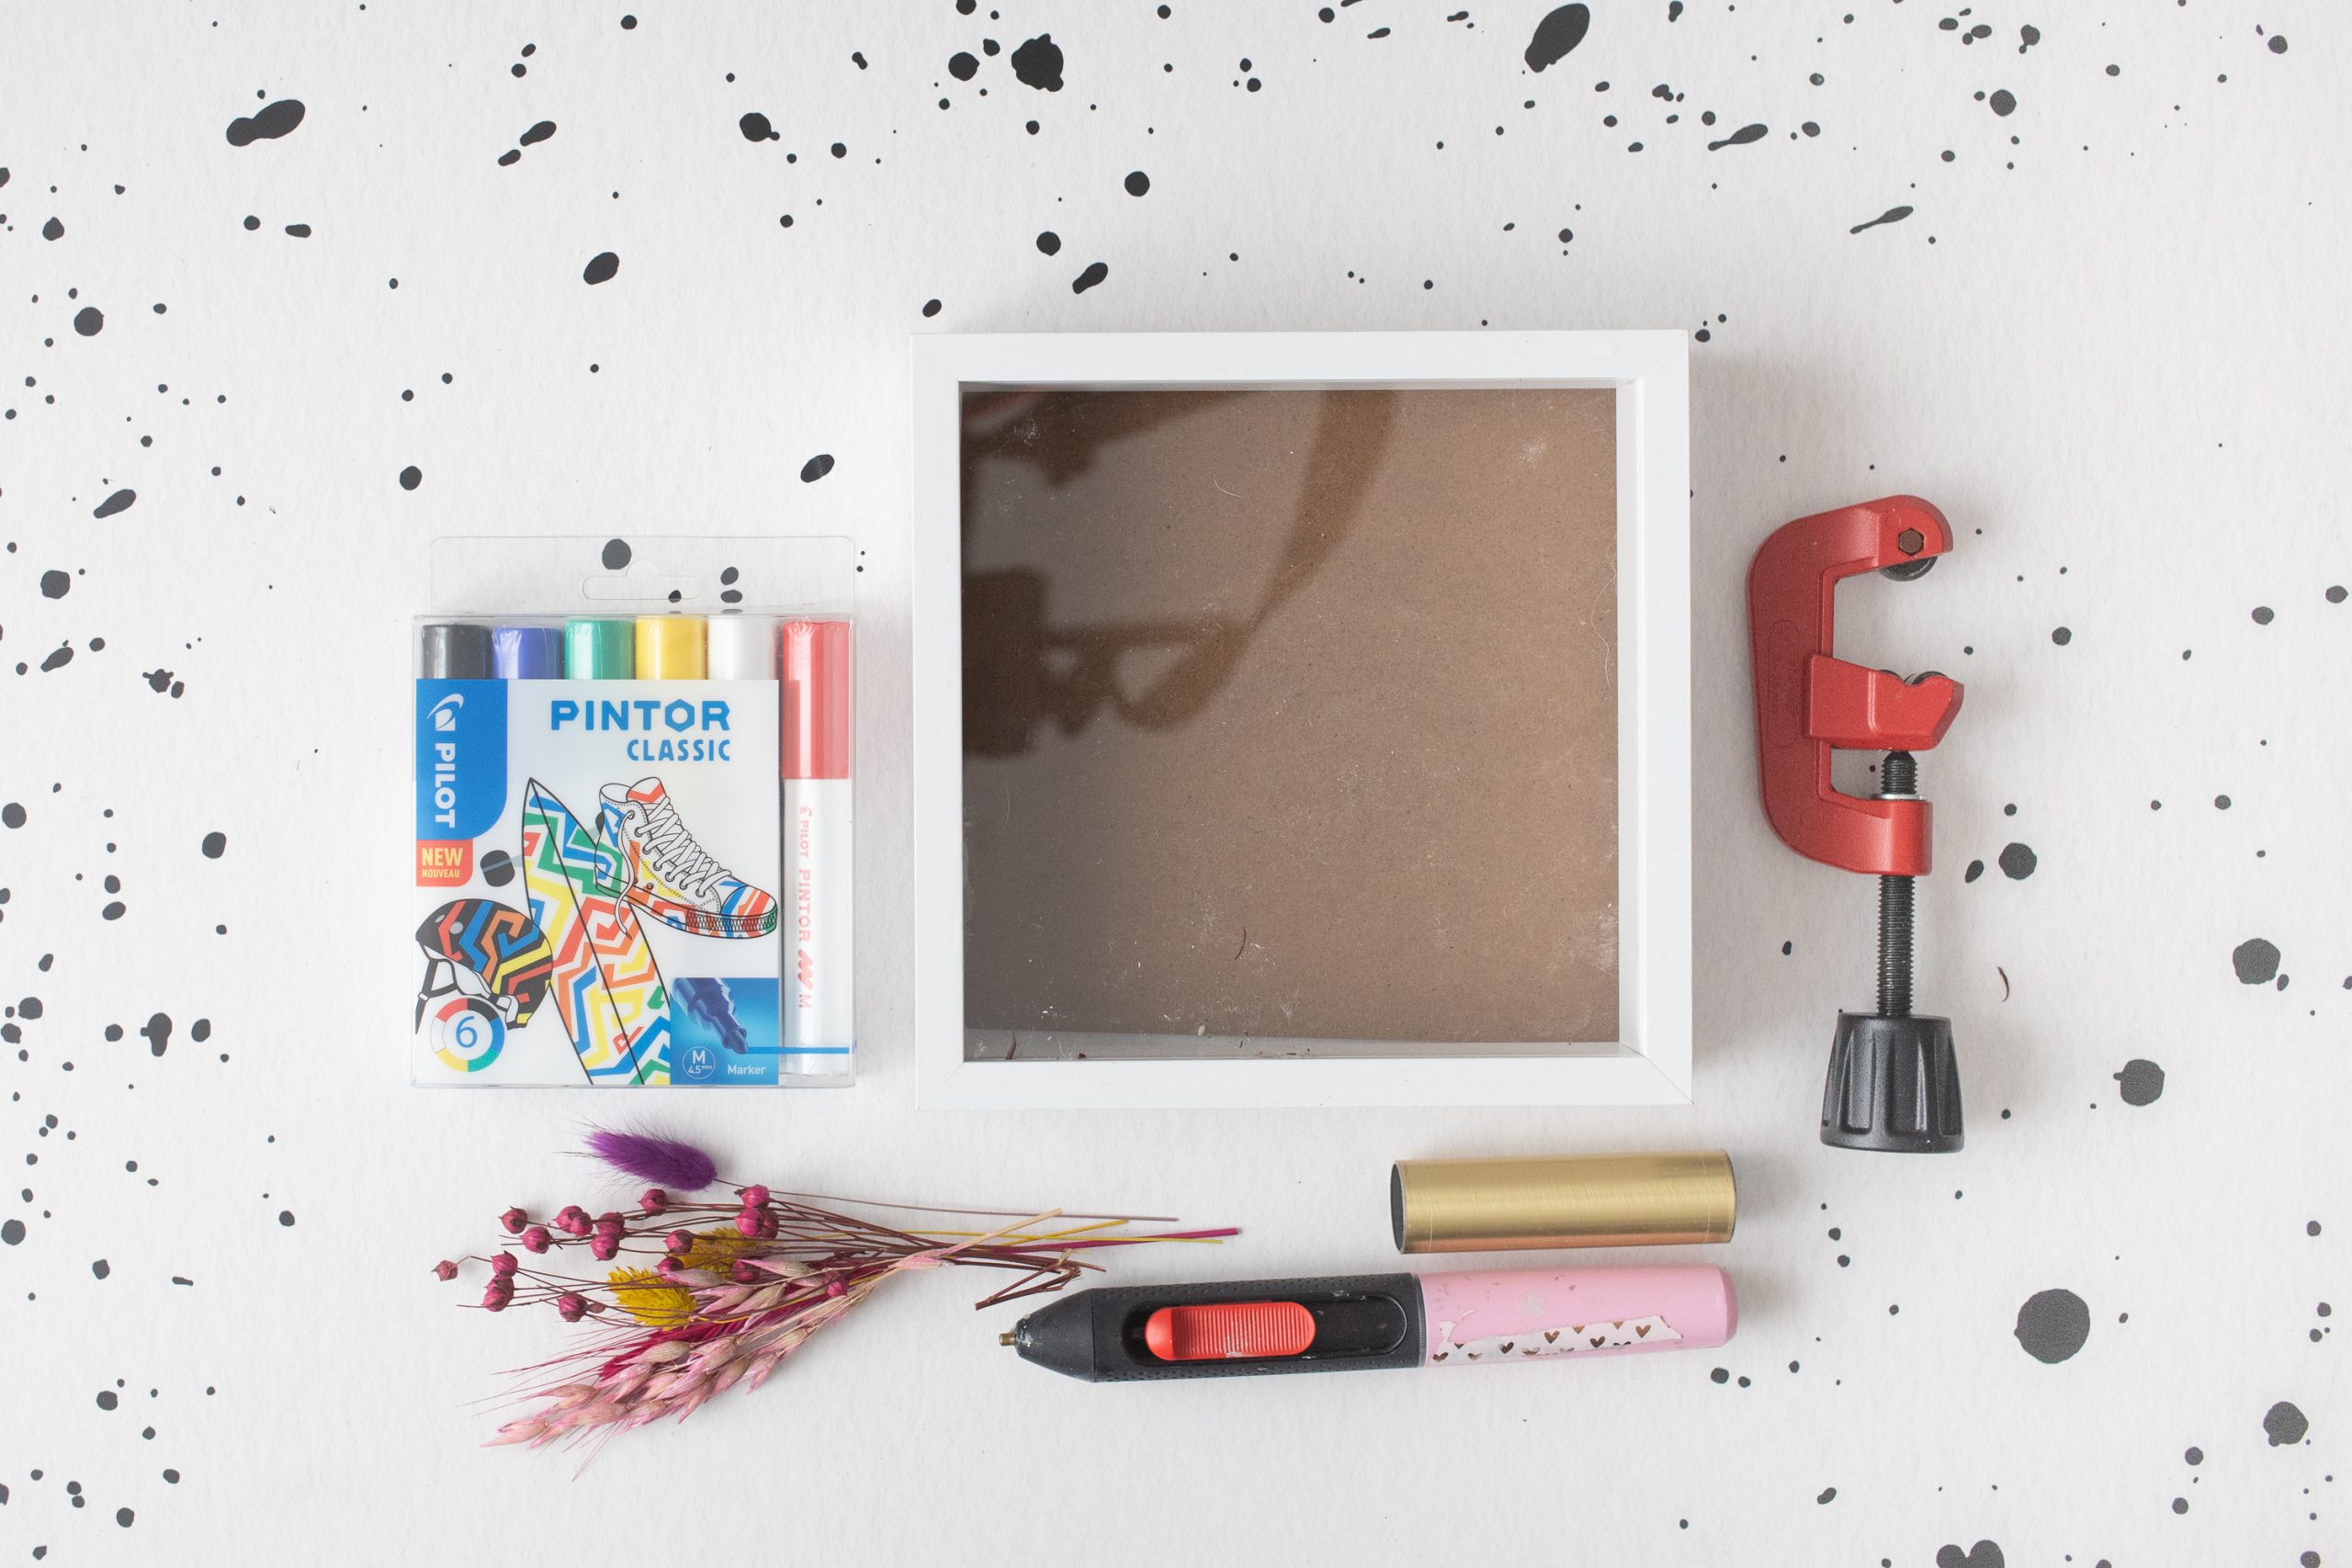
- 3D picture frame – used here: picture frame in 20 x 20 cm / partner link
- PINTOR marker in line width M
- some colorful dried flowers
- Optional: colorful cardboard
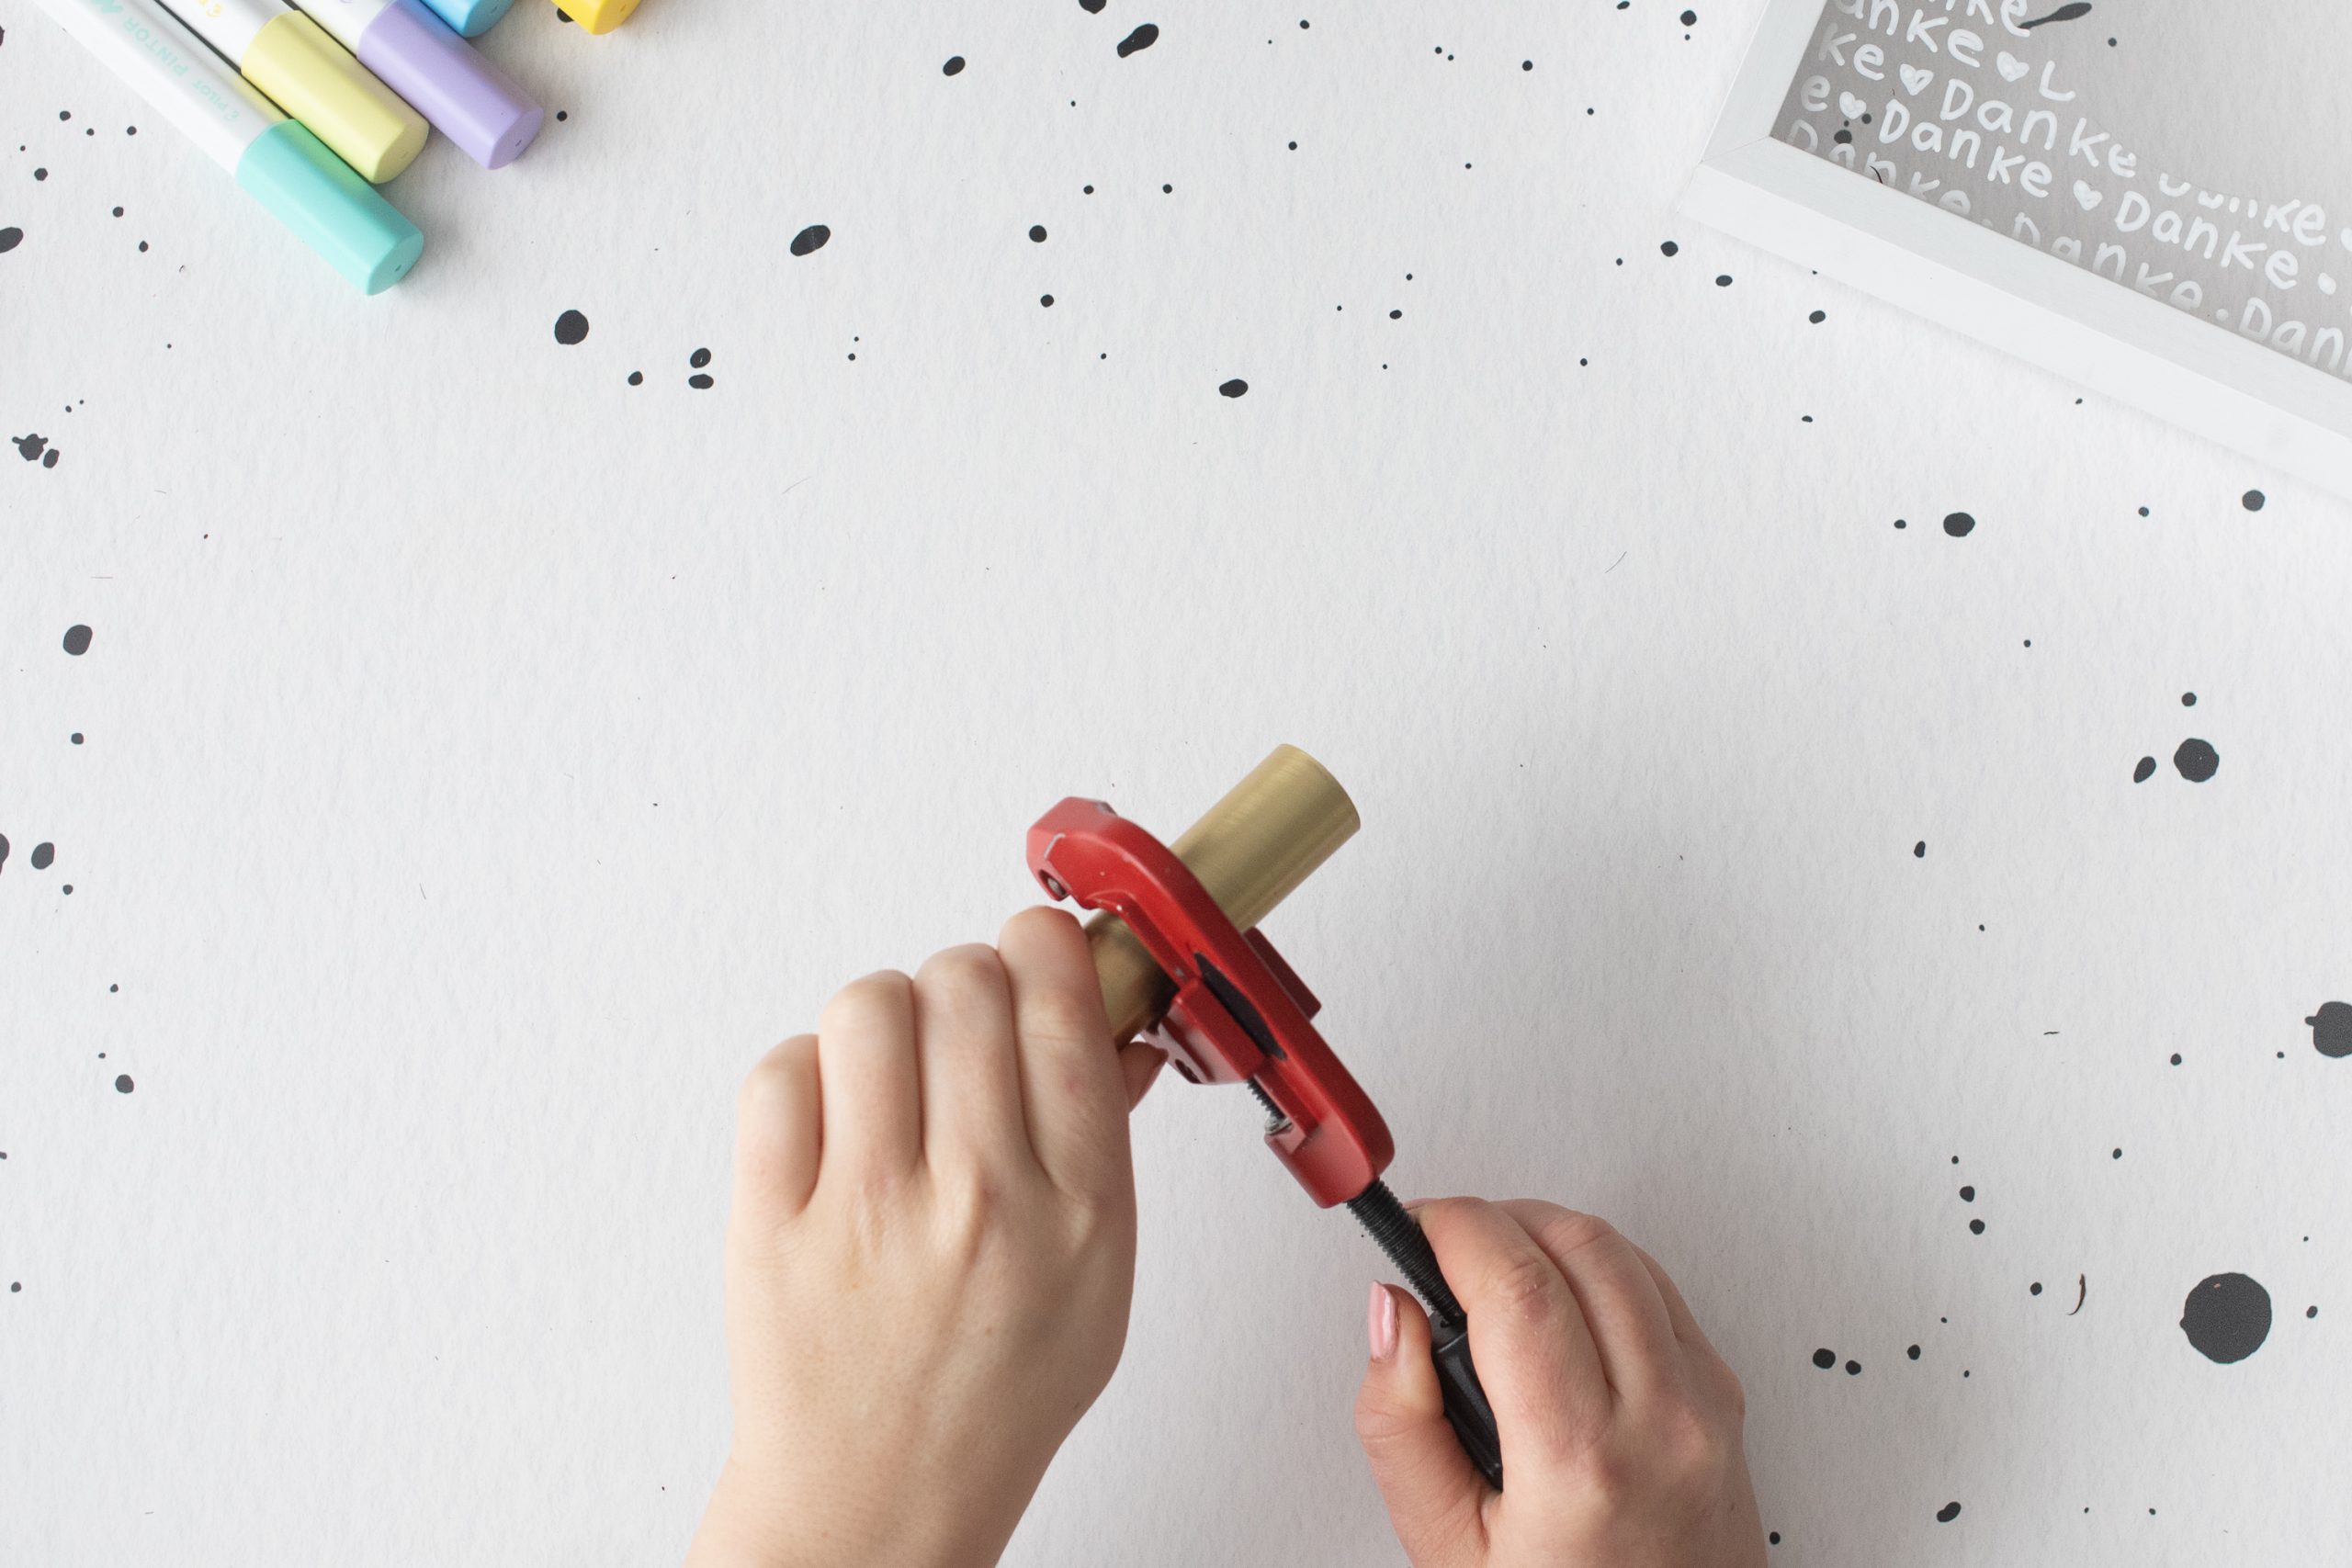
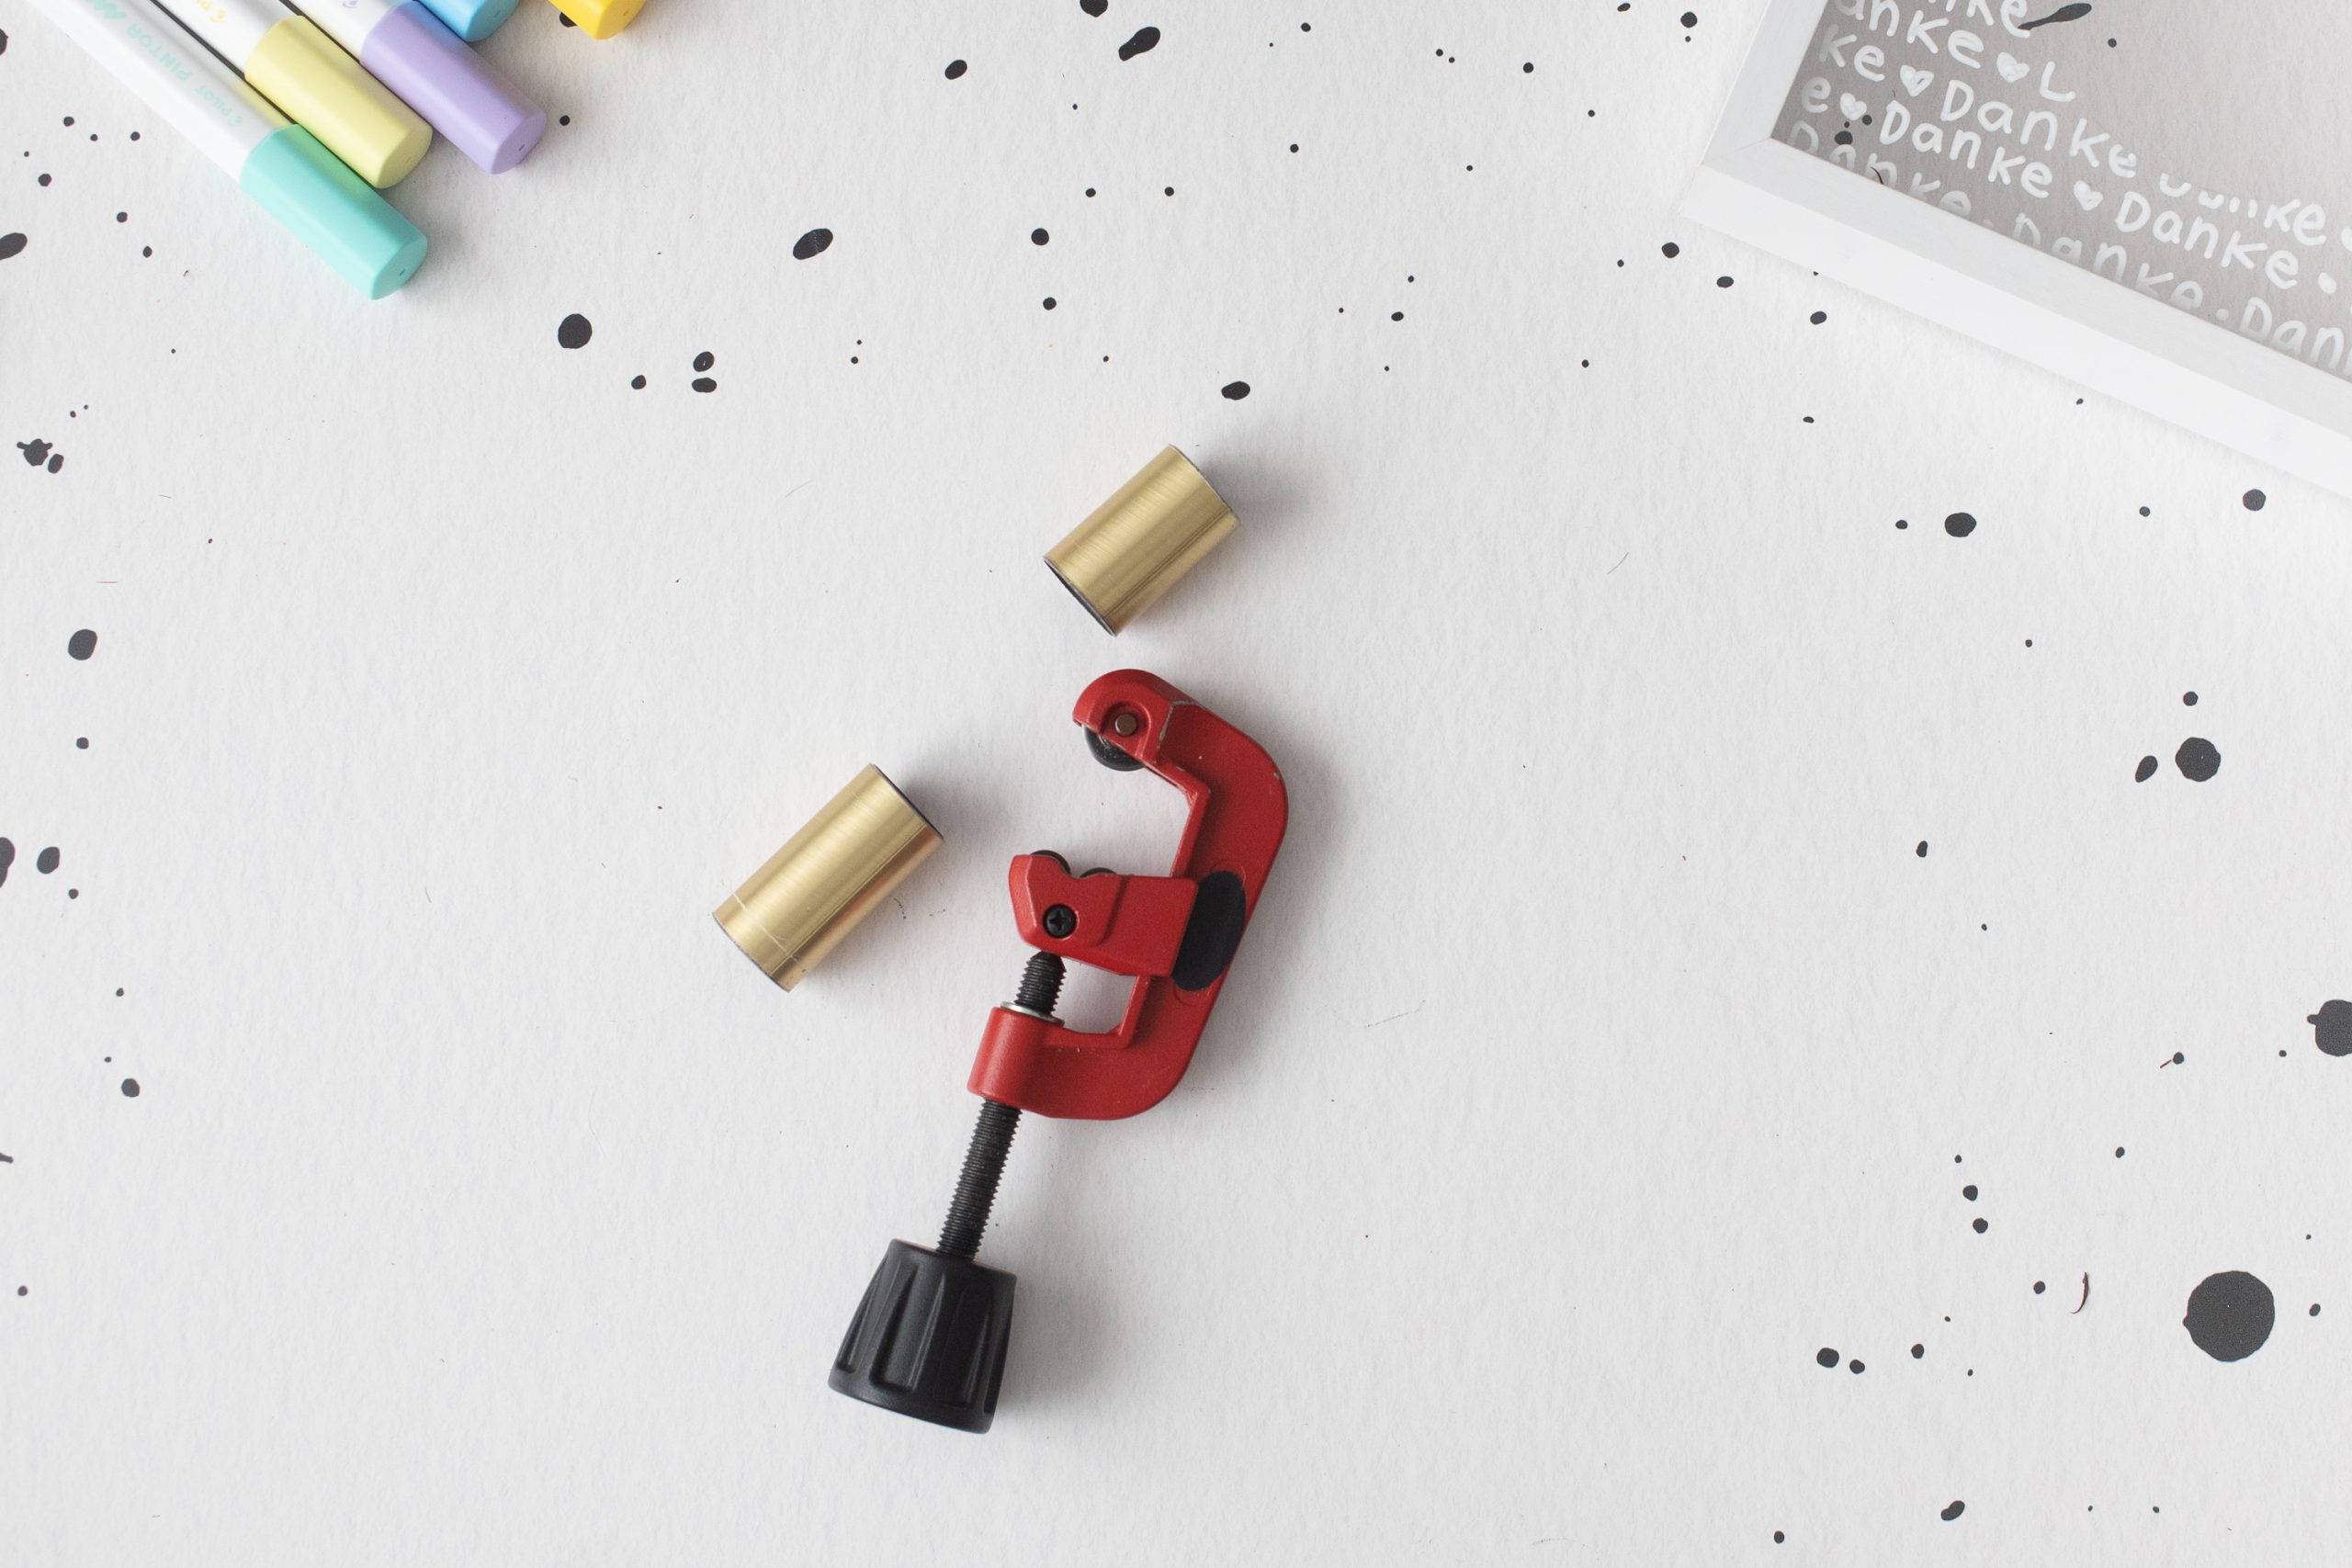
- something you can use as a vase – I used a piece of curtain rod here that I trimmed with the pipe cutter. Alternatively, you can use a test tube, a small screw-top jar, or something similar.
- hot glue
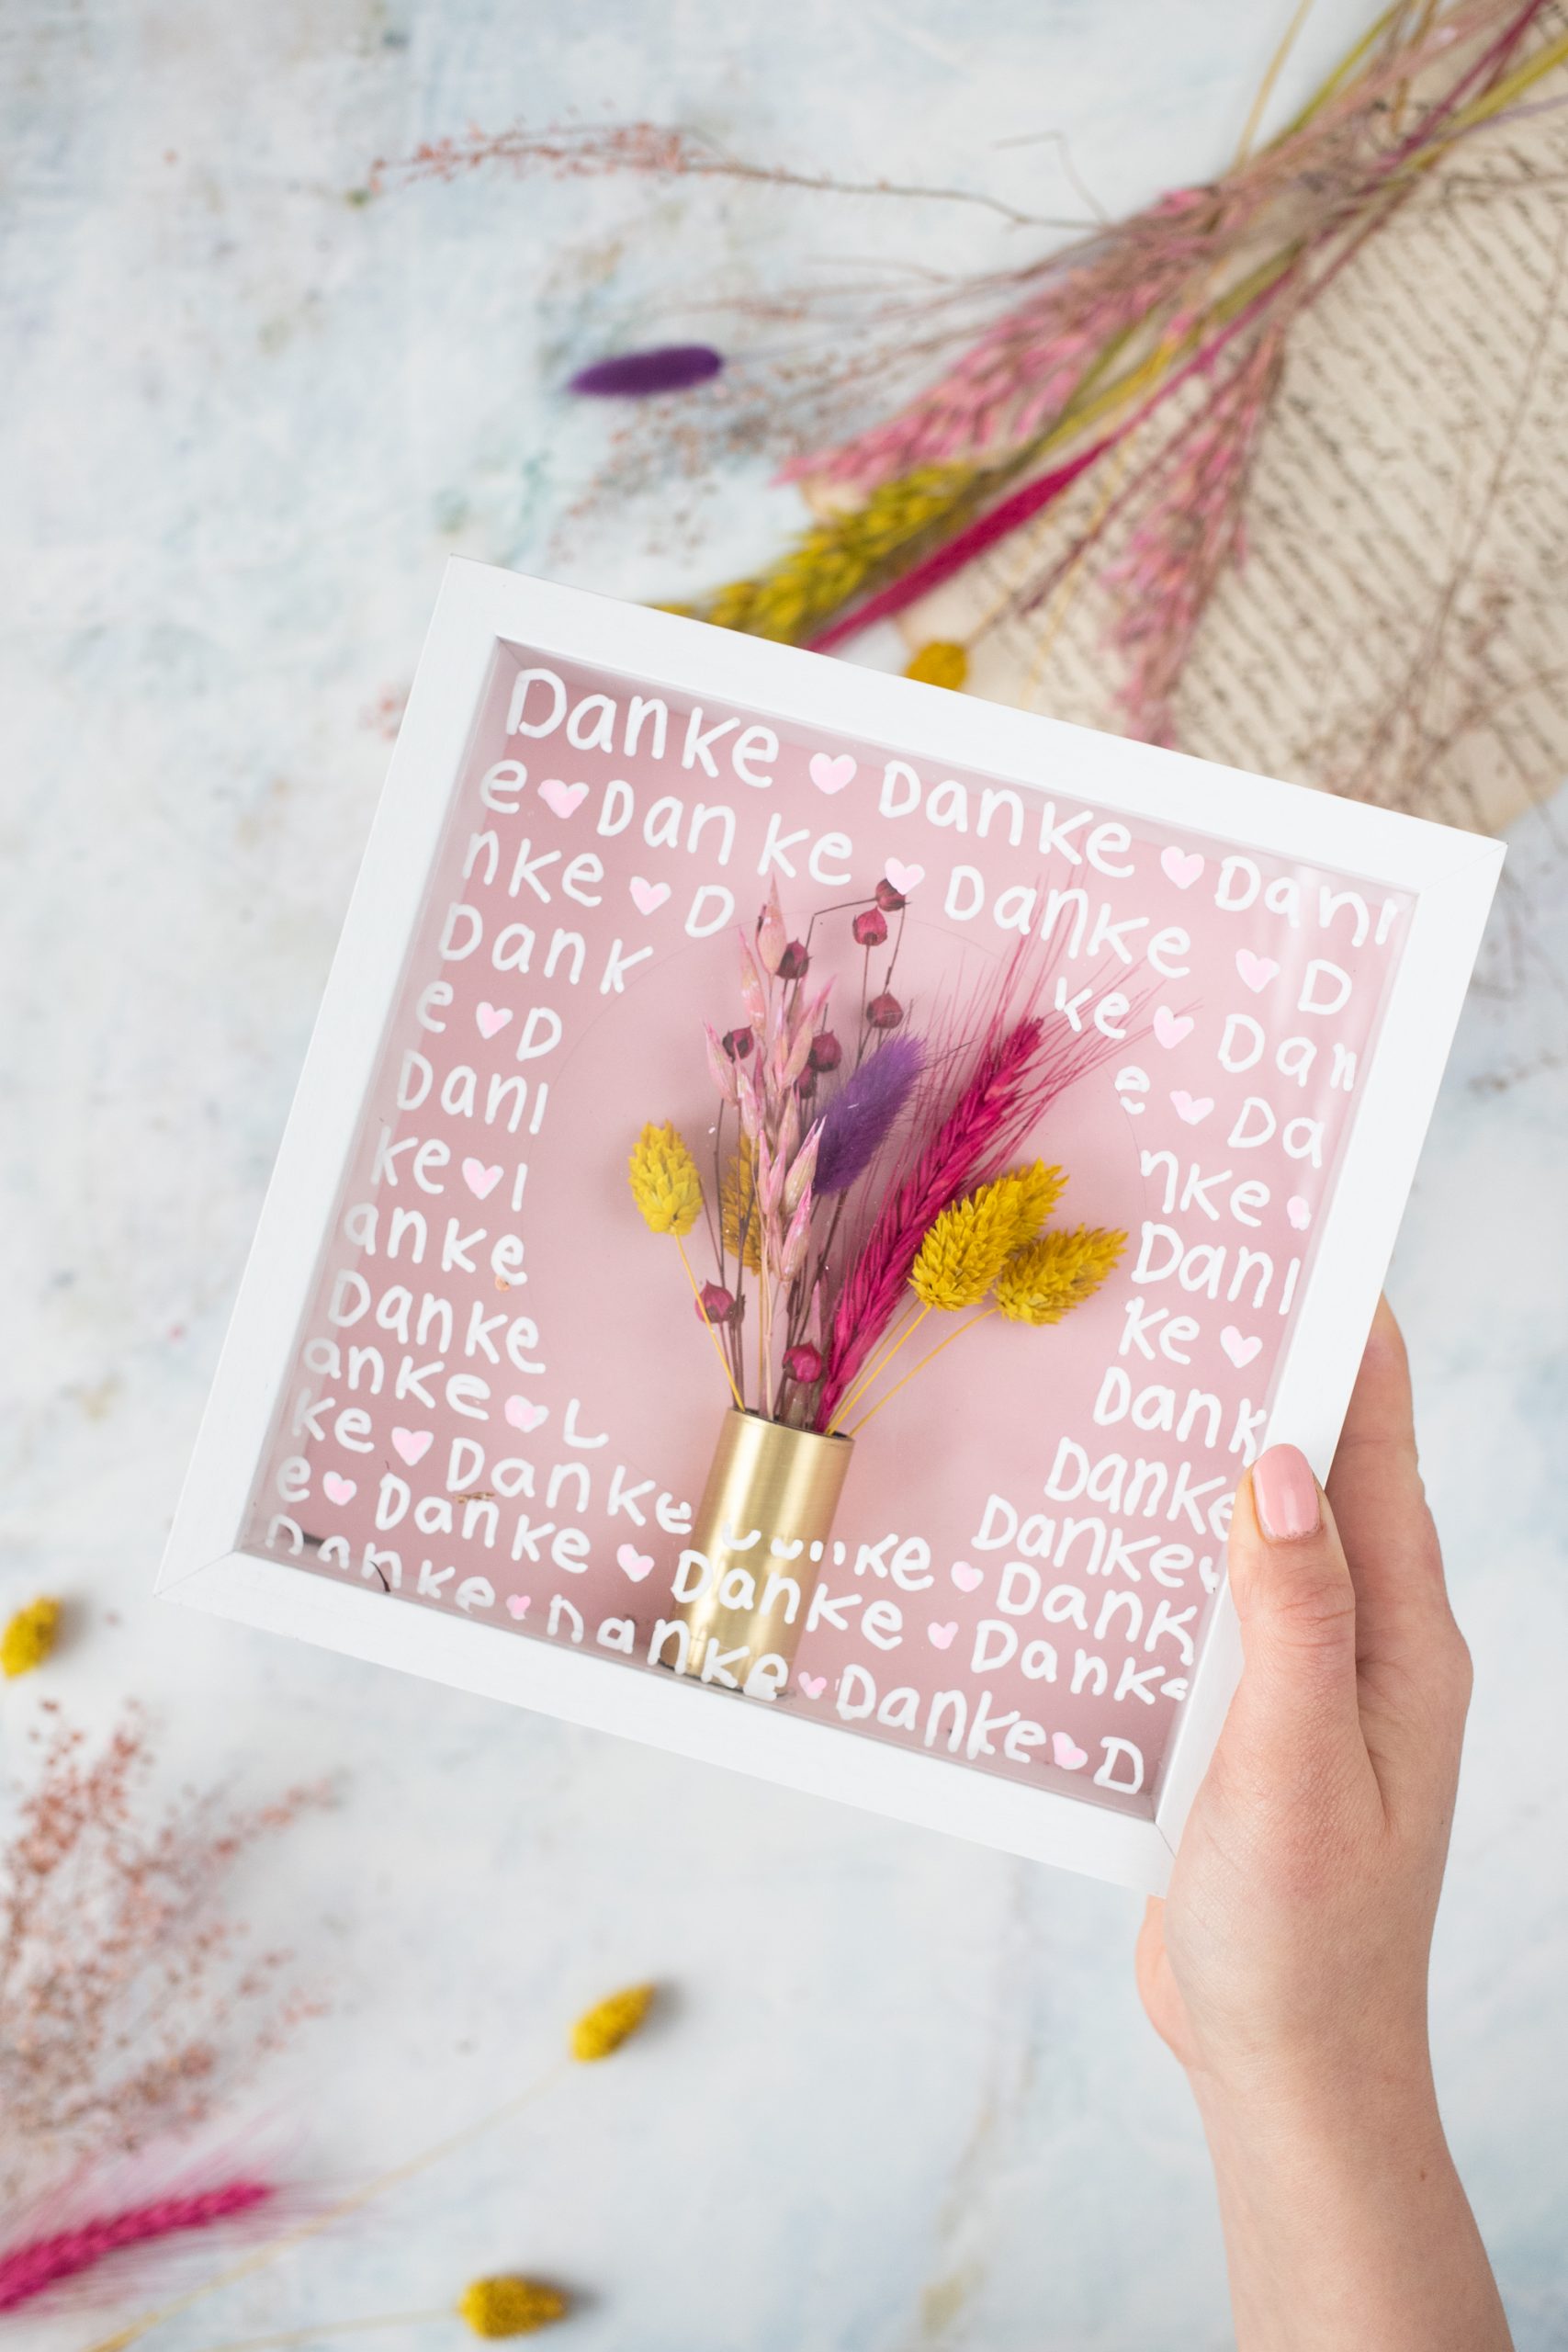
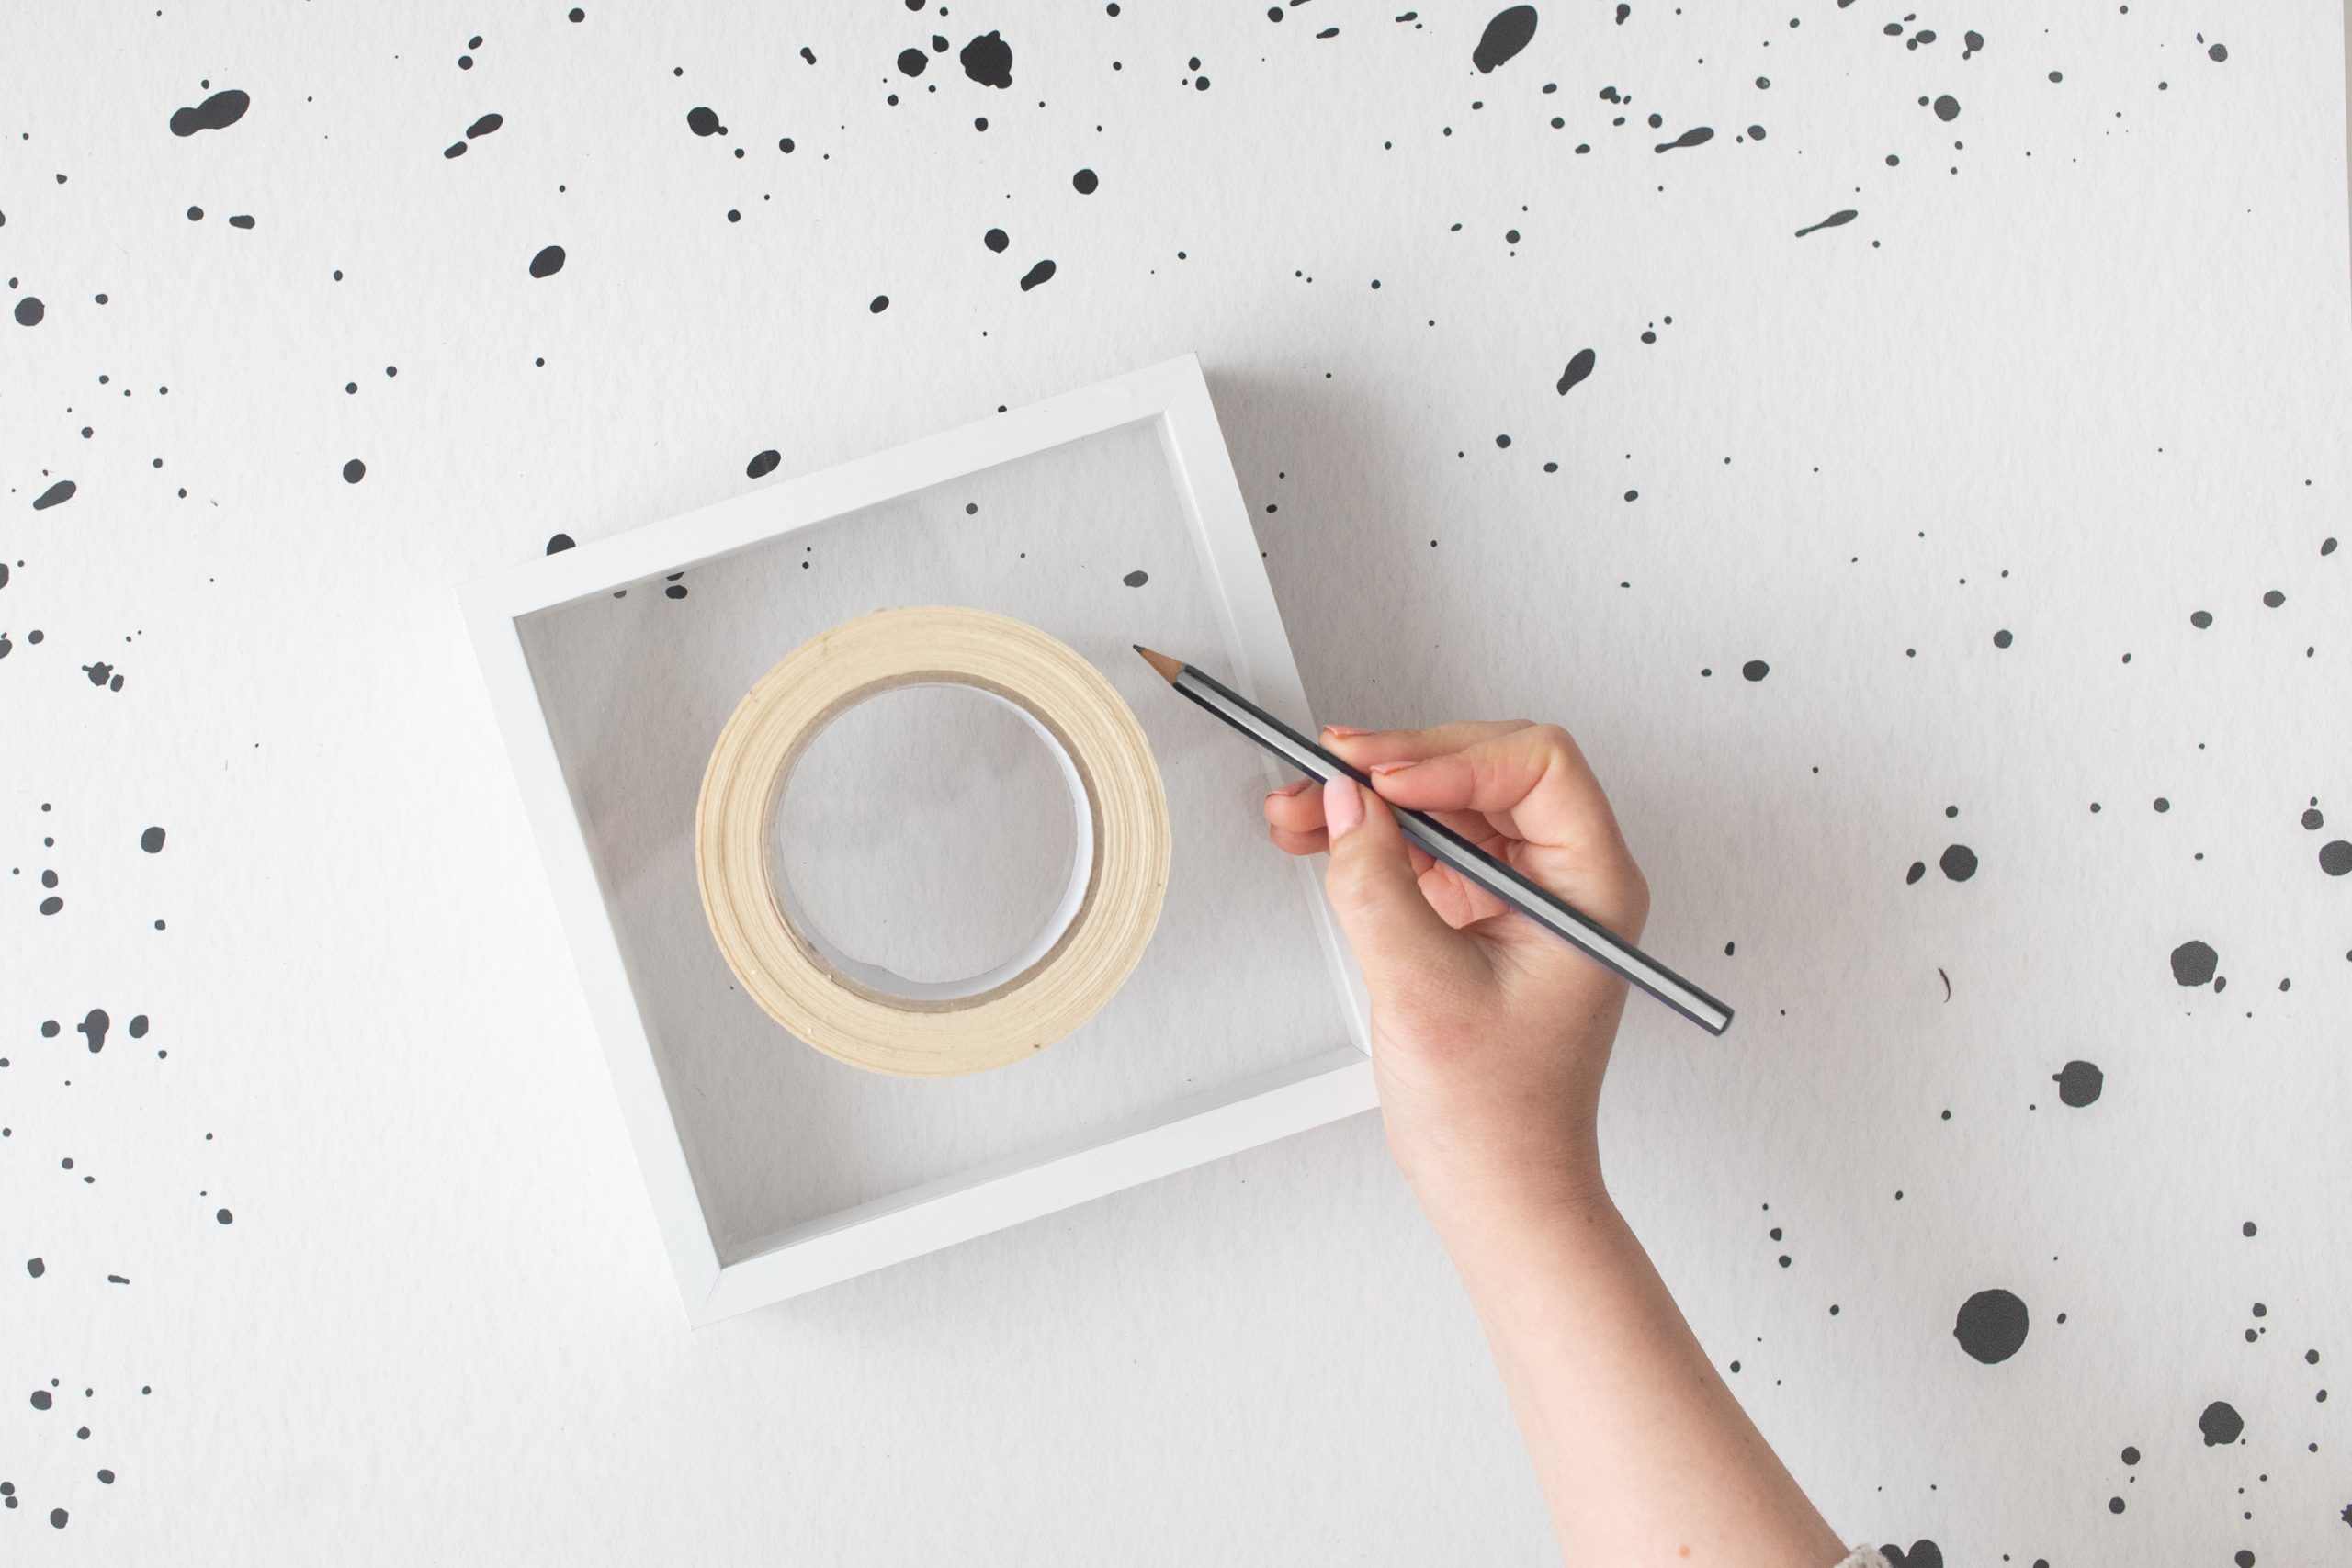
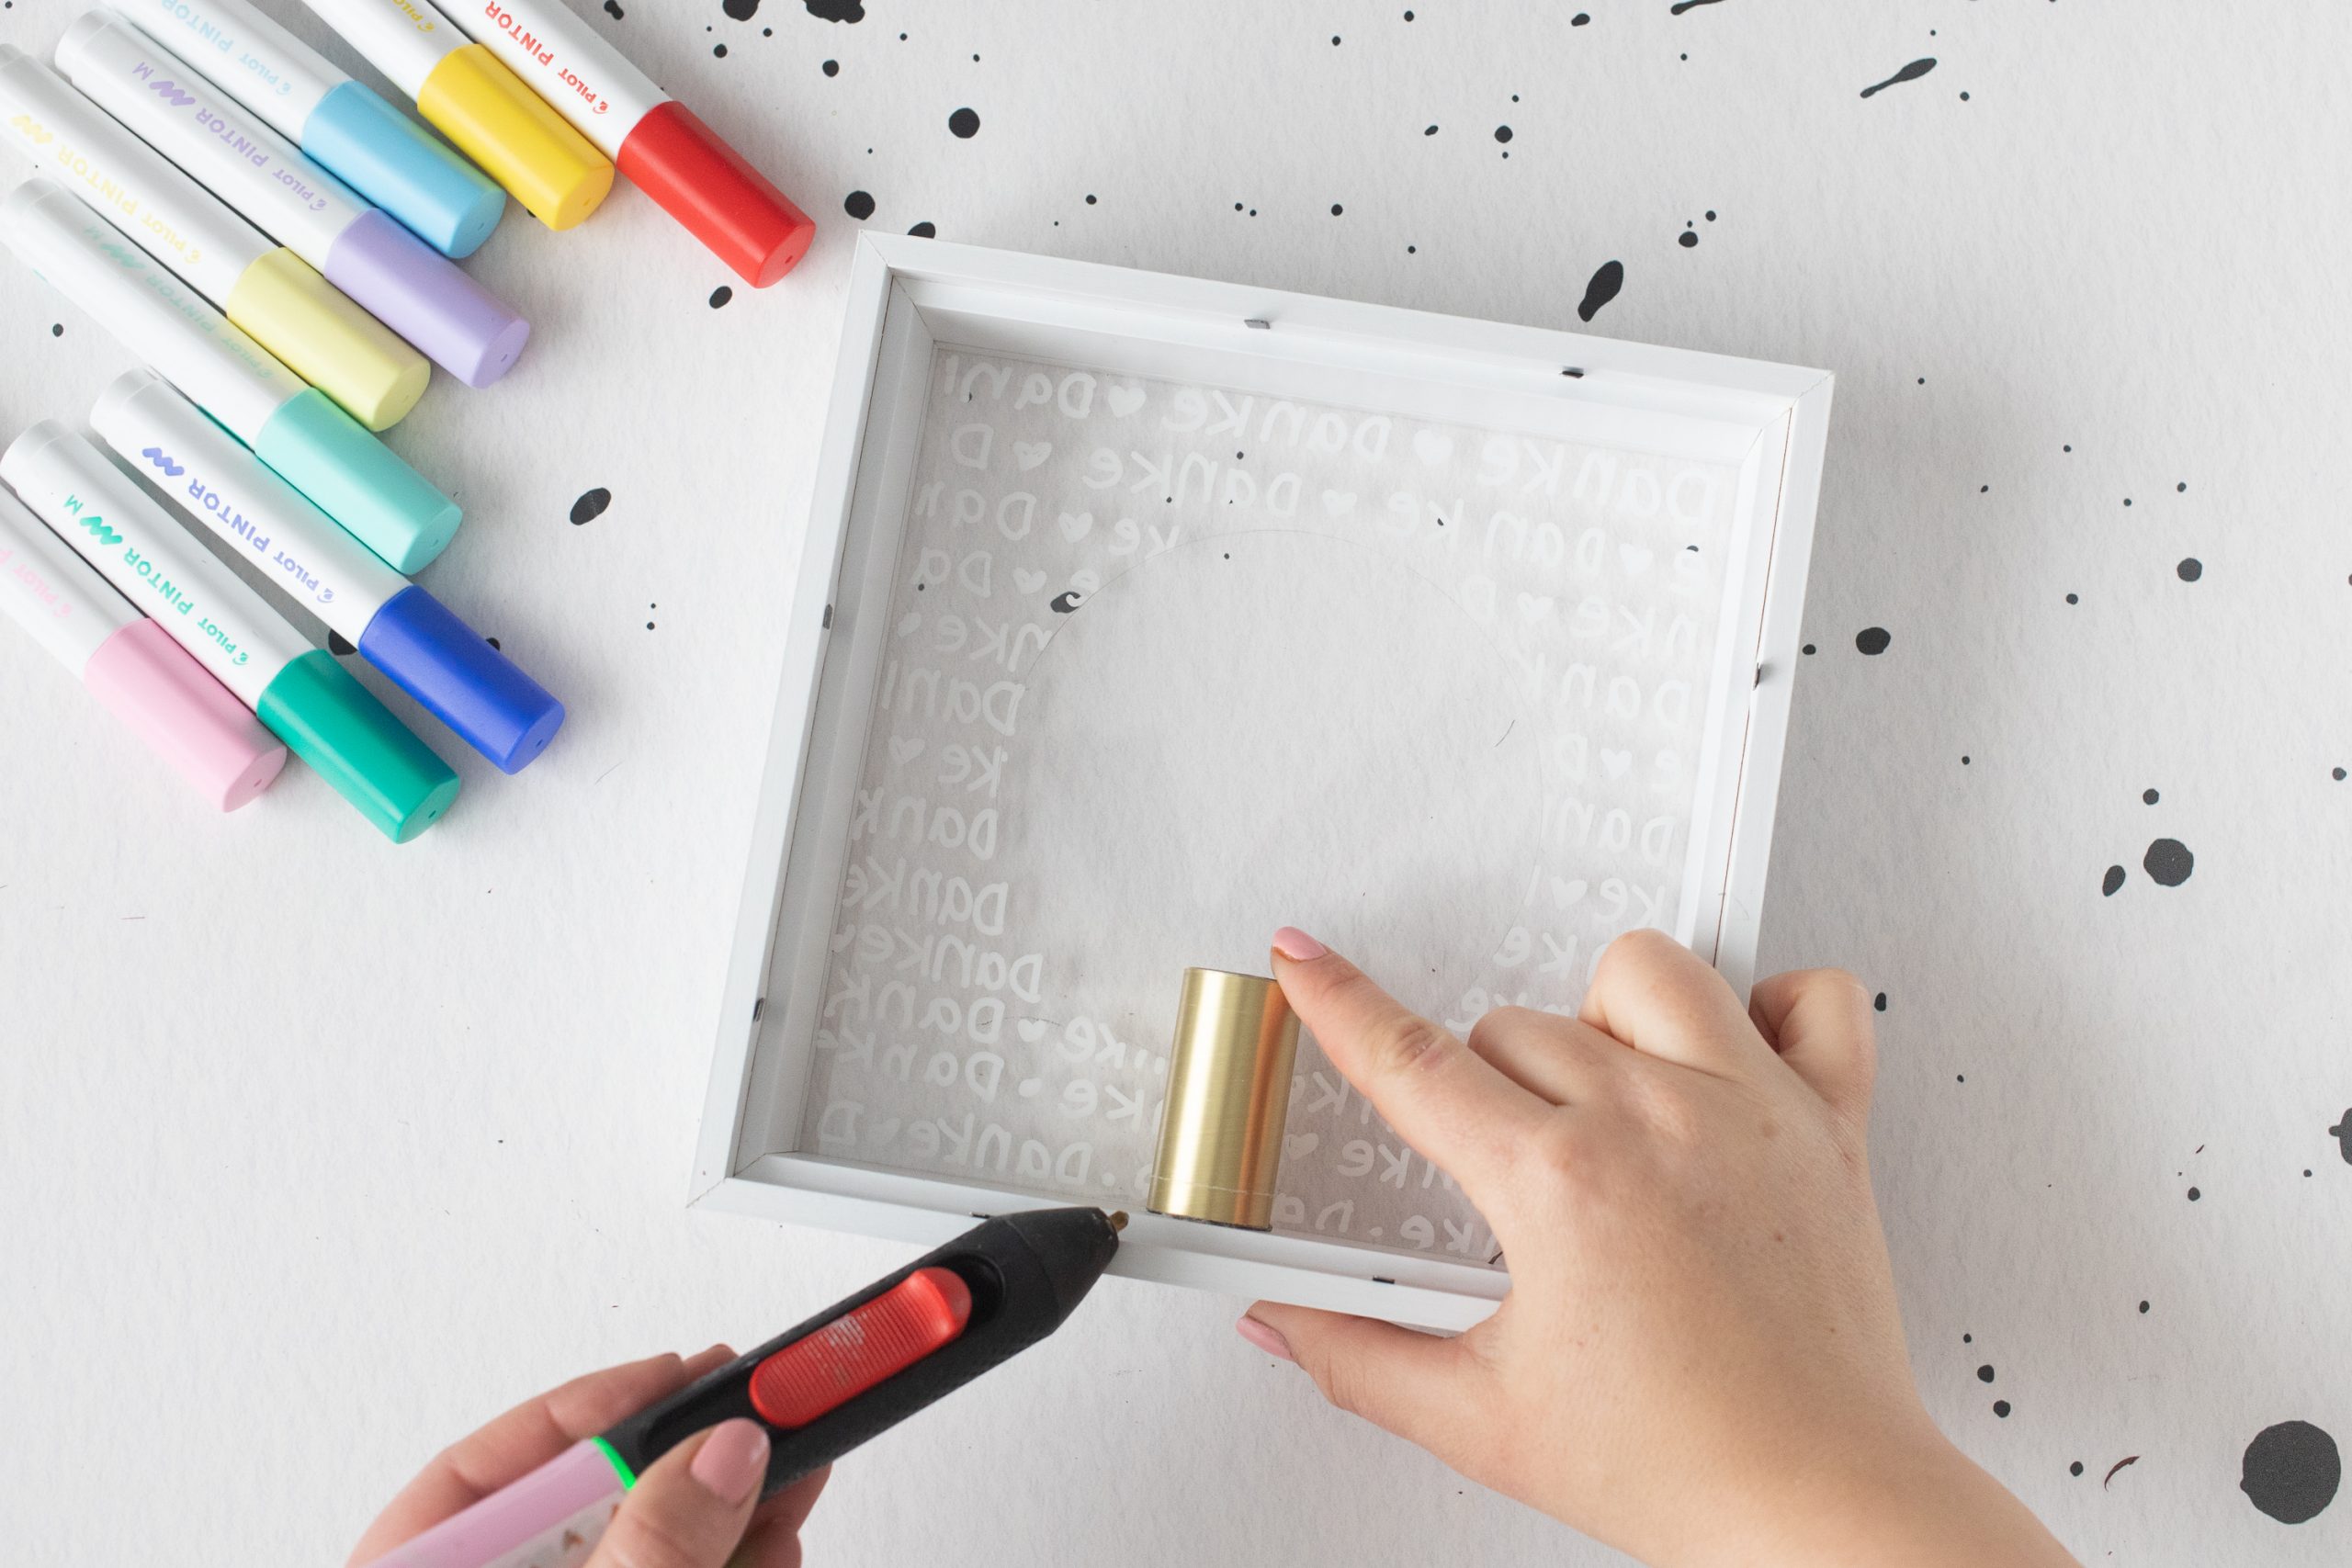
1. Take a round object and place it in the middle of the picture frame. Trace the circle with a pencil – this will serve as a guide for you to design the white writing.
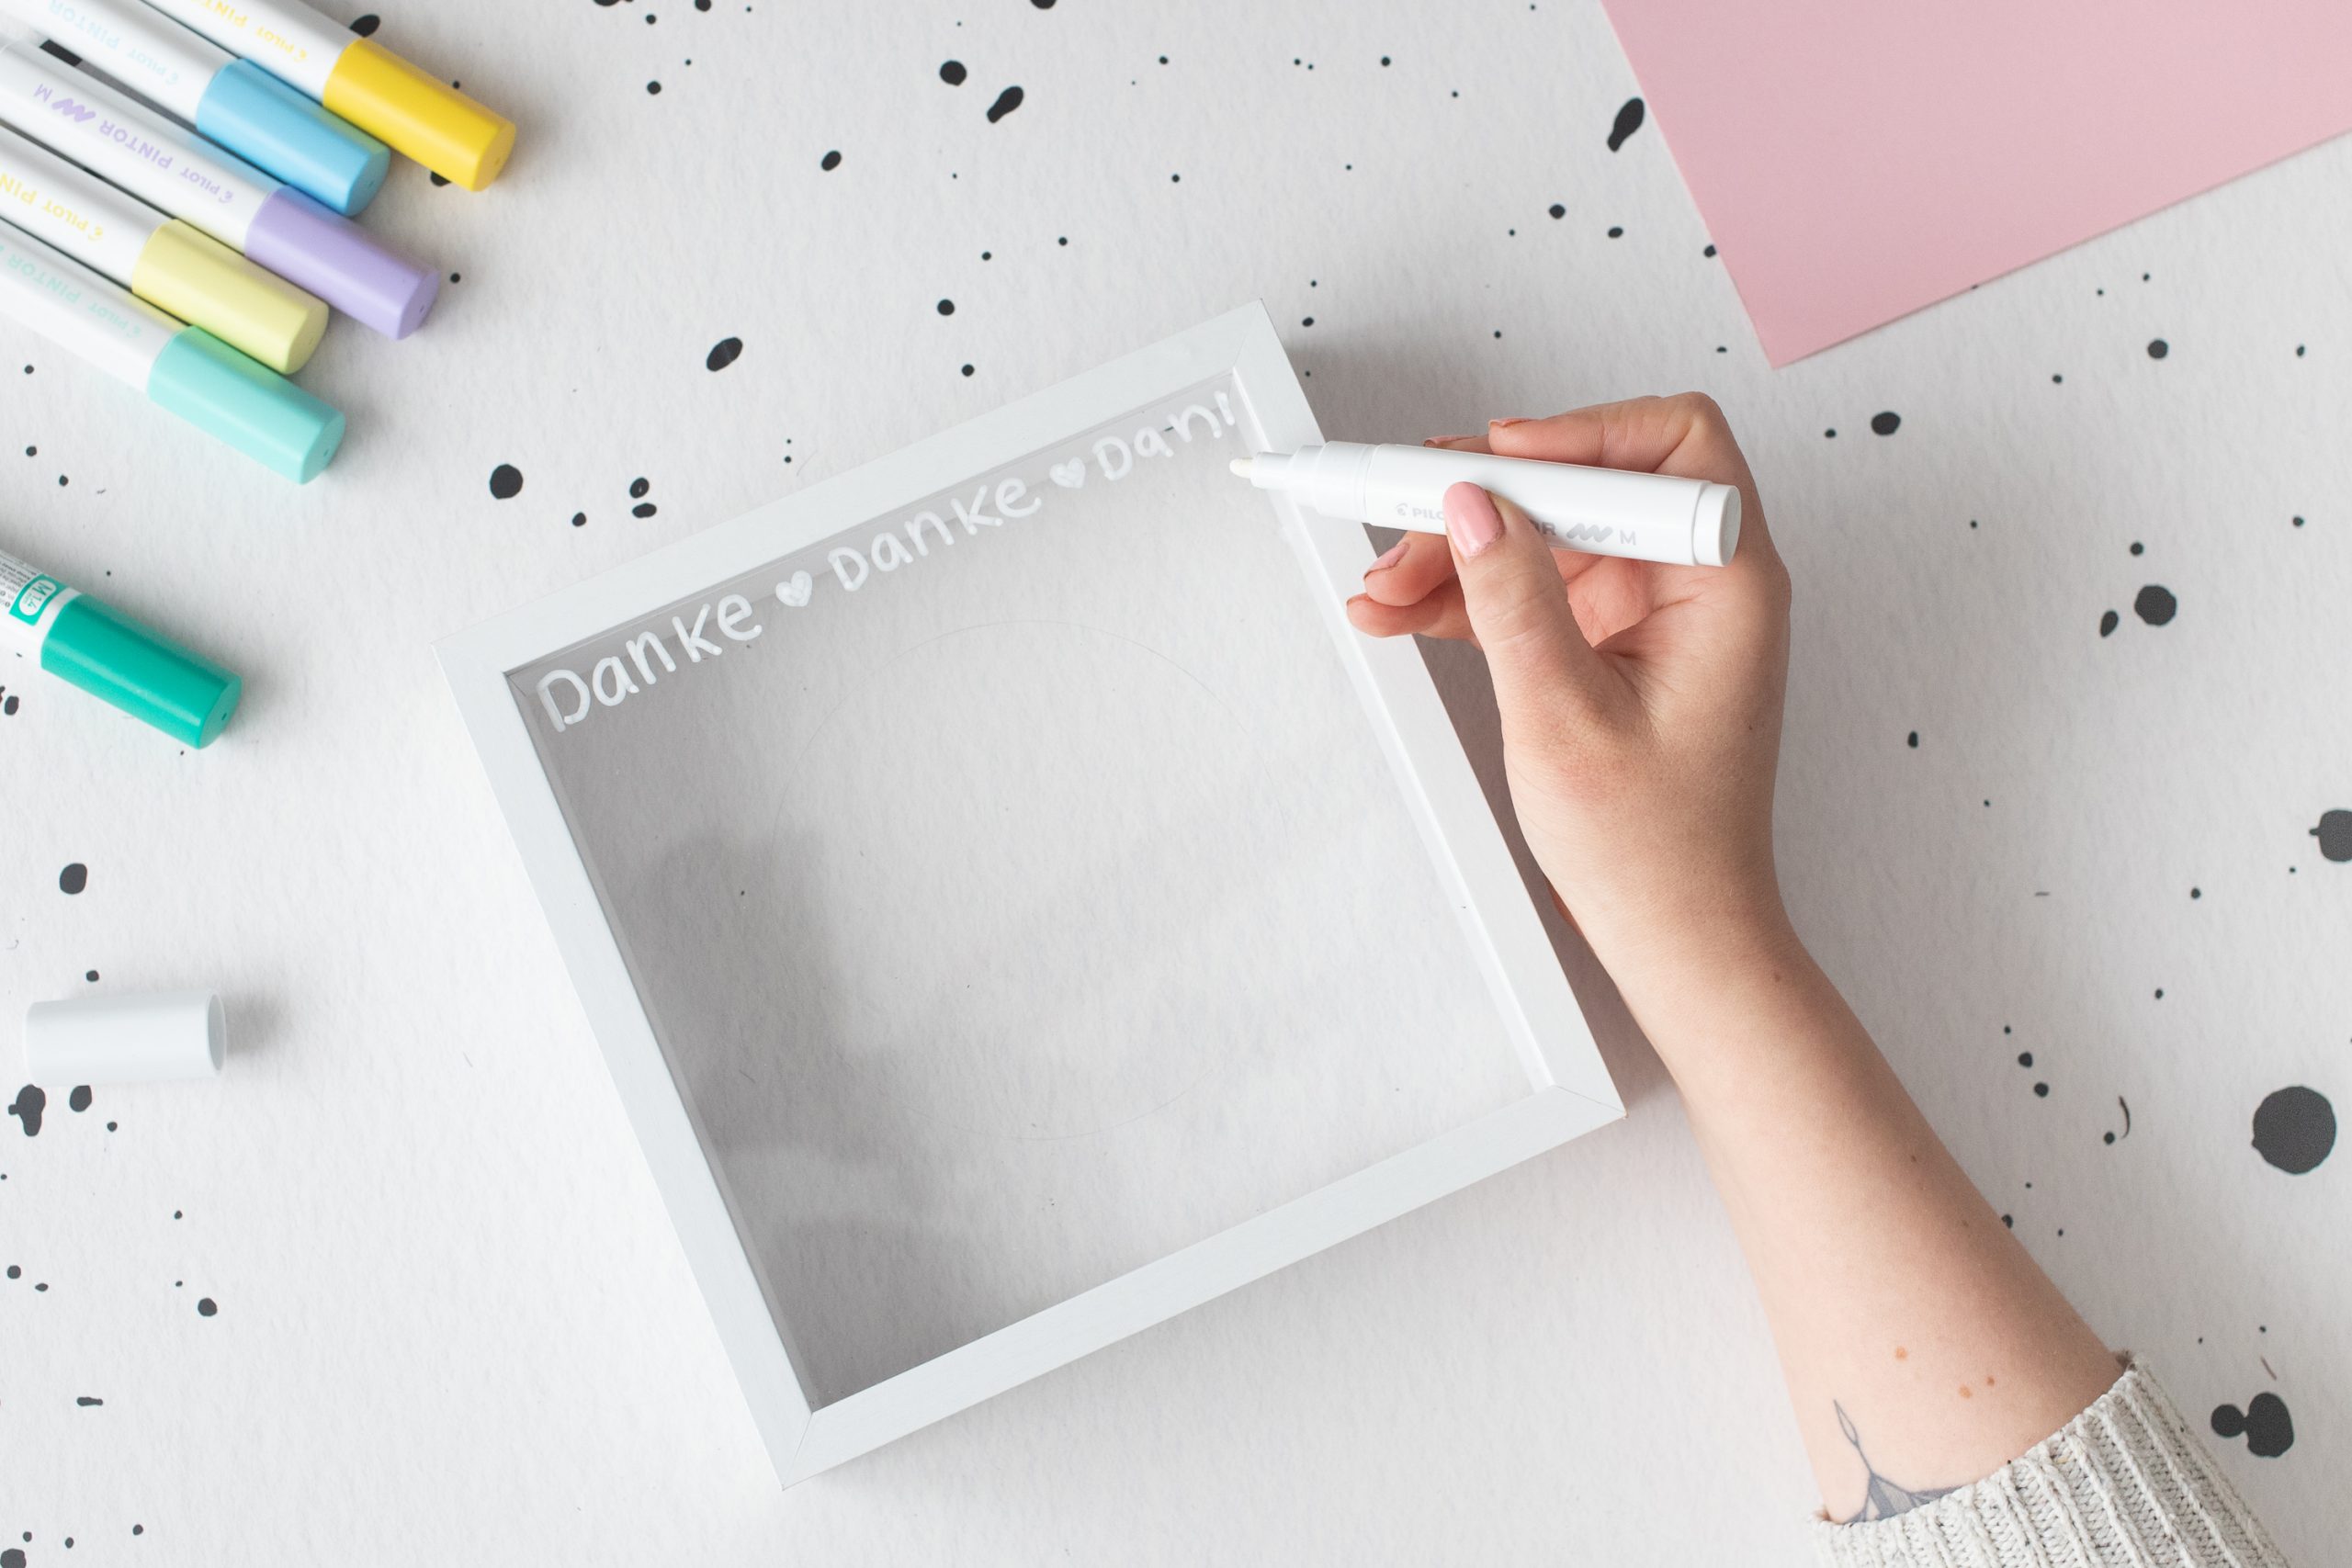
2. Now you start to write the word “thank you” very often in a row with a PINTOR marker in the color of your choice. (Of course, another word is also possible – or “Happy Birthday” for example!)
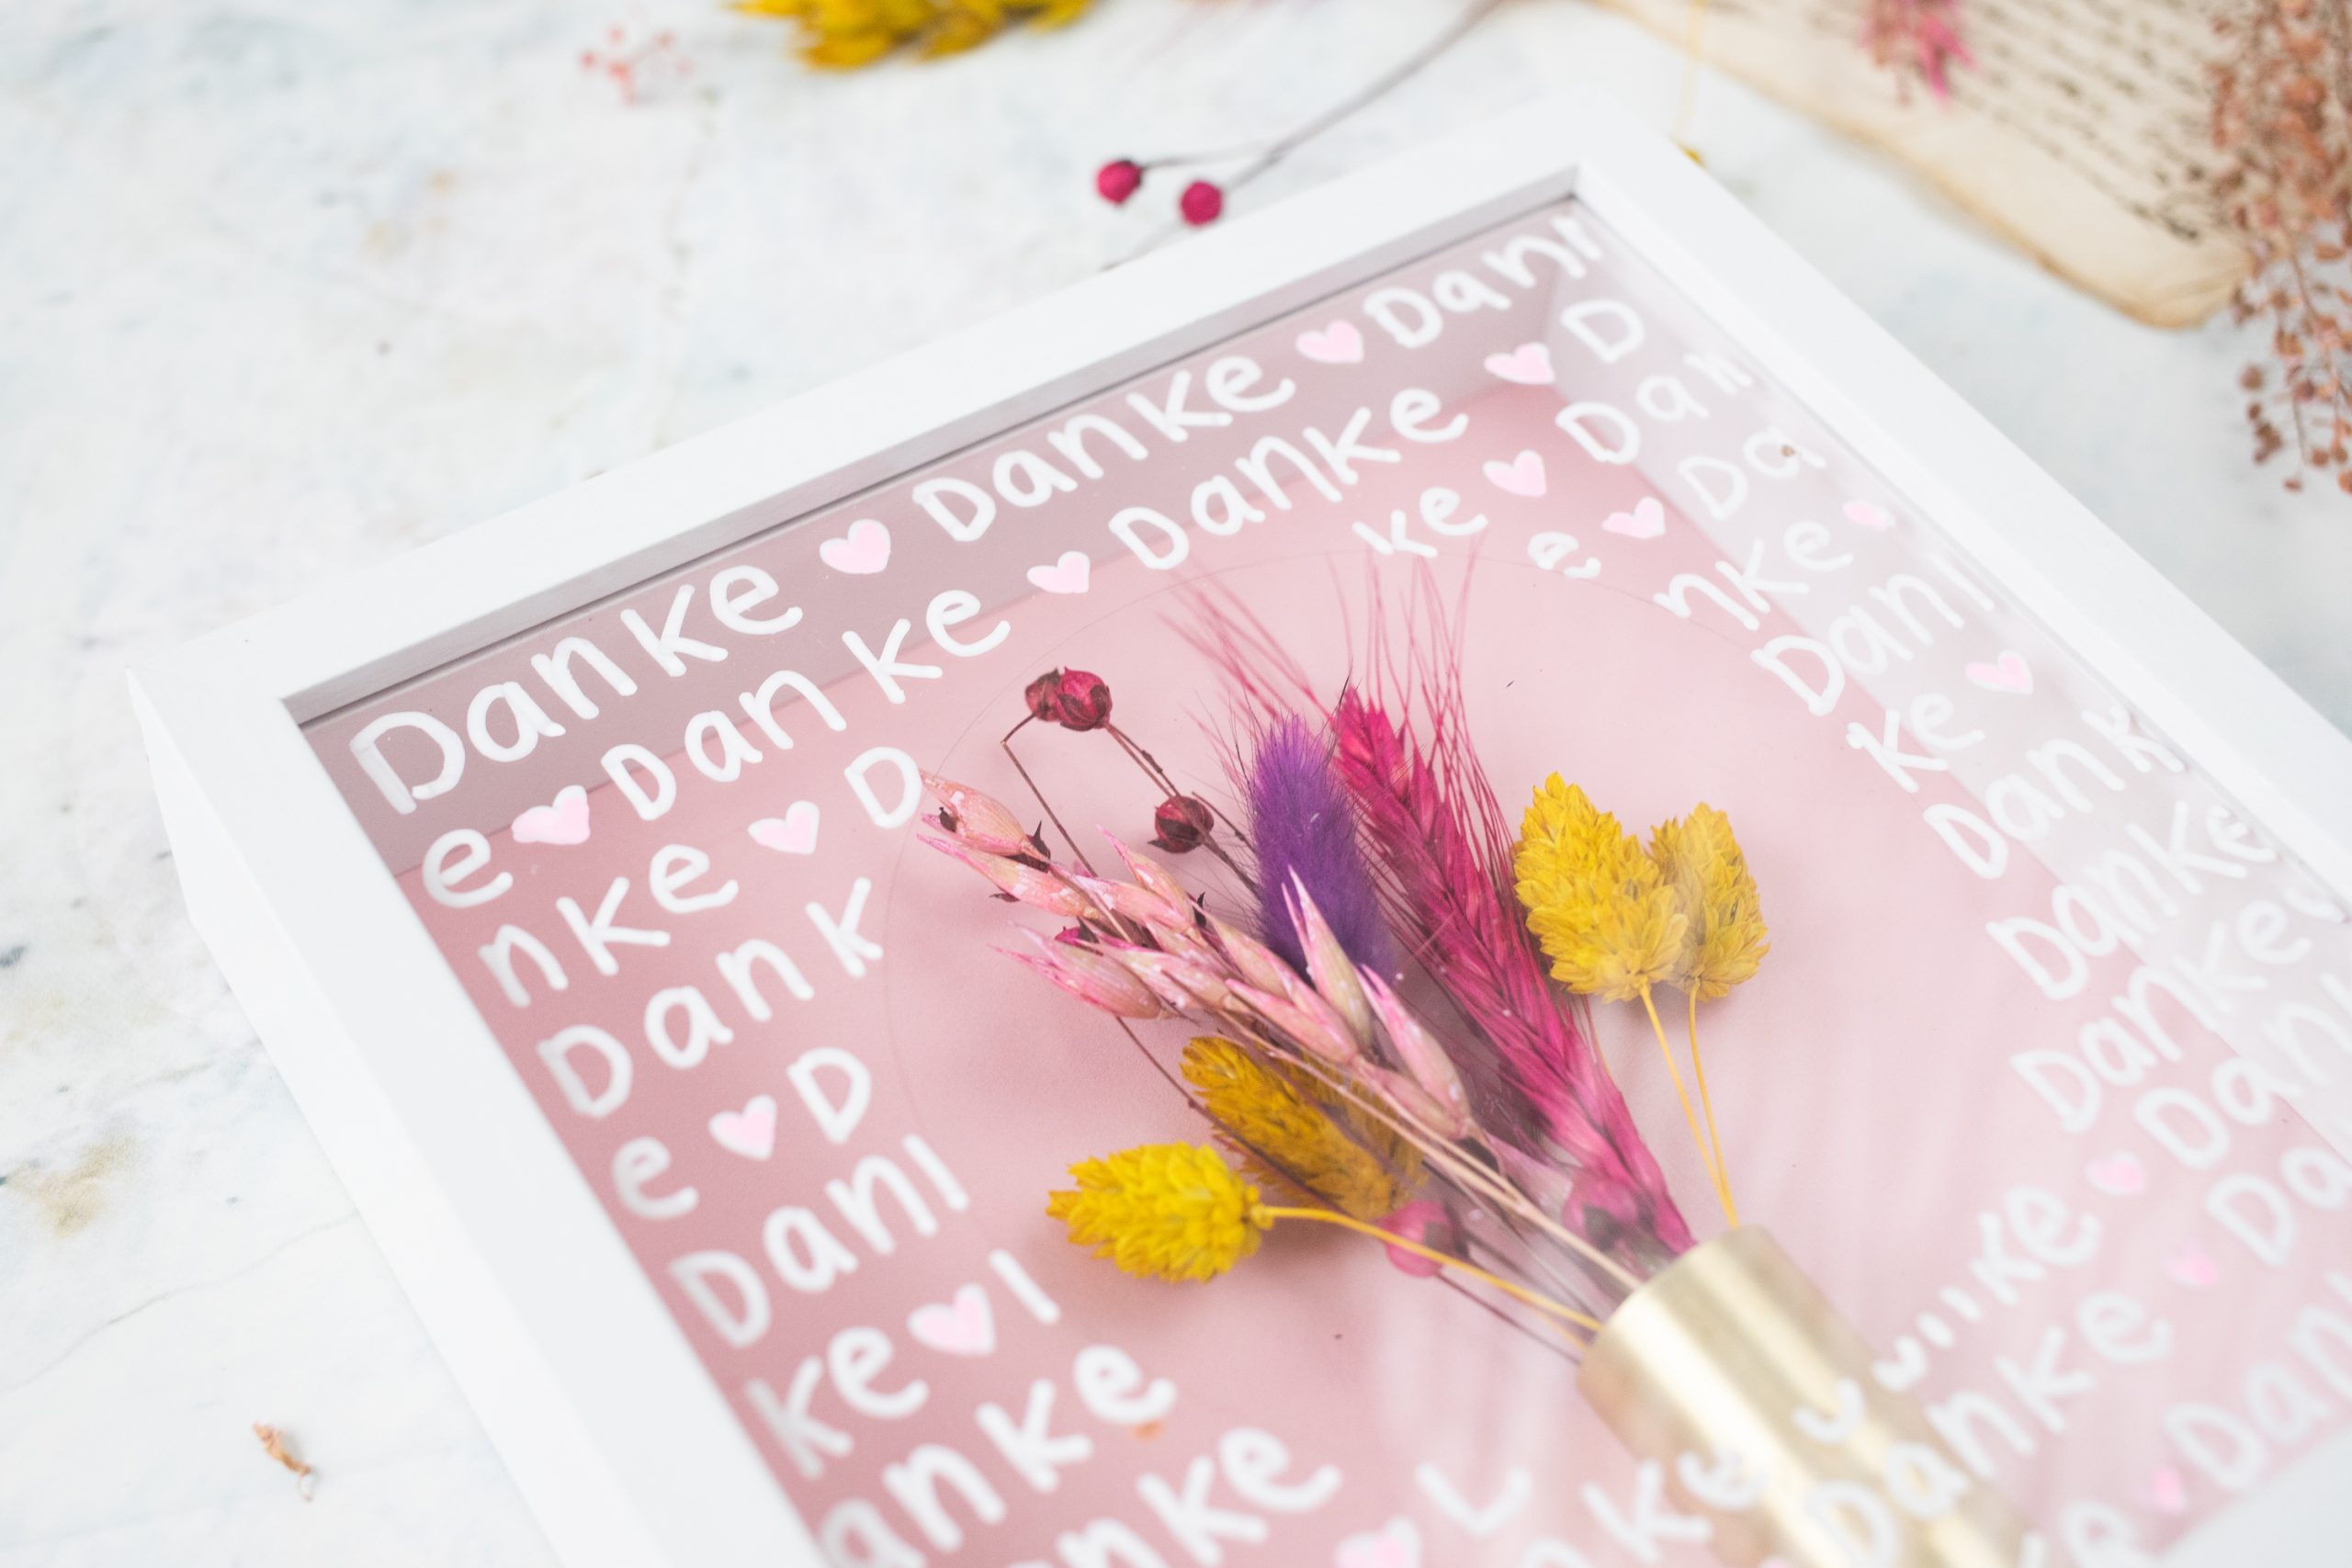
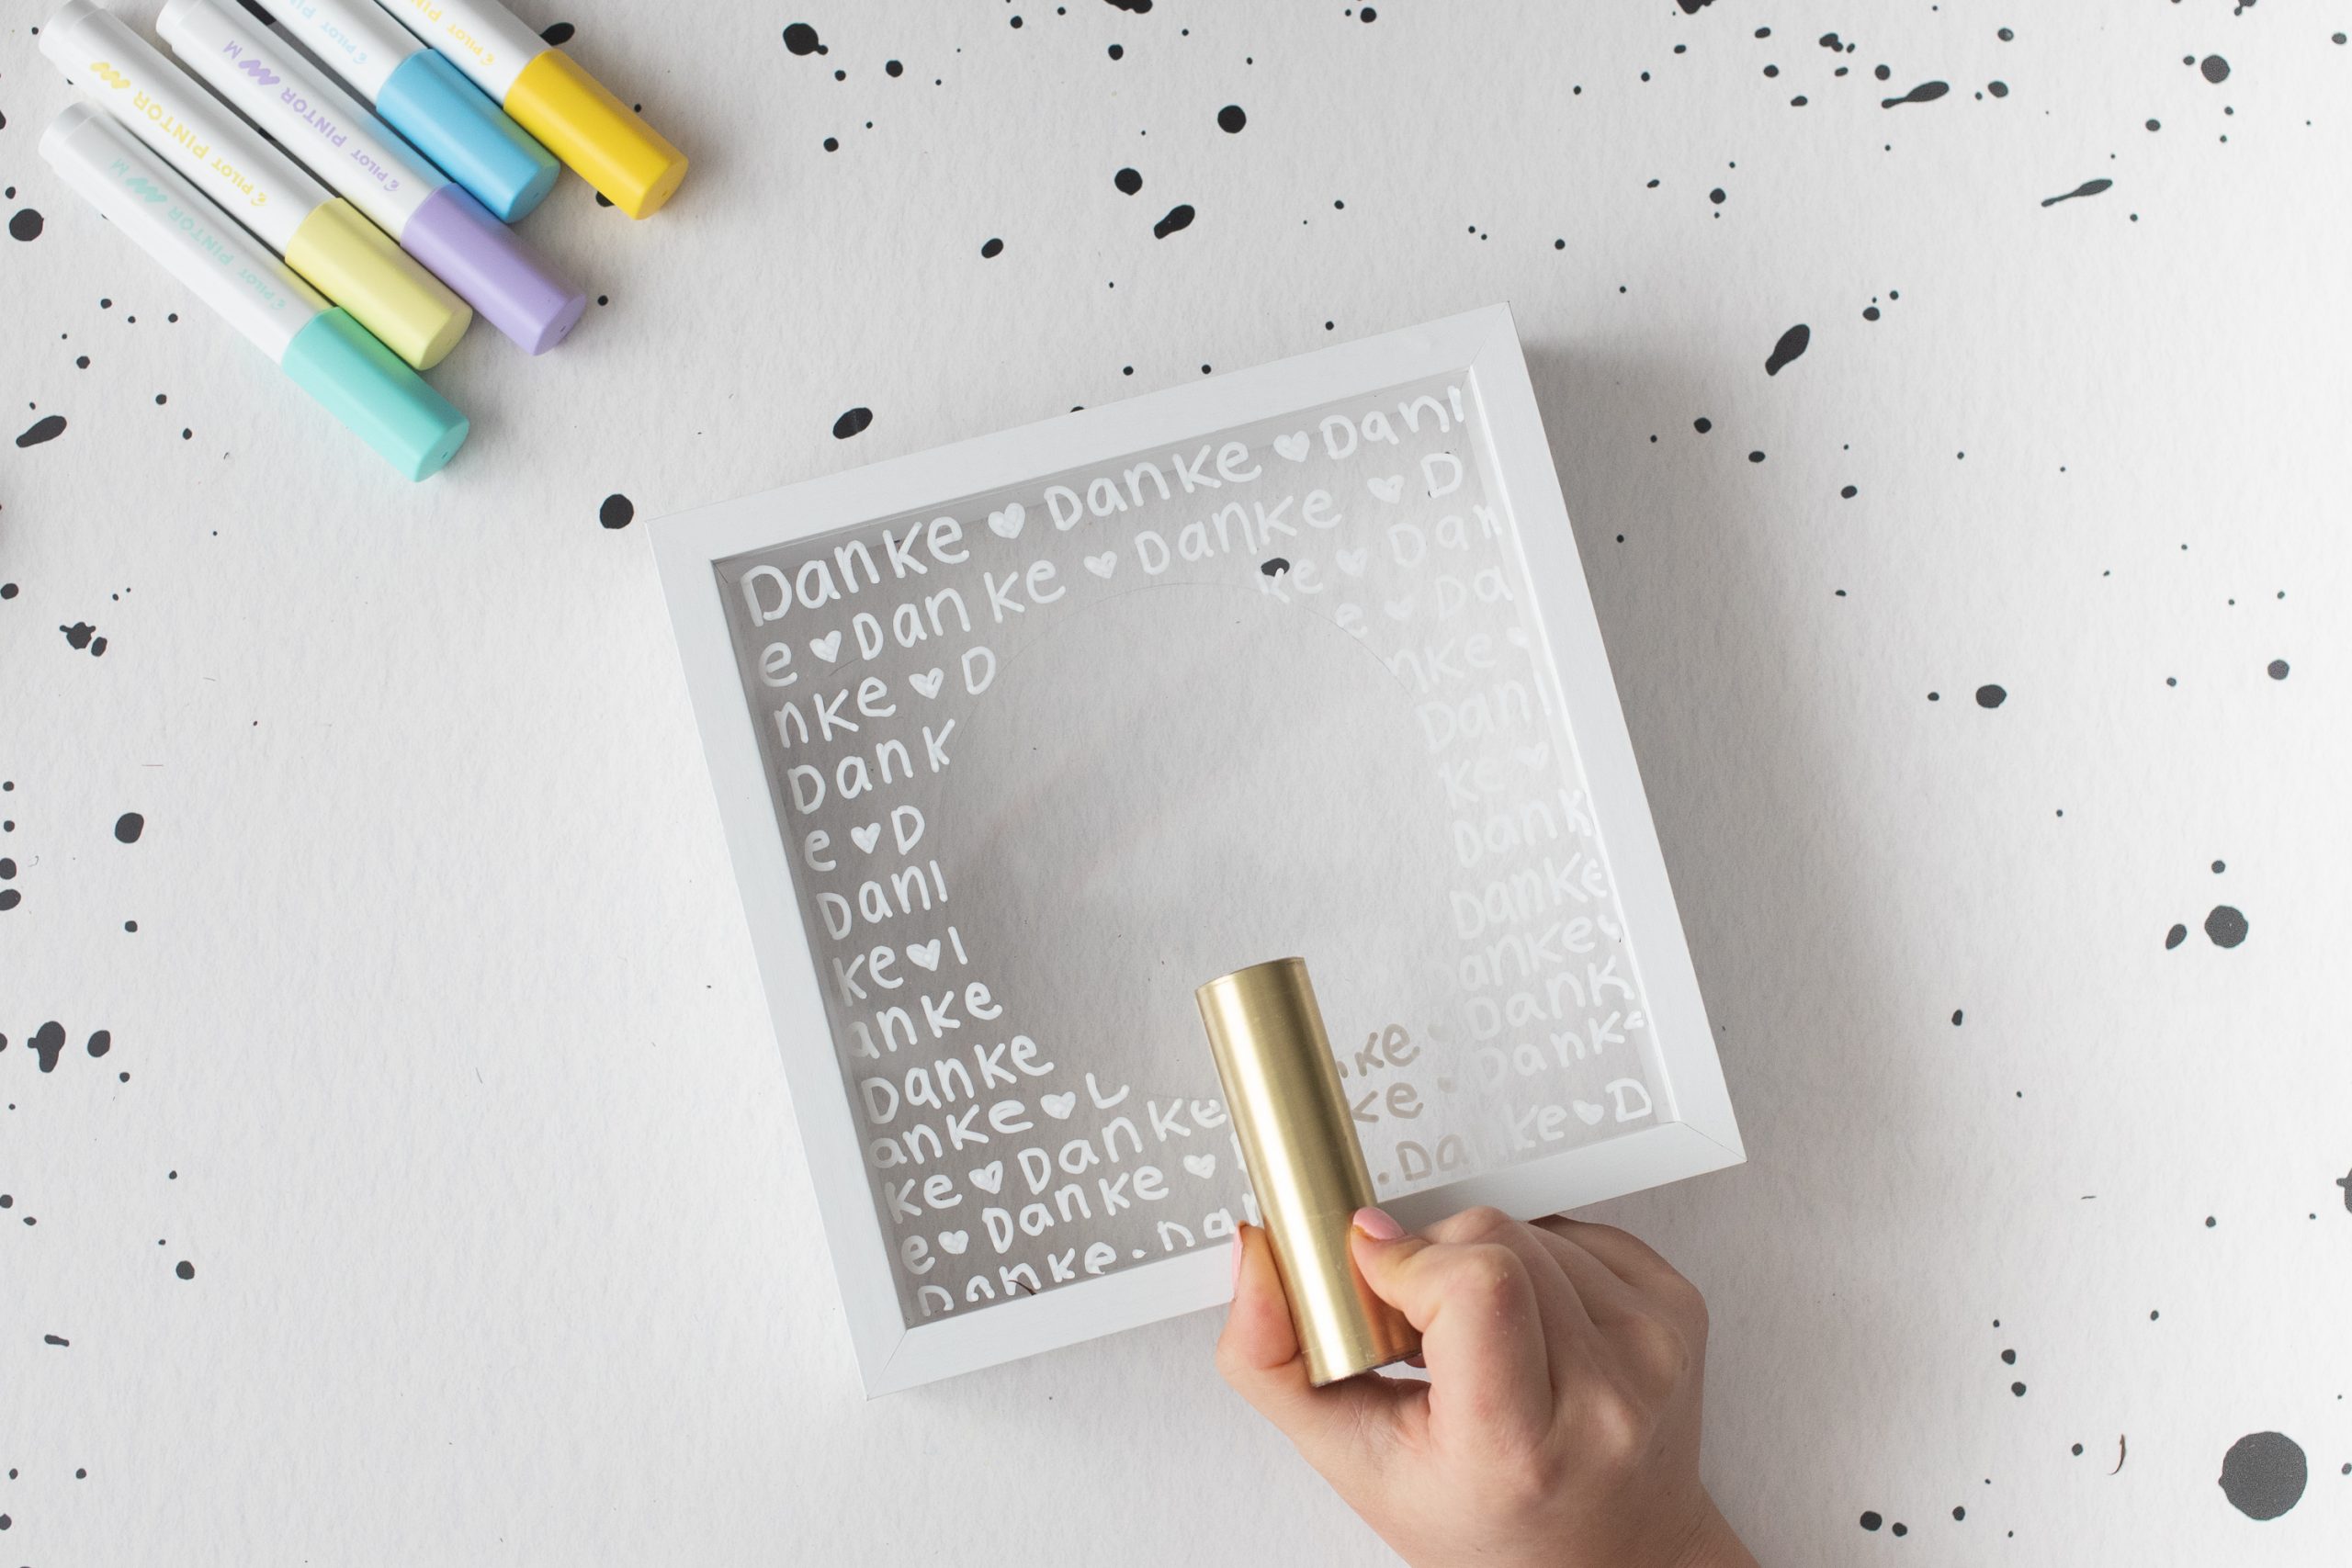
3. I separated the words with little hearts. I always started at a different place in the word so that the writing looks nice and mixed up. I left the circle I drew earlier blank. This is how the bouquet is beautifully highlighted.
4. The next step is the “vase”. I used a piece of gold curtain rod for this. You can also use a test tube instead, which you attach to the back wall of the picture frame. Alternatively, you can just roll up a piece of cardboard and use it as a vase. The “vase” is only for dried flowers and therefore does not get wet.

5. Since I used a metal curtain rod, I used a pipe cutter to shorten it.
Of course, if you are using something other than a vase, this step is not necessary.
6. Now use hot glue to glue the vase to the middle of the frame from the inside and press it down firmly.
7. Now you can decorate the vase with dried flowers. I trimmed the dried flowers so they are right in the center of the omitted circle.

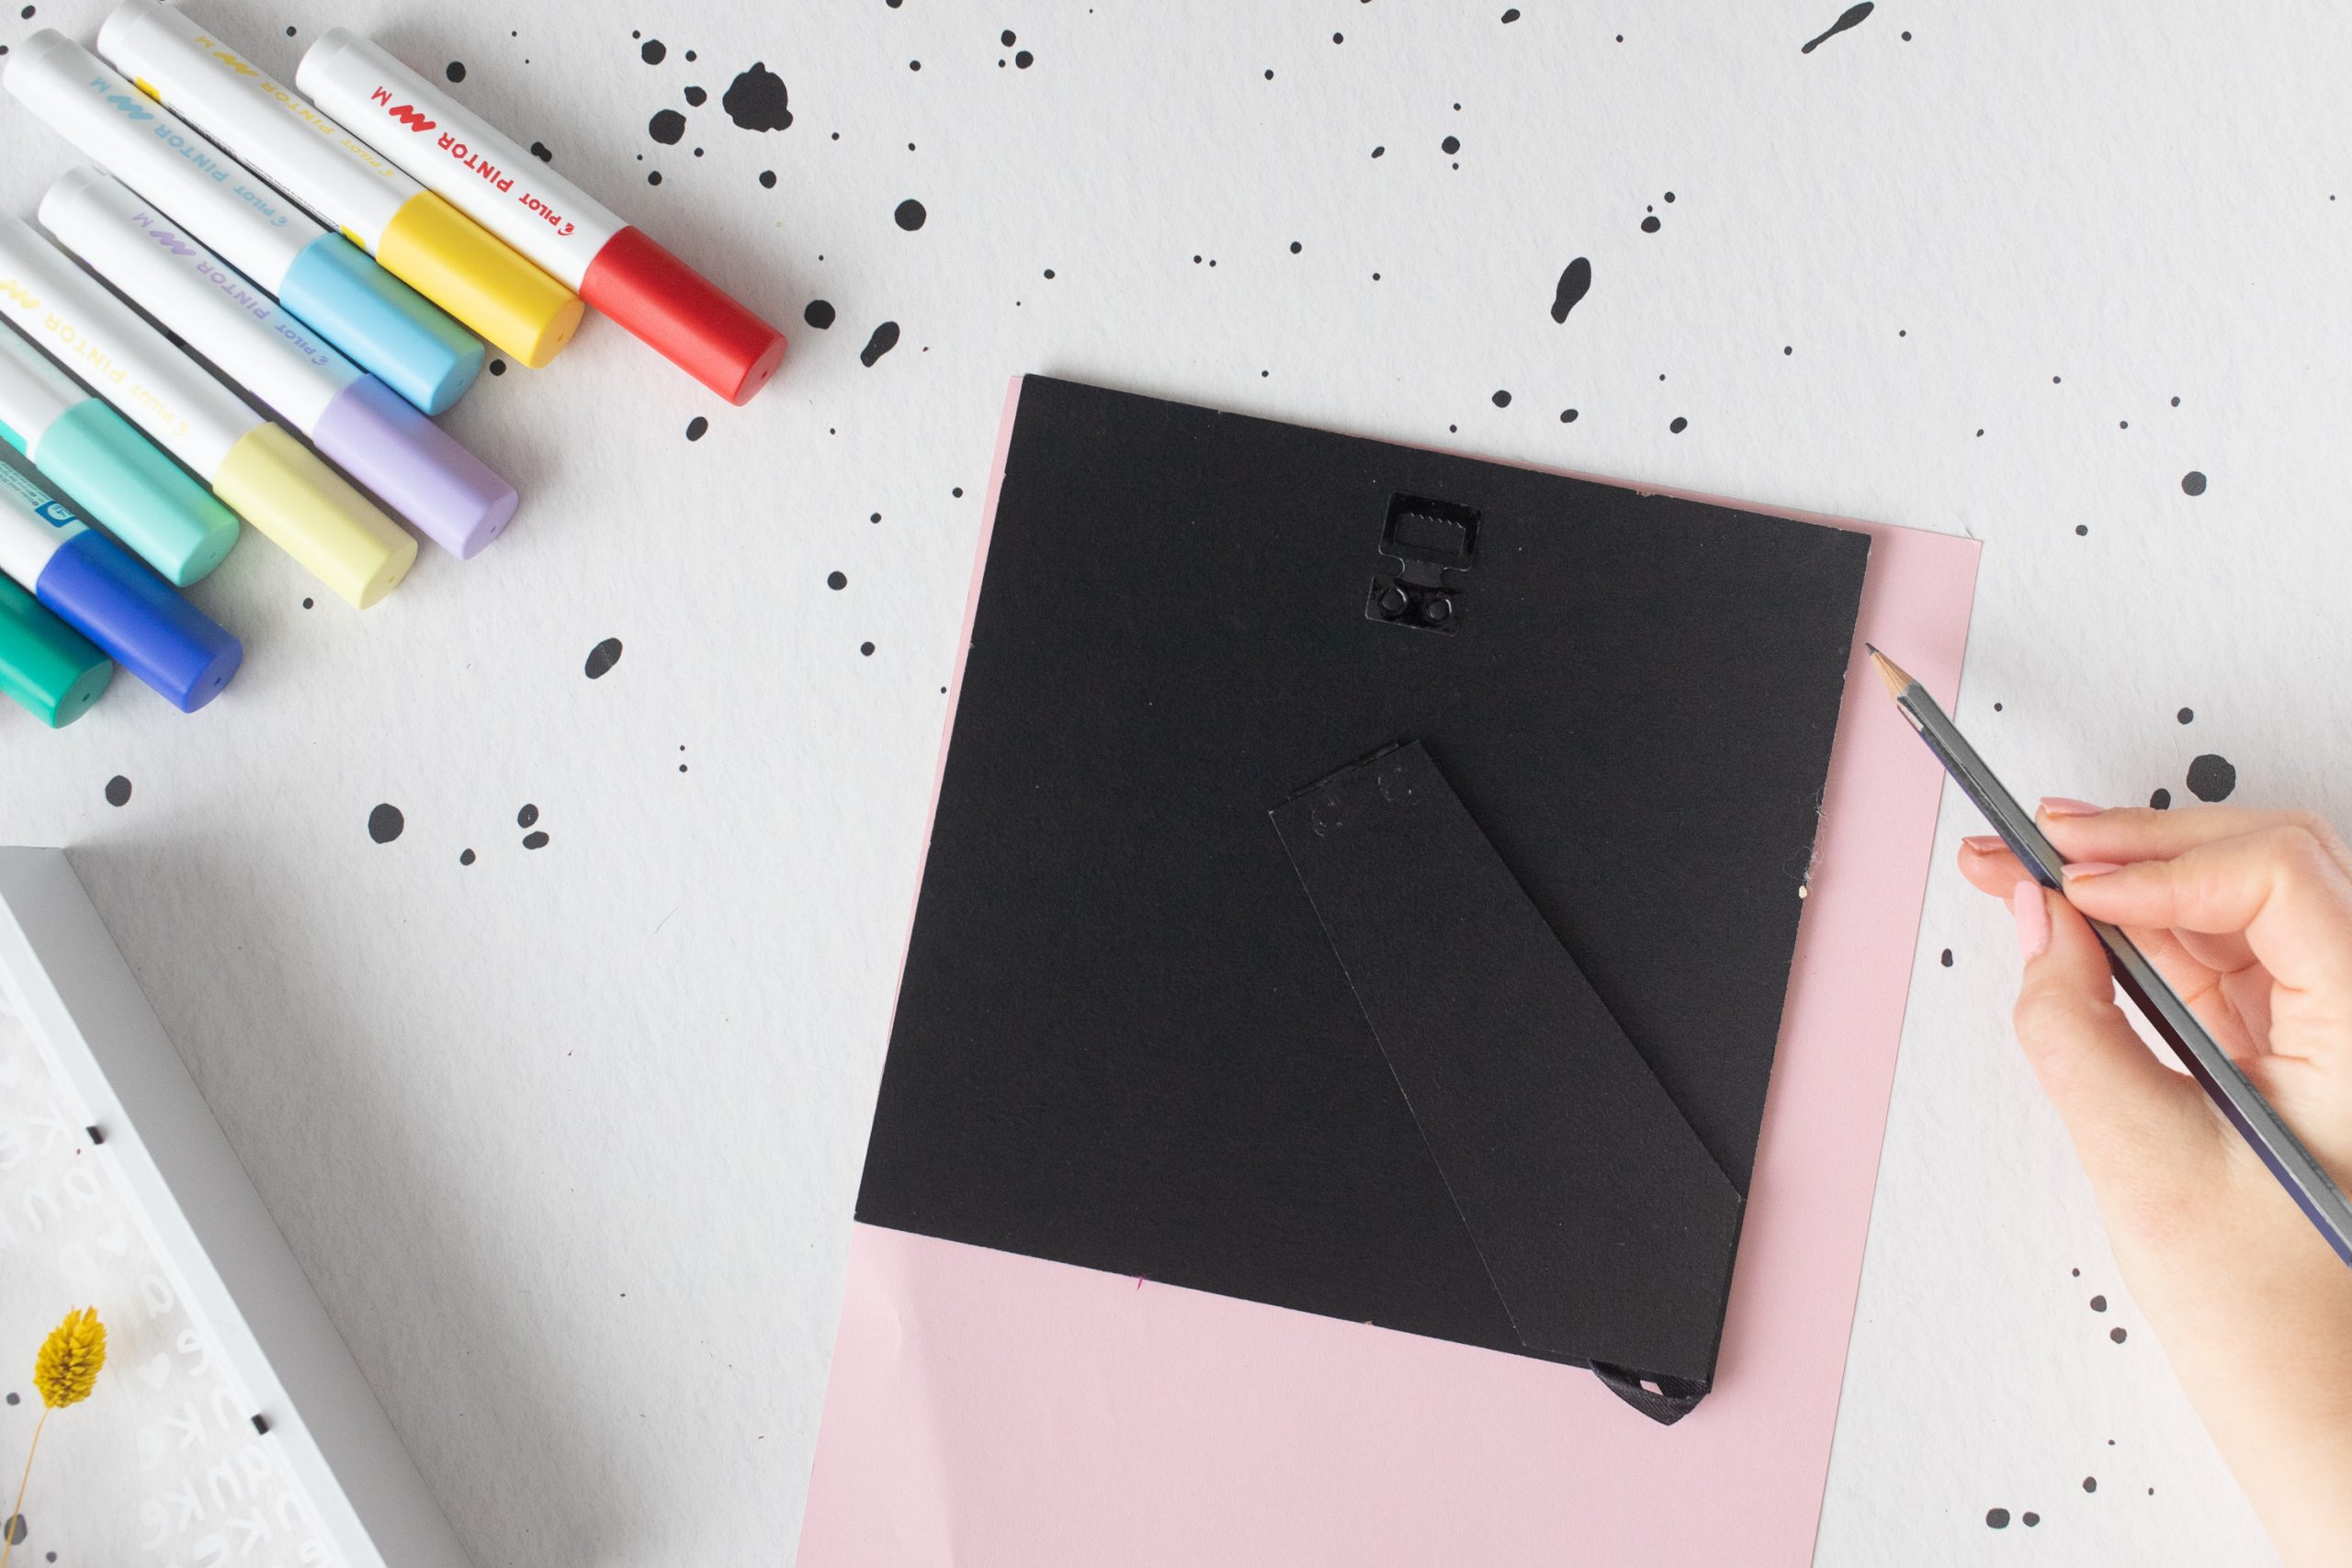
To make the writing on the glass stand out even better, I glued pink cardboard to the back of the frame. You can also leave the back wall white, that also looks good.
Now the picture frame is just put together – and the great gift idea is ready, which you can easily tinker with a picture frame. This is a nice DIY gift idea, which is also wonderful as a decoration. The special highlight is the writing with the PINTOR markers on the glass of the picture frame.
Of course, the floral decoration can also be exchanged at any time.

Do you like the DIY idea? Then feel free to take it with you on Pinterest with this photo and make a note of it on one of your pin boards:

I’m Lisa – and I can never sit still. I’ve been blogging about my passions on my fairy dust since 2013: These are great DIY ideas, chic designs and very special illustrations. The main thing is homemade! More about me.
Source: meinfeenstaub.com

