
This post contains advertising for POSCA Would you like to make a Mother’s Day card and surprise your mom with it? Then try this DIY sliding card, which you can easily make yourself.
Mother’s Day is a wonderful opportunity to give something back to our mothers with a small thank you. And what’s the best way to do that? With the classic: the Mother’s Day card! And that brings us to the new #DIYYearChallenge in 2024. Over the past three years, Lisa from meinfeenstaub.com and I have already implemented many projects on different topics and are looking forward to another creative DIY year with you. At the start we were able to meet our loyal partner POSCA* Win again for our project, who supported us with his acrylic paint markers.
Greeting card, birthday card or Mother’s Day card
For me it is always particularly nice to give something as a gift and give others a little joy. Greeting cards for birthdays, Mother’s Day or simply as a souvenir when visiting friends are always very pleasing to the recipient. Together with POSCA* and their variety of acrylic paint markers, I had plenty of scope to creatively implement this Mother’s Day card! The theme of May’s challenge is “a little thank you” and this is a wonderful gesture not only for Mother’s Day, but for many other occasions such as birthdays or to send someone a greeting from far away.
#DIYYearChallenge 2023/24
Lisa and I are taking on a creative challenge once a month for a year – the #DIYYEARChallenge. We independently implement a DIY based on a given topic and with the support of a sponsor. We get creative with the partner’s materials and publish our results on our blogs and social media channels. Our followers can win great prizes from the sponsor by voting for their favorite in the Instagram Reel.
Monthly theme for May: A little thank you
Lisa from meinfeenstaub.com and I have each come up with a craft idea for the month of May with the theme “little thank you” and, as already mentioned, we are supported by our partner POSCA. We were allowed to use the creative set from POSCA, for which we created creative ideas and templates together with Mone from machsschoen last year. The large selection of 20 different markers gave me lots of options to design my Mother’s Day card. Be sure to check out how Lisa interpreted the topic.

Ingredients
- POSCA acrylic paint marker or creative set*
- White paper, 220 gsm
- Motivpapier
- Origamipapier
- Iridescent foil
- Cotton fabric
- Scissors
- Lineal
- Pencil
- baking paper
- Foam pads
- Nagelschere
- Craft glue
Instructions
Using a pencil and a ruler, draw and cut out three pieces in the sizes 9.8 x 9.8 cm, 9.5 x 7.5 cm and 7.5 x 8.5 cm from plain white paper.
Cut out two pieces of motif paper measuring 10 x 10 cm.
Now cut out a strip measuring 17 x 2.5 cm from the baking paper.
Now cut two central paper slits 3 cm long and 1 cm away from the edge into the 9.8 x 9.8 cm piece of paper.
Insert the strip of baking paper into the slots and glue it together from the back with craft glue.
The gluing point is now moved all the way to the left of the slot.
Apply craft glue to the glued area on the far left and stick on the 7.5 x 8.5 cm piece of paper.
Now turn the paper over once and spread some craft glue on the far right and stick the 9.5 x 7.5 cm piece of paper on.
While the glue dries, prepare the paper flowers.
Cut a strip of different colors of origami paper and fold it back and forth in a zigzag pattern.
Draw a flower on the folded paper with a pencil.
Cut out the flower with nail scissors. This way you can cut out several flowers at once.
Now the flowers are painted colorfully with the acrylic paint markers.
The flowers are glued onto the papers measuring 9.5 x 7.5 cm and 7.5 x 8.5 cm. Important: The flowers must all be glued on the same side!
Distribute foam pads at the top and bottom of the card – with enough distance from the flowers so that you can open the card later – repeat the same on the back.
The motif paper is now glued onto the foam pads as a cover from both sides.
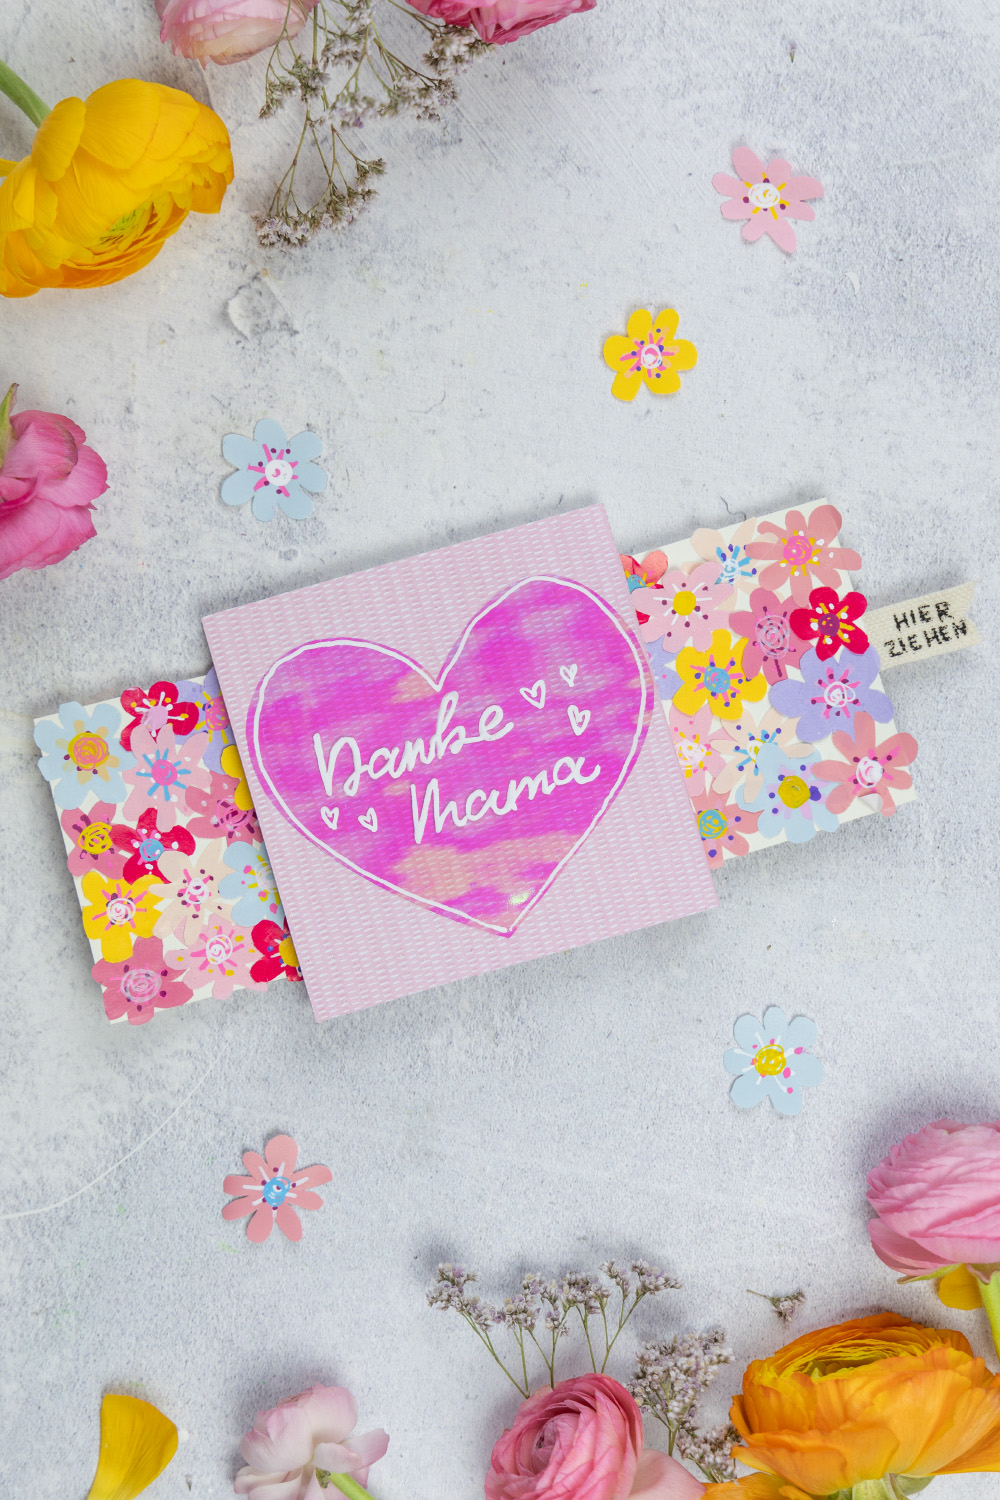
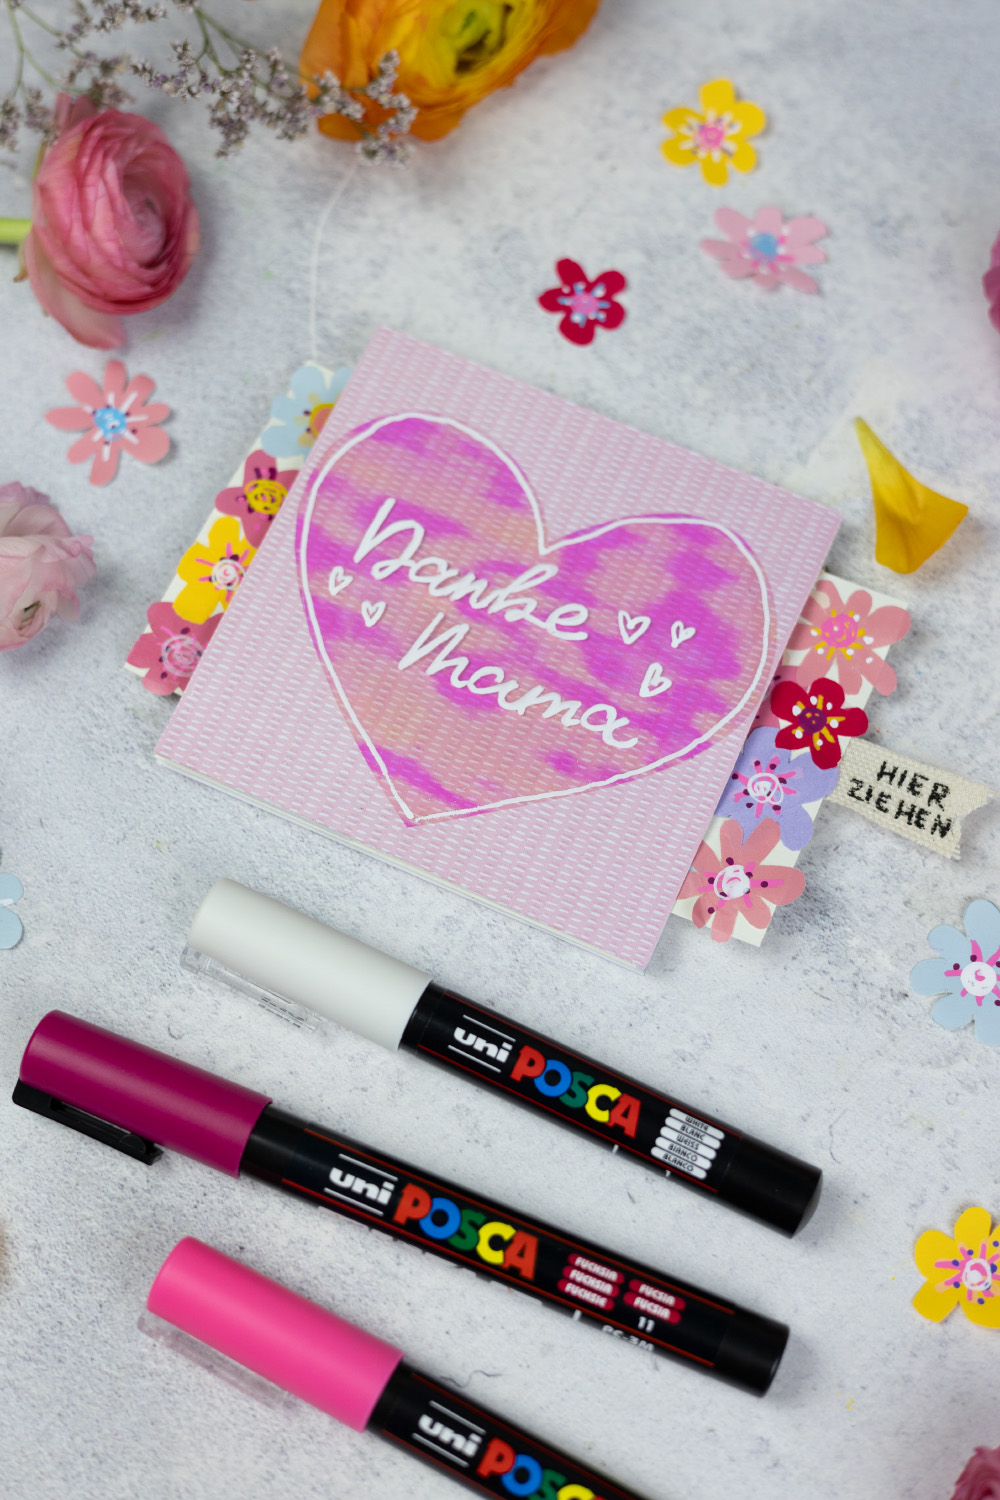
Cut out a heart from the iridescent foil and write “Thanks Mom” or another greeting on it with the acrylic paint markers. Additionally, decorations can be painted on it.
The heart is now glued to the front of the card.
Cut out a small sign that says “Pull here” from the cotton fabric and stick it behind the 9.8 x 9.8 cm paper.
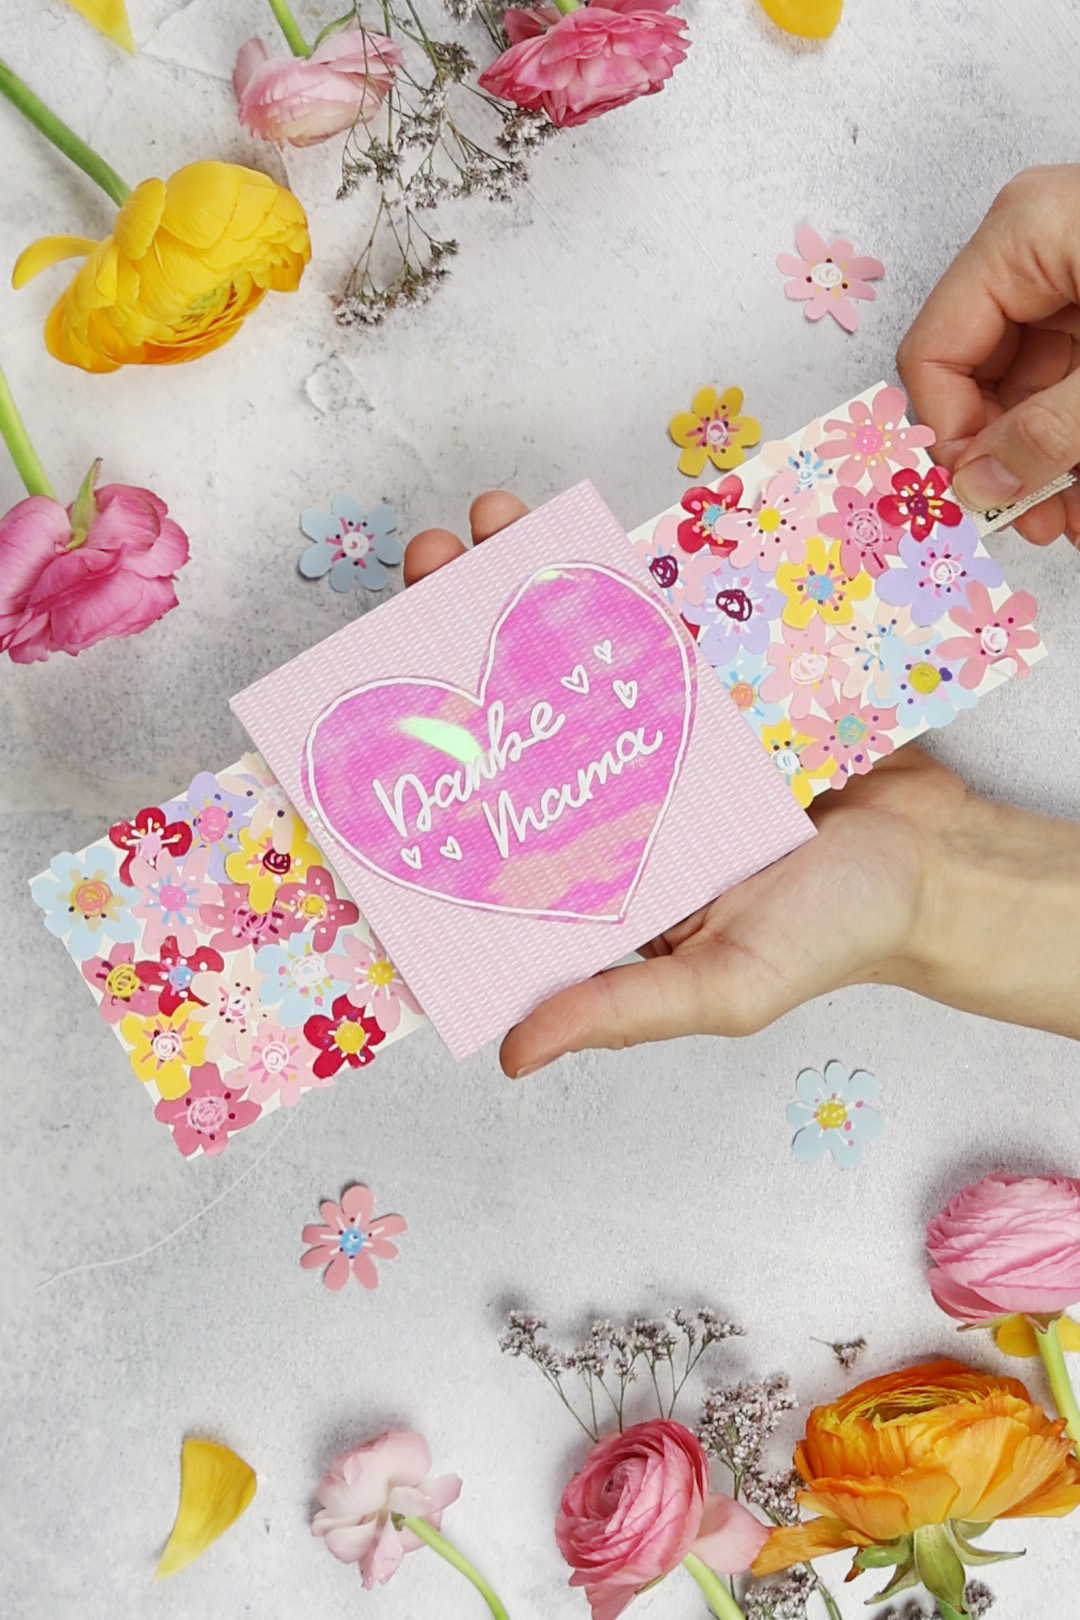
If everything worked, you can now pull on the small sign and the sliding card can be opened. Your Mother’s Day gift is ready!
Make creative greeting cards with POSCA
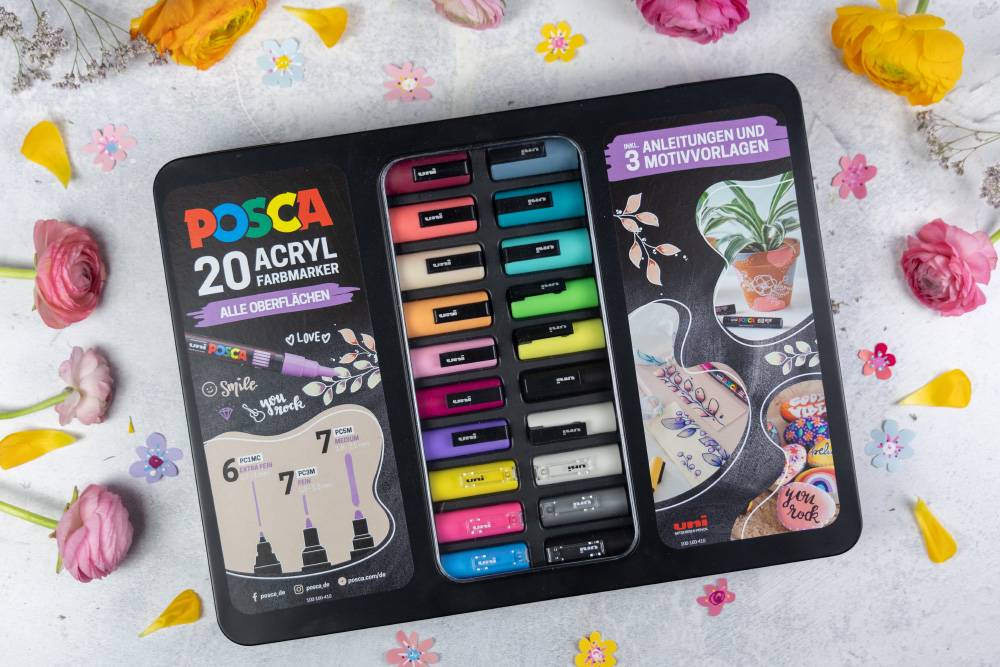
As promised, now find out a little more about him POSCA Acryl-Farbmarker* and that The creative set*. The color markers provide creative impulses and inspire artistic energy on all surfaces – from street art to fine art, as well as illustrations and graffiti.
As part of the creative set, the markers are delivered in a high-quality metal case containing 20 different colored markers with different line widths. The extra fine tip PC-1MC, the fine round tip 3M and the medium fine round tip 5M for many possible applications. The durable and waterproof color of the markers is suitable for almost all surfaces. You can use the acrylic paint markers to paint, for example, glass and ceramics, wood and textiles, paper and cardboard, plastic, metal and stone. In the metal case you will also find 3 creative ideas with instructions and suitable templates as well as a brochure with lots of tips and information about the markers.
If I have inspired you for a new DIY project, you shouldn’t miss this competition:


Win the POSCA creative set
So that you can see the products for yourself, POSCA, Lisa and I are giving away a POSCA suitcase to you, which contains 20 acrylic markers in different colors and line widths.
You can find all the conditions of participation here and information about winning can now be found in the current Reel*.
Next month’s challenge theme is: Let’s Party!
See you then. Your Laura
* In cooperation with POSCA
Source: trytrytry.de

