
Colorful summer collection and fun for children with IKEA Sindelfingen and Ludwigsburg *Advertising
Yay, spring is fast approaching! And with it the anticipation of warm barbecues at home and the colorful summer collection from IKEA, which I would like to show you in this blog post. Together with IKEA Sindelfingen and IKEA Ludwigsburg there is a small tour through the summer furniture exhibition with a few new furniture collections. And so that all parents can really relax in peace and quiet on their summer furniture in spring, I have a super sweet summer DIY for your children afterwards: a play raised bed made of KNAGGLIG boxes and DUKTIG play vegetables. Do you fancy it? Let’s go 😉
1.) The summer furniture area at IKEA Sindelfingen
Small but nice! The most important outdoor innovations for all IKEA fans can be found in the well-arranged summer furniture area. The focus here is on the two new furniture series NÄMMARÖ and SEGERÖN as well as the GRILLSKÄR series, which this year has a few additions waiting for grill lovers.

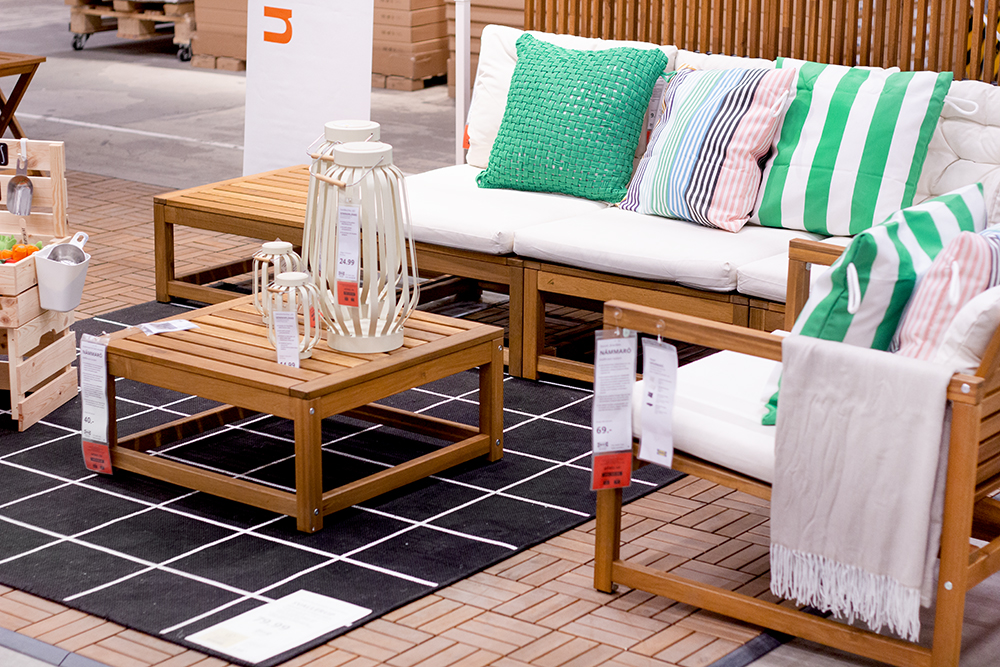
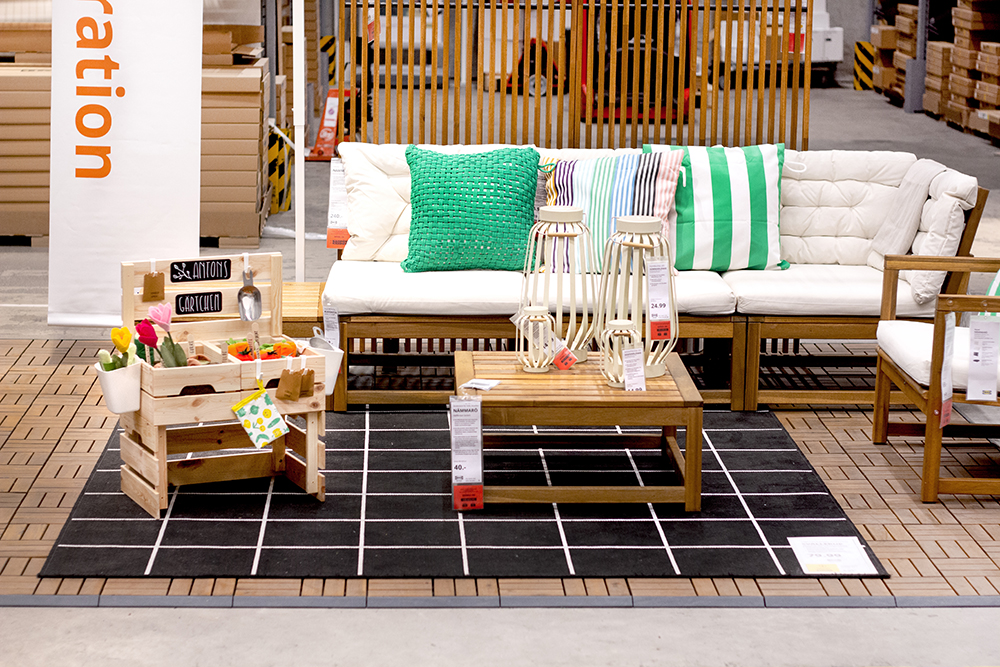
Here it is, the new NÄMMARÖ series, which replaces the previous model and appears in a lighter and therefore friendlier color tone. With the individual modules, a cozy outdoor living room atmosphere can be created very flexibly. On the sofa here you can see the cushions from the new summer collection: radiant shades of green and a colorful striped look ensure freshness and geometric simplicity at the same time.

I particularly like the woven structure of the TOFTÖ cushion, which looks equally cool indoors and outdoors and can withstand a lot with its water-repellent surface.
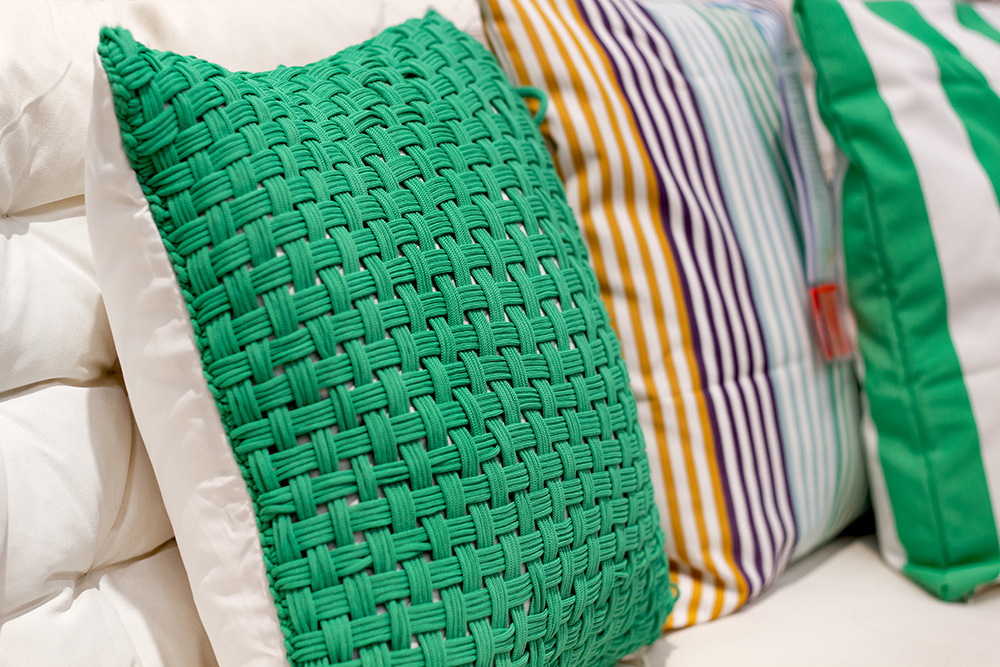
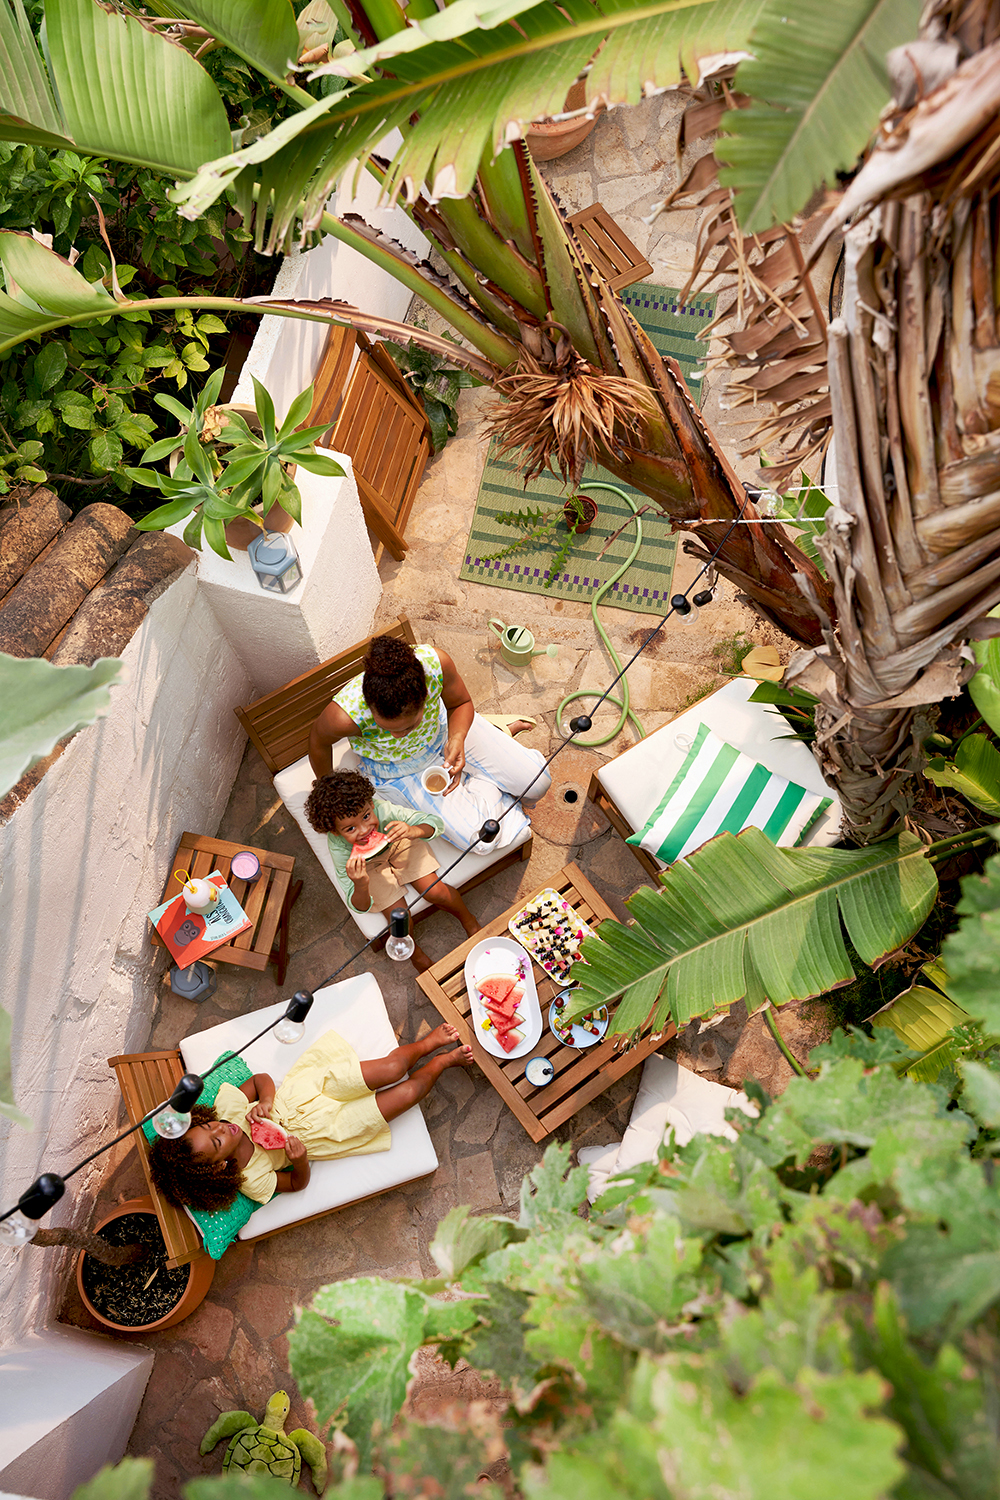
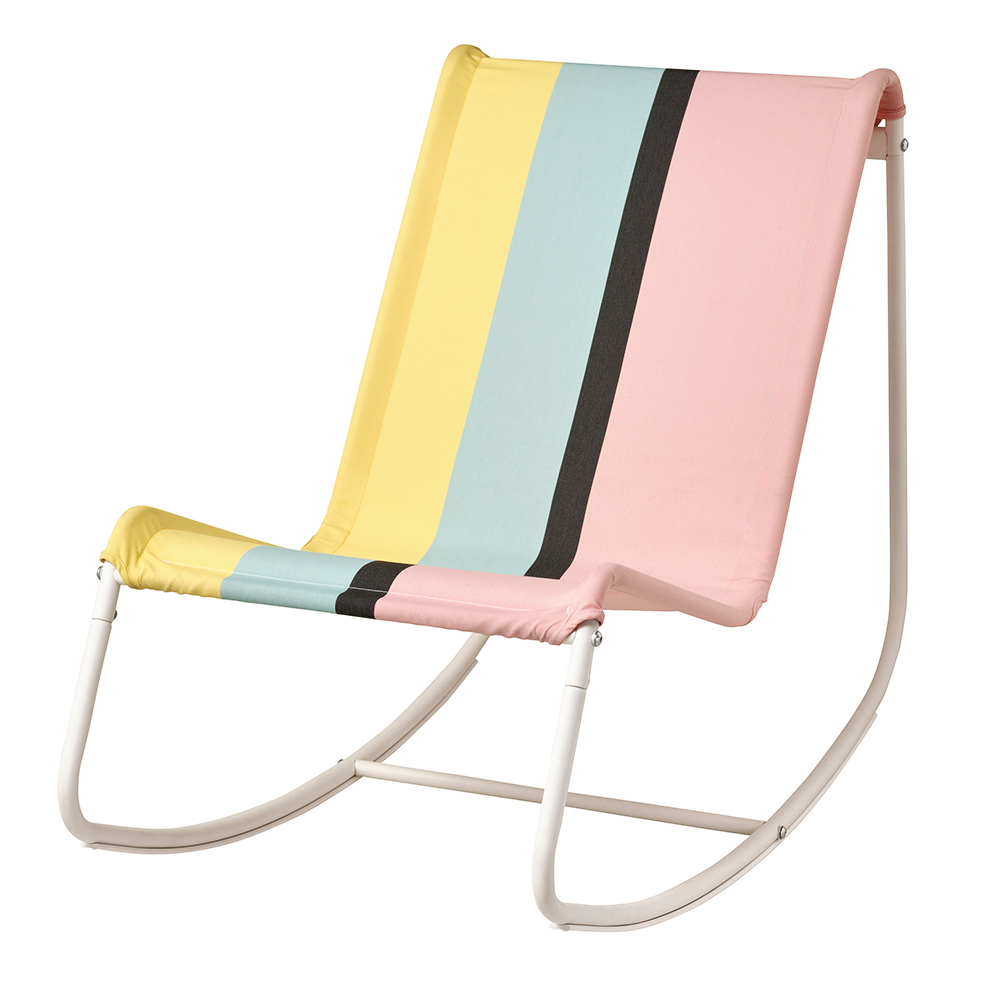
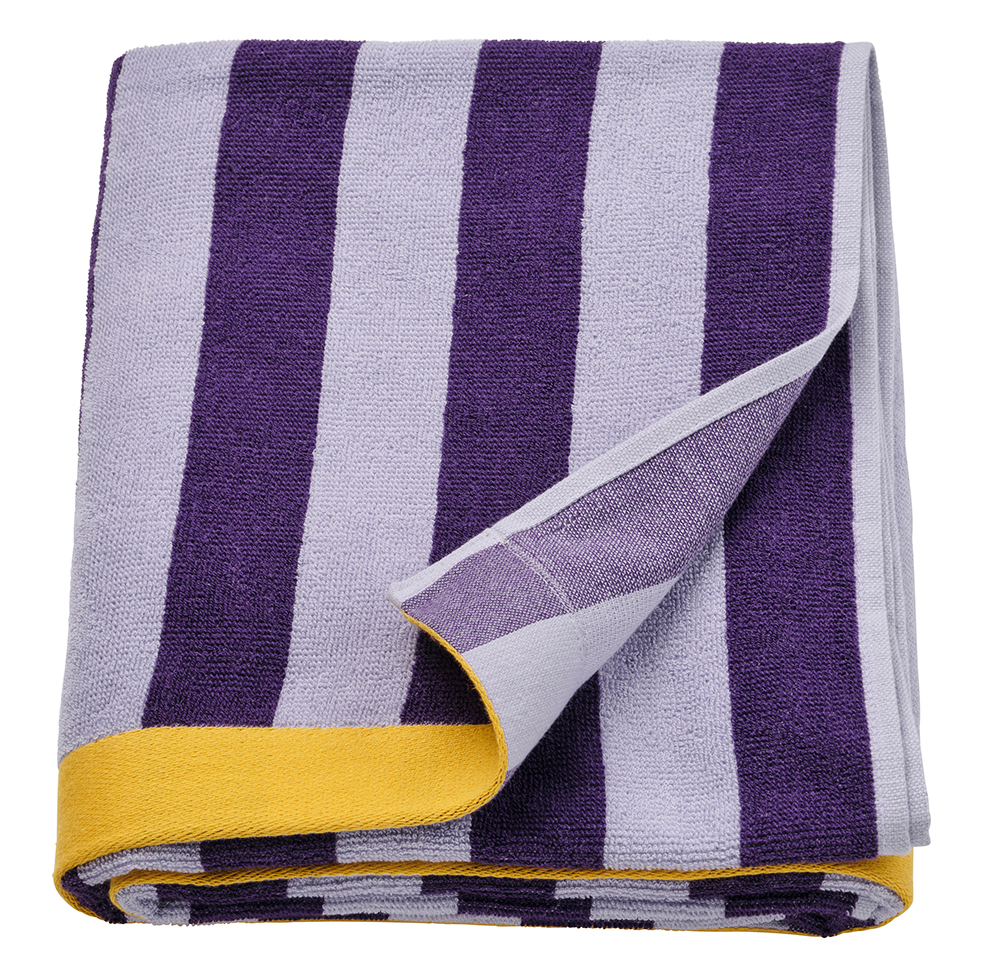
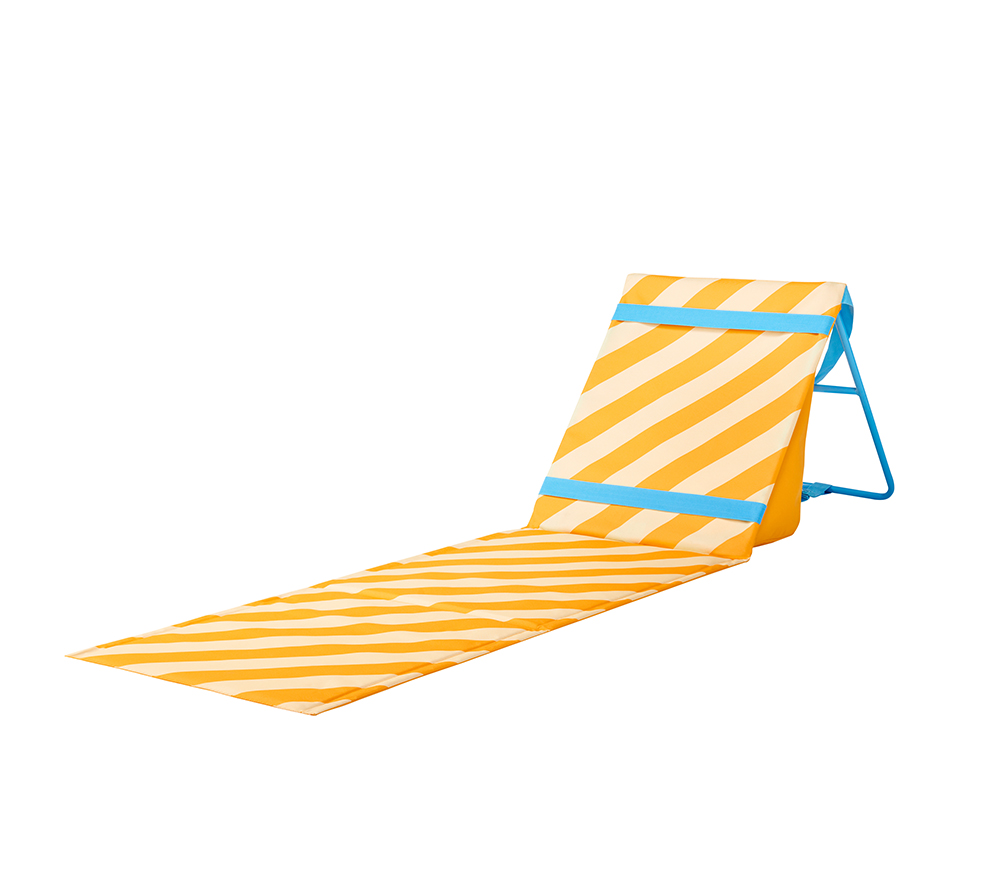
The other products from the summer collection are also colorful and have a striped look. There are also some handy accessories and portable seating this time around for family outings or beach days.
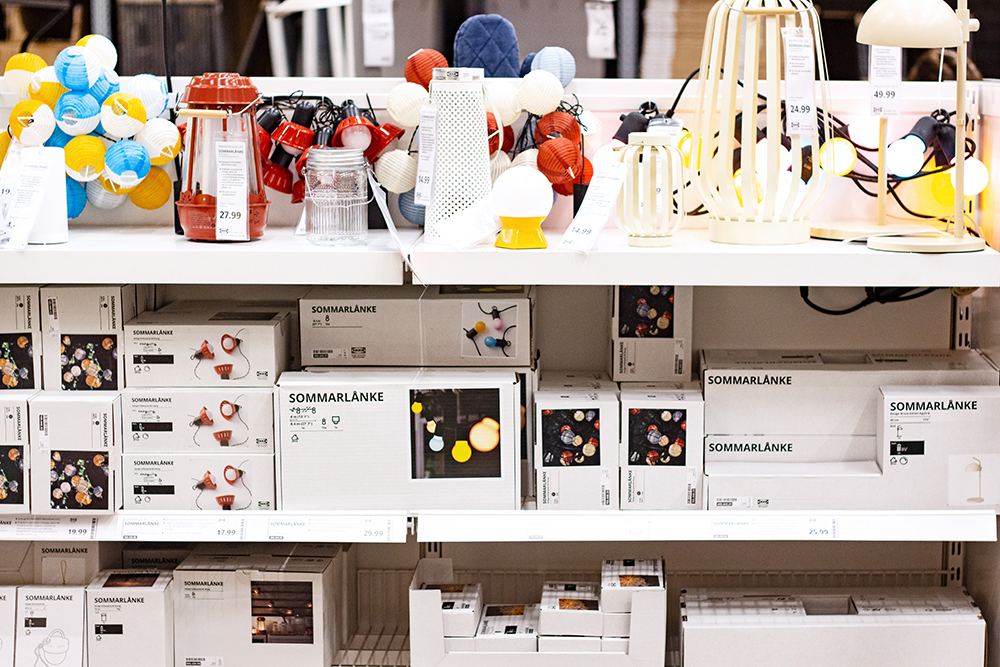
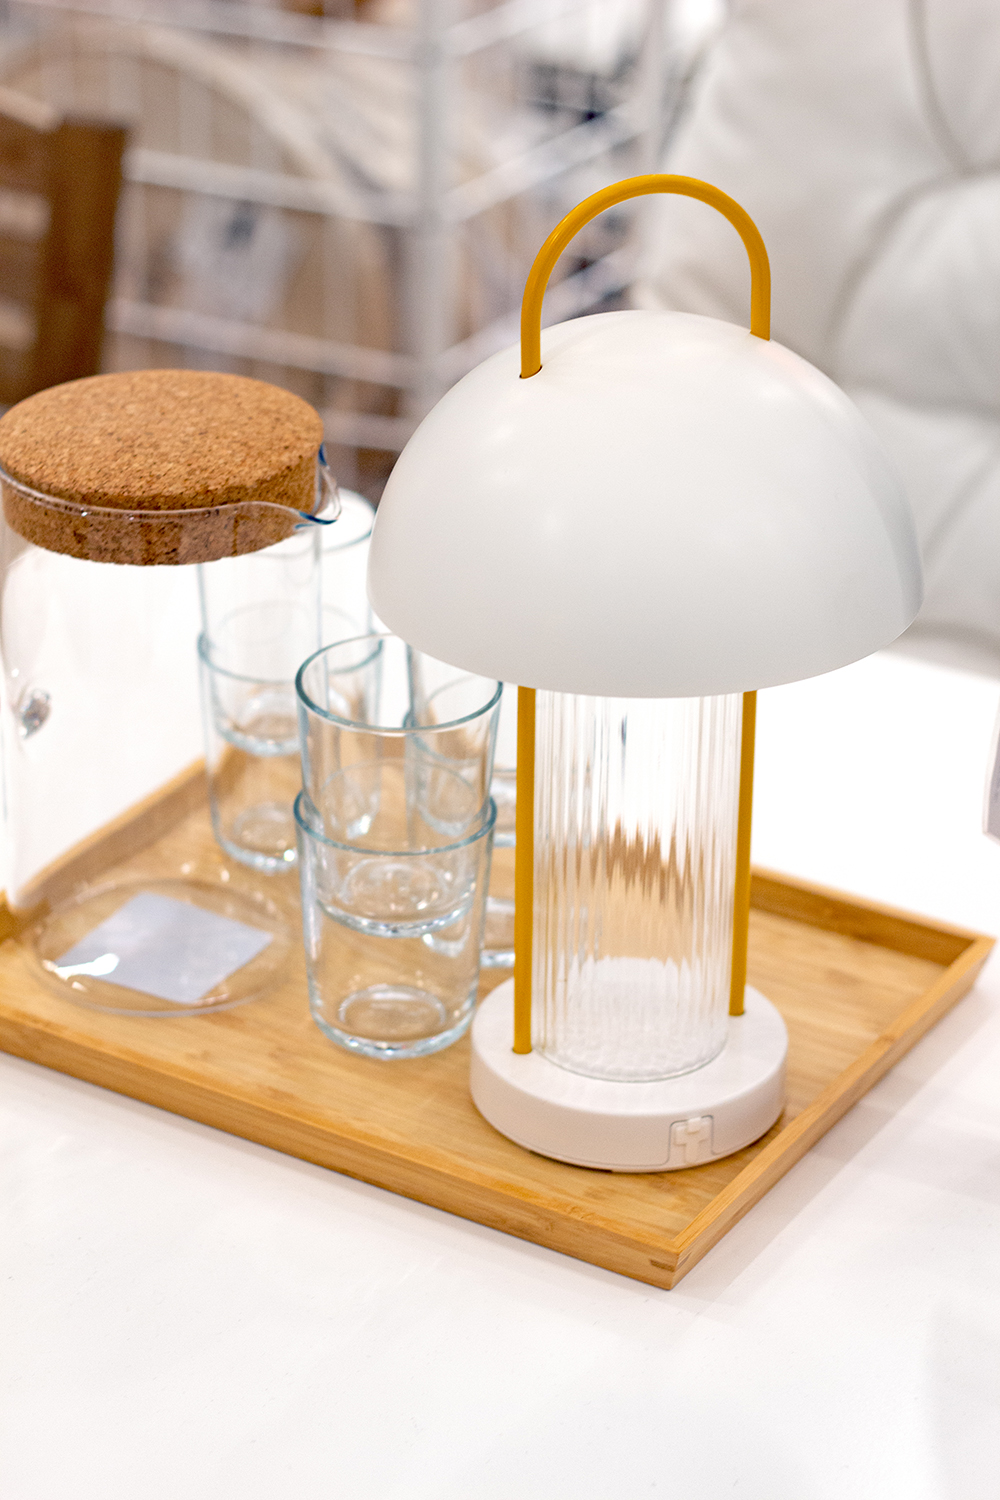
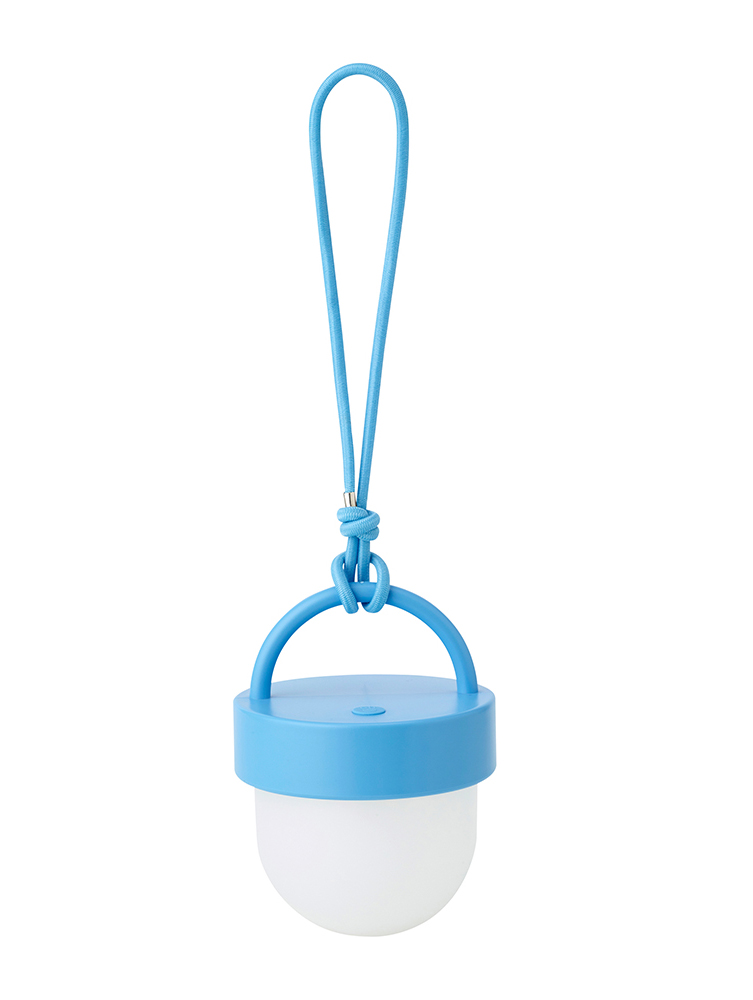
Matching the fresh color look: the new light chains, solar lamps and LED lights. You can even charge some of the latter very conveniently via a USB cable.

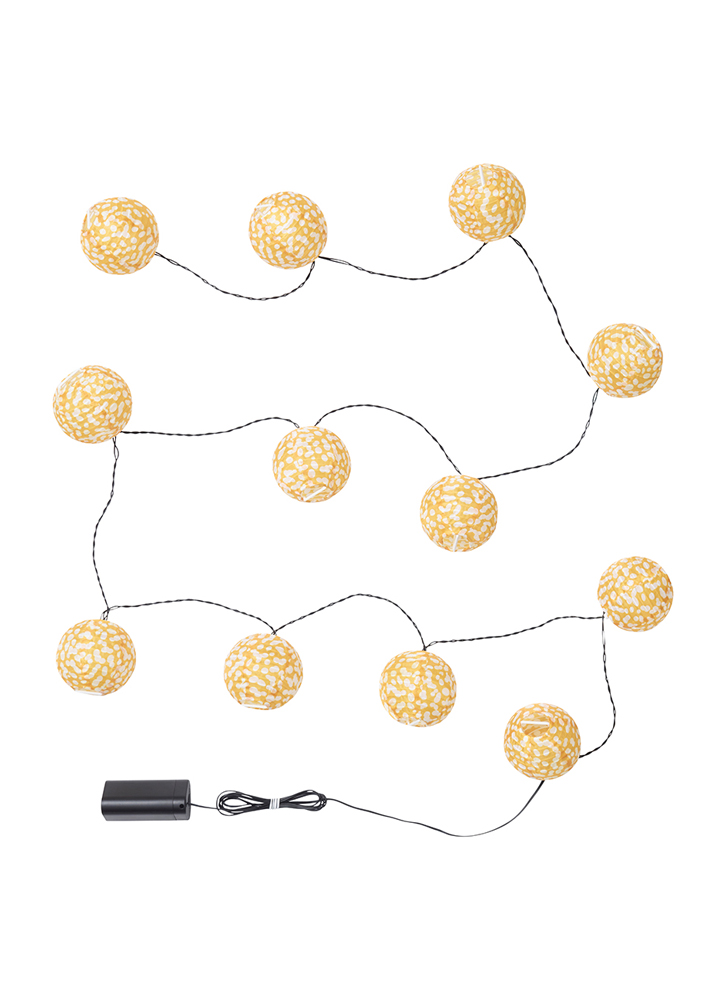

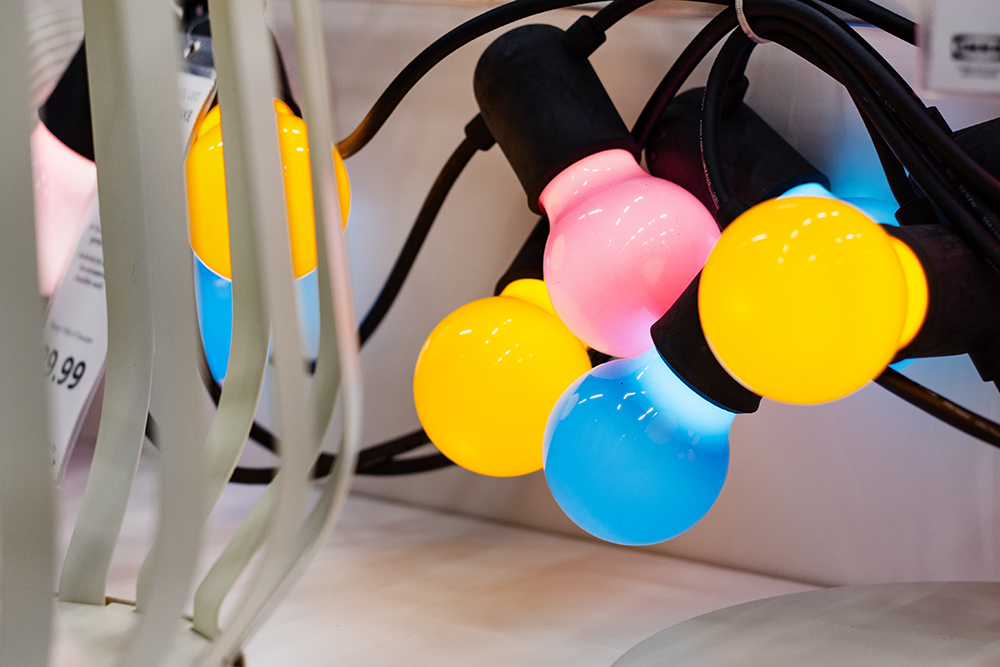
Always one of my absolute favourites: The SOMMERLANKE chain of lights, which has already been available in different versions – this time in yellow-pink-blue for a great evening atmosphere on the balcony and terrace:
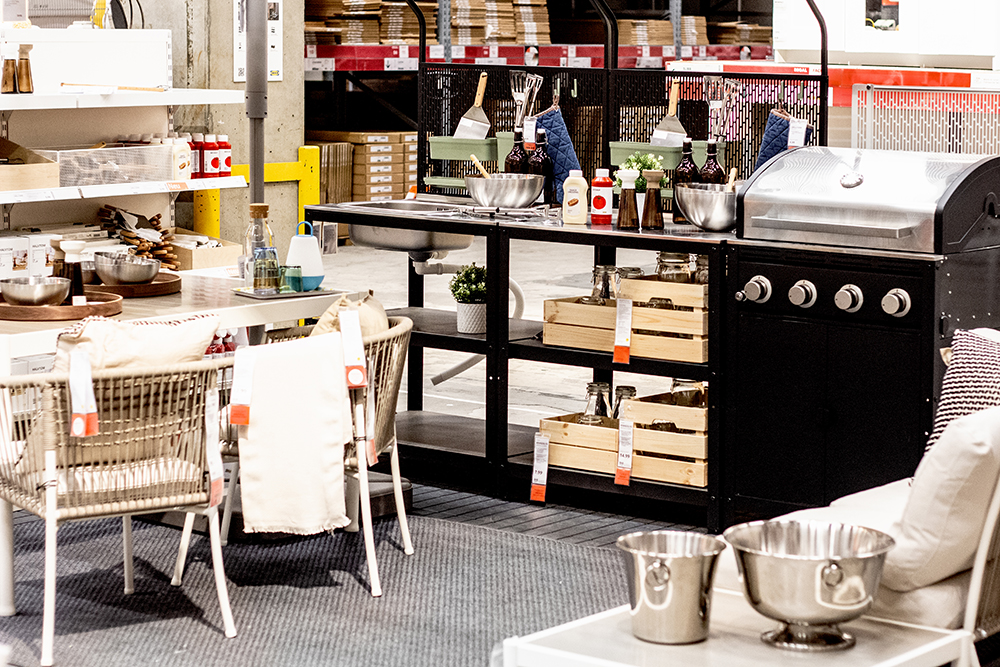
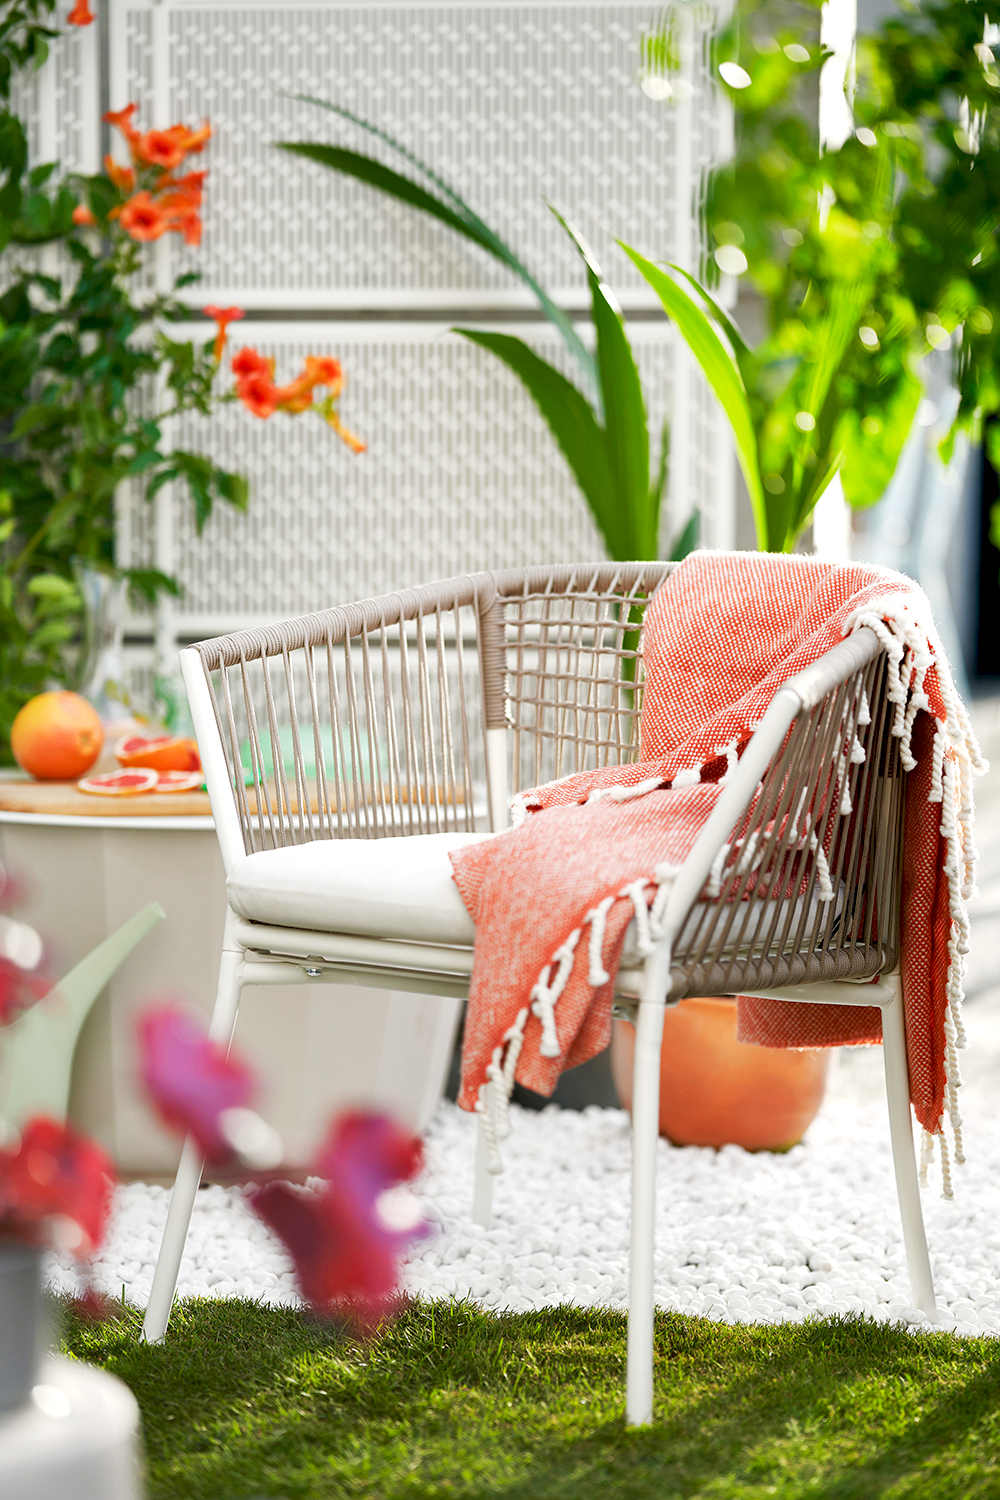
Now we come to the second highlight of the summer furniture area: the new furniture series SEGERÖN is presented together with the outdoor kitchen GRILLSKÄR and both just look great together! The minimalist furniture series is affordable yet of high quality so that it will last for a long time. It also looks almost luxurious with its timeless design in light cream tones.
From single-seaters to sun loungers and sofas to lounge sets, the modules can be put together as you like and ensure a stylish outdoor area that invites you to relax.

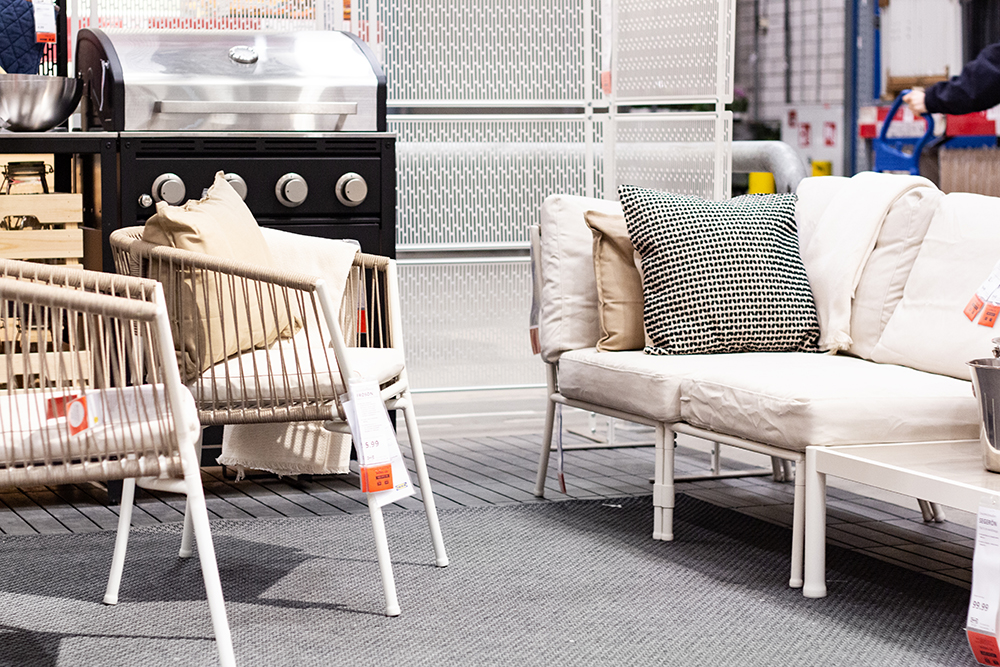
Here you can see the chair again up close. Super pretty with the cream-colored laces in a woven look, isn’t it? I think it’s a real designer piece.
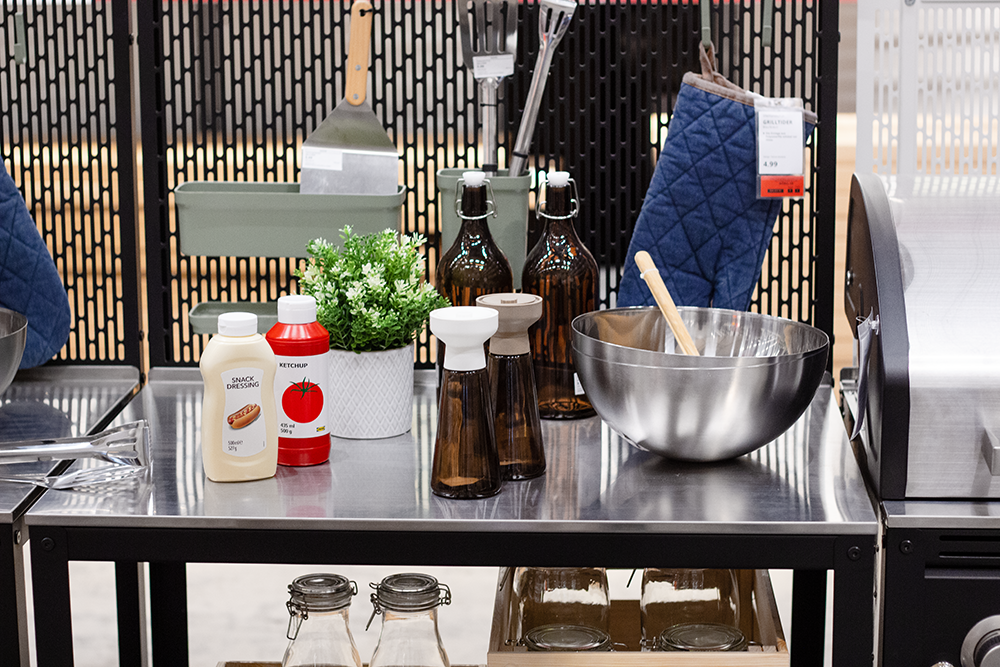
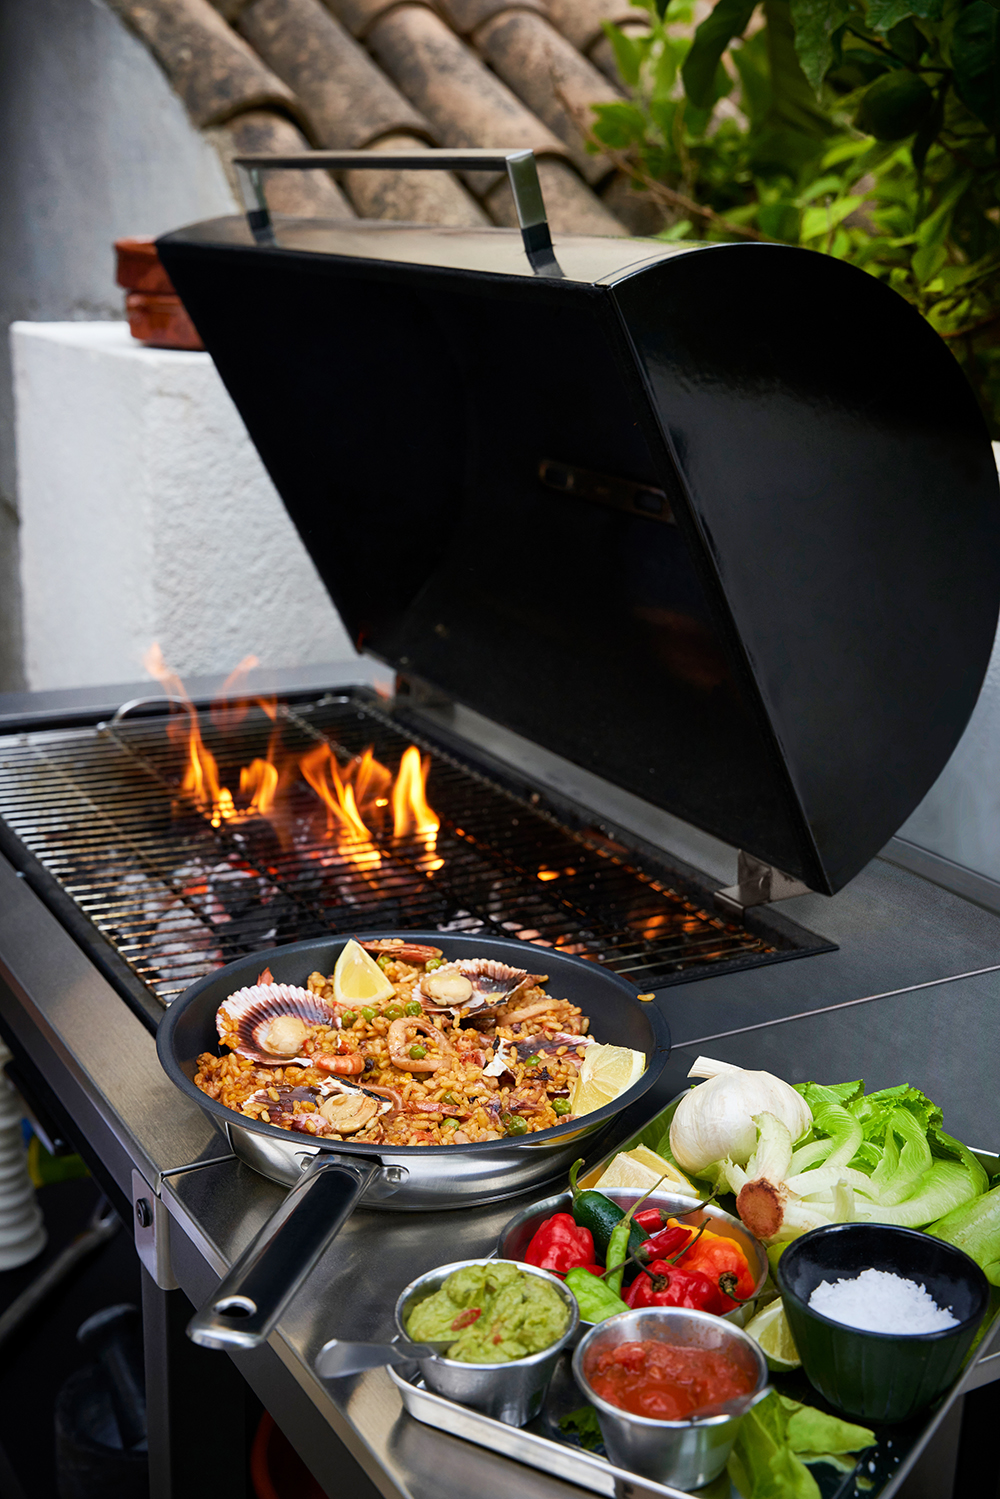
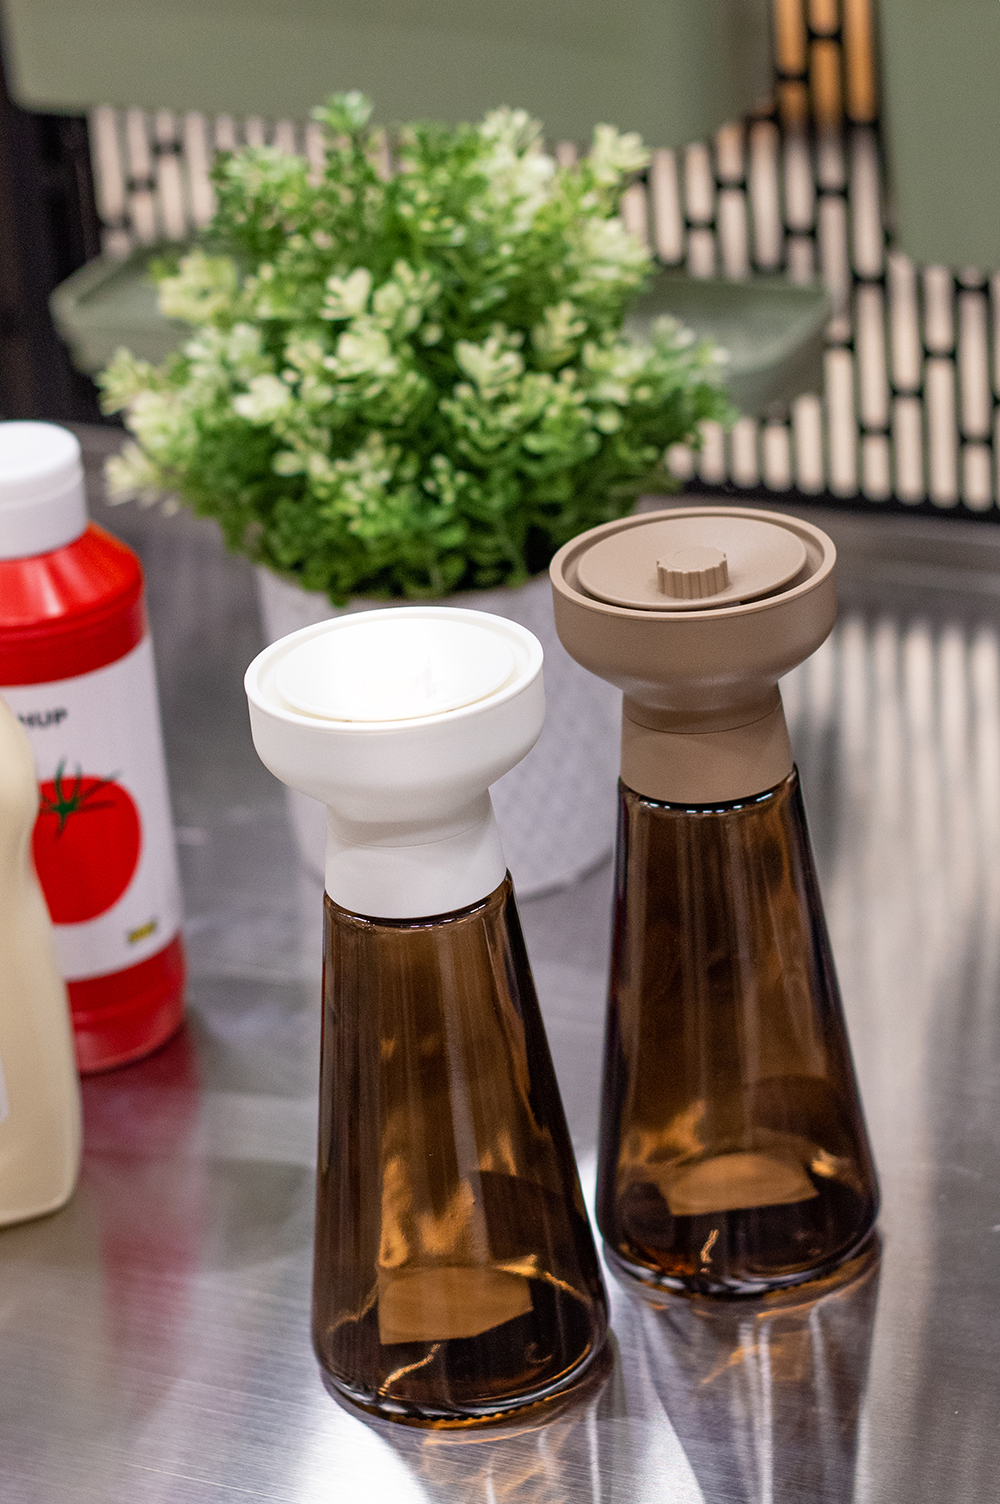
Let’s now come to the super stylish open-air kitchen. GRILLSKÄR consists of robust elements that have everything you need for a functional cooking station, from the worktop to the grill to the sink. The rear walls that can be mounted round off the outdoor kitchen wonderfully and also offer space for various plug-in holders for storing kitchen accessories.
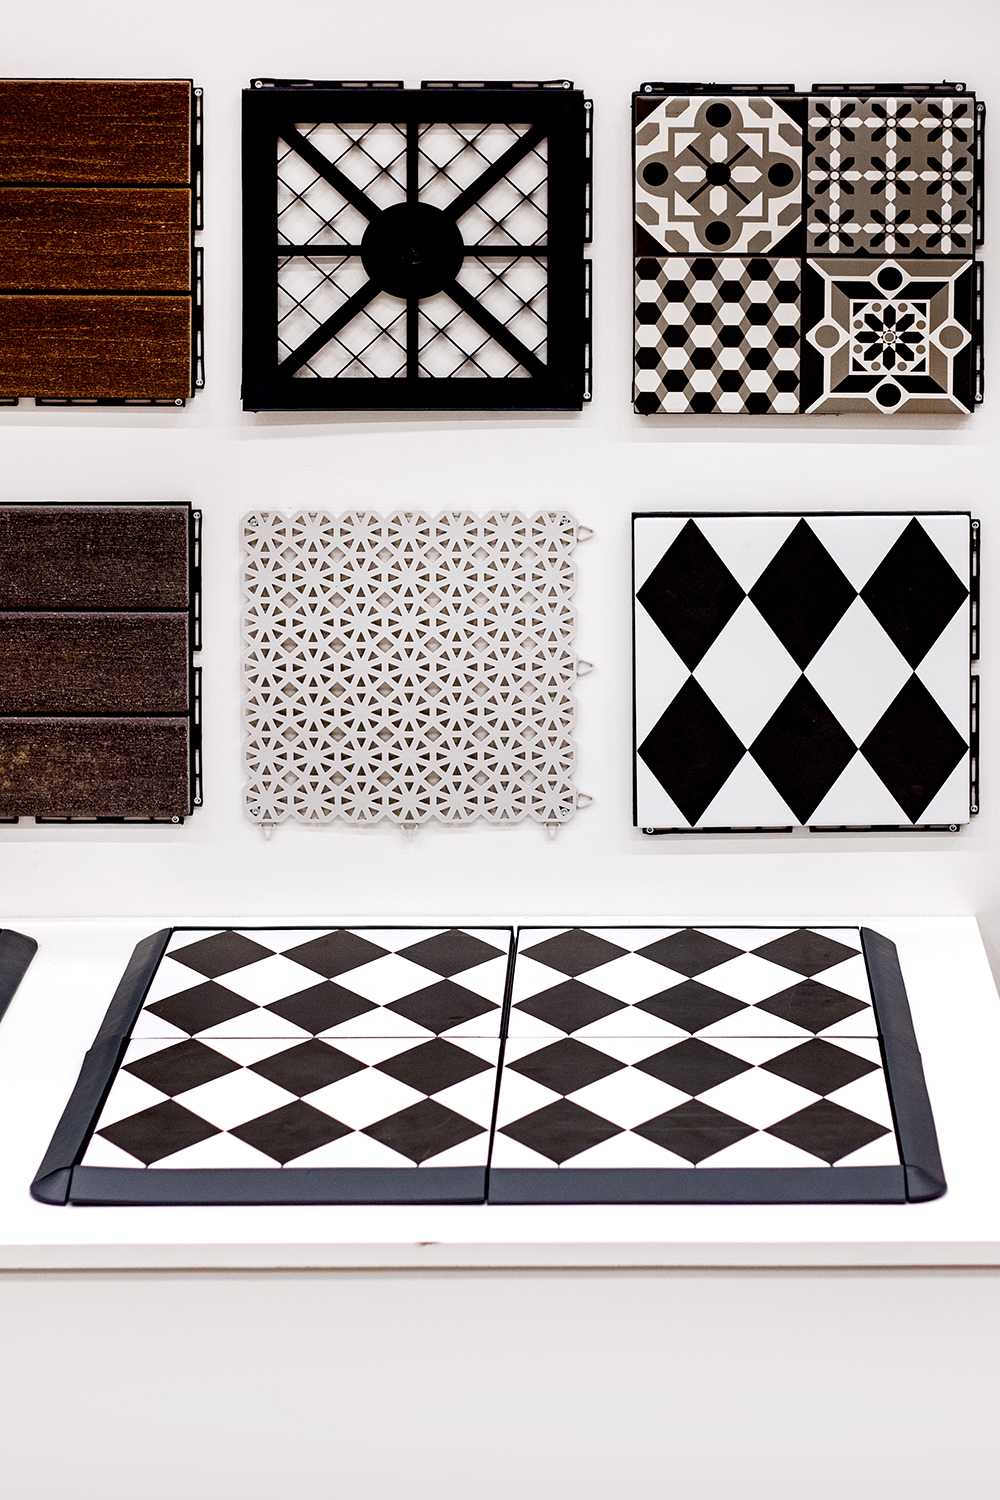
Last but not least, I would like to show you the great outdoor tiles. I especially love the checked pattern MÄLLSTEN and I imagine it to be incredibly stylish as a floor for the outdoor kitchen. I would love to set everything up on our terrace right away 😉
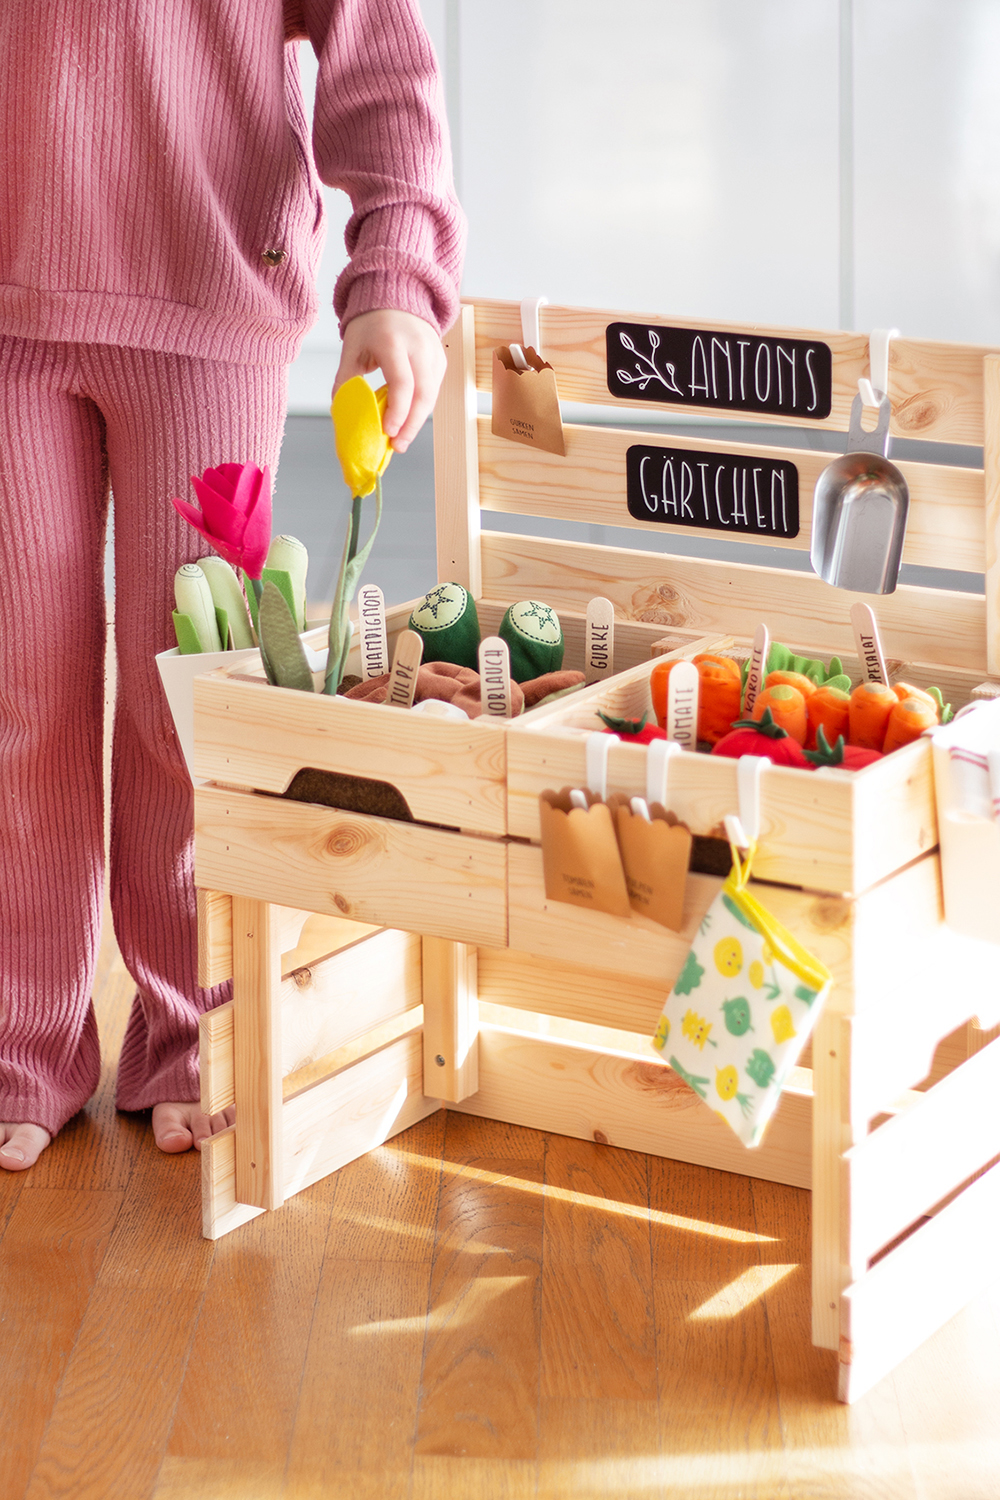
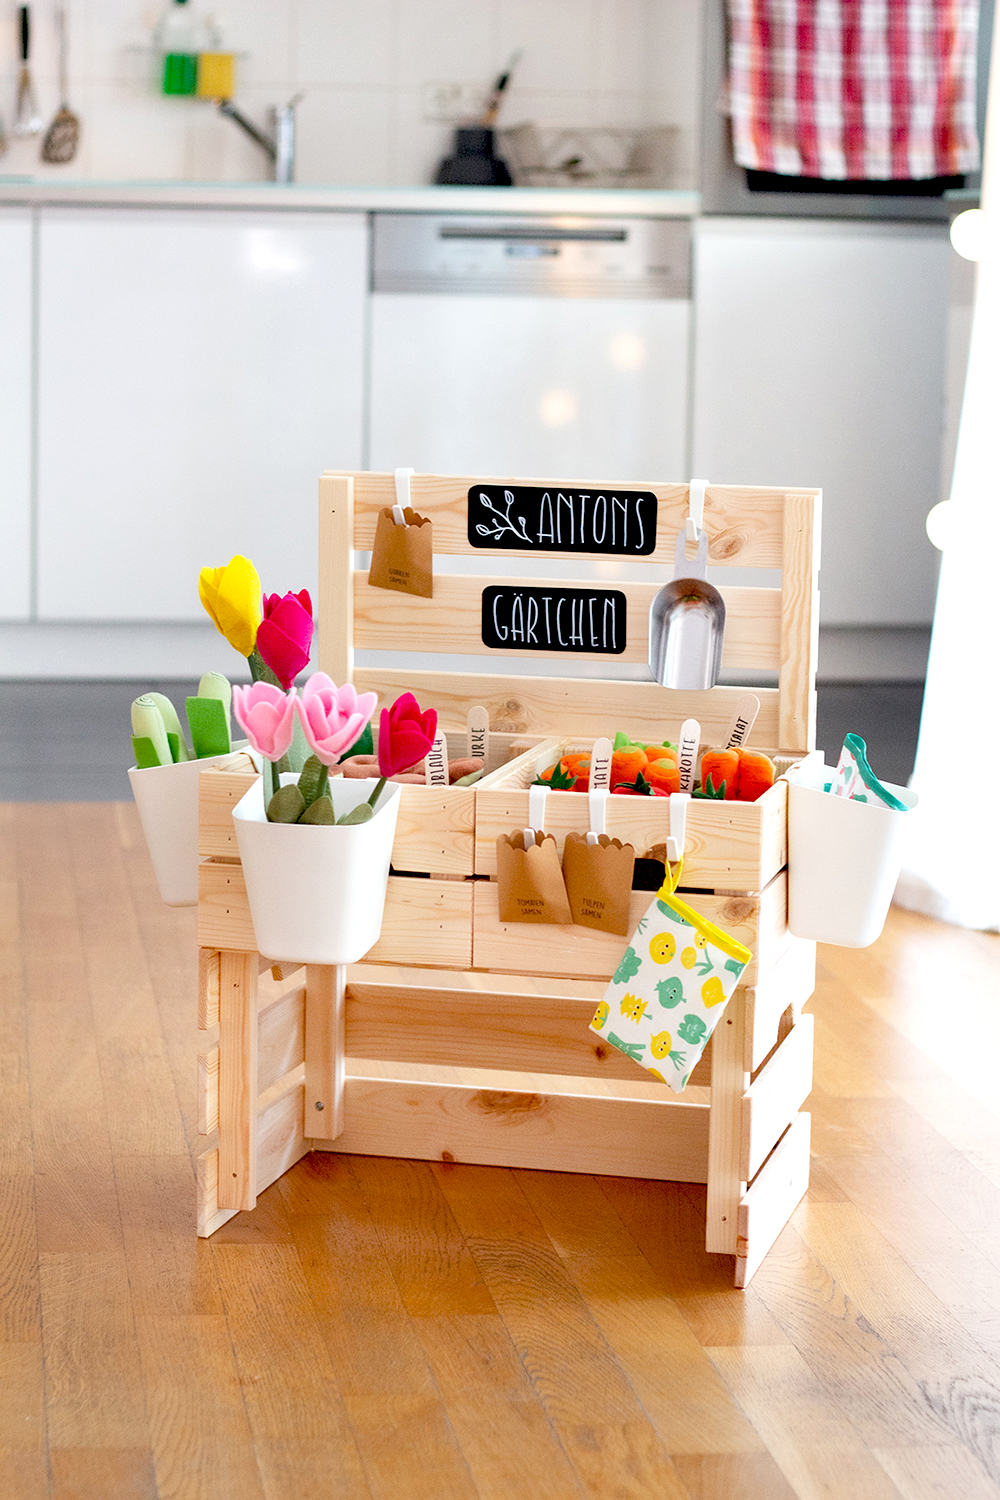
Sooooo, that’s it for the summer furniture area IKEA Sindelfingen. I would like to end the tour with this picture, because you can see the main actor of my blog post today, which I took with me to IKEA for the photo shoot 😉 The DIY children’s bed made of KNAGGLIG boxes and DUKTIG play vegetables, in which your children can freely to practice sowing and reaping.
2.) DIY raised bed for kids
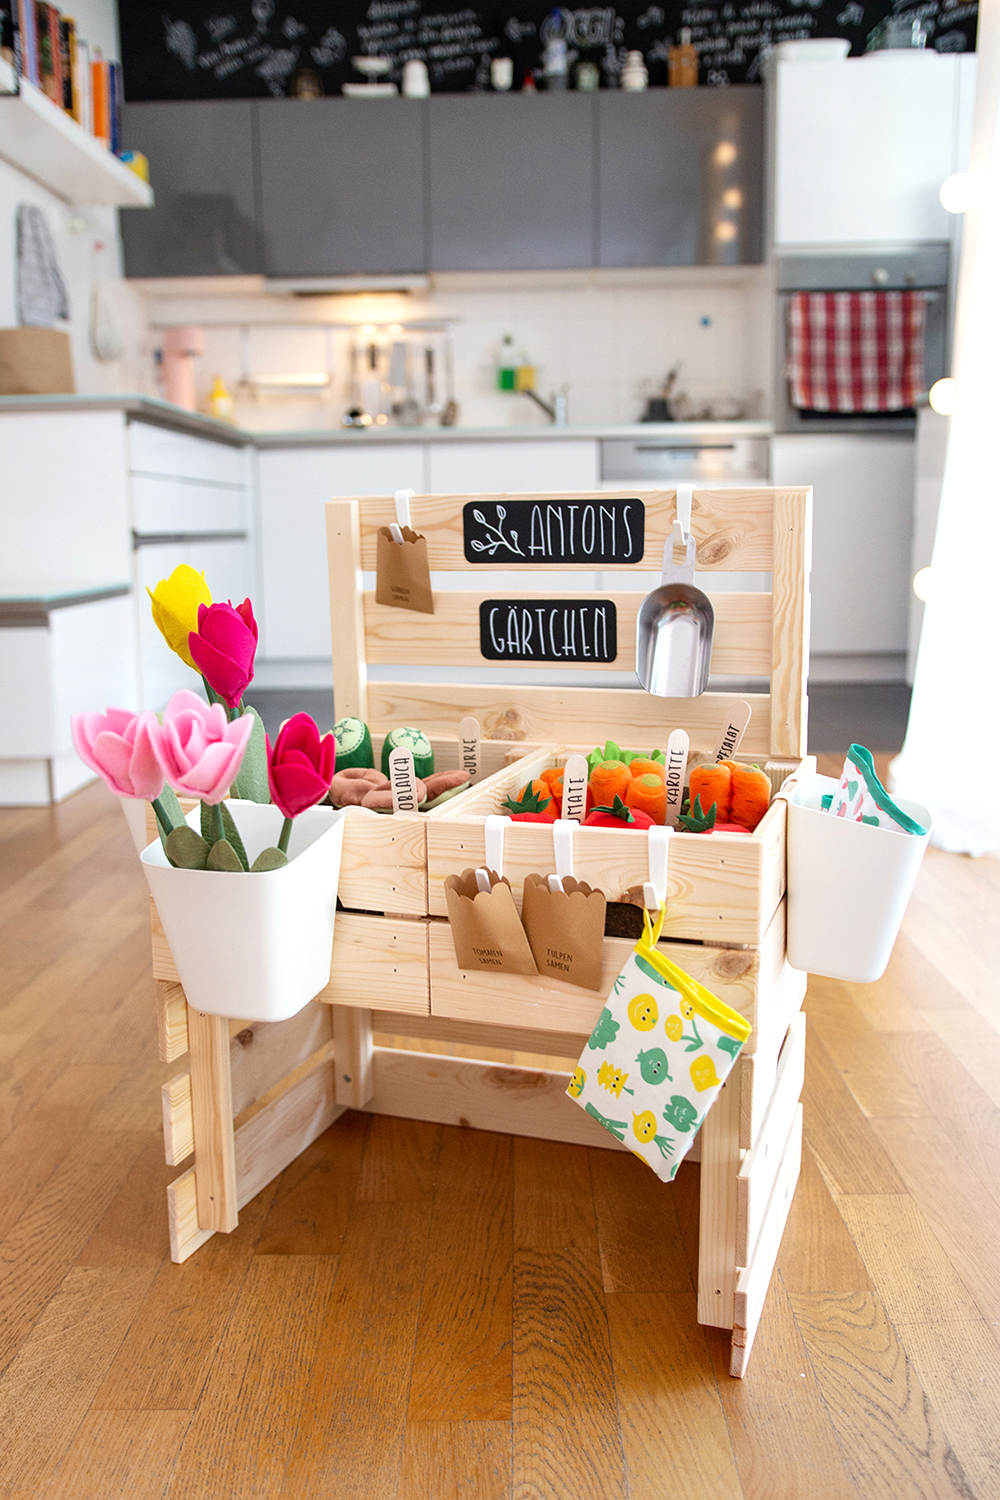
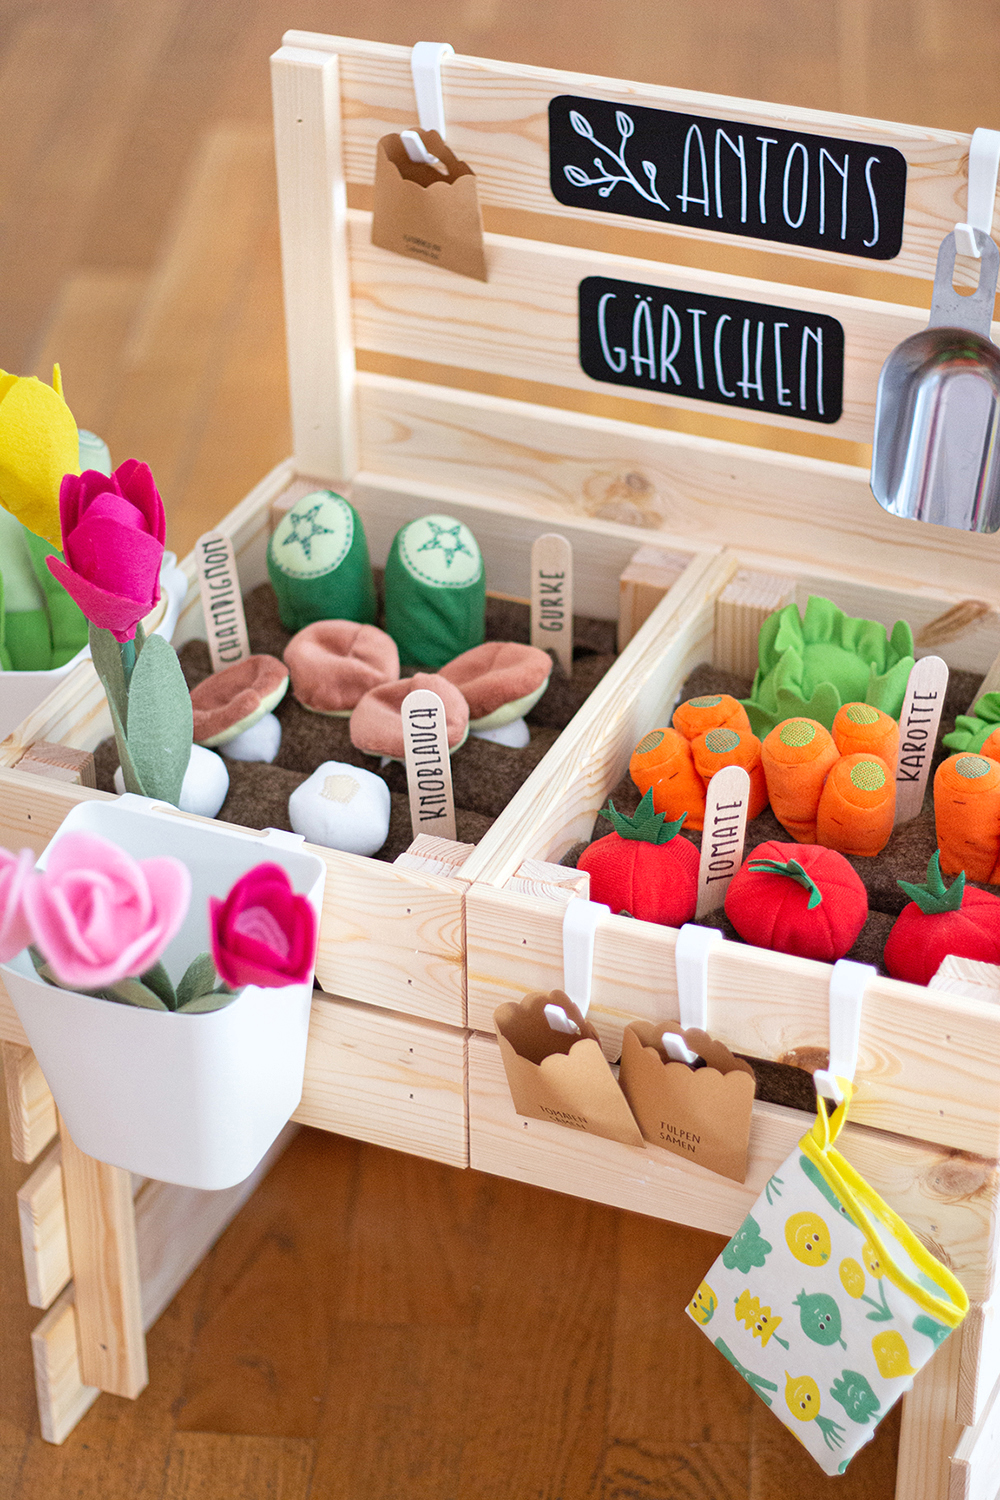
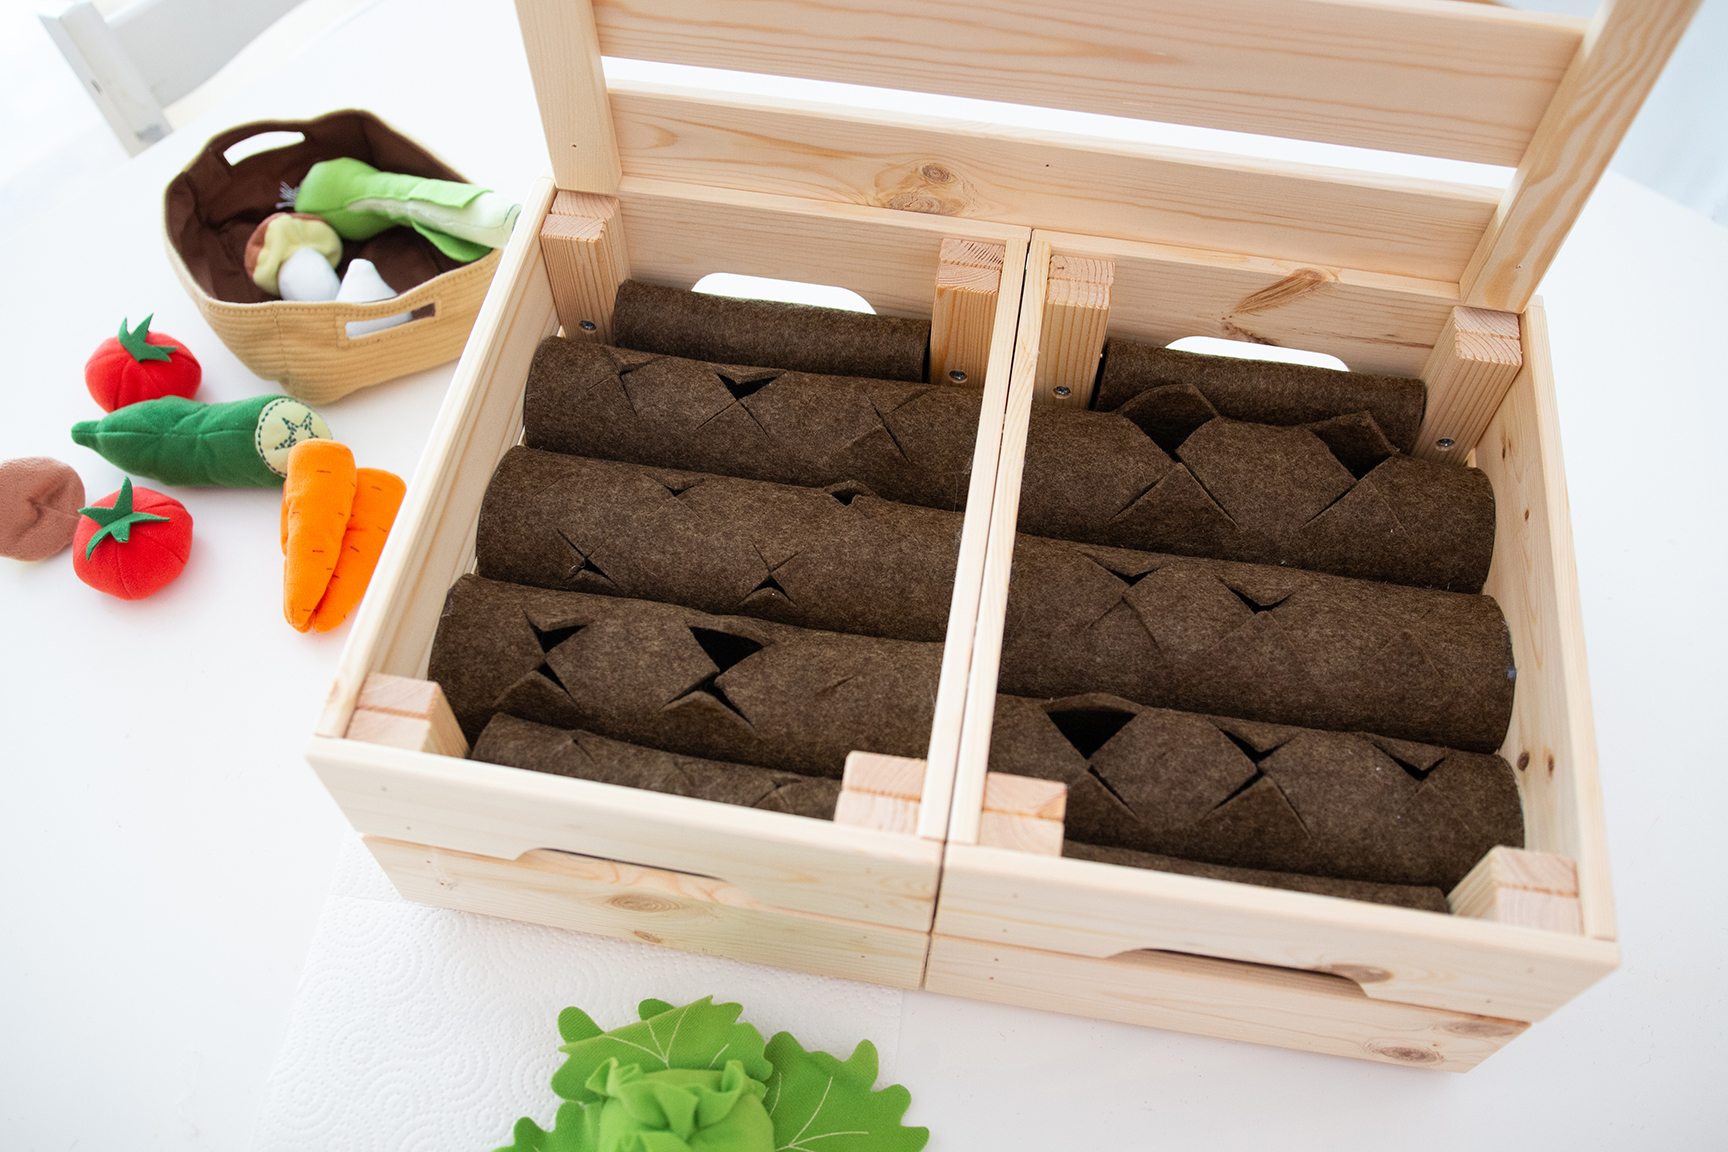
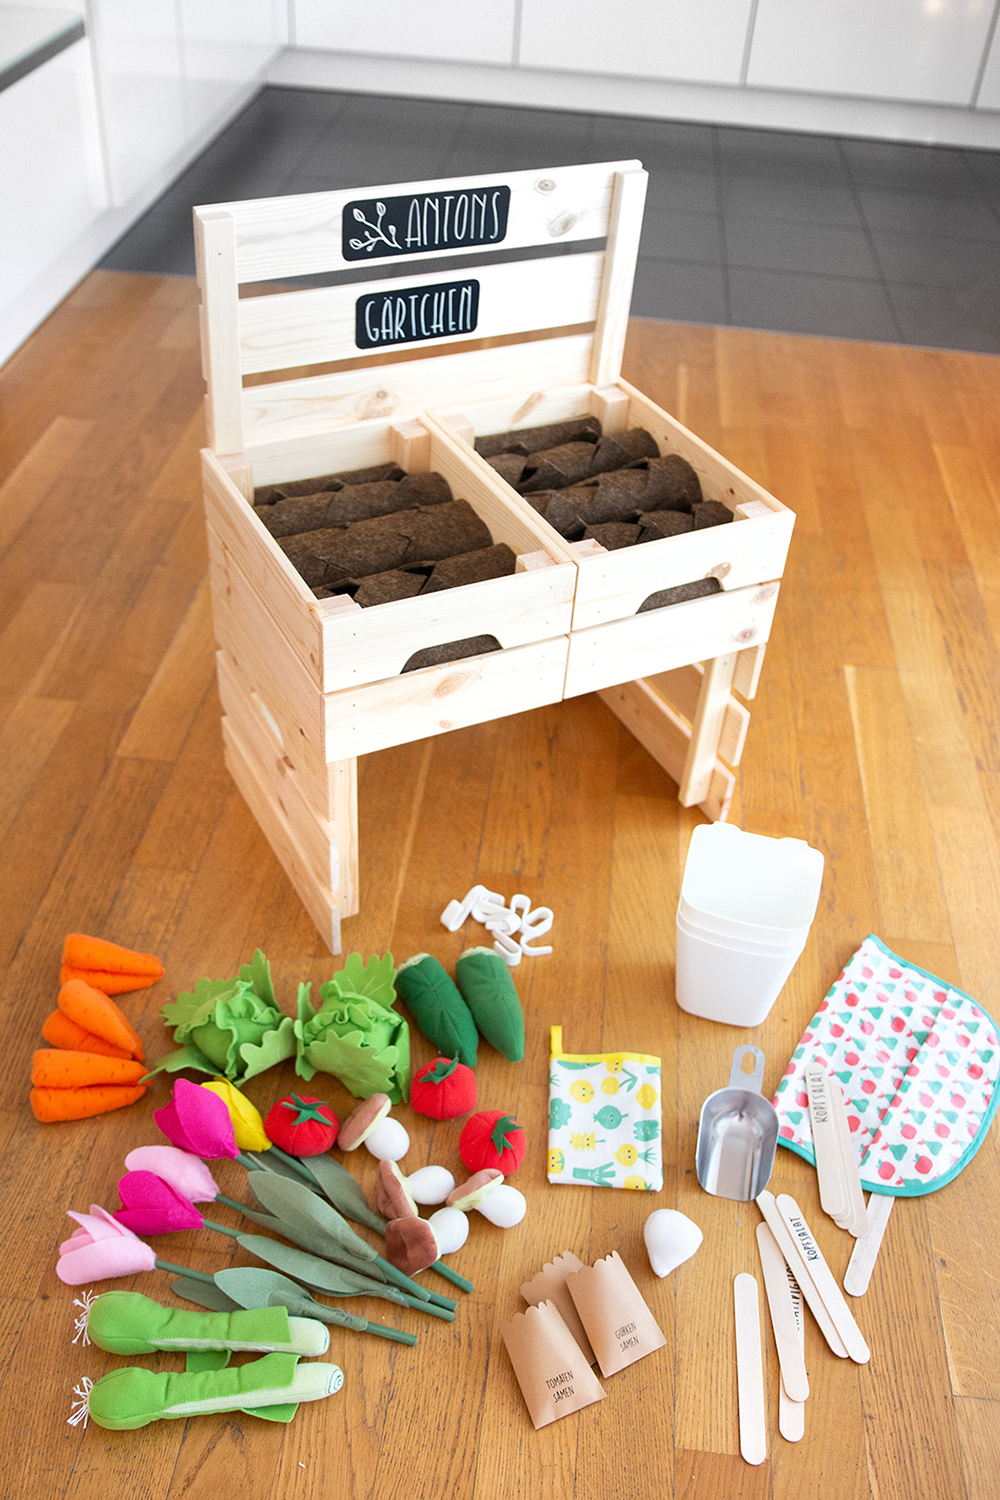
This cute DIY definitely has the potential to keep your kids busy and give you some time to relax outdoors 😉 I made a children’s bed out of two small and one large KNAGGLIG box. In the felt soil there are a few access points of different sizes through which play vegetables can be planted. The containers and hooks from the SUNNERSTA series fit exactly on the sides and are therefore ideal for garden accessories. Even small bags of seeds with content should not be missing, because the vegetables have to be sown first of all 😉 Do you like my DIY? Then let’s get started with the instructions.
Material list:
- 2x KNAGGLIG Cupboards small: CLICK
- 1x KNAGGLIG box large: CLICK
- 2x DUKTIG vegetables: CLICK
- DIY felt tulips (instructions directly below)
- 3x SUNNERSTA Behälter: CLICK
- 1x SUNNSERTA Chin Set: CLICK
- BEST Notiztafel: CLICK
- MALA Paper: CLICK
- 365+ Shovel: CLICK
- Felt brown, 3-4mm, ca 1x1m Size: CLICK
- Holzleim
- Craft Glue/Glue Stick
- white permanent marker: CLICK
- black sharpie
- wooden stick large
- hot glue
- several hot glue cartridges
- scissors big
- Scissors small and sharp
- My Freebie: CLICK
That’s how it works:
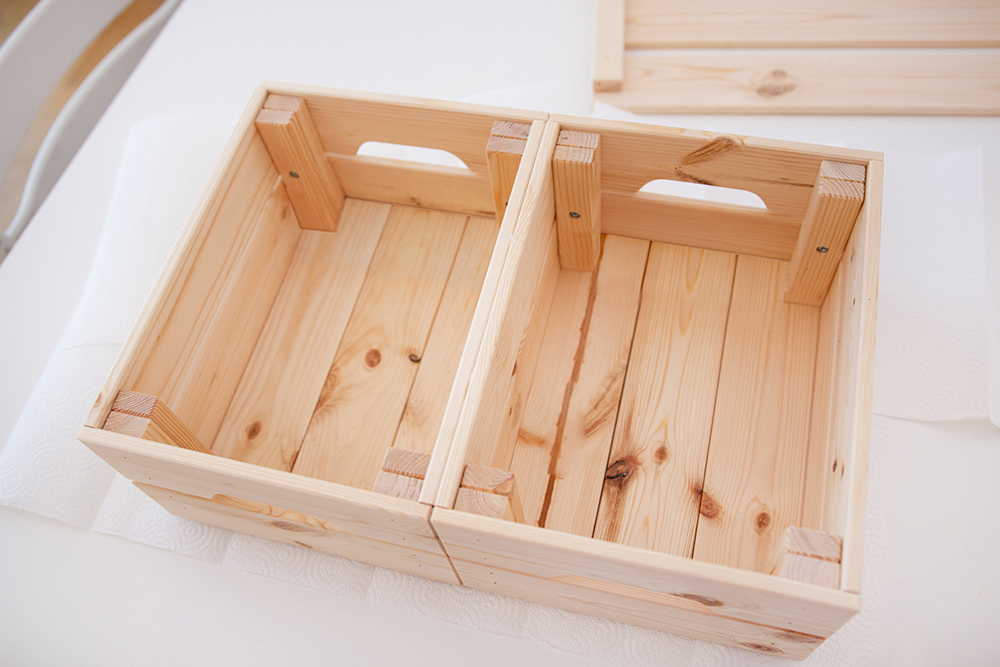
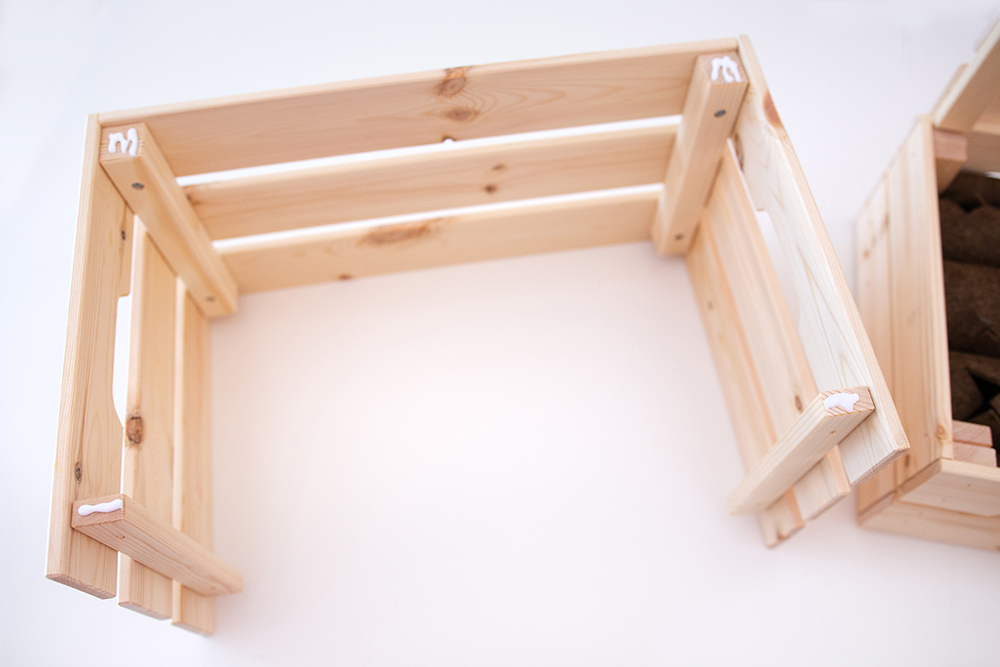
1.) Set up the frame First assemble the two small KNAGGLIG boxes according to the instructions. Then glue them together with wood glue. Alternatively, you can also screw them together.
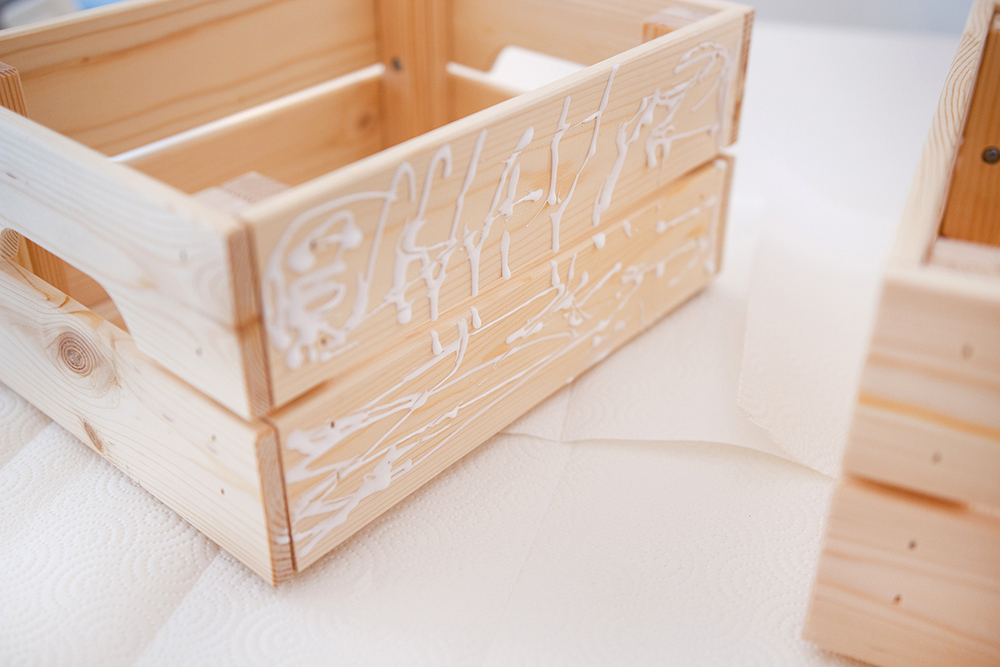
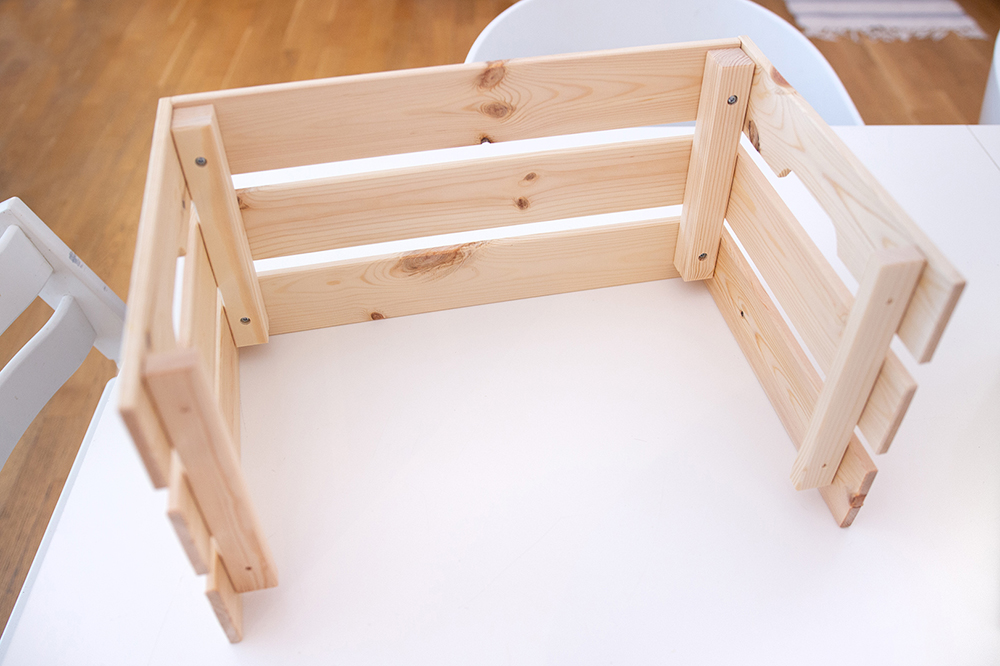
Then take one of the side panels of the large KNAGGLIG box. Now apply wood glue to the places shown here and glue the wooden part from behind by placing it on the edge.
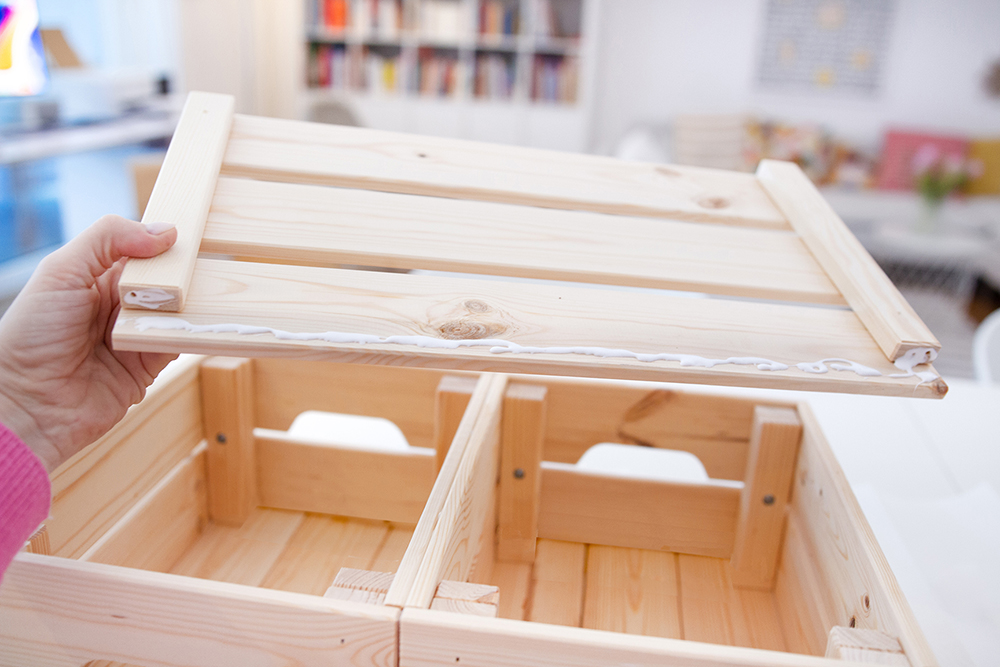
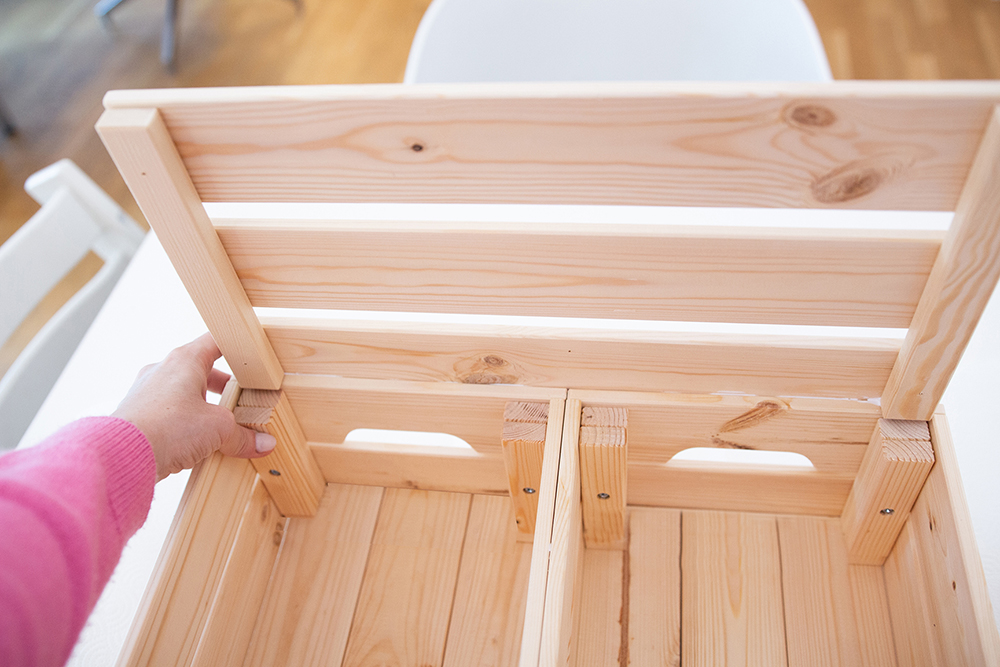
Now screw the three remaining side parts together according to the instructions. You simply leave out the bottom, it can later be used as a shelf or tray for playing.
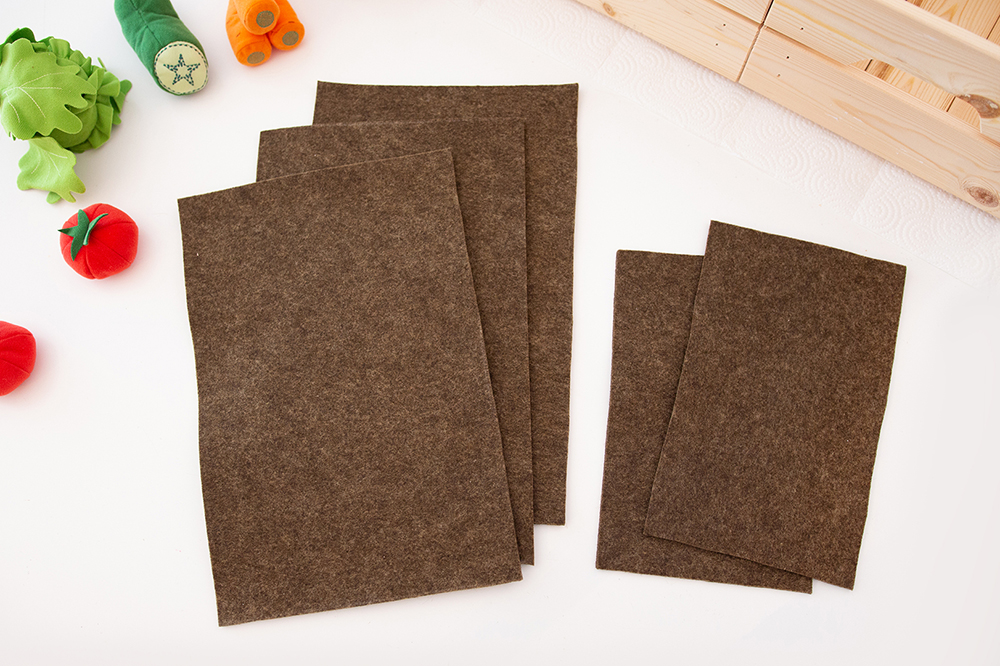
2.) Cut felt sheets Cut three large and two small plates for each bed box. The exact dimensions can be found in the freebie above in the list of materials. For both boxes together you need a total of six large and four small plates.
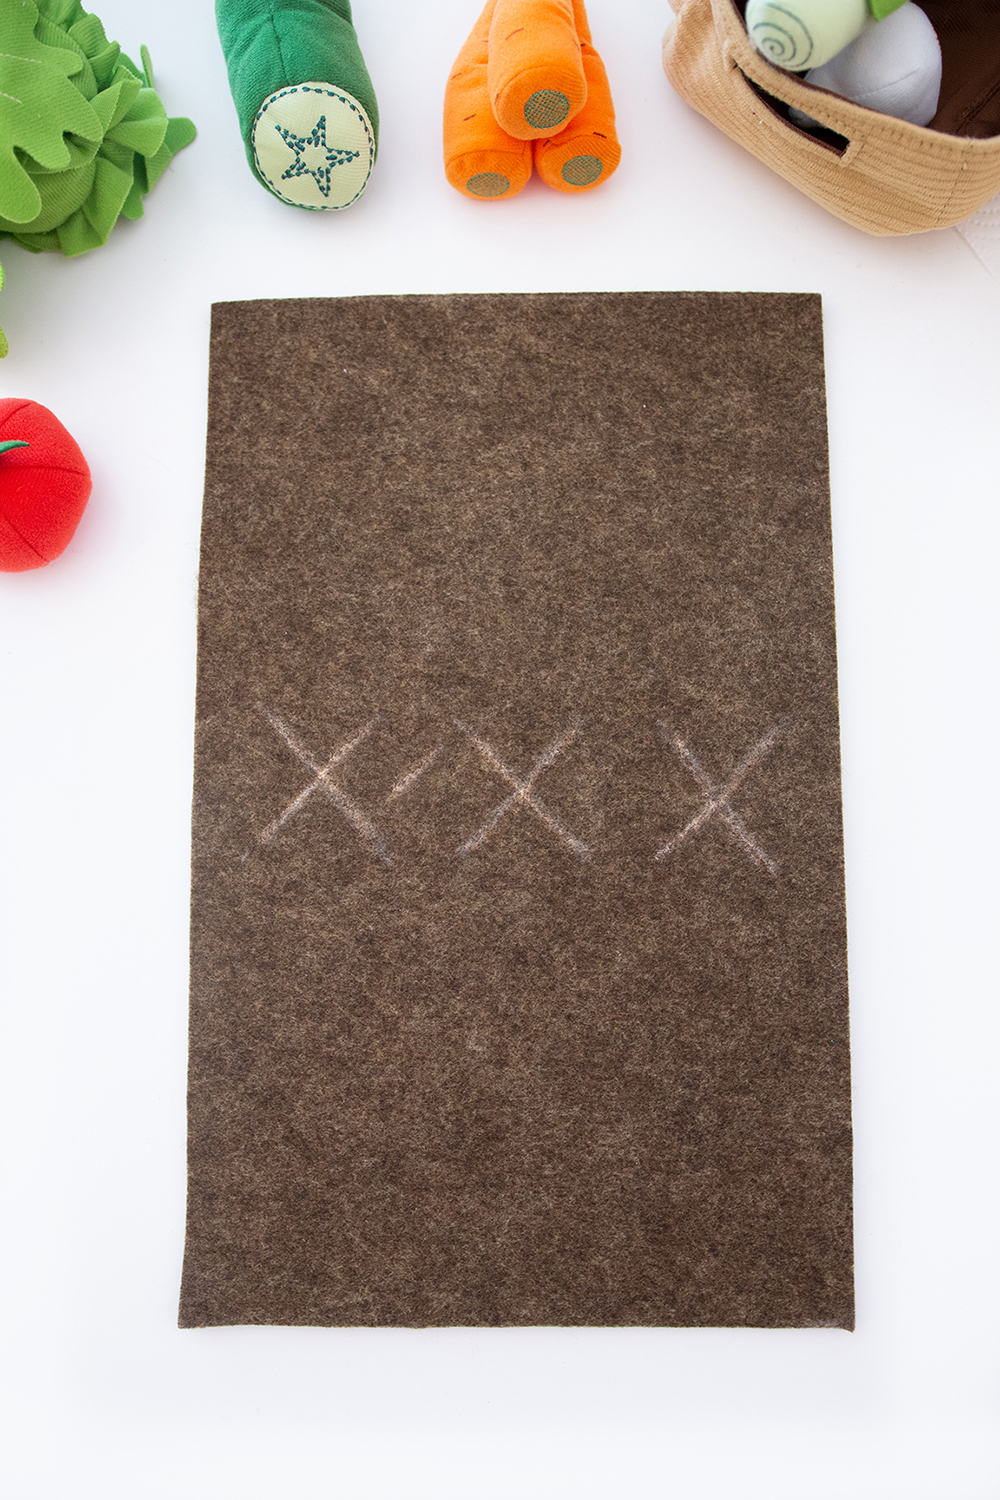
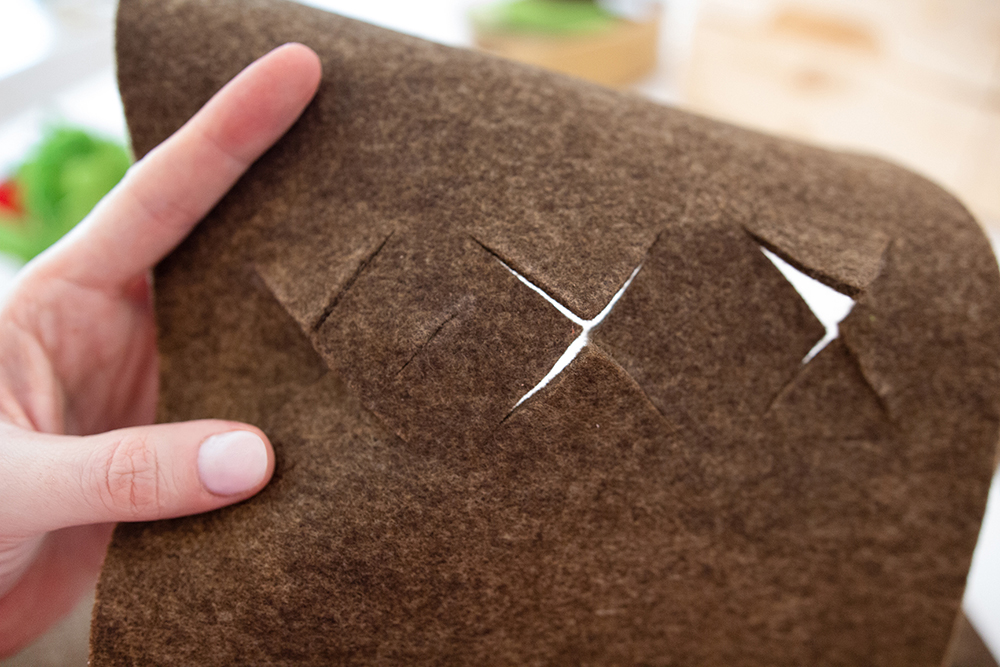
With a small pair of sharp scissors, cut crosses of different sizes in the middle of each plate, depending on which vegetables you want to “plant” in which spot. Test the correct size by trying to insert each vegetable – it should fit easily. If you also make the tulips, don’t forget to put in small crosses. Also cut a small slot for the wooden sticks on each plate.
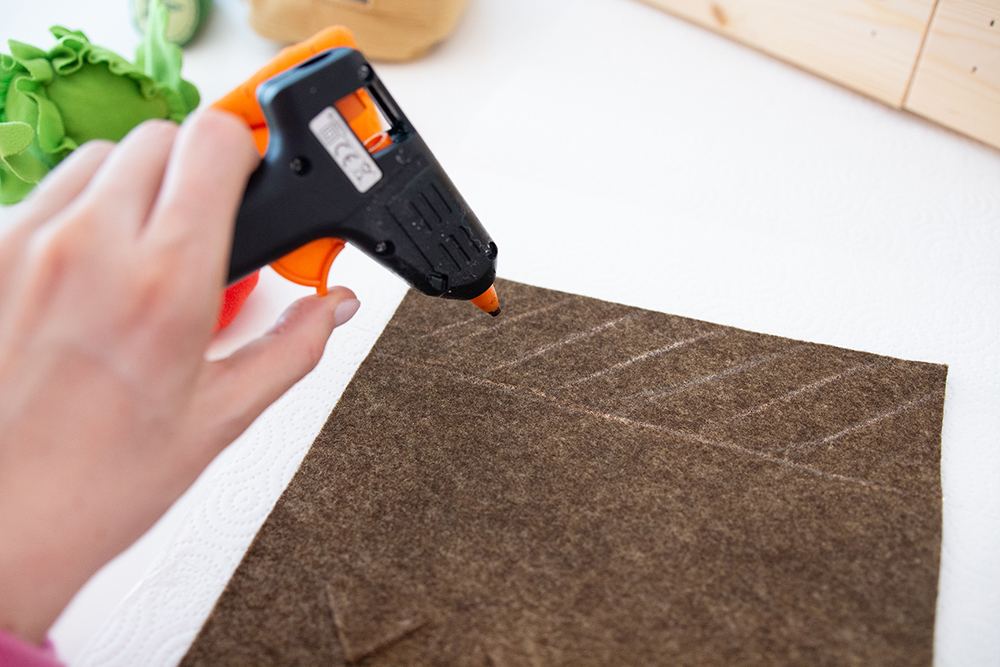
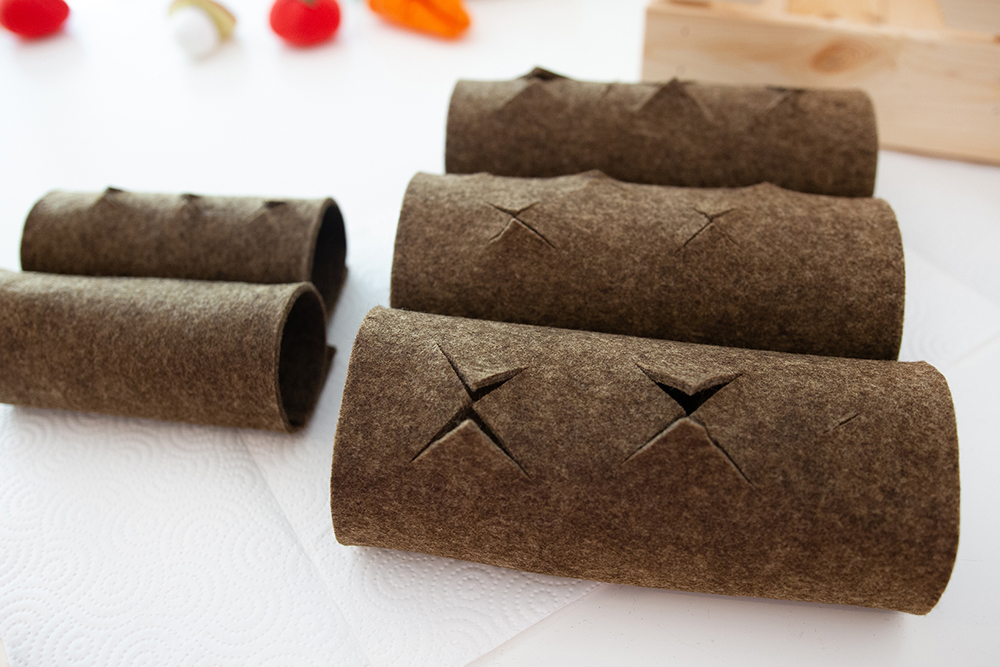
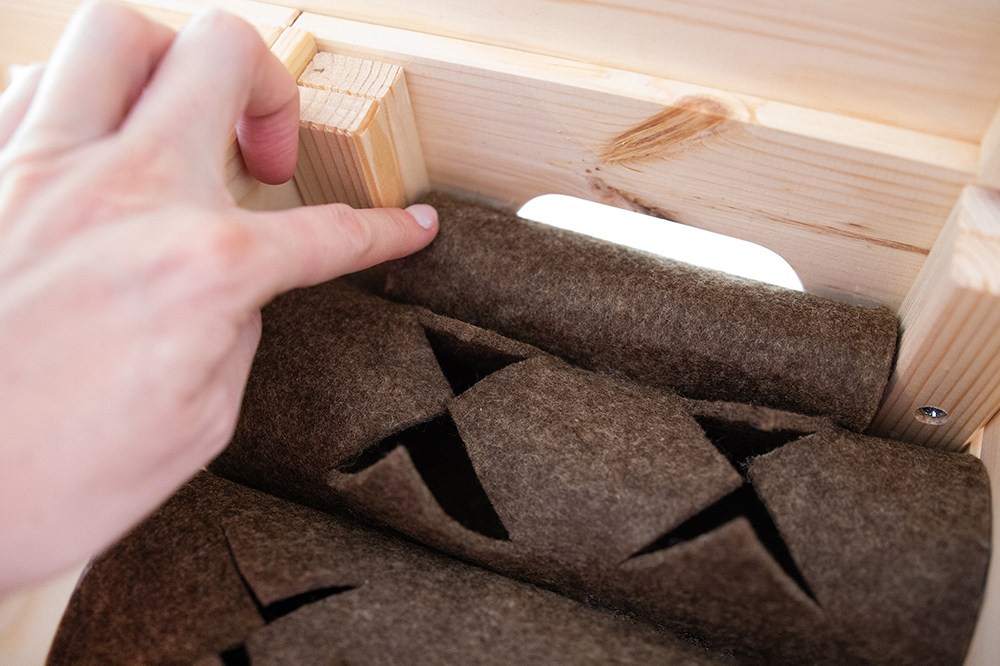
2.) Finish roles Glue the sheets to rolls by applying hot glue to an area of about 5 cm as shown here. Due to this large bonding surface, the entire roll is more stable overall when the vegetables are inserted from above.
Now apply hot glue to the underside of the large rolls and glue them into the box as follows. When everything is in place, glue the rolls together by adding glue to the gaps. Then you insert the two small rolls at the edges and glue them together. Finally, apply glue to the ends of the roll, along the felt edge, so to speak, and use it to fasten them vertically.
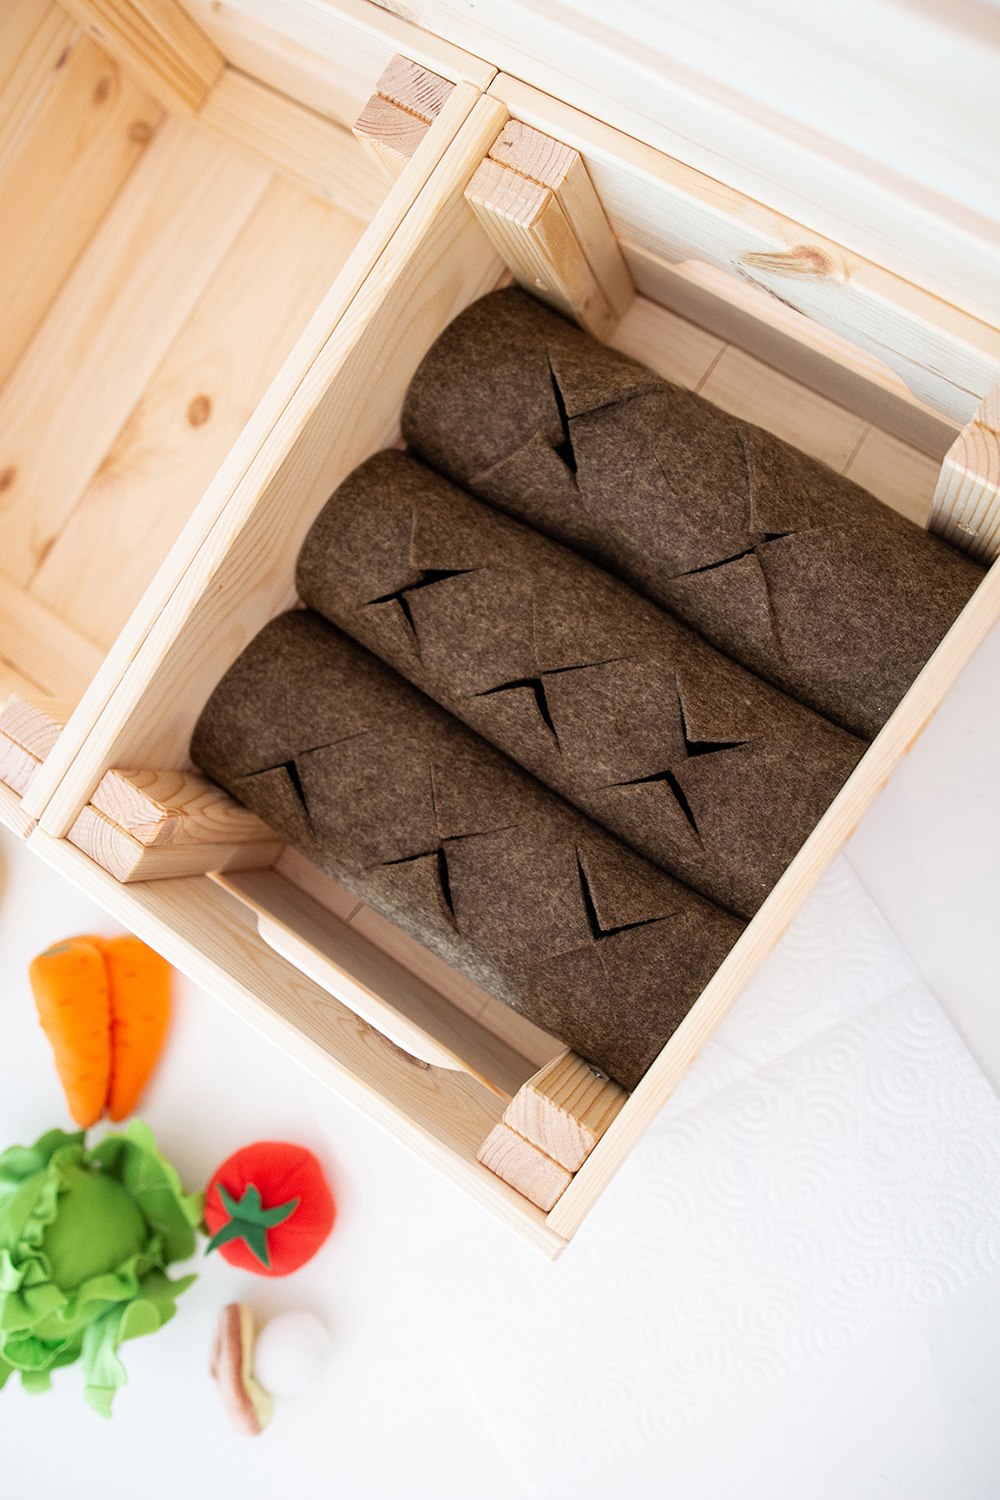
The finished bed looks like this:
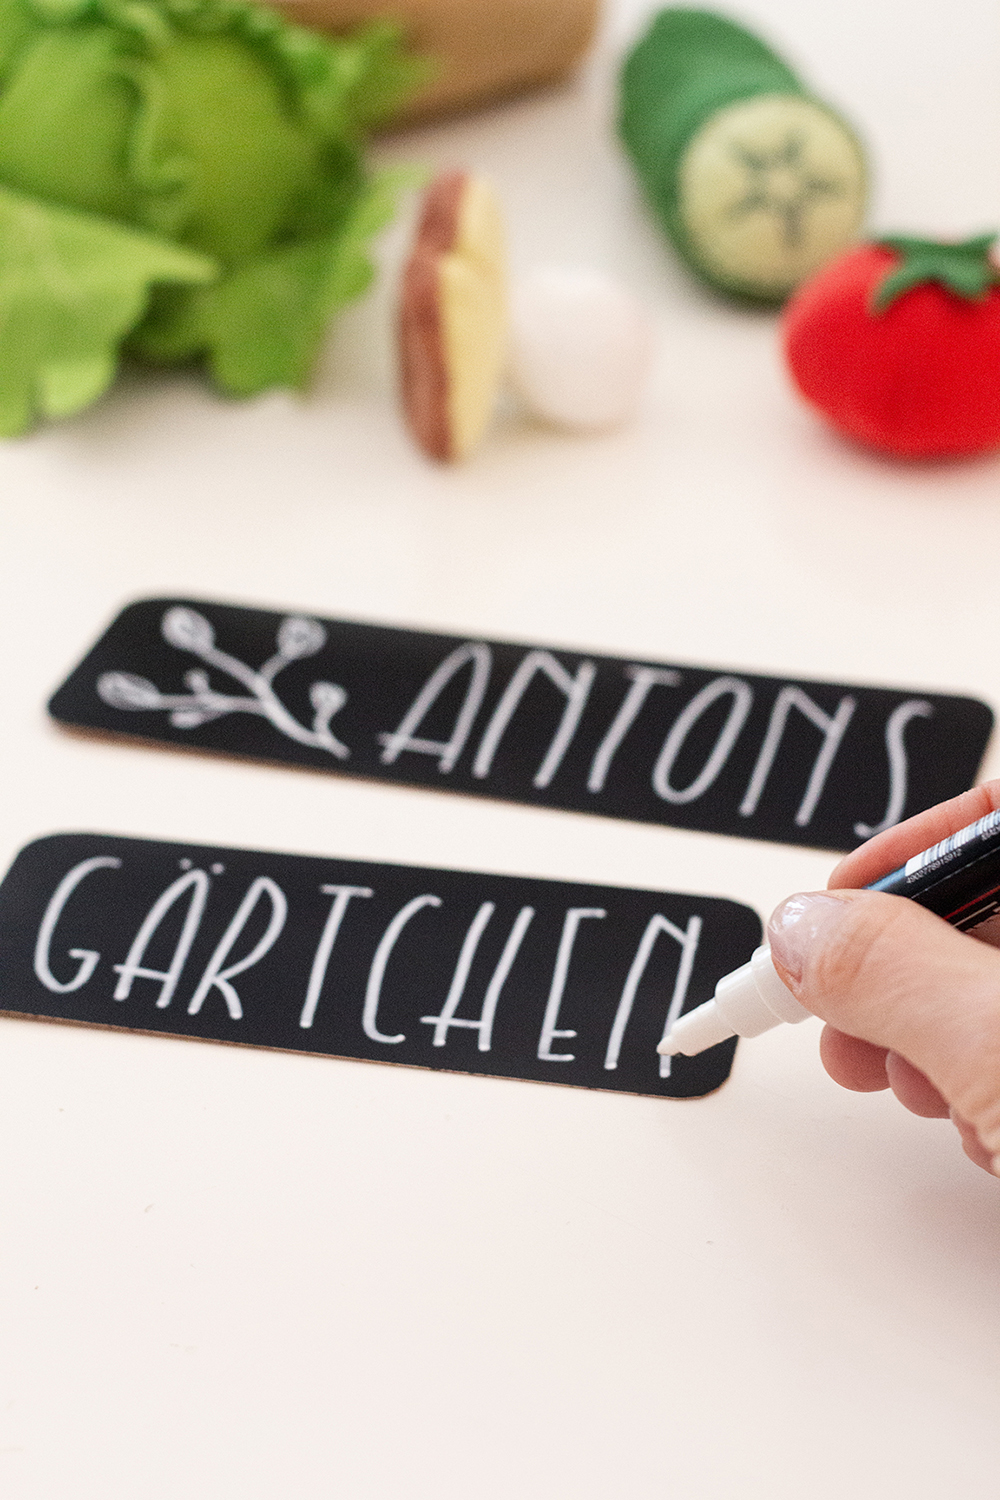
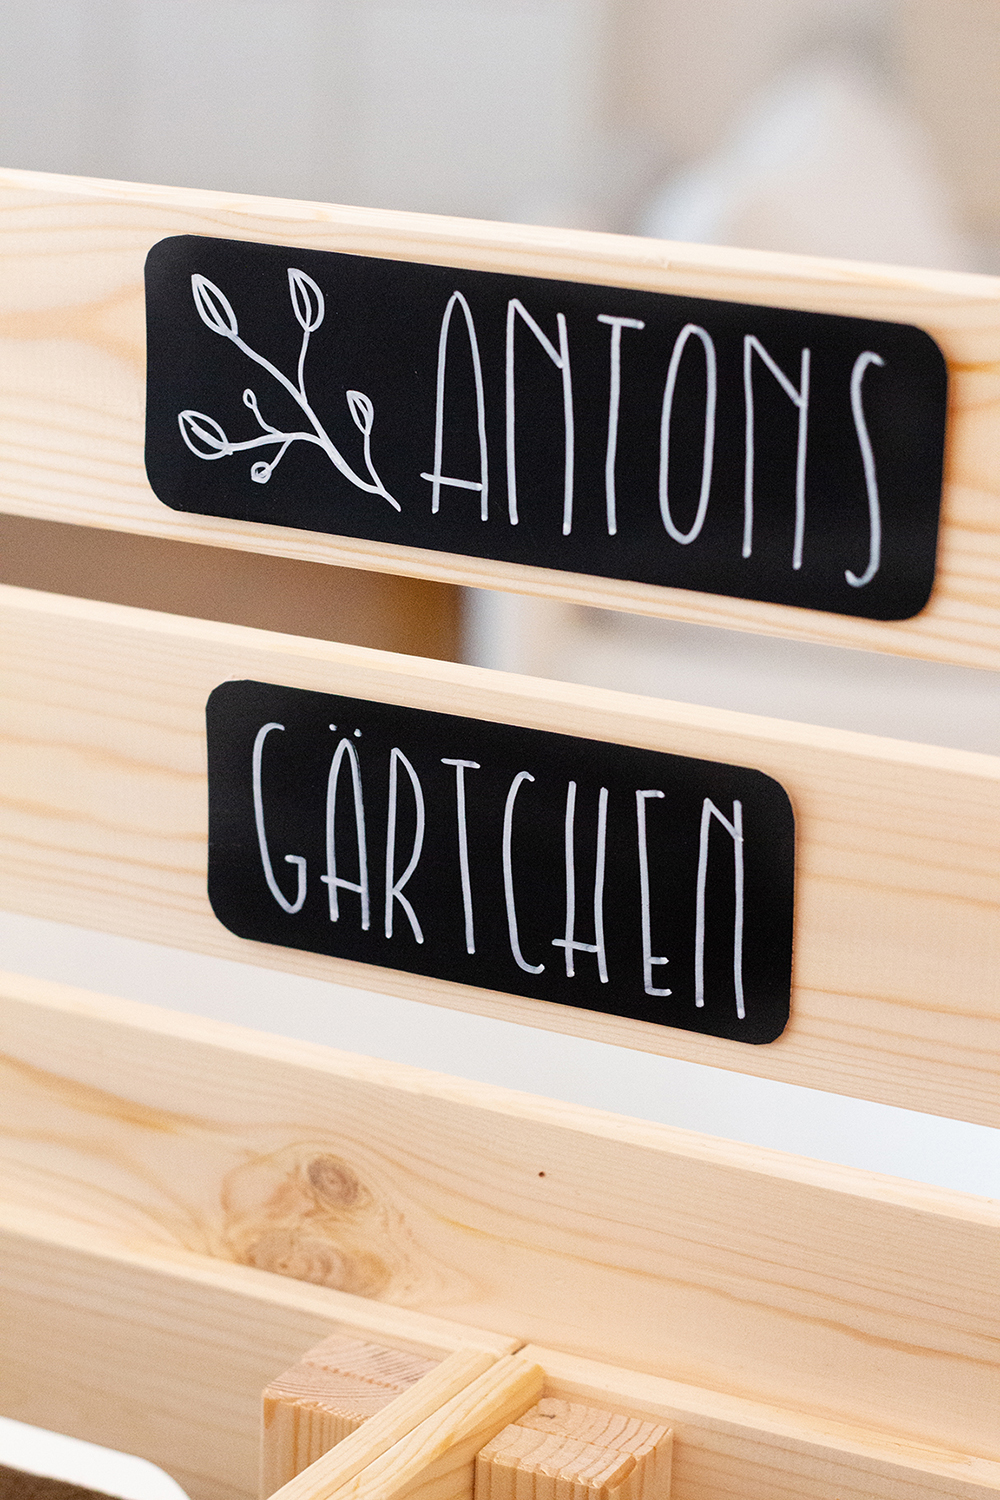
3.) Assemble the frame Cut out black rectangles from the notice board and write on them with a white marker pen. Then glue the lettering to the back wall with hot glue.
Then apply wood glue to the four corners as shown and place both pieces of wood on top of each other.

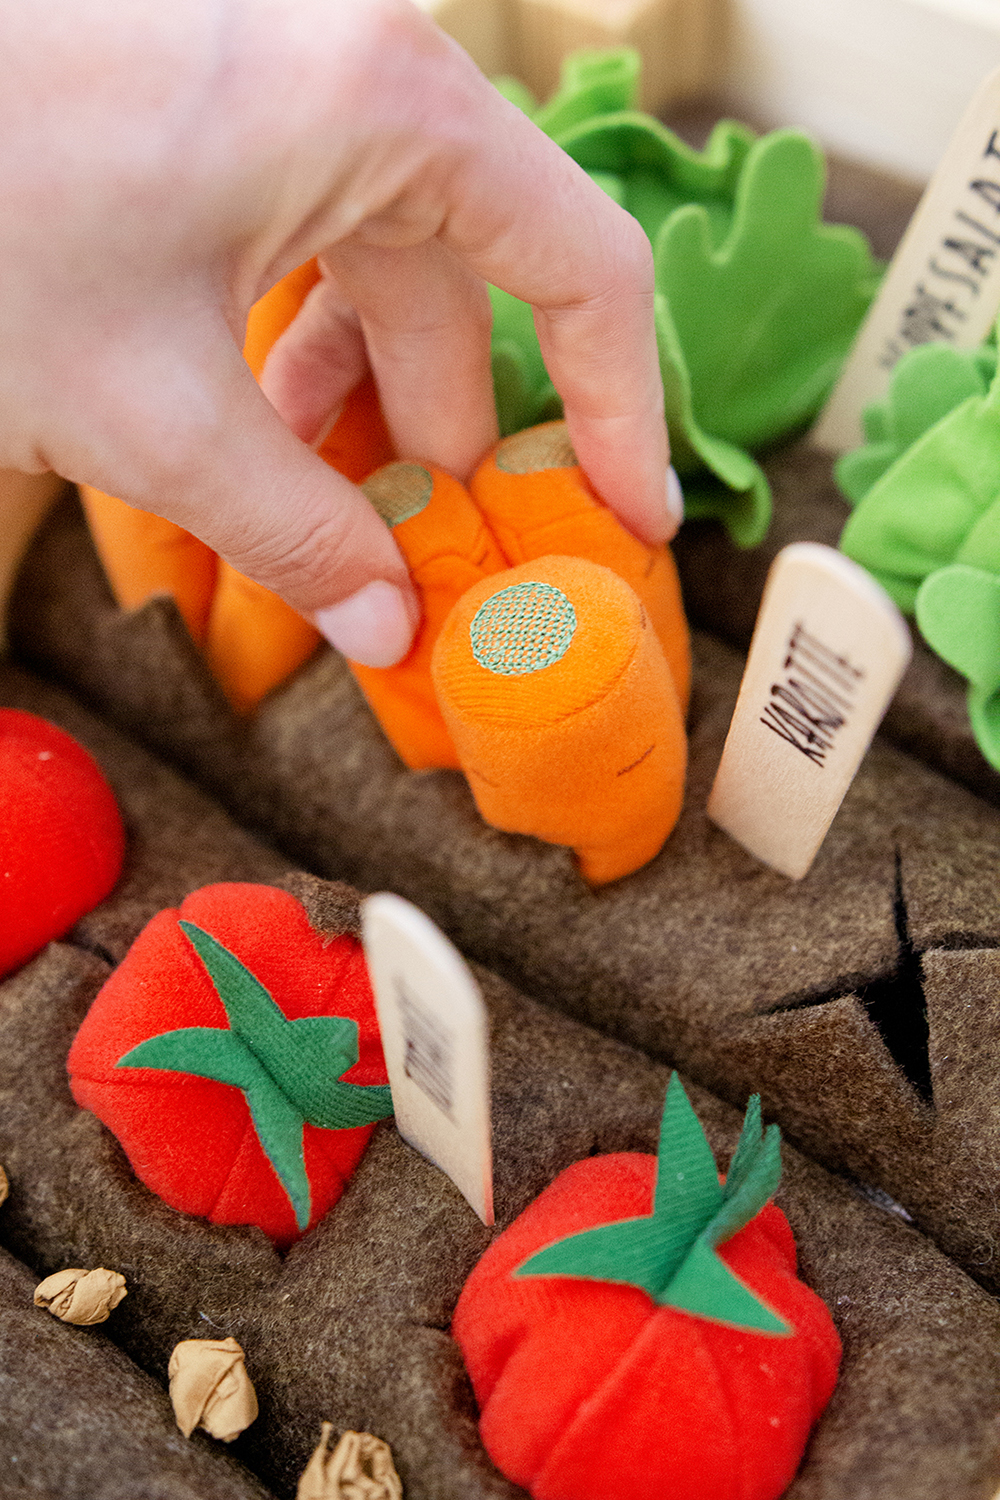
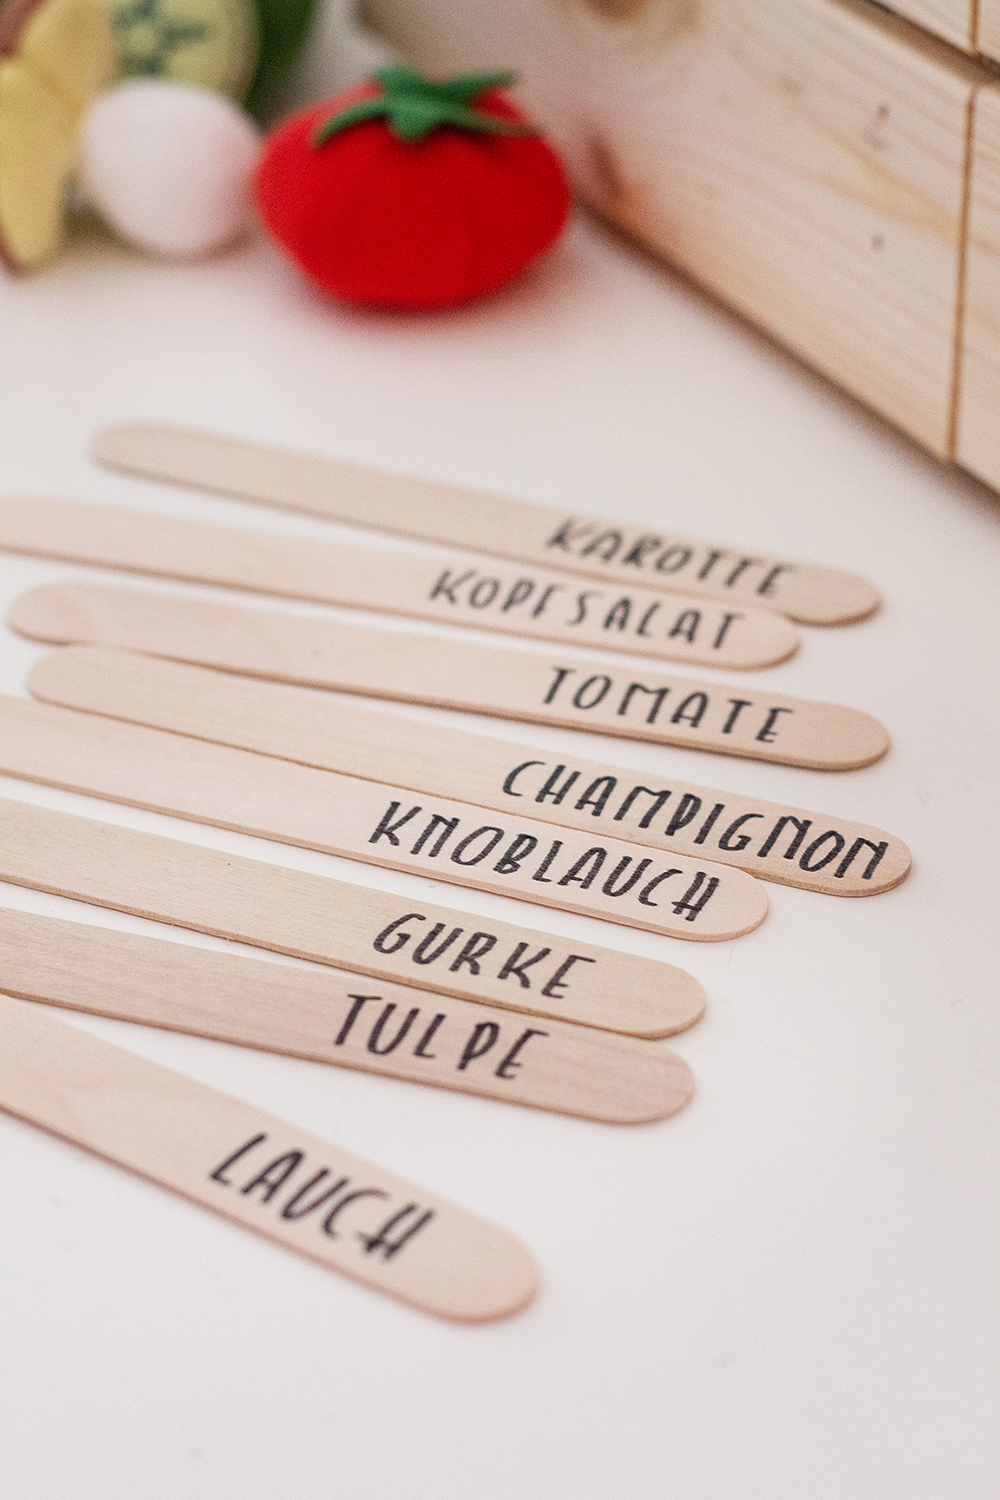
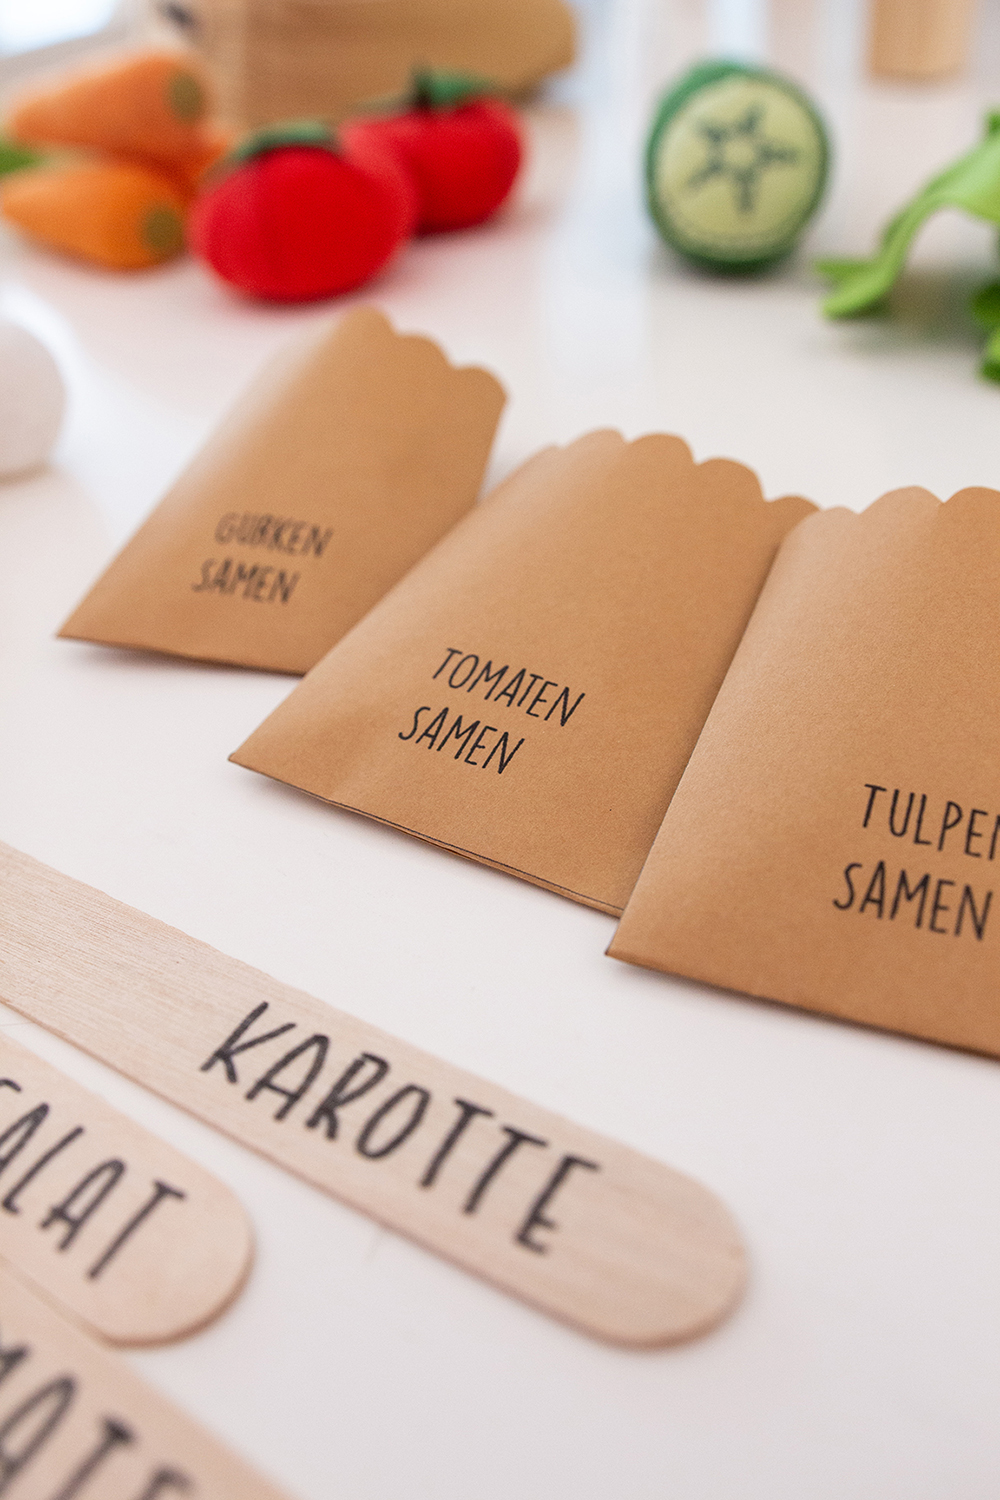
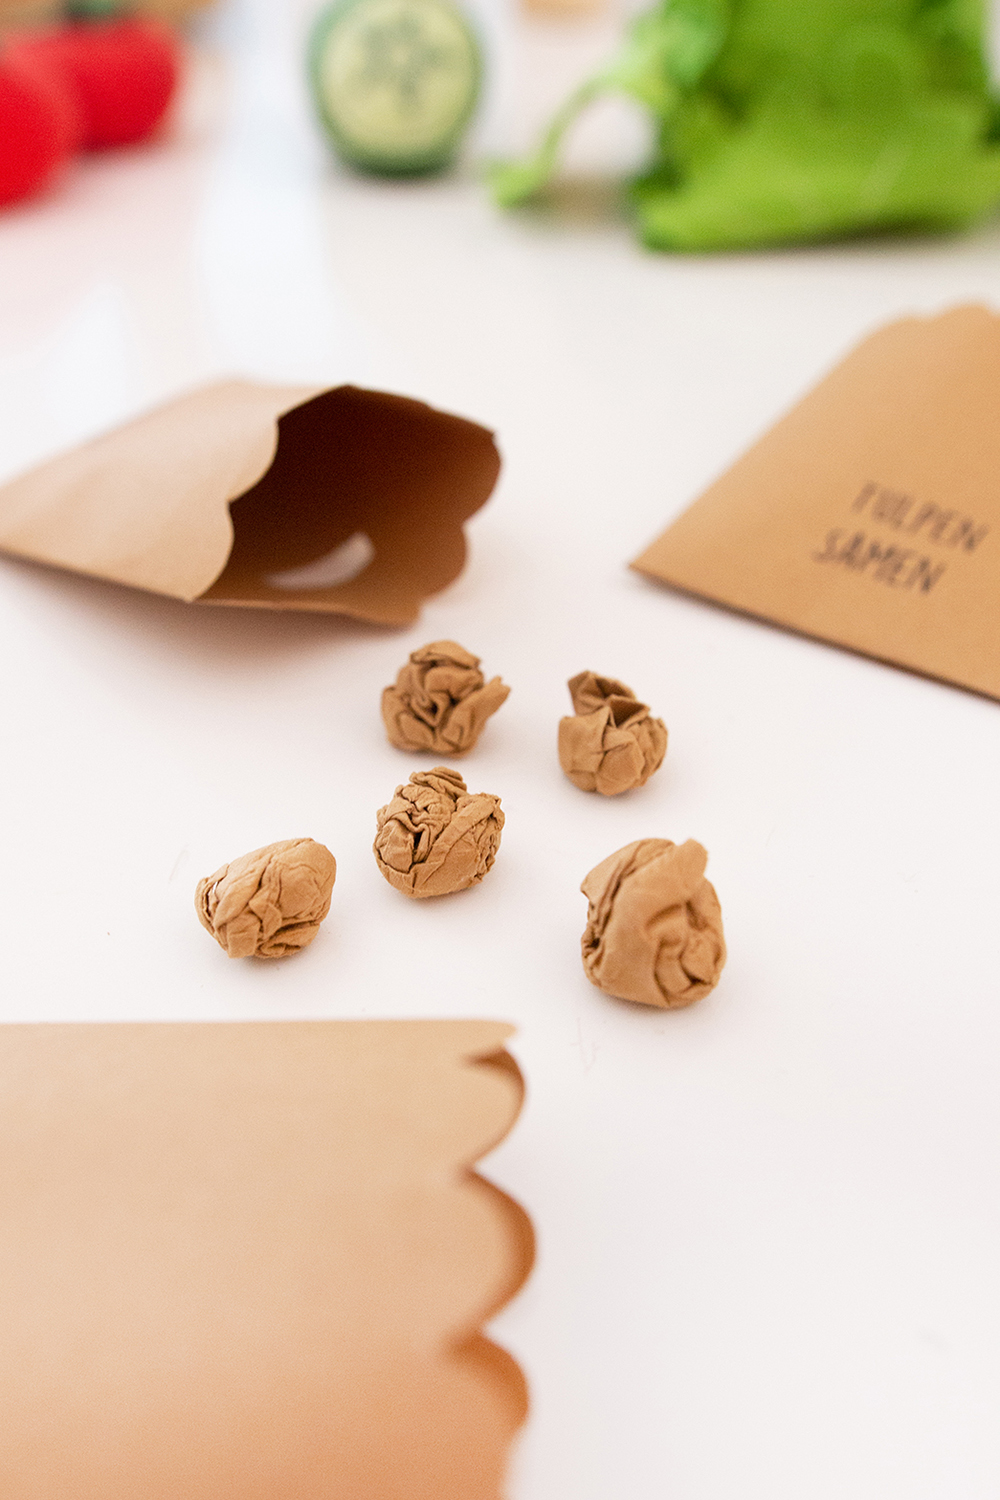
4.) Accessories Now it’s time for the accessories. Label the wooden sticks with the vegetables and print out the seed packets from page 2 of my freebie on the brown MALA paper. Then cut them out, fold them and glue them together with glue stick. For the seeds you moisten a piece of brown MALA paper and then tear off small pieces that you shape into small balls.
5.) Finish the raised bed Now you can hang the white SUNNERSTA containers and hooks on the side as you wish – they fit exactly 😉 Pack a few utensils, shovels and cloths and hang the seed bags on the hooks. Then plant your vegetables, just as you like it 😉

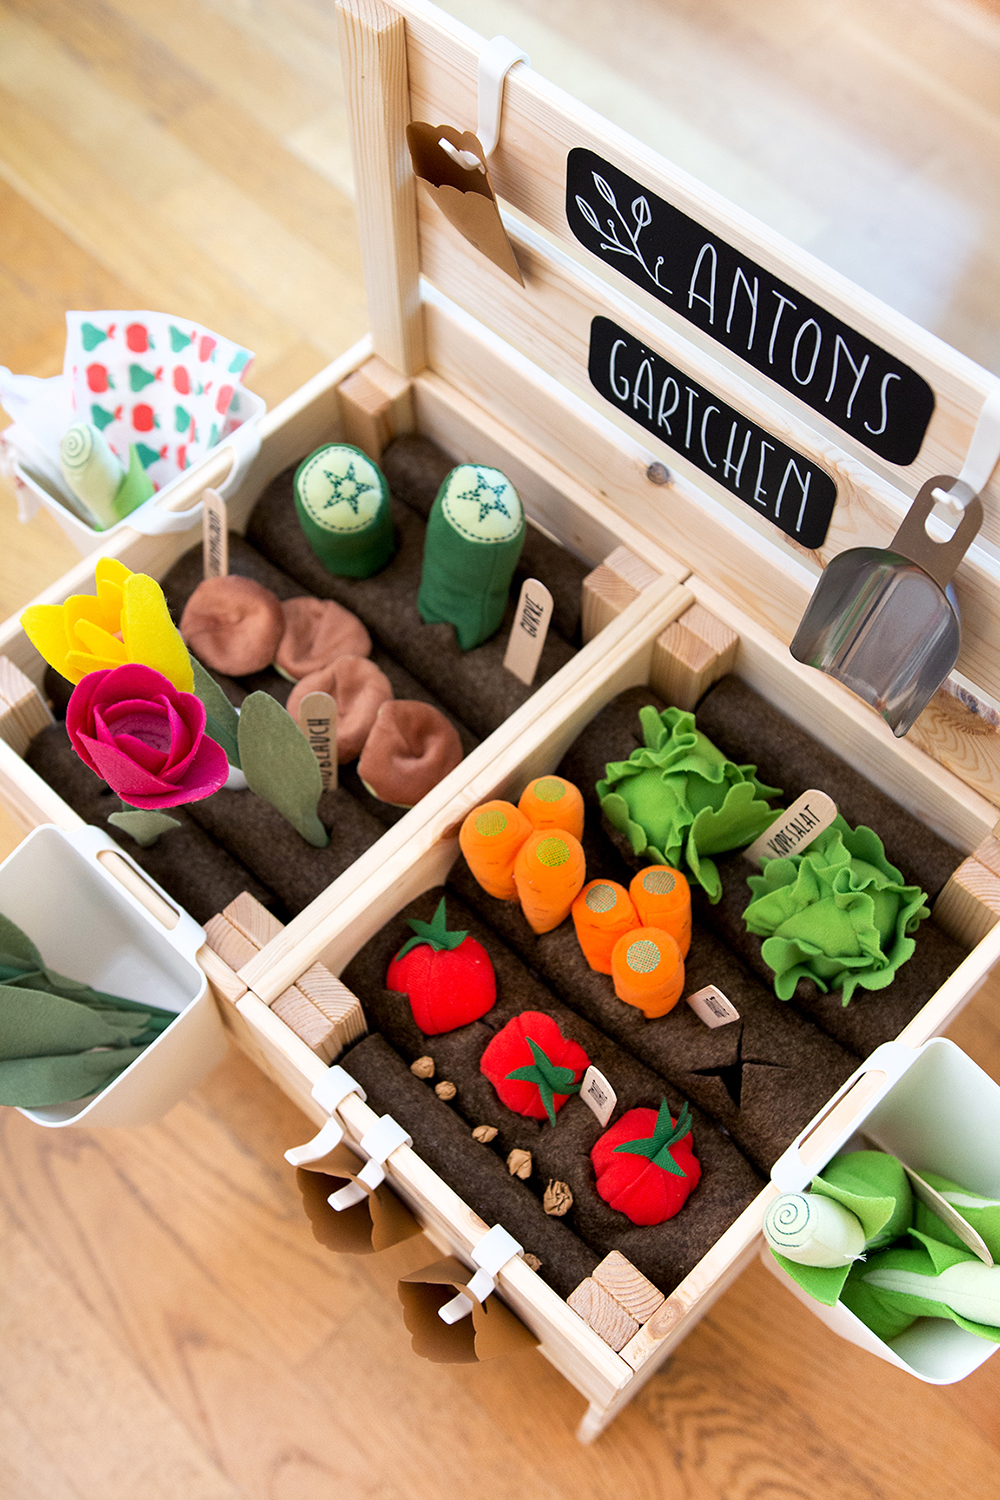
Ready is the cute children’s raised bed!
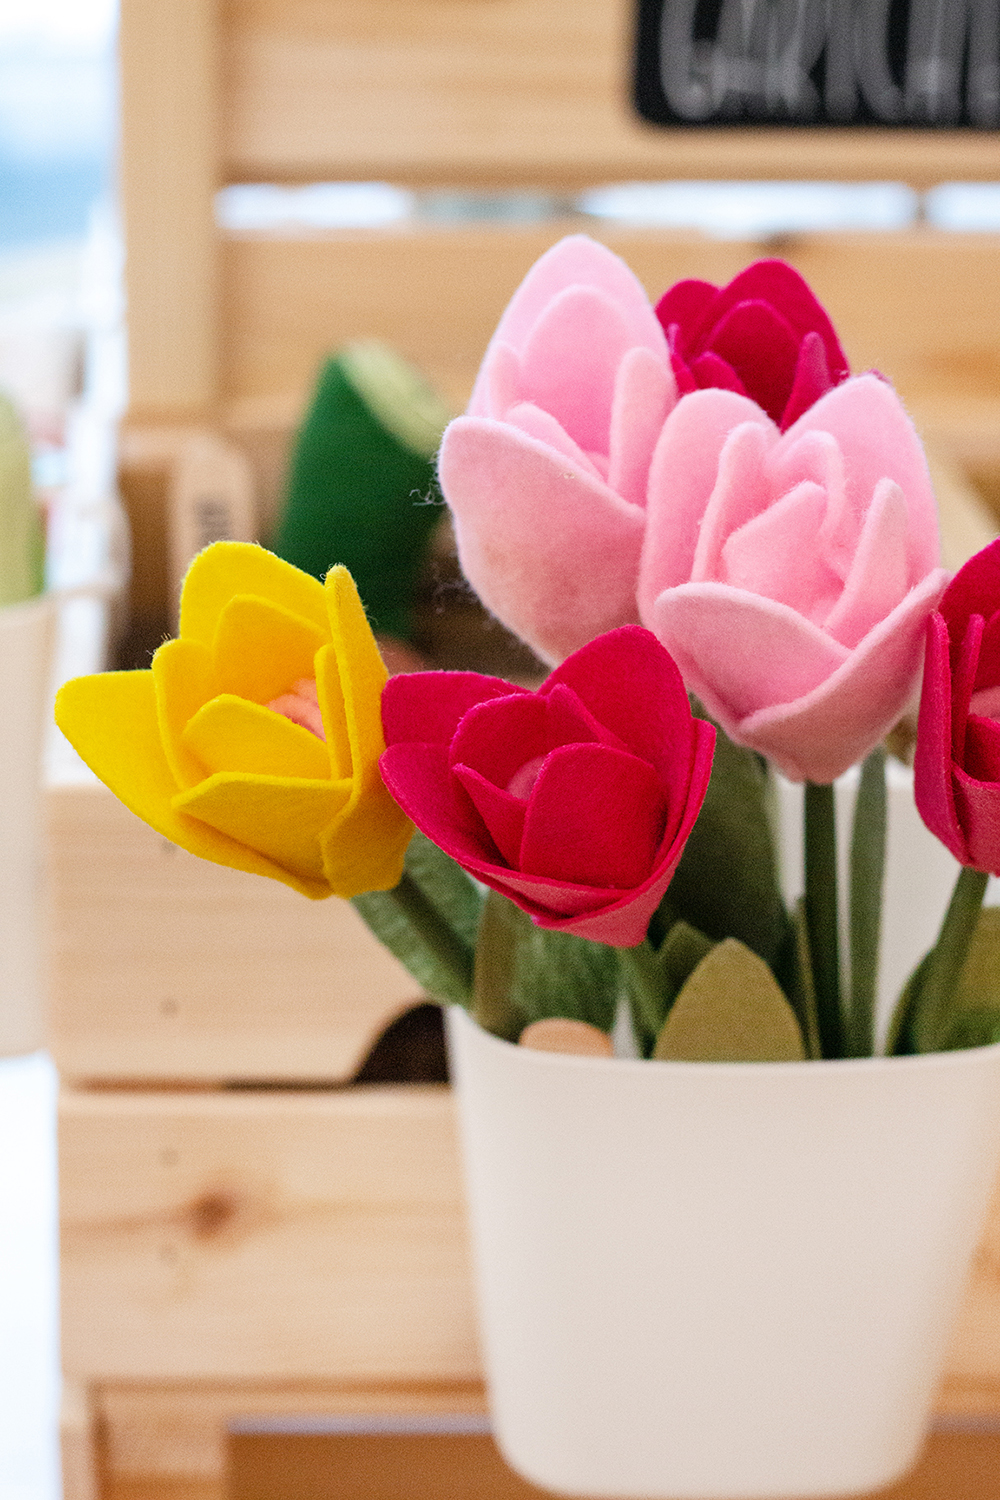
3.) DIY Tulips
Just missing a few flowers for that extra pop of color, right? At the end of this blog post, I will show you how to make these beautiful felt tulips.
Material list:
- TREBENT chopsticks: CLICK
- green acrylic paint
- Paint brush
- Felt 1mm in green and colors of your choice
- Felt in the color of your choice 3mm
- Scissors
- hot glue
- My Freebie: CLICK
That’s how it works:
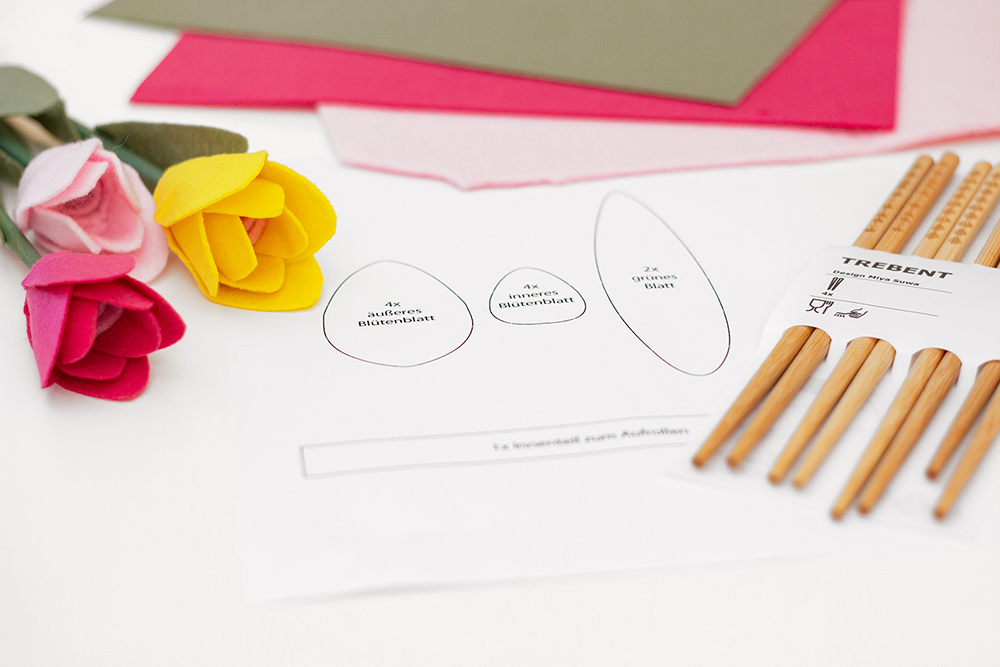
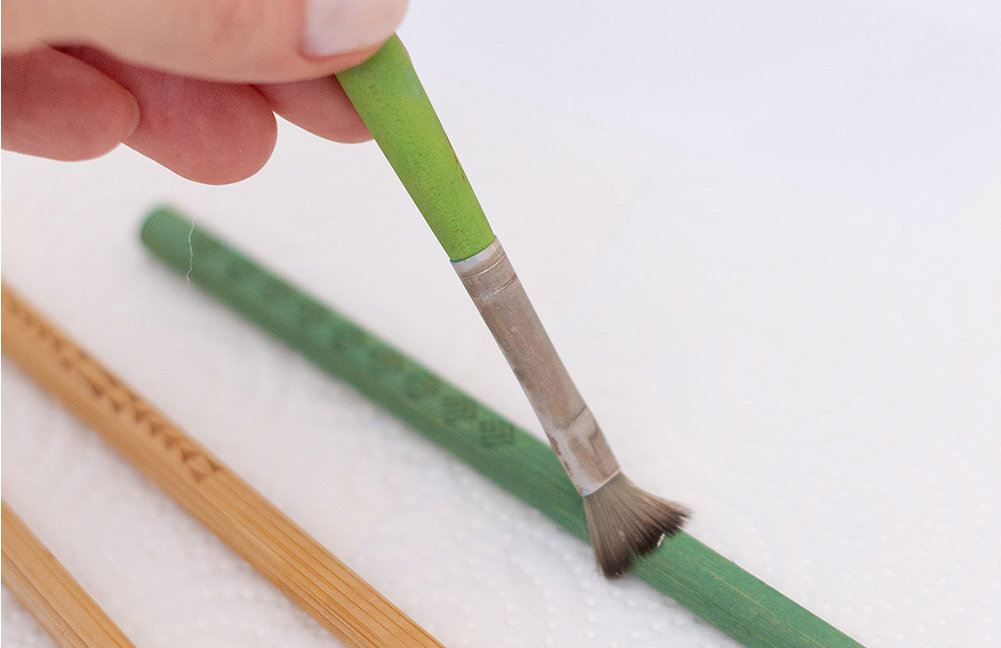
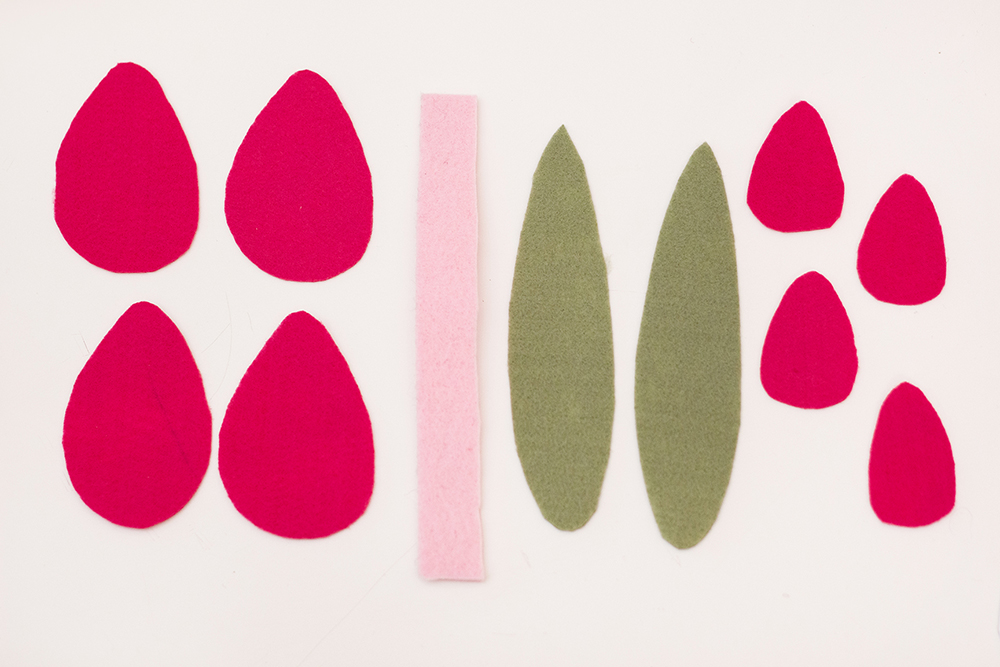
1.) Prepare individual parts First paint the chopsticks with green acrylic paint and let them dry. Print out my freebie on an A4 sheet and cut out the parts shown for each tulip. The long strip consists of the 3mm thick felt, all other parts are 1mm thick.
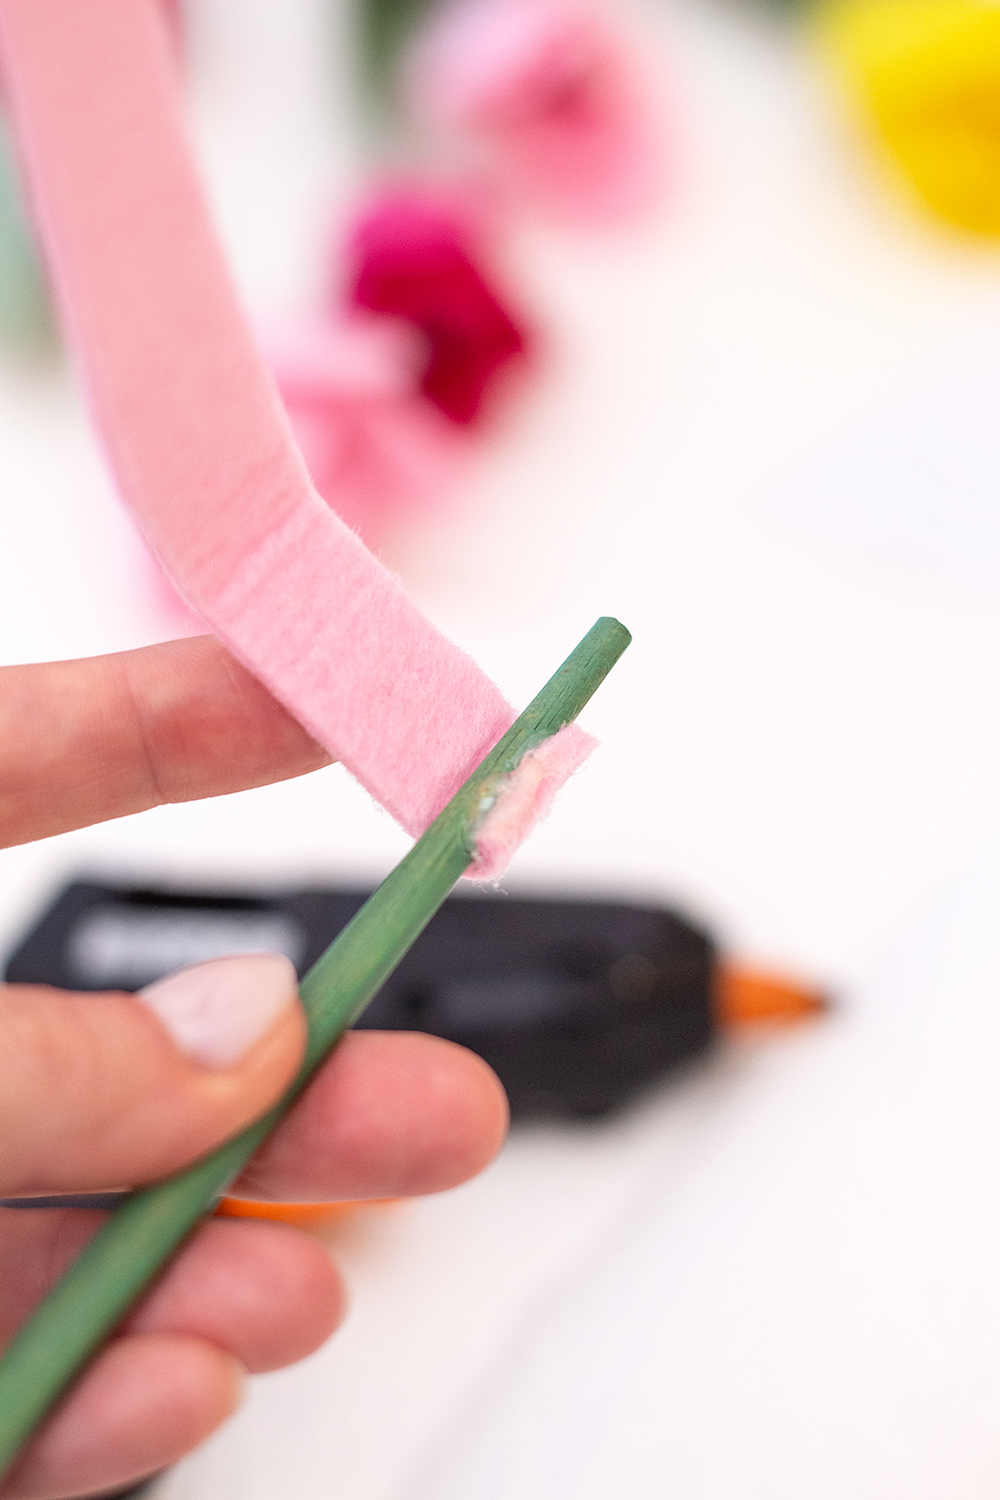
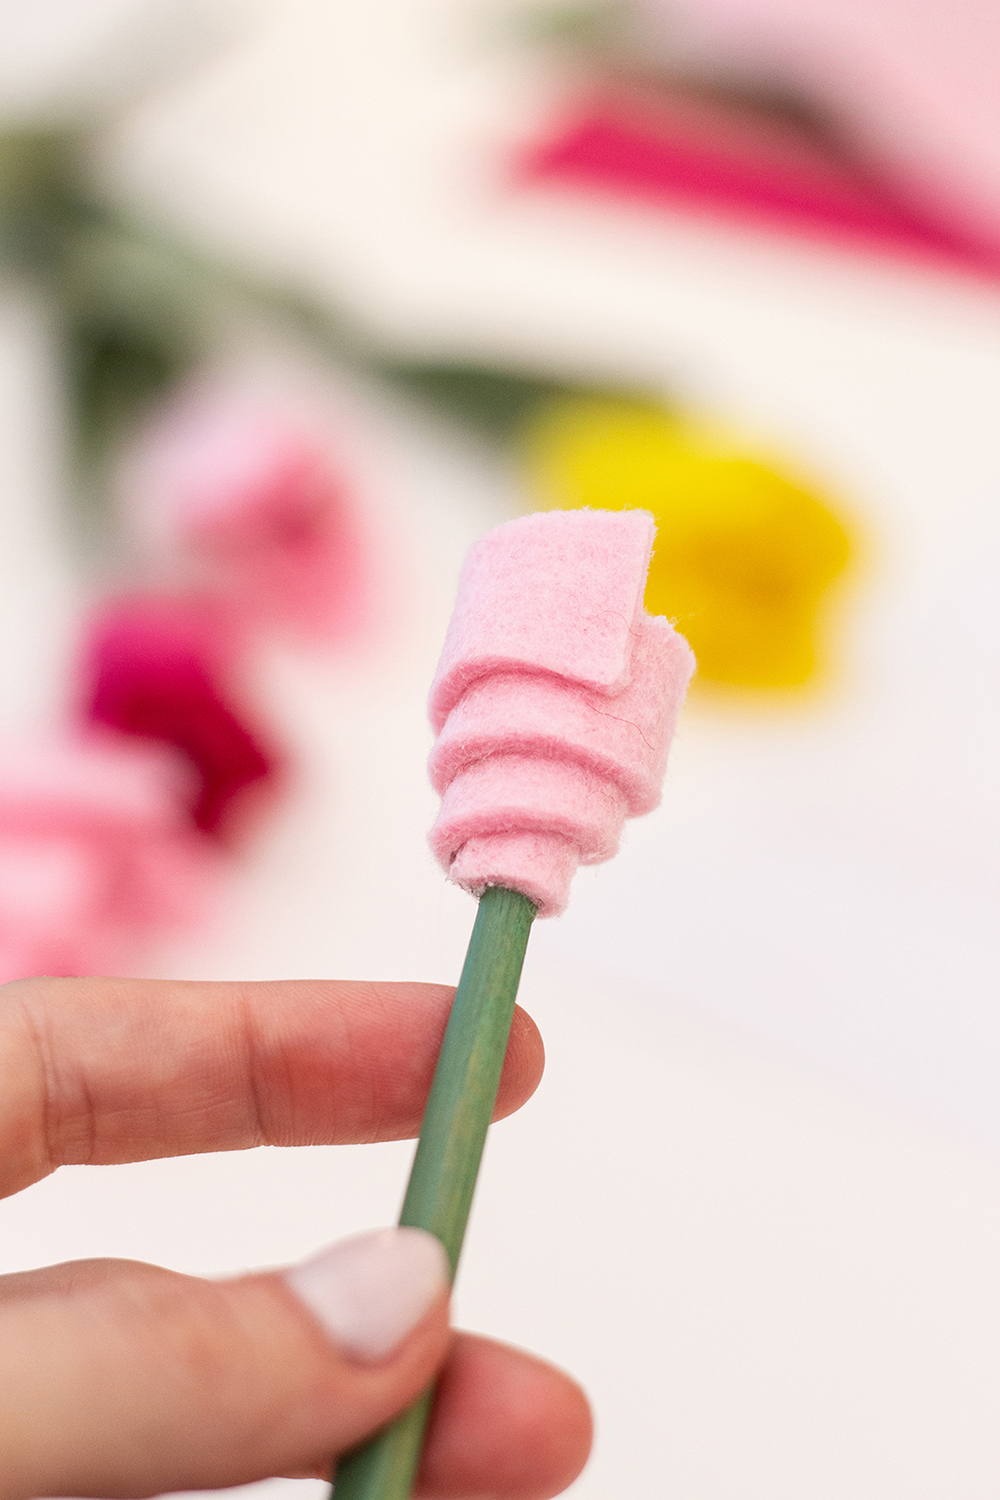
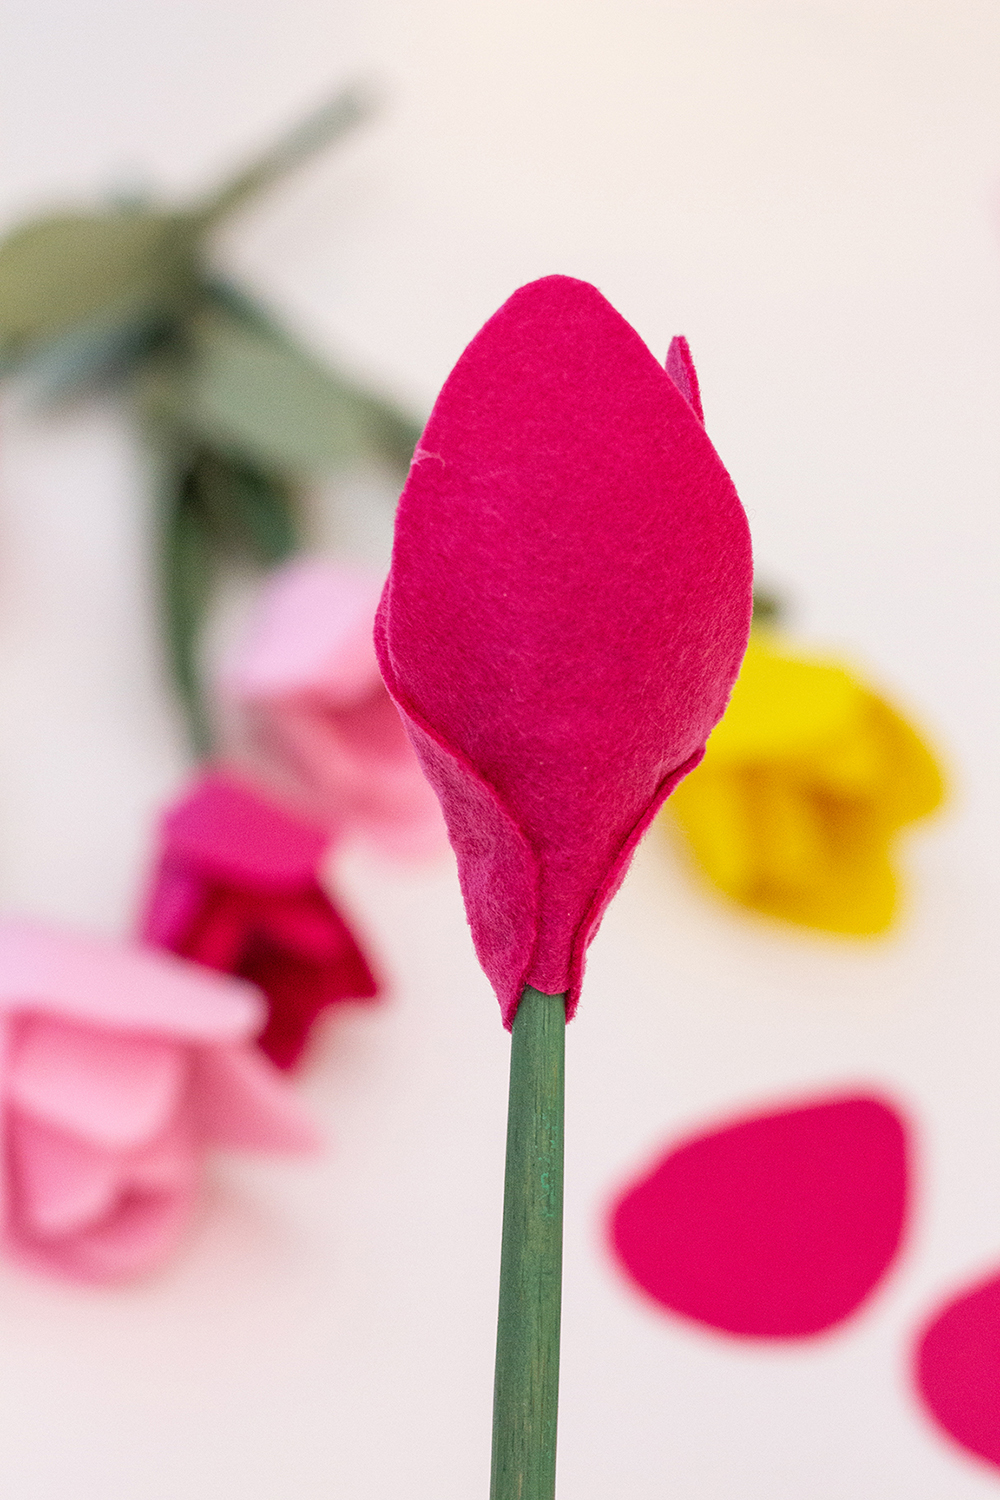
2.) Roll up the inner part Glue the strip for the inner part to the stick with hot glue as follows. Then apply hot glue to the entire strip and wrap it up offset.
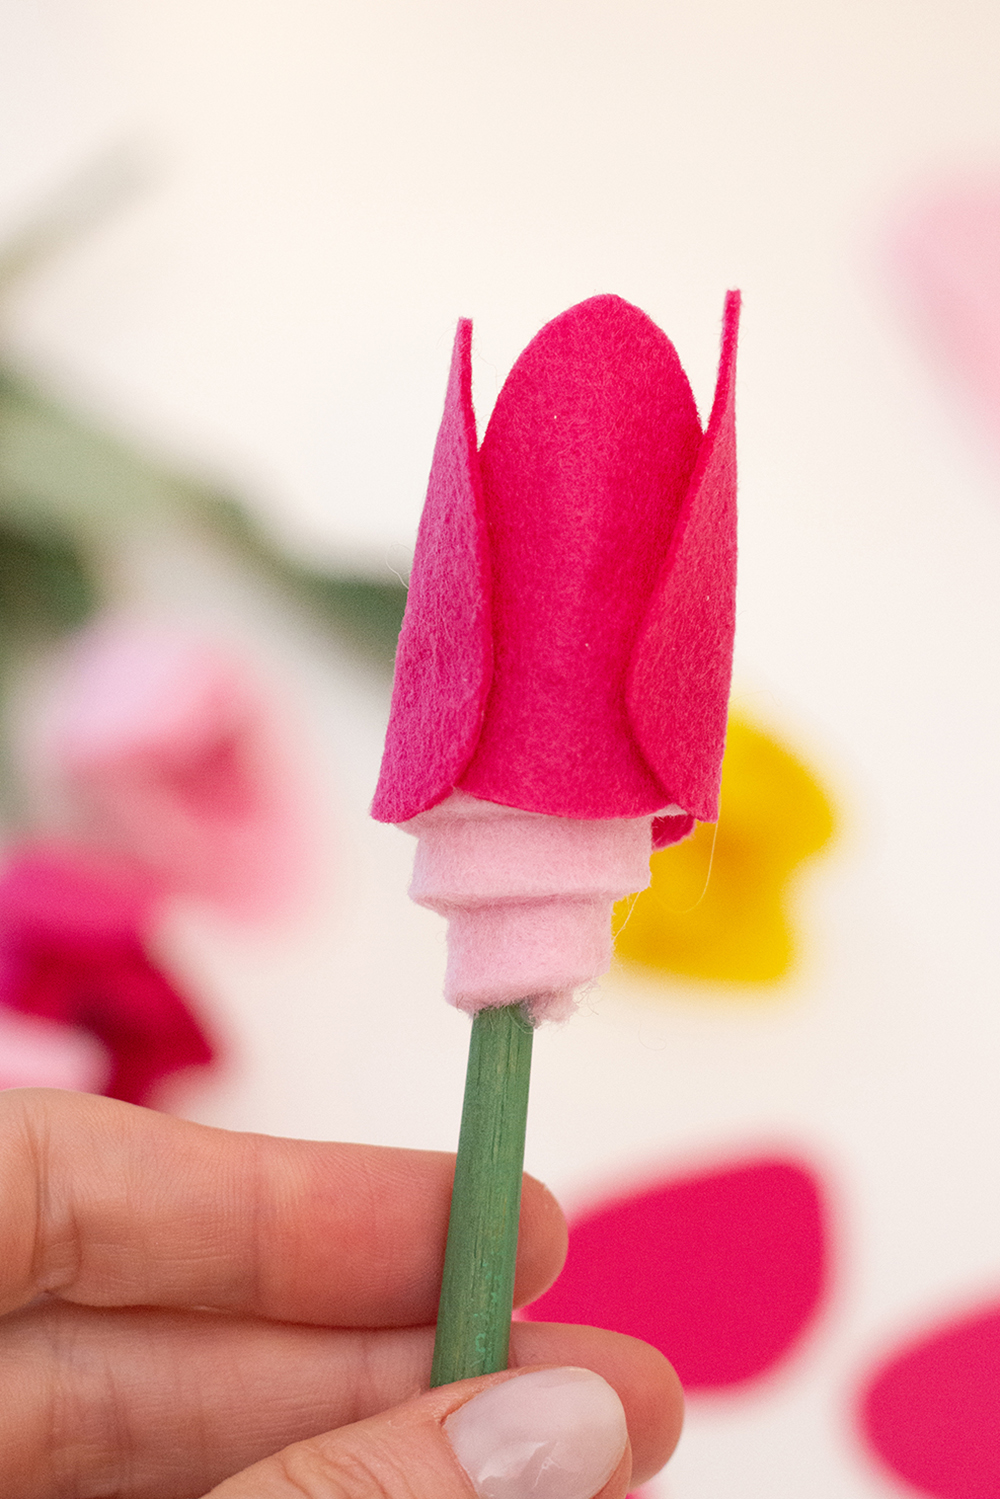
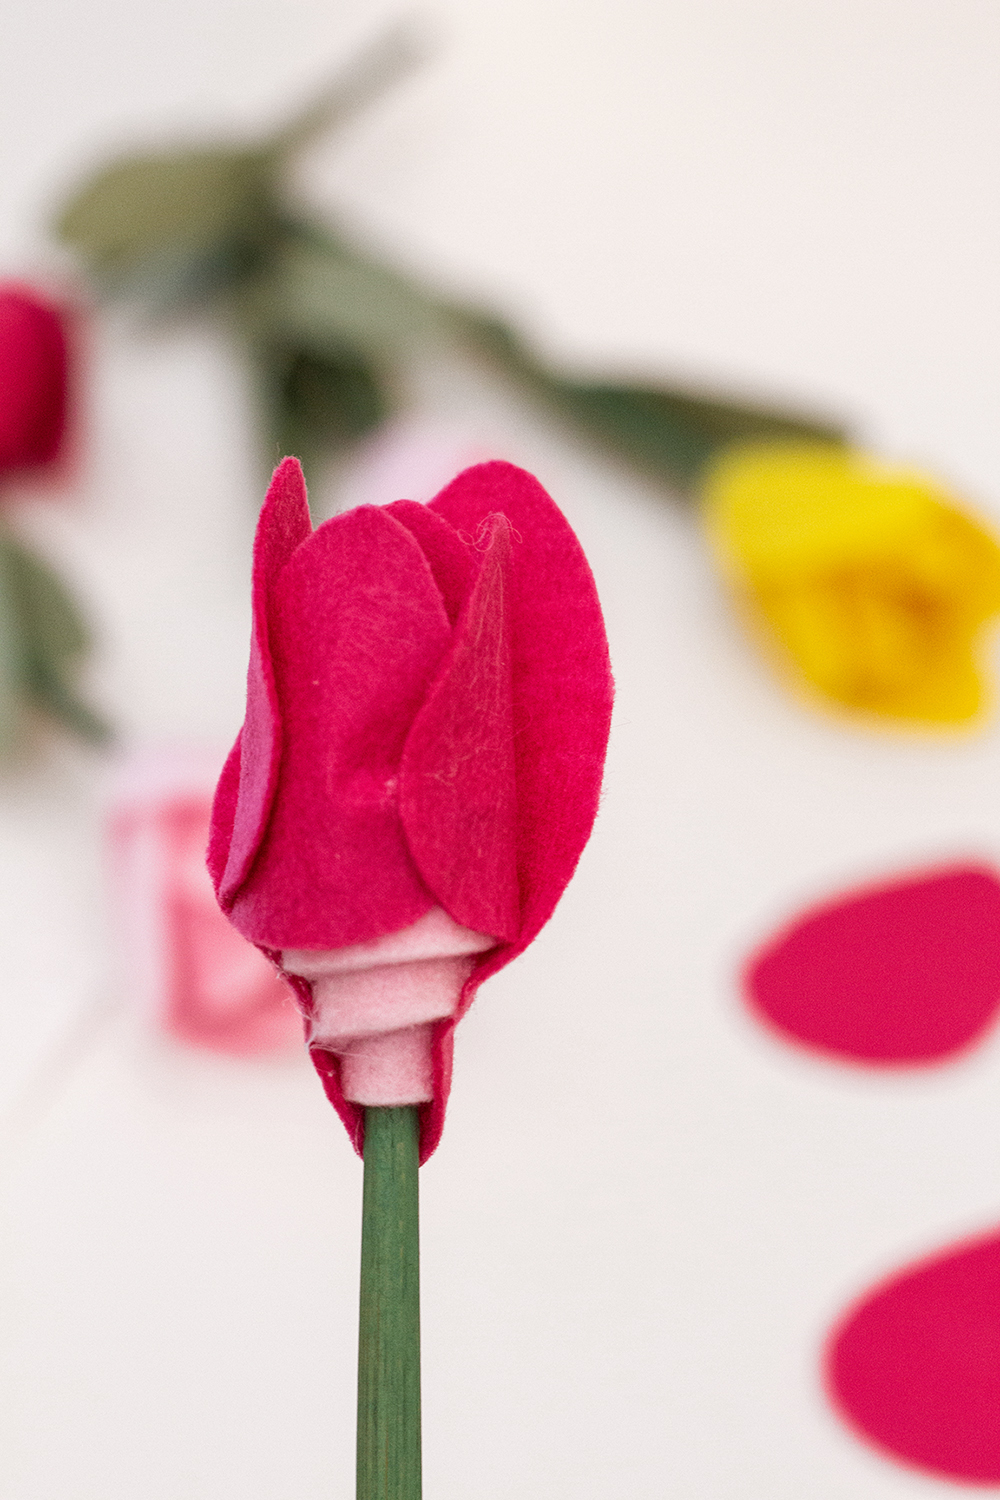
Then you glue the first two small flowers opposite each other and then the other two. Now you attach one large petal above all the others down to the stem, which you glue the leaf tightly around. Repeat the same on the opposite side and two more times on the sides.
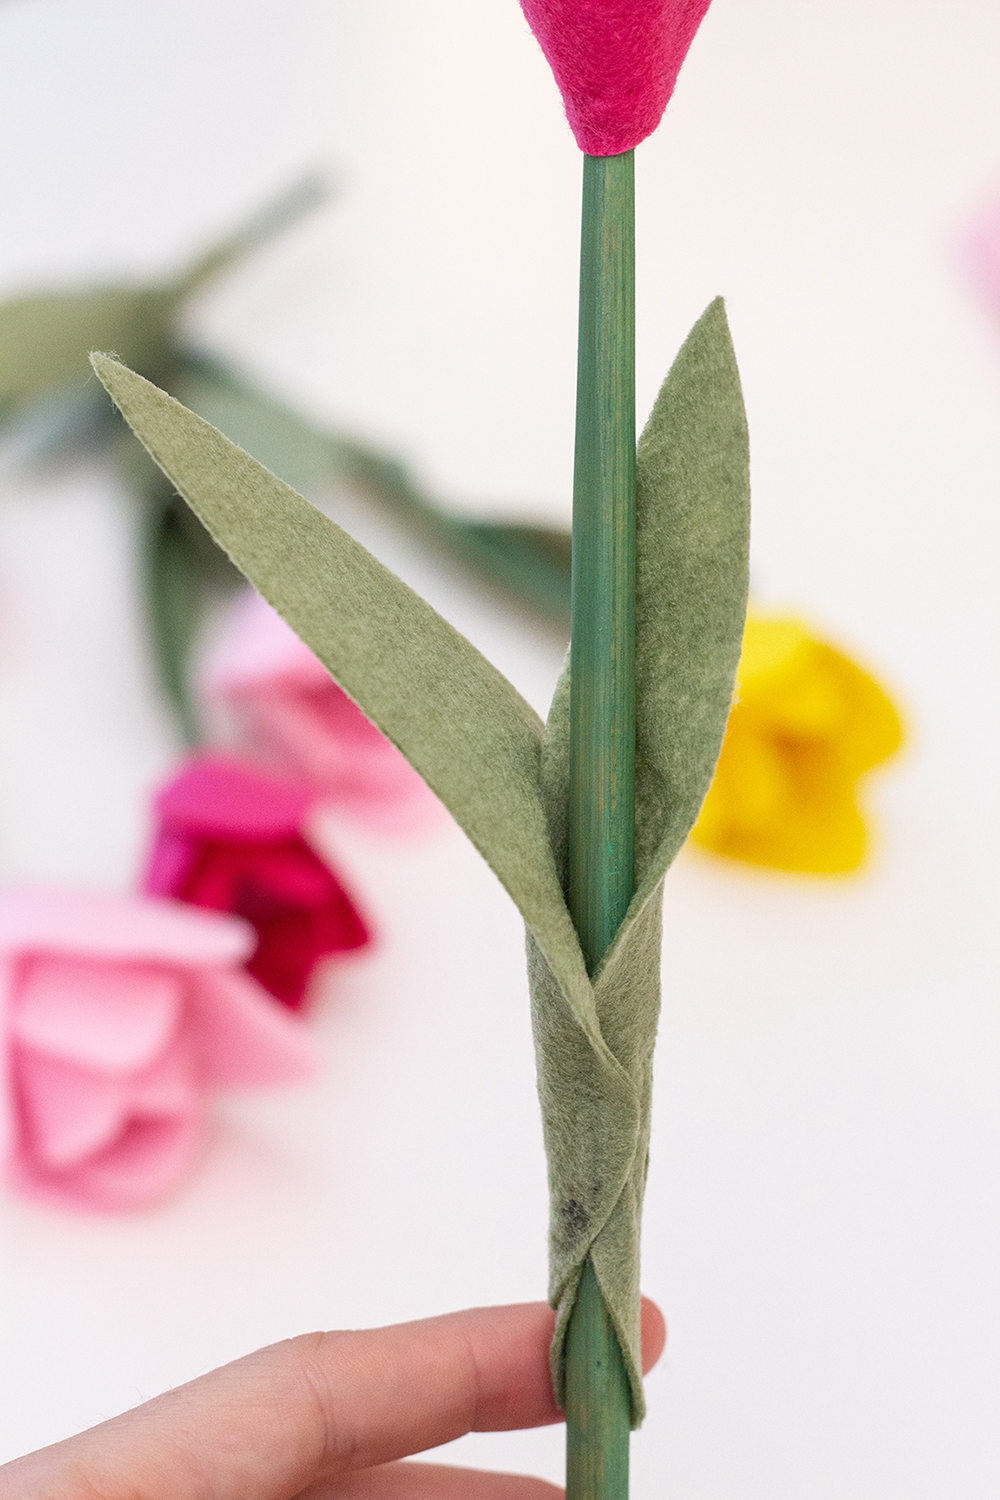
3.) Glue on leaves Finally, glue the leaves around the stem as shown here. The felt tulips for the children’s raised bed are ready.

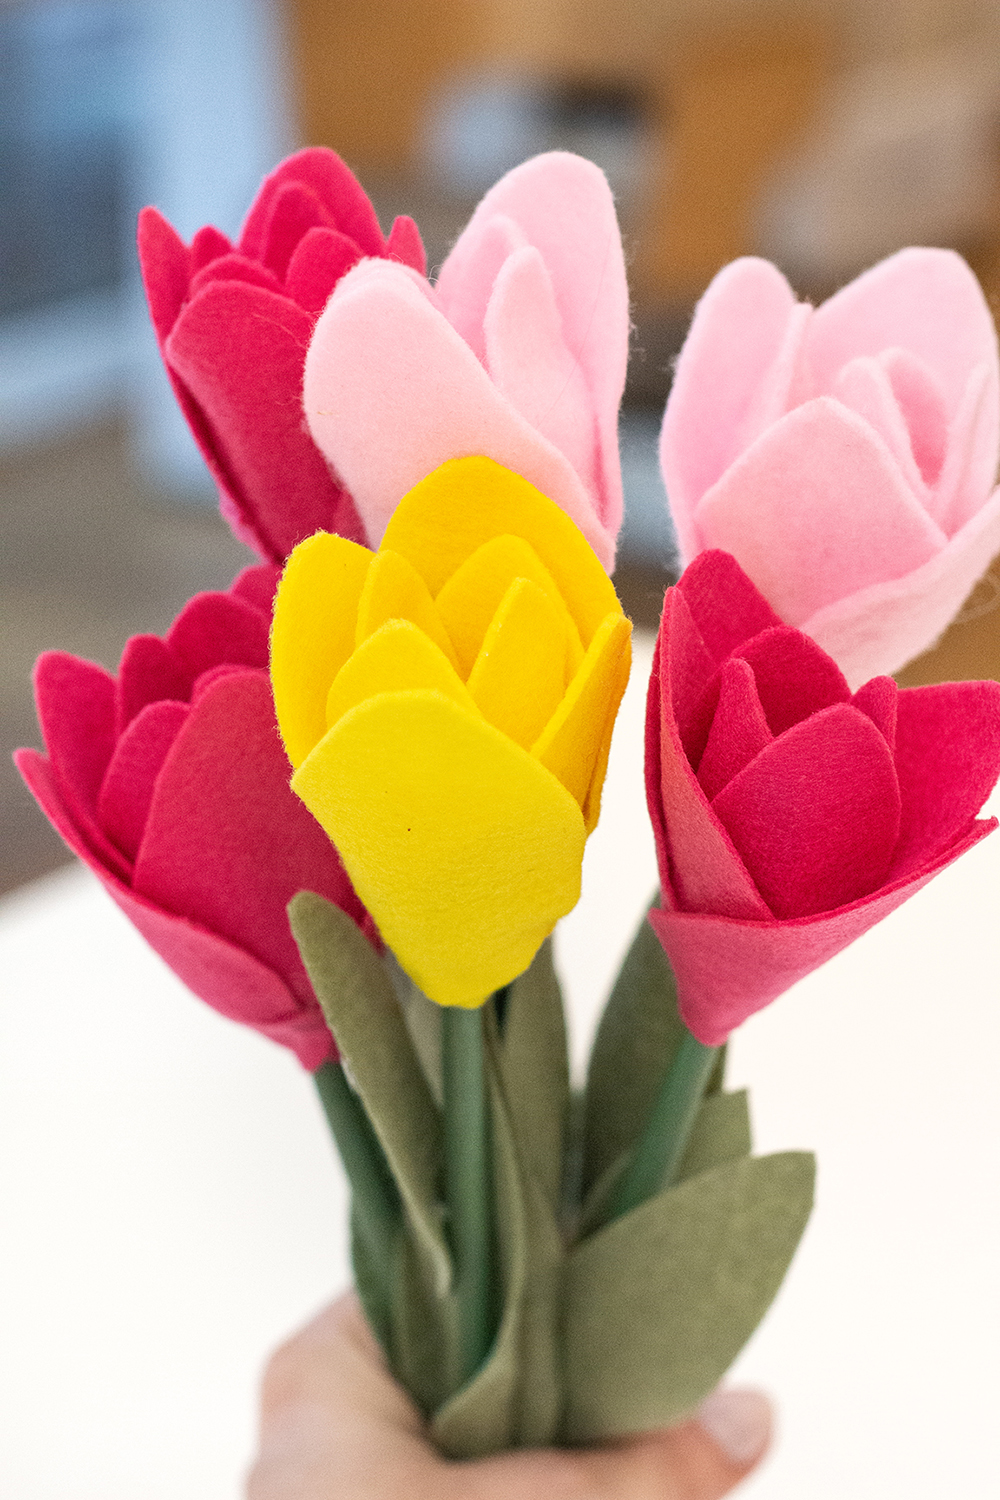
You can now plant the tulips or put them in the containers on the side for decoration. The colorful children’s raised bed is now ready for outdoor use – and a quiet time on the terrace is now within reach for parents 😉
I hope you enjoyed my tour of IKEA Sindelfingen and the DIY children’s raised bed. If so, then as always I am happy about diligent sharing and of course also about sending your own handicraft results.
spring greetings,
Your Sammy
Source: www.sammydemmy.de

